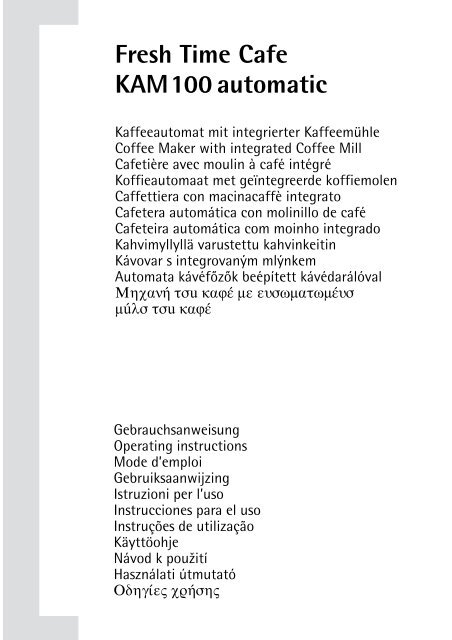
Fresh Time Cafe KAM100automatic - the Electrolux User Manuals site
Fresh Time Cafe KAM100automatic - the Electrolux User Manuals site
Fresh Time Cafe KAM100automatic - the Electrolux User Manuals site

Create successful ePaper yourself
Turn your PDF publications into a flip-book with our unique Google optimized e-Paper software.
<strong>Fresh</strong> <strong>Time</strong> <strong>Cafe</strong><br />
KAM 100 automatic<br />
Kaffeeautomat mit integrierter Kaffeemühle<br />
Coffee Maker with integrated Coffee Mill<br />
<strong>Cafe</strong>tière avec moulin à café intégré<br />
Koffieautomaat met geïntegreerde koffiemolen<br />
Caffettiera con macinacaffè integrato<br />
<strong>Cafe</strong>tera automática con molinillo de café<br />
<strong>Cafe</strong>teira automática com moinho integrado<br />
Kahvimyllyllä varustettu kahvinkeitin<br />
Kávovar s integrovaným mlýnkem<br />
Automata kávéf†z†k beépített kávédarálóval<br />
®¿¦º± ½÷u ¸¦ø¢ ¹ª ª¾÷þ¹¦½þ¹¢¾÷<br />
¹úð÷ ½÷u ¸¦ø¢<br />
Gebrauchsanweisung<br />
Operating instructions<br />
Mode d’emploi<br />
Gebruiksaanwijzing<br />
Istruzioni per l’uso<br />
Instrucciones para el uso<br />
Instruções de utilização<br />
Käyttöohje<br />
Návod k pou¤ití<br />
Használati útmutató<br />
‹å®ã¥ªÿ ¿¼±÷®ÿ
1<br />
Ausstattung<br />
A Frischwasserbehälter mit Deckel<br />
B Schwenkfilter mit Filtereinsatz und<br />
Antitropfventil<br />
C Kaffeekrug mit Tassenmarkierung und<br />
Krugdeckel<br />
D Warmhalteplatte beschichtet<br />
E Typschild (Geräteunterseite)<br />
F Bedienelemente<br />
G Display<br />
H Kaffeemehlauswurf<br />
J Mahlgradeinstellung<br />
K Vorratsbehälter Kaffeemühle mit Deckel<br />
L Mahlgradposition<br />
2<br />
Features<br />
A <strong>Fresh</strong> water container with lid<br />
B Swivelling filter with filter insert and<br />
non-drip valve<br />
C Coffee jug with cup mark and jug lid<br />
D Coated warming plate<br />
E Rating plate (underside of appliance)<br />
F Controls<br />
G Display<br />
H Ground coffee ejection<br />
J Grind setting<br />
K Coffee mill storage container with cover<br />
L Grind position<br />
A
2<br />
3<br />
Bedienelemente<br />
A Display für Anzeige: Tageszeit (bzw. Einschaltzeit),<br />
Tassenmenge, Kaffeestärke<br />
B Taste für Ein/Aus<br />
C Taste für Programmaktivierung<br />
D Uhrstelltaste für Stunden<br />
E Programmiertaste für Einschaltzeit, Tassenmenge,<br />
Kaffeestärke<br />
F Uhrstelltaste für Minuten<br />
G Taste für Tassenmenge<br />
H Taste für Kaffeestärke<br />
J Betriebsanzeige rot für Ein/Aus<br />
K Betriebsanzeige gelb für „Programm“-aktiviert<br />
Controls<br />
A Display for: time of day (switch-on time),<br />
number of cups, coffee strength<br />
B On/Off button<br />
C Program activating button<br />
D Clock setting button for hours<br />
E Programming button for switch-on time,<br />
number of cups, coffee strength<br />
F Clock setting button for minutes<br />
G Number of cups button<br />
H Coffee strength button<br />
J Red On/Off operating indicator<br />
K Amber “Program”-activated operating<br />
indicator<br />
4 5<br />
3
4<br />
6<br />
9<br />
12<br />
7 8<br />
10<br />
13A 13B<br />
143 15 4 16 5<br />
11
Dear customer, g Please read <strong>the</strong>se operating instructions<br />
through carefully. Please make<br />
sure you read <strong>the</strong> safety instructions<br />
on <strong>the</strong> first pages of <strong>the</strong>se operating<br />
instructions! Keep <strong>the</strong> operating<br />
instructions for future reference. Pass<br />
<strong>the</strong>m on to any future owners.<br />
1 Safety instructions<br />
The appliance must only ever be connected<br />
to an electricity supply whose<br />
voltage, current, and frequency are <strong>the</strong><br />
same as those specified on <strong>the</strong> rating<br />
plate (see underside of appliance)!<br />
Never bring <strong>the</strong> lead into contact with<br />
hot appliance parts!<br />
Do not pull <strong>the</strong> plug out of <strong>the</strong> socket<br />
by tugging on <strong>the</strong> lead!<br />
Do not operate <strong>the</strong> appliance if:<br />
– <strong>the</strong> electric lead is damaged, or<br />
– <strong>the</strong> housing shows any visible signs<br />
of damage.<br />
For functional reasons, <strong>the</strong> warming<br />
plate, coffee jug, and filter cover get<br />
hot while <strong>the</strong> coffee maker is in operation.<br />
Keep children well away!<br />
After making coffee, do not fill <strong>the</strong><br />
appliance, while still hot, with water.<br />
Switch off <strong>the</strong> appliance and let it cool<br />
for around 5 minutes!<br />
Follow <strong>the</strong> descaling instructions!<br />
Before undertaking any maintenance<br />
or cleaning work, make sure that <strong>the</strong><br />
appliance is switched off and unplugged<br />
from <strong>the</strong> electricity supply!<br />
Never immerse <strong>the</strong> basic appliance in<br />
water!<br />
Do not leave <strong>the</strong> appliance switched on<br />
unnecessarily.<br />
Only ever use <strong>the</strong> coffee mill for grinding<br />
roasted coffee beans. Never use it<br />
for o<strong>the</strong>r granular foods.<br />
Make sure that <strong>the</strong>re are no foreign<br />
bodies in <strong>the</strong> coffee being ground. The<br />
manufacturer cannot accept any warranty<br />
in case of contravention.<br />
; This appliance complies with <strong>the</strong> follo-<br />
g<br />
Should any repair be necessary, including<br />
replacement of <strong>the</strong> mains lead,<br />
<strong>the</strong> coffee maker should be sent to <strong>the</strong><br />
specialist retailer (since special tools<br />
have to be used) from whom it was<br />
purchased or to <strong>the</strong> AEG service centre.<br />
Repairs to electrical appliances may<br />
only be carried out by a qualified electrician.<br />
Any improper repairs or tampering may<br />
seriously endanger <strong>the</strong> user.<br />
The manufacturer will not be liable for<br />
any damage caused by improper use or<br />
failure to operate <strong>the</strong> appliance as<br />
instructed.<br />
wing EC Directives:<br />
–73/23/EEC of 19.02.1973 – Low-<br />
Voltage Directive (including Amendment<br />
Directive93/68/EEC)<br />
–89/336/EEC of 03.05.1989 EMC (Electro-magnetic<br />
Compatibility) Directive<br />
(including Amendment Directive 92/<br />
31/EEC).<br />
Flex compartment (Fig. 3)<br />
Your appliance is fitted with a flex<br />
compartment. If <strong>the</strong> length of lead<br />
required to reach <strong>the</strong> plug socket is too<br />
great, you can place unwanted flex in<br />
<strong>the</strong> compartment on <strong>the</strong> appliance<br />
back.<br />
Before using <strong>the</strong> appliance for<br />
<strong>the</strong> first time<br />
Before making coffee for <strong>the</strong> first time,<br />
you should first make one or two brews<br />
using water only.<br />
Fill <strong>the</strong> fresh water container with cold<br />
water as far as <strong>the</strong> upper cup mark and<br />
let it percolate through into <strong>the</strong> coffee<br />
jug without ground coffee and filter<br />
paper while <strong>the</strong> appliance is switched<br />
on. For switching on press button .<br />
11
g<br />
Preparatory steps<br />
12<br />
1 Filling with water (Fig. 4)<br />
Unfold <strong>the</strong> lid of <strong>the</strong> fresh water container<br />
(Fig. 1/A) and fill <strong>the</strong> container<br />
with clear, cold tap water.<br />
To measure <strong>the</strong> quantity you require,<br />
you can use <strong>the</strong> coffee jug. There are<br />
cup marks<br />
– in <strong>the</strong> fresh water container and<br />
– on <strong>the</strong> coffee jug.<br />
The marks apply to <strong>the</strong> quantity of<br />
fresh water. The quantity of coffee you<br />
will obtain later is smaller, since <strong>the</strong><br />
ground coffee absorbs water.<br />
Never use hot water. Never fill <strong>the</strong><br />
fresh water container with milk, readymade<br />
coffee, tea, etc.<br />
2 Inserting <strong>the</strong> filter paper<br />
(Fig. 5)<br />
Place one size 4 paper filter in <strong>the</strong> filter<br />
insert, folding over <strong>the</strong> side and lower<br />
edge beforehand.<br />
To ensure that no aroma is lost during<br />
coffee grinding and brewing, your coffee<br />
maker has an aroma lid. Please<br />
make sure it is always properly seated:<br />
on its underside, <strong>the</strong> aroma lid has a<br />
semicircular rib, which you should fit in<br />
<strong>the</strong> matching recess on <strong>the</strong> filter holder.<br />
The opening with <strong>the</strong> sealing lip<br />
<strong>the</strong>n sits on <strong>the</strong> left.<br />
Reclose <strong>the</strong> lid of <strong>the</strong> fresh water container.<br />
3 Placing <strong>the</strong> coffee jug with lid<br />
on <strong>the</strong> warming plate (Fig. 6)<br />
4 Coffee mill<br />
4.1 Filling <strong>the</strong> storage container<br />
with coffee beans (Fig. 7)<br />
The coffee mill has a storage container<br />
(Fig. 1/K) which always keeps <strong>the</strong> coffee<br />
beans aroma-fresh. Fill up <strong>the</strong> container<br />
and close <strong>the</strong> lid firmly.<br />
The storage container holds around<br />
125 g coffee beans.<br />
4.2 Setting <strong>the</strong> grind (Fig. 8)<br />
You can vary <strong>the</strong> grind and accordingly<br />
match it to <strong>the</strong> bean roast with <strong>the</strong><br />
adjusting ring (Fig. 1/J). 1 = ● is <strong>the</strong><br />
setting for light beans, 2 = ● is <strong>the</strong><br />
setting for dark beans. We recommend<br />
you start with a medium setting which<br />
is suitable for commercially available<br />
grades of coffee.<br />
5 Setting functions with <strong>the</strong><br />
controls (Fig. 2)<br />
5.1 First use:<br />
Plug in <strong>the</strong> appliance, <strong>the</strong> display<br />
(Fig. 2/A) shows (whereby <strong>the</strong><br />
time indicator flashes):<br />
Your appliance has a timer enabling<br />
you to set <strong>the</strong> time of day and to preprogram<br />
<strong>the</strong> switch-on time up to 24 h<br />
in advance.<br />
Now press <strong>the</strong> corresponding buttons<br />
(for longer than 1 second in each case).<br />
5.2 Setting <strong>the</strong> time of day<br />
Setting <strong>the</strong> hours:<br />
Button (Fig. 2/D)<br />
Setting <strong>the</strong> minutes:<br />
Button Fig. 2/F)<br />
5.3 Number of cups<br />
Button (Fig. 2/G)<br />
5.4 Coffee strength<br />
Button (Fig. 2/H)<br />
The wandering saucer in <strong>the</strong> display<br />
means from left to right: weak,<br />
medium, or strong coffee.<br />
You want e.g.: 4 cups of mediumstrength<br />
coffee.<br />
The display shows:
5.5 Preselecting <strong>the</strong> switch-on<br />
time, number of cups, and coffee<br />
strength:<br />
You press:<br />
Button (Fig. 2/E)<br />
Button (Fig. 2/D)<br />
Button (Fig. 2/F)<br />
To preselect <strong>the</strong> number of cups and<br />
coffee strength, see points 5.3 and 5.4.<br />
You want e.g.:<br />
4 cups of medium-strength coffee<br />
for 08.00 in <strong>the</strong> morning.<br />
The display shows:<br />
Button (Fig. 2/E) completes <strong>the</strong><br />
programming. The time of day and<br />
normal mode settings reappear (in<br />
Prog mode, <strong>the</strong> saucer of <strong>the</strong> coffee<br />
strength setting flashes).<br />
6 Making coffee<br />
You have taken <strong>the</strong> preparatory steps<br />
from point 1 - point 5 (see above) and<br />
now have various coffee making options.<br />
6.1 Coffee made from already<br />
ground coffee (Fig. 9 and 2)<br />
Fill with water (point 1), insert filter<br />
paper (point 2), fill with ground coffee,<br />
place coffee jug on warming plate<br />
(point 3), and <strong>the</strong>n press button<br />
(Fig. 2/B). The red operating indicator<br />
(Fig. 2/J) lights up.<br />
The brewing cycle starts.<br />
6.2 Coffee made from already<br />
ground coffee with preprogramming<br />
of <strong>the</strong> switch-on time<br />
(Fig. 9 and 2)<br />
Fill with water (point 1), insert filter<br />
paper (point 2), fill with ground coffee,<br />
place coffee jug on warming plate<br />
(point 3), and <strong>the</strong>n press buttons ,<br />
, , , (Fig. 2/B). The<br />
amber operating indicator lights up.<br />
The brewing cycle starts automatically<br />
at <strong>the</strong> entered time. At <strong>the</strong> switch-on<br />
g<br />
time, <strong>the</strong> amber operating indicator<br />
(Fig. 2/K) goes out and <strong>the</strong> red operating<br />
indicator (Fig. 2/J) lights up.<br />
Note: If <strong>the</strong> once preprogrammed<br />
switch-on time is not to be changed,<br />
you need only press <strong>the</strong> button to<br />
activate <strong>the</strong> program.<br />
6.3 Coffee via coffee mill (Fig.<br />
10, 11, and 2)<br />
Fill with water (point 1), insert filter<br />
paper (point 2), place coffee jug on<br />
warming plate (point 3), set number of<br />
cups via and coffee strength<br />
via . Swivel swivelling filter (Fig. 10)<br />
to <strong>the</strong> left until it engages.<br />
Press button . The red operating<br />
indicator (Fig. 2/J) lights up. When <strong>the</strong><br />
grinding cycle has ended, <strong>the</strong> filter<br />
automatically swivels into <strong>the</strong> brewing<br />
position (Fig. 11), and <strong>the</strong> brewing cycle<br />
starts.<br />
6.4 Coffee via coffee mill with<br />
preprogramming of <strong>the</strong> switchon<br />
time (Fig. 10, 11, and 2)<br />
Fill with water (point 1), insert filter<br />
paper (point 2), place coffee jug on<br />
warming plate (point 3), and <strong>the</strong>n press<br />
buttons , , , , , ,<br />
. The amber operating indicator<br />
(Fig. 2/K) lights up. Swivel swivelling<br />
filter (Fig. 10) to <strong>the</strong> left until it engages.<br />
At <strong>the</strong> preprogrammed time, <strong>the</strong> grinding<br />
and brewing cycle starts automatically.<br />
At <strong>the</strong> switch-on time, <strong>the</strong><br />
amber operating indicator (Fig. 2/K)<br />
goes out and <strong>the</strong> red operating indicator<br />
(Fig. 2/J) lights up. After <strong>the</strong> grinding<br />
cycle, <strong>the</strong> filter automatically<br />
swivels into <strong>the</strong> brewing position (Fig.<br />
11).<br />
Note: If <strong>the</strong> once preprogrammed<br />
switch-on time, number of cups, and<br />
coffee strength are not to be changed,<br />
you need only press <strong>the</strong> button to<br />
activate <strong>the</strong> program.<br />
13
g<br />
14<br />
6.5 Quick start<br />
If <strong>the</strong> appliance is preprogrammed via<br />
<strong>the</strong> „Auto” function (<strong>the</strong> amber “Program”-activated<br />
operating indicator<br />
lights up) but you want your coffee<br />
before <strong>the</strong> programming time, you<br />
should press <strong>the</strong> button (Fig. 2/B).<br />
The red operating indicator (Fig. 2/J)<br />
lights up, and <strong>the</strong> amber “Program”activated<br />
operating indicator goes out.<br />
The grinding and brewing cycle starts<br />
at once.<br />
6.6 Deactivating <strong>the</strong> “Auto”<br />
function<br />
You have programmed <strong>the</strong> “Auto”<br />
function but would like <strong>the</strong> program<br />
not to start. You should <strong>the</strong>n simply<br />
press <strong>the</strong> button . The amber operating<br />
indicator goes out. The normal<br />
indications appear in <strong>the</strong> display (Fig.<br />
2/A).<br />
6.7 Switching off<br />
You use <strong>the</strong> button (Fig. 2/B) to<br />
switch off <strong>the</strong> appliance.<br />
7 Warming plate (Fig. 1/D)<br />
After each brewing cycle, <strong>the</strong> warming<br />
plate keeps <strong>the</strong> coffee in <strong>the</strong> glass jug<br />
warm. 2 hours after <strong>the</strong> brewing cycle,<br />
<strong>the</strong> appliance automatically switches<br />
off.<br />
8 Removing <strong>the</strong> jug (Fig. 12)<br />
If <strong>the</strong> jug is removed, <strong>the</strong> non-drip<br />
valve prevents any dripping.<br />
9 Cleaning (it is important that<br />
you observe <strong>the</strong>se instructions)<br />
9.1 Coffee mill (Fig. 14-16)<br />
From time to time (at latest when a<br />
blockage occurs), it is necessary to<br />
clean <strong>the</strong> grinder channel to free it<br />
from oily coffee residues.<br />
To do this, proceed as follows: open <strong>the</strong><br />
lid on <strong>the</strong> fresh water container and<br />
turn <strong>the</strong> screw (e.g. with a coin) on <strong>the</strong><br />
grinder channel cover to „open"<br />
(Figure 14). Take hold of <strong>the</strong> grinder<br />
channel cover at <strong>the</strong> front left and<br />
remove it slowly (Figure 15). Place a<br />
paper filter in <strong>the</strong> swivelling filter and<br />
rotate it to <strong>the</strong> grinding position until<br />
it clicks. Using a suitable tool (e.g.<br />
brush), "brush" <strong>the</strong> coffee residues into<br />
<strong>the</strong> paper filter (Figure 16). Ano<strong>the</strong>r<br />
good way of removing coffee residues<br />
is to use a vacuum cleaner. In <strong>the</strong> case<br />
of a more serious blockage, in particular<br />
in <strong>the</strong> rear section of <strong>the</strong> grinder<br />
channel, run <strong>the</strong> grinder for 1 to 2<br />
seconds to press out <strong>the</strong> blockage with<br />
freshly ground coffee. Repeat if necessary.<br />
Then wipe out <strong>the</strong> grinder channel<br />
with a dry cloth and swivel <strong>the</strong> filter<br />
back through <strong>the</strong> resistance to <strong>the</strong><br />
brewing position. Empty <strong>the</strong> paper filter,<br />
replace <strong>the</strong> cover and turn <strong>the</strong><br />
screw back to <strong>the</strong> „close" position.<br />
Check that <strong>the</strong> cover is correctly seated.<br />
Your coffee machine is now ready<br />
for use again.<br />
When dark, oily coffee beans are used,<br />
<strong>the</strong> grinder channel must be cleaned<br />
more frequently than if light beans are<br />
used.<br />
You can avoid grinder channel blokkages<br />
by:<br />
Not using frozen coffee beans, water<br />
condenses on <strong>the</strong>se on defrosting,<br />
this can cause a blockage.<br />
Not swivelling <strong>the</strong> filter back to <strong>the</strong><br />
grinding position immediately after<br />
brewing, steam rising from <strong>the</strong> coffee<br />
grounds can cause a blockage.<br />
Positioning <strong>the</strong> appliance sufficiently<br />
far away from <strong>the</strong> cooker or<br />
a deep fat fryer, fat can cause a<br />
blockage.<br />
Always keeping <strong>the</strong> container for <strong>the</strong><br />
coffee beans closed.<br />
Clean <strong>the</strong> storage container of <strong>the</strong><br />
coffee mill (Fig. 1/K) free from <strong>the</strong><br />
oily residues of coffee beans from<br />
time to time with a dry cloth.
9.2 Coffee part (Fig. 13/A and B)<br />
The filter insert can be removed for<br />
emptying and cleaning.<br />
Remove <strong>the</strong> glass jug and unfold <strong>the</strong><br />
lid of <strong>the</strong> fresh water container (Fig. 1/<br />
A), place your finger in <strong>the</strong> rear handle<br />
recess (Fig. 13/A), and pull up <strong>the</strong> brakket.<br />
The filter insert is <strong>the</strong>n unlocked<br />
and can be removed for cleaning. You<br />
should operate <strong>the</strong> filter valve several<br />
times during cleaning. To insert, press<br />
<strong>the</strong> filter bracket vertically upwards<br />
and into <strong>the</strong> rear handle recess by its<br />
lug. Place <strong>the</strong> bracket for <strong>the</strong> fresh<br />
water container in position (Fig. 13/B).<br />
The filter insert is now relocked.<br />
Please make sure it is inserted properly!<br />
Now place <strong>the</strong> glass jug on <strong>the</strong> warming<br />
plate.<br />
Only ever clean <strong>the</strong> appliance with a<br />
damp cloth. Never immerse it in<br />
water! Only <strong>the</strong> coffee jug and jug lid<br />
are dish-washer-safe.<br />
Descaling - to prolong <strong>the</strong> life of<br />
your coffee maker<br />
You are recommended to descale your<br />
coffee maker every 3 months as a precaution.<br />
If you are using a gold filter,<br />
you should remove it from <strong>the</strong> filter<br />
insert before <strong>the</strong> descaling cycle.<br />
For descaling, you should use an environmentally<br />
friendly descaling agent.<br />
Please only ever use it according to <strong>the</strong><br />
manufacturer’s instructions. Never use<br />
any scale solvent based on concentrated<br />
formic acid. Also never use any<br />
descaling powder. Always first fill <strong>the</strong><br />
fresh water container with cold water<br />
and <strong>the</strong>n add <strong>the</strong> descaling agent.<br />
Never vice versa. Place <strong>the</strong> coffee jug<br />
with lid on <strong>the</strong> warming plate. Leave<br />
<strong>the</strong> descaling solution to work for<br />
around 15 minutes, and only <strong>the</strong>n<br />
Important<br />
g<br />
switch on <strong>the</strong> appliance. After all <strong>the</strong><br />
descaling solution has percolated<br />
through, switch off <strong>the</strong> appliance.<br />
Repeat <strong>the</strong> descaling cycle if necessary.<br />
Then repeat <strong>the</strong> percolation cycle at<br />
least twice with clean water. Throroughly<br />
rinse <strong>the</strong> coffee jug, jug lid, and<br />
swivelling filter under running water.<br />
Operate <strong>the</strong> filter valve repeatedly<br />
during rinsing.<br />
In <strong>the</strong> event of a short-term power<br />
failure, <strong>the</strong> entered data remain stored<br />
for around 30 seconds.<br />
Should <strong>the</strong> swivelling filter have been<br />
placed in <strong>the</strong> grinding position by<br />
mistake, it can be swivelled back to <strong>the</strong><br />
right manually (by hand).<br />
What to do, when ...<br />
<strong>the</strong> swivel filter does not swivel properly<br />
to <strong>the</strong> brewing position?<br />
– Ensure that <strong>the</strong> filter holder is correctly<br />
seated (Point 9.2)!<br />
– Ensure that <strong>the</strong> aroma cover is correctly<br />
seated!<br />
<strong>the</strong> coffee runs into <strong>the</strong> jug too<br />
slowly?<br />
– Clean <strong>the</strong> anti-drip valve (Point<br />
9.2)!<br />
– Descale <strong>the</strong> appliance (see instructions<br />
on descaling)<br />
Spare parts/accessories<br />
Coffee jug<br />
Should your coffee jug ever get broken,<br />
you can obtain a replacement<br />
from your specialist retailer or <strong>the</strong> AEG<br />
service centre at <strong>the</strong> appropriate<br />
charge by quoting <strong>the</strong> model description<br />
of your coffee maker; see <strong>the</strong><br />
rating plate (Fig. 1/E).<br />
15
g<br />
16<br />
2 For <strong>the</strong> sake of <strong>the</strong><br />
environment<br />
Do not simply throw <strong>the</strong> packaging<br />
away.<br />
– The cardboard packaging material<br />
can be handed in as salvage at your<br />
local waste-paper collection point.<br />
If <strong>the</strong> following packaging materials<br />
have been used:<br />
– Plastic bags made of polyethylene<br />
(PE) can be handed in to your local<br />
PE collection point.<br />
– Padding made of expanded polystyrene<br />
(PS) is CFC-free and can be<br />
handed in to your local collection<br />
point (recycling depot).<br />
Please ask your local authority for <strong>the</strong><br />
address of your nearest recycling<br />
depot.<br />
The used coffee grounds are excellent<br />
for composting.<br />
Customer service<br />
We demand <strong>the</strong> highest quality of our<br />
products.<br />
Should you never<strong>the</strong>less have any queries<br />
about using this appliance, please<br />
write to us at <strong>the</strong> address enclosed.<br />
It is only with your help that we can<br />
develop appliances meeting your<br />
requirements.
AEG Kundendienst in Europa<br />
Deutschland Europa<br />
Sollte dieses AEG Kleingerät wider Erwarten nicht<br />
funktionieren, senden Sie es bitte an folgende Adresse:<br />
Beginnt die Postleitzahl Ihres Wohnortes<br />
mit 2 - 3 - 4 - 5<br />
AEG Kleingeräte-Zentralwerkstatt<br />
Firma Elektro Stefan Irsen<br />
Sachtlebenstraße 1<br />
41541 Dormagen<br />
Beginnt die Postleitzahl Ihres Wohnortes<br />
mit 0 - 1 - 6 - 7 - 8 - 9<br />
AEG Kleingeräte-Zentralwerkstatt<br />
Firma Trepesch GmbH<br />
Steinstraße 21<br />
90419 Nürnberg<br />
Garantiebedingungen<br />
Für dieses Gerät leisten wir - zusätzlich zu<br />
der gesetzlichen Gewährleistung des<br />
Händlers aus Kaufvertrag - dem Endabnehmer<br />
gegenüber zu den nachstehenden Bedingungen<br />
Garantie:<br />
1. Die Garantiezeit beträgt 12 Monate und<br />
beginnt mit dem Zeitpunkt der Übergabe<br />
des Geräts, der durch Rechnung oder<br />
andere Unterlagen zu belegen ist. Die<br />
Garantiezeit ist auf 6 Monate beschränkt,<br />
wenn das Gerät gewerblich genutzt wird.<br />
2. Die Garantie umfaßt die Behebung aller<br />
innerhalb der Garantiezeit auftretenden<br />
Schäden oder Mängel des Geräts, die<br />
nachweislich auf Material- oder Fertigungsfehlern<br />
beruhen. Nicht unter die<br />
Garantie fallen Schäden oder Mängel aus<br />
nicht vorschriftsmäßiger Handhabung<br />
sowie Nichtbeachtung der Gebrauchsanweisungen.<br />
3. Im Garantiefall senden Sie das Gerät an<br />
die für Ihren Wohnort zuständige AEG<br />
Kleingeräte-Zentralwerkstatt oder übergeben<br />
es Ihrem Fachhändler.<br />
Bei Einsendung achten Sie bitte auf gute<br />
Verpackung, Ihre vollständige Absender-<br />
Anschrift und eine kurze Fehlerbeschreibung.<br />
Fügen Sie zum Nachweis Ihres<br />
Garantieanspruchs den Kaufbeleg bei.<br />
4. Die Garantieleistungen werden ohne jede<br />
Berechnung durchgeführt; sie bewirken<br />
weder eine Verlängerung noch einen<br />
Neubeginn der Garantiezeit. Ausgewechselte<br />
Teile gehen in unser Eigentum über.<br />
Guarantee<br />
This appliance is covered by <strong>the</strong> following<br />
guarantee and is in addition to your statutory<br />
and o<strong>the</strong>r legal rights. All components<br />
wich fail due to defective manufacture will<br />
be repaired or replaced free of charge for a<br />
period of 12 months from <strong>the</strong> date of<br />
purchase. We will not accept claims if unauthorised<br />
modification is made or if nonstandard<br />
components are used. The appliance<br />
must be used in accordance with <strong>the</strong><br />
operating instructions and <strong>the</strong> guarantee<br />
does not cover any damage caused during<br />
transit or through misuse. In order to establish<br />
<strong>the</strong> date of purchase, advice note or similar<br />
document must be produced whenever<br />
<strong>the</strong> guarantee is claimed.<br />
Garantie<br />
Pour toute mise en œvre de garantie ou de<br />
service après vente, vous devez yous adresser<br />
à votre vendeur.<br />
AEG assure au vendeur le remplacement gratuit<br />
des pièces détachées nécessaires à la réparation<br />
pendant 1 an, à partir de la date de<br />
votre facture, sauf en cas de non respect des<br />
prescriptions d’utilisation ou lorsqu’une cause<br />
étrangère à l’appareil est responsable de la<br />
défaillance.<br />
Les dispositions stipulées ci-dessus ne sont<br />
pas exclusives du bénéfice au profit de<br />
l’acheteur de la garantie légale pour défaut<br />
et vice cachés qui s’applique, en tout état de<br />
cause, dans les conditions des articles 1641 et<br />
suivants, du code civil.<br />
Garantie<br />
AEG Huishoudelijke Apparaten neemt voor<br />
reparaties binnen de garantietermijn - voor<br />
zover de defecten zijn terug te voeren op<br />
materiaal - en/of constructiefouten - de kosten<br />
op zich voor materiaal en arbeidsloon.<br />
De garantie bedraagt 12 maanden en gaat in<br />
op de dag van aankoop. Wanneer garantie<br />
AEG Hausgeräte GmbH, Muggenhofer Straße 135, D-90429 Nürnberg<br />
Österreich, 1230 Wien, 1-8 66 43-333<br />
Belgique/België, 1502 Lembeck, 02/363.0555<br />
Danmark, 7000 Fredericia, 70 117400<br />
España, Madrid, 1-885-2700<br />
France, 60307 Senlis-Cedex 03-44622929<br />
Great Britain, Newbury Berkshire, 01635 572700<br />
Hellas, 17674 Kalli<strong>the</strong>a, A<strong>the</strong>n 01/9 30 49 85<br />
Island, Reykjavik (Brædurnier Ormsson Ltd.) 91-3 88 20<br />
Italia, 20094 Agrate Brianza (Milano) 39/68 99-8 39<br />
Luxembourg, 1273 Luxembourg-Hamm 4 24 31-1<br />
Nederland, 2400 AS, Alphen aan den Rijn, 0172-46 8268<br />
Norge, 0611 Oslo, 2272 4500<br />
Portugal, Cabra Figa, 915 0325<br />
Schweiz - Svizzera, 5506 Mägenwil, 0848 848348<br />
Suomi, 28101 Pori, +358-9-77042470<br />
Sverige, 17104 Solna, 08-290080<br />
wordt verlangd, dient de faktuur can aankoop<br />
te worden overlegd. De garantietermijn<br />
wordt door reparaties niet verlengd. Buiten<br />
elke garantieverplichting vallen losse onderdelen<br />
van glas en/of kunststof. Alle overige<br />
kosten, zoals voorrijdkosten, kosten van opzending<br />
en administratie, zijn voor rekening<br />
van de eigenaar.<br />
Garanzia<br />
Duranti i primi 12 mesi d’esercizio, vengono<br />
fornite gratuitamente dall’AEG le parti di ricambio<br />
riconosciute difettose. La garanzia ha<br />
inizio con il giorno dell’acquisto che deve venir<br />
comprovato a mezzo della fattura o boletta<br />
di cosegna. Per il resto valgono le<br />
condizioni generali di fornitura della rispettiva<br />
rappresentanza nazionale.<br />
Garantia<br />
Durante los primeros 12 meses, la AEG se<br />
hace cargo de cuantos costes de material y<br />
horas de trabajos invertidas se produzcan en<br />
la subsanación de defectos. La garantia empieza<br />
a regir a partir de la fecha de la entrega,<br />
la que deberá justificarse mediante<br />
presentación de la factura o de la nota de depacho.<br />
Por lo demás serán de aplicación las<br />
condiciones generales de venta se gun rigen<br />
en el respectivo pais de nuestra representación.<br />
Garantie<br />
In Belgien ist nur die durch belge AEG ausgegebene<br />
Garantiekarte gültig.<br />
En Belgique, seule la carte de garantie émise<br />
par la belge AEG est valable.<br />
In België is slechts de door de belge AEG uitgegeven<br />
waarborgkaart geldig.
AEG Hausgeräte GmbH<br />
Postfach 1036<br />
D-90327 Nürnberg<br />
http://www.aeg.hausgeraete.de<br />
© Copyright by AEG<br />
822 949 010 - 1198