You also want an ePaper? Increase the reach of your titles
YUMPU automatically turns print PDFs into web optimized ePapers that Google loves.
Bedienungsanleitung<br />
Instruction Leaflet<br />
11/01<br />
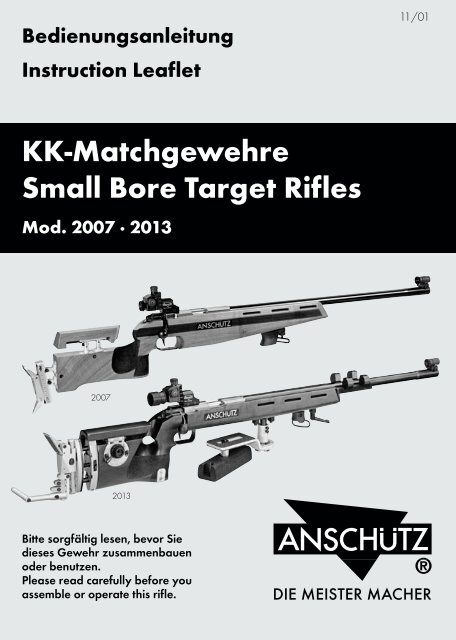
KK-Matchgewehre<br />
Small Bore Target Rifles<br />
Mod. <strong>2007</strong> · <strong>2013</strong><br />
<strong>2007</strong><br />
<strong>2013</strong><br />
Bitte sorgfältig lesen, bevor Sie<br />
dieses Gewehr zusammenbauen<br />
oder benutzen.<br />
Please read carefully before you<br />
assemble or operate this rifle.
Index<br />
Preface .......................................................... p.18<br />
Safety instructions ........................................ p.18<br />
General handling of rifles ........................... p.19<br />
Ear and eye protection ................................ p.20<br />
Laws .............................................................. p.20<br />
Product relating safety instructions ............. p.20<br />
Liability .......................................................... p.21<br />
Technical data .............................................. p.21<br />
Assembly, fitting the ANSCHÜTZ barreled action .. p.22<br />
Cocking, loading and safety operation ..... p.22<br />
Unloading ..................................................... p.23<br />
Bolt ................................................................ p.23<br />
Trigger ........................................................... p.24<br />
Order-numbers ............................................. p.29<br />
Dry firing device ........................................... p.30<br />
Cleaning, maintenance, care, lubrication .. p.30<br />
Accessories ................................................... p.32<br />
Warranty ....................................................... p.32<br />
Copyright ...................................................... p.32<br />
Drawings / Spare parts .............................. p.34<br />
2
Preface<br />
Dear Friends of ANSCHÜTZ,<br />
You have made a good choice, now that<br />
you have decided to buy an ANSCHÜTZ<br />
product. The many great results obtained<br />
with ANSCHÜTZ rifles by target shooters,<br />
participants in the Olympic Games as well<br />
as in World and European championships<br />
made your choice easy, as your rifle has<br />
benefited from our great experience of<br />
making fine sporting and target rifles since<br />
1856. World-wide, ANSCHÜTZ rifles are<br />
respected because of their fine accuracy,<br />
impeccable design and immaculate<br />
workmanship. Should you still be unaware,<br />
they include:<br />
Air rifles, repeater summer biathlon air rifles,<br />
small bore biathlon rifles, Flobert rifles, small<br />
bore single loaders and repeaters, hunting<br />
rifles and shotguns in diverse calibers, the<br />
famous ANSCHÜTZ small bore target rifles<br />
and air rifles and silhouette pistols and<br />
silhouette rifles.<br />
Safety instructions<br />
Attention:<br />
have problems with the safe usage and<br />
correct handling of your rifle or should you<br />
have additional questions, please do not<br />
hesitate to contact a competent gunsmith<br />
or dealer or address our factory directly.<br />
This instruction leaflet is extraordinarily<br />
important. Make sure that it is always with<br />
the rifle especially when it is sold, lent or<br />
otherwise given to a third person. Our<br />
products are exclusively meant for target<br />
shooting. Their use is subject to the „General<br />
Technical Rules“ for all target shooting<br />
disciplines of the INTERNATIONAL<br />
SHOOTING SPORT FEDERATION (ISSF),<br />
Bavariaring 21, 80336 München,<br />
Germany or to the rules of the INTERNA-<br />
TIONAL BIATHLON UNION, Airportcenter,<br />
Postbox 1, A-5073 Wals-Himmelreich,<br />
Austria. Additional copies of this<br />
booklet can be ordered.<br />
Warning:<br />
This rifle can be dangerous if it is not used<br />
correctly or if this instruction leaflet is not<br />
observed. The privilege of ownership and<br />
safe use of your rifle carries a personal<br />
responsibility that no one should take lightly.<br />
Rifle accidents would not occur if the<br />
following rules of shooting safety were<br />
observed.<br />
Please read carefully the following articles<br />
before using this rifle. It is extremely<br />
important that you become thoroughly<br />
familiar with this rifle and its operating<br />
characteristics by carefully reading and<br />
understanding the instructions in this booklet<br />
before you attempt any use of it with<br />
ammunition. Always remember the<br />
sequence of disassembly. Should you still<br />
18
General handling of rifles<br />
1. Treat every rifle as though it was loaded.<br />
Do not take anyone’s word or automatically<br />
assume it is not loaded. Check your rifle<br />
personally each time you handle it. The safe<br />
and courteous way to carry a rifle when<br />
you are with others is to leave the bolt open<br />
so that they can easily see that the rifle<br />
cannot be fired. Make sure that the rifle is<br />
not loaded when you stop shooting. Make<br />
sure your rifle is unloaded before every<br />
transport. Never pick up your rifle with your<br />
finger on the trigger or the trigger guard.<br />
2. Whenever you pick up your rifle, point<br />
the muzzle at the ground. Always point the<br />
muzzle of the barrel in a safe direction.<br />
Never pull a rifle towards you by the<br />
muzzle.<br />
3. Only use your rifle in approved shooting<br />
ranges. Shoot your rifle only under good<br />
visibility and daylight conditions. If you use<br />
your rifle in an indoors range, make sure it<br />
is adequately ventilated. Make sure that<br />
there is a safe bullet trap which can be seen<br />
from all sides and that there is no one in<br />
the vicinity of your target. Be absolutely sure<br />
of a safe backstop and target. Never fire<br />
at a hard, smooth surface or water. Never<br />
shoot at a skyline target or into the air. Do<br />
not shoot at anything from which a bullet<br />
may ricochet. Never fire your rifle with the<br />
muzzle in the water or against any other<br />
material to avoid an accident or damage<br />
of your rifle.<br />
4. Be sure that you use the correct ammunition.<br />
The correct calibre can be seen<br />
on your rifle. Load your rifle only when you<br />
are at the range and ready to shoot.<br />
5. Always keep your rifle clean. Be sure<br />
the bore is not obstructed by dirt, water,<br />
grease or any other foreign materials.<br />
6. Place the safety fully into „S“ or „F“<br />
position - never inbetween. Always keep<br />
safety in full „safe“ position until ready to<br />
fire. Do not put your finger on the trigger<br />
when operating the safety or whenever you<br />
are not ready to shoot.<br />
7. When not in use your rifle should be<br />
stored in a locked and secure place<br />
accessible only to you. Check first to make<br />
sure it is unloaded. Store the rifle with<br />
uncocked trigger. Store ammunition in a<br />
separate and secure place. It is your special<br />
responsibility to make sure that at all times<br />
and especially when you are not present<br />
your rifle is well secured, out of any reach<br />
of children and other unauthorised persons<br />
and in no way accessible to them. For the<br />
safe storage of your rifle even in a locked<br />
cabinet or safe the use of an additional<br />
trigger lock is recommended.<br />
Only give your rifle to authorised persons.<br />
Never let your rifle be used by anyone who<br />
is not familiar with the safe handling of a<br />
rifle and these instructions. This rifle must<br />
only by used by a responsible adult or<br />
under his or her supervision.<br />
8. Watch for any change in the operation<br />
of your rifle which might impair its safety. If<br />
you suspect or note a defect or malfunction,<br />
stop using it immediately, unload the rifle,<br />
make sure that it is not under pressure and<br />
send it to a competent gunsmith, the factory<br />
or its recommended repair station for<br />
inspection. Note: Apart from normal<br />
cleaning the rifle must only be disassembled<br />
19
y an authorized gunsmith. Unqualified<br />
handling or disassembly can cause injuries<br />
or irreparable damage of the rifle.<br />
9. Your rifle should always be handled with<br />
extreme care. Make sure that it is never<br />
dropped or placed in such a way that it<br />
can fall. For transport purposes your rifle<br />
should be dry and clean. We recommend<br />
an approved protective gun case.<br />
10. You must be in good physical condition<br />
and mental health and not under the<br />
influence of any substance (drugs, alcohol)<br />
which might impair vision, dexterity or<br />
judgement. Do not use your rifle when you<br />
are tired. Tiredness may result in a loss of<br />
control.<br />
11. Clean your hands carefully after<br />
shooting and cleaning your ANSCHÜTZ<br />
product. Residues of bullets, powder or oil<br />
might impair the health of your skin.<br />
12. Your ANSCHÜTZ rifle has been<br />
carefully built and inspected by skilled<br />
technicians to provide maximum efficiency.<br />
The service life depends on the owner’s<br />
care and on cleaning following the owner’s<br />
manual closely.<br />
Ear and eye protection<br />
You and other persons should always use<br />
approved hearing protection and approved<br />
shatterproof eye protection while shooting.<br />
Laws<br />
When using a rifle observe the corresponding<br />
regulations and laws for the use<br />
of firearms in your country.<br />
Product related safety<br />
instructions<br />
Important note for the handling of<br />
rifles:<br />
1. Unload your rifle immediately if you do<br />
not intend to continue shooting. Remove the<br />
bolt or leave it open at least. In the case of<br />
a repeater remove the magazine as well.<br />
Make sure there is no cartridge left in the<br />
chamber.<br />
2. Make sure there is nobody in the area<br />
of case ejection.<br />
3. If you store the rifle remove the bolt and<br />
store the bolt uncocked in a separate place.<br />
Important note for the handling of<br />
ammunition:<br />
1. Exclusively use clean, factory loaded and<br />
new ammunition in the caliber approved for<br />
your rifle.<br />
2. Be aware that the range of a bullet<br />
starting from cal. .22 l.r. might be 1.6 km<br />
or even longer. Therefore also be sure of<br />
the safety of the impact area.<br />
20
Liability<br />
1. ANSCHÜTZ does not assume any<br />
responsibility or payment of damage claims<br />
for damages of any kind resulting from the<br />
disregard of these instructions, non-qualified<br />
treatment or repair, the use of non-original<br />
ANSCHÜTZ spare parts, incorrect<br />
handling, negligence, removal of the knot<br />
varnish or unauthorized modifications.<br />
2. The stock of this rifle has been very carefully<br />
checked by factory inspectors prior to<br />
shipment and has been determined to be<br />
free of defects. Certain kinds of abuse, such<br />
as dropping of the rifle can cause damage<br />
to the stock for which the owner is solely<br />
responsible. We also assume no<br />
responsibility for defects resulting from<br />
inappropriate transportation (mail, plane,<br />
etc.). Please immediately contact your<br />
transporter in such a case.<br />
3. Changes or alterations to this rifle or any<br />
of its parts are prohibited. Such changes<br />
or alterations can significantly impair the<br />
safe use of our product and can lead to<br />
accidents involving severe or even fatal<br />
bodily injuries. Any product warranty will<br />
automatically lapse in case changes or<br />
alterations are implemented. Users are<br />
requested to carefully inspect the product<br />
with regard to possible changes and<br />
alterations before use. In case of doubt you<br />
should contact us for further information.<br />
Small bore target rifles<br />
Mod. <strong>2007</strong> · <strong>2013</strong><br />
Technical Data:<br />
<strong>2007</strong> · <strong>2007</strong>/660<br />
Caliber: .22 l.r.<br />
Barrel length: 69 cm/66 cm<br />
27.1“/25.9“<br />
Rifling: 50 cm/66 cm<br />
19.6“/25.9“<br />
Total length: 116 cm/113 cm<br />
45.6“/44.4“<br />
Sighting line: 80 cm/77 cm<br />
31.4“/30.3“<br />
Weight: 5,0 kg/5,1 kg<br />
11.0 lbs/11.2 lbs<br />
Version: Single loader<br />
<strong>2013</strong> · <strong>2013</strong>/690<br />
Caliber: .22 l.r.<br />
Barrel length: 69 cm/69 cm<br />
27.1“/27.1“<br />
Rifling: 50 cm/69 cm<br />
19.6“/27.1“<br />
Total length: 114-117 cm/114-117cm<br />
44.8“-46.0“/44.8“-46.0“<br />
Sighting line: 80 cm/80 cm<br />
31.4“/31.4“<br />
Weight: 7,0 kg/7,0 kg<br />
15.4 lbs/15.4 lbs<br />
Version: Single loader<br />
21
<strong>2007</strong>/660 Alu stock · <strong>2013</strong>/690 Alu stock<br />
Caliber: .22 l.r.<br />
Barrel length: 66 cm/69 cm<br />
25.9“/27.1“<br />
Rifling: 66 cm/69 cm<br />
25.9“/27.1“<br />
Total length: 109-112 cm/112-115 cm<br />
42.91“-44.09“/<br />
44.09“-45.27“<br />
Sighting line: 77 cm/80 cm<br />
30.3“/31.4“<br />
Weight: 5,35 kg/5,7 kg<br />
11.7 lbs/12.5 lbs<br />
Version: Single loader<br />
signal pin<br />
signal pin is visible<br />
= cocked<br />
uncocked<br />
Assembly, fitting the<br />
ANSCHÜTZ barreled action<br />
The stock, the barreled action and the bolt<br />
are packed separately for shipment and<br />
need to be assembled. However, do not do<br />
this until you have followed all the<br />
procedures listed below.<br />
•Wipe away excess oil from the barreled<br />
action and the bolt.<br />
•Insert the cocked bolt (also see chapter<br />
„Disassemble the bolt“). The bolt is<br />
cocked when the red ring at the end of<br />
the bolt is visible (see picture).<br />
•Insert the barreled action into the barrel<br />
channel in the stock and press both parts<br />
together. Please note that the abutment<br />
must fit exactly to the shape of the reciever<br />
in the stock as otherwise correct joining<br />
together of both parts cannot be guaranteed.<br />
The top surface of the abutment must<br />
not touch the bottom of the receiver,<br />
however.<br />
Note: The abutment in the stock must be<br />
inserted into the mill-out at the bottom of<br />
the receiver. It must not touch it, however.<br />
•Screw in bedding screws with enclosed<br />
Allen wrench Model No. 4406<br />
(Order No. 710.6301). First slightly<br />
tighten all screws. Then tighten the front<br />
screws and subsequently the rear screws<br />
(in the direction of the muzzle). For correct<br />
adjustments we recommend our torque<br />
wrench model No. 4405 (Order No.<br />
700.6180), which is to be adjusted to<br />
5 Nm (= 50 cmkp) for wood stocks and<br />
to 6 Nm (60 cmkp) for aluminum stocks.<br />
•Pull a cleaning patch through the barrel<br />
from the chamber towards the muzzle<br />
several times.<br />
After assembly for the first time large<br />
settlements of the stock wood may occur.<br />
Consequently we suggest that you tighten<br />
the screws once more in the manner<br />
described after some time. Check the the<br />
screws before every shooting.<br />
Fitting the barrel<br />
The screws for fixing the barrel must not be<br />
loosened. Should it be necessary to<br />
22
exchange the barrel, this must be carried<br />
out by ANSCHÜTZ only. If the red seals<br />
are damaged any claims for liability and<br />
warranty become obsolete.<br />
Cocking, loading and safety<br />
operation<br />
•Degrease the bolt and the interior of the<br />
barrel without leaving lint.<br />
•Open the bolt and pull it back to the stop.<br />
Carefully insert an approved cartridge<br />
with the bullet forward with the thumb into<br />
the chamber. Make sure that the bullet is<br />
not damaged.<br />
•Now push the bolt forward to close the<br />
breech and ensure that the bolt handle is<br />
pushed completely downwards to lock it.<br />
The bolt is now locked and cocked.<br />
•After firing, lift the bolt handle and pull<br />
the bolt fully to the rear. This will cock<br />
the bolt again and eject the empty case.<br />
The safety is located on the left-hand side<br />
of the receiver. It can be operated in cocked<br />
position.<br />
The rifle is:<br />
•safe, when the „S“ (safe) is visible but the<br />
„F“ (fire) is covered<br />
•ready for shooting when the „F“ (fire) is<br />
visible but the „S“ (safe) is covered.<br />
Unloading<br />
For safety reasons the rifle must immediately<br />
be unloaded if you intend to stop shooting.<br />
Unlock and open the bolt. This will eject<br />
the cartridge. Please also see safety<br />
instructions for the handling of rifles and<br />
pistols.<br />
Bolt<br />
To disassemble the bolt:<br />
•Depress the bolt stop at the left hand side<br />
of the receiver (procedure with true left<br />
hand rifles vice-versa) and keep it pressed<br />
until the bolt is completely removed from<br />
the receiver.<br />
•For disassembling, unlock the bolt by<br />
rotating the bolt handle clockwise (for lefthanded<br />
bolts counter-clockwise). The red<br />
signal pin protruding at the end of the<br />
cocked bolt will disappear into the cap.<br />
•Unscrew the cap. Attention: During the<br />
first twists you can hear a ratcheting<br />
sound.<br />
•The firing pin and the associated parts of<br />
the bolt may be removed now one after<br />
the other.<br />
•To remove the firing pin spring from the<br />
firing pin push back the front spring<br />
support until it stops and twist it slightly to<br />
the right or the left (approx. 1/4 turn).<br />
You can now easily remove the spring<br />
support together with the spring by pulling<br />
it forward.<br />
To reassemble the bolt:<br />
Note: the sequence and position of the<br />
parts can be seen from the drawing.<br />
•First push back the firing pin spring then<br />
the front spring support over the firing pin.<br />
Push back the spring support until it stops<br />
and lock by twisting it slightly either<br />
clockwise or counter-clockwise (approx.<br />
1/4 turn).<br />
•Hold the bolt body perpendicular to the<br />
ground. Slide the bolt handle with its wide<br />
front surface to the front onto the end of<br />
23
the bolt body. Turn the bolt handle until<br />
the cocking cam is in line with the slot at<br />
the end of the bolt body.<br />
•Insert the complete firing pin with spring<br />
and spring support with the pin first into<br />
the bolt body and ensure that its lug<br />
penetrates the longitudinal slot.<br />
•Attach the cover sleeve and rear spring<br />
support with its slotted end towards the<br />
front of the bolt body. This can only be<br />
done when the guide tab at the base of<br />
oneslot is lined up with the slot in the bolt<br />
body.<br />
•Finally insert the signal pin, large end first,<br />
and the small compression spring and<br />
screw on the bolt cap.<br />
•Before inserting the assembled bolt in the<br />
receiver, recock the bolt by rotating the<br />
bolt handle counter-clockwise (for lefthanded<br />
bolts clockwise).<br />
e r t ui<br />
opasd f<br />
Trigger<br />
Warning:<br />
Your ANSCHÜTZ target rifle offers you a<br />
versatility of individual adjusting properties.<br />
Please make sure that your rifle always is<br />
unloaded when carrying out adjustments.<br />
Trigger adjustments<br />
1. Trigger weight:<br />
Adjust the trigger weight with set screw<br />
No. 10 (silver screw):<br />
•if you turn it to the right:<br />
trigger weight is increased (+)<br />
•if you turn it to the left:<br />
trigger weight is decreased (-)<br />
Trigger weight and first stage weight<br />
depend on each other with regard to the<br />
mechanic mechanism. If one of them is<br />
changed there will always be a corresponding<br />
change of the other as well.<br />
24
To move trigger cam No. 11:<br />
•lowest position of the trigger cam:<br />
lowest trigger weight<br />
•highest position of the trigger cam:<br />
highest trigger weight<br />
If the trigger weight is to be more than 200 g,<br />
the trigger cam No. 11 must be adjusted to<br />
the highest position (turn it by 180° and fix<br />
it then). To do this you need a 2 mm hex<br />
key and perhaps tweezers.<br />
•if you turn it to the left:<br />
You release the screw<br />
•if you turn it to the right:<br />
You tighten the screw<br />
Attention:<br />
Please ensure the trigger cam is positioned<br />
correctly. Be very careful tightening the<br />
small cam screw as it is easily broken!<br />
Please check the sear engagement according<br />
to paragraph No. 3 when you have<br />
finished this process. It might have to be<br />
adjusted as well. The precise adjustments<br />
of the trigger weight and first stage weight<br />
are carried out with the set screws No. 10<br />
(trigger weight) and No.9 (first stage weight).<br />
2. First stage weight (only for two-stage<br />
triggers):<br />
Adjust first stage weight with set screw<br />
No. 9 (black screw):<br />
•if you turn it to the right:<br />
first stage weight is increased (+)<br />
•if you turn it to the left:<br />
first stage weight is decreased (-)<br />
Trigger weight and first stage weight<br />
depend on each other with regard to the<br />
mechanic mechanism. If one of them is<br />
changed there will always be a corresponding<br />
change of the other as well.<br />
Attention:<br />
Do not reduce either trigger weight screw<br />
to zero or lower as the trigger pull may<br />
become erratic.<br />
3. Sear engagement:<br />
The sear engagement is the distance between<br />
the second stage and the release of<br />
the trigger.<br />
Important note:<br />
To protect your precise trigger and to<br />
guarantee perfect operation you should<br />
always close the action carefully. If the sear<br />
engagement of single stage triggers is too<br />
small and the trigger weight is too low or if<br />
the first stage of two-stage triggers is too<br />
short, the trigger might release inadvertently<br />
by a sudden impact or too powerful closing<br />
of the action if the rifle is loaded and not in<br />
the ”safe“ position.<br />
Adjustment of the sear engagement for twostage<br />
triggers with set screw No. 5:<br />
•if you turn it to the right:<br />
sear engagement is shortened<br />
•if you turn it to the left:<br />
sear engagement is extended<br />
Adjustment of an optimum sear engagement:<br />
Make sure your rifle is not loaded. Cock<br />
your rifle and release the trigger. Check if<br />
the trigger releases as desired.<br />
25
for single stage triggers with set screw<br />
No. 5 see point 7:<br />
4. First stage (only for single stage<br />
triggers):<br />
The single stage is the distance between<br />
the trigger blade from zero position to the<br />
second stage.<br />
Adjustment of first stage with set screw No. 4:<br />
e r t ui<br />
opasd f<br />
The sear engagement is too long:<br />
There is a small distance between the<br />
second stage and the release of the trigger.<br />
•Turn set screw No. 5 clockwise after<br />
cocking and releasing (approximately<br />
1/ 8 turn each).<br />
•Repeat this process until you do not feel<br />
the second stage anymore. Then turn<br />
1/ 5 turn back to the left. Thus the optimum<br />
sear engagement is adjusted.<br />
The sear engagement is too short:<br />
There is no second stage. The trigger<br />
releases undefined without second stage.<br />
•Turn set screw No. 5 counter-clockwise<br />
for at least 1/ 4 turn after cocking. Then<br />
release the trigger and check if there is a<br />
second stage. If not, repeat this procedure<br />
until you feel a second stage.<br />
•As soon as you feel a second stage<br />
proceed according to the points of the<br />
paragraph „The sear engagement is too<br />
long“ to obtain an optimum sear<br />
engagement.<br />
For the adjustment of the sear engagement<br />
26<br />
•if you turn it to the right:<br />
first stage is shortened<br />
•if you turn it to the left:<br />
first stage is extended<br />
Caution:<br />
Set screw No. 4 (first stage) can be turned<br />
past the second stage function. In this case<br />
the trigger does not work anymore. Danger!<br />
Do not under no circumstances remove<br />
the first stage completely in order to change<br />
the two-stage trigger into a single stage<br />
trigger.<br />
5. Trigger stop:<br />
The trigger stop is the distance from the second<br />
stage to the stop of the trigger blade.<br />
Adjustment of the trigger stop with set screw<br />
No. 8:<br />
•if you turn it to the right:<br />
overtravel is shortened<br />
•if you turn it to the left:<br />
overtravel is extended
Attention:<br />
The trigger stop set screw No. 8 can be<br />
turned over the second stage or first stage<br />
function. Malfunction (the trigger does not<br />
release)!<br />
6. Adjustment of the trigger blade:<br />
•Loosen hex screw No. 7<br />
•Trigger blade No. 6 can be moved in the<br />
longitudinal guide and can be tilted<br />
laterally.<br />
7. Change of two-stage trigger into<br />
single stage trigger:<br />
Adjusting process:<br />
•Turn first stage weight screw No. 4 clockwise<br />
until you have reached the maximum<br />
first stage.<br />
•Cock the rifle.<br />
•Turn set screw No. 5 (first stage) clockwise<br />
until the trigger releases.<br />
•Turn set screw No. 5 from this position<br />
approx. 1/ 4 turn counter-clockwise.<br />
The trigger is now adjusted to single stage<br />
operation, there is no more first stage.<br />
Warning:<br />
Single stage triggers are very sensitive and<br />
must be operated with special care.<br />
The sear engagement of 5/ 100 mm is obtained<br />
after the action is closed. In<br />
combination with a minimum trigger weight<br />
there might be a malfunction and an<br />
increased risk (independent shot<br />
release).<br />
8. Change of single stage trigger into<br />
two-stage trigger:<br />
•Turn trigger stop set screw No. 8 approx.<br />
2 1/ 2 turns to the left (adjust max. trigger<br />
stop longer).<br />
•Release the safety of the trigger and cock<br />
the rifle.<br />
•Turn set screw No. 5 approx. 2 1/ 2 turns<br />
counter-clockwise.<br />
•You should now feel a second stage<br />
•To adjust the optimum sear engagement<br />
proceed according to paragraph 3.<br />
•Perhaps you have to adjust the first stage<br />
according to paragraph 4, the trigger<br />
stop according to paragraph 5, the<br />
trigger weight according to paragraph 1<br />
and the first stage weight according to<br />
paragraph 2 to the desired values.<br />
9. Malfunctions of the trigger due to<br />
wrong adjustment procedure:<br />
If the trigger is not adjusted correctly malfunctions<br />
may occur, tampering with the<br />
trigger adjustments will not result in any<br />
success. Therefore proceed as follows:<br />
After every change the function of the<br />
trigger must be checked. When the<br />
malfunction is removed check the desired<br />
trigger values and adjust them again if<br />
necessary.<br />
The trigger catches the firing pin, but the<br />
trigger does not release:<br />
•Make sure that the safety of the trigger is<br />
released.<br />
•Check if there is a trigger cam and that it<br />
is attached correctly.<br />
27
10. Safety:<br />
On the left side of the trigger there is a<br />
safety lever. Please see chapter „Cocking,<br />
loading and safety operation“.<br />
11. Maintenance:<br />
Please see chapter „Cleaning, maintenance,<br />
care, lubrication“.<br />
e r t ui<br />
opasd f<br />
•The trigger stop set screw No. 8 is<br />
screwed in too much. Turn it a few turns<br />
to the left until the cocking piston or firing<br />
pin will release again.<br />
The trigger does not catch the cocking<br />
piston or firing pin:<br />
•Set screw No. 4 (first stage) is screwed in<br />
too much.<br />
•Check to see if the spring is correctly<br />
attached and not defective.<br />
Important note:<br />
To protect your highly accurate trigger and<br />
to maintain perfect functioning always close<br />
the bolt carefully.<br />
Attention:<br />
If you change the trigger remove the bolt<br />
from the receiver when fitting the trigger as<br />
otherwise the trigger will be damaged.<br />
The first stage trigger is adjusted too<br />
tightly:<br />
•Turn set screw No. 5 stepwise 1/ 4 turn to<br />
the right until the firing pin is caught.<br />
Catch rebound spring is too weak or<br />
defective:<br />
•Send your trigger to the factory or your<br />
service center for inspection.<br />
28
Order No.<br />
Model<br />
Two-stage<br />
trigger<br />
Single-stage<br />
trigger<br />
Adjusted to<br />
Right hand<br />
version<br />
Left hand<br />
version<br />
For models<br />
For small bore<br />
models<br />
production years<br />
For small bore<br />
models serial-no.<br />
starting from<br />
700.6540 1407-U9 ● 150 g ●<br />
700.6541 1408-U1 ● 500 g ●<br />
700.6542 1408 D-U1 ● 500 g ●<br />
700.6543 1411-U2 ● 1500 g ●<br />
1407, 1407 Z, 1409, 1411<br />
1413, 1408 EDS<br />
1959 - 1974<br />
700.6550 5071/1 ● 100 g ●<br />
700.6560 5071/1 D ● 100 g ●<br />
700.6570 5075/1 ● 550 g ●<br />
700.6580 5075/1 D ● 550 g ●<br />
1607, 1613, 1608 EDS<br />
1974-1979<br />
143655<br />
to<br />
182155<br />
700.6600 5018 ● 100 g ●<br />
700.6610 5018 L ● 100 g ●<br />
700.6620 5018 D ● 150 g ●<br />
700.6630 5018 L D ● 150 g ●<br />
700.6640 5020 ● 550 g ●<br />
700.6650 5020 L ● 550 g ●<br />
700.6660 5020 D ● 550 g ●<br />
700.6670 5020 L D ● 550 g ●<br />
700.6740 5022 ● 1500 g ●<br />
1807, 1907, 1807 Z, 1907 Z<br />
1907 Silh., 1807 Rep.<br />
1907 Rep., 1907 Rep., 1912<br />
1813, 1913, 1808 EDS<br />
1808 D-RT, 1827, 1827F, <strong>2007</strong><br />
<strong>2007</strong>/660, 2012, <strong>2013</strong><br />
<strong>2013</strong>/690, <strong>2013</strong> Benchrest<br />
54.18 MSR, 1808 MSR<br />
2002 Compressed Air,<br />
2020, 2025<br />
starting<br />
from 1979<br />
starting<br />
from<br />
182156<br />
700.6800 5098 ● 280 g ●<br />
700.6810 5098 L ● 280 g ●<br />
700.6860 5100 D ● 500 g ●<br />
700.6870 5100 L D ● 500 g ●<br />
700.6873 5103 ● 1500 g ●<br />
1903, 1416 MSP, 1403 Rep.<br />
64 MSR<br />
700.6700 5019 ● 100 g ●<br />
700.6710 5021 D ● 550 g ●<br />
700.6720 5021 ● 100 g ●<br />
800.0000 5024 ● 1500 g ●<br />
700.6730 5023 D ● 550 g ●<br />
700.6660 5020 D ● 550 g ●<br />
700.6881 5197 ● 550 g ●<br />
When you order trigger parts<br />
please indicate the order<br />
number, type of rifle model<br />
together with the trigger model<br />
number. For left hand versions<br />
please add ”L”<br />
2001 Superair<br />
2001 D-RT Superair<br />
2002 Superair<br />
2002 D-RT Superair<br />
2002 D-RT Compr.Air, 1827, 1827F<br />
2027 Summer biathlon<br />
L = Left hand version<br />
D = Single-stage trigger<br />
D-RT = Running target<br />
EDS = Running target<br />
Rep. = Repeater<br />
Silh. = Silhouette<br />
F = Fortner<br />
Z = ”Zimmerstutzen”<br />
MSP = Silhouette pistol<br />
MSR = Silhouette rifle<br />
29
Dry firing device<br />
The length of the spring-supported firing pin<br />
is adjusted so that it definitely ignites the<br />
cartridges. If there is no cartridge or<br />
cartridge case in the chamber, the firing pin<br />
as well as the rim of the chamber may be<br />
damaged when dryfiring for a longer<br />
period. In order to prevent any possible<br />
damage use either a cartridge case (after<br />
about 5 practice shots insert a different<br />
case) or preferably the training firing pin<br />
1807T-12. With this device you can<br />
practice under competition conditions<br />
without having to use ammunition.<br />
The procedure for changing the firing pin<br />
is described in the chapter „To disassemble<br />
and reassemble the bolt“.<br />
Do not forget to exchange the training firing<br />
pin for the original one for live firing.<br />
Cleaning, Maintenance, Care,<br />
Lubrication<br />
Even after considerable use, your<br />
ANSCHÜTZ small bore match rifle will not<br />
require much attention - a tribute to its solid<br />
design, first class materials, well proven<br />
ANSCHÜTZ workmanship and precision.<br />
If you follow the recommendations below,<br />
you will help maintain the excellent<br />
performance of your rifle for a long time.<br />
Regular care after every shooting:<br />
•Please only use resin and acid free oils.<br />
•Use cleaning rod guide No. 4401 (Order<br />
No. 710.6340) to remove any<br />
residues from the barrel to avoid that dirt<br />
or oil particles will penetrate the trigger<br />
mechanism. Clean with a lint-free cloth or<br />
pull cleaning cords several times through<br />
the barrel from chamber to muzzle to<br />
remove deposits. Subsequently pull a<br />
slightly oiled, lint-free cloth or cleaning<br />
cords through the barrel to avoid corrosion.<br />
•Clean the bolt with a slightly oiled cloth.<br />
•Make sure that the metal parts of your<br />
rifle are protected against corrosion by a<br />
slight oil film.<br />
•Remove the oil film with a dry cloth or<br />
cleaning cords before you shoot again.<br />
Careful cleaning:<br />
New rifles up to 10,000 shots in 1,000 shot<br />
intervals, subsequently in 5,000 shot<br />
intervals at least.<br />
•Use oil to clean the barrel and push a<br />
brass brush from the chamber to the<br />
muzzle. Never move the brush back and<br />
forth in the barrel. Only clean in shooting<br />
direction. Remove the brush outside of the<br />
muzzle and carefully pull the rod back<br />
through the barrel.<br />
•Then pull cleaning cords in dry condition<br />
through the barrel until the last one shows<br />
no considerable dirt.<br />
•Before shooting the next time fire 5 shots<br />
to get back to the former shooting performance.<br />
•Clean external parts with a slightly oiled<br />
cloth.<br />
Maintenance of the muzzle tube:<br />
After every shooting session the residues<br />
of powder and humidity have to be<br />
removed from the muzzle tube as otherwise<br />
30
they may have a detrimental influence on<br />
the performance of your rifle.<br />
•Loosen the clamping screws.<br />
•Pull off the muzzle tube in the direction of<br />
shooting. Once removed the muzzle tube<br />
has to be cleaned with cleaning device<br />
4422/1 (Order No. 710.6350). Any<br />
residue must then be removed.<br />
•Carefully clean the muzzle with a slightly<br />
oiled lint-free cloth.<br />
•Following this the tube is refixed to the<br />
barrel so that the groove in the tube is<br />
coupled with the fixing pin on the barrel.<br />
• Afterwards the clamping screws must be<br />
tightened with a torque of 5.5 Nm<br />
(55 cmkp).<br />
Maintenance of the trigger:<br />
•Lubricate the bearings slightly with cold<br />
resistant molybdenum disulphide grease<br />
once a year.<br />
•Spot a small amount of oil into the bearing<br />
parts using a needle.<br />
•The internal parts should not be washed<br />
with spray or oil to avoid resin or other<br />
residues in the trigger.<br />
Vacuum clean your gun case or soft gun<br />
case once a month to remove dust and lint.<br />
Gun cases and soft gun cases should have<br />
a smooth and dust rejecting inner lining.<br />
Be aware that condensed water might<br />
occur as a result of temperature variations.<br />
In such a case it has to be removed at once.<br />
Leave your gun case or soft gun case open<br />
when you store them at home so that<br />
possible humidity can escape.<br />
Adding a humidity absorber reduces the<br />
development of humidity. Be aware of other<br />
possible changes or damage. In such a<br />
case take your rifle to an authorized<br />
gunsmith for checking or send it to our<br />
factory.<br />
To reduce the risk of damage in transit, we<br />
recommend the disassembly of the barreled<br />
action from the stock.<br />
Attention:<br />
When cleaning the rifle no dirt, residues of<br />
solvents, grease or non-suitable oils must get<br />
into the trigger mechanism. We therefore<br />
recommend either to use our cleaning rod<br />
guide or to clean your gun in a way that it<br />
is horizontal or even with the stock up to<br />
avoid any contamination of the trigger<br />
mechanism.<br />
Protect your rifle against dust, sand,<br />
humidity, heat and other harmful influences.<br />
31
Accessories<br />
Please ask for our catalogue.<br />
Warranty<br />
A warranty of 1 year will be issued. Parts<br />
which are subjected to wear are not part<br />
of this warranty. In the case of warranty we<br />
substitute the defective parts free of charge.<br />
Cases of warranty will only be accepted if<br />
the article in question and the corresponding<br />
purchase receipt plus filled-in<br />
warranty card are presented. Warranty will<br />
not be accepted if changes or repair works<br />
have been carried out by persons who are<br />
not authorised, if the rifle is not used<br />
correctly or if non-ANSCHÜTZ original<br />
parts were used.<br />
We wish you much pleasure and success<br />
with your ANSCHÜTZ product and would<br />
be pleased if you could let us have your<br />
ideas on our products and the design of<br />
this instruction leaflet.<br />
Copyright<br />
Product specifications, design and model<br />
changes are subject to change without prior<br />
notice. Dimensions and colors are subject<br />
to change. With reservation of misprints and<br />
errors. Goods are subject to prior sale.<br />
Delivery subject to the presentation of the<br />
referring license for the purchase of<br />
firearms.<br />
ANSCHÜTZ, the ANSCHÜTZ logo and the<br />
ANSCHÜTZ logo in connection with the<br />
slogan „Die Meister Macher“ (also in<br />
modified spelling) are protected brands of<br />
J.G. ANSCHÜTZ GmbH & Co. KG, Ulm,<br />
Germany. The unauthorized use of this<br />
brand name is not allowed and punishable.<br />
All rights of this instruction leaflet reserved.<br />
The use of the instruction leaflet, also in<br />
excerpts, is not allowed without the<br />
permission of J.G. ANSCHÜTZ GmbH &<br />
Co. KG and otherwise is punishable. This<br />
is especially applicable for unauthorized<br />
copying, translations and read-ins in<br />
electronic systems.<br />
32
Fabr.-Nr.:<br />
Serial No.:..........................................................................<br />
Bitte hier eintragen · Please fill in here<br />
Originalschussbild Ihres Gewehres 10 Schuss auf 50 m<br />
Original group of your rifle 10 shots at 50 m<br />
J.G. ANSCHÜTZ GmbH & Co. KG<br />
Jagd- und Sportwaffenfabrik<br />
Daimlerstrasse 12<br />
D-89079 Ulm / GERMANY<br />
Postfach 11 28<br />
D-89001 Ulm / GERMANY<br />
Telefon (++49)-(0)-731-4012-0<br />
Telefax (++49)-(0)-731-4012-700<br />
anschuetz-sport.com<br />
JGA-Info@anschuetz-sport.com<br />
DGG · 11/01/1.000


