INSURER USER MANUAL Chapter 10 - HCAI
INSURER USER MANUAL Chapter 10 - HCAI
INSURER USER MANUAL Chapter 10 - HCAI

You also want an ePaper? Increase the reach of your titles
YUMPU automatically turns print PDFs into web optimized ePapers that Google loves.
<strong>INSURER</strong> <strong>USER</strong> <strong>MANUAL</strong><br />
<strong>Chapter</strong> <strong>10</strong><br />
Insurer User Management<br />
July 2012
<strong>Chapter</strong> <strong>10</strong>: Insurer User Management<br />
OVERVIEW<br />
User Management involves the setup and maintenance of individual Users within <strong>HCAI</strong>. Users are<br />
assigned roles and domains within <strong>HCAI</strong> that define what a User can do and where they can do it. Roles<br />
are defined as a set of tasks that a User can perform. Each task represents a User’s interaction with the<br />
<strong>HCAI</strong> web application. Domains specify where the tasks are performed or, more simply, the place within<br />
an Insurer organization where the claim information is located. For more information on the structure of<br />
Insurer organizations within <strong>HCAI</strong>, please see <strong>Chapter</strong> 9: Insurer Management.<br />
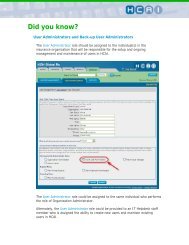
The User Administrator role is the only role allowed to access to the User Management module in<br />
<strong>HCAI</strong>. The User Administrator can create Users, assign roles, and grant domain access for<br />
organizations that he/she is allowed to manage. Once a User has been successfully created in <strong>HCAI</strong>,<br />
an email will be sent to the User providing his or her User ID and temporary password (if the email<br />
address has been provided). The User Administrator must notify the User manually regarding his/her<br />
User Name and password if no email address is available.<br />
ADDING A <strong>USER</strong>...........................................................................................................................................2<br />
Level of Access......................................................................................................................................3<br />
ASSIGNING ROLES AND RESPONSIBILITIES ....................................................................................................5<br />
GRANT ACCESS RIGHTS TO <strong>USER</strong> ................................................................................................................7<br />
SAVING A NEW <strong>USER</strong> ...................................................................................................................................7<br />
SEARCHING FOR A <strong>USER</strong> ..............................................................................................................................9<br />
VIEWING SEARCH RESULTS........................................................................................................................<strong>10</strong><br />
DOWNLOAD SEARCH REPORT ....................................................................................................................11<br />
UPDATING A <strong>USER</strong> .....................................................................................................................................11<br />
UPDATING A <strong>USER</strong> .....................................................................................................................................12<br />
RESETTING <strong>USER</strong> PASSWORDS ..................................................................................................................13<br />
DEACTIVATING/REACTIVATING A <strong>USER</strong>........................................................................................................15<br />
1
Adding a User<br />
Only those Users assigned the User Administrator role are able to view the User Management tab and<br />
access the Add User functionality.<br />
1. Click the Manage tab on the Insurer home page.<br />
2. If the User Management tab is not the default selection, select it. User Search screen opens.<br />
3. In the Add a New User section of this screen, click the button. The Add/Edit<br />
User screen appears.<br />
4. Fill out the form provided in this screen. Fields marked with asterisks are mandatory.<br />
2 Insurer Manual – <strong>Chapter</strong> <strong>10</strong>
5. Enter the User’s last and first names in the respective fields.<br />
6. Enter the title of the User in the “Title” field.<br />
7. Specify a User Name for the User. This name is editable only on the first creation of the User<br />
account. After this, it is read-only for the lifetime of the account. The User Name is unique for<br />
each User; no User Name—even one that has been deactivated—can be reused by an<br />
organization.<br />
8. Enter Employee ID. The employee ID is assigned by the Insurer.<br />
9. Enter the User’s phone number and email address in the respective fields. Both fields are<br />
optional. If provided, the email address will be used to send the User Name and Password to the<br />
User. If not specified, it will be the administrator’s role to provide this information.<br />
<strong>10</strong>. Specify the level of access to be assigned to the User.<br />
Level of Access<br />
Descriptions for the different levels of access that can be assigned:<br />
Insurer. A User with Insurer (parent) level access will be able to view details of all companies within<br />
the group. This level of access is usually assigned to Users who are performing User Administration,<br />
Organization Administration and Plan/Invoice Manger roles.<br />
Child Insurer. A User with child insurer level access will be able to view details for the selected<br />
companies. This access is normally assigned to Users who perform Plan/Invoice Manager role.<br />
Branch. A User with branch level access will be able to view details for the selected branches. This<br />
access is normally given to Users who perform tasks for a number of branches.<br />
Adjuster. A User with Adjuster level access will be able to view details for the selected Adjusters.<br />
3 Insurer Manual – <strong>Chapter</strong> <strong>10</strong>
Once the level of access is determined, the roles and responsibilities sections will display the<br />
selections available and the grant access rights box will display the appropriate selections.<br />
4 Insurer Manual – <strong>Chapter</strong> <strong>10</strong>
Assigning Roles and Responsibilities<br />
Once you have selected the level of access, the screen will be refreshed with the Roles and<br />
Responsibilities. The roles available for the selection will coincide with the level of access chosen.<br />
A list of the Insurer roles available within <strong>HCAI</strong>, along with a description of the tasks associated with<br />
each role is provided in the following table:<br />
Roles<br />
Insurer User Administrator<br />
Organization Administrator<br />
Plan/Invoice Manager<br />
Report Viewer<br />
Plan/Invoice Support<br />
Claim-Claimant Administrator<br />
Tasks<br />
View, create, update and search User<br />
Reset Password<br />
View Manage tab and User Management Sub Tab<br />
Deactivate/Activate Users<br />
View and update Insurer<br />
View, create, and update Branch<br />
View, create and update Adjuster<br />
View Insurer Management Tab and Insurer<br />
Management Sub Tab<br />
Deactivate/Activate Insurers, Branches, Adjusters<br />
View Plan/InvoicesView OCF 9<br />
Search Document<br />
View Work list<br />
View Plan/Invoice, Search, Claim, Manage Tabs<br />
Reassign Document Branch<br />
Reassign Adjuster<br />
View, create, search and update Claim<br />
View, create, search and update Claimant<br />
Unlink & match Claimant from a Document<br />
View Insurer Claimant reports<br />
View and Print Insurer Reports<br />
View Manage Tab and Reports Sub Tab<br />
View Plan/Invoice<br />
Save work in progress for Plan/Invoice<br />
View EOB – View OCF-9<br />
Search Document<br />
View Work list<br />
View Plan/Invoice and Search Tab<br />
View Insurer Claimant Reports<br />
View, create, search and update Claim<br />
View, create, search and update Claimant<br />
View Plan/Invoice<br />
Search for Document<br />
View Claims, Search & Manage Tabs<br />
View Claims & Claimant Sub Tab<br />
5 Insurer Manual – <strong>Chapter</strong> <strong>10</strong>
View Insurer Claimant Reports<br />
6 Insurer Manual – <strong>Chapter</strong> <strong>10</strong>
Plan/Invoice Adjuster<br />
View and submit response to Plan/Invoice<br />
Save work in progress for Plan/Invoice<br />
Take & release document ownership<br />
Match Claimant (if permitted by User’s level of access)<br />
View, create, delete and update OCF-9<br />
Search Document<br />
View Plan/Invoice, Search & Manage Tab<br />
Initiate Need to Discuss<br />
Respond to Need to Discuss<br />
Request Amend Plan<br />
Withdraw Plan/Invoice Response<br />
Place Plan/Invoice in Pending<br />
View Insurer Claimant Reports<br />
Users can be assigned one role or multiple roles. The variety of roles available and the ability to assign<br />
multiple roles to a User provides Insurers with the flexibility to narrowly restrict the tasks that some<br />
Users are permitted to perform, while granting other Users broad access to functions within <strong>HCAI</strong>.<br />
To assign roles and responsibilities to the User, click on the box beside the role to be assigned.<br />
Grant Access Rights to User<br />
The appropriate selections will be available based on the level of access you have chosen for the User.<br />
Insurer. The User will have access to all information for the group of companies and no further input<br />
is necessary.<br />
Child Insurer. Select the appropriate companies, by clicking on the box beside the company name.<br />
Note: this level will only appear if organization is set up as a group of companies.<br />
Branches. Select the appropriate branches by clicking on the box beside the branch.<br />
Adjuster. Select the appropriate Adjusters from the list, to select more than one Adjuster, press shift<br />
key and click on each Adjuster, click the button to add the Adjusters to the list. To select all<br />
Adjusters click the button.<br />
1. To remove an Adjuster, select the name from the list and click the button. To remove<br />
all Adjusters use the button.<br />
Saving a New User<br />
Click in the bottom of the Edit User screen to save the User and his/her associated role and<br />
domain access in <strong>HCAI</strong>, a confirmation screen will appear, review the assigned access and click<br />
.<br />
Once the User set-up is confirmed, you are returned to the form with a confirmation message stating<br />
that you have successfully added a new User and providing the User with a password. The User Name<br />
and password should be given to the new User unless the email address has been provided, in which<br />
case the Password will be sent directly to the User.<br />
7 Insurer Manual – <strong>Chapter</strong> <strong>10</strong>
If the User Name you have chosen already exists, an error message appears at the top of the screen.<br />
You must then specify a new User Name.<br />
If the data is invalid or incomplete, saving the User information fails and you are returned to the form<br />
with an error message displaying the field name and type of error.<br />
8 Insurer Manual – <strong>Chapter</strong> <strong>10</strong>
Searching for a User<br />
The User Search functionality is found in the User Management module, which is accessible from the<br />
Manage tab on the Insurer home page. Click the Manage tab. If the User Management tab is not the<br />
default selection, select it. The User Search screen displays.<br />
In the Search for Users section, use any of the following search criteria:<br />
User Status. Select one of the two boxes – “Active” or “Deactivated” – if you know the status of the<br />
User you are searching for.<br />
Last Name. Enter at least one character in this field. (When searching by first name, the User must<br />
specify the last name.)<br />
First Name. Enter at least one character in this field. When searching by first name, the User must<br />
specify the last name.<br />
Employee ID. If known, this search criterion returns the direct result.<br />
Click . If there are any errors, an error message appears. Otherwise, you proceed to the<br />
Search Results screen.<br />
Note: All searches are performed with a forward wildcard. Thus, searching for “A” is<br />
effectively “A*.”<br />
9 Insurer Manual – <strong>Chapter</strong> <strong>10</strong>
Viewing Search Results<br />
The Search Results screen shows a list of Users determined by your search criteria and associated<br />
with your organization.<br />
The default sort order of the Users is alphanumeric ascending by Employee ID. If there are multiple<br />
search results, they are divided onto several pages with the default number of line items displayed on<br />
each page restricted to <strong>10</strong>.<br />
To change the number of line items per page:<br />
• Select the number of items from the “View” drop-down list to set the quantity of line items to be<br />
displayed on each page of the Search Results set.<br />
To navigate in the multi-page search results:<br />
• Click or to move backward or forward through all the pages of the Search<br />
Results set.<br />
• Use the page number links to move to a particular page of the search results.<br />
To refine your search:<br />
• Click the “Refine Search” text-link. This returns you to the User Search screen.<br />
• Modify the data as required and click .<br />
To change the sort order of the search results list:<br />
• Click on the “Employee ID” column header. This toggles the sort order from the default<br />
alphanumeric ascending to descending.<br />
• Click on the “Name” column header to sort the results in ascending order by the User’s name.<br />
Click again to switch to descending order. The secondary sort order is alphanumeric ascending<br />
by Employee ID.<br />
• Click on the “Status” header to sort the results in ascending order by the status of the User. Click<br />
again to switch to descending order.<br />
To view User details:<br />
• Click on the User Name link in the “Name” column to proceed to the Add/Edit User screen.<br />
<strong>10</strong> Insurer Manual – <strong>Chapter</strong> <strong>10</strong>
Download Search Report<br />
This report enables a User to download results from the User Search > Search Results screen to a<br />
spreadsheet. The spreadsheet is a more detailed report than the web view of the search results and<br />
includes more information, such as the User Name, email address, phone number and Date of<br />
Deactivation for each user appearing in the search results.<br />
11 Insurer Manual – <strong>Chapter</strong> <strong>10</strong>
Updating a User<br />
Search for a required User as described in Searching for a User section. In the Search Results list,<br />
click on the User Name link in the “Name” column. This brings up the Add/Edit User screen.<br />
In this screen, you can edit the User details in the “Last Name,” “First Name,” “Title,” “Employee ID,”<br />
“Email,” and “Phone” fields. You cannot edit the User Name; it is only editable on creation of the User<br />
account. After that, the User Name is read-only for the life of the account.<br />
Level of access and roles can be edited.<br />
• Input the appropriate changes and press the button; the confirmation screen will display,<br />
then review the changes and press again.<br />
• A message will display that User has been successfully updated.<br />
12 Insurer Manual – <strong>Chapter</strong> <strong>10</strong>
Resetting User Passwords<br />
When a User is suspended from <strong>HCAI</strong>, the User Administrator for the Insurer can reset the User’s<br />
password by:<br />
1. Clicking on the Manage tab.<br />
2. Clicking the User Management sub-tab.<br />
3. Entering the User’s name in the “Search for Users” section.<br />
4. Once the User is located, click on his or her name to open the profile.<br />
5. Hit the reset button located within the User’s profile.<br />
If the User Administrator has entered the User’s email as part of his or her profile, the User will<br />
receive the temporary password automatically. When no email address has been provided, the<br />
User Administrator will contact the User and provide him or her with the temporary password.<br />
6. Click if you need to reset a User’s password. The system generates a new<br />
password. If the password is the only update in this screen, you do not have to save. You will<br />
either provide the User with the new password or, if the email address has been provided, the<br />
new password will be sent directly to the User.<br />
13 Insurer Manual – <strong>Chapter</strong> <strong>10</strong>
14 Insurer Manual – <strong>Chapter</strong> <strong>10</strong>
Deactivating/Reactivating a User<br />
The Deactivate / Reactivate User functionality is found in the User Management sub tab, (located<br />
under the Manage tab). Click the Manage tab. If the User Management tab is not the resulting default<br />
selection, select it. The User Search screen opens.<br />
To deactivate a User:<br />
• Search for a required User as described in Searching for User section.<br />
• In the Search Results list, click on the User Name link in the “Name” column. This brings up the<br />
Add/Edit User screen containing the User details:<br />
• Click the button to deactivate the User. The dialog appears for you to confirm<br />
deactivation. Click . The screen refreshes. The message “User Deactivated” appears and<br />
the button is replaced by the button. The User will no longer have<br />
access to <strong>HCAI</strong>.<br />
Note: Although the User is deactivated, his/her User Name cannot be reused within the<br />
<strong>HCAI</strong> system by any organization.<br />
15 Insurer Manual – <strong>Chapter</strong> <strong>10</strong>
If a User with the role of Adjuster (Adjuster-User) has active claims/Claimants attached to his or her<br />
profile, the User Administrator will be unable to deactivate the User. Active claims/Claimants must<br />
either be adjudicated or transferred to another Adjuster for adjudication before the User Administrator<br />
can deactivate the User.<br />
When a User Administrator deactivates an Adjuster-User by clicking the<br />
button in the<br />
Add/Edit User screen of the User Management sub tab, the User’s profile in the Associated Adjusters<br />
section of the Branch Details screen must also be deactivated.<br />
16 Insurer Manual – <strong>Chapter</strong> <strong>10</strong>
Likewise, when an Adjuster-User is deactivated by clicking the<br />
button located in the<br />
Branch Details screen of the Insurer Management sub tab, the User Administrator must also deactivate<br />
the User in Add/Edit User screen of the User Management sub tab.<br />
To deactivate an Adjuster-User from the Insurer Management sub tab:<br />
1. Click the branch for which the User to be deactivated is associated in the “Browse Branches”<br />
section. This will bring up the Branch Details screen.<br />
2. Click the button on the same line of the Adjuster you wish to deactivate. The<br />
screen refreshes and the button has changed from to .<br />
17 Insurer Manual – <strong>Chapter</strong> <strong>10</strong>
To reactivate an Adjuster-User in the Insurer Management sub tab:<br />
1. Locate the Branch to which the deactivated Adjuster is associated in the Browse Branches<br />
section of the Insurer Management sub-tab.<br />
2. Click the branch name. The Branch Details screen appears.<br />
3. Locate the deactivated Adjuster-User in the “Associated Adjuster” section.<br />
4. Click the button located on the same line of the Adjuster-User you wish to reactivate<br />
(next to the Status column in the “Associated Adjusters” section).<br />
The screen refreshes and the Adjuster-User is now active. So as to ensure the Adjuster-User is active<br />
and can adjudicate claims, the User Administrator must go to the User Management sub tab, search for<br />
the User Profile of the recently activated Adjuster, and determine whether the Adjuster-User’s profile is<br />
active.<br />
18 Insurer Manual – <strong>Chapter</strong> <strong>10</strong>
To reactivate a User in the User Management sub tab:<br />
1. Search for a required User as described in Searching for a User section.<br />
2. In the Search Results list, click on the User Name link in the “Name” column. This brings up the<br />
Add/Edit User screen containing the User details.<br />
3. Click the button to reactivate the User. The screen refreshes.<br />
The message “User Activated” appears, and the<br />
button is replaced with the<br />
button. The User will now have access to <strong>HCAI</strong>.<br />
19 Insurer Manual – <strong>Chapter</strong> <strong>10</strong>