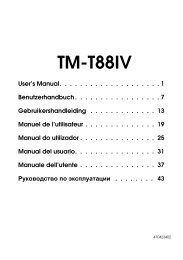
TM-U220 Technical Reference guide EPSON - Perimatic.fr
TM-U220 Technical Reference guide EPSON - Perimatic.fr
TM-U220 Technical Reference guide EPSON - Perimatic.fr

Create successful ePaper yourself
Turn your PDF publications into a flip-book with our unique Google optimized e-Paper software.
<strong>TM</strong>-<strong>U220</strong><br />
<strong>Technical</strong> <strong>Reference</strong><br />
<strong>guide</strong><br />
<strong>EPSON</strong><br />
English<br />
Rev. D<br />
404455404
<strong>TM</strong>-<strong>U220</strong> <strong>Technical</strong> <strong>Reference</strong> Guide<br />
❏<br />
❏<br />
❏<br />
❏<br />
❏<br />
❏<br />
❏<br />
CAUTIONS<br />
This document shall apply only to the product(s) identified herein.<br />
No part of this document may be reproduced, stored in a retrieval system, or transmitted in any form or by any<br />
means, electronic, mechanical, photocopying, recording, or otherwise, without the prior written permission of<br />
Seiko Epson Corporation.<br />
The contents of this document are subject to change without notice. Please contact us for the latest information.<br />
While every precaution has been taken in the preparation of this document, Seiko Epson Corporation assumes no<br />
responsibility for errors or omissions.<br />
Neither is any liability assumed for damages resulting <strong>fr</strong>om the use of the information contained herein.<br />
Neither Seiko Epson Corporation nor its affiliates shall be liable to the purchaser of this product or third parties<br />
for damages, losses, costs, or expenses incurred by the purchaser or third parties as a result of: accident, misuse, or<br />
abuse of this product or unauthorized modifications, repairs, or alterations to this product, or (excluding the U.S.)<br />
failure to strictly comply with Seiko Epson Corporation's operating and maintenance instructions.<br />
Seiko Epson Corporation shall not be liable against any damages or problems arising <strong>fr</strong>om the use of any options<br />
or any consumable products other than those designated as Original <strong>EPSON</strong> Products or <strong>EPSON</strong> Approved<br />
Products by Seiko Epson Corporation.<br />
TRADEMARKS<br />
<strong>EPSON</strong> ® and ESC/POS ® are registered trademarks of Seiko Epson Corporation.<br />
Microsoft ® Windows ® and Windows NT ® are registered trademarks of Microsoft Corporation.<br />
General Notice: Other product and company names used herein are for identification purposes only and may be<br />
trademarks of their respective companies.<br />
ESC/POS ® Proprietary Command System<br />
<strong>EPSON</strong> took the initiative by introducing ESC/POS, a proprietary POS printer command system including patented<br />
commands and enabling versatile POS system construction with high scalability. Compatible with all types of <strong>EPSON</strong><br />
POS printers and displays, this proprietary control system also offers the flexibility to easily make future upgrades. Its<br />
popularity is worldwide.<br />
Revision Information<br />
Revision Page Altered Items and Contents<br />
Rev. A all pages Newly authorized<br />
Rev. B all pages Revising about the wall hanging unit and miscellaneous.<br />
Rev. C 1-6, C-21, C-22 Correcting and deleting the notes.<br />
Rev. D<br />
all pages<br />
Add wall hanging unit and miscellaneous.<br />
Rev. D<br />
i
About This Manual<br />
Aim of the Manual<br />
This manual was created to provide information on the <strong>TM</strong>-<strong>U220</strong> printer for anyone who is<br />
developing hardware, installations, or programs. Programmers will also want to consult other<br />
documents.<br />
Contents of the Manual<br />
Chapter 1, “General Information.”<br />
Chapter 2, “System Planning.”<br />
Chapter 3, “Setup.”<br />
Chapter 4, “Troubleshooting.”<br />
Chapter 5, “Application Development<br />
Information.”<br />
Chapter 6, “Notices for Replacement of<br />
the <strong>TM</strong>-U210/<strong>TM</strong>-U300.”<br />
Appendix A, “Comparison table for <strong>TM</strong>-<br />
<strong>U220</strong>/U210/U300.”<br />
Appendix B, “How to Install the Printer on<br />
a Wall with the WH-10.”<br />
Appendix C, “Power Supply Unit.”<br />
Appendix D, “Character Code Table.”<br />
General description of features plus<br />
specifications.<br />
Contains introduction of control methods and<br />
each connection form.<br />
Contains information on such matters as DIP<br />
switches, memory switches, error processing for<br />
using <strong>TM</strong>-<strong>U220</strong>.<br />
Contains useful information for using.<br />
Contains useful information for programming.<br />
Contains various notices and comparison<br />
information for using the <strong>TM</strong>-<strong>U220</strong> as a<br />
replacement for the <strong>TM</strong>-U210/<strong>TM</strong>-U300.<br />
Comparison table for replacing <strong>TM</strong>-U210/<br />
<strong>TM</strong>-U300 with the <strong>TM</strong>-<strong>U220</strong>.<br />
Installation instructions.<br />
Describes the external dimensions and<br />
specifications of the power supply units.<br />
Contains the supported character tables.<br />
ii<br />
Rev. D
<strong>TM</strong>-<strong>U220</strong> <strong>Technical</strong> <strong>Reference</strong> Guide<br />
Related Software and Documents<br />
Related software and documents<br />
Software/document name<br />
<strong>TM</strong>-<strong>U220</strong> User’s Manual/<br />
<strong>TM</strong>-<strong>U220</strong> <strong>Technical</strong> <strong>Reference</strong> Guide<br />
ESC/POS Application Programming Guide<br />
<strong>EPSON</strong> OPOS ADK<br />
<strong>EPSON</strong> OPOS ADK Manual<br />
<strong>EPSON</strong> Advanced Printer Driver<br />
<strong>EPSON</strong> Advanced Printer Driver Manual<br />
Description<br />
This provides basic handling procedures for the end user of the<br />
printer<br />
This Manual<br />
This provides descriptions in Acrobat format of the commands<br />
used by each <strong>TM</strong> printer, along with sample programs and other<br />
information about the printers<br />
This is a OCX driver<br />
This provides information for anyone who is programming using<br />
OPOS. This is included in the <strong>EPSON</strong> OPOS ADK<br />
This is a Windows driver<br />
This provides information for anyone who is programming using<br />
the APD (<strong>EPSON</strong> Advanced Printer Driver)<br />
Rev. D<br />
iii
iv<br />
Rev. D
<strong>TM</strong>-<strong>U220</strong> <strong>Technical</strong> <strong>Reference</strong> Guide<br />
Safety Precautions<br />
EMC and Safety Standards Applied<br />
Product Name: <strong>TM</strong>-<strong>U220</strong>A / <strong>TM</strong>-<strong>U220</strong>B / <strong>TM</strong>-<strong>U220</strong>D<br />
Model Name: M188A / M188B/ M188D<br />
The following standards are applied only to the printers that are so labeled. (EMC is tested using the <strong>EPSON</strong>’s power<br />
supply.)<br />
Europe:<br />
CE marking<br />
Safety: TÜV (EN 60950)<br />
North America:<br />
EMI: FCC/ICES-003 Class A<br />
Safety: UL60950/CSA C22.2<br />
No. 60950<br />
Japan:<br />
EMI: VCCI Class A<br />
Oceania:<br />
EMC: AS/NZS 3548 Class B<br />
WARNING<br />
The connection of a non-shielded printer interface cable to this printer will invalidate the EMC standards of this<br />
device.<br />
You are cautioned that changes or modifications not expressly approved by Seiko Epson could void your authority to<br />
operate the equipment.<br />
CE Marking<br />
The printer conforms to the following Directives and Norms<br />
Directive 89/336/EEC<br />
EN 55022 Class B<br />
EN 55024<br />
IEC 61000-4-2<br />
IEC 61000-4-3<br />
IEC 61000-4-4<br />
IEC 61000-4-5<br />
IEC 61000-4-6<br />
IEC 61000-4-11<br />
WARNING<br />
M147C is a Class A product. In a domestic environment these products may cause radio interference in which case the<br />
user may be required to take adequate measures.<br />
Rev. D<br />
v
FCC Compliance Statement For American Users<br />
This equipment has been tested and found to comply with the limits for a Class A digital device, pursuant to Part 15 of<br />
the FCC Rules. These limits are designed to provide reasonable protection against harmful interference when the<br />
equipment is operated in a commercial environment.<br />
This equipment generates, uses, and can radiate radio <strong>fr</strong>equency energy and, if not installed and used in accordance<br />
with the instruction manual, may cause harmful interference to radio communications.<br />
Operation of this equipment in a residential area is likely to cause harmful interference, in which case the user will be<br />
required to correct the interference at his own expense.<br />
For Canadian Users<br />
This Class A digital apparatus complies with Canadian ICES-003.<br />
GEREÄUSCHPEGEL<br />
Gemäß der Dritten Verordnung zum Gerätesicherheitsgesetz (Maschinenlärminformations- Verordnung-3. GSGV) ist<br />
der arbeitsplatzbezogene Geräusch-Emissionswert kleiner als 70 dB(A) (basierend auf ISO 7779).<br />
Key to Symbols<br />
The following symbols are used in the documentation for this product. See the specific warnings<br />
and cautions at appropriate points throughout this <strong>guide</strong>.<br />
WARNING:<br />
Warnings must be followed carefully to avoid serious bodily injury.<br />
CAUTION:<br />
Cautions must be observed to avoid minor injury to yourself or damage to your<br />
equipment.<br />
Note:<br />
Notes have important information and useful tips on the operation of your printer.<br />
vi<br />
Rev. D
<strong>TM</strong>-<strong>U220</strong> <strong>Technical</strong> <strong>Reference</strong> Guide<br />
Safety Precautions<br />
This section presents important information to ensure safe and effective use of this product.<br />
Please read this section carefully and store it in an accessible location.<br />
❏<br />
❏<br />
❏<br />
❏<br />
❏<br />
❏<br />
❏<br />
❏<br />
❏<br />
❏<br />
WARNING:<br />
Shut down your equipment immediately if it produces smoke, a strange odor, or<br />
unusual noise. Continued use may lead to fire or electric shock. Immediately unplug<br />
the equipment and contact your dealer or a Seiko Epson service center for advice.<br />
Never attempt to repair this product yourself. Improper repair work can be<br />
dangerous.<br />
Never disassemble or modify this product. Tampering with this product may result in<br />
injury, fire, or electric shock.<br />
Be sure to use the specified power source. Connection to an improper power source<br />
may cause fire or shock.<br />
Never insert or disconnect the power plug with wet hands. Doing so may result in<br />
severe shock.<br />
Do not allow foreign matter to fall into the equipment. Penetration of foreign objects<br />
may lead to fire or shock.<br />
If water or other liquid spills into this equipment, unplug the power cord immediately,<br />
and then contact your dealer or a Seiko Epson service center for advice.<br />
Continued usage may lead to fire or shock.<br />
Do not place multiple loads on the power outlet (wall outlet). Overloading the outlet<br />
may lead to fire.<br />
Always supply power directly <strong>fr</strong>om a standard domestic power outlet.<br />
Handle the power cord with care. Improper handling may lead to fire or shock.<br />
• Do not modify or attempt to repair the cord.<br />
• Do not place any object on top of the cord.<br />
• Avoid excessive bending, twisting, and pulling.<br />
• Do not place cord near heating equipment.<br />
• Check that the plug is clean before plugging it in.<br />
• Be sure to push the prongs all the way in.<br />
❏<br />
If the cord becomes damaged, obtain a replacement <strong>fr</strong>om your dealer or a Seiko<br />
Epson service center.<br />
Rev. D<br />
vii
❏<br />
❏<br />
❏<br />
❏<br />
❏<br />
❏<br />
CAUTION:<br />
Do not connect cables other than as described in this manual. Different<br />
connections may cause equipment damage and burning.<br />
Be sure to set this equipment on a firm, stable, horizontal surface.<br />
Product may break or cause injury if it falls.<br />
Do not use in locations subject to high humidity or dust levels.<br />
Excessive humidity and dust may cause equipment damage, fire, or shock.<br />
Do not place heavy objects on top of this product. Never stand or lean on this<br />
product. Equipment may fall or collapse, causing breakage and possible injury.<br />
To ensure safety, please unplug this product prior to leaving it unused for an<br />
extended period.<br />
Do not touch either the thermal or the dot matrix print head or the paper feed<br />
motor. Wait for the heads and the motor to cool. The head and the motor can be<br />
very hot after printing for a long time. Touching them may cause burns.<br />
viii<br />
Rev. D
<strong>TM</strong>-<strong>U220</strong> <strong>Technical</strong> <strong>Reference</strong> Guide<br />
Contents<br />
<strong>TM</strong>-<strong>U220</strong> <strong>Technical</strong> <strong>Reference</strong> <strong>guide</strong><br />
Chapter 1 General Information<br />
1.1 Features . . . . . . . . . . . . . . . . . . . . . . . . . . . . . . . . . . . . . . . . . . . . . . . . . . . . . . . . . . 1-1<br />
1.1.1 General . . . . . . . . . . . . . . . . . . . . . . . . . . . . . . . . . . . . . . . . . . . . . . . . . . . . . 1-1<br />
1.1.2 Printer handling . . . . . . . . . . . . . . . . . . . . . . . . . . . . . . . . . . . . . . . . . . . . . . 1-1<br />
1.1.3 Printing . . . . . . . . . . . . . . . . . . . . . . . . . . . . . . . . . . . . . . . . . . . . . . . . . . . . . . 1-1<br />
1.1.4 Software . . . . . . . . . . . . . . . . . . . . . . . . . . . . . . . . . . . . . . . . . . . . . . . . . . . . 1-1<br />
1.2 Product Structure . . . . . . . . . . . . . . . . . . . . . . . . . . . . . . . . . . . . . . . . . . . . . . . . . 1-2<br />
1.2.1 Printer types . . . . . . . . . . . . . . . . . . . . . . . . . . . . . . . . . . . . . . . . . . . . . . . . . 1-2<br />
1.2.2 Standard Parts Included with the Printer . . . . . . . . . . . . . . . . . . . . . . . 1-2<br />
1.2.3 Related materials for <strong>TM</strong>-<strong>U220</strong> . . . . . . . . . . . . . . . . . . . . . . . . . . . . . . . . 1-3<br />
1.3 Consumables . . . . . . . . . . . . . . . . . . . . . . . . . . . . . . . . . . . . . . . . . . . . . . . . . . . . . 1-4<br />
1.3.1 Ribbons . . . . . . . . . . . . . . . . . . . . . . . . . . . . . . . . . . . . . . . . . . . . . . . . . . . . . 1-4<br />
1.3.2 Roll paper . . . . . . . . . . . . . . . . . . . . . . . . . . . . . . . . . . . . . . . . . . . . . . . . . . . 1-4<br />
1.4 Product Specifications Overview . . . . . . . . . . . . . . . . . . . . . . . . . . . . . . . . . . . 1-5<br />
1.5 Printing and paper Specifications . . . . . . . . . . . . . . . . . . . . . . . . . . . . . . . . . . 1-6<br />
1.5.1 Autocutter (for Type A / B) . . . . . . . . . . . . . . . . . . . . . . . . . . . . . . . . . . . 1-8<br />
1.5.2 Paper Roll Supply . . . . . . . . . . . . . . . . . . . . . . . . . . . . . . . . . . . . . . . . . . . . 1-9<br />
1.5.2.1 Paper Specifications . . . . . . . . . . . . . . . . . . . . . . . . . . . . . . . . . . . 1-10<br />
1.5.2.2 Printable Area . . . . . . . . . . . . . . . . . . . . . . . . . . . . . . . . . . . . . . . . . 1-11<br />
1.6 Other Specifications . . . . . . . . . . . . . . . . . . . . . . . . . . . . . . . . . . . . . . . . . . . . . . . 1-13<br />
1.6.1 EMI and Safety Standards Applied . . . . . . . . . . . . . . . . . . . . . . . . . . . . 1-13<br />
1.6.1.1 Printer (<strong>TM</strong>-<strong>U220</strong>) . . . . . . . . . . . . . . . . . . . . . . . . . . . . . . . . . . . . . . . 1-13<br />
1.6.1.2 AC Adapter C (packaged in ANK model) . . . . . . . . . . . . . . . 1-14<br />
1.6.1.3 AC adapter (packaged in Multilingual model (PS-180)) . . 1-14<br />
1.6.2 Reliability . . . . . . . . . . . . . . . . . . . . . . . . . . . . . . . . . . . . . . . . . . . . . . . . . . . . 1-15<br />
1.6.3 Environmental Conditions . . . . . . . . . . . . . . . . . . . . . . . . . . . . . . . . . . . . 1-15<br />
1.6.4 Installation . . . . . . . . . . . . . . . . . . . . . . . . . . . . . . . . . . . . . . . . . . . . . . . . . . 1-16<br />
1.7 External Dimensions and Mass . . . . . . . . . . . . . . . . . . . . . . . . . . . . . . . . . . . . . . 1-17<br />
1.7.1 External Dimensions and Mass . . . . . . . . . . . . . . . . . . . . . . . . . . . . . . . . 1-17<br />
1.7.1.1 Overview (Type A) . . . . . . . . . . . . . . . . . . . . . . . . . . . . . . . . . . . . . 1-17<br />
1.7.1.2 Overview (Type B) . . . . . . . . . . . . . . . . . . . . . . . . . . . . . . . . . . . . . . 1-18<br />
1.7.1.3 Overview (Type D) . . . . . . . . . . . . . . . . . . . . . . . . . . . . . . . . . . . . . 1-19<br />
Chapter 2 System Planning<br />
2.1 Control Method . . . . . . . . . . . . . . . . . . . . . . . . . . . . . . . . . . . . . . . . . . . . . . . . . . . 2-1<br />
2.1.1 Windows Driver (<strong>EPSON</strong> Advanced Printer Driver) . . . . . . . . . . . . . . 2-1<br />
2.1.1.1 General Features of the <strong>EPSON</strong> Advanced Printer Driver . . 2-1<br />
2.1.1.2 <strong>EPSON</strong> Advanced Printer Driver Components . . . . . . . . . . . . 2-2<br />
2.1.1.3 <strong>EPSON</strong> Advanced Printer Driver Support Environment . . . . 2-2<br />
2.1.2 <strong>EPSON</strong> OPOS ADK . . . . . . . . . . . . . . . . . . . . . . . . . . . . . . . . . . . . . . . . . . . 2-3<br />
2.1.2.1 General Features of <strong>EPSON</strong> OPOS ADK (OPOS Control) . . . 2-3<br />
2.1.2.2 <strong>EPSON</strong> OPOS ADK Contents . . . . . . . . . . . . . . . . . . . . . . . . . . . . 2-4<br />
2.1.2.3 <strong>EPSON</strong> OPOS ADK Supported Environment . . . . . . . . . . . . . . . 2-5<br />
2.1.3 ESC/POS Command . . . . . . . . . . . . . . . . . . . . . . . . . . . . . . . . . . . . . . . . . 2-5<br />
2.1.4 How to Get a Driver . . . . . . . . . . . . . . . . . . . . . . . . . . . . . . . . . . . . . . . . . . 2-5<br />
2.2 Connection Form and Cables . . . . . . . . . . . . . . . . . . . . . . . . . . . . . . . . . . . . . 2-6<br />
2.3 Serial Connection . . . . . . . . . . . . . . . . . . . . . . . . . . . . . . . . . . . . . . . . . . . . . . . . . 2-6<br />
2.3.1 Stand alone . . . . . . . . . . . . . . . . . . . . . . . . . . . . . . . . . . . . . . . . . . . . . . . . . 2-7<br />
2.3.2 Y-connection . . . . . . . . . . . . . . . . . . . . . . . . . . . . . . . . . . . . . . . . . . . . . . . . 2-7<br />
2.3.3 Pass-through connections . . . . . . . . . . . . . . . . . . . . . . . . . . . . . . . . . . . . 2-8<br />
Rev. D ix
2.4 Parallel Connection . . . . . . . . . . . . . . . . . . . . . . . . . . . . . . . . . . . . . . . . . . . . . . . 2-8<br />
2.5 USB connection . . . . . . . . . . . . . . . . . . . . . . . . . . . . . . . . . . . . . . . . . . . . . . . . . . . 2-8<br />
2.6 Ethernet connection . . . . . . . . . . . . . . . . . . . . . . . . . . . . . . . . . . . . . . . . . . . . . . . 2-9<br />
Chapter 3 Setup<br />
3.1 Part Name and Basic Operation . . . . . . . . . . . . . . . . . . . . . . . . . . . . . . . . . . . . 3-1<br />
3.1.1 Part name . . . . . . . . . . . . . . . . . . . . . . . . . . . . . . . . . . . . . . . . . . . . . . . . . . . 3-1<br />
3.1.1.1 Connectors . . . . . . . . . . . . . . . . . . . . . . . . . . . . . . . . . . . . . . . . . . . . 3-1<br />
3.1.2 The Control Panel . . . . . . . . . . . . . . . . . . . . . . . . . . . . . . . . . . . . . . . . . . . . 3-2<br />
3.1.2.1 LED . . . . . . . . . . . . . . . . . . . . . . . . . . . . . . . . . . . . . . . . . . . . . . . . . . . . 3-2<br />
3.1.2.2 Control Panel Buttons . . . . . . . . . . . . . . . . . . . . . . . . . . . . . . . . . . . 3-3<br />
3.2 Setup Flow . . . . . . . . . . . . . . . . . . . . . . . . . . . . . . . . . . . . . . . . . . . . . . . . . . . . . . . . 3-4<br />
3.3 Printer setup . . . . . . . . . . . . . . . . . . . . . . . . . . . . . . . . . . . . . . . . . . . . . . . . . . . . . . . 3-6<br />
3.3.1 Installing or Replacing the Ribbon Cassette . . . . . . . . . . . . . . . . . . . . 3-6<br />
3.3.2 Installing the Roll Paper . . . . . . . . . . . . . . . . . . . . . . . . . . . . . . . . . . . . . . . 3-7<br />
3.3.2.1 Installing rhe Roll Paper for Type B, D . . . . . . . . . . . . . . . . . . . . . 3-8<br />
3.3.2.2 Installing the Roll Paper for Type A . . . . . . . . . . . . . . . . . . . . . . . 3-9<br />
3.3.2.3 Replacing the Roll Paper . . . . . . . . . . . . . . . . . . . . . . . . . . . . . . . . 3-12<br />
3.3.3 Connecting the Power Supply Unit . . . . . . . . . . . . . . . . . . . . . . . . . . . . 3-13<br />
3.3.3.1 Connecting procedure . . . . . . . . . . . . . . . . . . . . . . . . . . . . . . . . . 3-13<br />
3.4 Adjusting Various Settings . . . . . . . . . . . . . . . . . . . . . . . . . . . . . . . . . . . . . . . . . . 3-14<br />
3.4.1 How to Confirm Current Settings . . . . . . . . . . . . . . . . . . . . . . . . . . . . . . 3-14<br />
3.4.2 Adjusting the DIP Switches . . . . . . . . . . . . . . . . . . . . . . . . . . . . . . . . . . . . 3-15<br />
3.4.2.1 When the letters are STD . . . . . . . . . . . . . . . . . . . . . . . . . . . . . . . . 3-15<br />
3.4.2.2 Notes for DIP switch 2-1 . . . . . . . . . . . . . . . . . . . . . . . . . . . . . . . . . 3-17<br />
3.4.3 Memory Switches . . . . . . . . . . . . . . . . . . . . . . . . . . . . . . . . . . . . . . . . . . . . 3-17<br />
3.4.4 Memory Switch Setup Mode . . . . . . . . . . . . . . . . . . . . . . . . . . . . . . . . . . 3-19<br />
3.4.4.1 Starting the memory switch setup mode . . . . . . . . . . . . . . . . . 3-20<br />
3.4.4.2 Ending memory switch setting mode . . . . . . . . . . . . . . . . . . . . 3-20<br />
3.4.4.3 Operating procedure . . . . . . . . . . . . . . . . . . . . . . . . . . . . . . . . . . . 3-21<br />
3.4.5 Adjusting Roll paper width . . . . . . . . . . . . . . . . . . . . . . . . . . . . . . . . . . . . 3-24<br />
3.4.6 Adjusting Position of Roll Paper Near End Detector . . . . . . . . . . . . . 3-25<br />
3.4.7 Select Autocutter action . . . . . . . . . . . . . . . . . . . . . . . . . . . . . . . . . . . . . 3-26<br />
3.4.8 Connecting the Printer to the Host PC / POS Terminal . . . . . . . . . . 3-28<br />
3.4.8.1 Serial Interface model . . . . . . . . . . . . . . . . . . . . . . . . . . . . . . . . . . 3-29<br />
3.4.8.2 Parallel Interface Models . . . . . . . . . . . . . . . . . . . . . . . . . . . . . . . . 3-29<br />
3.4.8.3 USB Interface Models . . . . . . . . . . . . . . . . . . . . . . . . . . . . . . . . . . . 3-29<br />
3.4.8.4 Ethernet interface . . . . . . . . . . . . . . . . . . . . . . . . . . . . . . . . . . . . . . 3-31<br />
3.4.8.5 Connecting a Drawer . . . . . . . . . . . . . . . . . . . . . . . . . . . . . . . . . . 3-32<br />
3.5 Install a Printer Driver in the Host PC / POS Terminal . . . . . . . . . . . . . . . . . . 3-32<br />
3.5.1 OPOS . . . . . . . . . . . . . . . . . . . . . . . . . . . . . . . . . . . . . . . . . . . . . . . . . . . . . . . 3-32<br />
3.5.1.1 Install and Set up. . . . . . . . . . . . . . . . . . . . . . . . . . . . . . . . . . . . . . . . 3-32<br />
3.5.1.2 Package contents of <strong>EPSON</strong> OPOS ADK. . . . . . . . . . . . . . . . . . 3-35<br />
3.5.2 Advanced Printer Driver (APD) . . . . . . . . . . . . . . . . . . . . . . . . . . . . . . . . 3-36<br />
3.5.2.1 Installing and Setting Up . . . . . . . . . . . . . . . . . . . . . . . . . . . . . . . . 3-36<br />
3.6 Self Test . . . . . . . . . . . . . . . . . . . . . . . . . . . . . . . . . . . . . . . . . . . . . . . . . . . . . . . . . . . 3-38<br />
3.6.1 Self Test Procedure . . . . . . . . . . . . . . . . . . . . . . . . . . . . . . . . . . . . . . . . . . . 3-38<br />
Chapter 4 Troubleshooting<br />
4.1 LED Blinking Pattern . . . . . . . . . . . . . . . . . . . . . . . . . . . . . . . . . . . . . . . . . . . . . . . . 4-1<br />
4.1.1 Error Types . . . . . . . . . . . . . . . . . . . . . . . . . . . . . . . . . . . . . . . . . . . . . . . . . . . 4-1<br />
4.1.1.1 Errors that automatically recover . . . . . . . . . . . . . . . . . . . . . . . . . . 4-1<br />
4.1.1.2 Recoverable Errors . . . . . . . . . . . . . . . . . . . . . . . . . . . . . . . . . . . . . . . 4-2<br />
4.1.1.3 Errors that are impossible to recover: . . . . . . . . . . . . . . . . . . . . . . . 4-2<br />
4.2 Removing a Paper Jam . . . . . . . . . . . . . . . . . . . . . . . . . . . . . . . . . . . . . . . . . . . . 4-3<br />
4.3 Autocutter Jam . . . . . . . . . . . . . . . . . . . . . . . . . . . . . . . . . . . . . . . . . . . . . . . . . . . 4-3<br />
4.4 Printer Stops Printing / Printer Repeats Printing on a Line . . . . . . . . . . . . . . 4-4<br />
x<br />
Rev. D
<strong>TM</strong>-<strong>U220</strong> <strong>Technical</strong> <strong>Reference</strong> Guide<br />
4.5 Printer prints ““ or Incorrect Data With Serial Interface . . . . . . . . . . . . . . 4-7<br />
4.6 Print Speed is Slow When Using Windows Printer Driver . . . . . . . . . . . . . . . 4-7<br />
4.7 Printer doesn’t cut roll paper with the autocutter . . . . . . . . . . . . . . . . . . . . 4-7<br />
4.8 Hexadecimal Dump mode . . . . . . . . . . . . . . . . . . . . . . . . . . . . . . . . . . . . . . . . 4-7<br />
Chapter 5 Application Development Information<br />
5.1 Various Status Categories . . . . . . . . . . . . . . . . . . . . . . . . . . . . . . . . . . . . . . . . . . 5-1<br />
5.1.1 Printer Status on APD . . . . . . . . . . . . . . . . . . . . . . . . . . . . . . . . . . . . . . . . . 5-1<br />
5.1.2 OPOS . . . . . . . . . . . . . . . . . . . . . . . . . . . . . . . . . . . . . . . . . . . . . . . . . . . . . . . 5-2<br />
5.1.2.1 Checking the printer state . . . . . . . . . . . . . . . . . . . . . . . . . . . . . . . . 5-2<br />
5.1.2.2 Printer Errors and Status . . . . . . . . . . . . . . . . . . . . . . . . . . . . . . . . . 5-3<br />
5.1.2.3 ESC/POS commands . . . . . . . . . . . . . . . . . . . . . . . . . . . . . . . . . . . . 5-3<br />
5.2 Cash Drawer Control . . . . . . . . . . . . . . . . . . . . . . . . . . . . . . . . . . . . . . . . . . . . . . 5-4<br />
5.2.1 Advanced Printer Driver . . . . . . . . . . . . . . . . . . . . . . . . . . . . . . . . . . . . . . 5-4<br />
5.2.1.1 Drawer Open . . . . . . . . . . . . . . . . . . . . . . . . . . . . . . . . . . . . . . . . . . . 5-4<br />
5.2.1.2 Checking Drawer Status . . . . . . . . . . . . . . . . . . . . . . . . . . . . . . . . . . 5-5<br />
5.2.2 OPOS . . . . . . . . . . . . . . . . . . . . . . . . . . . . . . . . . . . . . . . . . . . . . . . . . . . . . . . 5-5<br />
5.2.2.1 Drawer Open/Close . . . . . . . . . . . . . . . . . . . . . . . . . . . . . . . . . . . . . 5-5<br />
5.2.2.2 Checking Drawer Status . . . . . . . . . . . . . . . . . . . . . . . . . . . . . . . . . . 5-5<br />
5.2.3 ESC/POS . . . . . . . . . . . . . . . . . . . . . . . . . . . . . . . . . . . . . . . . . . . . . . . . . . . . 5-6<br />
5.3 NV memory . . . . . . . . . . . . . . . . . . . . . . . . . . . . . . . . . . . . . . . . . . . . . . . . . . . . . . . 5-6<br />
5.4 NV Bit-image Printing . . . . . . . . . . . . . . . . . . . . . . . . . . . . . . . . . . . . . . . . . . . . . . 5-8<br />
5.4.1 Advanced Printer Driver . . . . . . . . . . . . . . . . . . . . . . . . . . . . . . . . . . . . . . 5-8<br />
5.4.1.1 How to print “NV Bit-image“ . . . . . . . . . . . . . . . . . . . . . . . . . . . . . 5-8<br />
5.4.1.2 Printable bitmap format in APD . . . . . . . . . . . . . . . . . . . . . . . . . . . 5-8<br />
5.4.2 OPOS . . . . . . . . . . . . . . . . . . . . . . . . . . . . . . . . . . . . . . . . . . . . . . . . . . . . . . . 5-8<br />
5.4.2.1 Printing method . . . . . . . . . . . . . . . . . . . . . . . . . . . . . . . . . . . . . . . . . 5-8<br />
5.4.2.2 LetterQuality . . . . . . . . . . . . . . . . . . . . . . . . . . . . . . . . . . . . . . . . . . . 5-9<br />
5.4.2.3 Setting of printing position by escape sequence . . . . . . . . . 5-9<br />
5.4.2.4 Printable bitmap format in OPOS . . . . . . . . . . . . . . . . . . . . . . . . . . 5-9<br />
5.4.3 ESC/POS command . . . . . . . . . . . . . . . . . . . . . . . . . . . . . . . . . . . . . . . . . 5-9<br />
5.5 Printing for journal used . . . . . . . . . . . . . . . . . . . . . . . . . . . . . . . . . . . . . . . . . . . . 5-10<br />
5.6 FAQ List . . . . . . . . . . . . . . . . . . . . . . . . . . . . . . . . . . . . . . . . . . . . . . . . . . . . . . . . . . . 5-10<br />
5.6.1 Q. Drawer kick does not operate properly. . . . . . . . . . . . . . . . . . . . . 5-10<br />
5.6.1.1 A. Drawer specifications differ, depending on the manufacturer and the part number. 5-10<br />
5.6.2 Q. Unable to print a part of Page 0 in Visual Basic. . . . . . . . . . . . . . 5-11<br />
5.6.2.1 A. Follow the procedure . . . . . . . . . . . . . . . . . . . . . . . . . . . . . . . . . . 5-11<br />
Chapter 6 Notices for Replacement of the <strong>TM</strong>-U210/<strong>TM</strong>-U300<br />
6.1 For Replacement of the <strong>TM</strong>-U210 . . . . . . . . . . . . . . . . . . . . . . . . . . . . . . . . . . . 6-1<br />
6.1.1 About printing format compatibility . . . . . . . . . . . . . . . . . . . . . . . . . . . 6-1<br />
6.1.1.1 Printing area . . . . . . . . . . . . . . . . . . . . . . . . . . . . . . . . . . . . . . . . . . . . 6-1<br />
6.1.1.2 Characters . . . . . . . . . . . . . . . . . . . . . . . . . . . . . . . . . . . . . . . . . . . . . . 6-2<br />
6.1.1.3 Cutting position <strong>fr</strong>om print start position . . . . . . . . . . . . . . . . . . . 6-2<br />
6.1.2 Cutting Method . . . . . . . . . . . . . . . . . . . . . . . . . . . . . . . . . . . . . . . . . . . . . 6-3<br />
6.1.3 Dimensions . . . . . . . . . . . . . . . . . . . . . . . . . . . . . . . . . . . . . . . . . . . . . . . . . . 6-4<br />
6.1.4 Receive buffer size . . . . . . . . . . . . . . . . . . . . . . . . . . . . . . . . . . . . . . . . . . . 6-4<br />
6.1.4.1 Effect on the application when condition of buffer full is changed 6-4<br />
6.1.4.2 Effect on the application in the condition of release full state . . 6-5<br />
6.1.5 Accessories compatibility . . . . . . . . . . . . . . . . . . . . . . . . . . . . . . . . . . . . 6-5<br />
6.1.5.1 Power supply unit . . . . . . . . . . . . . . . . . . . . . . . . . . . . . . . . . . . . . . . 6-5<br />
6.1.5.2 Consumable compatibility . . . . . . . . . . . . . . . . . . . . . . . . . . . . . . . . 6-5<br />
6.1.6 Provided statuses . . . . . . . . . . . . . . . . . . . . . . . . . . . . . . . . . . . . . . . . . . . . 6-5<br />
6.1.7 Use for Journal . . . . . . . . . . . . . . . . . . . . . . . . . . . . . . . . . . . . . . . . . . . . . . . 6-7<br />
6.1.8 New functions added . . . . . . . . . . . . . . . . . . . . . . . . . . . . . . . . . . . . . . . . 6-7<br />
6.1.8.1 Wall hanging . . . . . . . . . . . . . . . . . . . . . . . . . . . . . . . . . . . . . . . . . . . 6-7<br />
Rev. D xi
6.1.8.2 NV bit-image . . . . . . . . . . . . . . . . . . . . . . . . . . . . . . . . . . . . . . . . . . . . 6-7<br />
6.1.8.3 User NV memory . . . . . . . . . . . . . . . . . . . . . . . . . . . . . . . . . . . . . . . . 6-7<br />
6.1.8.4 Memory Switch and memory switch setup mode . . . . . . . . . . . . 6-8<br />
6.1.9 Driver compatibility . . . . . . . . . . . . . . . . . . . . . . . . . . . . . . . . . . . . . . . . . . 6-8<br />
6.1.9.1 Advanced Printer Driver . . . . . . . . . . . . . . . . . . . . . . . . . . . . . . . . . . 6-8<br />
6.1.9.2 OPOS . . . . . . . . . . . . . . . . . . . . . . . . . . . . . . . . . . . . . . . . . . . . . . . . . . 6-8<br />
6.1.9.3 ESC/POS command (Direct control) . . . . . . . . . . . . . . . . . . . . . . . 6-8<br />
6.2 For Replacement of the <strong>TM</strong>-U300 . . . . . . . . . . . . . . . . . . . . . . . . . . . . . . . . . . . 6-8<br />
6.2.1 About Printing format compatibility . . . . . . . . . . . . . . . . . . . . . . . . . . . 6-8<br />
6.2.1.1 Printing area . . . . . . . . . . . . . . . . . . . . . . . . . . . . . . . . . . . . . . . . . . . . 6-9<br />
6.2.1.2 Characters . . . . . . . . . . . . . . . . . . . . . . . . . . . . . . . . . . . . . . . . . . . . . . 6-9<br />
6.2.1.3 Cutting position <strong>fr</strong>om print start position . . . . . . . . . . . . . . . . . . . 6-10<br />
6.2.2 Cutting Method . . . . . . . . . . . . . . . . . . . . . . . . . . . . . . . . . . . . . . . . . . . . . . 6-11<br />
6.2.3 Dimensions . . . . . . . . . . . . . . . . . . . . . . . . . . . . . . . . . . . . . . . . . . . . . . . . . . 6-11<br />
6.2.4 Receive buffer size . . . . . . . . . . . . . . . . . . . . . . . . . . . . . . . . . . . . . . . . . . . 6-11<br />
6.2.4.1 Effect to the application when condition of buffer full is changed 6-12<br />
6.2.4.2 Effect to the application when condition of release full state . . . 6-12<br />
6.2.5 Accessories compatibility . . . . . . . . . . . . . . . . . . . . . . . . . . . . . . . . . . . . . 6-12<br />
6.2.5.1 Power supply unit . . . . . . . . . . . . . . . . . . . . . . . . . . . . . . . . . . . . . . . 6-12<br />
6.2.5.2 Consumables compatibility . . . . . . . . . . . . . . . . . . . . . . . . . . . . . . . 6-12<br />
6.2.6 Provided statuses and detectors . . . . . . . . . . . . . . . . . . . . . . . . . . . . . . 6-13<br />
6.2.6.1 Newly added Status . . . . . . . . . . . . . . . . . . . . . . . . . . . . . . . . . . . . . . 6-13<br />
6.2.7 Use for Journal . . . . . . . . . . . . . . . . . . . . . . . . . . . . . . . . . . . . . . . . . . . . . . . 6-13<br />
6.2.8 Added new functions . . . . . . . . . . . . . . . . . . . . . . . . . . . . . . . . . . . . . . . . 6-13<br />
6.2.8.1 Wall hanging . . . . . . . . . . . . . . . . . . . . . . . . . . . . . . . . . . . . . . . . . . . . 6-13<br />
6.2.8.2 NV bit-image . . . . . . . . . . . . . . . . . . . . . . . . . . . . . . . . . . . . . . . . . . . . 6-13<br />
6.2.8.3 User NV memory . . . . . . . . . . . . . . . . . . . . . . . . . . . . . . . . . . . . . . . . 6-13<br />
6.2.8.4 Memory Switch and Memory Switch setting mode . . . . . . . . . . . 6-13<br />
6.2.9 Driver compatibility . . . . . . . . . . . . . . . . . . . . . . . . . . . . . . . . . . . . . . . . . . 6-13<br />
6.2.9.1 Advanced Printer Driver . . . . . . . . . . . . . . . . . . . . . . . . . . . . . . . . . . 6-14<br />
6.2.9.2 OPOS . . . . . . . . . . . . . . . . . . . . . . . . . . . . . . . . . . . . . . . . . . . . . . . . . . 6-14<br />
6.2.10 ESC/POS command (Direct control) . . . . . . . . . . . . . . . . . . . . . . . . . . 6-14<br />
Appendix A Comparison table for <strong>TM</strong>-<strong>U220</strong>/U210/U300<br />
Appendix B How to Install the Printer on a Wall with the WH-10<br />
B.1 The Procedure . . . . . . . . . . . . . . . . . . . . . . . . . . . . . . . . . . . . . . . . . . . . . . . . . . . . . B-1<br />
B.1.1 Precautions . . . . . . . . . . . . . . . . . . . . . . . . . . . . . . . . . . . . . . . . . . . . . . . . . . . B-1<br />
B.1.2 Unpacking . . . . . . . . . . . . . . . . . . . . . . . . . . . . . . . . . . . . . . . . . . . . . . . . . . . B-1<br />
B.1.3 Installation . . . . . . . . . . . . . . . . . . . . . . . . . . . . . . . . . . . . . . . . . . . . . . . . . . . B-2<br />
B.1.3.1 Installing the wall-mount . . . . . . . . . . . . . . . . . . . . . . . . . . . . . . . . . B-2<br />
B.1.4 Affixing the operation panel sheet . . . . . . . . . . . . . . . . . . . . . . . . . . . . . . . B-2<br />
B.1.5 Changing the roll-paper detector position . . . . . . . . . . . . . . . . . . . . . . . . B-2<br />
B.1.6 Installing the brackets . . . . . . . . . . . . . . . . . . . . . . . . . . . . . . . . . . . . . . . . . B-7<br />
B.1.7 Mounting the printer on the wall . . . . . . . . . . . . . . . . . . . . . . . . . . . . . . . . B-8<br />
B.2 Exterior Overviews . . . . . . . . . . . . . . . . . . . . . . . . . . . . . . . . . . . . . . . . . . . . . . . . . B-9<br />
B.2.1 <strong>TM</strong>-<strong>U220</strong> (Type B) . . . . . . . . . . . . . . . . . . . . . . . . . . . . . . . . . . . . . . . . . . . . . B-9<br />
B.2.2 <strong>TM</strong>-<strong>U220</strong> (Type D) . . . . . . . . . . . . . . . . . . . . . . . . . . . . . . . . . . . . . . . . . . . . B-10<br />
Appendix C Character Code Table<br />
C.1 Page 0 (PC437: USA, Standard Europe) . . . . . . . . . . . . . . . . . . . . . . . . . . . . C-1<br />
C.2 Page 1 (Katakana) . . . . . . . . . . . . . . . . . . . . . . . . . . . . . . . . . . . . . . . . . . . . . . . C-2<br />
C.3 Page 2 (PC850: Multilingual) . . . . . . . . . . . . . . . . . . . . . . . . . . . . . . . . . . . . . . . C-3<br />
C.4 Page 3 (PC860: Portuguese) . . . . . . . . . . . . . . . . . . . . . . . . . . . . . . . . . . . . . . . C-4<br />
C.5 Page 4 (PC863: Canadian-French) . . . . . . . . . . . . . . . . . . . . . . . . . . . . . . . . C-5<br />
C.6 Page 5 (PC865: Nordic) . . . . . . . . . . . . . . . . . . . . . . . . . . . . . . . . . . . . . . . . . . . C-6<br />
xii<br />
Rev. D
<strong>TM</strong>-<strong>U220</strong> <strong>Technical</strong> <strong>Reference</strong> Guide<br />
C.7 Page 6 (Hiragana) . . . . . . . . . . . . . . . . . . . . . . . . . . . . . . . . . . . . . . . . . . . . . . . . . . C-7<br />
C.8 Page 7 (One-pass printing Kanji characters) . . . . . . . . . . . . . . . . . . . . . . . . . . . . C-8<br />
C.9 Page 8 (One-pass printing Kanji characters) . . . . . . . . . . . . . . . . . . . . . . . . . . . . C-9<br />
C.10 Page 16 (WPC1252) . . . . . . . . . . . . . . . . . . . . . . . . . . . . . . . . . . . . . . . . . . . . . C-10<br />
C.11 Page 17 (PC866: Cyrillic #2) . . . . . . . . . . . . . . . . . . . . . . . . . . . . . . . . . . . . . . C-11<br />
C.12 Page 18 (PC852: Latin2) . . . . . . . . . . . . . . . . . . . . . . . . . . . . . . . . . . . . . . . . . C-12<br />
C.13 Page 19 (PC858: Euro) . . . . . . . . . . . . . . . . . . . . . . . . . . . . . . . . . . . . . . . . . . . C-13<br />
C.14 Page 20 (Thai character code 42) . . . . . . . . . . . . . . . . . . . . . . . . . . . . . . . . C-14<br />
C.15 Page 21 (Thai character code 11) . . . . . . . . . . . . . . . . . . . . . . . . . . . . . . . . C-15<br />
C.16 Page 22 (Thai character code 13) . . . . . . . . . . . . . . . . . . . . . . . . . . . . . . . . C-16<br />
C.17 Page 23 (Thai character code 14) . . . . . . . . . . . . . . . . . . . . . . . . . . . . . . . . C-17<br />
C.18 Page 24 (Thai character code 16) . . . . . . . . . . . . . . . . . . . . . . . . . . . . . . . . C-18<br />
C.19 Page 25 (Thai character code 17) . . . . . . . . . . . . . . . . . . . . . . . . . . . . . . . . C-19<br />
C.20 Page 26 (Thai character code 18) . . . . . . . . . . . . . . . . . . . . . . . . . . . . . . . . C-20<br />
C.21 Page 254 (Blank page) . . . . . . . . . . . . . . . . . . . . . . . . . . . . . . . . . . . . . . . . . . C-21<br />
C.22 Page 255 (Blank page) . . . . . . . . . . . . . . . . . . . . . . . . . . . . . . . . . . . . . . . . . . C-22<br />
C.23 International Character Sets . . . . . . . . . . . . . . . . . . . . . . . . . . . . . . . . . . . . . C-23<br />
Appendix D Power Supply Unit<br />
D.1 AC Adapter C . . . . . . . . . . . . . . . . . . . . . . . . . . . . . . . . . . . . . . . . . . . . . . . . . . . . . D-1<br />
D.1.1 Case specifications . . . . . . . . . . . . . . . . . . . . . . . . . . . . . . . . . . . . . . . . . . . . D-1<br />
D.2 PS-180 . . . . . . . . . . . . . . . . . . . . . . . . . . . . . . . . . . . . . . . . . . . . . . . . . . . . . . . . . . . . D-2<br />
D.2.1 Case specifications . . . . . . . . . . . . . . . . . . . . . . . . . . . . . . . . . . . . . . . . . . . . D-2<br />
D.2.2 Usage cautions . . . . . . . . . . . . . . . . . . . . . . . . . . . . . . . . . . . . . . . . . . . . . . . D-2<br />
Rev. D xiii
xiv<br />
Rev. D
<strong>TM</strong>-<strong>U220</strong> <strong>Technical</strong> <strong>Reference</strong> Guide<br />
Chapter 1<br />
General Information<br />
1.1 Features<br />
The <strong>TM</strong>-<strong>U220</strong> is a POS printer that can print receipt paper (paper roll).<br />
The <strong>TM</strong>-<strong>U220</strong> is designed to be compatible with existing systems built around a <strong>TM</strong>-U210.<br />
1.1.1 General<br />
❏<br />
Compact and lightweight.<br />
❏ 3 model types are provided. (See “Printer types” (page 1-2))<br />
❏<br />
❏<br />
Excellent reliability and long life due to adoption of a stepping motor both for moving the<br />
carriage and for paper feeding.<br />
Can be installed hanging on the wall with an optional hanging bracket (only for type B, D).<br />
1.1.2 Printer handling<br />
❏<br />
❏<br />
❏<br />
Easy drop-in paper loading and easy maintenance<br />
Cable connectors are housed in the bottom of the printer.<br />
Built-in two drawer kickout interface connectors<br />
❏ Built-in autocutter (for type A or B)<br />
❏ Built-in take-up device (for type A)<br />
1.1.3 Printing<br />
❏<br />
❏<br />
❏<br />
High-speed printing through logic-seeking control<br />
Two-color printing (black and red)<br />
Can print on various paper wide range (for type B or D: 76 / 69.5 / 57.5 mm)<br />
1.1.4 Software<br />
❏<br />
❏<br />
❏<br />
Command protocol is based on the ESC/POS proprietary command system.<br />
OPOS ADK and Windows printer driver are available.<br />
Automatic status back (ASB) function that automatically transmits changes in printer status.<br />
Rev. D General Information 1-1
1.2 Product Structure<br />
1.2.1 Printer types<br />
<strong>TM</strong>-<strong>U220</strong> has 3 model types: A, B, D. The features are as following.<br />
Type A Type B Type D<br />
Two color printing Yes Yes Yes<br />
Autocutter Yes Yes No<br />
Take up device Yes No No<br />
paper width (mm) 76 76/ 69.5/ 57.5 76/ 69.5/ 57.5<br />
wall hanging install No Yes Yes<br />
Supported<br />
language<br />
Alphanumeric model:<br />
alphanumeric<br />
Multilingual model<br />
It supports<br />
alphanumeric and<br />
printing with one of the<br />
following:<br />
• Japanese Kanji<br />
• Simplified Chinese<br />
• Traditional Chinese<br />
• Korean<br />
• Thai<br />
Alphanumeric model:<br />
alphanumeric<br />
Multilingual model<br />
It supports<br />
alphanumeric and<br />
printing with one of the<br />
following:<br />
• Japanese Kanji<br />
• Simplified Chinese<br />
• Traditional Chinese<br />
• Korean<br />
• Thai<br />
Alphanumeric model:<br />
alphanumeric<br />
Multilingual model<br />
It supports<br />
alphanumeric and<br />
printing with one of the<br />
following:<br />
• Japanese Kanji<br />
• Simplified Chinese<br />
• Traditional Chinese<br />
• Korean<br />
• Thai<br />
Near end detector Factory option Factory option Factory option<br />
1.2.2 Standard Parts Included with the Printer<br />
This printer is packed with the materials listed below.<br />
❏<br />
❏<br />
❏<br />
❏<br />
❏<br />
User’s Manual<br />
Roll paper: 1 roll<br />
Power switch cover (using this cover enables you to prevent accidental turning off of the<br />
power)<br />
Exclusive ribbon cassette ERC-38(B/R)<br />
Power supply unit (May not be included with the printer)<br />
Note:<br />
The “AC Adapter. C” which is packed in the carton box of ANK model is not able to use for the<br />
Multilingual model.<br />
*Multilingual means the printer model that can print any one of the following: Japanese Kanji,<br />
Simplified Chinese, Traditional Chinese, Thai characters, or Korean characters.<br />
1-2 General Information Rev. D
<strong>TM</strong>-<strong>U220</strong> <strong>Technical</strong> <strong>Reference</strong> Guide<br />
1.2.3 Related materials for <strong>TM</strong>-<strong>U220</strong><br />
<strong>TM</strong>-<strong>U220</strong> has the related materials listed in the following table.<br />
Category Name Description<br />
Options WH-10 This is an optional unit for installing the printer on a wall.<br />
POS<br />
accessories<br />
DF-10<br />
DC-21<br />
PS-180<br />
DM-D105/D205,<br />
DM-D106/DM-D206<br />
UB-S01/02,<br />
UB-P02II,<br />
UB-U01II/02II,<br />
UB-E01 etc...)<br />
DM-D series<br />
Affixing Velcro® tape<br />
This is optional power supply cable to gain power <strong>fr</strong>om user’s<br />
power supply.<br />
<strong>EPSON</strong> power supply unit<br />
Direct connection customer display (available only for some<br />
serial interface models and some USB models)<br />
(See the below NOTE also.)<br />
Various interface boards. (Serial, Parallel, USB, Ethernet<br />
interface)<br />
These are customer displays. (Line Display)<br />
Consumables Roll Paper This is required to print.<br />
Ribbon Casette<br />
This is required to print.<br />
Manuals User’s Manual This manual is packed in the carton box.<br />
Drivers<br />
(WIndows<br />
environment)<br />
Utilities<br />
(WIndows<br />
environment)<br />
<strong>Technical</strong><br />
<strong>Reference</strong> Guide<br />
FAQ about ESC/<br />
POS command<br />
ESC/POS<br />
Application Guide<br />
OPOS ADK<br />
Advanced Printer<br />
Driver<br />
Memory Switch<br />
setting Utility<br />
<strong>TM</strong>Flogo<br />
This Manual.<br />
This Manual is Quick <strong>Reference</strong> of ESC/POS command. and this<br />
has a simple sample program & Tips.<br />
This Manual is Command <strong>Reference</strong> Guide of ESC/POS<br />
command. and this has a supplement which has some sample<br />
programs & Tips.<br />
This provides the OCX driver which is based upon OPOS. It has<br />
Manuals, sample programs, and <strong>TM</strong>Flogo utility.<br />
This is a Windows Driver. This Driver has a Manual, Sample<br />
programs, and utilities to use the driver.<br />
This is a utility to adjust the setting (Memory Switch) of this printer.<br />
See “Memory Switches” (page 3-17) for details.<br />
This is a utility to store “NV bitmap“ into this printer. It helps<br />
printing “NV bitmap.”<br />
Please contact your dealer to get these.<br />
Note:<br />
When you are using the <strong>TM</strong>-<strong>U220</strong> with the “AC Adapter C“ power unit, which is packed in the carton<br />
box of Alphanumeric model, the DM-D series can’t get power <strong>fr</strong>om the <strong>TM</strong>-<strong>U220</strong>. If you want to provide<br />
power <strong>fr</strong>om the <strong>TM</strong>-<strong>U220</strong> to a DM-D, you have to use “PS-180.“<br />
Rev. D General Information 1-3
1.3 Consumables<br />
1.3.1 Ribbons<br />
This printer needs a ribbon cassette to print receipts. We provide 3 ribbon cassettes:<br />
❏<br />
❏<br />
❏<br />
<strong>EPSON</strong> ribbon cassette, ERC-38 (B) (Life: 3,000,000 characters / Color: Black)<br />
<strong>EPSON</strong> ribbon cassette, ERC-38 (P) (Life: 4,000,000 characters / Color: Purple)<br />
<strong>EPSON</strong> ribbon cassette, ERC-38 (B/R) (Life: 1,500,000 characters / Color: Black)<br />
(Life: 750,000 characters / Color: Red)<br />
Note:<br />
These ribbon cassette life numbers are under the <strong>EPSON</strong> test conditions.<br />
1.3.2 Roll paper<br />
We provide roll paper and carbon roll paper with 1 copy for this printer. The widths are 76 mm,<br />
69.5 mm, and 57.5 mm {3.00"/2.74"/2.26"}.<br />
1-4 General Information Rev. D
<strong>TM</strong>-<strong>U220</strong> <strong>Technical</strong> <strong>Reference</strong> Guide<br />
1.4 Product Specifications Overview<br />
Print method<br />
serial impact dot matrix<br />
Paper width 76 mm / 69.5 mm / 57.5 mm {3.00"/2.74"/2.26"}<br />
Cut type<br />
Character sets<br />
There are 2 types. The type can be changed.<br />
Partial cut (cutting with one point on left edge left uncut) (default)<br />
or Full cut<br />
95 alphanumeric, 48 international characters,<br />
Extended graphics: 128 × 12 pages. (15 tables for Japanese model)<br />
Multilingual character model supports printing with one of the following character sets:<br />
• Japanese Kanji (Two-pass printing font) (JIS X0208-1990): 6879<br />
• Simplified Chinese (Two-pass printing font) (GB18030-2000): 28553<br />
• Traditional Chinese (Two-pass printing font) (Big 5): 13494<br />
• Korean (Two-pass printing font) (KS C5601 type): 8366<br />
• Thai (Three-pass printing font) : 128 characters × 7 pages (133 character types)<br />
Interface<br />
(compatible)<br />
RS-232C / Bidirectional parallel<br />
Dealer options: USB, 10Base-T I/F<br />
Buffer Receive buffer: Selectable as 4KB or 40 bytes using a DIP switch 1-2.<br />
Non-volatile graphics data buffer:<br />
128KB<br />
User NV memory: 8KB<br />
Power supply<br />
Operating voltage<br />
Power<br />
consumption<br />
(except for<br />
drawer kickout<br />
driving)<br />
Temperature<br />
Humidity<br />
Weight (mass)<br />
Power supplied by included AC adapter<br />
ANK model: AC Adapter.C or PS-180 ((option))<br />
Multilingual model: PS-180<br />
24 VDC ± 7% (optional power supply: <strong>EPSON</strong> PS-180)<br />
Operating:Mean: Alphanumeric model: Approximately 31W<br />
Multilingual* model: Approximately 38W<br />
Standby: Mean: Approximately 2.2W<br />
During operation: 0 °C to 50 °C {41°F to 122 °F}. (At 34 °C {93°F} or higher, there are humidity<br />
restrictions; refer to “Environmental Conditions” (page 1-15)<br />
During operation:10 to 90% (no condensation)<br />
During storage:10 to 90% (no condensation; excludes paper and ribbon)<br />
Type A: Approximately 2.7 kg {5.94 lb}<br />
Type B: Approximately 2.5 kg {5.5 lb}<br />
Type D: Approximately 2.3 kg {5.06 lb}<br />
*Multilingual means the printer model that can print any one of the following: Japanese Kanji, Simplified<br />
Chinese, Traditional Chinese, Thai characters, or Korean characters.<br />
Rev. D General Information 1-5
1.5 Printing and paper Specifications<br />
Printing method:<br />
Head wire<br />
configuration:<br />
Printing direction:<br />
Print speed: *1<br />
Serial impact dot matrix<br />
9-pin serial configuration<br />
Bidirectional printing (logic seeking)<br />
Approximately 4.7 lps (printing 40 columns per line at 16 cpi)<br />
Approximately 6.0 lps (printing 30 columns per line at 16 cpi, with 1/8"<br />
line spacing)<br />
(except data transmission and processing time)<br />
Paper width: 76 mm / 69.5 mm / 57.5 mm {3.00"/2.74"/2.26"}<br />
Printing width: 63.4 mm / 57 mm / 47.5 mm {2.50" / 2.24" / 1.87"}<br />
Dot positions depend on DIP switch setting. See the table “Dot width<br />
of Printable area” (page 1-7) for details.<br />
Characters per line:<br />
Character spacing:<br />
35 (font A), 40 (font B, default) (When using 76mm width paper)<br />
ANK: 3 half dots (default) or 2 half dots.<br />
Kanji: 2 half dots (default) or 0 half dots.<br />
Thai: 3 half dots (default) or 2 half dots.<br />
The spacing of ANK and Thai characters is selectable by DIP SW2-1.<br />
The spacing of Kanji characters is selectable by ESC/POS command.<br />
Paper feed speed:<br />
30 lps<br />
Line spacing (default): 4.23 mm {1/6"}, programmable by control commands.<br />
Number of characters: 95 alphanumeric, 48 international characters,<br />
Extended graphics: 128 × 12 pages. (15 tables for Japanese model)<br />
Character structure: Font A: 9 × 9<br />
Font B: 7 × 9<br />
Kanji: 16 × 16<br />
Multilingual character model supports printing with one of the<br />
following character sets:<br />
• Japanese Kanji (Two-pass printing font) (JIS X0208-1990): 6879<br />
• Simplified Chinese (Two-pass printing font) (GB18030-2000): 28553<br />
• Traditional Chinese (Two-pass printing font) (Big 5): 13494<br />
• Korean Kanji (Two-pass printing font) (KS C5601 type): 8366<br />
• Thai (Three-pass printing font): 128 characters 7 pages<br />
(133 character types)<br />
(Font B is the default)<br />
*1 This printer adjusts print speed when it prints graphic data, etc.<br />
1-6 General Information Rev. D
<strong>TM</strong>-<strong>U220</strong> <strong>Technical</strong> <strong>Reference</strong> Guide<br />
The dot width of the printable area depends on DIP switch setting and paper width as shown in<br />
the following table.<br />
Dot width of Printable area<br />
Paper width<br />
DIP SW2-1 setting<br />
ON<br />
OFF<br />
76 mm 385 half dots 400 half dots<br />
69.5 mm 360 half dots 360 half dots<br />
57.5 mm 297 half dots 300 half dots<br />
Character Dimensions, Characters Per Inch, Characters Per line<br />
Character configuration<br />
Horiz. x<br />
Vert.<br />
Condition<br />
of DIP SW<br />
2-1<br />
Character<br />
type<br />
Character<br />
dimensions<br />
W x H<br />
Dot spacing<br />
between<br />
characters<br />
Paper width (mm)<br />
and<br />
Characters per line<br />
(cpl)<br />
76 mm 69.5 mm 57.5 mm<br />
Characters per<br />
inch (cpi)<br />
(1 inch =<br />
25.4 mm)<br />
7 x 9<br />
(Font B)<br />
(default)<br />
ON ANK 1.2 x 3.1 2 half dots 42 40 33 17.8<br />
Graphic 1.6 x 3.1 0<br />
OFF<br />
(default)<br />
ANK 1.2 x 3.1 3 half dots 40 36 30 16<br />
Graphic 1.7 x 3.1 0<br />
9 x 9<br />
(Font A)<br />
ON ANK 1.6 x 3.1 2 half dots 35 32 27 14.5<br />
Graphic 1.9 x 3.1 0<br />
16 x 16<br />
(Kanji<br />
font)<br />
OFF<br />
(default)<br />
Regardless<br />
*<br />
ANK 1.6 x 3.1 3 half dots 33 30 25 13.3<br />
Graphic 2.0 x 3.1 0<br />
Kanji 2.7 x 2.7 2 half dots<br />
(default) *<br />
22 20 16 8.9<br />
0 * 25 22 18 9.5<br />
7 x 27<br />
(Thai<br />
font)<br />
ON<br />
OFF<br />
(default)<br />
Thai<br />
character<br />
1.2 x 9.5 2 half dots 42 40 33 17.8<br />
3 half dots 40 36 30 16<br />
9 x 27<br />
(Thai<br />
font)<br />
ON<br />
OFF<br />
(default)<br />
Thai<br />
character<br />
1.6 x 9.5 2 half dots 35 32 27 14.5<br />
3 half dots 33 30 25 13.3<br />
*: The dot spacing between Kanji character is selected by an ESC/POS command.<br />
Rev. D General Information 1-7
1.5.1 Autocutter (for Type A / B)<br />
Cutting method: By separated-blade scissors<br />
Cutting type: ❏ Partial cut (one point left uncut) (default)<br />
❏ Full cut (completely cut off)<br />
See “Select Autocutter action” (page 3-26) for changing cut type.<br />
Note:<br />
It is recommended to feed approximately 2.116 mm or more in advance before printing to prevent dot<br />
displacement after cutting.<br />
Changing between partial cut and full cut is not controlled by a software command.<br />
The cutting type (partial cut or full cut) must be selected before the printer is first used. If the cutting type<br />
is changed <strong>fr</strong>om partial cut to full cut after the printer has been used, the printer may not be reliable<br />
because the wear-out level of the cutter blade differs.<br />
CAUTION:<br />
When the paper is cut completely (full cut) with the printer’s horizontal installation, make<br />
sure to remove the cut paper, then perform the next cut. Never allow several pieces of<br />
the cut paper to remain in the paper exit because double cuts, paper jams, or<br />
autocutter error may occur because the cut paper drops into the paper path.<br />
1-8 General Information Rev. D
<strong>TM</strong>-<strong>U220</strong> <strong>Technical</strong> <strong>Reference</strong> Guide<br />
1.5.2 Paper Roll Supply<br />
Supply method:<br />
Paper roll end detection:<br />
Near-end detector:<br />
Drop-in method<br />
Detection method: Mechanical microswitch<br />
Detection position: Positioned within the paper path for the<br />
roll paper; detects the end of the roll paper<br />
Detection method: Mechanical microswitch<br />
Inner diameter of the roll paper core: 10.5 to 12.5 mm<br />
Near-end adjustment: Adjusting screw<br />
Remaining amount: Fixed position<br />
#1 approximately 8 mm<br />
#2 approximately 5 mm<br />
(The adjusting screw has two positions.)<br />
See“Adjusting Position of Roll Paper Near End Detector”<br />
(page 3-25).<br />
Rev. D General Information 1-9
1.5.2.1 Paper Specifications<br />
Paper feeding method:<br />
Friction feed<br />
Paper feed interval: Initial setting: Approximately 4.23mm {1/6"}<br />
Can be set in units of approximately 0.18mm {1/144"} by<br />
ESC/POS command<br />
Paper feed speed:<br />
30 lps (approximately 4.99" /s)<br />
(during continuous feeding)<br />
[lps: lines per second]<br />
Roll paper width: 76 ± 0.5 mm (3" ± 0.02") / 69.5 ± 0.5 mm (2.74" ± 0.02")<br />
/ 57.5 ± 0.5 mm (2.26" ± 0.02")<br />
Maximum diameter: 83 mm (3.27")<br />
Core:<br />
Normal paper<br />
specifications:<br />
Carbon paper<br />
specifications:<br />
When there is no near-end detector, always be sure to use roll<br />
paper that is not glued to the core.<br />
Paper thickness: 1 sheet: 0.06 to 0.085mm {0.0024 to 0.0033"}<br />
Weight: 52.3 to 64 g/m 2 {14 to 17 lb}<br />
(45 to 55 kg/1000 sheets 1091 × 788mm)<br />
Number of copies: Original 1 sheet + one copy sheet<br />
Thickness: 0.05 to 0.08 mm {0.002 to 0.0031"}<br />
(thickness of one sheet);<br />
Recommended paper:<br />
Paper by Mitsubishi - Carbonless paper (blue)<br />
Top sheets:<br />
N40Hi (paper thickness: 0.06mm {0.0024"},<br />
mass: 47.2 g/m 2 {12.6 lb}<br />
Bottom sheet<br />
N60 (paper thickness: 0.08mm {0.0031"},<br />
mass: 68.0 g/m 2 {18 lb}<br />
The copying capability is affected by the ambient temperature,<br />
and is guaranteed for the temperature ranges of 5 - 50°C {41 -<br />
122°F}.<br />
1-10 General Information Rev. D
<strong>TM</strong>-<strong>U220</strong> <strong>Technical</strong> <strong>Reference</strong> Guide<br />
1.5.2.2 Printable Area<br />
Cutting position (manual cutter) (Type A, B)<br />
Cutting position (autocutter) (Type A, B)<br />
Cutting position (manual cutter) (Type D)<br />
22.1<br />
27<br />
34.9<br />
(6.8) (5.8)<br />
63.4<br />
Maximum 200dots,<br />
400 positions<br />
76<br />
[Units: mm]<br />
Printable area for 76mm width paper<br />
Rev. D General Information 1-11
Cutting position (manual cutter) (Type B)<br />
Cutting position (autocutter) (Type B)<br />
Cutting position (manual cutter) (Type D)<br />
22.1<br />
27<br />
34.9<br />
(6.7) (5.8)<br />
57<br />
Maximum 180 dots,<br />
360 positions<br />
69.5<br />
[Units: mm]<br />
Printable area for 69.5mm width paper<br />
1-12 General Information Rev. D
<strong>TM</strong>-<strong>U220</strong> <strong>Technical</strong> <strong>Reference</strong> Guide<br />
Cutting position (manual cutter) (Type B)<br />
Cutting position (autocutter) (Type B)<br />
Cutting position (manual cutter) (Type D)<br />
22.1<br />
27<br />
34.9<br />
(4.2) (5.8)<br />
47.5<br />
Maximum 150 dots,<br />
300 positions<br />
57.5<br />
[Units: mm]<br />
Printable area for 57.5mm width paper<br />
1.6 Other Specifications<br />
1.6.1 EMI and Safety Standards Applied<br />
1.6.1.1 Printer (<strong>TM</strong>-<strong>U220</strong>)<br />
EMC is Tested Using the <strong>EPSON</strong>’s AC adapter.<br />
Europe:<br />
North America:<br />
Japan:<br />
Oceania:<br />
CE Marking Directive 89/336/EEC<br />
EN55022 Class B<br />
EN55024<br />
IEC 61000-4-2<br />
IEC 61000-4-3<br />
IEC 61000-4-4<br />
IEC 61000-4-5<br />
IEC 61000-4-6<br />
IEC 61000-4-11<br />
Safety: EN 60950<br />
EMI: FCC/ICES-003 Class A<br />
Safety: UL60950/CSA C22.2 No. 60950<br />
EMI: VCCI Class A<br />
EMC: AS/NZS 3548 Class B<br />
Rev. D General Information 1-13
1.6.1.2 AC Adapter C (packaged in ANK model)<br />
Europe:<br />
CE Marking Directive 89/336/EEC<br />
EN55022 Class B<br />
EN55024<br />
IEC 61000-4-2<br />
IEC 61000-4-3<br />
IEC 61000-4-4<br />
IEC 61000-4-5<br />
IEC 61000-4-6<br />
IEC 61000-4-11<br />
EN61000-3-2<br />
EN61000-3-3<br />
Safety: EN 60950<br />
North America: Safety: UL1950/CSA C22.2 No. 950<br />
Japan:<br />
Oceania:<br />
Electrical Appliance and Material Control Law<br />
Safety: AS3260<br />
1.6.1.3 AC adapter (packaged in Multilingual model (PS-180))<br />
Europe:<br />
CE Marking Directive 89/336/EEC EN55022 Class B<br />
EN55024<br />
IEC61000-4-2<br />
IEC61000-4-3<br />
IEC61000-4-4<br />
IEC61000-4-5<br />
IEC61000-4-6<br />
IEC61000-4-11<br />
Safety Standard: EN60950<br />
North America:<br />
EMI: FCC Class A<br />
Safety Standards: UL1950-2TH-D3<br />
C-UL<br />
Japan: EMI: VCCI Class 1<br />
Safety Standards: Electrical Appliance and Material Control<br />
Law of Japan.<br />
This unit meets EMI and EMC Standards, whether or not it is connected to an <strong>EPSON</strong> product.<br />
1-14 General Information Rev. D
<strong>TM</strong>-<strong>U220</strong> <strong>Technical</strong> <strong>Reference</strong> Guide<br />
1.6.2 Reliability<br />
Life:<br />
MTBF:<br />
MCBF:<br />
Print head life:<br />
Autocutter life:<br />
Mechanism: 7,500,000 lines<br />
180,000 hours<br />
Failure is defined as a Random Failure occurring at the time<br />
of the Random Failure Period.<br />
18,000,000 lines<br />
This is an average failure interval based on failures relating to<br />
Wearout and Random Failures up to the life of 7.5 million<br />
lines.<br />
150 million characters (using an average of 2 dots/wire per<br />
character). (The printing pattern is <strong>EPSON</strong> test pattern).<br />
800,000 cuts<br />
End of life is defined as the point at which the printer reaches<br />
the beginning of the wearout period.<br />
1.6.3 Environmental Conditions<br />
Temperature:<br />
Humidity:<br />
During operation: 0 °C to 50 °C {41°F to 122 °F}.<br />
(At 34 °C {93°F} or higher, there are humidity restrictions as<br />
listed below. )<br />
During operation:10 to 90% (no condensation)<br />
During storage:10 to 90% (no condensation; excludes paper<br />
and ribbon)<br />
Operating temperature and humidity range<br />
Rev. D General Information 1-15
Vibration resistance:<br />
When packed:<br />
Frequency: 5 to 55 Hz<br />
Acceleration: 19.6m/s 2 {2 G}<br />
Sweep: 10 minutes (half cycle)<br />
Duration: 1 hour<br />
Directions: x, y, and z<br />
No external or internal damage should be found after the<br />
vibration test, and the unit should operate normally.<br />
Impact resistance:<br />
When packed:<br />
Package: <strong>EPSON</strong> standard package<br />
Height: 60 cm (2 feet)<br />
Directions: 1 corner, 3 edges, and 6 surfaces<br />
No external or internal damage should be found after the<br />
drop test, and the unit should operate normally.<br />
When unpacked:<br />
Height: 5 cm (2")<br />
Directions: Lift one edge and release it (for all 4 edges).<br />
When the printer is not printing, no external or internal<br />
damage should be found after the drop test.<br />
1.6.4 Installation<br />
Install the printer horizontally as a basic position.The printer also must be installed so that it<br />
does not move or vibrate during paper cutting or the drawer kick-out operation. Velcro tape is<br />
available as an option.<br />
The printer (Type B or D) can be also installed on a wall with the optional wall hanging bracket<br />
(WH-10) . (The schedule is TBD.)<br />
1-16 General Information Rev. D
<strong>TM</strong>-<strong>U220</strong> <strong>Technical</strong> <strong>Reference</strong> Guide<br />
1.7 External Dimensions and Mass<br />
1.7.1 External Dimensions and Mass<br />
Model type External Dimensions Mass<br />
Width Height Depth<br />
Type A<br />
160 mm<br />
{Approximately 6.3"}<br />
157.5 mm<br />
{Approximately 6.2"}<br />
286 mm<br />
{Approximately 11.3"}<br />
Approximately 2.7 kg<br />
{5.9 lb}<br />
Type B<br />
160 mm<br />
{Approximately 6.3"}<br />
138.5 mm<br />
{Approximately 5.5"}<br />
248 mm<br />
{Approximately 9.8"}<br />
Approximately 2.5 kg<br />
{5.5 lb}<br />
Type D<br />
160 mm<br />
{Approximately 6.3"}<br />
138.5 mm<br />
{Approximately 5.5"}<br />
248 mm<br />
{Approximately 9.8"}<br />
Approximately 2.5 kg<br />
{5.1 lb}<br />
(All the numeric values are typical.)<br />
Color:<strong>EPSON</strong> standard color (ECW, EDG)<br />
1.7.1.1 Overview (Type A)<br />
Rev. D General Information 1-17
1.7.1.2 Overview (Type B)<br />
1-18 General Information Rev. D
<strong>TM</strong>-<strong>U220</strong> <strong>Technical</strong> <strong>Reference</strong> Guide<br />
1.7.1.3 Overview (Type D)<br />
Rev. D General Information 1-19
1-20 General Information Rev. D
<strong>TM</strong>-<strong>U220</strong> <strong>Technical</strong> <strong>Reference</strong> Guide<br />
Chapter 2<br />
System Planning<br />
This section provides you information for system planning.<br />
2.1 Control Method<br />
A <strong>TM</strong> printer can print and be controlled using any of the following three methods:<br />
1. Windows printer driver (<strong>EPSON</strong> Advanced Printer Driver)<br />
2. <strong>EPSON</strong> OPOS ADK<br />
3. ESC/POS commands<br />
Depending on the driver or interface to be used, an IP setting tool for the Ethernet specification,<br />
a USB device driver, and a logo registration utility for printing (<strong>TM</strong>Flash logo utility) are<br />
provided.<br />
See “How to Get a Driver” in this chapter.<br />
2.1.1 Windows Driver (<strong>EPSON</strong> Advanced Printer Driver)<br />
The <strong>EPSON</strong> Advanced Printer Driver is a method for controlling the <strong>TM</strong> printer in the same<br />
manner as the Windows standard printer driver.<br />
2.1.1.1 General Features of the <strong>EPSON</strong> Advanced Printer Driver<br />
The <strong>EPSON</strong> Advanced Printer Driver has the following features:<br />
❏<br />
❏<br />
❏<br />
❏<br />
Supplies the Windows printer driver for the <strong>TM</strong> printer, which enables printing through<br />
general Windows applications.<br />
Enables executing unique functions of the POS printer, such as paper cutting and drawer<br />
opening.<br />
Font type selection enables printing with the printer’s internal fonts.<br />
Enables obtaining the printer status by StatusAPI with a programming language such as<br />
VisualBasic. This makes it possible to have bi-directional communication with the <strong>TM</strong><br />
printer under the Windows standard printer driver environment.<br />
Note:<br />
The statusAPI is the API for controlling the printer, which is supplied exclusively by <strong>EPSON</strong>. Using this<br />
enables obtaining printer status and transmitting ESC/POS commands.<br />
Rev. D System Planning 2-1
2.1.1.2 <strong>EPSON</strong> Advanced Printer Driver Components<br />
Installer recognizes PC environment in which the installation will be done and installs DLL files<br />
and software components necessary for operating automatically. Driver, sample program, or<br />
manual can be selected to be installed.<br />
❏<br />
Driver<br />
You can select a driver depending on the purpose of usage (installation can be done at the same<br />
time). Each has functions such as two-color printing, smoothing, continuous printing, and<br />
option selection for cutting method.<br />
• Receipt: printing receipt<br />
• Reduce35: reducing whole print display to fit it into the width of receipt paper and<br />
printing it<br />
❏<br />
Sample program<br />
Sample program for using the StatusAPI with Visual Basic and Visual C++ can be installed.<br />
❏<br />
Manual<br />
The following manuals can be installed:<br />
• Driver: User’s Manual<br />
• Status API: <strong>Reference</strong> Manual<br />
2.1.1.3 <strong>EPSON</strong> Advanced Printer Driver Support Environment<br />
❏ Supported interfaces<br />
• Serial, Parallel, USB, Ethernet<br />
❏<br />
Supported Operating Systems: Epson has confirmed performance with the following:<br />
• Windows 95 English Version Standard OSR2.5<br />
• Windows 98 English Version Second Edition<br />
• Windows NT Ver 4.0 English Version SP5, SP6<br />
• Windows 2000 English Version<br />
• Windows XP English Version<br />
❏<br />
Supported Development Languages<br />
• Visual Basic<br />
• VisualC++<br />
2-2 System Planning Rev. D
<strong>TM</strong>-<strong>U220</strong> <strong>Technical</strong> <strong>Reference</strong> Guide<br />
❏<br />
Supported devices<br />
(For detailed information on which devices can be used, see the release note for the driver.)<br />
• <strong>EPSON</strong> receipt printer<br />
• <strong>EPSON</strong> customer display<br />
• <strong>EPSON</strong> cash drawer<br />
Note:<br />
The USB specification printer needs the USB driver and the Ethernet specification printer needs the IP<br />
setting utility in addition.<br />
For detailed information, please contact your dealer or <strong>EPSON</strong>.<br />
2.1.2 <strong>EPSON</strong> OPOS ADK<br />
<strong>EPSON</strong> OPOS ADK supports the development environment necessary for OLE for Retail POS<br />
(OPOS) application development by OPOS Control proposed by the OPOS committee and<br />
supplies a printer driver (OCX) conforming to OPOS.<br />
When developing an OPOS confirmed application, use the following control methods. <strong>EPSON</strong><br />
OPOS ADK has the following features.<br />
❏<br />
❏<br />
<strong>EPSON</strong> OPOS ADK supports not only the OPOS Control (CO + SO) proposed by the OPOS<br />
committee but also totally supports the OPOS application development environment such<br />
as utilities for installation and setup, the contents necessary for development, such as sample<br />
programs and manuals, and also the function of Log when debugging, and silent<br />
installation, which enables easy installation for a targeted PC.<br />
<strong>EPSON</strong> OPOS ADK supports DirectIO with parameters for unique functions exclusively for<br />
<strong>TM</strong> printers by <strong>EPSON</strong>. Also the power notice function, offline buffer clear processing, and<br />
device irregular processing that has been taken into account by developers are supported by<br />
the driver; these can reduce the number of application steps.<br />
Note:<br />
For detailed information for the API functions, refer to “OLE for Retail POS Application Programmer’s<br />
Guide (APG)” issued by the OPOS committee.<br />
2.1.2.1 General Features of <strong>EPSON</strong> OPOS ADK (OPOS Control)<br />
OPOS Control included in <strong>EPSON</strong> OPOS ADK has the following features:<br />
❏<br />
❏<br />
Offers CO for each device class and SO for <strong>EPSON</strong> devices.<br />
Can use Direct IO with parameter<br />
• Acquires maintenance counter<br />
• Prints bit image for which NVRAM has already been registered<br />
Rev. D System Planning 2-3
❏<br />
❏<br />
❏<br />
Power on notice function (recovering automatically to the status before the power is turned<br />
off when turning on the power again)<br />
Offline buffer clear processing (deleting contents in print buffer at offline)<br />
Debugging function (trace function)<br />
• Logs between an application and CO (for used API and its return value)<br />
• Logs for device status (acquires causes for offline and errors in devices)<br />
2.1.2.2 <strong>EPSON</strong> OPOS ADK Contents<br />
Any installer later than <strong>EPSON</strong> OPOS ADK Ver2.10 supports the silent install function that can<br />
install the OPOS environment without a user interface, which offers easier installation. With this<br />
installer, OPOS Control for <strong>EPSON</strong> devices that are compatible with OPOS, manuals, utilities<br />
and sample programs described below can be installed.<br />
❏<br />
OPOS Control for <strong>EPSON</strong> devices<br />
The following can be installed: CO, SO, header file for C++, header file for VB, TLB file for<br />
CO, or device information file.<br />
❏<br />
Manuals<br />
• User’s Guide (Environment construction manual: installation/uninstallation/usage of<br />
each utility)<br />
• Application Development Guide (for OPOS compatible application developers: editions<br />
for common description and for each device)<br />
❏<br />
Utilities<br />
• SetUpPOS Utility<br />
Can select a device to be used, connection port and settings, such as paper width,<br />
monochrome/two-color (only for two-color supported devices) and print waiting time.<br />
• <strong>TM</strong> Flash logo utility<br />
Can register a bit map file to the printer and customer display.<br />
• USB device driver<br />
Required to connect a USB specification printer.<br />
• Sample program<br />
Sample programs in VB and VC++ can be installed.<br />
2-4 System Planning Rev. D
<strong>TM</strong>-<strong>U220</strong> <strong>Technical</strong> <strong>Reference</strong> Guide<br />
2.1.2.3 <strong>EPSON</strong> OPOS ADK Supported Environment<br />
❏ Supported interfaces<br />
• Serial, Parallel, USB, Ethernet<br />
❏<br />
Supported Operating Systems: Epson has confirmed performance with the following:<br />
• Windows 95 English Version Standard OSR2.5<br />
• Windows 98 English Version Second Edition<br />
• Windows NT Ver 4.0 English Version SP5, SP6<br />
• Windows 2000 English Version<br />
• Windows XP English Version<br />
❏<br />
Supported Development Languages<br />
• Visual Basic<br />
• VisualC++<br />
2.1.3 ESC/POS Command<br />
Print/control by ESC/POS commands is direct control for <strong>TM</strong> printers using the ESC/POS<br />
commands proposed by <strong>EPSON</strong>. Sending ESC/POS commands to the printer <strong>fr</strong>om an<br />
application enables direct control of the printer. For the detailed information regarding the<br />
ESC/POS commands, contact the dealer where you purchased the product.<br />
Note:<br />
USB specification printer needs the USB driver and the Ethernet specification printer needs the IP<br />
setting utility in addition.<br />
For detailed information, see item 4.1.4 Driver Information and Download Site in this Chapter.<br />
2.1.4 How to Get a Driver<br />
Please contact <strong>EPSON</strong> or your dealer about OPOS, APD, and ESC/POS.<br />
Rev. D System Planning 2-5
2.2 Connection Form and Cables<br />
2.3 Serial Connection<br />
When the <strong>TM</strong> printer is connected to the host PC with a serial interface, the following connection<br />
forms are possible:<br />
• Stand alone<br />
• Y-connection<br />
• Pass-through connection<br />
Connections for usable serial cross cables are as follows:<br />
The type of cable that should be used depends on the operation and the handshake method for<br />
the <strong>TM</strong> printer. You can operate the <strong>TM</strong> printer by Windows driver, OPOS, or ESC/POS<br />
commands. XON/XOFF, DTR/DSR, or RTS/CTS are available as handshake controls. See tables<br />
in following sections for the type cable for each connection.<br />
2-6 System Planning Rev. D
<strong>TM</strong>-<strong>U220</strong> <strong>Technical</strong> <strong>Reference</strong> Guide<br />
2.3.1 Stand alone<br />
Both <strong>TM</strong> printer and customer display (DM-D) are connected to the host PC via serial port.<br />
2<br />
1<br />
Application<br />
<strong>TM</strong> side control<br />
control setting<br />
XON/XOFF<br />
(except OPOS)<br />
DTR/DSR<br />
(DOS, OPOS, Visual C)<br />
RTS/CTS<br />
(DOS, Windows driver, Visual C,<br />
Visual Basic, MSComm)<br />
XON/XOFF 1 Type A or B — —<br />
2 DM-D500: A,B<br />
Other DM-D: not available<br />
— —<br />
DTR/DSR 1 — Type A or B Type B<br />
2 — Type A or B Type B<br />
2.3.2 Y-connection<br />
<strong>TM</strong> printer is connected to the host PC via serial port and the customer display (DM-D) is<br />
connected to <strong>TM</strong> printer via a modular connector.<br />
Application<br />
<strong>TM</strong> side control<br />
control setting<br />
XON/XOFF<br />
(except OPOS)<br />
DTR/DSR<br />
(DOS, OPOS, Visual C)<br />
RTS/CTS<br />
(DOS, Windows driver, Visual C,<br />
Visual Basic, MSComm)<br />
XON/XOFF Not available — —<br />
DTR/DSR — Type B (*) Type B<br />
(*) When RTS/CTS control is used between the <strong>TM</strong> and DM.<br />
Note:<br />
When you would like to provide power <strong>fr</strong>om <strong>TM</strong>-<strong>U220</strong> to a DM-D, you have to use “PS-180.“ The “AC<br />
Adapter C” can’t provide power to a DM-D.<br />
You need to use the UB-S09 interface when you use a modular connector.<br />
On the DM-D (DM-D500 etc...) which has DIP switch to select Y-type connection, confirm that the DIP<br />
switch has been set “Y-type connection: Enable.”<br />
Rev. D System Planning 2-7
2.3.3 Pass-through connections<br />
The <strong>TM</strong> printer is connected to the customer display (DM-D) via a serial port, and the DM-D is<br />
connected to the host PC via a serial port.<br />
Note:<br />
On the DM-D (DM-D500 etc...) which has a DIP switch to select Y-type connection, confirm that the<br />
DIP switch has been set to “Y-type connection: Disable.”<br />
Application<br />
<strong>TM</strong> side control<br />
control setting<br />
XON/XOFF<br />
(except OPOS)<br />
DTR/DSR<br />
(DOS, OPOS, Visual C)<br />
RTS/CTS<br />
(DOS, Windows driver, Visual C,<br />
Visual Basic, MSComm)<br />
XON/XOFF Not available — —<br />
DTR/DSR 1 — Type A or B Type B<br />
2 — Type A or B Type A or B<br />
2.4 Parallel Connection<br />
The <strong>TM</strong> printer is connected to the host PC via a parallel interface board (UB-P02II). The<br />
customer display (DM-D) is connected to the host PC via a serial port.<br />
2.5 USB connection<br />
The <strong>TM</strong> printer can be connected to the host PC via a USB connector, and other <strong>TM</strong> printers can<br />
be connected to the first printer via USB. (See “Changing the DIP Switch Settings” in Chapter 3<br />
for DIP switch settings.)<br />
2-8 System Planning Rev. D
<strong>TM</strong>-<strong>U220</strong> <strong>Technical</strong> <strong>Reference</strong> Guide<br />
Modular<br />
(with UB-U02II)<br />
(with UB-U01II)<br />
Self-powered USB HUB<br />
(with UB-U01II)<br />
Note:<br />
UB-U01II has bus-powered USB HUB. Therefore This USB model printer can’t be connected directly to<br />
other bus powered HUB (including other UB-U01II equipped <strong>TM</strong> printer) and bus-powered function<br />
whose current consumption is over 100mA. If you would like to connect other USB model <strong>TM</strong> printer<br />
with UB-U01II, use a self powered USB HUB as shown in the above figure.<br />
When you would like to provide power <strong>fr</strong>om <strong>TM</strong>-<strong>U220</strong> to a DM-D, you have to use “PS-180.“ The “AC<br />
Adapter C” can’t provide power to a DM-D.<br />
The host PC needs to have an installed “USB device driver” for using USB model <strong>TM</strong> printer. Please<br />
contact <strong>EPSON</strong> or your dealer about the USB device driver and the procedure for installing.<br />
2.6 Ethernet connection<br />
Rev. D System Planning 2-9
<strong>TM</strong> printers are connected to a network via a hub using an Ethernet cable.<br />
Note:<br />
If the <strong>TM</strong> printer is connected to the host PC via an Ethernet interface, a DM-D cannot be connected to<br />
the <strong>TM</strong> printer.<br />
We provide the IP address setup utility“<strong>EPSON</strong> <strong>TM</strong>Net WinConfig,” for setting the IP address of the<br />
Ethernet model <strong>TM</strong> printer on the host PC. Please contact <strong>EPSON</strong> or your dealer about “<strong>EPSON</strong> <strong>TM</strong>Net<br />
WinConfig” and the procedure for installing.<br />
2-10 System Planning Rev. D
<strong>TM</strong>-<strong>U220</strong> <strong>Technical</strong> <strong>Reference</strong> Guide<br />
Chapter 3<br />
Setup<br />
3.1 Part Name and Basic Operation<br />
3.1.1 Part name<br />
unit (Type A only)<br />
roll paper cover<br />
ribbon casette cover<br />
manual cutter<br />
power switch<br />
control panel<br />
This figure is Type A.<br />
3.1.1.1 Connectors<br />
WARNING:<br />
Do not connect a telephone line to the drawer kick-out connector or the display module connector;<br />
otherwise the printer and the telephone line may be damaged.<br />
Rev. D Setup 3-1
You can connect up to four cables to the printer. They all connect to the connector panel (on the<br />
bottom rear of the printer), which is shown below.<br />
FG<br />
FG<br />
DK<br />
DC24V<br />
interface<br />
connector<br />
drawer kick-out<br />
connector<br />
power supply<br />
connector<br />
Note:<br />
This illustration shows the serial interface model. The other interface connector looks slightly different.<br />
3.1.2 The Control Panel<br />
The control panel is shown below.<br />
❏<br />
❏<br />
❏<br />
❏<br />
POWER LED<br />
ERROR LED<br />
PAPER OUT LED<br />
FEED button<br />
3.1.2.1 LED<br />
POWER<br />
On: Power supply is stable.<br />
Off: Power supply is not stable.<br />
ERROR<br />
When this light is on but not blinking, it means that the printer is offline. Check to see if a cover<br />
is open. When this light is blinking, there is an error. See “LED Blinking Pattern” in Chapter 4.<br />
3-2 Setup Rev. D
<strong>TM</strong>-<strong>U220</strong> <strong>Technical</strong> <strong>Reference</strong> Guide<br />
PAPER OUT<br />
On: The roll paper near end (*1) or real end is detected.<br />
Off: Paper is loaded (normal condition).<br />
Flashing: Self-test waiting state for test print.<br />
Note:<br />
The roll paper near-end sensor is available as an factory option. If the printer is not equipped with the roll paper<br />
near-end sensor, the roll paper near-end is always detected as paper present. See “Adjusting Position of Roll<br />
Paper Near End Detector” (page 3-25) for information on adjusting the detector.<br />
3.1.2.2 Control Panel Buttons<br />
FEED<br />
The control panel has paper button that you may have to use, although most paper handling<br />
functions will be handled by your software.<br />
Use this button to feed roll paper or to start a roll paper self test. (See “Self Test Procedure” (page<br />
3-38).)<br />
Note:<br />
The FEED button can be disabled by using an ESC/POS command. Refer to “ESC/POS Application<br />
Programming Guide” for details.<br />
Rev. D Setup 3-3
3.2 Setup Flow<br />
You have to set up your printer to use it. And you can adjust some features by customizing<br />
them. This section describes the setup.<br />
The set up flow of preparing to use printer is below.<br />
1. Printer set up<br />
❏ Install Ribbon Cassette<br />
❏ Install Paper Roll<br />
❏ Connect the Printer to the Power Supply<br />
(See “Printer setup,” page 3-6)<br />
2. Adjust various settings (If you need to)<br />
❏ DIP switches<br />
❏ Memory switches<br />
❏ Paper width<br />
(Adjust the spacer & Memory switches)<br />
❏ Roll Paper Near End Detector<br />
(For equipped model only)<br />
❏ Auto cutter method (Type A, B)<br />
(See “Adjusting Various Settings” (page 3-<br />
3. Connect the Printer to the host PC/POS terminal<br />
(See “Install a Printer Driver in the Host PC / POS Terminal” (page 3-32))<br />
When you select<br />
Direct control<br />
method (ESC/<br />
POS command,)<br />
you don’t need<br />
to install any<br />
drivers.<br />
4. Driver setup<br />
❏ OPOS<br />
❏ APD<br />
(See “Install a Printer Driver in the Host PC /<br />
POS Terminal,” page 3-32)<br />
5. Complete set up<br />
3-4 Setup Rev. D
<strong>TM</strong>-<strong>U220</strong> <strong>Technical</strong> <strong>Reference</strong> Guide<br />
Note:<br />
When you use OPOS (OCX driver <strong>fr</strong>om <strong>EPSON</strong>) or the Advanced Printer Driver, you need to install the<br />
driver. When you use ESC/POS commands, you don’t have to install drivers. For information on these<br />
drivers, see “Control Method” on page 2-1 and “Install a Printer Driver in the Host PC / POS Terminal”<br />
(page 3-32).<br />
This printer can be installed on a wall. See “How to Install the Printer on a Wall with the WH-10” in<br />
Appendix B for details.<br />
The following sections describe the setup. The flow of preparing to use printer is listed below.<br />
1. Printer setup<br />
•Install Ribbon Cassette<br />
(“Installing or Replacing the Ribbon Cassette” (page 3-6))<br />
•Install Paper Roll (“Installing the Roll Paper” (page 3-7))<br />
• Connect the Pritner to the Power Supply<br />
(“Connecting the Power Supply Unit” (page 3-13))<br />
2. Adjust various setting ( If you need to)<br />
When you use this printer with a serial interface, you have to adjust the communication<br />
settings. See “Adjusting the DIP Switches” (page 3-15) and “Memory Switches” (page 3-<br />
17) for how to set them.<br />
•DIP switches (“Adjusting the DIP Switches” (page 3-15))<br />
The DIP switches set serial communication conditions, busy condition,<br />
print column, receive buffer capacity, etc...<br />
•Memory switches (“Memory Switches” (page 3-17))<br />
The Memory switches set serial communication conditions,<br />
roll paper width, cover open status handling, etc...<br />
• Paper width (“Adjusting Roll paper width” (page 3-24))<br />
The paper width is set by the spacer & Memory switch setting.<br />
• Roll Paper Near End Detector (For model equipped with the detector)<br />
(“Adjusting Position of Roll Paper Near End Detector” (page 3-25))<br />
• Auto cutter method (“Select Autocutter action” (page 3-26))<br />
The Autocutter setting is selectable “Partial cut“ or “Full cut.“<br />
3. Connect the Pritner to the Host PC/POS Terminal (and Cash Drawer)<br />
(“Connecting the Printer to the Host PC / POS Terminal” (page 3-28))<br />
4. Driver set up (If you use driver)<br />
(“Install a Printer Driver in the Host PC / POS Terminal” (page 3-32))<br />
5. Complete the setup<br />
Rev. D Setup 3-5
3.3 Printer setup<br />
3.3.1 Installing or Replacing the Ribbon Cassette<br />
<strong>EPSON</strong> recommends the use of genuine <strong>EPSON</strong> ribbon cassettes. Ribbon cassettes not<br />
manufactured by <strong>EPSON</strong> may cause damage to your printer that is not covered by <strong>EPSON</strong>’s<br />
warranties.<br />
To install the ribbon cassette for the first time or to replace a used ribbon, follow the steps below:<br />
Knob<br />
1. Unpack the ribbon cassette and turn<br />
the knob in the direction shown to<br />
take up any slack.<br />
2. Open the ribbon cassette cover of the<br />
printer, using the tabs on each side of<br />
the cover.<br />
Tab<br />
3. Remove the old ribbon, if there is<br />
one.<br />
4. Insert the new ribbon cassette as<br />
shown and push the ribbon cassette<br />
down until it clicks.<br />
Note:<br />
Make sure the ribbon is installed between the<br />
print head and the platen without wrinkles or<br />
creases.<br />
5. Close the ribbon cassette cover of the printer.<br />
3-6 Setup Rev. D
<strong>TM</strong>-<strong>U220</strong> <strong>Technical</strong> <strong>Reference</strong> Guide<br />
3.3.2 Installing the Roll Paper<br />
The installing procedure is little different between Type A and Type B, D.<br />
CAUTION:<br />
Be sure to use roll paper that meets the specifications.<br />
Be sure not to touch the manual cutter. Otherwise your fingers might be injured.<br />
Rev. D Setup 3-7
3.3.2.1 Installing rhe Roll Paper for Type B, D<br />
1. Using scissors, cut the leading edge of<br />
the roll paper, as shown in the left figure.<br />
2. Turn on the printer and open the roll<br />
paper cover by using the tab, as shown in<br />
the left.<br />
Tab<br />
3. Insert the roll paper, as shown on the left.<br />
Note:<br />
Note the direction the paper comes off the<br />
roll, as shown below.<br />
When using 2-ply roll paper, be sure that the<br />
top and bottom sheets are aligned at the paper<br />
exit. See the below illustration.<br />
4. Close the roll paper cover.<br />
3-8 Setup Rev. D
<strong>TM</strong>-<strong>U220</strong> <strong>Technical</strong> <strong>Reference</strong> Guide<br />
3.3.2.2 Installing the Roll Paper for Type A<br />
1. Using scissors, cut the leading edge of<br />
the roll paper, as shown in the left figure.<br />
Tab<br />
2. Turn on the printer and open the roll<br />
paper cover by using the tab, as shown in<br />
the left.<br />
Note:<br />
The printer feeds for 30 mm automatically if<br />
the roll paper cover is open. This is a normal<br />
operation to prevent the printer <strong>fr</strong>om<br />
damaging the paper when the roll paper cover<br />
is opened or closed.<br />
Since the printer does not feed even if the roll<br />
paper cover is open when the printer is<br />
turned off, make sure not to pinch the paper<br />
when the cover is closed.<br />
3. Open the unit by using the lever, as<br />
shown in the left.<br />
lever<br />
Rev. D Setup 3-9
4. Insert the roll paper, as shown in the left.<br />
Note:<br />
Note the direction the paper comes off the<br />
roll, as shown in following<br />
When using 2-ply roll paper, be sure that the top<br />
and bottom sheets are aligned at the paper exit.<br />
See below illustration.<br />
5. Close the roll paper cover.<br />
6. If you are not using a take-up spool, pull out a small amount of roll paper and close<br />
the roll paper cover; then tear off the paper with the manual cutter. You can skip<br />
steps 6 through 11.<br />
7. When using 2-ply roll paper, pull out the<br />
roll paper to the bottom <strong>fr</strong>ont of the<br />
printer as a <strong>guide</strong>, as shown in left.<br />
3-10 Setup Rev. D
<strong>TM</strong>-<strong>U220</strong> <strong>Technical</strong> <strong>Reference</strong> Guide<br />
8. Close the unit, as shown in the left<br />
illustration.<br />
9. Insert the end of the bottom paper<br />
(journal paper) into the paper take-up<br />
spool, as shown in following.<br />
10. Insert the paper take-up spool in the<br />
printer. Be sure that the paper is aligned<br />
with the spool's flange, as shown.<br />
11. Feed the paper with the FEED button so<br />
that the paper is taken up by the spool.<br />
12. Close the roll paper cover and tear off the<br />
roll paper with the manual cutter, as<br />
shown.<br />
Rev. D Setup 3-11
Note:<br />
Since the printer does not feed even if the roll paper cover is open when the printer is turned off, make sure<br />
not to pinch the paper when the cover is closed.<br />
Do not open the roll paper cover during printing or paper feeding.<br />
When using the printer, be sure to cut the roll paper with the manual cutter after paper feeding is<br />
complete.<br />
3.3.2.3 Replacing the Roll Paper<br />
Tab<br />
1. Turn on the printer and open the<br />
roll paper cover by using the tab,<br />
as shown.<br />
2. Types B and D: Remove the used roll paper core.<br />
3. Type A only: Remove the take-up<br />
spool, and open the unit by using<br />
the unit open lever, as shown; then<br />
remove the used roll paper core.<br />
4. Insert new roll paper. See the section “Installing the Roll Paper for Type A”<br />
(page 3-9).<br />
3-12 Setup Rev. D
<strong>TM</strong>-<strong>U220</strong> <strong>Technical</strong> <strong>Reference</strong> Guide<br />
3.3.3 Connecting the Power Supply Unit<br />
Use the power supply or equivalent for your printer as listed below.<br />
<strong>TM</strong>-<strong>U220</strong> Alphanumeric model (Type A,B, D) <strong>TM</strong>-<strong>U220</strong> Multilingual model (Type A,B, D)<br />
AC Adapter C (which is packed with ANK model)<br />
or PS-180 (Which is provided as option)<br />
PS-180 (which is packed with Multilingual model)<br />
Note:<br />
The AC Adapter packed in the carton box of ANK model cannot be used for the Multilingual model.<br />
The "AC adapter, C," which is packed with the alphanumeric model, cannot be used with the<br />
multilingual* model. Be sure to use the "PS-180" with the multilingual* model. If the “AC adapter, C,”<br />
packed with the alphanumeric model, is connected to the multilingual* model by mistake, the printer<br />
might not operate correctly. For example, printing might stop before all the lines are printed or the printer<br />
might print the same line repeatedly.<br />
*Multilingual means the printer model that can print any one of the following: Japanese Kanji, Simplified<br />
Chinese, Traditional Chinese, Thai characters, or Korean characters.<br />
WARNING:<br />
Make sure you use the AC Adapter C or <strong>EPSON</strong> PS-180 power supply or equivalent.<br />
Don’t use the PA-#### or PB-#### power supply unit with <strong>TM</strong>-<strong>U220</strong>.<br />
Using an incorrect power supply may cause fire or electrical shock.<br />
CAUTION:<br />
When connecting or disconnecting the power supply <strong>fr</strong>om the printer, make sure the<br />
power supply is not plugged into an electrical outlet. Otherwise you may damage the<br />
power supply or the printer.<br />
3.3.3.1 Connecting procedure<br />
1. Make sure the printer’s power switch is turned off and the power supply’s power cord is<br />
unplugged <strong>fr</strong>om the electrical outlet.<br />
2. Check the label on the power supply to make sure the voltage required by the power supply<br />
matches that of your electrical outlet.<br />
Rev. D Setup 3-13
3. Plug the power supply cord into the connector shown below.<br />
FG<br />
FG<br />
DK<br />
DC24V<br />
Power supply connector<br />
Note:<br />
To remove the DC cable connector, make sure the power supply’s power cord is unplugged; then grasp the<br />
connector and pull it straight out.<br />
When you connect the power supply unit to the printer, we recommend to do a self test to<br />
confirm the operation. See “Self Test” (page 3-38) for details.<br />
3.4 Adjusting Various Settings<br />
This printer is able to be adjusted for the items below:<br />
❏<br />
❏<br />
❏<br />
❏<br />
DIP switch (communication condition, busy condition, print column,<br />
receive buffer capacity, etc...)<br />
Memory switch (serial communication conditions, roll paper width,<br />
cover open status handling, etc...)<br />
Roll paper width (76mm / 69.5mm / 59.5mm)<br />
Adjusting the spacer & memory switch<br />
Position of roll paper near end detector<br />
The current settings can be confirmed by a self test. (See “Self Test” (page 3-38).)<br />
Note:<br />
When you use serial interface model with 1200bps, 2400bps, or 19200bps, you have to adjust DIP switch<br />
“Serial interface selection“ function and Memory switch “Serial communication condition“.<br />
When you adjust the items, we recommend to confirm the new setting. The confirmation is performed by<br />
running a self-test. See “Self Test Procedure” (page 3-38).<br />
3.4.1 How to Confirm Current Settings<br />
You can use a self-test to confirm the current settings. See “Self Test” on page 3-38.<br />
3-14 Setup Rev. D
<strong>TM</strong>-<strong>U220</strong> <strong>Technical</strong> <strong>Reference</strong> Guide<br />
3.4.2 Adjusting the DIP Switches<br />
The printer has two sets of DIP switches. The function of the DIP switches is different for each<br />
interface model.<br />
If you need to change settings, follow the steps below to make your changes:<br />
CAUTION:<br />
Turn off the power while removing the DIP switch cover to prevent an electric short,<br />
which can damage the printer.<br />
Use a crosshead screwdriver to remove the screw holding the DIP switch cover.<br />
ON<br />
Look at the numbers and letters in the area<br />
indicated in the illustration.If the last<br />
letters are “STD”, use the “STD” tables.<br />
OFF<br />
OFF<br />
ON<br />
CAUTION:<br />
Be sure to put back the DIP switch<br />
cover before using the printer.<br />
Note:<br />
The functions of the switches are shown in the following sections.<br />
3.4.2.1 When the letters are STD<br />
Serial model<br />
(DIP Switch 1) (DIP Switch 2)<br />
SW Function On Off SW Function On Off<br />
1 Data receive error Ignored Prints “” 1 Print column 42/35 40/33<br />
2 Receive buffer<br />
capacity<br />
40 bytes 4 KB 2 Reserved<br />
(Auto cutter enable/<br />
disable)<br />
Type A, B<br />
Fixed to On<br />
Type D<br />
Fixed to Off<br />
3 Handshaking XON/XOFF DTR/DSR 3 Reserved - Fixed to Off<br />
4 Word length 7 bits 8 bits 4 Serial interface<br />
selection<br />
Memory<br />
switch<br />
DIP switch<br />
5 Parity check Yes No 5 Reserved - Fixed to Off<br />
6 Parity selection Even Odd 6 Reserved - Fixed to Off<br />
7 Transmission speed 4800 bps 9600 bps 7 Pin 6 reset signal Used Not used<br />
8 BUSY condition Receive<br />
buffer full<br />
Receive<br />
buffer full or<br />
Offline<br />
8 Pin 25 reset signal Used Not used<br />
Rev. D Setup 3-15
Parallel / USB / Ethernet model (Except serial)<br />
(DIP Switch 1) (DIP Switch 2)<br />
SW Function On Off SW Function On Off<br />
1 Auto line feed Enabled Disabled 1 Print column selection 42/35 40/33<br />
2 Receive buffer<br />
capacity<br />
40 bytes 4 KB 2 Reserved<br />
(Auto cutter enable/<br />
disable)<br />
Type A, B<br />
Fixed to On<br />
Type D<br />
Fixed to Off<br />
3~7 Reserved - Fixed to Off 3~7 Reserved - Fixed to Off<br />
8 BUSY condition Receive<br />
buffer full<br />
Receive<br />
buffer full or<br />
Offline<br />
8 Pin 31 reset signal Used Not used<br />
Note:<br />
See “Notes for DIP switch 2-1” (page 3-17) about the DIP SW 2-1 setting.<br />
When you use serial interface model with 1200bps, 2400bps, or 19200bps, you have to adjust DIP switch<br />
“Serial interface selection“ function and Memory switch “Serial communication condition“.<br />
3-16 Setup Rev. D
<strong>TM</strong>-<strong>U220</strong> <strong>Technical</strong> <strong>Reference</strong> Guide<br />
3.4.2.2 Notes for DIP switch 2-1<br />
The DIP switch 2-1 defines the print columns as listed in the following table.<br />
DIP switch 2-1 status<br />
Paper width<br />
Character font<br />
ON<br />
OFF<br />
76 mm Font A (9 x 9) 35 33<br />
Font B (7 x 9) 42 40<br />
69.5 mm Font A (9 x 9) 32 30<br />
Font B (7 x 9) 40 36<br />
57.5 mm Font A (9 x 9) 27 25<br />
Font B (7 x 9) 33 30<br />
Unit: cpl (Character per line)<br />
Note:<br />
The cpl of a Kanji character font is available to be changed by an ESC/POS command. (default: 22 cpl to<br />
25cpl)<br />
3.4.3 Memory Switches<br />
This printer has “Memory switch“ set which is software switches. Memory switch set has “Msw<br />
2,” “Msw 8,” “Customize value,” “Serial communication condition.”<br />
“Memory switch setting utility” can change the Memory switch set to ON or OFF as shown in<br />
the table below (default: all OFF):<br />
Note:<br />
The Memory switch is available to be changed by five methods:<br />
• Memory switch setting utility<br />
• Memory switch setup mode (there are limitations on what can be changed)<br />
• Control <strong>fr</strong>om setupPOS (OPOS only, and there are limitations on what can be changed)<br />
• Control <strong>fr</strong>om Windows driver (Advanced Printer Driver only, and<br />
there are limitations on what can be changed)<br />
• Control <strong>fr</strong>om ESC/POS command<br />
Some Memory switch settings can be changed by the “Memory switch setting mode.“See “Memory<br />
Switch Setup Mode” on page 3-19.<br />
Settings of the memory switch are stored in the NV memory; therefore, even if the printer is turned off, the<br />
settings are maintained. Excessive use of this function may destroy the NV memory. As a <strong>guide</strong>line, do<br />
not use this function more than 10 times a day.<br />
When you use OPOS or APD, generally you don’t need to adjust memory switch because OPOS or APD<br />
are able to set these items automatically.<br />
When you replace a <strong>TM</strong>-U210 with a <strong>TM</strong>-<strong>U220</strong>, you should adjust the Msw 8-5 to OFF.<br />
Rev. D Setup 3-17
Memory Switch 2<br />
SW Function On Off<br />
1 Reserved - Fixed to Off<br />
2 Reserved - Fixed to Off<br />
3 Selection of the character code system of GB2312 GB18030<br />
the Simplified Chinese<br />
4 ~ 8 Reserved - Fixed to Off<br />
Note:<br />
Msw 2-3:<br />
The memory switch Msw 2-3 affects the Simplified Chinese model only.<br />
Memory Switch 8<br />
SW Function On Off<br />
1 ~ 4 Reserved - Fixed to Off<br />
5 Selection of the cover open status Cover open Paper end<br />
6 Reserved - Fixed to Off<br />
7 Condition to release the BUSY in the<br />
receive buffer<br />
Remaining 138 bytes Remaining 256 bytes<br />
8 Printer cover open during operation Errors that can possibly<br />
recover<br />
Errors that automatically<br />
recover<br />
Note:<br />
Msw 8-5:<br />
When Off is selected, a bit of the "roll paper end sensor" in each status that is transmitted <strong>fr</strong>om the printer<br />
is changed every time the roll paper cover is open or closed. When On is selected, a bit of the "roll paper<br />
cover open / close" in each status that is transmitted <strong>fr</strong>om the printer is changed every time the roll paper<br />
cover is open or closed. When you replace a <strong>TM</strong>-U210 with a <strong>TM</strong>-<strong>U220</strong>, you should adjust the Msw 8-5<br />
to Off.<br />
Msw 8-8:<br />
When Off is selected, a bit of the "automatic recoverable error" in each status that is transmitted <strong>fr</strong>om the<br />
printer is changed every time the roll paper cover is open. When On is selected, a bit of the "mechanical<br />
error" in each status that is transmitted <strong>fr</strong>om the printer is changed every time the roll paper cover is open.<br />
The setting of Msw 8-5 and 8-8 can be set by “Memory switch setup mode.“ See “Memory Switch Setup<br />
Mode” on page 3-19.<br />
Customize value<br />
Function<br />
Selectable value<br />
Roll paper width 57.5 mm 69.5 mm<br />
76 mm (default value) --<br />
3-18 Setup Rev. D
<strong>TM</strong>-<strong>U220</strong> <strong>Technical</strong> <strong>Reference</strong> Guide<br />
Note:<br />
These setting can be set by “Memory switch setup mode.“ See “Memory Switch Setup Mode” on page 3-<br />
19.<br />
See “Adjusting Roll paper width” (page 3-24) also to adjust roll paper width.<br />
Serial communication<br />
Function<br />
Selectable value<br />
baud rate 1200 bps 2400 bps<br />
4800 bps 9600 bps<br />
19200 bps --<br />
Parity None Odd<br />
Even --<br />
Handshake DSR/DTR XON/XOFF<br />
Data length 7 bit 8 bit<br />
Note:<br />
There are two methods, DIP switch and Memory switch, to adjust the serial communication conditions.<br />
DIP SW2 selects which is effective, DIP switch or Memory switch.<br />
To enable the “Serial communication“ setting, you have to adjust the “Serial interface selection“ function<br />
of DIP switch 2 to “Memory switch.“<br />
These settings can be set by “Memory switch setup mode.“ See “Memory Switch Setup Mode” on page 3-<br />
19.<br />
3.4.4 Memory Switch Setup Mode<br />
The following items are specified in the memory switch setup mode:<br />
❏<br />
Basic Serial communication condition (Serial communication)<br />
• Transmission speed<br />
• Parity<br />
• Handshaking<br />
• Data length<br />
❏ Receive buffer full release condition (Msw 8-7)<br />
❏<br />
Roll paper width (Customize value)<br />
❏ Cover open status (Msw 8-5)<br />
Note:<br />
All new settings will be lost if the power supply is turned off in the memory switch setup mode. Be sure to<br />
follow the proper procedure, and turn the power off at the correct time.<br />
Rev. D Setup 3-19
3.4.4.1 Starting the memory switch setup mode<br />
Use the following procedure to start the memory switch setup mode.<br />
1. Open the roll paper cover.<br />
2. Turn the power on while pressing the paper FEED button.<br />
3. Press the FEED button twice while POWER, ERROR, and PAPER OUT LEDs are lit.<br />
4. Close the cover. The printer prints the enabled settings of the memory switches and<br />
instructions.<br />
5. Follow the instructions to process the switch setup.<br />
Note:<br />
In the memory switch setup, the paper out LED may be flashing. The flashing time indicates “The times of<br />
FEED button is pressed before the roll paper cover is closed.“<br />
3.4.4.2 Ending memory switch setting mode<br />
Once the setting is performed, the contents of the setting are stored. Then the printer initializes.<br />
When initialization is finished, the printer returns to normal operating mode.<br />
3-20 Setup Rev. D
<strong>TM</strong>-<strong>U220</strong> <strong>Technical</strong> <strong>Reference</strong> Guide<br />
3.4.4.3 Operating procedure<br />
The procedures used for this process are described below.<br />
Entering Memory Switch Setting Mode<br />
1. Open the paper roll cover and turn the power on while pressing the paper FEED button.<br />
2. Press the paper FEED button twice while POWER, ERROR, and PAPER OUT LED are lighting.<br />
3. Close the cover.<br />
The printer prints the current settings and setting instructions.<br />
Selecting Items to Set<br />
Open the paper roll cover.<br />
Press the FEED button the number of times required to select the desired item (as shown below);<br />
then close the paper roll cover.<br />
Pressing the paper FEED button 0 times or 10 or more times will terminate this procedure.<br />
❒ 3 times:<br />
❒ 4 times:<br />
❒ 7 times:<br />
❒ 9 times:<br />
Basic Serial Interface Settings<br />
Receive buffer full release condition<br />
Roll Paper Width<br />
Cover open status<br />
❒ 0, 1, 2, 5, 6, 8 times: Unused<br />
❒ 10 or more times: Unused<br />
Selecting Individual Settings<br />
Open the paper roll cover.<br />
Press the FEED button the number of times required to select the setting for each item; then<br />
close the paper roll cover.<br />
Basic Serial Interface<br />
Setting<br />
Baud Rate Setup<br />
(page 3-22)<br />
Receive buffer<br />
full release<br />
condition<br />
(page 3-23)<br />
Roll Paper Width<br />
(page 3-23)<br />
Cover open status<br />
(page 3-23)<br />
Data Length,<br />
Handshake, or Parity<br />
(page 3-22)<br />
Ending Memory Switch Setting Mode<br />
The printer prints the new settings and saves the settings to non-volatility memory. Then, the<br />
software resets and enters the normal printable status. Turn the power supply OFF.<br />
Rev. D Setup 3-21
Selecting individual settings<br />
❏<br />
Basic serial interface setting<br />
To select transmission conditions, first choose “Serial interface settings”; then select “Data<br />
length, handshake, or parity.”<br />
Press the FEED button the number of times required to select the desired “Serial interface<br />
settings” used for transmission conditions.<br />
Press FEED button<br />
Setting selected<br />
0 ~ 3 times: No change<br />
4 times: 19200 bps<br />
5 times: 9600 bps<br />
6 times: 4800 bps<br />
7 times: 2400 bps<br />
8 times: 1200 bps<br />
9 or more times: No change<br />
bps: Indicates the number of transmitted bits per second (bps).<br />
❏<br />
Data length, handshake, or parity<br />
Press the FEED button the number of times required to select the desired “Data length,<br />
handshake, or parity” setting used for transmission conditions.<br />
Press FEED button<br />
Setting selected<br />
Data Length Handshake Parity<br />
0 times: No change<br />
1 time: 8 bits DTR/DSR control No parity<br />
2 times: Even<br />
3 times: Odd<br />
4 times: XON/XOFF control No parity<br />
5 times: Even<br />
6 times: Odd<br />
7 times: 7 bits DTR/DSR control No parity<br />
8 times: Even<br />
9 times: Odd<br />
10 times: XON/XOFF control No parity<br />
11 times: Even<br />
12 times: Odd<br />
13 or more times: No change<br />
3-22 Setup Rev. D
<strong>TM</strong>-<strong>U220</strong> <strong>Technical</strong> <strong>Reference</strong> Guide<br />
❏<br />
Receive buffer full release condition<br />
Press the FEED button the number of times required to select the desired receive buffer full<br />
release condition setting.<br />
Press FEED button<br />
Receive buffer full release condition<br />
0 times: No change<br />
1 time: 256 bytes remain (Msw 8-7: Off)<br />
2 times: 138 bytes remain (Msw 8-7: On)<br />
3 or more times: No change<br />
❏<br />
Paper width setting<br />
Press the FEED button the number of times required to select the desired roll paper width setting<br />
(Customize value.)<br />
Press FEED button<br />
Selecting paper width<br />
0 times: No change<br />
1 time: 76 mm<br />
2 times: 69.5 mm<br />
3 times: 58.5 mm<br />
4 or more times: No change<br />
Note:<br />
See “Adjusting Roll paper width” (page 3-24) also to adjust roll paper width.<br />
❏<br />
Cover open status<br />
Press the FEED button the number of times required to select the desired the mapping of cover<br />
open status setting.<br />
Press FEED button<br />
Setting selected<br />
0 times: No change<br />
1 time: Paper out (Msw 8-8: OFF)<br />
2 times: Cover open (Msw 8-8: ON)<br />
3 or more times: No change<br />
Rev. D Setup 3-23
3.4.5 Adjusting Roll paper width<br />
The <strong>TM</strong>-<strong>U220</strong> accommodates 76 mm {3"},69.5 mm {2.74"}, 57.5 mm {2.26"} wide paper rolls.<br />
Note:<br />
When you use a near-end detector equipped model, be sure not to pinch the lead wires of the near-end<br />
detector between the roll paper <strong>guide</strong> and the roll paper holder, and to push the lead wires inside so that the<br />
lead wire of the paper-end detector does not contact the motor gear.<br />
When replacing the wires, be sure that the wires do not catch between the roll paper <strong>guide</strong> and the roll<br />
paper holder.<br />
leading the wires<br />
between the holder<br />
and <strong>fr</strong>ame<br />
Roll paper <strong>guide</strong><br />
Roll paper holder<br />
1. Make sure the power supply is disconnected.<br />
2. Open the roll paper cover.<br />
3. Take off the roll paper <strong>guide</strong> <strong>fr</strong>om the printer by loosening the two screws.<br />
A: paper width76 mm<br />
B: paper width69.5mm<br />
C:paper width57.5mm<br />
Roll paper<br />
<strong>guide</strong><br />
position of fixing<br />
the screws (left<br />
side)<br />
A<br />
B<br />
C<br />
position of fixing the<br />
screws (right side)<br />
4. Push the roll paper <strong>guide</strong> on the appropriate width (See figure above.)<br />
3-24 Setup Rev. D
<strong>TM</strong>-<strong>U220</strong> <strong>Technical</strong> <strong>Reference</strong> Guide<br />
5. Tighten the spacer with two screws included with the <strong>guide</strong>. (See figure above.)<br />
6. Set the memory switch (customize value) for the paper width. (See “Memory Switches”<br />
(page 3-17))<br />
3.4.6 Adjusting Position of Roll Paper Near End Detector<br />
Below are two reasons for the roll paper to require an NE detector adjustment.<br />
❏<br />
❏<br />
To adjust the location of detection for the diameter of the roll paper core.<br />
To adjust the amount of remaining paper.<br />
The procedure is as following.<br />
1. Make sure the power supply is disconnected.<br />
2. Open the roll paper cover, and remove the paper roll.<br />
3. Loosen the detector adjustment screw with a coin or similar tool.<br />
4. Adjust the detector by sliding the lever in the direction shown below.<br />
Detector<br />
adjustment screw<br />
Knob<br />
Detector lever<br />
#1 setting<br />
#2 setting<br />
Seeing at outside for roll paper spacer<br />
The table below shows the point at which the near-end detector is triggered. Note that this<br />
figure is a calculated value, and there may be some variations, depending on the printer.<br />
Detection point of roll paper near-end<br />
Detector position (attaching point of<br />
the detector adjustment lever )<br />
Trigger point (included the thickness of paper roll core)<br />
#1 setting Approx. 8 mm<br />
#2 setting Approx. 5 mm<br />
5. Tighten the detector adjustment screw.<br />
6. Check to be sure that the detecting lever moves <strong>fr</strong>eely.<br />
Rev. D Setup 3-25
3.4.7 Select Autocutter action<br />
The autocutter action on the <strong>TM</strong>-<strong>U220</strong> can be either “partial cut“ or “full cut.“ The procedure to<br />
change <strong>fr</strong>om one to the other is described below.<br />
Note:<br />
It is recommended to feed approximately 2.116 mm or more in advance of printing to prevent dot<br />
displacement after cutting.<br />
The cutting type (partial cut or full cut) must be selected before the printer is first used. If the cutting type<br />
is changed <strong>fr</strong>om partial cut to full cut after the printer has been used, the printer may not be reliable<br />
because the wear-out level of the cutter blade differs.<br />
1. Make sure the power supply is disconnected.<br />
2. Open the roll paper cover.<br />
3. Push and take out the shaft <strong>fr</strong>om the inside of the Frame, and release the three hooks.<br />
Roll paper cover<br />
Hook<br />
Frame<br />
Shaft<br />
3-26 Setup Rev. D
<strong>TM</strong>-<strong>U220</strong> <strong>Technical</strong> <strong>Reference</strong> Guide<br />
4. Loosen the screw as indicated in following figure.<br />
Loosen the screw<br />
Remove the screw<br />
Emergency cutter<br />
5. Lift the top of the cutter unit upward towards you and remove <strong>fr</strong>om the dowel.<br />
dowel<br />
Cutter unit<br />
Rev. D Setup 3-27
6. When you select partial cut (default), you have to adjust the dowel to the right, as shown.<br />
When you select full cut, you have to adjust the dowel to left as shown.<br />
Partial cut<br />
Full cut<br />
7. Tighten the two screws.<br />
8. Set again the roll paper cover, and set the shaft which is taken out in step 3.<br />
9. Install roll paper<br />
10. Execute the self test to confirm the cutter action. (See “Self Test Procedure” (page 3-38))<br />
3.4.8 Connecting the Printer to the Host PC / POS Terminal<br />
All cables are connected to the connector panel located on the lower rear side of the printer.<br />
Drawer kick connector<br />
FG<br />
FG<br />
DK<br />
DC24V<br />
Interface connector<br />
Power supply connector<br />
Connector panel<br />
Note:<br />
The figure above shows the connector panel for the serial interface model printer. The shape of the interface<br />
connector varies according to the type of interface used.<br />
Be sure to turn off the power supply for both the printer and the host computer unit before connecting the<br />
various cables.<br />
You need an appropriate serial, parallel, USB, or Ethernet interface cable to connect your computer to the<br />
printer. For the serial model, it is important that you use a null modem cable, not any other serial cable,<br />
and for the parallel model use an IEEE 1284 cable.<br />
3-28 Setup Rev. D
<strong>TM</strong>-<strong>U220</strong> <strong>Technical</strong> <strong>Reference</strong> Guide<br />
3.4.8.1 Serial Interface model<br />
Before connecting any of the cables, make sure that both the printer and the host PC are turned<br />
off.<br />
1. Plug the cable connector securely into the printer’s interface connector.<br />
2. If the cable connector has screws on it, tighten the screws on both sides of the connector.<br />
3. If your interface connector has a grounding wire, attach it to the printer using the screw<br />
labeled FG, which is next to the interface connector.<br />
4. Attach the other end of the cable to the host PC.<br />
Note:<br />
When using serial interface, you need to adjust serial communication using the DIP switches. See<br />
“Adjusting the DIP Switches” (page 3-15) for details.<br />
When using serial interface, see “Serial Connection” in Chapter 2 also.<br />
3.4.8.2 Parallel Interface Models<br />
1. Press the connector on the end of the interface cable firmly into the interface connector on<br />
the connector panel.<br />
2. Press down the clips on either side of the connector to lock it in place.<br />
3. For interface cables equipped with a ground line, attach the ground line to the screw hole<br />
marked "FG" on the printer.<br />
4. Connect the other end of the interface cable to the host computer.<br />
3.4.8.3 USB Interface Models<br />
1. Attach the locking wire saddle at the location shown in the figure below.<br />
2. Hook the USB cable through the locking wire saddle, as shown in the figure below.<br />
Rev. D Setup 3-29
Note:<br />
Hooking the USB cable through the locking wire saddle, as shown in the figure below, will prevent the<br />
cable <strong>fr</strong>om coming unplugged.<br />
USB upstream connector<br />
UB-BOARD<br />
Locking wire saddle<br />
USB downstream connector<br />
(Only for the USB HUB: UB-U01)<br />
DM connector<br />
USB cable<br />
Attaching locking wire saddle<br />
3. Connect the USB cable <strong>fr</strong>om the host computer to the USB upstream connector.<br />
4. For models that have the UB-U01II installed, a maximum of two USB devices can be<br />
connected to the USB downstream connector.<br />
Note:<br />
The UB-U01 serves as a bus power-supply hub. Therefore, it is important to note that bus power<br />
supply hubs (including the UB-U01II) and bus power supply functions with power dissipation of 100<br />
mA or more cannot be connected directly to the printer. (A UB-U02II can be directly connected to a<br />
UB-U01 hub.)<br />
5. Install the UB-U01II/02II device driver on the host computer.<br />
Note:<br />
For information on how to obtain the required device drivers and their installation procedures, contact<br />
the nearest <strong>EPSON</strong> service center.<br />
3-30 Setup Rev. D
<strong>TM</strong>-<strong>U220</strong> <strong>Technical</strong> <strong>Reference</strong> Guide<br />
3.4.8.4 Ethernet interface<br />
The following view shows the part names of the UB-E01.<br />
10BASE-T Ethernet<br />
interface<br />
connector<br />
LED (green) LED (red)<br />
Be sure not to push the<br />
LEDs by accident<br />
Switch<br />
If you press and hold<br />
this switch when the<br />
printer is on, the<br />
interface will be<br />
reset to the factory<br />
settings<br />
Before connecting any of the cables, make sure that both the printer and the host computer are<br />
turned off.<br />
1. Make sure both the printer and the host computer are turned off.<br />
2. Plug the 10BASE-T cable connector securely into the UB-E01's 10BASE-T Ethernet connector<br />
until you feel it click.<br />
CAUTION:<br />
Do not connect a telephone line , a display module cable, or a drawer kick-out cable<br />
to the UB-E01’s 10BASE-T connector.<br />
Note:<br />
The display module connector on the <strong>TM</strong> printer cannot be used when the UB-E01 is installed.<br />
3. Connect the power supply to the printer.<br />
Rev. D Setup 3-31
3.4.8.5 Connecting a Drawer<br />
CAUTION:<br />
Be sure to connect a drawer that meets printer specifications. Connecting a drawer of<br />
the wrong specifications may result in damage to both the drawer and the printer.<br />
Never connect the telephone line to the drawer kick out connector (labeled “DK”).<br />
Doing so may result in damage to both the telephone line and the printer.<br />
Never connect the drawer cable to the customer display connector (labeled “DM-D”).<br />
Doing so may result in damage to both the drawer cable and the printer.<br />
1. Connect the drawer cable to the drawer kick out connector (labeled “DK”) on the connector<br />
panel.<br />
FG<br />
FG<br />
DK<br />
DC24V<br />
Drawer kick connector<br />
Connecting drawer<br />
2. The connecting is finished.<br />
3.5 Install a Printer Driver in the Host PC / POS Terminal<br />
<strong>EPSON</strong> provides printer drivers for the <strong>TM</strong>-<strong>U220</strong>. The drivers are OPOS and Advanced Printer<br />
Driver (APD). They are for the Windows® environment.<br />
3.5.1 OPOS<br />
3.5.1.1 Install and Set up.<br />
When you install and set up, please refer to the User's Manual, the file is automatically created at<br />
the installation of OPOS ADK.<br />
3-32 Setup Rev. D
<strong>TM</strong>-<strong>U220</strong> <strong>Technical</strong> <strong>Reference</strong> Guide<br />
Outline of install and Setup procedure is as follows.<br />
START<br />
1. Installation OPOS ADK<br />
(Execute the Setup.exe in DISK1, and continue to installation by wizard)<br />
Is installation completed<br />
ERROR<br />
Completed<br />
2. Setup the OPOS & device setting by using SetupPOS utility<br />
You can setup the OPOS and device setting by the SetupPOS utility.<br />
For detail refer to<br />
[ User Manual]<br />
2.1 Setup the OPOS & device setting<br />
❏ Select the device and I/F setting<br />
❏<br />
Device specified setting<br />
• Paper type & size setting<br />
• Bitmap setting<br />
Rev. D Setup 3-33
2.2. Device communication test by executing the CheckHealth<br />
ResultCode<br />
ERROR<br />
SUCCESS<br />
The OPOS and device settings are right.<br />
&<br />
The Install and Setup are completed.<br />
Confirm the error condition by<br />
referring to the [User's manual]<br />
(3. Confirmation by sample program)<br />
4. Make a OPOS compliant program<br />
END<br />
1. Installation.<br />
Execute the Setup.exe in DISK1. and continue to installation by wizard.<br />
3-34 Setup Rev. D
<strong>TM</strong>-<strong>U220</strong> <strong>Technical</strong> <strong>Reference</strong> Guide<br />
2. Set up the device and environment.<br />
1. Set the device setting by using SetupPOS utility.<br />
• Select the device and I/F setting.<br />
• Device specified setting. (set the specified setting of the device)<br />
2. Execute the CheckHealth<br />
Device communication test.<br />
• If you get "SUCCESS", the setting of the device is right.<br />
• If you get ResultCode (error), please re-check the device connection setting by<br />
following the User's Manual.<br />
After performing the above procedure, please use an OPOS compliant program in your system.<br />
Note:<br />
Please refer to the sample program when you make a program.<br />
OPOS ADK provides a sample program for each device class. The sample programs are intended as<br />
programs to serve as references for application developers. The ways to use the principal methods and<br />
properties for each device are introduced in the form of Visual Basic, Visual C++ programs. In this<br />
manual, it is introduced in the form of Visual Basic.<br />
3.5.1.2 Package contents of <strong>EPSON</strong> OPOS ADK.<br />
Package contents of <strong>EPSON</strong> OPOS ADK are same as that of the previous one.<br />
❏<br />
❏<br />
❏<br />
❏<br />
Installer<br />
SetupPOS Utility<br />
OPOS Controls<br />
Manual<br />
• User’s Manual :Installation of the <strong>EPSON</strong> OPOS ADK, Configurations,and explanations<br />
of the attached tools.<br />
• ADG : Detailed information on the each device to support the development.<br />
ADG for General :<br />
ADG for Common Information :<br />
ADG for device class :<br />
ADG for model :<br />
Sample program :<br />
General information on the development.<br />
Common information to all the devices.<br />
General information on the device class.<br />
Specific explanation on the device.<br />
Information on the Sample Programs.<br />
❏<br />
Sample Program<br />
Sample program for VB and VC (for each device class)<br />
Rev. D Setup 3-35
3.5.2 Advanced Printer Driver (APD)<br />
3.5.2.1 Installing and Setting Up<br />
When you install and set up the APD, please refer to the “<strong>EPSON</strong> Advanced Printer Driver<br />
Install Manual.“ The Manual is a PDF file, which is provided with other manuals for the APD.<br />
Outline of installation and setup procedure is as follows.<br />
1. Install <strong>EPSON</strong> Advanced Printer Driver<br />
Select the modules needed to install:<br />
<strong>TM</strong>-<strong>U220</strong>, Status API (and USB device driver)<br />
What interface model<br />
When the printer is<br />
USB interface model<br />
When the printer is<br />
Serial or Parallel<br />
interface model<br />
When the printer is<br />
Ethernet model on<br />
Window 98 or 95<br />
2. Install “USB driver”<br />
3. Install “<strong>EPSON</strong><br />
Net Direct print”<br />
4. Set up the printer port<br />
5. Test print<br />
3-36 Setup Rev. D
<strong>TM</strong>-<strong>U220</strong> <strong>Technical</strong> <strong>Reference</strong> Guide<br />
1. Install <strong>EPSON</strong> Advanced Printer Driver<br />
Execute the installer “ADT###e.exe,“ and select modules which you need. The<br />
recommended modules are shown below. Refer to the installation manual for details.<br />
<strong>EPSON</strong> <strong>TM</strong>-<strong>U220</strong> Receipt<br />
(76mm):<br />
<strong>EPSON</strong> <strong>TM</strong>-<strong>U220</strong> Receipt<br />
(69.5mm):<br />
<strong>EPSON</strong> <strong>TM</strong>-<strong>U220</strong> Receipt:<br />
(57.5mm)<br />
Status API:<br />
USB driver:<br />
This module (printer driver) is required for printing on<br />
76mm width receipt.<br />
This module (printer driver) is required for printing on<br />
69.5mm width receipt.<br />
This module (printer driver) is required for printing on<br />
57.5mm width receipt.<br />
This module is required for monitoring the printer. This<br />
module provides API to monitor the printer’s status.<br />
This module (device driver) is required for the USB<br />
interface model printer.<br />
Note:<br />
For the Manual, Sample program, and each utility, you have to download separately the<br />
ADT###e.exe.<br />
2. Install “USB driver”<br />
When you use a USB interface model printer, you need to install the “USB driver.” The<br />
procedure depends on the OS; therefore see the installation manual. If you aren’t using a<br />
USB interface model printer, you don’t need to install this module.<br />
3. Install “<strong>EPSON</strong> Net Direct print“<br />
When you use the Ethernet interface model printer with Windows98/95, you need to install<br />
“<strong>EPSON</strong> Net Direct print.” See the installation manual for details. If you aren’t using the<br />
Ethernet interface model printer, or aren’t using Windows 98/95, you don’t need to install<br />
this module.<br />
4. Set up the printer port<br />
After installing APD (and “USB driver” or “<strong>EPSON</strong> Net Direct print“) you need to adjust the<br />
printer port setting for the printer interface model. See the Installation manual and the<br />
User’s manual for details.<br />
Note:<br />
When you use the serial interface model printer, you need to adjust serial communication setting<br />
between printer and printer driver. See “Adjusting the DIP Switches” (page 3-15) and “Memory<br />
Switches” (page 3-17) for information on the settings.<br />
5. Test print<br />
Execute test print <strong>fr</strong>om the “property” of printer to confirm the setting. If the test print is not<br />
correct, please see the “Notes” on the “User’s Manual” and “Status API <strong>Reference</strong> Manual”<br />
to solve the your problem.<br />
Rev. D Setup 3-37
Note:<br />
You can use the printer with sample program (written in Microsoft Visual Basic, Visual C++). The<br />
sample program is provided separately.<br />
3.6 Self Test<br />
The self test lets you know if your printer is operating properly. It checks the control circuits,<br />
printer mechanisms, print quality, control software version, and DIP switch settings.<br />
This test is independent of any other equipment or software, so it is a good idea to run it when<br />
you first set up the printer and if you have any trouble. If the self tests work correctly, the<br />
problem is in the other equipment or the software, not the printer.<br />
3.6.1 Self Test Procedure<br />
1. Make sure the printer is turned off and the roll paper cover is closed properly.<br />
2. While holding down the FEED button, turn on the printer using the switch on the <strong>fr</strong>ont of the<br />
printer. The self test prints the printer settings and then prints the following, cuts the paper,<br />
and pauses. (The PAPER OUT light blinks.)<br />
If you want to continue SELF-TEST printing, Please press the<br />
FEED button.<br />
3. Press the FEED button to continue printing. The printer prints a pattern using the built-in<br />
character set.<br />
4. The self test automatically ends and cuts the paper after printing the following:<br />
*** completed ***<br />
The printer is ready to receive data as soon as it completes the self test.<br />
Note:<br />
If you want to pause the self test manually, press the FEED button. Press the FEED button again to<br />
continue the self test.<br />
3-38 Setup Rev. D
<strong>TM</strong>-<strong>U220</strong> <strong>Technical</strong> <strong>Reference</strong> Guide<br />
Chapter 4<br />
Troubleshooting<br />
This section describes general troubleshooting.<br />
4.1 LED Blinking Pattern<br />
4.1.1 Error Types<br />
The printer stops all printer operations for the selected paper section, goes offline, and the<br />
ERROR LED blinks when an error is detected.<br />
4.1.1.1 Errors that automatically recover<br />
ERROR LED Blinking Pattern<br />
ERROR<br />
Description<br />
160 ms<br />
Recovery<br />
Roll paper cover<br />
open error (when<br />
recoverable error is<br />
selected) (*1)<br />
The roll paper cover is<br />
opened when printing.<br />
Recovers automatically<br />
when the cover is<br />
closed.<br />
Print head<br />
temperature error (*2)<br />
The temperature of the<br />
print head is extremely<br />
high<br />
Recovers automatically<br />
when the print head<br />
cools<br />
Note:<br />
(*1) This conditions are selected by MSW 8-5, 8-8. When MSW 8-5 (mapping of the cover open status) is<br />
off, the error hasn’t occurred but there is a “paper end error” instead. If MSW 8-8 is off, this error is<br />
handled as an automatically recoverable error.<br />
(* 2) Print head temperature error is not abnormal.<br />
Rev. D Troubleshooting 4-1
4.1.1.2 Recoverable Errors<br />
When a recoverable error occurs, after the cause of the error is removed, the printer<br />
can recover <strong>fr</strong>om the error by receiving an error recovery command without turning off<br />
the power:<br />
ERROR LED Blinking Pattern<br />
ERROR<br />
Description<br />
160 ms<br />
Recovery<br />
Paper roll cover open<br />
error (*1)<br />
The roll paper cover is<br />
opend when printing.<br />
Recovers by error recovery<br />
command with the cover<br />
closed<br />
Autocutter error<br />
(Type A, B only)<br />
The autocutter does not<br />
work correctly<br />
Recovers by error recovery<br />
command. (See “Autocutter<br />
Jam” (page 4-3))<br />
Home position<br />
detection error<br />
(This is “Mechanical<br />
error“)<br />
The home position cannot<br />
be detected due to a<br />
paper jam<br />
Recovers by error recovery<br />
command<br />
Note:<br />
(*1) These conditions are selected by MSW 8-5 and 8-8. When MSW 8-5 (mapping of the cover open<br />
status) is OFF, the error does not occur and a “paper end error” occurs instead. If MSW 8-8 is ON, this<br />
error is handled as a recoverable error.<br />
4.1.1.3 Errors that are impossible to recover:<br />
ERROR LED Blinking Pattern<br />
ERROR<br />
Description<br />
160 ms<br />
Recovery<br />
R/W error in memory<br />
or gate array<br />
After R/W checking, the<br />
printer does not work<br />
correctly.<br />
Writing to, reading out, or<br />
erasing the NV memory for<br />
image scanning results<br />
does not work correctly.<br />
Impossible to recover<br />
High voltage error<br />
The power supply voltage<br />
is extremely high<br />
Impossible to recover<br />
Low voltage error<br />
The power supply voltage<br />
is extremely low<br />
Impossible to recover<br />
CPU execution error<br />
The CPU executes an<br />
incorrect address or I/F<br />
board is not connected<br />
Impossible to recover<br />
Print head<br />
temperature<br />
detection circuit error<br />
There is an abnormality in<br />
the print head<br />
temperature<br />
Impossible to recover<br />
4-2 Troubleshooting Rev. D
<strong>TM</strong>-<strong>U220</strong> <strong>Technical</strong> <strong>Reference</strong> Guide<br />
4.2 Removing a Paper Jam<br />
CAUTION:<br />
Be sure not to touch the manual cutter. Otherwise your finger might be injured.<br />
1. Turn the power off.<br />
2. Open the roll paper cover by using the tab, as shown in the below illustration.<br />
3. If you have a Type A printer, remove the take-up spool and open the unit by using the unit<br />
open lever, as shown in the illustration.<br />
Roll paper cover<br />
Tab<br />
lever<br />
1. open the roll paper cover<br />
2. (only type A) open the unit<br />
4. Remove the jammed paper.<br />
Note:<br />
When you turn the power off by mistake during the printing operation, the cutter blade may stop in the<br />
paper feed line. So the paper may not be fed in the first operation normally when you turn the power on. If<br />
the phenomenon happens again after removing the jammed paper, try the solution “Autocutter Jam”<br />
(page 4-3).<br />
4.3 Autocutter Jam<br />
If a foreign object such as a push pin or paper clip drops in the autocutter and causes the auto<br />
cutter to lock up, the printer enters an error state and begins the recovery operation<br />
automatically.<br />
If the problem is not serious, the autocutter returns to its normal position without any<br />
intervention by the user.<br />
If the autocutter does not return to its normal position by itself, follow the steps below to fix the<br />
problem:<br />
1. Open the roll paper cover, and remove the jammed object if there is one.<br />
Rev. D Troubleshooting 4-3
2. Turn off the printer, and close the roll paper cover, and turn it back on. Then the cutter blade<br />
returns to the normal position. If you would like not to turn off the printer, send an error<br />
recovery command and initialize printer command instead.<br />
3. If the cutter blade doesn’t return to the normal position, return the cutter blade to the normal<br />
position by rotating the autocutter knob in the direction of the arrow. When it is returned to<br />
the normal position, a lever comes into the center of hole in the autocutter <strong>fr</strong>ame.<br />
Hole<br />
Cutter cover<br />
Lever<br />
Autocutter unit<br />
Knob<br />
4. Close the roll paper cover.<br />
4.4 Printer Stops Printing / Printer Repeats Printing on a Line<br />
When you connect the wrong power supply unit, printer will not perform correctly. See below<br />
to determine which power supply unit should be connected to the printer.<br />
<strong>TM</strong>-<strong>U220</strong> Alphanumeric model (Type A,B, D) <strong>TM</strong>-<strong>U220</strong> Multilingual model (Type A,B, D)<br />
AC Adapter C (which is packed with ANK model)<br />
or PS-180 (Which is provided as an option)<br />
PS-180 (which is packed with the Multilingual model)<br />
4-4 Troubleshooting Rev. D
<strong>TM</strong>-<strong>U220</strong> <strong>Technical</strong> <strong>Reference</strong> Guide<br />
Note:<br />
*Multilingual means the printer model that can print any one of the following: Japanese Kanji, Simplified<br />
Chinese, Traditional Chinese, Thai characters, or Korean characters.<br />
Use the self test to confirm what model of printer you have, and then use the correct power supply. (See<br />
“Self Test Procedure” (page 3-38) for how to run the self test.)<br />
Rev. D Troubleshooting 4-5
Alphanumeric model<br />
SELF-TEST<br />
...<br />
Resident Character<br />
Alphanumeric<br />
The following models are called Multilingual<br />
SELF-TEST<br />
...<br />
Resident Character<br />
Alphanumeric<br />
Chinese GB18030<br />
SELF-TEST<br />
...<br />
Resident Character<br />
Alphanumeric<br />
Traditional Chinese<br />
Simplified Chinese model<br />
Traditional Chinese model<br />
SELF-TEST<br />
...<br />
Resident Character<br />
Alphanumeric<br />
Korean<br />
SELF-TEST<br />
...<br />
Resident Character<br />
Alphanumeric<br />
Thai 3 pass<br />
Korean model<br />
Thai model<br />
SELF-TEST<br />
...<br />
Resident Character<br />
Alphanumeric<br />
Japanese<br />
Japanese model<br />
Result of SELF-TEST and printer model<br />
4-6 Troubleshooting Rev. D
4.5 Printer prints ““ or Incorrect Data With Serial Interface<br />
<strong>TM</strong>-<strong>U220</strong> <strong>Technical</strong> <strong>Reference</strong> Guide<br />
If one of the following errors occurs during serial interface communication, the printer prints “”<br />
or ignores the data, depending on the setting of DIP switch 1-1.<br />
❏<br />
❏<br />
❏<br />
Parity error<br />
Framing error<br />
Overrun error<br />
Note:<br />
For other errors, we recommend confirming the transmission setting of DIP switch 1-3: Handshaking.<br />
4.6 Print Speed is Slow When Using Windows Printer Driver<br />
When the printer prints a Windows font using the <strong>EPSON</strong> Advanced Printer Driver, the print<br />
speed is slow. To improve the print speed, use a printer font.<br />
4.7 Printer doesn’t cut roll paper with the autocutter<br />
<strong>TM</strong>-<strong>U220</strong> Type D does not have an autocutter unit. If you use the type D model, you can’t use<br />
the autocutter function. Use the manual cutter.<br />
4.8 Hexadecimal Dump mode<br />
This feature allows experienced users to see exactly what data is coming to the printer. This can<br />
be useful in finding software problems. When you turn on the hex dump function, the printer<br />
prints all commands and other data in hexadecimal format, along with a <strong>guide</strong> section to help<br />
you find specific commands.<br />
To use the hex dump feature, follow these steps:<br />
1. After you make sure the printer is off, open the paper roll cover.<br />
2. While you hold down the FEED button, turn on the printer.<br />
3. Close the cover.<br />
Rev. D Troubleshooting 4-7
4. Run any software program that sends data to the printer. The printer prints “Hexadecimal<br />
Dump” and then all the codes it receives in a two-column format. The first column contains<br />
the hexadecimal codes and the second column gives the ASCII characters that correspond to<br />
the codes. Part of a hexadecimal dump is shown below:<br />
Hexadecimal Dump<br />
To terminate hexadecimal dump,<br />
press FEED button three times.<br />
1B 21 00 1B 26 02 40 40<br />
. ! . . & . @ @<br />
1B 25 01 1B 63 34 00 1B . % . . c 4 . .<br />
41 42 43 44 45 46 47 48 A B C D E F G H<br />
• A period (.) is printed for each code that has no ASCII equivalent.<br />
• In hex dump mode all commands except real time ESC/POS commands are disabled.<br />
5. Open the cover to set the printer offline so that it will print the last line.<br />
6. Close the cover and turn off the printer, press the FEED button three times, or reset the<br />
printer to turn off the hex dump mode.<br />
Note:<br />
The hexadecimal dump mode can’t be used with OPOS or the APD.<br />
4-8 Troubleshooting Rev. D
Chapter 5<br />
Application Development Information<br />
<strong>TM</strong>-<strong>U220</strong> <strong>Technical</strong> <strong>Reference</strong> Guide<br />
This section contains usable information to develop POS systems that use this printer.<br />
5.1 Various Status Categories<br />
This printer is able to send various status reports to the host PC. This section describes about the<br />
kind of statuses and handling.<br />
Status Categories<br />
Drawer kick connector pin<br />
status<br />
Roll Paper cover status<br />
Paper feeding button status<br />
Error status<br />
Paper remaining amount<br />
status<br />
Description<br />
Cash drawer is open or closed.<br />
Roll paper cover is open or closed<br />
Paper feed button is pressed or not<br />
Various error information (Off-line / On-line), (detail of the error;<br />
Mechanical error, autocutter error, auto-recovery error,<br />
unrecoverable error)<br />
It provides status of paper remaining amount (Near-end or Paper<br />
end)<br />
Note<br />
Near-end status (paper remain status) is supported only by printers equipped with a near-end<br />
detector. The near-end detector is a factory option.<br />
This printer has an Automatic status back (ASB) function that automatically transmits changes in<br />
printer status. It is available in any control method (APD, OPOS, ESC/POS command.)<br />
The status format depends on each control method. Refer to each manual for detail.<br />
The statuses are useful for the following situations.<br />
❏<br />
❏<br />
When an error status is sent to the host PC, the host PC can display an error message or<br />
solution message for operator.<br />
When “Paper near end” or “Paper end“ status is sent to the host PC, the host PC can display<br />
a warning message for operator to replace roll paper.<br />
5.1.1 Printer Status on APD<br />
When you use APD to get printer’s status, you have to install “Status API“ and use it. Refer to<br />
“Status API User’s Manual“ and the sample program of Status API for details.<br />
Rev. D Application Development Information 5-1
5.1.2 OPOS<br />
Note<br />
This section describes the summary of status handling. Refer to “OPOS ADK Application Development<br />
Guide General Functions” for details.<br />
5.1.2.1 Checking the printer state<br />
The state of the printer can be checked through properties supported by the printer. For<br />
example, if the user wants to check if the printer cover is open, the CoverOpen property can be<br />
used.<br />
If OPOSPOSPrinter1.CoverOpen = True Then<br />
MsgBox ìCover is open!î<br />
End If<br />
This and many other events can also be checked by firing a StatusUpdateEvent.<br />
[Event management]<br />
Private Sub OPOSPOSPrinter1_StatusUpdateEvent(ByVal Data As Long)<br />
If Data = PTR_SUE_COVER_OPEN Then<br />
MsgBox ìCover is open!î<br />
End If<br />
End Sub<br />
StatusUpdateEvent can return information on the following items.<br />
STATUS INFORMATION<br />
PTR_SUE_COVER_OPEN<br />
PTR_SUE_COVER_OK<br />
PTR_SUE_REC_EMPTY<br />
PTR_SUE_REC_NEAREMPTY<br />
PTR_SUE_REC_PAPEROK<br />
PTR_SUE_IDLE<br />
Cover is open.<br />
Cover is closed.<br />
Receipt paper is out.<br />
Receipt paper is near the end. (The near end detector is<br />
factory option. When the printer does not have one, the status<br />
does not occur.)<br />
Receipt paper is OK.<br />
Printer State is idle.<br />
When the FlagWhenIdle property is set to TRUE, PTR_SUE_IDLE is sent to inform the<br />
application that the printer is idle. Other than when data is being sent, the printer is in an idle<br />
state, so if FlagWhenIdle is TRUE, an event will be fired when printing is finished. After the<br />
event is fired, FlagWhenIdle will be set to FALSE. By using this value, the information below can<br />
be found out.<br />
*Finding out when multiple asynchronous print jobs have finished printing. When multiple<br />
asynchronous print jobs have been sent to the printer, it is possible to know when they have<br />
finished printing. After setting the AsyncMode property to TRUE and running the PrintNormal<br />
5-2 Application Development Information Rev. D
<strong>TM</strong>-<strong>U220</strong> <strong>Technical</strong> <strong>Reference</strong> Guide<br />
method, change the FlagWhenIdle property to TRUE. When all data has finished printing, the<br />
printer becomes idle and a StatusUpdateEvent is fired to the application with the value of<br />
PTR_SUE_IDLE.<br />
5.1.2.2 Printer Errors and Status<br />
A change in printer status when asynchronous data is being sent is made available to the<br />
program by the firing of an ErrorEvent and StatusUpdateEvent. When the printer changes status<br />
while nothing is happening, the change is told to the program by a StatusUpdateEvent only.<br />
As an example, assume that the printer cover becomes open. Usually, when data is not being<br />
sent to the printer and the cover is opened, a StatusUpdateEvent is fired to the application. After<br />
the AsyncMode property is set to TRUE and a method is used to print data, if the cover is<br />
opened while the data is being sent, the program is notified by an ErrorEvent. ErrorEvents are<br />
fired when the error has interrupted the data that is being sent. Only StatusUpdateEvent will<br />
fire when the error does not effect the data and the data will continue being sent as normal.<br />
Reasons for the ErrorEvent being fired and the corresponding error names are listed below.<br />
ResultCode/ ResultCodeExtended Reason<br />
OPOS_E_ILLEGAL<br />
There is an abnormality with the device. (Includes the<br />
following 1 error)<br />
OPOS_E_EXTENDED<br />
OPOS_EPTR_COVER_OPEN<br />
OPOS_EPTR_REC_EMPTY<br />
OPOS_E_FAILURE<br />
OPOS_EPTR_UNRECOVERABLE<br />
OPOS_EPTR_CUTTER<br />
OPOS_EPTR_MECHANICAL<br />
OPOS_EPTR_OVERHEAT<br />
OPOS_EX_DEVBUSY<br />
OPOS_EPTR_REC_CARTRIDGE_REMOVED<br />
OPOS_EPTR_REC_CARTRIDGE_EMPTY<br />
OPOS_EPTR_REC_HEAD_CLEANING<br />
Error determined by the device’s SO (Includes the<br />
following 4 errors)<br />
Cover is open.<br />
Receipt paper is empty.<br />
Hard error (Includes the following 6 errors).<br />
Error that cannot be recovered <strong>fr</strong>om.<br />
Error with the auto cutter.<br />
Mechanical error.<br />
Head overheat error.<br />
Device busy error.<br />
Receipt cartridge is removed.<br />
Receipt cartridge is empty.<br />
Receipt head starts cleaning.<br />
After an error occurs, more detailed information about the error can be obtained <strong>fr</strong>om the<br />
ErrorLevel, ErrorStation, and ErrorString properties.<br />
5.1.2.3 ESC/POS commands<br />
When you use ESC/POS commands to control the printer, you can get the status by using<br />
“status command” including Auto Status Back command (ASB.) Please refer to “ESC/POS<br />
APG.”<br />
Rev. D Application Development Information 5-3
5.2 Cash Drawer Control<br />
5.2.1 Advanced Printer Driver<br />
5.2.1.1 Drawer Open<br />
When you control a drawer which is connected to this printer using APD, you have 2 methods<br />
to open the drawer. The first method is using “Control font,” second is using “Status API.“<br />
Below is as example of a program (Visual Basic) to open a cash drawer using Control font.<br />
'Execute open cash drawer1.<br />
Printer.Font.Name = "control"<br />
Printer.Print "A"<br />
íThisîAî means ìopen the drawer1 with 50msec pulse.ì<br />
Below is as example of a program (Visual Basic) to open a cash drawer using Status API.<br />
'call api to open the drawer1<br />
rtn = BiOpenDrawer(m_hApi, EPS_BI_DRAWER_1, EPS_BI_PULSE_100)<br />
íThis calling means ìopen the drawer1 with 100msec pulse.ì<br />
Note: Program needs to call “BiOpenMonPrinter“ before calling “BiOpenDraewer.“<br />
5-4 Application Development Information Rev. D
<strong>TM</strong>-<strong>U220</strong> <strong>Technical</strong> <strong>Reference</strong> Guide<br />
5.2.1.2 Checking Drawer Status<br />
You can get drawer status by using Status API. Below is examples of program which checks the<br />
drawer status.<br />
'get the current printer status<br />
rtn = BiGetStatus(m_hApi, getstatus)<br />
If rtn < 0 Then<br />
ErrMsg (rtn) íError handling<br />
Exit Sub<br />
End If<br />
If (getstatus And ASB_DRAWER_KICK) = ASB_DRAWER_KICK Then<br />
MsgBox("Drawer is opened") íPin No.3 is high<br />
Else<br />
MsgBox("Drawer is closed")<br />
End If<br />
There are the other checking method (Bi BiSetStatusBackFunction, BiSetStatusBackWnd) in<br />
Status API. Refer to the Status API User’s Manual and the sample programs for detail.<br />
5.2.2 OPOS<br />
Programming examples of how to use API function relating to a Cash Drawer are shown below.<br />
5.2.2.1 Drawer Open/Close<br />
Using the OpenDrawer method opens the cash drawer. The DrawerOpened property can be<br />
used to check the current state of the drawer. To pause the program until the drawer is closed,<br />
the WaitForDrawerClose method is used.<br />
Below is as example of a program to open and close a cash drawer.<br />
If Not OPOSCashdrawer1.DrawerOpened Then<br />
OPOSCashdrawer1.OpenDrawer<br />
OPOSCashdrawer1.WaitForDrawerClose 10000, 1000, 100, 100<br />
End If<br />
5.2.2.2 Checking Drawer Status<br />
There are methods other than explained in section 5.2.2.1 that can be used to check drawer<br />
status. A StatusUpdateEvent is fired whenever the drawer is opened or closed.<br />
Rev. D Application Development Information 5-5
Below are examples of programs that use events to check if the drawer has been opened or<br />
closed.<br />
[Main Program]<br />
Global DrawerFlag As Boolean<br />
If Not OPOSCashdrawer1.DrawerOpened Then<br />
DrawerFlag = True<br />
OPOSCashdrawer1.OpenDrawer<br />
While (DrawerFlag = True)<br />
íThis part uses timer management to check the status of DrawerFlag.<br />
DoEvents<br />
Wend<br />
End If<br />
[Event Management]<br />
Private Sub OPOSCashdrawer1_StatusUpdateEvent(ByVal As Long)<br />
If Data = False Then<br />
DrawerFlag = False<br />
End If<br />
End Sub<br />
5.2.3 ESC/POS<br />
When you drive a cash drawer which is connected to this printer, please refer to “FAQ about<br />
ESC/POS command.“ About “FAQ about ESC/POS command,“ please contact your dealer or<br />
<strong>EPSON</strong>.<br />
5.3 NV memory<br />
This printer has NV memory (Non-volatile). The data of NV memory remains after you turn off<br />
the power. The NV memory is available in two ways.<br />
1. NV Bit-image<br />
Please refer “NV Bit-image Printing” (page 5-8) for detail of the function.<br />
5-6 Application Development Information Rev. D
<strong>TM</strong>-<strong>U220</strong> <strong>Technical</strong> <strong>Reference</strong> Guide<br />
2. User NV memory<br />
There is <strong>fr</strong>ee area in the NV memory that the user can use. You can use this <strong>fr</strong>ee area for<br />
notations, to write other character information, or for many other purposes. The data<br />
remains after you turn off the power. Use ESC/POS commands to read and write this data.<br />
The following are examples of purposes.<br />
• Date of the printer for maintenance<br />
• ID definition for developer or POS system<br />
Note<br />
When you use User NV memory area by using OPOS or APD, you have to use “Direct I/O method”<br />
or “Control A font.” Please contact <strong>EPSON</strong> or your dealer for details.<br />
Note the following when writing to and erasing NV memory.<br />
❏<br />
The following restrictions apply when performing NV memory operations (including data<br />
storage and deletion).<br />
• The paper FEED button must not be used to feed paper.<br />
• The real-time command must not be executed.<br />
• The ASB status will not be sent, even when the ASB function is set to enabled.<br />
❏<br />
❏<br />
The printer sometimes enters the Busy state while data is written to NV memory. It is<br />
important not to send data <strong>fr</strong>om the host computer while the printer is in the Busy state, as it<br />
will be incapable of processing any received data.<br />
Frequent use of the functions for defining data to and deleting data <strong>fr</strong>om NV memory can<br />
damage the memory. As a rule in using the various commands, avoid writing to NV<br />
memory more than a 10 times per day.<br />
Rev. D Application Development Information 5-7
5.4 NV Bit-image Printing<br />
This printer has “NV Bit-image“ Function. This function provides printing bit-image (e.g. a shop<br />
logo.) This function is available for any control method (APD, OPOS, ESC/POS command.)<br />
<strong>EPSON</strong> provides a tool, “<strong>TM</strong>FLogo” that enables registration of a bitmap image in the NV<br />
memory of an <strong>EPSON</strong> <strong>TM</strong> series printer. The bitmap image in the NV memory can be printed<br />
with the printer by using each control method.<br />
Printable Size<br />
Printing method<br />
NV<br />
Bit-image<br />
<br />
Less than paper width.<br />
<br />
There is a limitation Height length<br />
= NV memory Size / width length<br />
Store<br />
Store bitmap to NVRAM by <strong>TM</strong>FLogo utility in device specific<br />
settings on the SetupPOS utility. If you store the bitmap in a<br />
NVRAM, it is not necessary to restore unless the NV memory is<br />
deleted.<br />
Print<br />
Depends on each control method.<br />
Note<br />
The available NV memory size for the <strong>TM</strong>-<strong>U220</strong> is 128KB.<br />
Example: The NV memory can store 20 graphics data when the file size of a graphic is 6 KB.<br />
5.4.1 Advanced Printer Driver<br />
5.4.1.1 How to print “NV Bit-image“<br />
APD prints a stored “NV Bit-image“ by using “Control font.“ See the User’s Manual of<br />
Advanced Printer Driver for detail.<br />
5.4.1.2 Printable bitmap format in APD<br />
The printable bitmap formats are formats that meet all the following condition.<br />
❏<br />
When using “NV Bit-image“<br />
5.4.2 OPOS<br />
• Depends on the <strong>TM</strong> Flogo utility. (.BMP format)<br />
<strong>EPSON</strong> OPOS ADK provides a tool, “<strong>TM</strong>FLogo” that enables registration of a bitmap image in<br />
the NVRAM of an <strong>EPSON</strong> <strong>TM</strong> series printer. The tool can be used <strong>fr</strong>om the device specific<br />
settings of the SetupPOS utility. The bitmap image in the NVRAM can be printed with a printer<br />
by using the DirectIO method. Concerning the available NVRAM size for the <strong>TM</strong>-<strong>U220</strong>, refer to<br />
the ADG for <strong>TM</strong>-<strong>U220</strong> in the OPOS ADK.<br />
5.4.2.1 Printing method<br />
Print stored bitmap by DirectIO method.<br />
• *Command : PTR_DI_PRINT_FLASH_BI<strong>TM</strong>AP<br />
5-8 Application Development Information Rev. D
<strong>TM</strong>-<strong>U220</strong> <strong>Technical</strong> <strong>Reference</strong> Guide<br />
The available NVRAM size for the <strong>TM</strong>-<strong>U220</strong> is 128KB.<br />
5.4.2.2 LetterQuality<br />
It is possible to change the speed and quality of a bitmap by using the XXXLetterQuality<br />
property.<br />
RecLetterQuality = TRUE ‘print Receipt’s bitmap in quality mode.<br />
RecLetterQuality = FALSE ‘print Receipt’s bitmap in speed mode.<br />
5.4.2.3 Setting of printing position by escape sequence<br />
POS Printers support escape sequences that can be treated as printing data. The following<br />
commands are the escape sequence command for setting of printing position.<br />
Name Data Remarks<br />
Center ESC |cA Aligns following text in the center.<br />
Right justify ESC |rA Aligns following text at the right.<br />
Normal ESC |N Restores printer characteristics to<br />
normal condition.<br />
Note1: manner of ”ESC |cA” and “ESC |rA”<br />
Characteristics are reset at the end of each print method or by a “Normal” sequence, so these escape<br />
sequences cannot be used in the following manner.<br />
OPOSPOSPrinter1.PrintNormal PTR_S_RECEIPT, Chr(&H1B) + ”|cA” + ”123”<br />
OPOSPOSPrinter1.PrintNormal PTR_S_RECEIPT, “456” + Chr(13) + Chr(10)<br />
The “123” characters will be printed in the center, but not under “456”. When using a new method to<br />
print characters, it is necessary to add the desired escape sequence again.<br />
Note2 : limitation of ”ESC |cA” and “ESC |rA”<br />
*During rotated printing mode (Left90, right90), these escape sequences will not work.<br />
*These will not work if they are not the first character of a line.<br />
*It is not possible to use these on PrintBitmap method.<br />
5.4.2.4 Printable bitmap format in OPOS<br />
The printable bitmap formats are formats that meet all the following conditions.<br />
❏<br />
❏<br />
❏<br />
BMP files<br />
Monochrome, 16-color (4 bit), 256-color (8 bit)<br />
Uncompressed<br />
5.4.3 ESC/POS command<br />
See “ESC/POS Application Programming Guide“ about the method.<br />
Rev. D Application Development Information 5-9
5.5 Printing for journal used<br />
This printer can print on carbon paper (original + 1 copy.) This is available to use for journal.<br />
When you use this printer “Type A” model, you can take up the copied paper with Auto take-up<br />
unit. If you use this printer “Type B“ model, you can cut each a receipt and the copy at same<br />
time.<br />
A special control isn’t required to use carbon paper; you can treat it as same as normal paper.<br />
However, when you use the Type A model with Auto take-up unit, you have to install carbon<br />
paper with Auto take-up unit. Please refer “Installing the Roll Paper for Type A” (page 3-9).<br />
5.6 FAQ List<br />
The questions shown in the list below begin with “Q” and their replies with “A.”<br />
1. Sentences beginning with “Q” provide information relating to a question or problem.<br />
2. The instructions described in the “A” sentence answer the question or solve the problem.<br />
5.6.1 Q. Drawer kick does not operate properly.<br />
5.6.1.1 A. Drawer specifications differ, depending on the manufacturer and the part<br />
number.<br />
We recommend to use a Drawer that is made by <strong>EPSON</strong>. These conditions also apply to any<br />
other devices that use the drawer kick-out connector. Any devices that do not satisfy all the<br />
following conditions must not be used.<br />
[Conditions]<br />
• A load must be provided between drawer kick-out connector pins 4 and 2 or between<br />
pins 4 and 5. (*1)<br />
• When the drawer open/close signal is used, a switch must be provided between drawer<br />
kick-out connector pins 3 and 6. (*2)<br />
• The resistance of the load must be 24 W or more, or the input current must be 1 A or less.<br />
(*3)<br />
• Be sure to use drawer kick-out connector pin 4 (24 V power output) to drive the device.<br />
Never connect any other power supply to the drawer kick-out connector. (*4)<br />
NOTES:<br />
(*1) Operating the printer with incorrectly installed devices voids the warranty.<br />
(*2) Connecting devices other than the drawer open/close switch voids the warranty.<br />
(*3) If a device with a resistance of less than 24 Ω or an input current of over 1 A is used, the resulting overcurrent<br />
may damage the device.<br />
(*4) Connecting a power supply other than that specified voids the warranty.<br />
5-10 Application Development Information Rev. D
<strong>TM</strong>-<strong>U220</strong> <strong>Technical</strong> <strong>Reference</strong> Guide<br />
5.6.2 Q. Unable to print a part of Page 0 in Visual Basic.<br />
Unable to print a part of Page 0 (for example<br />
) in Visual Basic.<br />
5.6.2.1 A. Follow the procedure<br />
When programming with Visual Basic, limitations prevent data <strong>fr</strong>om 81h through 9Fh and <strong>fr</strong>om<br />
E0h through FEh <strong>fr</strong>om being sent as characters. However, you can use the following procedure<br />
to send this data.<br />
Dim Send_ data(0) As Byte<br />
Send_data(0) = &h81 ’1 byte of sending data<br />
MSComm1.Output = Send_data<br />
Rev. D Application Development Information 5-11
5-12 Application Development Information Rev. D
<strong>TM</strong>-<strong>U220</strong> <strong>Technical</strong> <strong>Reference</strong> Guide<br />
Chapter 6<br />
Notices for Replacement of the <strong>TM</strong>-U210/<strong>TM</strong>-U300<br />
<strong>TM</strong>-<strong>U220</strong> is designed to smoothly replace the <strong>TM</strong>-U210/<strong>TM</strong>-U300. This section gives answers to<br />
your questions.<br />
6.1 For Replacement of the <strong>TM</strong>-U210<br />
When you replace <strong>TM</strong>-U210 with the <strong>TM</strong>-<strong>U220</strong>, you have to set the memory switch [MemSW8-5:<br />
OFF (default)] and [MemSW 8-8: OFF (default)] to get the same statas provided by the <strong>TM</strong>-U210.<br />
See “6.1.6 Provided statuses (6-5 page)” for details.<br />
6.1.1 About printing format compatibility<br />
The <strong>TM</strong>-<strong>U220</strong> can provide almost the same printing result as the <strong>TM</strong>-U210. This section<br />
describes the reasons, which are printing area compatibility, character compatibility, and top<br />
margin compatibility (cutting position.)<br />
6.1.1.1 Printing area<br />
The <strong>TM</strong>-<strong>U220</strong> has almost the same printing area as <strong>TM</strong>-U210 as shown in the following table<br />
and figures.Therefore, the <strong>TM</strong>-<strong>U220</strong> can print same contents as the <strong>TM</strong>-U210 without adjusting<br />
any original control sources.<br />
Printing areaItem <strong>TM</strong>-U210 (Type A,B,D) <strong>TM</strong>-<strong>U220</strong> (Type A,B, D)<br />
(when 76mm paper using)<br />
Print width<br />
63.34mm<br />
(200dots, 400 position)<br />
63.34mm<br />
(200dots,400position)<br />
Left margin (5.9mm) 6.8mm<br />
Right margin (6.76mm) 5.8mm<br />
76 mm<br />
76 mm<br />
63.34 mm<br />
63.34 mm<br />
Printable area<br />
5.9 mm<br />
6.76 mm<br />
6.8 mm<br />
Printable area<br />
5.8 mm<br />
<strong>TM</strong>-U210<br />
<strong>TM</strong>-<strong>U220</strong> (When using 76mm roll paper)<br />
These values are reference values<br />
Printing area and margins<br />
Rev. D Notices for Replacement of the <strong>TM</strong>-U210/<strong>TM</strong>-U300 6-1
6.1.1.2 Characters<br />
<strong>TM</strong>-<strong>U220</strong> has almost the same character spec as the <strong>TM</strong>-U210. Therefore, the <strong>TM</strong>-<strong>U220</strong> can print<br />
the same contents as the <strong>TM</strong>-U210 without adjusting any original control sources.<br />
Character spec <strong>TM</strong>-U210 (Type A,B,D) <strong>TM</strong>-<strong>U220</strong> (Type A,B, D)<br />
Character<br />
par line<br />
(CPI)<br />
Font A (9 x 9) 33 (35) cpl 33 (35) cpl<br />
Font B (7 x 9) 40 (42) cpl 40 (42) cpl<br />
Kanji (16 x 16) 25 (22) cpl 25 (22) cpl<br />
Character<br />
width<br />
Font A (9 x 9) 1.6 x 3.1 1.6 x 3.1<br />
Font B (7 x 9) 1.2 x 3.1 1.2 x 3.1<br />
Kanji (16 x 16) 2.7 x 2.7 2.7 x 2.7<br />
Character configuration<br />
Code page 0 to 8, and<br />
19 to 26<br />
Code page 0 to 8, and 19 to<br />
26 and code page 16, 17, 18<br />
Note:<br />
The character per line for Font A, B can be changed by DIP SW2-1.<br />
The cpl for the Kanji character font can be changed by anESC/POS command. (default:22cpl to 25cpl)<br />
6.1.1.3 Cutting position <strong>fr</strong>om print start position<br />
<strong>TM</strong>-<strong>U220</strong> has same distance between the auto cut position and the print start position as the<br />
<strong>TM</strong>-U210. Therefore the top margin is the same as the previous one when you replace the<br />
<strong>TM</strong>-U210 with the <strong>TM</strong>-<strong>U220</strong> with autocutter. In other cases, please refer the table and figures<br />
below.<br />
Cutting position <strong>TM</strong>-U210 (Type A,B,D) <strong>TM</strong>-<strong>U220</strong> (Type A,B, D)<br />
Autocutting position to print start<br />
position<br />
Manual cut position to print start<br />
position<br />
Cutting method of partial cut<br />
27mm<br />
20.2mm<br />
one point left uncut position at<br />
center position.<br />
(Type A, B only)<br />
27mm<br />
Type D: 22.1mm<br />
TypeA,B: 34.9mm<br />
one point left uncut position at<br />
right position.<br />
(Type A, B only)<br />
6-2 Notices for Replacement of the <strong>TM</strong>-U210/<strong>TM</strong>-U300 Rev. D
<strong>TM</strong>-<strong>U220</strong> <strong>Technical</strong> <strong>Reference</strong> Guide<br />
Paper feed direction<br />
<strong>TM</strong>-U210 (Type A, B, D)<br />
22.1 mm<br />
Manual cut position line<br />
Print start position line<br />
Paper feed direction<br />
27 mm<br />
34.9 mm<br />
Manual cut position line<br />
Auto cut position line<br />
<strong>TM</strong>-<strong>U220</strong> (Type A, B)<br />
(When using 76mm roll paper)<br />
Print start position line<br />
Paper feed direction<br />
<strong>TM</strong>-<strong>U220</strong> (Type D)<br />
(When using 76mm roll paper)<br />
22.1 mm<br />
Manual cut position line<br />
Print start position line<br />
These values are reference values<br />
6.1.2 Cutting Method<br />
The <strong>TM</strong>-<strong>U220</strong> (Type A, B) can perform autocutting with partial cut or full cut. However, the<br />
partial cut method is a little different <strong>fr</strong>om the <strong>TM</strong>-U210. The <strong>TM</strong>-U210 always uses the partial<br />
cut method. The partial cut method is one point left uncut at the center position, so the method is<br />
different <strong>fr</strong>om that of the <strong>TM</strong>-<strong>U220</strong> in respect to the uncut position. The <strong>TM</strong>-<strong>U220</strong> leaves the<br />
right position uncut in the partial cut.<br />
Rev. D Notices for Replacement of the <strong>TM</strong>-U210/<strong>TM</strong>-U300 6-3
6.1.3 Dimensions<br />
Some dimensions of the <strong>TM</strong>-<strong>U220</strong> are smaller than those of the <strong>TM</strong>-U210 except Type D.<br />
Therefore, the <strong>TM</strong>-<strong>U220</strong> Type A and B printers can be installed in the same space as the<br />
<strong>TM</strong>-U210 Type A and B.<br />
<strong>TM</strong>-U210<br />
<strong>TM</strong>-<strong>U220</strong><br />
Dimensions<br />
(W x D x H)<br />
(Unit: mm)<br />
Type A 160 x 295 x 160 160 x 286 x 158<br />
Type B 160 x 248 x 150 160 x 248 x 139<br />
Type D 160 x 248 x 133 160 x 248 x 139<br />
See “1.7.1 External Dimensions and Mass (1-17 page)” for details.<br />
6.1.4 Receive buffer size<br />
This topic is for serial model.<br />
The receive buffer size of the <strong>TM</strong>-<strong>U220</strong> can be changed as shown in the following table.<br />
Product Receive buffer capacity Condition of<br />
buffer full<br />
Condition of<br />
release full<br />
state<br />
Byte number <strong>fr</strong>om buffer full to<br />
release full state<br />
<strong>TM</strong>-U210<br />
40 bytes (DIP SW1-2 is On)<br />
(ANK: DIP SW1-2 is Off)<br />
1K bytes<br />
(Multilingual: DIP SW1-2 is Off)<br />
512 bytes<br />
Buffer space is<br />
16 bytes<br />
Buffer space is<br />
26 bytes<br />
10 bytes<br />
<strong>TM</strong>-<strong>U220</strong> 40 bytes (DIP SW1-2 is On) Buffer space is<br />
16 bytes<br />
Buffer space is<br />
26 bytes<br />
10 bytes<br />
(Regardless of MemSW8-7)<br />
4K bytes<br />
(DIP SW1-2 is Off)<br />
(default)<br />
Buffer space is<br />
128 bytes<br />
Buffer space is<br />
128 bytes<br />
Buffer space is<br />
256 bytes<br />
Buffer space is<br />
138 bytes<br />
128 bytes<br />
(MemSW8-7:OFF) (default)<br />
10 bytes<br />
(MemSW8-7: ON)<br />
Note:<br />
The receive buffer of <strong>TM</strong>-U210 may cause lost data at bufferfull state when there is no FIFO setting, or the<br />
FIFO setting is larger than 16 bytes. However, the <strong>TM</strong>-<strong>U220</strong> will have enough remaining receive buffer<br />
space to prevent data loss at bufferfull state when DIP SW1-2 is Off regardless of the setting of MemSW<br />
8-7.<br />
The “Byte number <strong>fr</strong>om buffer full to release full state” is larger than <strong>TM</strong>-U210. It is for<br />
improvement. However, you should pay attention to the following:<br />
6.1.4.1 Effect on the application when condition of buffer full is changed<br />
The time <strong>fr</strong>om buffer empty to buffer full becomes longer. However, there are no cases in which<br />
the Host PC watches the time. Therefore, there should be no problem.<br />
6-4 Notices for Replacement of the <strong>TM</strong>-U210/<strong>TM</strong>-U300 Rev. D
<strong>TM</strong>-<strong>U220</strong> <strong>Technical</strong> <strong>Reference</strong> Guide<br />
6.1.4.2 Effect on the application in the condition of release full state<br />
The time <strong>fr</strong>om buffer full to releasing full state becomes longer than for the <strong>TM</strong>-U210. There is a<br />
possibility that the application gets a time-out. For countermeasure, Memory switch<br />
[MemSW8-7] assigned for selection of buffer-full release condition, 256 bytes (default) of 138<br />
bytes. Therefore when the time-out occurs, set the memory switch [MemSW8-7] on.<br />
6.1.5 Accessories compatibility<br />
<strong>TM</strong>-<strong>U220</strong> can use same consumables as the <strong>TM</strong>-U210. However, the power supply unit isn’t<br />
compatible. The following sections describe these.<br />
6.1.5.1 Power supply unit<br />
The <strong>TM</strong>-<strong>U220</strong> can’t use the power supply unit of <strong>TM</strong>-U210 (PA-#### or PB-####.) The <strong>TM</strong>-<strong>U220</strong><br />
can use the power supply units only as described in the following table.<br />
<strong>TM</strong>-<strong>U220</strong> ANK model (Type A,B, D) <strong>TM</strong>-<strong>U220</strong> Multilingual model (Type A,B, D)<br />
AC Adapter C (which is packed with ANK model)<br />
or PS-180 (Which is provided as option)<br />
PS-180 (which is packed with Multilingual model)<br />
CAUTION:<br />
Don’t use the PA-#### or PB-#### power supply unit with <strong>TM</strong>-<strong>U220</strong>. Connection to an<br />
improper power source may cause fire or shock.<br />
6.1.5.2 Consumable compatibility<br />
<strong>TM</strong>-<strong>U220</strong> can use same consumables as the <strong>TM</strong>-U210 except the carbon roll paper (original + 2<br />
copies. <strong>TM</strong>-<strong>U220</strong> can’t print on carbon roll paper with 2 copies.)<br />
Consumables <strong>TM</strong>-U210 (Type A,B,D) <strong>TM</strong>-<strong>U220</strong> (Type A,B, D)<br />
Ribbon cassette ERC-38 (B), (P), (B/R) ERC-38 (B), (P), (B/R)<br />
6.1.6 Provided statuses<br />
<strong>TM</strong>-<strong>U220</strong> has same statuses as <strong>TM</strong>-U210; in addition, the <strong>TM</strong>-<strong>U220</strong> has the following status<br />
added. About the purpose of these, See “5.1 Various Status Categories (5-1 page).”<br />
❏<br />
Roll paper cover open/close status (and detector)<br />
When you replace the <strong>TM</strong>-U210 with the <strong>TM</strong>-<strong>U220</strong>, you have to set the Memory switch as<br />
described below. These settings make the <strong>TM</strong>-<strong>U220</strong> have almost the same as behavior as the<br />
<strong>TM</strong>-U210 statuses.<br />
❏<br />
❏<br />
Msw 8-5 “Cover open status mapping“ : OFF<br />
( Default: Paper end status)<br />
Msw 8-8 “Error select when cover is opened during printing“: OFF<br />
(Default: Auto recover error)<br />
Rev. D Notices for Replacement of the <strong>TM</strong>-U210/<strong>TM</strong>-U300 6-5
See the next tables for the behavior.<br />
The status behavior is as following two tables.<br />
Printer status bit<br />
Operation when paper-end<br />
Off-line<br />
Paperout<br />
LED<br />
U210<br />
Waiting<br />
on-line<br />
recovery<br />
1) Paper end occurs. OFF line ON OFF --<br />
2) Operator opens the cover for<br />
setting a paper roll.<br />
OFF line ON OFF --<br />
Cover<br />
open<br />
This printer doesn’t have<br />
cover open sensor.<br />
Therefore, there are no<br />
status.<br />
ASB(Auto Status Back)<br />
notification does not<br />
occur because status did<br />
not change.<br />
3) Operator installed paper roll<br />
then closed cover.<br />
4) Type B,D: Operator pressed<br />
FEED SW when paper out LED<br />
blinks.<br />
Type A: After approx.500msec.<br />
passed.<br />
OFF line OFF waiting<br />
on-line<br />
recover<br />
On line OFF OFF --<br />
--<br />
ASB(Auto Status Back)<br />
notification occurs<br />
because status is<br />
changed.<br />
Printer status bit <strong>U220</strong> (Msw 8-5: OFF) <strong>U220</strong> (Msw 8-5: ON)<br />
Operation when paper-end<br />
Off-line<br />
Paperout<br />
LED<br />
Waiting<br />
on-line<br />
recovery<br />
Cover<br />
open<br />
Off-line<br />
Paperout<br />
LED<br />
Waiting<br />
on-line<br />
recovery<br />
Cover<br />
open<br />
1) Paper end occurs. OFF line ON -- OFF OFF line ON -- OFF<br />
2) Operator opens the cover for<br />
setting a paper roll.<br />
3) Operator installed paper roll<br />
then closed cover.<br />
OFF line ON -- OFF OFF line ON -- ON<br />
On line OFF -- OFF On line OFF -- OFF<br />
The mapping of cover open status is as following two tables.<br />
Printer status bit<br />
U210<br />
This “Cover open” means;<br />
Off: Cover is closed<br />
On: Cover is opened<br />
Operation when paper-end<br />
Off-line<br />
Paperout<br />
LED<br />
Waiting<br />
on-line<br />
Cover<br />
open<br />
Operation when cover open<br />
Off-line<br />
Paperout<br />
Waiting<br />
on-line<br />
Cover<br />
open<br />
Cover open OFF OFF OFF --<br />
Cover close OFF OFF OFF --<br />
Printer status bit <strong>U220</strong> (Msw 8-5: OFF) <strong>U220</strong> (Msw 8-5: ON)<br />
Operation when paper-end<br />
Off-line<br />
Paperout<br />
LED<br />
Waiting<br />
on-line<br />
Cover<br />
open<br />
Off-line<br />
Paperout<br />
Waiting<br />
on-line<br />
Cover<br />
open<br />
Cover open OFF ON -- OFF OFF OFF -- ON<br />
Cover close OFF OFF -- OFF OFF OFF -- OFF<br />
6-6 Notices for Replacement of the <strong>TM</strong>-U210/<strong>TM</strong>-U300 Rev. D
<strong>TM</strong>-<strong>U220</strong> <strong>Technical</strong> <strong>Reference</strong> Guide<br />
You don't have to be a<strong>fr</strong>aid when you use the printer with OPOS or Advanced Printer Driver<br />
(APD) and you set the memory switch as [MemSW 8-5: OFF], [MemSW 8-8: OFF]. Because the<br />
status behavior normally doesn't affect your application.<br />
When you use the printer with ESC/POS commands (when you control printer without any<br />
driver), read the sentences below:<br />
The <strong>TM</strong>-U210 uses the "waiting on-line recover" bit in ASB status (the bit may indicate "0" or<br />
"1"); however, the <strong>TM</strong>-<strong>U220</strong> does not use the bit (the bit is always "0"). Because the <strong>TM</strong>-<strong>U220</strong><br />
recovers to online when the cover is closed (cover is closed is detected by the cover open<br />
detector.) Therefore, if your application program watches the bit, confirm that it doesn't affect<br />
the performing of program.<br />
By the way, the ASB data transmitted timing of <strong>TM</strong>-<strong>U220</strong> is same as <strong>TM</strong>-U210. You don't have to<br />
be a<strong>fr</strong>aid when your application program doesn’t watch the bit.<br />
Note:<br />
The "waiting on-line recover" is a status which is constructed by a bit in ASB (Auto Status Back) data.<br />
The status is for telling that the printer is not prepared to print (roll paper cover isn't closed, etc...) to the<br />
host PC. The status tells that the preparation done by the host PC is canceled. This status is canceled by<br />
action of the FEED button or host PC. These canceling actions must be executed after the roll paper is<br />
installed and roll paper cover is closed.<br />
The "waiting on-line recover"bit of <strong>TM</strong>-<strong>U220</strong> is always "0," because the <strong>TM</strong>-<strong>U220</strong> can tell "ready for<br />
printing (roll papaer is installed and roll paper cover is closed )" to the host PC.<br />
6.1.7 Use for Journal<br />
<strong>TM</strong>-<strong>U220</strong> Type A is able to be used for journal as <strong>TM</strong>-U210 (Type A.) However, notice following<br />
item when you replace the <strong>TM</strong>-U210 with the <strong>TM</strong>-<strong>U220</strong>.<br />
❏<br />
<strong>TM</strong>-U210 (Type D) can print on carbon roll paper with 2 copies; however, the <strong>TM</strong>-<strong>U220</strong> can<br />
print on carbon roll paper with 1 copies, not 2 copies.<br />
6.1.8 New functions added<br />
6.1.8.1 Wall hanging<br />
The <strong>TM</strong>-<strong>U220</strong> can be installed on a wall. The installing requires an option, the “WH-10.“ (The<br />
schedule is TBD.)<br />
6.1.8.2 NV bit-image<br />
The <strong>TM</strong>-<strong>U220</strong> can print bit-images on roll paper. See “5.4 NV Bit-image Printing (5-8 page)” for<br />
details.<br />
6.1.8.3 User NV memory<br />
The <strong>TM</strong>-<strong>U220</strong> can store some text data. See “5.3 NV memory (5-6 page)” for details.<br />
Rev. D Notices for Replacement of the <strong>TM</strong>-U210/<strong>TM</strong>-U300 6-7
6.1.8.4 Memory Switch and memory switch setup mode<br />
The <strong>TM</strong>-<strong>U220</strong> has a Memory switch which is a software DIP switch. The memory switch setup<br />
mode is for adjusting the memory switches by printer only (No host PC needed.) See “3.4.3<br />
Memory Switches (3-17 page)” and “3.4.4 Memory Switch Setup Mode (3-19 page)” for detail.<br />
6.1.9 Driver compatibility<br />
This section informs you the compatibility and notices for replacing.<br />
6.1.9.1 Advanced Printer Driver<br />
The <strong>TM</strong>-<strong>U220</strong> has compatibility with the <strong>TM</strong>-U210 in APD. Therefore, the <strong>TM</strong>-U210 Advanced<br />
Printer Driver can drive the <strong>TM</strong>-<strong>U220</strong>. However, the print margin is little different <strong>fr</strong>om the<br />
original output, and the <strong>TM</strong>-U210 driver can’t use NV memory functions. See “6.1.1 About<br />
printing format compatibility (6-1 page)” and “6.1.8 New functions added (6-7 page)” for the<br />
differences.<br />
6.1.9.2 OPOS<br />
<strong>TM</strong>-<strong>U220</strong> has compatibility with the <strong>TM</strong>-U210 in OPOS. Therefore, the <strong>TM</strong>-U210 OPOS can<br />
drive the <strong>TM</strong>-<strong>U220</strong>. However, the print margin is a little different <strong>fr</strong>om the original output, and<br />
the <strong>TM</strong>-U210 driver can’t use NV memory functions. See “6.1.1 About printing format<br />
compatibility (6-1 page)” and “6.1.8 New functions added (6-7 page)” for the differences.<br />
6.1.9.3 ESC/POS command (Direct control)<br />
The <strong>TM</strong>-<strong>U220</strong> has compatibility with the <strong>TM</strong>-U210 in ESC/POS commands. Therefore, a<br />
program source for the <strong>TM</strong>-U210 can drive the <strong>TM</strong>-<strong>U220</strong>. However, the print margin is a little<br />
different <strong>fr</strong>om original output. See “6.1.1 About printing format compatibility (6-1 page)” for the<br />
difference.<br />
6.2 For Replacement of the <strong>TM</strong>-U300<br />
6.2.1 About Printing format compatibility<br />
The <strong>TM</strong>-<strong>U220</strong> can print almost the same printing result as the <strong>TM</strong>-U210/<strong>TM</strong>-U300. This section<br />
describes the reasons which are printing area compatibility, character compatibility, and top<br />
margin compatibility (cutting position.)<br />
6-8 Notices for Replacement of the <strong>TM</strong>-U210/<strong>TM</strong>-U300 Rev. D
<strong>TM</strong>-<strong>U220</strong> <strong>Technical</strong> <strong>Reference</strong> Guide<br />
6.2.1.1 Printing area<br />
The <strong>TM</strong>-<strong>U220</strong> has almost the same printing area as the <strong>TM</strong>-U300 as shown in the following table<br />
and figures. Therefore, the <strong>TM</strong>-<strong>U220</strong> can print same contents as the <strong>TM</strong>-U300 without any<br />
adjustment of original control sources.<br />
Printing areaItem <strong>TM</strong>-U300 (Type A,B, C, D) <strong>TM</strong>-<strong>U220</strong> (Type A,B, D)<br />
(when 76mm paper using)<br />
Print width<br />
63.5mm<br />
(200dots, 400 position)<br />
63.34mm<br />
(200dots,400position)<br />
Left margin 6mm 6.8mm<br />
Right margin 6.5mm 5.8mm<br />
This value is reference value.<br />
76 mm<br />
76 mm<br />
63.5 mm<br />
63.34 mm<br />
Printable area<br />
Printable area<br />
6 mm<br />
6.5 mm<br />
6.8 mm<br />
5.8 mm<br />
<strong>TM</strong>-U300<br />
<strong>TM</strong>-<strong>U220</strong> (When using 76mm roll paper)<br />
These values are reference values<br />
Printing area and margins<br />
6.2.1.2 Characters<br />
The <strong>TM</strong>-<strong>U220</strong> has almost the same character spec as the <strong>TM</strong>-U300. Therefore, the <strong>TM</strong>-<strong>U220</strong> can<br />
print the same contents as the <strong>TM</strong>-U300 without adjusting any original control sources.<br />
Character spec <strong>TM</strong>-U300 (Type A,B, C, D) <strong>TM</strong>-<strong>U220</strong> (Type A,B, D)<br />
Character<br />
par line<br />
(CPI)<br />
Font A (9 x 9) 33 cpl 33 (35) cpl<br />
Font B (7 x 9) 40 cpl 40 (42) cpl<br />
Kanji (16 x 16) 25 (22) cpl 25 (22) cpl<br />
Character<br />
width<br />
Font A (9 x 9) 1.6 x 3.1 1.6 x 3.1<br />
Font B (7 x 9) 1.2 x 3.1 1.2 x 3.1<br />
Kanji (16 x 16) 2.7 x 2.7 2.7 x 2.7<br />
Character configuration Code page 0 to 5 Code page 0 to 8, and 19 to<br />
26 and code page 16, 17, 18<br />
Note:<br />
The character per line for Font A, B can be changed by DIP SW2-1.<br />
The cpl of the Kanji character font can be changed by ESC/POS command. (default:22cpl to 25cpl)<br />
Rev. D Notices for Replacement of the <strong>TM</strong>-U210/<strong>TM</strong>-U300 6-9
6.2.1.3 Cutting position <strong>fr</strong>om print start position<br />
The <strong>TM</strong>-<strong>U220</strong> has almost the same distance <strong>fr</strong>om the auto cut position to the print start position<br />
as the <strong>TM</strong>-U300. Therefore the top margin is same as previous one when you replace the<br />
<strong>TM</strong>-U300 with the <strong>TM</strong>-<strong>U220</strong> with an autocutter. In other cases, please refer the table and figures<br />
below.<br />
Cutting position <strong>TM</strong>-U300 (Type A,B, C, D) <strong>TM</strong>-<strong>U220</strong> (Type A,B, D)<br />
A/C position to print start position 36mm 27mm<br />
Manual cut position to print start<br />
position<br />
26mm (type A, B)<br />
28mm (type C, D)<br />
Type D: 22.1mm<br />
TypeA,B: 34.9mm<br />
Paper feed direction<br />
Auto cut position line<br />
36 mm<br />
26 mm (Type A, B)<br />
28 mm (Type C, D)<br />
Manual cut position line<br />
Print start position line<br />
<strong>TM</strong>-U300 (Type A, B, C, D)<br />
Paper feed direction<br />
27 mm<br />
34.9 mm<br />
Manual cut position line<br />
Auto cut position line<br />
<strong>TM</strong>-<strong>U220</strong> (Type A, B)<br />
(When using 76mm roll paper)<br />
Print start position line<br />
Paper feed direction<br />
<strong>TM</strong>-<strong>U220</strong> (Type D)<br />
(When using 76mm roll paper)<br />
22.1 mm<br />
Manual cut position line<br />
Print start position line<br />
These values are reference value<br />
6-10 Notices for Replacement of the <strong>TM</strong>-U210/<strong>TM</strong>-U300 Rev. D
<strong>TM</strong>-<strong>U220</strong> <strong>Technical</strong> <strong>Reference</strong> Guide<br />
6.2.2 Cutting Method<br />
The <strong>TM</strong>-<strong>U220</strong> (Type A, B) has auto cutting with partial cut or full cut method. These methods<br />
are switched by user operation. (See “3.4.7 Select Autocutter action (3-26 page)” for detail.)<br />
However, the partial cut method is little different <strong>fr</strong>om the <strong>TM</strong>-U300. The <strong>TM</strong>-U300 can select<br />
the partial cut method <strong>fr</strong>om Driver or ESC/POS command control. There are two partial cut<br />
methods, one is three points left method, the other is one point left uncut.<br />
6.2.3 Dimensions<br />
Some dimensions ofthe <strong>TM</strong>-<strong>U220</strong> are smaller thanthose of the <strong>TM</strong>-U300 except Type D.<br />
Therefore, the <strong>TM</strong>-<strong>U220</strong> can be installed in the same space as a <strong>TM</strong>-U300.<br />
<strong>TM</strong>-U300<br />
<strong>TM</strong>-<strong>U220</strong><br />
Dimensions<br />
(W x D x H)<br />
Type A: 170 x 288 x 183 160 x 286 x 158<br />
Type B: 170 x 253 x 148 160 x 248 x 139<br />
Type C: 158 x 295 x 145 --<br />
Type D: 158 x 235 x 125 160 x 248 x 139<br />
See “1.7.1 External Dimensions and Mass (1-17 page)” for details.<br />
6.2.4 Receive buffer size<br />
This topic is for serial model.<br />
The receive buffer size of the <strong>TM</strong>-<strong>U220</strong> can be changed as shown in the following table.<br />
Product Receive buffer capacity Condition of<br />
buffer full<br />
Condition of<br />
release full<br />
state<br />
Byte number <strong>fr</strong>om buffer full to<br />
release full state<br />
<strong>TM</strong>-U300<br />
40 bytes<br />
(DIP SW1-2 is On)<br />
Buffer space is<br />
10 bytes<br />
Buffer space is<br />
20 bytes<br />
10 bytes<br />
(ANK: DIP SW1-2 is Off)<br />
1K bytes<br />
(Multilingual: DIP SW1-2 is Off)<br />
512 bytes<br />
<strong>TM</strong>-<strong>U220</strong><br />
40 bytes<br />
(DIP SW1-2 is On)<br />
Buffer space is<br />
16 bytes<br />
Buffer space is<br />
26 bytes<br />
10 bytes<br />
(Regardless of MemSW8-7)<br />
4K bytes<br />
(DIP SW1-2 is Off)<br />
(default)<br />
Buffer space is<br />
128 bytes<br />
Buffer space is<br />
128 bytes<br />
Buffer space is<br />
256 bytes<br />
Buffer space is<br />
138 bytes<br />
128 bytes<br />
(MemSW8-7:OFF) (default)<br />
10 bytes<br />
(MemSW8-7: ON)<br />
Note:<br />
The receive buffer of <strong>TM</strong>-U300 may cause lost data at bufferfull state when there is no FIFO setting, or the<br />
FIFO setting is larger than 10 bytes. However, the <strong>TM</strong>-<strong>U220</strong> will have enough remaining receive buffer<br />
space to prevent data loss at bufferfull state when DIP SW1-2 is Off regardless of the setting of MemSW<br />
8-7.<br />
Rev. D Notices for Replacement of the <strong>TM</strong>-U210/<strong>TM</strong>-U300 6-11
The “Byte number <strong>fr</strong>om buffer full to release full state” is larger than <strong>TM</strong>-U300. It is for<br />
improvement.<br />
However, you should pay attention to the following:<br />
6.2.4.1 Effect to the application when condition of buffer full is changed<br />
The time <strong>fr</strong>om buffer empty to buffer full becomes longer. However, there are no cases in which<br />
the host PC watches the time; therefore, there should be no problem.<br />
6.2.4.2 Effect to the application when condition of release full state<br />
The time <strong>fr</strong>om buffer full to releasing full state becomes longer than for the <strong>TM</strong>-U300. There is a<br />
possibility that the application gets a time-out. For countermeasure, Memory switch<br />
[MemSW8-7] is assigned for selection of buffer-full release condition, 256 bytes (default) of 138<br />
bytes. Therefore when the time-out occurs, set the memory switch [MemSW8-7] to on.<br />
6.2.5 Accessories compatibility<br />
<strong>TM</strong>-<strong>U220</strong> can use same consumables as the <strong>TM</strong>-U300. However, the power supply unit isn’t<br />
compatible. The following sections describe these.<br />
6.2.5.1 Power supply unit<br />
<strong>TM</strong>-<strong>U220</strong> can’t use the power supply unit of <strong>TM</strong>-U300 (PA-#### or PB-####.) The <strong>TM</strong>-<strong>U220</strong> can<br />
use the power supply units only as described in the following table.<br />
<strong>TM</strong>-<strong>U220</strong> ANK model (Type A, B, D) <strong>TM</strong>-<strong>U220</strong> Multilingual model (Type A, B, D)<br />
AC Adapter C (which is packed with ANK model)<br />
or PS-180 (Which is provided as option)<br />
PS-180 (which is packed with Multilingual model)<br />
CAUTION:<br />
Don’t use the PA-#### or PB-#### power supply unit with <strong>TM</strong>-<strong>U220</strong>. Connection to an<br />
improper power source may cause fire or shock.<br />
6.2.5.2 Consumables compatibility<br />
<strong>TM</strong>-<strong>U220</strong> can use same consumables as the <strong>TM</strong>-U300 except a carbon roll paper (original + 2<br />
copies. The <strong>TM</strong>-<strong>U220</strong> can’t print on carbon roll paper with 2 copies.)<br />
Consumables <strong>TM</strong>-U300 (Type A, B, C, D) <strong>TM</strong>-<strong>U220</strong> (Type A, B, D)<br />
Ribbon cassette ERC-38 (P), (B/R) ERC-38 (B), (P), (B/R)<br />
6-12 Notices for Replacement of the <strong>TM</strong>-U210/<strong>TM</strong>-U300 Rev. D
<strong>TM</strong>-<strong>U220</strong> <strong>Technical</strong> <strong>Reference</strong> Guide<br />
6.2.6 Provided statuses and detectors<br />
<strong>TM</strong>-<strong>U220</strong> has same statuses as <strong>TM</strong>-U210/<strong>TM</strong>-U300. In addition, the <strong>TM</strong>-<strong>U220</strong> has new statuses.<br />
The following sections describe them.<br />
6.2.6.1 Newly added Status<br />
The following statuses have been added for the <strong>TM</strong>-<strong>U220</strong>. About the use of these statuses , See<br />
“5.1 Various Status Categories (5-1 page).”<br />
❏<br />
❏<br />
Roll paper cover open/close status<br />
Roll paper near-end status (When equipped with a near-end detector [Factory option])<br />
6.2.7 Use for Journal<br />
<strong>TM</strong>-<strong>U220</strong> Type A is able to be used for journal as <strong>TM</strong>-U300 (Type A, C.) However, notice the<br />
following item when you replace the <strong>TM</strong>-300 with the <strong>TM</strong>-<strong>U220</strong>.<br />
❏<br />
The <strong>TM</strong>-U300 can print on carbon roll paper with 2 copies; however, the <strong>TM</strong>-<strong>U220</strong> can print<br />
carbon roll paper with 1 copies, not 2 copies.<br />
6.2.8 Added new functions<br />
6.2.8.1 Wall hanging<br />
The <strong>TM</strong>-<strong>U220</strong> can be installed on a wall. The installation requires an option, the “WH-10.“ (The<br />
schedule is TBD.)<br />
6.2.8.2 NV bit-image<br />
The <strong>TM</strong>-<strong>U220</strong> can print bit-image on roll paper. See “5.4 NV Bit-image Printing (5-8 page)” for<br />
detail.<br />
6.2.8.3 User NV memory<br />
The <strong>TM</strong>-<strong>U220</strong> can store some text data. See “5.3 NV memory (5-6 page)” for detail.<br />
6.2.8.4 Memory Switch and Memory Switch setting mode<br />
The <strong>TM</strong>-<strong>U220</strong> has a memory switch ,which is a software DIP switch. The memory switch setting<br />
mode is for adjusingt the memory switches by printer only (No need for a host PC.) See “3.4.3<br />
Memory Switches (3-17 page)” and “3.4.4 Memory Switch Setup Mode (3-19 page)” for details.<br />
6.2.9 Driver compatibility<br />
This section informs you the compatibility and notices for replacing.<br />
Rev. D Notices for Replacement of the <strong>TM</strong>-U210/<strong>TM</strong>-U300 6-13
6.2.9.1 Advanced Printer Driver<br />
The <strong>TM</strong>-<strong>U220</strong> does not have compatibility with the <strong>TM</strong>-U300 in the Advanced Printer Driver<br />
(APD). Therefore, the <strong>TM</strong>-U300 APD can’t drive the <strong>TM</strong>-<strong>U220</strong>. However, you can print almost<br />
the same output as the <strong>TM</strong>-U300 APD by using the <strong>TM</strong>-<strong>U220</strong> APD. The print margin is little<br />
different <strong>fr</strong>om original output. See “6.2.1 About Printing format compatibility (6-8 page)” for the<br />
difference.<br />
6.2.9.2 OPOS<br />
<strong>TM</strong>-<strong>U220</strong> does not have compatibility with the <strong>TM</strong>-U210/<strong>TM</strong>-U300 in OPOS. Therefore,<br />
<strong>TM</strong>-U210/<strong>TM</strong>-U300 OPOS can’t drive <strong>TM</strong>-<strong>U220</strong>. However, you can replace the printer module<br />
easily in OPOS. You only have to change the printer device to <strong>TM</strong>-U210 <strong>fr</strong>om other printer.<br />
About the difference of print margin, see “6.2.1 About Printing format compatibility (6-8 page).”<br />
6.2.10 ESC/POS command (Direct control)<br />
The <strong>TM</strong>-<strong>U220</strong> has some compatibility with the <strong>TM</strong>-U300 in ESC/POS commands. Therefore, a<br />
program source for the <strong>TM</strong>-U300 may drive the <strong>TM</strong>-<strong>U220</strong>. See also “6.2.1 About Printing format<br />
compatibility (6-8 page)” for the difference of print margin.<br />
6-14 Notices for Replacement of the <strong>TM</strong>-U210/<strong>TM</strong>-U300 Rev. D
<strong>TM</strong>-<strong>U220</strong> <strong>Technical</strong> <strong>Reference</strong> Guide<br />
Appendix A<br />
Comparison table for <strong>TM</strong>-<strong>U220</strong>/U210/U300<br />
<strong>TM</strong>-U300 (Type A, B, C, D) <strong>TM</strong>-U210 (Type A, B, D) <strong>TM</strong>-<strong>U220</strong> (Type A, B, D)<br />
Print specification Print method Serial 9 pin<br />
Bi-direction, logical seeking<br />
Paper supply<br />
functions<br />
Paper<br />
specification<br />
<strong>TM</strong>-U300 (Type A, B, C,<br />
D) <strong>TM</strong>-U210 (Type A, B, D) <strong>TM</strong>-<strong>U220</strong> (Type A, B, D)<br />
Roll Paper install method Paper roll holding<br />
shaft<br />
Paper roll drop in
<strong>TM</strong>-<strong>U220</strong> <strong>Technical</strong> <strong>Reference</strong> Guide<br />
<strong>TM</strong>-U300 (Type A, B, C, D) <strong>TM</strong>-U210 (Type A, B, D) <strong>TM</strong>-<strong>U220</strong> (Type A, B, D)<br />
Take up unit Auto-take up (type A, C) Auto-take up (type A)
<strong>TM</strong>-U300 (Type A, B, C,<br />
D) <strong>TM</strong>-U210 (Type A, B, D) <strong>TM</strong>-<strong>U220</strong> (Type A, B, D)<br />
Applicable Power<br />
supply unit<br />
For North America PA-6509 or PB-6509 PB-6509 For ANK model: AC Adapter C<br />
which is in carton box.<br />
For Europe (Germany) PA-6510 or PB-6510 PB-6510<br />
or PS-180<br />
For Europe (U.K.) PA-6511 or PB-6511 PA-6511<br />
For Multi-language model: PS-180.<br />
Australia PA-6513 or PB-6513 PA-6513<br />
Dimensions<br />
(W x D x H)<br />
Type A;<br />
170 x 288 x 183<br />
Type A;<br />
160 x 295 x 160<br />
Type A: 160x286x158<br />
Type B: 170 x 253 x 148 Type B; 160 x 248 x 150 Type B: 160x248x139,<br />
Type C;<br />
158 x 295 x 145<br />
-- --<br />
Type D;<br />
158 x 235 x 125<br />
Type D;<br />
160 x 248 x 133<br />
Type D: 160 x 248 x 139<br />
Printer tray of IR option can be used.<br />
Burn-resistant grade of case V-0 V-0 V-0<br />
Install Horizontal (max. slant<br />
15 degree)<br />
and Wall hanging<br />
possible.(Type B, D)<br />
Horizontal (max. slant<br />
15 degree)<br />
Horizontal (max. slant 15 degree)<br />
and Wall hanging possible.(Type B, D)<br />
A-4 Comparison table for <strong>TM</strong>-<strong>U220</strong>/U210/U300 Rev. D
<strong>TM</strong>-<strong>U220</strong> <strong>Technical</strong> <strong>Reference</strong> Guide<br />
Appendix B<br />
How to Install the Printer on a Wall with the WH-10<br />
WH-10 is a option for the <strong>TM</strong> printer series, with it you can install a <strong>TM</strong>-<strong>U220</strong> on a wall. This<br />
section describes how to install wall hanging <strong>TM</strong>-<strong>U220</strong>. See the “WH-10 installation Manual“ for<br />
details.<br />
B.1 The Procedure<br />
B.1.1 Precautions<br />
❏<br />
Static electricity may cause cut paper to adhere to the printer case.<br />
(This static electricity will not affect the operation of the printer.)<br />
B.1.2 Unpacking<br />
Open the package and confirm that it contains all of the parts listed in the illustration. If any<br />
parts are missing or damaged, please contact your dealer for assistance.<br />
wall-mount (note: screws for<br />
wall-mount not included; see<br />
the installation section.)<br />
brackets (2 pieces)<br />
control panel sheets<br />
Please attach the appropriate sheet.<br />
installation manual screws for brackets (3×12)<br />
(4 pieces)<br />
screws (3×10)<br />
screws (3×6) (5 pieces)<br />
Note: 4 of the screws are<br />
used for attaching the<br />
brackets<br />
Note:<br />
roll paper holder for<br />
hanging bracket<br />
cam<br />
Other parts are packed for<br />
other <strong>TM</strong> printer series.<br />
Depending on the conditions during storage and shipping, some rust may form around the<br />
edges of the wall-mount or brackets. This may be removed with sandpaper.<br />
Rev. D How to Install the Printer on a Wall with the WH-10 B-1
B.1.3 Installation<br />
Before installation, be sure that the printer and all equipment connected to the printer is turned<br />
off. Detach all cables <strong>fr</strong>om the body of the printer.<br />
B.1.3.1 Installing the wall-mount<br />
CAUTION:<br />
The weight of the printer is approx. 2.5 kg for the <strong>TM</strong>-<strong>U220</strong> Type B, and approx. 2.3 kg for<br />
the <strong>TM</strong>-<strong>U220</strong> Type D. In order to insure that the wall-mount can properly support the<br />
weight of the printer, please secure it with screws appropriate to the type of wall the<br />
wall-mount is installed on. A screw with 4 mm diameter and length of 12 mm or more is<br />
recommended. The thickness of the wall should be 10 mm or more.<br />
Be sure to fasten the wall-mount securely to the wall with a screw in each of the ten<br />
holes.<br />
Before attaching the wall-mount, make sure enough space<br />
remains around the printer.<br />
84mm<br />
Make sure that there is enough space for opening the<br />
printer cover.<br />
Attach the wall-mount to the wall in the position illustrated to<br />
the right (with the area marked A at the top), and fasten<br />
securely with ten screws. These screws are not included;<br />
please use screws appropriate to the type of wall being<br />
used.<br />
B.1.4 Affixing the operation panel sheet<br />
A<br />
48mm<br />
When you mount the printer on the wall, the operation panel on the printer will be upside<br />
down. Therefore, operation panel sheets in the correct direction for wall mounting have been<br />
enclosed.<br />
Align the FEED switch mark on the operation panel sheet with the FEED switch mark on the<br />
printer operation panel and affix the operation panel sheet to the printer.<br />
B.1.5 Changing the roll-paper detector position<br />
Two types of screws are used with the WH-10: 3×6 and 3×10. The longest screw (3×12) will not<br />
be used.<br />
1. Open the roll paper cover.<br />
For a model that does not have a roll-paper near-end detector and does not need a change in<br />
paper width, jump to step 7. For a model that does not have a roll-paper near-end detector<br />
and needs a change in paper width, jump to step 3<br />
B-2 How to Install the Printer on a Wall with the WH-10 Rev. D
<strong>TM</strong>-<strong>U220</strong> <strong>Technical</strong> <strong>Reference</strong> Guide<br />
2. Loosen the detector adjustment screw a little bit by using a tool such as a coin and then<br />
loosen the screw gently by hand as until it stops. It must not be removed completely.<br />
detector<br />
adjustment<br />
screw<br />
3. Remove the two screws of the roll paper <strong>guide</strong>.<br />
roll paper<br />
<strong>guide</strong><br />
For a model that does not have a roll-paper near-end detector , jump to step 6.<br />
4. Rotate the detector lever on the roll paper <strong>guide</strong> to change its direction.<br />
Note:<br />
After the direction of the detector lever is changed, be sure that the cable is connected to the connector<br />
firmly.<br />
detector lever<br />
cable<br />
5. Tighten the detector adjustment screw.<br />
6. Align the hole on the roll paper <strong>guide</strong> with the hole on the roll paper holder to match your<br />
roll paper width and then tighten the screw (3×10).<br />
Note:<br />
You will not use one of the two screws that have been removed when the roll paper <strong>guide</strong> is removed.<br />
Please store it as an extra screw in case you need it.<br />
Rev. D How to Install the Printer on a Wall with the WH-10 B-3
oll paper<br />
<strong>guide</strong><br />
roll paper<br />
holder<br />
76 mm 70 mm 58 mm<br />
7. Align the hole on the roll paper holder for hanging bracket with the dowel on the roll paper<br />
<strong>guide</strong>. (For a model that needs a change of paper width, the hole to be used will be different<br />
to match your roll paper width.)<br />
Putting the screw (3×6) in the hole on the roll paper holder for hanging bracket makes it<br />
easier for you to tighten the screw in the next step.<br />
76 mm 70 mm 58 mm<br />
dowel<br />
roll paper holder for<br />
hanging bracket<br />
hole<br />
8. Tighten the screw (3×6) to fix the roll paper holder for hanging bracket and the base <strong>fr</strong>ame.<br />
B-4 How to Install the Printer on a Wall with the WH-10 Rev. D
<strong>TM</strong>-<strong>U220</strong> <strong>Technical</strong> <strong>Reference</strong> Guide<br />
9. Tighten the screw (3×10) to fix the roll paper holder for hanging bracket and the roll paper<br />
holder.<br />
10. Check that the brake arm is up as shown in the illustration below.<br />
brake arm<br />
CAUTION:<br />
Do not move the brake arm until the roll paper holder for hanging bracket is attached<br />
onto the base <strong>fr</strong>ame. Otherwise the arm part will be damaged.<br />
11. Insert the dowel of the cam into the hole of the platen <strong>fr</strong>ame.<br />
dowel<br />
hole<br />
platen <strong>fr</strong>ame<br />
Rev. D How to Install the Printer on a Wall with the WH-10 B-5
12. While you make sure the pin of the brake arm is in the groove on the inner side of the cam,<br />
rotate the cam along with the surface of the platen <strong>fr</strong>ame in the direction indicated by the<br />
arrow until it clicks into position.<br />
pin of brake arm<br />
13. Close the printer cover.<br />
Note:<br />
When closing the cover, push the middle of the printer indicated by the circle in the illustration below.<br />
B-6 How to Install the Printer on a Wall with the WH-10 Rev. D
<strong>TM</strong>-<strong>U220</strong> <strong>Technical</strong> <strong>Reference</strong> Guide<br />
14. Turn the printer over and then put it on a packing box as a platform horizontally.<br />
Fold this part inside and<br />
insert it into holes to<br />
assemble the package.<br />
15. See the “Installing the Brackets” section for attaching the brackets.<br />
Removing the cam<br />
While you push the cam through the hole on the platen <strong>fr</strong>ame with a pointed tool such as<br />
tweezers, rotate the cam in the upper direction to remove it.<br />
B.1.6 Installing the brackets<br />
Four different sets of screw holes are found on each bracket. Each hole is identified by a number;<br />
be sure to use the holes indicated in the instructions.<br />
Attach the upper bracket to the holes numbered “2” and the lower bracket to the holes<br />
numbered “1”using the screws (3×6).<br />
2<br />
2<br />
1<br />
1<br />
Rev. D How to Install the Printer on a Wall with the WH-10 B-7
B.1.7 Mounting the printer on the wall<br />
CAUTION:<br />
When mounting the printer, make sure that the wall-mount is securely fastened to the<br />
wall.<br />
When the brackets are attached properly for the <strong>TM</strong>-<strong>U220</strong>B/<strong>U220</strong>D, the printer’s<br />
operation panel will be on the top and the connector side on the bottom. If this is not<br />
the case, please see the installing the brackets section and reattach the brackets in the<br />
proper position.<br />
Slide the brackets into the slots of the wall-mount, starting with the top bracket.<br />
B-8 How to Install the Printer on a Wall with the WH-10 Rev. D
<strong>TM</strong>-<strong>U220</strong> <strong>Technical</strong> <strong>Reference</strong> Guide<br />
B.2 Exterior Overviews<br />
B.2.1 <strong>TM</strong>-<strong>U220</strong> (Type B)<br />
5<br />
146<br />
14<br />
Rev. D How to Install the Printer on a Wall with the WH-10 B-9
B.2.2 <strong>TM</strong>-<strong>U220</strong> (Type D)<br />
5<br />
146<br />
14<br />
B-10 How to Install the Printer on a Wall with the WH-10 Rev. D
<strong>TM</strong>-<strong>U220</strong> <strong>Technical</strong> <strong>Reference</strong> Guide<br />
Appendix C<br />
Character Code Table<br />
C.1 Page 0 (PC437: USA, Standard Europe)<br />
(International character set: when U.S. is selected.)<br />
Rev. D Character Code Table C-1
C.2 Page 1 (Katakana)<br />
C-2 Character Code Table Rev. D
<strong>TM</strong>-<strong>U220</strong> <strong>Technical</strong> <strong>Reference</strong> Guide<br />
C.3 Page 2 (PC850: Multilingual)<br />
Rev. D Character Code Table C-3
C.4 Page 3 (PC860: Portuguese)<br />
C-4 Character Code Table Rev. D
<strong>TM</strong>-<strong>U220</strong> <strong>Technical</strong> <strong>Reference</strong> Guide<br />
C.5 Page 4 (PC863: Canadian-French)<br />
Rev. D Character Code Table C-5
C.6 Page 5 (PC865: Nordic)<br />
C-6 Character Code Table Rev. D
<strong>TM</strong>-<strong>U220</strong> <strong>Technical</strong> <strong>Reference</strong> Guide<br />
C.7 Page 6 (Hiragana)<br />
This page is available on the Japanese model only.<br />
Rev. D Character Code Table C-7
C.8 Page 7 (One-pass printing Kanji characters)<br />
This page is available on the Japanese model only.<br />
C-8 Character Code Table Rev. D
<strong>TM</strong>-<strong>U220</strong> <strong>Technical</strong> <strong>Reference</strong> Guide<br />
C.9 Page 8 (One-pass printing Kanji characters)<br />
This page is available on the Japanese model only.<br />
Rev. D Character Code Table C-9
C.10 Page 16 (WPC1252)<br />
C-10 Character Code Table Rev. D
<strong>TM</strong>-<strong>U220</strong> <strong>Technical</strong> <strong>Reference</strong> Guide<br />
C.11 Page 17 (PC866: Cyrillic #2)<br />
Rev. D Character Code Table C-11
C.12 Page 18 (PC852: Latin2)<br />
C-12 Character Code Table Rev. D
<strong>TM</strong>-<strong>U220</strong> <strong>Technical</strong> <strong>Reference</strong> Guide<br />
C.13 Page 19 (PC858: Euro)<br />
Rev. D Character Code Table C-13
C.14 Page 20 (Thai character code 42)<br />
This page is available on the Thai model only.<br />
C-14 Character Code Table Rev. D
<strong>TM</strong>-<strong>U220</strong> <strong>Technical</strong> <strong>Reference</strong> Guide<br />
C.15 Page 21 (Thai character code 11)<br />
This page is available on the Thai model only.<br />
Rev. D Character Code Table C-15
C.16 Page 22 (Thai character code 13)<br />
This page is available on the Thai model only.<br />
C-16 Character Code Table Rev. D
<strong>TM</strong>-<strong>U220</strong> <strong>Technical</strong> <strong>Reference</strong> Guide<br />
C.17 Page 23 (Thai character code 14)<br />
This page is available on the Thai model only.<br />
Rev. D Character Code Table C-17
C.18 Page 24 (Thai character code 16)<br />
This page is available on the Thai model only.<br />
C-18 Character Code Table Rev. D
<strong>TM</strong>-<strong>U220</strong> <strong>Technical</strong> <strong>Reference</strong> Guide<br />
C.19 Page 25 (Thai character code 17)<br />
This page is available on the Thai model only.<br />
Rev. D Character Code Table C-19
C.20 Page 26 (Thai character code 18)<br />
This page is available on the Thai model only.<br />
C-20 Character Code Table Rev. D
<strong>TM</strong>-<strong>U220</strong> <strong>Technical</strong> <strong>Reference</strong> Guide<br />
C.21 Page 254 (Blank page)<br />
Rev. D Character Code Table C-21
C.22 Page 255 (Blank page)<br />
C-22 Character Code Table Rev. D
<strong>TM</strong>-<strong>U220</strong> <strong>Technical</strong> <strong>Reference</strong> Guide<br />
C.23 International Character Sets<br />
Country<br />
ASCII code (hexadecimal number)<br />
U.S.<br />
France<br />
Germany<br />
UK<br />
Denmark I<br />
Sweden<br />
Italy<br />
Spain I<br />
Japan<br />
Norway<br />
Denmark II<br />
Spain II<br />
Latin America<br />
Korea<br />
Rev. D Character Code Table C-23
C-24 Character Code Table Rev. D
<strong>TM</strong>-<strong>U220</strong> <strong>Technical</strong> <strong>Reference</strong> Guide<br />
Appendix D<br />
Power Supply Unit<br />
D.1 AC Adapter C<br />
This power supply unit can be used with the <strong>TM</strong>-<strong>U220</strong> ANK model only. When you use any<br />
other model of the <strong>TM</strong>-<strong>U220</strong>, please use PS-180.<br />
D.1.1 Case specifications<br />
❏ Size: 54 mm(D) × 114 mm(L) × 36 mm(H)<br />
{2.13 (D) × 4.49 (L) × 1.42" (H)}<br />
(excluding projections) Refer to the figure below.<br />
❏ Mass: Approx. 0.4kg (excluding the AC cable)<br />
❏ Material: Flame-resistance grade: V0<br />
❏ Color: Black (matte)<br />
Case specifications<br />
Rev. D Power Supply Unit D-1
D.2 PS-180<br />
This power supply unit can be used with all models of the <strong>TM</strong>-<strong>U220</strong>.<br />
D.2.1 Case specifications<br />
❏ Size: 68 mm(D) × 136 mm(L) × 32 mm(H)<br />
{2.68 (D) × 5.35 (L) × 1.26" (H)}<br />
(excluding projections) Refer to the figure below.<br />
❏ Mass: Approx. 0.4kg (excluding the AC cable)<br />
❏ Material: Flame-resistance grade: V0<br />
❏ Color: Black (matte)<br />
D.2.2 Usage cautions<br />
❏<br />
Case specifications<br />
AC cable Select an AC cable that satisfies the following conditions<br />
• Product safety standards<br />
• Plug with PE terminal<br />
❏ Ground connection Ground certainly for safety<br />
D-2 Power Supply Unit Rev. D
<strong>EPSON</strong><br />
SEIKO <strong>EPSON</strong> CORPORATION Printed in Japan