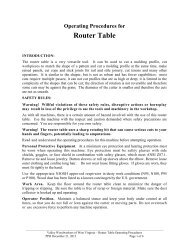
Mini Max MM20 Band S.. - Valley Woodworkers
Mini Max MM20 Band S.. - Valley Woodworkers
Mini Max MM20 Band S.. - Valley Woodworkers

Create successful ePaper yourself
Turn your PDF publications into a flip-book with our unique Google optimized e-Paper software.
looks like a gray sharpening stone that was turned into paste. It can be found at<br />
an auto parts store where both coarse and fine is available. Both grits are useful<br />
to polish trunnions, miter slots, and the kinds of roughness or binding often found<br />
on machine tools.<br />
MITER GAUGE AND SLOT<br />
If the miter gauge binds in the slot, slide it along the slot to find out where it<br />
binds. Use a fine file dragged along the edge of the slot. Then polish the slot and<br />
the miter gauge bar with some fine emery cloth. A piece of oak to back up the<br />
emery cloth will keep the repair flat and square. Frankly, a miter gauge is of very<br />
little use on a bandsaw so don’t waste too much time adjusting it.<br />
ADJUSTING THE FENCE<br />
Fence and Blade drift<br />
Blade drift means the blade isn’t cutting<br />
parallel to the fence. Every blade will<br />
cut in a slightly different manner and<br />
you may have to adjust the fence angle<br />
to compensate for this drift. To check<br />
blade drift, mark a straight line on a<br />
board 24" long, rip the board freehand<br />
while carefully following the line About<br />
halfway, through the cut, stop the saw<br />
and leave the board in place. Mark the<br />
side of the board on the saw table with<br />
a soft pencil. This line indicates the<br />
appropriate angle for the fence. Move and<br />
adjust the fence parallel to this line (and<br />
therefore parallel to the direction that the particular blade wants to cut).The fence<br />
angle may be adjusted by loosening the top bolt in the fence assembly. Pivot the<br />
fence about the roll pin and tighten the bolt. (SEE FIGURE 28 FENCE<br />
ADJUSTMENT BOLT).<br />
THROAT PLATE ADJUSTMENT<br />
The height of the throat plate is adjusted by 4 screws. A fine screwdriver may be<br />
used to adjust the plate absolutely flush to the table.(SEE FIGURE 29 THROAT<br />
PLATE ADJUSTMENT<br />
14