Headers and Footers - StudentZone - Roehampton
Headers and Footers - StudentZone - Roehampton
Headers and Footers - StudentZone - Roehampton

Create successful ePaper yourself
Turn your PDF publications into a flip-book with our unique Google optimized e-Paper software.
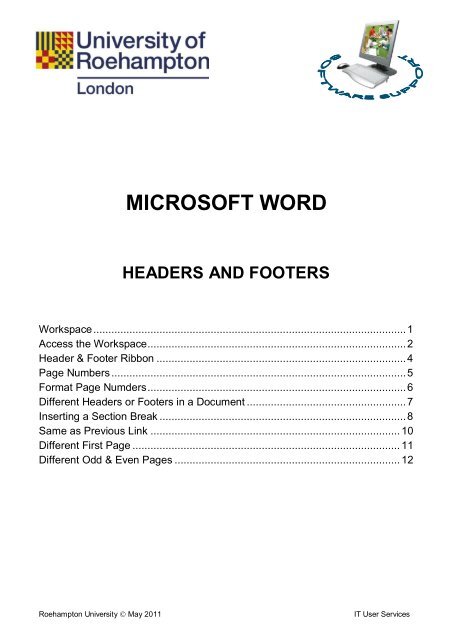
MICROSOFT WORD<br />
HEADERS AND FOOTERS<br />
Workspace ........................................................................................................ 1<br />
Access the Workspace ...................................................................................... 2<br />
Header & Footer Ribbon ................................................................................... 4<br />
Page Numbers .................................................................................................. 5<br />
Format Page Numders ...................................................................................... 6<br />
Different <strong>Headers</strong> or <strong>Footers</strong> in a Document ..................................................... 7<br />
Inserting a Section Break .................................................................................. 8<br />
Same as Previous Link ................................................................................... 10<br />
Different First Page ......................................................................................... 11<br />
Different Odd & Even Pages ........................................................................... 12<br />
<strong>Roehampton</strong> University May 2011<br />
IT User Services
Workspace<br />
The main point is that header <strong>and</strong> footer content inhabits a layer of the document that is separate<br />
from the main body. This is because headers <strong>and</strong> footers behave differently than your document's<br />
main content.<br />
1<br />
2<br />
3<br />
1<br />
1. The workspace includes the areas at the top <strong>and</strong> bottom of a document page <strong>and</strong> is specifically<br />
for header <strong>and</strong> footer content.<br />
2. After you have inserted a header or footer, these areas become active <strong>and</strong> editable; they are<br />
marked with a dashed line, as the diagram shows.<br />
3. When you add one header or footer, such as a page number or date, it appears on every page. In<br />
the case of page numbers, they're also programmed to be consecutive <strong>and</strong> to update themselves<br />
automatically when more pages are added.<br />
1
Access the Workspace<br />
1<br />
2<br />
1. On the Insert ribbon, go to the Header & Footer tool group.<br />
2. Click on the menu arrowhead next to either the Header button or the Footer button.<br />
3. On the drop-down menu there are Built-In styles if you want to use them.<br />
3<br />
4. Select the Edit Header option<br />
to open the workspace.<br />
4<br />
2
Header & Footer Ribbon<br />
1. After you open the workspace, the Header & Footer Tools ribbon will appear<br />
1<br />
2. On the Header & Footer tool group you can select a Built-In style as mentioned before.<br />
2<br />
4
Page Numbers<br />
1. On the Header & Footer tool group you can select the Page Numger tool, <strong>and</strong> then Top of Page<br />
or Bottom of Page depending on where you want the page number to appear.<br />
1<br />
2<br />
2. In the Top of Page or Bottom of Page sub-menu, there are a variety of Built-In styles.<br />
5
Format Page Numders<br />
1. On the Header & Footer tool group you can select the Page Numger tool, <strong>and</strong> then Format<br />
Page Numbers option on the sub-menu.<br />
1<br />
The Page Number Format dialogue<br />
box will appear.<br />
2<br />
3<br />
2. You can chose the style of numbers, i.e., 1, 2, 3, or a, b, c, etc.<br />
3. You can chose the starting point of the page numbering.<br />
6
Different <strong>Headers</strong> or <strong>Footers</strong> in a Document<br />
If you have a multipart document, you may want to create headers <strong>and</strong> footers that go with each part:<br />
<br />
<br />
<br />
For the cover page, you may want no page numbers at all <strong>and</strong> no header or footer text.<br />
For the table of contents, headers <strong>and</strong> footers should reflect this part.<br />
For chapters, headers can serve effectively as sign posts to readers reminding them of<br />
which chapter they are in.<br />
If you want unique headers <strong>and</strong> footers for each part, the first thing you need to do is to create<br />
section breaks between the document's parts.<br />
1<br />
1. A section break enables you to create a unique page layout for all the pages in that section. With<br />
this unique layout established, you can then set up the headers <strong>and</strong> footers for each section.<br />
7
Inserting a Section Break<br />
Always insert section breaks in the main body of the document, not within the header <strong>and</strong> footer<br />
workspace. Close the header <strong>and</strong> footer workspace before proceeding.<br />
1<br />
2<br />
3<br />
4<br />
1. Place the cursor where you want a new section to start.<br />
2. Open the Page Layout ribbon.<br />
3. Click the Breaks button.<br />
4. Under Section Breaks, click the Next Page option.<br />
8
5<br />
6<br />
7<br />
The section break means that what comes before it is one section, <strong>and</strong> what's after it is another<br />
section. So, with the section break inserted before chapter 1, all the front items — the cover page,<br />
table of contents, list of illustrations, <strong>and</strong> so on — becomes section 1, <strong>and</strong> all the remaining chapters<br />
become section 2.<br />
When you open the header <strong>and</strong> footer workspace, the markers include a section number to define<br />
the sections they belong to which help to keep you oriented.<br />
5. The footer is at the end of Section 1.<br />
6. The header is at the start of Section 2.<br />
7. You will see another tab: Same as Previous.<br />
Notes<br />
The actual section breaks in the document do not show automatically. You can reveal them by<br />
clicking the Show / Hide button on the Home ribbon.<br />
You can also set up section breaks if you want content to start on odd-numbered or even-numbered<br />
pages.<br />
9
Same as Previous Link<br />
By default, the Same as Previous option is connected ( as shown in the illustration below ) which<br />
means that the header content for the new section is linked or carried over from header content in the<br />
preceding section.<br />
1<br />
1. If you want the headers in the new section to be unique, you have to break this link to the<br />
preceding section before you type in the headers workspace.<br />
2. Go to the Header & Footer Tools ribbon.<br />
2<br />
3<br />
3. You will see the Link to Previous button is connected or engaged. Click it to turn it off <strong>and</strong> break<br />
the link to the preceding section. Then return to the workspace to type your header.<br />
10
Different First Page<br />
1. Use the Different First Page option to enable the header <strong>and</strong> footer areas to be different on the<br />
first page of a section from the rest of the pages in the same section.<br />
1<br />
2<br />
2. Take notice of the section's marker with the added text, First Page …<br />
3. Click the Next button on the Header & Footer Tools ribbon to edit the hearder <strong>and</strong> footer for the<br />
remaining pages of the section.<br />
3<br />
3<br />
11
Different Odd & Even Pages<br />
You can create headers <strong>and</strong> footers for odd <strong>and</strong> even pages. This puts the content on the outer edge<br />
of the page, like a book does for facing pages. If you're binding your document, you might want this<br />
format.<br />
To apply headers <strong>and</strong> footers to odd <strong>and</strong> even pages, go through the same process described<br />
earlier: Create document sections, tick the Different Odd & Even Pages option, break the links<br />
between the sections, <strong>and</strong> then add the header <strong>and</strong> footer content that you want in each section.<br />
12
Further Help<br />
IT Helpdesk<br />
Library; Ground Floor<br />
helpdesk@roehampton.ac.uk<br />
Online Learning<br />
24/7 Software Support<br />
http://studentzone.roehampton.ac.uk/softwaresupport<br />
Software Advisor<br />
Daniel Rukstelis<br />
d.rukstelis@roehampton.ac.uk<br />
13