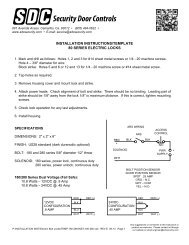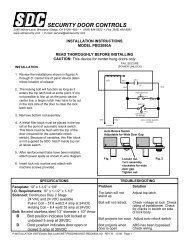
Installation - SDC Security Door Controls
Installation - SDC Security Door Controls
Installation - SDC Security Door Controls

You also want an ePaper? Increase the reach of your titles
YUMPU automatically turns print PDFs into web optimized ePapers that Google loves.
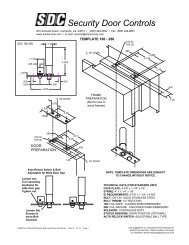
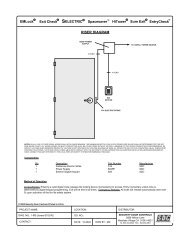
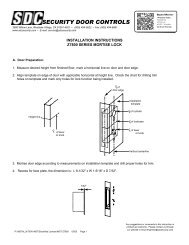
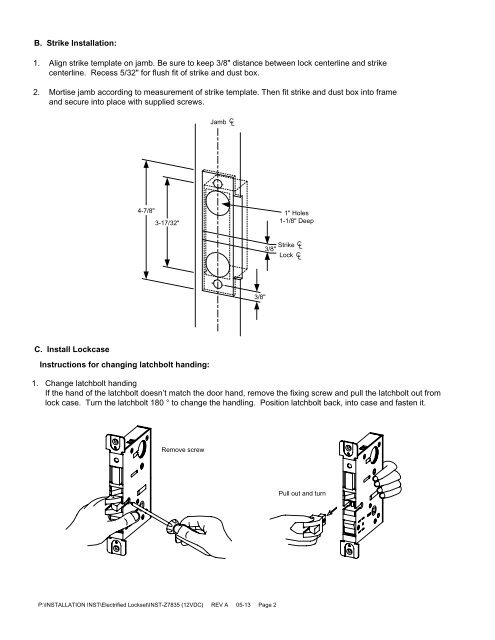
B. Strike <strong>Installation</strong>:<br />
1. Align strike template on jamb. Be sure to keep 3/8" distance between lock centerline and strike<br />
centerline. Recess 5/32" for flush fit of strike and dust box.<br />
2. Mortise jamb according to measurement of strike template. Then fit strike and dust box into frame<br />
and secure into place with supplied screws.<br />
Jamb C L<br />
4-7/8"<br />
3-17/32"<br />
1" Holes<br />
1-1/8" Deep<br />
Strike C<br />
3/8" L<br />
Lock C L<br />
3/8"<br />
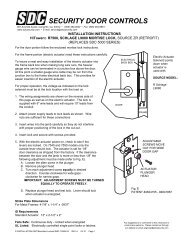
C. Install Lockcase<br />
Instructions for changing latchbolt handing:<br />
1. Change latchbolt handing<br />
If the hand of the latchbolt doesn’t match the door hand, remove the fixing screw and pull the latchbolt out from<br />
lock case. Turn the latchbolt 180 ° to change the handling. Position latchbolt back, into case and fasten it.<br />
Remove screw<br />
Pull out and turn<br />
P:\INSTALLATION INST\Electrified Lockset\INST-Z7835 (12VDC) REV A 05-13 Page 2