
You also want an ePaper? Increase the reach of your titles
YUMPU automatically turns print PDFs into web optimized ePapers that Google loves.
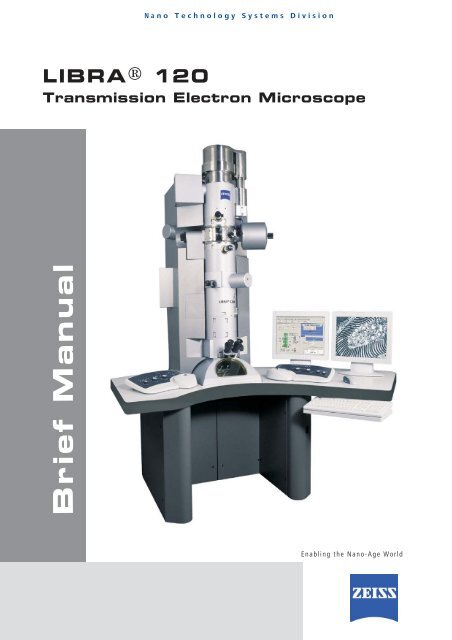
Brief Manual<br />
Nano Technology Systems Division<br />
LIBRA® <strong>120</strong><br />
Transmission Electron Microscope<br />
Enabling the Nano-Age World
User´s manual<br />
Nano Technology Systems Division<br />
LIBRA <strong>120</strong><br />
Operating Manual<br />
344200-0000-016
© Carl <strong>Zeiss</strong> NTS GmbH<br />
A Carl <strong>Zeiss</strong> SMT AG Company<br />
Carl-<strong>Zeiss</strong>-Str. 56<br />
73447 Oberkoch<strong>en</strong><br />
Germany<br />
This manual is designed for users (operators) who have be<strong>en</strong> trained in the use of<br />
the instrum<strong>en</strong>t by an authorized professional. Users of this instrum<strong>en</strong>t may not<br />
deviate from the instruction provided in this docum<strong>en</strong>tation.<br />
Carl <strong>Zeiss</strong> NTS GmbH holds all copyrights and rights of exploitation, including all<br />
translations of this material. The lic<strong>en</strong>se rights for the software provided with this<br />
instrum<strong>en</strong>t are noted in an agreem<strong>en</strong>t that becomes a perman<strong>en</strong>t part of the<br />
instrum<strong>en</strong>t file.<br />
No part of this docum<strong>en</strong>tation may be reproduced, edited, or provided to a third<br />
party without writt<strong>en</strong> permission from Carl <strong>Zeiss</strong> NTS GmbH.<br />
If the user modifies the instrum<strong>en</strong>t without the manufacturer´s cons<strong>en</strong>t, the<br />
manufacturer will not be liable for any damage that may result. Such modifications<br />
will also void the warranty.<br />
Carl <strong>Zeiss</strong> NTS GmbH reserves the right to terminate the user´s lic<strong>en</strong>se and sue for<br />
damages if the terms of this agreem<strong>en</strong>t are violated.<br />
Carl <strong>Zeiss</strong> NTS GmbH reserves the right to make modifications as part of the<br />
technical developm<strong>en</strong>t process.<br />
Carl <strong>Zeiss</strong> NTS GmbH<br />
A Carl <strong>Zeiss</strong> SMT AG Company<br />
Carl <strong>Zeiss</strong> Straße 56<br />
D-73447 Oberkoch<strong>en</strong><br />
GERMANY<br />
Tel: +497364/205991<br />
Fax: +497364/943226<br />
info-nts@smt.zeiss.com<br />
Carl <strong>Zeiss</strong> SMT Ltd.<br />
Coldhams Lane<br />
Cambridge CB1 3JS<br />
UK<br />
Tel: +44 1223/414166<br />
Fax: +44 1223/412776<br />
info-uk@smt.zeiss.com<br />
Carl <strong>Zeiss</strong> SMT Sarl.<br />
86, Av<strong>en</strong>ue du 18 juin 1940<br />
92500 Rueil-Malmaison<br />
France<br />
Tel: +33 1 41/39 92 10<br />
Fax: +33 1 41/39 92 29<br />
info-fr@smt.zeiss.com<br />
Carl <strong>Zeiss</strong> SMT Inc.<br />
One <strong>Zeiss</strong> Drive,Thornwood<br />
New York 10594<br />
USA<br />
Tel: +1 914 747 7700<br />
Fax: +1 914 747 7443<br />
info-usa@smt.zeiss.com
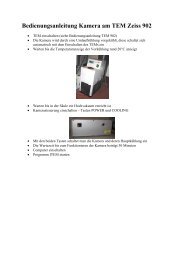
Brief Manual LIBRA <strong>120</strong><br />
1. EM System Turn-ON<br />
• Push the gre<strong>en</strong> button (On) at the console.<br />
• Start the EM PC.<br />
• Click on the icon WinTEM on the Desktop.<br />
• Type in user ID and password.<br />
2. Check Vacuum Readiness<br />
− Column, Gun, and Camera chamber<br />
are gre<strong>en</strong>.<br />
3. Turn On High T<strong>en</strong>sion<br />
• Op<strong>en</strong> Gun tab sheet.<br />
• Click on the icon HT On.<br />
− HT is ramping up to the selected<br />
high voltage step.<br />
4. Turn On Filam<strong>en</strong>t<br />
• Click on the icon Fil On.<br />
− The filam<strong>en</strong>t is ramping up according to the<br />
gun profile.<br />
• Adjust emission step until the emission curr<strong>en</strong>t<br />
is ≥ 1 µA.<br />
1
5. Check Status of the Specim<strong>en</strong> Holder<br />
• The holder must be inserted, otherwise the<br />
gun blanker cannot be op<strong>en</strong>ed.<br />
6. Op<strong>en</strong> Gun and Column Valve<br />
• Click on Column Valve Op<strong>en</strong> (if closed).<br />
− If not possible, remove holder from the airlock<br />
and insert it again.<br />
7. Check Status of the Beam Blanker<br />
• Click on the beam blanker icon that the frame<br />
around the icon is gone ⇒ Beam Blanker Off.<br />
− The status is also diplayed in the status bar<br />
and can be changed there.<br />
• Check also that no other device is blanking the<br />
beam externally.<br />
8. Retract Specim<strong>en</strong> Holder<br />
• Retract holder untill it stops (1) and turn it a<br />
few degrees to the left (2) that it stays retracted.<br />
− Make sure that WinTEM still recognizes the<br />
holder to be inserted.<br />
2
9. Check Mag and Ill Angle<br />
• Set mag to 10k and illumination angle to 0.5 mrad.<br />
☞<br />
NOTICE:<br />
If there is fluor<strong>en</strong>s<strong>en</strong>ce on the scre<strong>en</strong>, continue with point 12.<br />
If there is no fluor<strong>en</strong>s<strong>en</strong>ce on the scre<strong>en</strong>, continue with point 10.<br />
10. Retract Apertures<br />
• Retract spectrometer slit aperture.<br />
− Mostly the beam is visible on the scre<strong>en</strong>.<br />
− If so, continue with 11.<br />
• Retract objective aperture.<br />
• Retract cond<strong>en</strong>ser aperture.<br />
11. Calibrate Deflecting Systems<br />
• Select Img Shft and calibrate it with R in the<br />
right lower corner of the nav. box.<br />
• Select Calibrate All , if no fluores<strong>en</strong>ce is<br />
visible on the scre<strong>en</strong>.<br />
This way is recomm<strong>en</strong>ded, if the status of the<br />
LIBRA <strong>120</strong> is not known.<br />
3
12. Turn AIS Mode to Off<br />
• Click on AIS Off in the tab sheet TEM.<br />
− Display in the status bar.<br />
• Set brightness to 0.5 mrad.<br />
13. Select Magnification<br />
• Select mag 31.5 k with knob (3).<br />
M8<br />
M7<br />
M6<br />
M5<br />
2<br />
3<br />
14. Check Spot Position<br />
• Switch to Spot mode with button (20).<br />
• Calibrate spot with button Cal (25).<br />
• C<strong>en</strong>ter spot to index point with knobs (1,6).<br />
• Switch back to TEM illumination with button (20).<br />
M4<br />
M3<br />
M2<br />
M1<br />
20<br />
25<br />
5<br />
43<br />
30<br />
31<br />
1 6<br />
15. Insert Cond<strong>en</strong>ser Aperture<br />
• Turn cond<strong>en</strong>ser aperture holder to the 3. clickstop<br />
and c<strong>en</strong>ter the c<strong>en</strong>tral AIS aperture (37.5 µm).<br />
•<br />
4
16. Check Spectrum Position<br />
• Switch to EELS mode with button (23).<br />
− If the spectrum tip is not visible on the large<br />
scre<strong>en</strong>, start the magnetic reset as described<br />
in point 17.<br />
• Shift spectrum tip to the index point<br />
of the scre<strong>en</strong> with knobs (1, 6).<br />
• Switch to ESI mode with button (23).<br />
M4<br />
M3<br />
M2<br />
M1<br />
23<br />
43<br />
30 31<br />
1 6<br />
Index point<br />
17. Start Magnetic Reset<br />
• Click on Start Magnetic Reset to formate the<br />
OMEGA filter.<br />
− Only necessary, if spectrum is not visible<br />
on the scre<strong>en</strong>.<br />
− This can take 1-2minutes.<br />
18. Turn AIS Mode to Auto<br />
• Click on AIS Auto in the TEM tab sheet.<br />
− Display in the status bar.<br />
19. C<strong>en</strong>ter Spectrometer Entrance Aperture<br />
• Insert aperture (2. clickstop) and c<strong>en</strong>ter it to<br />
the large scre<strong>en</strong>.<br />
5
20. Adjust Spot<br />
• Increase magnification to 100k with knob (3)<br />
• Switch to Spot mode with button (20).<br />
• Increase spot size to 100 nm with knob (5).<br />
• Push Cal (25).<br />
• Shift spot to the index point with knobs (1, 6).<br />
M4<br />
M3<br />
M2<br />
M1<br />
20<br />
25<br />
5<br />
43<br />
30<br />
31<br />
1 6<br />
• Rec<strong>en</strong>ter spot to index point with knobs (1, 6).<br />
• Switch back to TEM mode with button (20)..<br />
21. C<strong>en</strong>ter Cond<strong>en</strong>ser Aperture<br />
• Click on AIS Off in the tab sheet TEM.<br />
− Display in the status bar.<br />
• C<strong>en</strong>ter cond<strong>en</strong>ser aperture (37.5 µm) to the<br />
large scre<strong>en</strong> mechanically.<br />
22. Insert Specim<strong>en</strong> Holder<br />
• Insert objective aperture (1. clickstop).<br />
− see point 25 for adjustm<strong>en</strong>t.<br />
• Lower mag to 50 k.<br />
• Move holder back into the column and look<br />
for a specim<strong>en</strong> detail.<br />
• C<strong>en</strong>ter detail to the index point.<br />
23. Adjust Euc<strong>en</strong>tric Height<br />
• Switch on Foc Aid with button (26).<br />
• Calibrate the objective l<strong>en</strong>s with button (25).<br />
− The sample is moving forth and back, if it is<br />
not in the euc<strong>en</strong>tric plane.<br />
• Adjust Z with the focus knob (4).<br />
M4<br />
M3<br />
M2<br />
M1<br />
25<br />
22<br />
26<br />
4<br />
5<br />
• Turn off Foc Aid with button (26).<br />
6
24. Check Illumination Tilt<br />
• Move a specim<strong>en</strong> detail to the scre<strong>en</strong> c<strong>en</strong>ter<br />
with the joystick.<br />
• Turn on the wobbler Objective in the group box<br />
Wobbler.<br />
• Minimize the oscillating movem<strong>en</strong>t of the sample<br />
with knobs (1, 6).<br />
• Turn off the wobbler with Off.<br />
25. Check Beam Alignm<strong>en</strong>t<br />
• Select Diff mode with button (22).<br />
• Set illumination angle (brightness)<br />
to 0.06 mrad (60 µrad) with knob (5).<br />
• Adjust diffraction spot to index point with<br />
knobs (1) and (6).<br />
• Activate Gun Tilt in the group box Alignm<strong>en</strong>t.<br />
− Gun Tilt is displayed on the hardpanel (43).<br />
• Increase illumination angle (brightness) to<br />
1.6 mrad with knob (5).<br />
• Shift diffraction spot to the index point with<br />
knobs (1) and (6).<br />
• Save settings with Store Gun Alignm<strong>en</strong>t.<br />
26. Check Diffraction Spot<br />
• Select Diff mode (22) and set camera l<strong>en</strong>gth<br />
to 720 mm with knob (3) on the left hardpanel.<br />
• Shift diffraction spot to the index point with<br />
knobs (1, 6).<br />
• Insert an objective aperture and c<strong>en</strong>ter it to<br />
the diffraction spot.<br />
• Switch back to IMG mode with button (22).<br />
M4<br />
M3<br />
M2<br />
M1<br />
J1<br />
22<br />
43<br />
30<br />
31<br />
1 6<br />
7
27. Turn AIS Mode to Auto<br />
• Click on AIS Auto.<br />
− Display Auto in the status bar.<br />
If the AIS alignm<strong>en</strong>t was done and saved earlier, there is nothing to do on AIS.<br />
☞<br />
NOTICE:<br />
If an AIS alignm<strong>en</strong>t is necessary, go to chapter AIS Alignm<strong>en</strong>t in the ext<strong>en</strong>ded manual.<br />
8
Enabling the Nano-Age World<br />
Carl <strong>Zeiss</strong> NTS GmbH<br />
A Carl <strong>Zeiss</strong> SMT AG Company<br />
Carl <strong>Zeiss</strong> Straße 56<br />
D-73447 Oberkoch<strong>en</strong><br />
GERMANY<br />
Tel: +497364/205991<br />
Fax: +497364/943226<br />
info-nts@smt.zeiss.com<br />
Carl <strong>Zeiss</strong> SMT Ltd.<br />
Coldhams Lane<br />
Cambridge CB1 3JS<br />
UK<br />
Tel: +44 1223/414166<br />
Fax: +44 1223/412776<br />
info-uk@smt.zeiss.com<br />
Carl <strong>Zeiss</strong> SMT Inc.<br />
One <strong>Zeiss</strong> Drive,Thornwood<br />
New York 10594<br />
USA<br />
Tel: +1 914 747 7700<br />
Fax: +1 914 747 7443<br />
info-usa@smt.zeiss.com<br />
Carl <strong>Zeiss</strong> SMT Sarl<br />
86, av<strong>en</strong>ue du 18 juin 1940<br />
Rueil-Malmaision<br />
FRANCE<br />
Tel: +33 1 41399210<br />
Fax: +33 1 41399229<br />
info-fr@smt.zeiss.com<br />
Plus a worldwide network<br />
of authorised distributors<br />
www.smt.zeiss.com<br />
Due to policy of continuous<br />
developm<strong>en</strong>t, we reserve the<br />
right to change specifications<br />
without notice.<br />
© Carl <strong>Zeiss</strong> SMT, Oberkoch<strong>en</strong>