using the ked
using the ked
using the ked

Create successful ePaper yourself
Turn your PDF publications into a flip-book with our unique Google optimized e-Paper software.
Using <strong>the</strong> KED<br />
Model 125 KED<br />
5.6 Wrapping and Positioning <strong>the</strong><br />
KED<br />
1. Wrap both torso flaps around <strong>the</strong> patient’s torso,<br />
lifting <strong>the</strong> patient’s arms only as much as needed<br />
to slide <strong>the</strong> flaps beneath <strong>the</strong>m. The top of <strong>the</strong><br />
flaps should be just below <strong>the</strong> patient’s armpits<br />
(Figure 22).<br />
2. Use <strong>the</strong> lift handles to raise and adjust <strong>the</strong> KED<br />
until <strong>the</strong> top edges of <strong>the</strong> torso flaps press firmly<br />
into <strong>the</strong> armpit area. You can also use <strong>the</strong> lift<br />
handles to keep <strong>the</strong> KED in place until <strong>the</strong> straps<br />
can be buckled.<br />
If <strong>using</strong> three operators, <strong>the</strong> two side operators<br />
lift <strong>the</strong> KED with <strong>the</strong> side straps.<br />
Important<br />
It is important to pull <strong>the</strong> KED up snugly under<br />
<strong>the</strong> armpits to make sure <strong>the</strong> patient’s weight<br />
is suspended. This will reduce <strong>the</strong> possibility<br />
of <strong>the</strong> patient slipping downward later when he/<br />
she is lifted.<br />
Figure 22 -Wrapping <strong>the</strong> Torso Flaps<br />
Around <strong>the</strong> Patient<br />
3. Before beginning to fasten <strong>the</strong> straps, make sure<br />
<strong>the</strong> patient is sitting back against <strong>the</strong> KED as fully<br />
as his/her body structure and condition allow.<br />
To check and adjust <strong>the</strong> patient’s position, <strong>the</strong><br />
operator behind <strong>the</strong> patient holds <strong>the</strong> patient’s<br />
head in alignment while a side operator gently<br />
presses on <strong>the</strong> patient’s chest area just below <strong>the</strong><br />
cervical collar (Figure 23).<br />
Be Aware<br />
Positioning <strong>the</strong> patient as fully as possible against<br />
<strong>the</strong> KED minimizes <strong>the</strong> need for padding between<br />
<strong>the</strong> patient’s head and <strong>the</strong> KED. But be aware that<br />
some patients may not be able to sit fully back<br />
into <strong>the</strong> KED.<br />
Figure 23 - Moving <strong>the</strong> Patient Back<br />
Into <strong>the</strong> KED<br />
18 © Ferno-Washington, Inc. 234-1754-02 April 2001


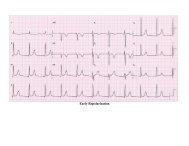
![EKG Basics.ppt [Read-Only] - Grand County EMS](https://img.yumpu.com/34986415/1/190x146/ekg-basicsppt-read-only-grand-county-ems.jpg?quality=85)