using the ked
using the ked
using the ked

Create successful ePaper yourself
Turn your PDF publications into a flip-book with our unique Google optimized e-Paper software.
Using <strong>the</strong> KED<br />
Model 125 KED<br />
5.10 Buckling <strong>the</strong> Top Strap and<br />
Making Final Strap<br />
Adjustments<br />
When <strong>the</strong> long spine board and ambulance cot are<br />
prepared and waiting, it is time to buckle <strong>the</strong> top strap<br />
and make final adjustments to <strong>the</strong> o<strong>the</strong>r straps.<br />
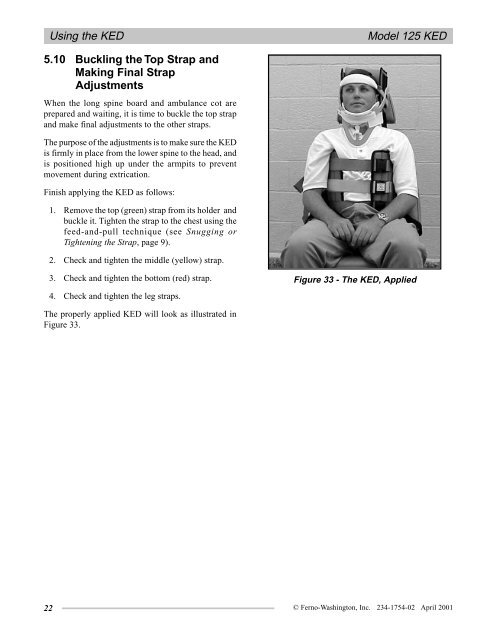
The purpose of <strong>the</strong> adjustments is to make sure <strong>the</strong> KED<br />
is firmly in place from <strong>the</strong> lower spine to <strong>the</strong> head, and<br />
is positioned high up under <strong>the</strong> armpits to prevent<br />
movement during extrication.<br />
Finish applying <strong>the</strong> KED as follows:<br />
1. Remove <strong>the</strong> top (green) strap from its holder and<br />
buckle it. Tighten <strong>the</strong> strap to <strong>the</strong> chest <strong>using</strong> <strong>the</strong><br />
feed-and-pull technique (see Snugging or<br />
Tightening <strong>the</strong> Strap, page 9).<br />
2. Check and tighten <strong>the</strong> middle (yellow) strap.<br />
3. Check and tighten <strong>the</strong> bottom (red) strap.<br />
4. Check and tighten <strong>the</strong> leg straps.<br />
Figure 33 - The KED, Applied<br />
The properly applied KED will look as illustrated in<br />
Figure 33.<br />
22 © Ferno-Washington, Inc. 234-1754-02 April 2001


![EKG Basics.ppt [Read-Only] - Grand County EMS](https://img.yumpu.com/34986415/1/190x146/ekg-basicsppt-read-only-grand-county-ems.jpg?quality=85)