2005 - MX Pro Coil
2005 - MX Pro Coil
2005 - MX Pro Coil

You also want an ePaper? Increase the reach of your titles
YUMPU automatically turns print PDFs into web optimized ePapers that Google loves.
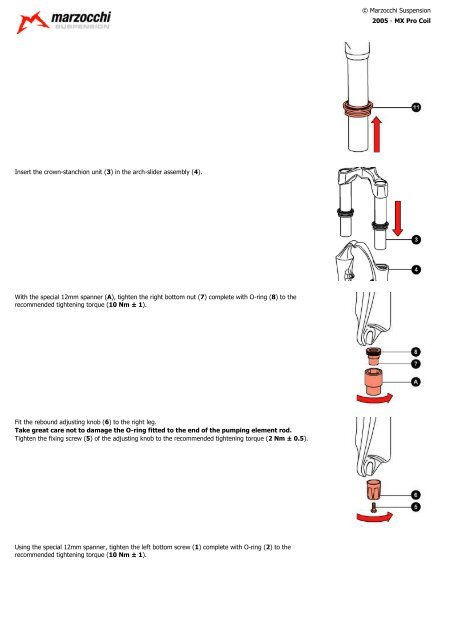
© Marzocchi Suspension<br />
<strong>2005</strong> - <strong>MX</strong> <strong>Pro</strong> <strong>Coil</strong><br />
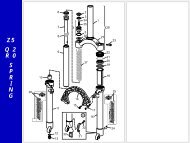
Insert the crown-stanchion unit (3) in the arch-slider assembly (4).<br />
With the special 12mm spanner (A), tighten the right bottom nut (7) complete with O-ring (8) to the<br />
recommended tightening torque (10 Nm ± 1).<br />
Fit the rebound adjusting knob (6) to the right leg.<br />
Take great care not to damage the O-ring fitted to the end of the pumping element rod.<br />
Tighten the fixing screw (5) of the adjusting knob to the recommended tightening torque (2 Nm ± 0.5).<br />
Using the special 12mm spanner, tighten the left bottom screw (1) complete with O-ring (2) to the<br />
recommended tightening torque (10 Nm ± 1).