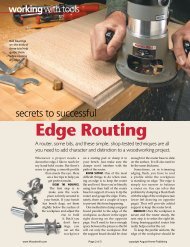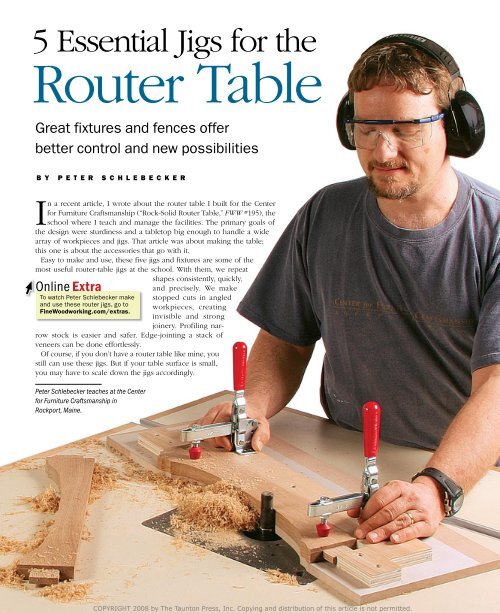
5 Essential Jigs for the Router Table - gerald@eberhardt.bz
5 Essential Jigs for the Router Table - gerald@eberhardt.bz
5 Essential Jigs for the Router Table - gerald@eberhardt.bz

You also want an ePaper? Increase the reach of your titles
YUMPU automatically turns print PDFs into web optimized ePapers that Google loves.
5 <strong>Essential</strong> <strong>Jigs</strong> <strong>for</strong> <strong>the</strong><br />
<strong>Router</strong> <strong>Table</strong><br />
Great fixtures and fences offer<br />
better control and new possibilities<br />
BY PETER SCHLEBECKER<br />
In a recent article, I wrote about <strong>the</strong> router table I built <strong>for</strong> <strong>the</strong> Center<br />
<strong>for</strong> Furniture Craftsmanship (“Rock-Solid <strong>Router</strong> <strong>Table</strong>,” FWW #195), <strong>the</strong><br />
school where I teach and manage <strong>the</strong> facilities. The primary goals of<br />
<strong>the</strong> design were sturdiness and a tabletop big enough to handle a wide<br />
array of workpieces and jigs. That article was about making <strong>the</strong> table;<br />
this one is about <strong>the</strong> accessories that go with it.<br />
Easy to make and use, <strong>the</strong>se five jigs and fixtures are some of <strong>the</strong><br />
most useful router-table jigs at <strong>the</strong> school. With <strong>the</strong>m, we repeat<br />
shapes consistently, quickly,<br />
Online Extra<br />
and precisely. We make<br />
To watch Peter Schlebecker make stopped cuts in angled<br />
and use <strong>the</strong>se router jigs, go to workpieces, creating<br />
FineWoodworking.com/extras.<br />
invisible and strong<br />
joinery. Profiling narrow<br />
stock is easier and safer. Edge-jointing a stack of<br />
veneers can be done ef<strong>for</strong>tlessly.<br />
Of course, if you don’t have a router table like mine, you<br />
still can use <strong>the</strong>se jigs. But if your table surface is small,<br />
you may have to scale down <strong>the</strong> jigs accordingly.<br />
Peter Schlebecker teaches at <strong>the</strong> Center<br />
<strong>for</strong> Furniture Craftsmanship in<br />
Rockport, Maine.<br />
COPYRIGHT 2008 by The Taunton Press, Inc. Copying and distribution of this article is not permitted.
Fea<strong>the</strong>rboard<br />
MANAGE SMALL AND<br />
1NARROW WORKPIECES<br />
A lso called a finger board, this simple<br />
fixture holds a workpiece firmly against<br />
<strong>the</strong> table surface while a cut is made. It is<br />
particularly important to use if <strong>the</strong> workpiece<br />
is very narrow and <strong>the</strong>re is a risk of getting<br />
your fingers too close to <strong>the</strong> blade. I use a<br />
fea<strong>the</strong>rboard <strong>for</strong> a pencil bead or <strong>for</strong> any o<strong>the</strong>r<br />
small molding, such as <strong>the</strong> slightly curved profile<br />
on dozens of pieces <strong>for</strong> a tambour door.<br />
The configuration that works best <strong>for</strong> <strong>the</strong><br />
router table is a long piece of ¾ -in. plywood<br />
that is about <strong>the</strong> same length as <strong>the</strong> routertable<br />
fence, with fea<strong>the</strong>rs cut on both sides<br />
around a notch <strong>for</strong> <strong>the</strong> bit. Plywood is strong in<br />
every direction, so it allows you to orient <strong>the</strong><br />
fea<strong>the</strong>rs along <strong>the</strong> side of this long board. Lay<br />
out pencil lines at 45° with ¼ -in. spacing, and<br />
<strong>the</strong>n cut <strong>the</strong> fea<strong>the</strong>rs on <strong>the</strong> bandsaw. The kerf<br />
will leave fea<strong>the</strong>rs about 3 ⁄16 in. thick, small<br />
enough to flex well but still be strong.<br />
To use <strong>the</strong> fea<strong>the</strong>rboard, put <strong>the</strong> workpiece<br />
on <strong>the</strong> table, apply light, downward pressure<br />
to <strong>the</strong> fea<strong>the</strong>rboard, and mount it to <strong>the</strong> fence<br />
with two clamps.<br />
Safe and accurate. Fea<strong>the</strong>rboards are great <strong>for</strong> holding workpieces down, but <strong>the</strong>y do not<br />
allow <strong>the</strong> workpiece to back up. If <strong>the</strong>re is a problem in <strong>the</strong> middle of <strong>the</strong> cut, ei<strong>the</strong>r stop <strong>the</strong><br />
router or just keep pushing <strong>the</strong> piece through. Use a thin push stick near <strong>the</strong> bit.<br />
1<br />
⁄16-in.<br />
relief kerf<br />
¼-in. spacing<br />
between kerfs<br />
25½ in.<br />
Opening <strong>for</strong> bit<br />
45°<br />
¾-in. plywood<br />
CUT THE FEATHERBOARD IN PLYWOOD<br />
1 2 3<br />
Reduce friction between <strong>the</strong> fea<strong>the</strong>rs and<br />
<strong>the</strong> fence. Be<strong>for</strong>e cutting <strong>the</strong> fea<strong>the</strong>rs, narrow<br />
<strong>the</strong> fence side of <strong>the</strong> plywood with a shallow<br />
cut, about 1 ⁄16 in. thick.<br />
Freehand <strong>the</strong> fea<strong>the</strong>rs on <strong>the</strong> bandsaw.<br />
First, remove <strong>the</strong> cutout <strong>for</strong> <strong>the</strong> bit, and <strong>the</strong>n<br />
cut <strong>the</strong> fea<strong>the</strong>r lines.<br />
Put on <strong>the</strong> pressure. To have an effective<br />
hold-down that still allows <strong>the</strong> piece to move<br />
along smoothly, keep a little downward hand<br />
pressure on <strong>the</strong> fea<strong>the</strong>rboard while you clamp<br />
it in place.<br />
Photos, except where noted: Anissa Kapsales; drawings: Vince Babak SEPTEMBER/OCTOBER 2008<br />
33<br />
COPYRIGHT 2008 by The Taunton Press, Inc. Copying and distribution of this article is not permitted.
2<br />
Pattern<br />
Pattern-routing jig<br />
FAST, PRECISE, AND<br />
EASY MULTIPLES<br />
made<br />
of MDF<br />
Clamps add<br />
convenience and<br />
safety.<br />
Plywood<br />
locator blocks<br />
Bearing-guided bit runs<br />
along <strong>the</strong> pattern.<br />
1. CREATE THE PROFILE<br />
Make <strong>the</strong> pattern<br />
jig. Draw <strong>the</strong> shape<br />
on tracing paper and<br />
glue it to MDF. Bandsaw<br />
close to <strong>the</strong> line,<br />
and <strong>the</strong>n fair <strong>the</strong><br />
curve to <strong>the</strong> line with<br />
a spindle sander or<br />
a block and sandpaper.<br />
2. ADD THE SCREW BLOCKS<br />
Position <strong>the</strong> blank and draw <strong>the</strong> shape. With <strong>the</strong> blank correctly located<br />
on <strong>the</strong> jig, screw locator blocks behind and on each end of <strong>the</strong> blank. Consider<br />
adding toggle clamps <strong>for</strong> extra control.<br />
The most common use of <strong>the</strong> router table in our shop is<br />
pattern-cutting. Used <strong>for</strong> curved legs, aprons, or multiples<br />
of any kind, pattern-cutting is when a part is cut out using a<br />
bearing-guided, flush-trimming bit. The piece is roughed out<br />
slightly oversize on <strong>the</strong> bandsaw and mounted to <strong>the</strong> pattern.<br />
The bit <strong>the</strong>n follows <strong>the</strong> pattern, producing <strong>the</strong> same profile<br />
every time.<br />
This particular jig makes pattern-cutting as easy as<br />
possible. I’ve included an extra area be<strong>for</strong>e and after <strong>the</strong><br />
pattern so <strong>the</strong> bearing has a place to ride as it moves into and<br />
out of <strong>the</strong> cut. I made it easy to locate workpieces instantly,<br />
and <strong>the</strong> toggle clamps hold <strong>the</strong> work in place and serve as<br />
built-in handles.<br />
To make a pattern jig, draw <strong>the</strong> outline of <strong>the</strong> shape onto<br />
tracing paper, and <strong>the</strong>n use spray adhesive to glue <strong>the</strong> paper<br />
to a piece of MDF. Use a piece larger than <strong>the</strong> shape so <strong>the</strong>re<br />
will be room <strong>for</strong> toggle clamps, locator blocks, and start-andstop<br />
areas <strong>for</strong> <strong>the</strong> bearing. Bandsaw close to <strong>the</strong> line and<br />
clean it up with power- and hand-sanding.<br />
Position a blank on <strong>the</strong> pattern and surround <strong>the</strong> blank<br />
with blocks to locate it. Then use <strong>the</strong> jig to trace <strong>the</strong> shape<br />
on <strong>the</strong> blank. Remove <strong>the</strong> blank and bandsaw <strong>the</strong> shape, leaving<br />
it about 1 ⁄8 in. oversize, and return <strong>the</strong> workpiece to <strong>the</strong><br />
jig. I usually install toggle clamps to hold <strong>the</strong> blank firmly.<br />
When routing, begin <strong>the</strong> contact with <strong>the</strong> bearing on <strong>the</strong><br />
pattern portion ahead of <strong>the</strong> actual blank. Follow through <strong>the</strong><br />
cut to <strong>the</strong> o<strong>the</strong>r end; it’s always good to take a second pass<br />
to clean up any inconsistencies left by sawdust and vibration.<br />
34<br />
FINE WOODWORKING<br />
COPYRIGHT 2008 by The Taunton Press, Inc. Copying and distribution of this article is not permitted.
3. ROUT THE WORKPIECE WITH A PATTERN BIT<br />
Pay attention to grain direction. A sharp bit can<br />
cleanly cut mild reversals in grain, but when <strong>the</strong><br />
grain is steep and tears out, a symmetrical piece<br />
can be flipped in <strong>the</strong> jig to work <strong>the</strong> grain in<br />
different directions. If <strong>the</strong> piece is asymmetrical,<br />
make a second, opposite jig and flip <strong>the</strong> workpiece.<br />
Bandsaw <strong>the</strong> waste, <strong>the</strong>n rout.<br />
Transfer <strong>the</strong> pattern to <strong>the</strong> blank<br />
(above). Bandsaw away <strong>the</strong> bulk<br />
of <strong>the</strong> waste, reinstall <strong>the</strong> blank<br />
in <strong>the</strong> jig, and rout (right). The<br />
bearing-guided bit rides along<br />
<strong>the</strong> pattern.<br />
Workpiece<br />
Pattern jig<br />
First rout halfway down<br />
<strong>the</strong> profile or curve.<br />
Bit<br />
Bearing<br />
Pattern<br />
Then flip <strong>the</strong> workpiece<br />
and rout <strong>the</strong> o<strong>the</strong>r half.<br />
Zero-clearance fence<br />
3FOR SMALL WORKPIECES<br />
S ometimes workpieces are so short, <strong>the</strong>re is a risk that<br />
<strong>the</strong>y will dip into <strong>the</strong> opening in <strong>the</strong> fence and cut too<br />
deeply, or that <strong>the</strong> leading edge of <strong>the</strong> wood will catch<br />
<strong>the</strong> outfeed side of <strong>the</strong> opening. A zero-clearance fence<br />
will prevent <strong>the</strong>se problems and make <strong>the</strong> operation safer.<br />
I use this auxiliary fence anytime I rout a profile around<br />
a small drawer front or door. A bearing on <strong>the</strong> router bit<br />
could get in <strong>the</strong> way of <strong>the</strong> fence, so if <strong>the</strong>re is a bearing,<br />
you’ll need to remove it.<br />
The zero-clearance fence clamps onto <strong>the</strong> regular<br />
fence. Make it out of 1 ⁄4-in. Masonite, about <strong>the</strong> same size<br />
as <strong>the</strong> regular fence. I use Masonite because it is stiff<br />
enough to stay straight near <strong>the</strong> center when clamped on<br />
<strong>the</strong> ends. After bringing <strong>the</strong> main fence <strong>for</strong>ward of <strong>the</strong> bit<br />
and clamping on <strong>the</strong> Masonite, clamp one end of <strong>the</strong> main<br />
fence to <strong>the</strong> table. With <strong>the</strong> bit set at <strong>the</strong> correct height,<br />
start <strong>the</strong> router and <strong>the</strong>n pivot <strong>the</strong> entire fence so that <strong>the</strong><br />
bit slowly cuts through <strong>the</strong> hardboard from <strong>the</strong> rear. I bring<br />
<strong>the</strong> cutter just a bit far<strong>the</strong>r out than needed and <strong>the</strong>n back<br />
it off to leave a little clearance <strong>for</strong> <strong>the</strong> blades. This reduces<br />
heat buildup and noise. Stop <strong>the</strong> router, lock down <strong>the</strong><br />
free end of <strong>the</strong> fence, and try a test cut.<br />
3. Pivot fence<br />
assembly slowly<br />
into spinning bit.<br />
No room<br />
<strong>for</strong> error. A<br />
zero-clearance<br />
fence closes <strong>the</strong><br />
gap around <strong>the</strong> bit<br />
and prevents short<br />
work, like this<br />
drawer front, from<br />
dipping into <strong>the</strong><br />
open space.<br />
1. Clamp a Masonite zero-clearance<br />
fence to <strong>the</strong> router-table fence.<br />
2. Clamp one<br />
end of fence<br />
assembly.<br />
www.finewoodworking.com<br />
SEPTEMBER/OCTOBER 2008 35<br />
COPYRIGHT 2008 by The Taunton Press, Inc. Copying and distribution of this article is not permitted.
Miter angle sled<br />
SIMPLE SLED PRESENTS<br />
4WORK AT AN ANGLE<br />
Upper leaf,<br />
¾ in. thick by<br />
15 in. wide by<br />
36 in. long<br />
Hidden joinery. An angle<br />
sled makes it simple to run a<br />
stopped groove into <strong>the</strong> edges<br />
of a mitered carcase, like this one<br />
by Seth Deysach, where <strong>the</strong> groove<br />
would show at <strong>the</strong> front and back if it<br />
went all <strong>the</strong> way through.<br />
Hidden<br />
spline<br />
When it is necessary to present a<br />
piece of wood at an angle to <strong>the</strong><br />
router bit, as with a mitered joint with<br />
spline grooves in box or carcase construction,<br />
this sled makes it easy. Cutting <strong>the</strong><br />
grooves on <strong>the</strong> tablesaw is not an option<br />
if you want to make stopped grooves, hiding<br />
<strong>the</strong> splines. But this sled, used on <strong>the</strong><br />
router table with a slot-cutting bit, will do<br />
<strong>the</strong> job perfectly.<br />
Constructing <strong>the</strong> sled is simple. I make<br />
my sled big enough to hold a range of sizes<br />
with extra space to screw in hold-down<br />
blocks should I need <strong>the</strong>m. Two squared<br />
boards of sheet material are held toge<strong>the</strong>r<br />
with inexpensive utility hinges, and end<br />
pieces establish <strong>the</strong> angle. The workpiece<br />
is clamped onto <strong>the</strong> upper leaf so that<br />
<strong>the</strong> leading edge just touches <strong>the</strong> table<br />
surface. Or you can align <strong>the</strong> side or top<br />
edge with marks or stop blocks screwed<br />
to <strong>the</strong> upper leaf. When routing <strong>the</strong> end<br />
of a narrower piece, <strong>the</strong> upright end can<br />
serve as a right-angle guide as long as <strong>the</strong><br />
components of <strong>the</strong> jig have been made accurately<br />
square.<br />
A router bit can be used with a bearing<br />
that will run along <strong>the</strong> workpiece, as in <strong>the</strong><br />
case of <strong>the</strong> slot-cutting bit.<br />
Upright, ¾ in. thick by 7 in.<br />
wide by 12 in. long<br />
Hinges, ¾ in.<br />
wide by 2½ in.<br />
long<br />
Lower leaf,<br />
¾ in. thick by<br />
15 in. wide by<br />
36 in. long<br />
Set up <strong>the</strong> angle. Once <strong>the</strong> leaves are hinged and <strong>the</strong> uprights are screwed to <strong>the</strong> lower leaf, use a<br />
bevel gauge to set <strong>the</strong> angle (left), and screw through each upright to lock <strong>the</strong> upper leaves (right).<br />
Use <strong>the</strong> fence as a pivot<br />
point <strong>for</strong> a stopped cut. With<br />
<strong>the</strong> workpiece clamped on <strong>the</strong><br />
angle sled and <strong>the</strong> stopping<br />
points taped on <strong>the</strong> fence, use<br />
<strong>the</strong> fence to pivot into <strong>the</strong> bit on<br />
one end and out on <strong>the</strong> o<strong>the</strong>r.<br />
36 FINE WOODWORKING<br />
Photo, top left: Seth Deysach<br />
COPYRIGHT 2008 by The Taunton Press, Inc. Copying and distribution of this article is not permitted.
Veneer jig<br />
JOINT PERFECT EDGES<br />
5ON A STACK OF VENEERS<br />
Veneer<br />
Crowned boards<br />
Carriage bolt with<br />
washer and wing nut<br />
Countersink bolt<br />
head in bottom<br />
board.<br />
Edge-jointing veneers with a handplane<br />
can be time-consuming and frustrating.<br />
Instead, you can use a veneer-trimming<br />
jig to joint multiple leaves of veneer at<br />
<strong>the</strong> same time. I like this jig because it is<br />
simple, can handle any width of veneer, and<br />
is easy to re-true on a jointer. It consists of<br />
two poplar boards bolted toge<strong>the</strong>r at <strong>the</strong><br />
ends. For short lengths, two flat boards will<br />
suffice. However, <strong>for</strong> veneers up to about<br />
5 ft. in length, I make a longer jig with a<br />
camber in <strong>the</strong> boards so that clamping<br />
pressure is even along <strong>the</strong> entire length.<br />
To create <strong>the</strong> camber, square up two<br />
5/4 boards to about 1 1 ⁄8 in. thick. Set <strong>the</strong><br />
jointer to take a 1 ⁄16-in. cut and run <strong>the</strong> first<br />
board over <strong>the</strong> cutterhead about one-third<br />
of <strong>the</strong> way along <strong>the</strong> board. Stop <strong>the</strong> motor,<br />
turn <strong>the</strong> board around, and repeat on<br />
<strong>the</strong> o<strong>the</strong>r end, same face down. Repeat<br />
this three times on both ends, stopping<br />
each time about 4 in. from <strong>the</strong> end of <strong>the</strong><br />
previous cut. The board should be tapered<br />
on both ends in a series of steps.<br />
Next, flip <strong>the</strong> board and use a planer to<br />
remove <strong>the</strong> material in <strong>the</strong> center until <strong>the</strong><br />
whole board has been planed end to end. A<br />
planer won’t remove <strong>the</strong> camber from <strong>the</strong><br />
Tighten veneers in <strong>the</strong> jig. The excess should protrude<br />
about 1 ⁄8 in. from <strong>the</strong> edge. Use a flush-trimming bit to do<br />
<strong>the</strong> trim cut. Go slow so as not to chip out highly figured<br />
veneers, and take a second pass to perfect <strong>the</strong> edge.<br />
board and <strong>the</strong> steps will not show up on<br />
<strong>the</strong> planed side. Flip <strong>the</strong> board and take a<br />
pass or two to clean up <strong>the</strong> stepped side.<br />
Repeat <strong>the</strong> process on <strong>the</strong> o<strong>the</strong>r board.<br />
Drill holes <strong>for</strong> carriage bolts, making<br />
sure to countersink <strong>the</strong> heads and install<br />
washers and wing nuts. When <strong>the</strong> crowns<br />
of <strong>the</strong> boards are pressed against each<br />
o<strong>the</strong>r, <strong>the</strong>y will <strong>for</strong>ce <strong>the</strong> whole jig to lie<br />
flat on <strong>the</strong> table surface. Lock <strong>the</strong> assembly<br />
down and run both edges over <strong>the</strong><br />
jointer to true <strong>the</strong>m up, and you’re ready to<br />
insert veneer leaves and edge-joint <strong>the</strong>m.<br />
CROWNED BOARDS ARE THE KEY<br />
Start with steps. Schlebecker<br />
takes multiple jointer passes on<br />
both ends of <strong>the</strong> boards, shorter<br />
each time. He tapes a mark<br />
on <strong>the</strong> jointer and matches it<br />
to lines on <strong>the</strong> top of <strong>the</strong> board<br />
to know when to pick up <strong>the</strong><br />
board.<br />
Plane it smooth. Next, with <strong>the</strong> steps facing down on <strong>the</strong><br />
bed, he runs <strong>the</strong> board through <strong>the</strong> planer until <strong>the</strong> board<br />
has been planed across its length. Then he flips <strong>the</strong> board<br />
over and gradually removes <strong>the</strong> steps.<br />
1<br />
⁄16 in.<br />
First, plane with <strong>the</strong> steps down.<br />
4th cut<br />
3rd cut<br />
2nd cut<br />
1st cut<br />
Then plane <strong>the</strong><br />
steps smooth.<br />
After planing, <strong>the</strong> board<br />
should be crowned.<br />
www.finewoodworking.com<br />
SEPTEMBER/OCTOBER 2008 37<br />
COPYRIGHT 2008 by The Taunton Press, Inc. Copying and distribution of this article is not permitted.