ANCA Screen IgG - Diagnostic Automation : Cortez Diagnostics
ANCA Screen IgG - Diagnostic Automation : Cortez Diagnostics
ANCA Screen IgG - Diagnostic Automation : Cortez Diagnostics

Create successful ePaper yourself
Turn your PDF publications into a flip-book with our unique Google optimized e-Paper software.
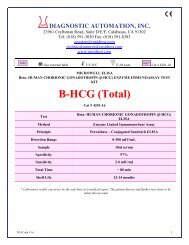
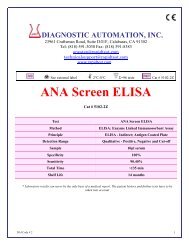
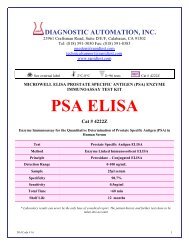
DIAGNOSTIC AUTOMATION, INC.<br />
23961 Craftsman Road, Suite D/E/F, Calabasas, CA 91302<br />
Tel: (818) 591-3030 Fax: (818) 591-8383<br />
onestep@rapidtest.com<br />
technicalsupport@rapidtest.com<br />
www.rapidtest.com<br />
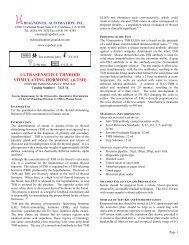
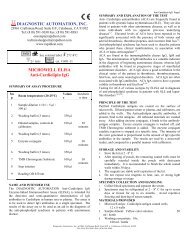
See external label 2°C-8°C Σ=96 tests Cat # 1681-2Z<br />
<strong>ANCA</strong> <strong>Screen</strong> <strong>IgG</strong><br />
Cat # 1681-2Z<br />
Cat # Number 1681-2Z<br />
Test<br />
<strong>ANCA</strong> <strong>Screen</strong> <strong>IgG</strong> ELISA<br />
Method<br />
ELISA: Enzyme Linked Immunosorbent Assay<br />
Principle<br />
ELISA - Indirect; Antigen Coated Plate<br />
Detection Range<br />
Qualitative: Positive, negative, cut off<br />
Sample<br />
10ul<br />
Specificity 94.90%<br />
Sensitivity 97.40%<br />
Total Time ~60<br />
Shelf Life<br />
12 months<br />
* Laboratory results can never be the only base of a medical report. The patient history and further tests have to be taken<br />
into account<br />
DAI Code # 2 1
PRINCIPLE OF THE ELISA ASSAY<br />
The <strong>Diagnostic</strong> <strong>Automation</strong> Inc. <strong>ANCA</strong> <strong>Screen</strong> ELISA test system is designed to detect <strong>IgG</strong> class antibodies to<br />
MPO and/or PR3 in human sera. Wells of plastic microwell strips are sensitized by passive absorption with a<br />
mixture of MPO and PR3 antigen. The test procedure involves three incubation steps:<br />
1. Test sera (properly diluted) are incubated in antigen coated microwells. Any antigen specific antibody<br />
in the sample will bind to the immobilized antigen. The plate is washed to remove unbound antibody<br />
and other serum components.<br />
2. Peroxidase Conjugated goat anti-human <strong>IgG</strong> (γ chain specific) is added to the wells and the plate is<br />
incubated.The Conjugate will react with antibody immobilized on the solid phase in step 1. The wells<br />
are washed to remove unreacted Conjugate.<br />
3. The microwells containing immobilized peroxidase Conjugate are incubated with peroxidase Substrate<br />
Solution. Hydrolysis of the Substrate by peroxidase produces a color change. After a period of time the<br />
reaction is stopped and the color intensity of the solution is measured photometrically. The color<br />
intensity of the solution depends upon the antibody concentration in the original test sample.<br />
SPECIMEN COLLECTION<br />
1. It is recommended that specimen collection be carried out in accordance with NCCLS document M29:<br />
Protection of Laboratory Workers from Infectious Disease.<br />
2. No known test method can offer complete assurance that human blood samples will not transmit<br />
infection.Therefore, all blood derivatives should be considered potentially infectious.<br />
3. Only freshly drawn and properly refrigerated sera obtained by approved aseptic venipuncture<br />
procedures should be used in this assay (7, 8). No anticoagulants or preservatives should be added.<br />
Avoid using hemolyzed, lipemic, or bacterially contaminated sera.<br />
4. Store sample at room temperature for no longer than 8 hours. If testing is not performed within 8 hours,<br />
sera may be stored between 2° and 8°C for no longer than 48 hours. If delay in testing is anticipated,<br />
store test sera at –20°C or lower. Avoid multiple freeze/thaw cycles that may cause loss of antibody<br />
activity and give erroneous results.<br />
EQUIPMENT AND MATERIALS:<br />
MATERIALS REQUIRED BUT NOT PROVIDED:<br />
• ELISA microwell reader capable of reading at a wavelength of 450nm.<br />
• Pipettes capable of accurately delivering 10 to 200µL.<br />
• Multichannel pipette capable of accurately delivering (50-200µL)<br />
• Reagent reservoirs for multichannel pipettes.<br />
• Wash bottle or microwell washing system.<br />
• Distilled or deionized water.<br />
• One liter graduated cylinder.<br />
• Serological pipettes.<br />
• Disposable pipette tips.<br />
• Paper towels.<br />
• Laboratory timer to monitor incubation steps.<br />
• Disposal basin and disinfectant. (example: 10% household bleach, 0.5% sodium hypochlorite.)<br />
MATERIALS PROVIDED<br />
Each kit contains the following components in sufficient quantities to perform the number of tests indicated on<br />
packaging label. Note: All reactive reagents contain sodium azide as a preservative at a concentration of<br />
0.1% (w/v).<br />
DAI Code # 2 2
The following components are not kit lot number dependent and may be used interchangeably with the ELISA<br />
assays: TMB, Stop Solution, and Wash Buffer.<br />
Note: Kit also contains:<br />
1. Component list containing lot specific information is inside the kit box.<br />
2. Package insert providing instructions for use.<br />
STORAGE CONDITIONS<br />
1. Store the unopened kit between 2° and 8°C.<br />
2. Coated microwell strips: Store between 2° and 8°C. Extra strips should be immediately resealed with<br />
desiccant and returned to proper storage. Strips are stable for 60 days after the envelope has been<br />
opened and properly<br />
resealed and the indicator strip on the desiccant pouch remains blue.<br />
3. Conjugate: Store between 2° and 8°C. DO NOT FREEZE.<br />
4. Calibrator, Positive Control and Negative Control: Store between 2° and 8°C.<br />
5. TMB: Store between 2° and 8°C.<br />
6. Wash Buffer concentrate (10X): Store between 2° and 25°C. Diluted wash buffer (1X) is stable at room<br />
temperature (20° to 25° C) for up to 7 days or for 30 days between 2° and 8°C.<br />
7. SAVe Diluent: Store between 2° and 8°C.<br />
8. Stop Solution: Store between 2° and 25°C.<br />
QUALITY CONTROL<br />
1. Each time the assay is run the Calibrator must be run in triplicate. A reagent blank, Negative Control,<br />
and Positive Control must also be included in each assay.<br />
2. Calculate the mean of the three Calibrator wells. If any of the three values differ by more than 15%<br />
from the mean, discard that value and calculate the mean using the remaining two wells.<br />
DAI Code # 2 3
3. The mean OD value for the Calibrator and the OD values for the Positive and Negative Controls should<br />
fall within the following ranges:<br />
OD Range<br />
Negative Control < 0.250<br />
Calibrator > 0.300<br />
Positive Control > 0.500<br />
a. The OD of the Negative Control divided by the mean OD of the Calibrator should be < 0.9.<br />
b. The OD of the Positive Control divided by the mean OD of the Calibrator should be > 1.25.<br />
c. If the above conditions are not met the test should be considered invalid and should be<br />
repeated.<br />
4. The Positive Control and Negative Control are intended to monitor for substantial reagent failure and<br />
will not ensure precision at the assay cut-off.<br />
5. Additional controls may be tested according to guidelines or requirements of local, state, and/or federal<br />
regulations or accrediting organizations.<br />
6. Refer to NCCLS document C24: Statistical Quality Control for Quantitative Measurements for guidance<br />
on appropriate QC practices.<br />
GENERAL PROCEDURE<br />
1. Remove the individual components from storage and allow them to warm to room temperature<br />
(20-25°C).<br />
2. Determine the number of microwells needed. Allow six Control/Calibrator determinations (one Blank,<br />
one Negative Control, three Calibrators and one Positive Control) per run. A Reagent Blank should be<br />
run on each assay. Check software and reader requirements for the correct Controls/Calibrator<br />
configurations. Return unused strips to the resealable pouch with desiccant, seal, and return to storage<br />
between 2° and 8°C.<br />
EXAMPLE PLATE SET-UP<br />
1 2<br />
A Blank Patient 3<br />
B Neg. Control Patient 4<br />
C Calibrator Etc.<br />
D<br />
Calibrator<br />
E<br />
Calibrator<br />
F<br />
Pos. Control<br />
G Patient 1<br />
H Patient 2<br />
3. Prepare a 1:21 dilution (e.g.: 10µL of serum + 200µL of SAVe Diluent, NOTE: Shake Well Before<br />
Use) of the Negative Control, Calibrator, Positive Control, and each patient serum.<br />
4. To individual wells, add 100µL of each diluted control, calibrator and sample. Ensure that the samples<br />
are properly mixed. Use a different pipette tip for each sample.<br />
5. Add 100µL of SAVe Diluent to well A1 as a reagent blank. Check software and reader requirements<br />
for the correct reagent blank well configuration.<br />
6. Incubate the plate at room temperature (20-25°C) for 25 + 5 minutes.<br />
7. Wash the microwell strips 5X.<br />
A. Manual Wash Procedure:<br />
a. Vigorously shake out the liquid from the wells.<br />
b. Fill each microwell with Wash Buffer. Make sure no air bubbles are trapped in the wells.<br />
c. Repeat steps a. and b. for a total of 5 washes.<br />
DAI Code # 2 4
d. Shake out the wash solution from all the wells. Invert the plate over a paper towel and tap firmly to<br />
remove any residual wash solution from the wells. Visually inspect the plate to ensure that no<br />
residual wash solution remains. Collect wash solution in a disposable basin and treat with 0.5%<br />
sodium hypochlorite (bleach) at the end of the days run.<br />
B. Automated Wash Procedure:<br />
If using an automated microwell wash system, set the dispensing volume to 300-350µL/well. Set the wash<br />
cycle for 5 washes with no delay between washes. If necessary, the microwell plate may be removed from<br />
the washer, inverted over a paper towel and tapped firmly to remove any residual wash solution from the<br />
microwells.<br />
8. Add 100µL of the Conjugate to each well, including reagent blank well, at the same rate and in the<br />
same order as the specimens were added.<br />
9. Incubate the plate at room temperature (20-25°C) for 25 + 5 minutes<br />
10. Wash the microwells by following the procedure as described in step 7.<br />
11. Add 100µL of TMB to each well, including reagent blank well, at the same rate and in the same order<br />
as the specimens were added.<br />
12. Incubate the plate at room temperature (20-25°C) for 10 to 15 minutes.<br />
13. Stop the reaction by adding 50µL of Stop Solution to each well, including reagent blank well, at the<br />
same rate and in the same order as the TMB was added. Positive samples will turn from blue to yellow.<br />
After adding the Stop Solution, tap the plate several times to ensure that the samples are thoroughly<br />
mixed.<br />
14. Set the microwell reader to read at a wavelength of 450nm and measure the optical density (OD) of<br />
each well against the reagent blank. The plate should be read within 30 minutes after the addition of the<br />
Stop Solution.<br />
CALCULATIONS/REPORTING RESULTS:<br />
INTERPRETATION OF RESULTS<br />
A. Calculations:<br />
1. Correction Factor<br />
A cutoff OD value for positive samples has been determined by the manufacturer and correlated to the<br />
Calibrator. The correction factor (CF) will allow you to determine the cutoff value for positive samples and to<br />
correct for slight day-to-day variations in test results. The correction factor is determined for each lot of kit<br />
components and is printed on the Component List located in the kit box.<br />
2. Cutoff OD Value<br />
To obtain the cutoff OD value, multiply the CF by the mean OD of the Calibrator determined above.<br />
(CF x mean OD of Calibrator = cutoff OD value)<br />
3. Index Values or OD Ratios<br />
Calculate the Index Value or OD Ratio for each specimen by dividing its OD value by the cutoff OD from<br />
step 2.<br />
Example:<br />
Mean OD of Calibrator = 0.793<br />
Correction Factor (CF) = 0.25<br />
Cut off OD = 0.793 x 0.25 = 0.198<br />
Unknown Specimen OD = 0.432<br />
Specimen Index Value or OD Ratio = 0.432 / 0.198 = 2.18<br />
B. Interpretations:<br />
Index Values or OD ratios are interpreted as follows:<br />
Index Value or OD<br />
Ratio<br />
DAI Code # 2 5
Negative Specimens < 0.90<br />
Equivocal<br />
0.91 to 1.09<br />
Specimens<br />
Positive Specimens > 1.10<br />
1. An OD ratio < 0.90 indicates no detectable <strong>IgG</strong> antibodies to Myeloperoxidase or Proteinase-3.<br />
2. An OD ratio > 1.10 is reactive for <strong>IgG</strong> antibodies to Myeloperoxidase and/or Proteinase-3. The results of<br />
this test system are qualitative; ratio values in the reactive range are not indicative of the amount of<br />
antibody present<br />
3. Specimens with OD ratio values in the equivocal range (0.91 - 1.09) should be re-tested. Specimens that<br />
remain equivocal after repeat testing should be tested by an alternate serologic procedure.<br />
PROCEDURE NOTES:<br />
PRECAUTIONS<br />
1. For In Vitro <strong>Diagnostic</strong> Use.<br />
2. Normal precautions exercised in handling laboratory reagents should be followed. In case of contact<br />
with eyes, rinse immediately with plenty of water and seek medical advice. Wear suitable protective<br />
clothing, gloves, and eye/face protection. Do not breathe vapor. Dispose of waste observing all local,<br />
state, and federal laws.<br />
3. The wells of the ELISA plate do not contain viable organisms. However, the strips should be<br />
considered POTENTIALLY BIOHAZARDOUS MATERIALS and handled accordingly.<br />
4. The human serum controls are POTENTIALLY BIOHAZARDOUS MATERIALS. Source materials<br />
from which these products were derived were found negative for HIV-1 antigen, HBsAg. and for<br />
antibodies against HCV and HIV by approved test methods. However, since no test method can offer<br />
complete assurance that infectious agents are absent, these products should be handled at the<br />
Biosafety Level 2 as recommended for any<br />
potentially infectious human serum or blood specimen in the Centers for Disease Control/National<br />
Institutes of Health manual “Biosafety in Microbiological and Biomedical Laboratories”: current edition;<br />
and OSHA’s Standard for Bloodborne Pathogens (9).<br />
5. Adherence to the specified time and temperature of incubations is essential for accurate results. All<br />
Reagents must be allowed to reach room temperature (20-25°C) before starting the assay.<br />
Return unused reagents to refrigerated temperature immediately after use.<br />
6. Improper washing could cause false positive or false negative results. Be sure to minimize the amount<br />
of any residual wash solution; (e.g., by blotting or aspiration) before adding Conjugate or Substrate.<br />
Do not allow the wells to dry out between incubations.<br />
7. The SAVe diluent, controls, wash buffer, and conjugate contain sodium azide at a concentration of<br />
0.1% (w/v). Sodium azide has been reported to form lead or copper azides in laboratory plumbing<br />
which may cause explosions on hammering. To prevent, rinse sink thoroughly with water after<br />
disposing of solution containing sodium azide.<br />
8. The Stop Solution is TOXIC. Causes burns. Toxic by inhalation, in contact with skin and if swallowed.<br />
In case of accident or if you feel unwell, seek medical advice immediately.<br />
9. The TMB Solution is HARMFUL. Irritating to eyes, respiratory system and skin.<br />
10. The Wash Buffer concentrate is an IRRITANT. Irritating to eyes, respiratory system and skin.<br />
11. Wipe bottom of plate free of residual liquid and/or fingerprints that can alter optical density (OD)<br />
readings.<br />
12. Dilution or adulteration of these reagents may generate erroneous results.<br />
13. Reagents from other sources or manufacturers should not be used.<br />
14. TMB Solution should be colorless, very pale yellow, very pale green, or very pale blue when used.<br />
Contamination of the TMB with conjugate or other oxidants will cause the solution to change color<br />
prematurely. Do not use the TMB if it is noticeably blue in color.<br />
15. Never pipette by mouth. Avoid contact of reagents and patient specimens with skin and mucous<br />
membranes.<br />
DAI Code # 2 6
16. Avoid microbial contamination of reagents. Incorrect results may occur.<br />
17. Cross contamination of reagents and/or samples could cause erroneous results<br />
18. Reusable glassware must be washed and thoroughly rinsed free of all detergents.<br />
19. Avoid splashing or generation of aerosols.<br />
20. Do not expose reagents to strong light during storage or incubation.<br />
21. Allowing the microwell strips and holder to equilibrate to room temperature prior to opening the<br />
protective envelope will protect the wells from condensation.<br />
22. Wash solution should be collected in a disposal basin. Treat the waste solution with 10% household<br />
bleach (0.5% sodium hypochlorite). Avoid exposure of reagents to bleach fumes.<br />
23. Caution: Liquid waste at acid pH should be neutralized before adding to bleach solution.<br />
24. Do not use ELISA plate if the indicator strip on the desiccant pouch has turned from blue to pink.<br />
25. Do not allow the conjugate to come in contact with containers or instruments that may have previously<br />
contained a solution utilizing sodium azide as a preservative. Residual amounts of sodium azide may<br />
destroy the conjugate’s enzymatic activity.<br />
26. Do not expose any of the reactive reagents to bleach-containing solutions or to any strong odors from<br />
Bleach-containing solutions. Trace amounts of bleach (sodium hypochlorite) may destroy the biological<br />
activity of many of the reactive reagents within this kit.<br />
27. Do not use ELISA plate if the indicator strip on the desiccant pouch has turned from blue to pink.<br />
28. Do not allow the conjugate to come in contact with containers or instruments that may have previously<br />
contained a solution utilizing sodium azide as a preservative. Residual amounts of sodium azide may<br />
destroy the conjugate’s en zymatic activity.<br />
29. Do not expose any of the reactive reagents to bleach-containing solutions or to any strong odors from<br />
bleach-containing solutions. Trace amounts of bleach (sodium hypochlorite) may destroy the biological<br />
activity of many of the reactive reagents within this kit.<br />
LIMITATION OF THE ASSAY<br />
1. A diagnosis should not be made on the basis of <strong>ANCA</strong> <strong>Screen</strong> ELISA results alone. Test results for<br />
<strong>ANCA</strong> <strong>Screen</strong> should be interpreted in conjunction with the clinical evaluation and the results of other<br />
diagnostic procedures.<br />
2. The performance characteristics of this device have not been established for lipemic, hemolyzed and<br />
icteric specimens; therefore, these specimens should not be tested with this assay.<br />
3. Although the <strong>ANCA</strong> <strong>Screen</strong> will detect antibodies to both MPO and PR-3, the assay will not<br />
differentiate between the two. Positive <strong>ANCA</strong> <strong>Screen</strong> specimens should be tested on the DAI individual<br />
MPO and PR-3 ELISAs to determine which antibody is present.<br />
5. The results of this assay are not diagnostic proof of the presence or absence of disease.<br />
Immunosuppressive therapy should not be started based on a positive result.<br />
REFERENCES:<br />
1. Davies D, Moran ME, Niall JF, Ryan GB: Segmental glomerulonephritis with antineutrophil antibody:<br />
Possible arbovirus aetiology. Br. J. Med. 285:606, 1982<br />
2. van der Woude FJ, Rasmussen N, Lobatto S, Wiik A, Permin H, van Es LA: Autoantibodies against<br />
neutrophils and monocytes: Tools for diagnosis and marker of disease activity in Wegener’s<br />
granulomatosis. Lancet 1:425-429, 1985.<br />
3. Feehally J, Wheeler DC, Walls J, et al: A case of microscopic polyarteritis associated with<br />
antineutrophilia cytoplasmic antibodies. Clin. Nephrol. 27: 214-215, 1987<br />
4. Falk RJ, Becker M, Terrell R, Jennette JC: Antigen specificity of P-<strong>ANCA</strong> and C-<strong>ANCA</strong> (Abstract).<br />
The 3rd International Workshop on <strong>ANCA</strong>, Washington, DC 1990: 2-3.<br />
5. Jennette JC, Falk RJ:Anti-neutrophil cytoplasmic autoantibodies with specificity for myeloperoxidase in<br />
Patients with systemic vasculitis and idiopathic necrotizing and crescentic glomerulonephritis. N.Engl.J.<br />
Med. 318: 1651- 1657, 1988.<br />
6. Savage COS, Tizard J, Jayne D, et al: Anti-neutrophil cytoplasmic antibodies in Kawasaki disease.<br />
Arch. Dis. Child. 64: 360-363, 1989.<br />
7. Procedures for the collection of diagnostic blood specimens by venipuncture. Second Edition:<br />
Approved Standard (1984). Published by National Committee for Clinical Laboratory Standards.<br />
DAI Code # 2 7
8. Procedures for the Handling and Processing of Blood Specimens. NCCLS Document H18-A, Vol. 10,<br />
No. 12, Approved Guideline, 1990.<br />
9. U.S. Department of Labor, Occupational Safety and Health Administration: Occupational Exposure to<br />
Bloodborne Pathogens, Final Rule. Fed. Register 56:64175-64182, 1991.<br />
ABBREVIATED TEST PROCEDURE<br />
1. Dilute Serum 1:21<br />
2. Add diluted serum to microwell 100 µL/well<br />
3. Incubate 20 to 30 minutes<br />
4. Wash<br />
5. Add Conjugate – 100 µL/well<br />
6. Incubate 20 to 30 minutes<br />
7. Wash<br />
8. Add TMB 100 µL/well<br />
9. Incubate 10 to 15 minutes<br />
10. Add Stop Solution 50 µL/well – Mix<br />
11. READ<br />
Date Adopted Reference No.<br />
2005-09-27 DA-<strong>ANCA</strong> <strong>Screen</strong>-2008<br />
DIAGNOSTIC AUTOMATION, INC.<br />
23961 Craftsman Road, Suite D/E/F, Calabasas, CA 91302<br />
Tel: (818) 591-3030 Fax: (818) 591-8383<br />
ISO 13485-2003<br />
Revision Date: 9/12/08<br />
DAI Code # 2 8