Create successful ePaper yourself
Turn your PDF publications into a flip-book with our unique Google optimized e-Paper software.
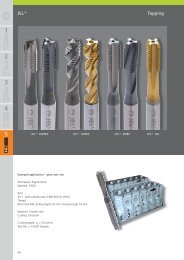
Design your own tool!<br />
There is an inquiry form on page 72.<br />
Enter the required dimensions and<br />
send us your inquiry. We check your<br />
specifications for technical feasibility<br />
and you receive a prompt reply.<br />
1<br />
2<br />
3<br />
Assembly instructions<br />
Cleaning:<br />
Make sure that the insert seats and indexable inserts are<br />
absolutely clean (grease and debris free). If necessary, remove tiny<br />
dust particles with compressed air!<br />
Assembly:<br />
• All indexable inserts and insert seats are marked with letters .<br />
This ensures correct assignment to the insert seat.<br />
• The number markings ensure that all indexable inserts are<br />
positioned correctly.<br />
A<br />
4<br />
5<br />
Tighten the screw (order no. N00 57710) to 22 in-lbs<br />
(2.5 Nm) (torque wrench order no. L05 00940) Measuring the diameter:<br />
The measuring inset is located at letter A and is<br />
also marked on the holder with a punch mark<br />
. If the diameter is too large, loosen the conical<br />
screw and turn it to the right to set the correct<br />
diameter. The conical screw does not have to be<br />
removed completely!<br />
<br />
<br />
<br />
<br />
<br />
<br />
Caution!<br />
• Uneven flute spacing!<br />
• There are 2 inserts 180° opposed = measuring<br />
flute A.<br />
• Measure the diameter at the front of the cutter<br />
(see illustration). Measuring further back will<br />
yield an incorrect measurement as inserts are<br />
ground with back taper.<br />
• Avoid damaging the inserts.<br />
• When indexing the insert on an adjustable<br />
holder, the diameter may need to be adjusted.<br />
6<br />
7<br />
8<br />
9<br />
Patent applied for inside and outside Germany<br />
(WSP-Reiben)<br />
71