2.1 CHANNEL MICRO HI-FI FOR iPod NX-8CD-BKDS - TDK
2.1 CHANNEL MICRO HI-FI FOR iPod NX-8CD-BKDS - TDK
2.1 CHANNEL MICRO HI-FI FOR iPod NX-8CD-BKDS - TDK

Create successful ePaper yourself
Turn your PDF publications into a flip-book with our unique Google optimized e-Paper software.
<strong>NX</strong>-<strong>8CD</strong>-<strong>BKDS</strong><br />
Imation Asia Pacific Pte Ltd.<br />
23,New Industrial Road,<br />
#03-01 Century Industrial Building,<br />
Singapore, 536209<br />
www.tdk-media.asia<br />
www.tdk-media.com.au<br />
AP003902-B<br />
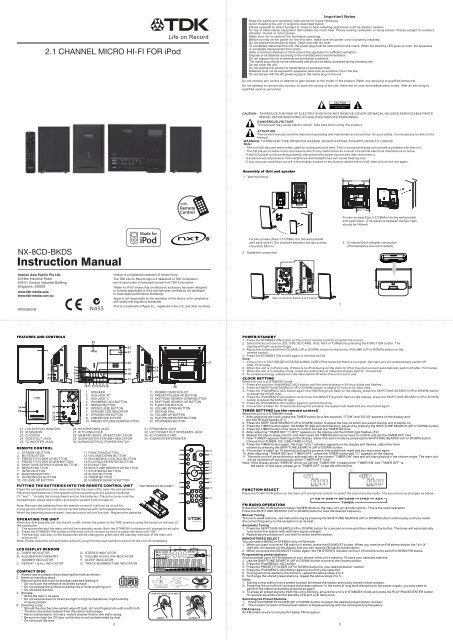
FEATURES AND CONTROLS<br />
34<br />
29<br />
1<br />
2<br />
3<br />
30<br />
31<br />
32<br />
33<br />
21. LCD DISPLAY WINDOW<br />
22. IR SENSOR<br />
23. CD DOOR<br />
24. VIDEO OUT JACK<br />
25. TO WOOFER JACK<br />
4<br />
5<br />
6<br />
7<br />
8<br />
9<br />
REMOTE CONTROL<br />
1. STANDBY BUTTON<br />
2. MUTE BUTTON<br />
3. PRESET/FOLDER UP BUTTON<br />
4. PRESET/FOLDER DOWN BUTTON<br />
5. SKIP/TUNE SEARCH DOWN BUTTON<br />
6. REPEAT BUTTON<br />
7. INTRO BUTTON<br />
8. RANDOM BUTTON<br />
9. ID3/MONO/ST BUTTON<br />
10. VOLUME UP BUTTON<br />
23<br />
1011 121314 15 16<br />
PUTTING THE BATTERIES INTO THE REMOTE CONTROL UNIT **BATTERIES NOT INCLUDED**<br />
Press the compartment cover down and slide the cover off to open the compartment.<br />
Place two AAA batteries in the remote control according to the polarity markings<br />
("+" and " - ") inside the compartment and on the batteries. Place the cover over the<br />
compartment, press down lightly and push it upward until it snaps on.<br />
Note: Remove the batteries from the remote control if it will not be in use for<br />
a long period of the time. Do not mix normal batteries with rechargeable batteries.<br />
When the batteries become weak, remote control will not function. Replace the batteries.<br />
22<br />
21<br />
20<br />
19<br />
18<br />
17<br />
24<br />
25<br />
26<br />
28<br />
11. SD/MMC CARD IN SLOT<br />
12. PRESET/FOLDER UP BUTTON<br />
13. SKIP/TUNE SEARCH DOWN BUTTON<br />
14. SKIP/TUNE SEARCH UP BUTTON<br />
15. FUNCTION BUTTON<br />
16. VOLUME DOWN BUTTON<br />
17. DECK for <strong>iPod</strong><br />
18. VOLUME UP BUTTON<br />
19. PLAY/PAUSE/ENTER BUTTON<br />
20. STOP/MENU BUTTON<br />
OPERATING THE UNIT<br />
When you first plug the unit into the AC outlet, switch the power to the "ON" position using the switch on the rear of<br />
the subwoofer.<br />
1. The subwoofer and the main unit will be in standby mode. Both the STANDBY indicators will change to red color.<br />
2. Press the STANDBY/ON button on the main unit (or remote control) to power the main unit "ON".<br />
3. The standby indicator on the subwoofer will be changed to green and the standby indicator of the main unit<br />
will turn off.<br />
Note: Power down the unit and remove the AC plug from the wall socket to switch off the unit off completely.<br />
LCD DISPLAY WINDOW<br />
A. TIMER INDICATOR<br />
B. ALBUM/RADIO MEMORY<br />
NUMBER INDICATOR<br />
C. REPEAT 1 & ALL INDICATOR<br />
<strong>2.1</strong> <strong>CHANNEL</strong> <strong>MICRO</strong> <strong>HI</strong>-<strong>FI</strong> <strong>FOR</strong> <strong>iPod</strong><br />
1. SPEAKER<br />
2. AUX JACK "R"<br />
3. AUX JACK "L"<br />
4. <strong>iPod</strong>/MEM/C-ADJ BUTTON<br />
5. REPEAT BUTTON<br />
6. OPEN/CLOSE BUTTON<br />
7. STANDBY LED INDICATOR<br />
8. STANDBY/ON BUTTON<br />
9. USB DEVICE IN PORT<br />
10. PRESET/FOLDER DOWN BUTTON<br />
26. HEADPHONES JACK<br />
27. <strong>HI</strong>TC<strong>HI</strong>NG HOLE<br />
28. MEMORY BACK-UP BATTERY DOOR<br />
29. SUBWOOFER STANDBY INDICATOR<br />
30. SUBWOOFER AC POWER SWITCH<br />
11. FUNCTION BUTTON<br />
12. VOLUME DOWN BUTTON<br />
13. <strong>iPod</strong>/MEM/CLOCK-ADJ BUTTON<br />
14.PLAY/PAUSE/ENTER BUTTON<br />
15.EQ BUTTON<br />
16.SKIP/TUNE SEARCH UP BUTTON<br />
17.STOP/MENU BUTTON<br />
18.SLEEP BUTTON<br />
19.TIMER BUTTON<br />
20. NUMBER SEARCH BUTTON<br />
D. STEREO INDICATOR<br />
E. VOLUME <strong>HI</strong>GH/LOW INDICATOR<br />
F. SLEEP INDICATOR<br />
G. TRACK/NUMBER/TIME INDICATOR<br />
COMPACT DISC<br />
1. Always use a compact discs bearing the mark as shown.<br />
2. Notes on handling discs<br />
Removing the disc from its storage case and loading it.<br />
* Do not touch the reflective recorded surface.<br />
* Do not expose the surface to adhesives or write anything on it<br />
* Do not bend the disc.<br />
3. Storage<br />
* Store the disc in its case.<br />
* Do not expose discs to direct sunlight or high temperatures, high humidity<br />
or dusty places.<br />
4. Cleaning a disc<br />
* Should the disc become soiled, wipe off dust, dirt and fingerprints with a soft cloth.<br />
* The disc should be cleaned from the center to the edge.<br />
* Never use benzene, thinners, record cleaner fluid or anti static spray.<br />
* Be sure to close the CD door so the lens is not contaminated by dust.<br />
* Do not touch the lens.<br />
2<br />
Imation is a registered trademark of Imation Corp.<br />
The <strong>TDK</strong> Life on Record logo is a trademark of <strong>TDK</strong> Corporation<br />
and is used under a trademark license from <strong>TDK</strong> Corporation.<br />
“Made for <strong>iPod</strong>” means that an electronic accessory has been designed<br />
to connect specifically to <strong>iPod</strong> and has been certified by the developer<br />
to meet Apple performance standards.<br />
Apple is not responsible for the operation of this device or its compliance<br />
with safety and regulatory standards.<br />
<strong>iPod</strong> is a trademark of Apple Inc., registered in the U.S. and other countries.<br />
31. FROM MAIN JACK<br />
32. LEFT/RIGHT OUT SPEAKERS JACK<br />
33. AC POWER CORD<br />
34. SUBWOOFER SPEAKER<br />
FROM THE CENTRE TO THE EDGE<br />
1<br />
2<br />
3<br />
4<br />
5<br />
6<br />
7<br />
CORRECT INCORRECT<br />
8<br />
9<br />
27<br />
10<br />
11<br />
12<br />
13<br />
14<br />
15<br />
16<br />
17<br />
18<br />
19<br />
20<br />
Important Notes<br />
Keep the safety and operating instructions for future reference.<br />
Avoid installing the unit in locations described below:<br />
Places exposed to direct sunlight or close to heat radiating appliances such as electric heaters.<br />
On top of other stereo equipment that radiate too much heat. Places lacking ventilation or dusty places. Places subject to constant<br />
vibration. Humid or moist places.<br />
Make sure not to obstruct the ventilation openings.<br />
Before turning on the power for the first time, make sure the power cord is properly installed.<br />
Do not expose this product to liquid. Clean only with dry cloth.<br />
To completely disconnect the unit, the power plug must be removed from the mains. When the stand-by LED gives no color, the apparatus<br />
is completely disconnected from mains.<br />
Allow a minimum distance of 10cm around the apparatus for sufficient ventilation.<br />
Dispose of all batteries according to the manufacturers' recommendation.<br />
Do not expose the unit to extreme environmental conditions.<br />
The mains plug should not be obstructed and should be easily accessed during intended use.<br />
Do not cover the unit.<br />
Do not expose this product to naked flame or excessive heat.<br />
Batteries must not be exposed to excessive heat such as sunshine, fire or the like.<br />
Do not tamper with the AC power supply or the mains plug on the unit.<br />
Do not remove any covers or attempt to gain access to the inside of the product. Refer any servicing to qualified personnel.<br />
Do not attempt to remove any screws, or open the casing of the unit; there are no user serviceable parts inside, refer all servicing to<br />
qualified service personnel.<br />
CAUTION : TO REDUCE THE RISK OF ELECTRIC SHOCK DO NOT REMOVE COVER (OR BACK), NO USER SERVICEABLE PARTS<br />
INSIDE, REFER SERVICING TO QUALI<strong>FI</strong>ED SERVICE PERSONNEL.<br />
DANGEROUS VOLTAGE<br />
This product may cause electric shock. Take care when using this product.<br />
ATTENTION<br />
The owners manual contains important operating and maintenance instructions, for your safety, it is necessary to refer to the<br />
manual.<br />
WARNING: TO PREVENT <strong>FI</strong>RE OR SHOCK HAZARD, DO NOT EXPOSE T<strong>HI</strong>S APPLIANCE TO LIQUIDS.<br />
Note:<br />
- This unit will become warm when used for a long period of time. This is normal and does not indicate a problem with the unit.<br />
- The CD player includes micro-processors which may malfunction as a result of external electrical interference or noise.<br />
If the CD player is not working properly, disconnect the power source and then reconnect it.<br />
- Excessive sound pressure from earphones and headphones can cause hearing loss.<br />
- If any unusual conditions occurs in the display window or key button, switch the unit off, then turn on the unit again.<br />
Assembly of Unit and speaker<br />
1. Wall mounting<br />
56mm<br />
139mm<br />
Fix two screws (Size:3.5*25BA) into the wall parallel<br />
with each other. (The distance between the two screws<br />
should be 56mm)<br />
2. Speakers connection<br />
Max connection distance is 2 metres<br />
1<br />
3<br />
146mm<br />
Fix two screws(Size:3.5*25BA) into the wall parallel<br />
with each other. (The distance between the two nails<br />
should be146mm)<br />
3. Universal Dock adapter connection<br />
(<strong>iPod</strong> adaptors are not included)<br />
POWER/STANDBY<br />
1. Press the STANDBY/ON button on the unit (or remote control) to switch the unit on.<br />
2. Select the sound source (CD, USB, SD CARD, <strong>iPod</strong>, AUX or TUNER) by pressing the FUNCTION button. The<br />
display will light up accordingly.<br />
3. Adjust the volume with the VOLUME (UP or DOWN) button on the unit or VOLUME (UP or DOWN) button on the<br />
remote control.<br />
4. Press the STANDBY/ON button again to turn the unit off.<br />
Note:<br />
1. If the unit is in CD/USB DEVICES/SD & MMC CARD/<strong>iPod</strong> mode but there is no signal, the main unit will automatically switch off<br />
after 15 minutes.<br />
2. When the unit is in <strong>iPod</strong> mode, if there is no <strong>iPod</strong> device on the dock for <strong>iPod</strong>, the main unit will automatically switch off after 15 minutes.<br />
3. When the unit is in standby mode, press any button/key to make the display light for 10 seconds.<br />
4. To conserve energy, please turn the main switch off when the unit is not in use.<br />
CLOCK SETTING<br />
When the unit is in STANDBY mode.<br />
1. Press and hold the <strong>iPod</strong>/MEM/C-ADJ button until the time displays in 24-hour digits and flashes.<br />
2. Press the SKIP/TUNE SEARCH (UP or DOWN) button to select 12-hour or 24-hour time.<br />
3. Press the <strong>iPod</strong>/MEM/C-ADJ button again, the HOUR digit will flash on the display, press the SKIP/TUNE SEARCH (UP or DOWN) button<br />
to adjust the HOUR digit.<br />
4. Press the <strong>iPod</strong>/MEM/C-ADJ button once more, the MINUTE digit will flash on the display, press the SKIP/TUNE SEARCH (UP or DOWN)<br />
button to adjust the MINUTE digit.<br />
5. Press the <strong>iPod</strong>/MEM/C-ADJ button again to confirm the time.<br />
6. If no action is taken for 10 seconds during this process, the system will reset and you must start again.<br />
TIMER SETTING (on the remote control)<br />
When the unit is in STANDBY mode.<br />
1. After adjusting the clock, press the TIMER button for a few seconds, " ON" and "00:00" appears on the display and<br />
the HOUR digit flashes.(F1)<br />
2. Press the SKIP/TUNE SEARCH (UP or DOWN) button to adjust the hour at which you would like the unit to switch on.<br />
3. Press the TIMER button again, the MINUTE digit will start flashing, adjust it by pressing the SKIP/TUNE SEARCH (UP or DOWN) button.<br />
4. Press the TIMER button once more to confirm and set the TIMER ON time.<br />
5. After adjusting "TIMER ON", " OFF" appears on the display and the HOUR digit flashes.(F2)<br />
6. Repeat the above steps 2 and 3, and then press the TIMER button once more to confirm and set the TIMER OFF time.<br />
7. Now "TUNER" appears flashing on the display. Select the alarm mode by pressing the SKIP/TUNE SEARCH (UP or DOWN) button.<br />
Choose from TUNER, CD, USB, CARD or <strong>iPod</strong>.<br />
8. Press the TIMER button again, the timer "VOL" indicator appears on the display and flashes, adjust the timer<br />
volume by pressing the SKIP/TUNE SEARCH (UP or DOWN) button.<br />
9. If no action is taken for 10 seconds during this process, the system will reset and you must start again<br />
10. After adjusting "TIMER ON" and "TIMER OFF”, press the TIMER button and " " appears on the display.<br />
11. The main unit will be switched on automatically at the chosen "TIMER ON" time and will start playing in the chosen mode. The main unit<br />
will be switched off automatically at the "TIMER OFF" time.<br />
Note: If the display shows "ERROR" while you set the “TIMER ON” it means both “TIMER ON” and “TIMER OFF” is<br />
the same. In this case, please go to “TIMER OFF” to set the off time first.<br />
FUNCTION SELECT<br />
Press the FUNCTION button on the main unit (or remote control) to select the sound source mode. The sound source changes as below.<br />
CD USB SD CARD IPOD AUX<br />
TUNER<br />
FM RADIO OPERATION<br />
Press the FUNCTION button to select TUNER mode on the main unit (or remote control). This is the radio operation.<br />
Press the SKIP/TUNE SEARCH (UP or DOWN) button to tune the desired frequency.<br />
Manual Tuning<br />
To tune to weak stations, use manual tuning by pressing the SKIP/TUNE SEARCH (UP or DOWN) button continuously until you reach<br />
the correct frequency or the reception is at its best.<br />
Automatic Tuning<br />
1. Press the SKIP/TUNE SEARCH (UP or DOWN) button for a second or more and then release the button. The tuner will automatically<br />
tune to the first station with sufficient signal strength.<br />
2. Repeat above procedure if you wish to select another station.<br />
MONO/STEREO SELECT<br />
You can select MONO or STEREO only in FM mode.<br />
1. When you want to tune an FM station in stereo, press the ID3/MO/ST button. When you receive an FM stereo station the " "<br />
indicator will appear on the display and you can receive FM stereo transmission.<br />
2. When you press the ID3/MO/ST button again, the FM STEREO indicator will turn off and the tuner switch to MONO FM status.<br />
Programming preset stations<br />
You can preset up to 30 FM stations of your choice in the unit’s memory. To store your selected stations:<br />
1. Use the SKIP/TUNE SEARCH (UP or DOWN) button to tune to the chosen station.<br />
2. Press the <strong>iPod</strong>/MEM/C-ADJ button.<br />
3. Press the PRESET/FOLDER (UP or DOWN) button for your desired station number.<br />
4. Press the <strong>iPod</strong>/MEM/C-ADJ button again to confirm your selection.<br />
5. To program more stations into memory, repeat the above steps 2 to 5.<br />
6. To change the stored preset stations, repeat the above steps 2 to 5.<br />
Notes:<br />
1. Storing a new station into a preset location will erase the station previously stored in that location.<br />
2. Powering the unit off will not erase the preset stations. In the event of long term disruption to the power supply, you may need to<br />
perform the station presetting procedures again.<br />
3. To erase all preset stations from the unit’s memory, ensure the unit is in STANDBY mode and press the PLAY/PAUSE/ENTER button<br />
for several seconds until the standby LED and LCD flash once.<br />
Selecting the Preset Stations<br />
1. Press the PRESET/FOLDER (UP or DOWN) button to select the desired preset station number.<br />
2. The numeric location of that preset station is displayed along with the corresponding frequency.<br />
FM Antenna<br />
An FM antenna wire is included for better FM reception.
CD/MP3/WMA OPERATION<br />
Listening To Compact Disc (CD/MP3/WMA)<br />
1. Press the FUNCTION button on the unit (or remote control) to select CD mode.<br />
2. Press the CD DOOR OPEN/CLOSE button on the main unit and the CD door will open.(F3)<br />
3. Insert a CD/MP3 disc into the CD compartment and press the CD DOOR OPEN/CLOSE button again to close the CD<br />
door. The main unit will read the CD/MP3 disc.<br />
NOTE: (1) This unit can play CD, CD-R, CD-RW, MP3 and WMA discs.<br />
(2) It can read "8 cm" and "Multi Section" MP3 discs.<br />
(3) The "Playback Transfer Rate" in MP3 and WMA.<br />
a. In MP3, transfer bit rate: 8 - 256 kbps.<br />
b. In WMA, transfer bit rate: 8 - 192 kbps.<br />
(4) The unit can read up to 99 folders and/or 999 tracks.<br />
(5) If no disc is inserted or the unit can’t read the disc, NO DISC will be displayed.(F4)<br />
Playing The Entire CD/MP3/WMA<br />
CD<br />
1. Insert the CD disc into the CD compartment. The main unit will read the total number of the folders and tracks.<br />
2. Press the PLAY/PAUSE/ENTER button and the unit will play the first track of the CD.(F5)<br />
3. Press the PLAY/PAUSE/ENTER button once again and the time elapsed indicator will flash.(F6)<br />
4. Press SKIP/TUNE SEARCH (UP or DOWN) button once on the unit (or remote control) to change tracks; press and hold the<br />
SKIP/TUNE SEARCH (UP or DOWN) button on the unit (or remote control) once to scan forwards or backwards within a track.<br />
5. To pause playback, press the PLAY/PAUSE/ENTER button once on the unit (or remote control).<br />
6. To resume playback, press the PLAY/PAUSE/ENTER button once more.<br />
7. To stop playback, press the STOP/MENU button once on the unit (or remote control).<br />
MP3/WMA<br />
1. Insert the MP3/WMA disc into the CD compartment. The main unit will read the total number of the folders and tracks.<br />
2. Press the PLAY/PAUSE/ENTER button and the unit will play the first track of the CD.(F7)<br />
3. Press the PLAY/PAUSE/ENTER button once again and the time elapsed indicator will flash.(F8)<br />
4. Press SKIP/TUNE SEARCH (UP or DOWN) button once on the unit (or remote control) to change tracks; press and hold the<br />
SKIP/TUNE SEARCH (UP or DOWN) button on the unit (or remote control) once to scan forwards or backwards within a track.<br />
5. To pause playback, press the PLAY/PAUSE/ENTER button once on the unit (or remote control).<br />
6. To resume playback, press the PLAY/PAUSE/ENTER button once more again.<br />
7. To change the ALBUM NO., press the PRESET/FOLDER (UP or DOWN) once.<br />
8. To stop playback, press the STOP/MENU button once on the unit (or remote control).<br />
F3<br />
F4 F5 F6<br />
F7 F8<br />
Note: If the main unit is not working properly, disconnect the power source and then reconnect it again.<br />
ID3 OPERATION (on the remote control)<br />
When the unit is in MP3/WMA mode<br />
1. Press the ID3/MO/ST button once to open the ID3 function.<br />
2. If the MP3/WMA file is written in “ID3”, the unit will automatically search information including “TITLE NAME”, “ARTIST NAME” and<br />
“ALBUM NAME” which it will show on the display.<br />
3. Press the ID3/MONO/STEREO button on the remote again. Then the unit will resume playing normally.<br />
USB/SD CARD OPERATION<br />
When the unit is in STANDBY mode<br />
1. Insert the USB DEVICE or SD/MMC CARD and then press the STANDBY button on the main unit (or remote control) to power "ON" the unit.<br />
2. Press the FUNCTION button on the main unit (or remote control) to select the USB or SD/MMC mode. The main unit will<br />
read the total number of the folders and tracks stored on the USB or SD/MMC device. (F9)<br />
3. If the USB memory device contains more than one folder.<br />
a. Press the PRESET/FOLDER (UP or DOWN) button to select a folder.<br />
b. Press the SKIP/TUNE SEARCH (UP or DOWN) button to select a track within the desired folder.<br />
4. If the MP3 and WMA are written in "ID3".<br />
a. When the unit is playing an MP3 or WMA file, press the ID3/MONO/STEREO button once. The display will show "ID3 ON" and it will<br />
then search more than 64 characters for "TITLE NAME", "ARTIST NAME" or "ALBUM NAME" which move continuously from the<br />
right corner to the left corner on the display.<br />
b. Press the ID3/MONO/STEREO button once again. The display will shows "ID3 OFF" and the main unit will play normally.<br />
Note: 1. The main unit can play MP3 and WMA only in this mode.<br />
2. This unit can support most USB devices and SD/MMC cards. The memory capacity is up to 2GB. The unit cannot access memory<br />
capacities over 2GB.<br />
3. This unit can support USB version 1.1 and 2.0.<br />
4. This unit does not support WMA files which are a protected “DRM <strong>FI</strong>LE”.<br />
4<br />
<strong>iPod</strong> OPERATION<br />
When the unit is in STANDBY mode:<br />
1. Insert the <strong>iPod</strong> device in the <strong>iPod</strong> dock connector on the top of the main unit.<br />
2. Power on the main unit and then press the FUNCTION button to <strong>iPod</strong> mode. The <strong>iPod</strong> indicator will appear on the display of<br />
the main unit. (F22)<br />
When the unit is in <strong>iPod</strong> mode:<br />
1. Press the PLAY/PAUSE/ENTER button once to start the <strong>iPod</strong> playing. Adjust the volume control by turning the VOLUME<br />
<strong>HI</strong>GH/LOW knob. To stop the current track playing, press the STOP/MENU button once.<br />
2. Press the PLAY/PAUSE/ENTER button once to pause the current track. To resume playback, press the<br />
PLAY/PAUSE/ENTER button once again.<br />
3. To skip forwards or backwards, press the SKIP/TUNE SEARCH (UP or DOWN) button to select the desired track.<br />
4. Press the REPEAT or RANDOM button on the remote control to make the <strong>iPod</strong> playing repeatedly or randomly.<br />
Note: <strong>iPod</strong> touch version 1.1.4 or above can support REPEAT or RANDOM function.<br />
<strong>iPod</strong> MENU mode:<br />
<strong>iPod</strong> MENU mode allows the <strong>iPod</strong> device to be controlled via the main unit and/or the remote control.<br />
1. When the unit is in <strong>iPod</strong> mode, press the <strong>iPod</strong>/MEM/CLOCK-ADJ button on the main unit or remote control to activate <strong>iPod</strong> MENU mode.<br />
<strong>iPod</strong> MENU will appear on the main unit’s display. (F23)<br />
a. Press PLAY/ENTER to enter each menu in the <strong>iPod</strong> device or to play a track or a file.<br />
b. Press STOP/MENU to return to previous menu in the <strong>iPod</strong> device.<br />
c. Press the SKIP/TUNER SEARCH (UP or DOWN) button to scroll up or down and to select desired folder or track on the <strong>iPod</strong> device.<br />
2. If you want to deactivate <strong>iPod</strong> MENU mode, press <strong>iPod</strong>/MENU/CLOCK-ADJ once.<br />
<strong>iPod</strong> MENU mode will no longer be displayed on the main unit’s display.<br />
3. To resume playback, press the <strong>iPod</strong>/MEM/C-ADJ button once again, the unit will return to <strong>iPod</strong> mode.<br />
Note:<br />
1. You can control the <strong>iPod</strong> device via the main unit, remote control or <strong>iPod</strong> player itself while the unit is in "<strong>iPod</strong>" or " <strong>iPod</strong> MENU" mode.<br />
2. To avoid damage to <strong>iPod</strong> devices and/or the main unit, the <strong>iPod</strong> device must be docked while the unit is in STANDBY mode.<br />
Charging the <strong>iPod</strong> device battery through the main unit:<br />
1. <strong>iPod</strong> devices have a internal non-removable battery which will need to be charged from time to time.<br />
2. You can charge the <strong>iPod</strong> device through the main unit when the unit is in STANDBY or POWER ON modes.<br />
Note: 1. The <strong>iPod</strong> device’s battery is 80-percent charged in about an hour and fully charged in a few hours. If you charge an <strong>iPod</strong> device<br />
while playing music, it may take longer.<br />
2. Charging an <strong>iPod</strong> device whilst the unit is in TUNER mode is not recommended as it may interfere with reception.<br />
F22 F23<br />
AUX PLAY<br />
The AUX input is located at the rear of the unit. Use a 3.5mm stereo jack cable to connect audio equipment through the LINE IN jack.<br />
1. To select the AUX input function, repeatedly press the FUNCTION button on the unit (or remote control) until AUX is shown on the display.<br />
2. Press the VOLUME (UP or DOWN) button to adjust the sound output level.<br />
Note: LINE in cable not included.<br />
TO SET SLEEP FUNCTION(on the remote control)<br />
1. If you want to fall asleep to music, press the SLEEP button.<br />
2. You may select the TUNER, CD/MP3, USB, SD/MMC, <strong>iPod</strong> or AUX mode to play between 10 and 90 minutes of music before the system<br />
shuts itself down automatically.<br />
EQ CONTROL(on the remote control)<br />
EQ shows the present sound tone. When you press the EQ button, the sound tone changes as below:<br />
MUTE SETTING(on the remote control)<br />
1. When you press the MUTE button once on the remote control, the volume level will flash and the audio output will be temporarily<br />
terminated. (F24)<br />
2. Press the MUTE button again, the volume level and the audio output will return to normal.<br />
F24<br />
6<br />
Playing the Entire discard<br />
1. Press the PLAY/PAUSE/ENTER button to start playback. Playback starts with the first track. The display shows the current track number<br />
and its elapsed time.(F10)<br />
2. To pause playback, press the PLAY/PAUSE/ENTER button. The time elapsed indicator will flash.(F11)<br />
3. To resume playback, press the PLAY/PAUSE/ENTER button again.<br />
4. To stop playback, press the STOP/MENU button.<br />
Note: To avoid damage to the main unit, USB or SD/MMC cards, the device must be inserted into the unit while the unit is in STANDBY mode.<br />
F9 F10 F11 F12<br />
REPEAT PLAY<br />
CD<br />
1. Press the REPEAT button once, REPEAT is displayed. The main unit will play the current track repeatedly.(F12)<br />
2. Press the REPEAT button twice, REPEAT ALL is displayed. The main unit will play all tracks repeatedly.(F13)<br />
3. Press the REPEAT button three times to switch the REPEAT function off.<br />
MP3/WMA<br />
1. Press the REPEAT button once, REPEAT is displayed. The main unit will play the current track repeatedly. (F14)<br />
2. Press the REPEAT button twice, REPEAT ALL is displayed. The main unit will play all tracks repeatedly.F15)<br />
3. Press the REPEAT button three times, REPEAT ALBUM is displayed. It will play the current album repeatedly.(F16)<br />
4. Press the REPEAT button four times to switch the REPEAT function off.<br />
F13 F14 F15<br />
PROGRAM MODE<br />
Users can program up to 32 tracks in CD mode or 64 tracks in MP3/WMA/USB/SD CARD mode into the system memory. Programming can<br />
only be done when the system is switched on but inactive.<br />
1. How to play the program<br />
CD<br />
1) Press the <strong>iPod</strong>/MEM/C-ADJ button and shift to PROGRAM mode.(F17)<br />
2) Press the SKIP/TUNER SEARCH (UP or DOWN) button, the track number will be changed.<br />
3) Press the <strong>iPod</strong>/MEM/C-ADJ button to confirm the track number.<br />
MP3/WMA/USB/SD CARD<br />
1) Press the <strong>iPod</strong>/MEM/C-ADJ button and shift to PROGRAM mode. The album number will flash. (F18)<br />
2) Press the PRESET/FOLDER button and the album number will be changed.<br />
3) Press the <strong>iPod</strong>/MEM/C-ADJ button and the track number will flash.(F19)<br />
4) Press the SKIP/TUNER SEARCH button to change the the track number.<br />
5) Press the <strong>iPod</strong>/MEM/C-ADJ button to confirm the track number.<br />
F17 F18 F19<br />
2. PROGRAM PLAY<br />
Press the PLAY/PAUSE/ENTER button on the unit (or remote control) and first track of the program will begin playing. When all<br />
tracks have been played, the unit display will show the number of tracks and the playing time of the CD/MP3/WMA tracks.<br />
3. CANCEL PROGRAM<br />
1. Press the STOP/MENU button once or open the CD tray door and close it again to erase the program memory.<br />
2. Setting a new program will clear the existing one.<br />
Note : When the unit is in program mode.<br />
1. Press the "REPEAT" button once and the "REPEAT" indicator will light on the display. The unit will repeat the current track.<br />
2. Press the “REPEAT" button twice and "REPEAT ALL" will light on the display. The unit will repeat all the tracks.<br />
3. Press the “REPEAT” button again. The main unit will return to play the program normally.<br />
RANDOM PLAY<br />
1. Press the RANDOM button once, RANDOM is displayed and the order of tracks is shuffled.(F20)<br />
2. Press the RANDOM button again to resume normal play.<br />
INTRO PLAY(on the remote control)<br />
1. Press the INTRO button once and INTRO is displayed. The main unit will play the first 10 seconds of each track.(F21)<br />
2. Press the INTRO button twice to resume normal play.<br />
F20 F21<br />
SPECI<strong>FI</strong>CATION<br />
POWER SUPPLY: 240V~50Hz<br />
OUTPUT POWER: 5.0 Watts x 2 + 30W SUBWOOFER<br />
UNIT MAXIMUM OUTPUT POWER: 85W<br />
UNIT DIMENSION: 250 (W) x 112.7 (D) x 207.5 (H) mm<br />
SUB WOOFER DIMENSION: 131(W)x 242 (D) x 202.5(H) mm<br />
SPEAKER BOX DIMENSION: 139 (W) x 72.5 (D) x 200 (H) mm<br />
N. W.: 6.6kg<br />
RADIO SECTION<br />
FREQUENCY RANGE: FM 87.5 - 108 MHz<br />
COMPACT DISC SECTION<br />
OPTICAL PICKUP: 3 - BEAM LASER<br />
FREQUENCY RESPONSE: 100Hz - 16kHz<br />
SPECI<strong>FI</strong>CATION SUBJECT TO CHANGE WITHOUT FURTHER NOTICE.<br />
Ventilation warning : " The normal ventilation of the product shall not be impeded for intended use."<br />
5<br />
7<br />
F16