TEAM KM 29 T - Kalorik
TEAM KM 29 T - Kalorik
TEAM KM 29 T - Kalorik

Create successful ePaper yourself
Turn your PDF publications into a flip-book with our unique Google optimized e-Paper software.
�<br />
I/B Version<br />
091201<br />
Fax +32 2 359 95 50<br />
Generated by Unregistered Batch DOC TO PDF Converter<br />
2011.3.804.1511, please register!<br />
Copies of the I/B. Please reproduce them without any<br />
changes except under special instruction from Team<br />
International BELGIUM. The pages must be reproduced<br />
and folded in order to obtain a booklet A5 (+/- 148.5 mm<br />
width x 210 mm height). When folding, make sure you<br />
keep the good numbering when you turn the pages of<br />
the I/B. Don’t change the page numbering. Keep the<br />
language integrity.<br />
Programmierbarer Kaffeeautomat<br />
Programmable Coffee Maker<br />
Cafetière programmable<br />
Programmeerbaar Koffiezetapparaat<br />
Cafetera programable<br />
Cafeteira programável<br />
Caffettiera/Orziera programmabile<br />
Filtru de cafea programabil<br />
Програмируема кафе машина<br />
�<br />
Front cover page (first page)<br />
Assembly page 1/40<br />
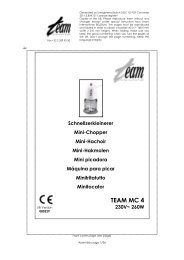
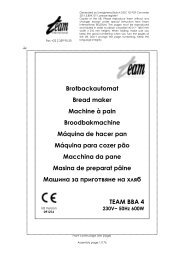
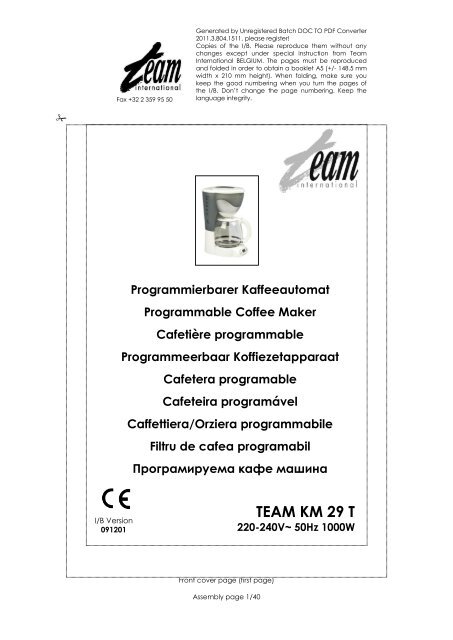
<strong>TEAM</strong> <strong>KM</strong> <strong>29</strong> T<br />
220-240V~ 50Hz 1000W
�<br />
Fax +32 2 359 95 50<br />
D<br />
1. Basis<br />
2. Warmhalteplatte<br />
3. Filterträger<br />
4. Wassertank mit Wasserstandsanzeige<br />
5. Deckel des Wassertankes<br />
6. Glaskanne<br />
7. Deckel der Glaskanne<br />
8. EIN-/AUS-Schalter (0/I)<br />
9. PROGRAMME-Taste<br />
10. AROMA-Taste<br />
11. LCD-Display<br />
12. HOUR-Taste<br />
13. MIN-Taste<br />
Copies of the I/B. Please reproduce them without any<br />
changes except under special instruction from Team<br />
International BELGIUM. The pages must be reproduced<br />
and folded in order to obtain a booklet A5 (+/- 148.5 mm<br />
width x 210 mm height). When folding, make sure you<br />
keep the good numbering when you turn the pages of<br />
the I/B. Don’t change the page numbering. Keep the<br />
language integrity.<br />
2 <strong>TEAM</strong> <strong>KM</strong> <strong>29</strong> T - 091201<br />
Assembly page 2/40<br />
UK<br />
1. Main Body<br />
2. Hotplate<br />
3. Filter holder housing<br />
4. Graduated water tank<br />
5. Lid of the water tank<br />
6. Glass jug<br />
7. Lid of the glass jug<br />
8. ON/OFF switch (0/I)<br />
9. PROGRAMME button<br />
10. AROMA button<br />
11. LCD display<br />
12. HOUR button<br />
13. MIN button
�<br />
Fax +32 2 359 95 50<br />
F<br />
1. Base<br />
2. Plaque chauffante<br />
3. Porte-filtre<br />
4. Réservoir d’eau gradué<br />
5. Couvercle du réservoir<br />
6. Verseuse<br />
7. Couvercle de la verseuse<br />
8. Interrupteur marche/arrêt (0/I)<br />
9. Bouton de programmation<br />
10. Bouton d’arôme<br />
11. Ecran LCD<br />
12. Bouton des heures (HOUR)<br />
13. Bouton des minutes (MIN)<br />
NL<br />
1. Basis<br />
2. Warmhoudplaat<br />
3. Filterhouder<br />
4. Waterreservoir<br />
5. Deksel van het waterreservoir<br />
6. Glazen kan<br />
7. Deksel van de glazen kan<br />
8. Aan-/uit-schakelaar (0/I)<br />
9. PROGRAMME-toets<br />
10. AROMA-toets<br />
11. LCD-display<br />
12. HOUR-toets<br />
13. MIN-toets<br />
SP<br />
1. Base<br />
2. Placa de calefacción<br />
3. Depósito para el filtro<br />
4. Depósito de agua<br />
5. Tapadera del depósito<br />
6. Jarra<br />
7. Tapadera de la jarra<br />
8. Interruptor ON/OFF (0/I)<br />
9. Botón PROGRAMME<br />
10. Botón AROMA<br />
11. Pantalla LCD<br />
12. Botón de las HORAS<br />
13. Botón MIN<br />
P<br />
1. Base<br />
2. Placa eléctrica<br />
3. Porta-filtro<br />
4. Reservatório da água<br />
5. Tampa do depósito<br />
6. Jarro<br />
Copies of the I/B. Please reproduce them without any<br />
changes except under special instruction from Team<br />
International BELGIUM. The pages must be reproduced<br />
and folded in order to obtain a booklet A5 (+/- 148.5 mm<br />
width x 210 mm height). When folding, make sure you<br />
keep the good numbering when you turn the pages of<br />
the I/B. Don’t change the page numbering. Keep the<br />
language integrity.<br />
3 <strong>TEAM</strong> <strong>KM</strong> <strong>29</strong> T - 091201<br />
Assembly page 3/40<br />
7. Tampa do jarro<br />
8. Interruptor ON/OFF (0/I)<br />
9. Botão PROGRAMME/Programa<br />
10. Botão AROMA<br />
11. Ecrã LCD<br />
12. Botão HOUR/Hora<br />
13. Botão MIN<br />
I<br />
1. Base<br />
2. Piastra riscaldante<br />
3. Portafiltro<br />
4. Serbatoio<br />
5. Coperchio<br />
6. Brocca di vetro<br />
7. Coperchio della brocca di vetro<br />
8. Interruttore ON/OFF (0/I)<br />
9. Tasto PROGRAMME<br />
10. Tasto AROMA<br />
11. Display LCD<br />
12. Tasto ORA/HOUR<br />
13. Tasto MINUTI/MIN<br />
RO<br />
1. Carcasa<br />
2. Placa calda<br />
3. Carcasa filtrului<br />
4. Rezervor apa gradat<br />
5. Capac rezervor apa<br />
6. Cana din sticla<br />
7. Capac cana sticla<br />
8. Buton Oprit/Pornit (0/I)<br />
9. Butonul PROGRAMME<br />
10. Butonul AROMA<br />
11. Display LCD<br />
12. Butonul HOUR<br />
13. Butonul MIN<br />
BG<br />
1. Корпус<br />
2. Котлон<br />
3. Държач на филтъра<br />
4. Разграфен резервоар<br />
5. Капак на резервоара<br />
6. Стъклена кана<br />
7. Капак на каната<br />
8. Ключ за Вкл./ Изкл. (0/I)<br />
9. Бутон за програмиране<br />
10. Бутон за аромата<br />
11. Дисплей с течни кристали<br />
12. Бутон за настройка на часа<br />
13. Бутон за настройка на минутите
�<br />
Fax +32 2 359 95 50<br />
WICHTIGE SICHERHEITSVORSCHRIFTEN<br />
Copies of the I/B. Please reproduce them without any<br />
changes except under special instruction from Team<br />
International BELGIUM. The pages must be reproduced<br />
and folded in order to obtain a booklet A5 (+/- 148.5 mm<br />
width x 210 mm height). When folding, make sure you<br />
keep the good numbering when you turn the pages of<br />
the I/B. Don’t change the page numbering. Keep the<br />
language integrity.<br />
Lesen Sie aufmerksam die Gebrauchsanleitung, bevor Sie Ihr Gerät benutzen, und befolgen Sie<br />
immer die Sicherheitsvorschriften und die Gebrauchsanweisung.<br />
Wichtig: Personen (einschließlich Kinder), die aufgrund ihrer physischen, sensorischen oder<br />
geistigen Fähigkeiten oder ihrer Unerfahrenheit oder Unkenntnis nicht in der Lage sind, das<br />
Gerät sicher zu benutzen, sollten dieses Gerät nicht ohne Aufsicht oder Anweisung durch eine<br />
verantwortliche Person benutzen. Kinder sollten beaufsichtigt werden, um sicherzustellen, dass<br />
sie nicht mit dem Gerät spielen.<br />
� Kontrollieren Sie, ob die Netzspannung mit der auf dem Gerät vermerkten Spannung<br />
übereinstimmt, bevor Sie das Gerät benutzen.<br />
� Lassen Sie Ihr Gerät niemals beim Gebrauch unbeaufsichtigt.<br />
� Überprüfen Sie regelmäßig die Anschlussleitung und das Gerät auf Beschädigungen. Bei<br />
Beschädigungen an Anschlussleitung oder Gerät, darf das Gerät aus Sicherheitsgründen<br />
nicht mehr benutzt werden. Für Reparaturen wenden Sie sich an einen Fachmann (*) .<br />
� Benutzen Sie das Gerät nur zu Haushaltszwecken, wie in der Bedienungsanleitung<br />
angegeben.<br />
� Tauchen Sie das Gerät niemals in Wasser oder andere Flüssigkeiten, weder zum Reinigen,<br />
noch zu einem anderen Zweck. Geben Sie das Gerät niemals in die Spülmaschine.<br />
� Benutzen Sie das Gerät nicht in der Nähe einer Wärmequelle.<br />
� Entfernen Sie den Stecker aus der Steckdose, und lassen Sie das Gerät erkalten, bevor Sie<br />
es reinigen oder wegräumen.<br />
� Benutzen Sie das Gerät nicht im Freien und bewahren Sie es an einem trockenen Platz auf.<br />
� Benutzen Sie nur Zubehör, welches vom Lieferanten empfohlen wurde. Anderes Zubehör<br />
stellt eine Gefahr für den Benutzer dar und das Gerät könnte dadurch beschädigt<br />
werden.<br />
� Ziehen Sie niemals an der Anschlussleitung, um das Gerät zu bewegen. Stellen Sie das<br />
Gerät auf einen Tisch oder auf eine ebene Fläche damit es nicht umfällt. Achten Sie<br />
darauf, dass nicht die Anschlussleitung irgendwo hängen bleibt und dies zum Fall des<br />
Gerätes führen könnte. Wickeln Sie die Anschlussleitung nicht um das Gerät oder knicken<br />
Sie diese nicht.<br />
� Benutzen Sie das Gerät nicht, wenn die Kanne Risse aufweist oder beschädigt ist.<br />
Benutzen Sie nur die mitgelieferte Kanne. Achtung! Während des Gebrauchs wird Ihre<br />
Kanne heiß. Fassen Sie die Kanne nur am Griff an.<br />
� Berühren Sie nicht die heißen Teile des Gerätes (Achtung: Die Warmhalteplatte ist<br />
ebenfalls heiß!). Fassen Sie nur die Plastikteile an oder heben Sie die Kanne mit Hilfe des<br />
Griffes hoch.<br />
� Achten Sie darauf, dass das Gerät nicht mit leicht entflammbaren Stoffen wie z.B.<br />
Gardinen in Kontakt kommt, es könnte in Brand geraten.<br />
� Benutzen Sie zum Entkalken ausschließlich hierfür vorgesehene Produkte. Benutzen Sie<br />
niemals Ammoniak oder andere Produkte, die Ihrer Gesundheit schaden könnten.<br />
� Geben Sie ausschließlich gemahlenen Kaffee in den Filter.<br />
� Schalten Sie Ihre Kaffeemaschine nicht an ohne Wasser eingefüllt zu haben. Handelt es<br />
sich bei Ihrer Kaffeemaschine um ein programmierbares Gerät, achten Sie darauf, dass Sie<br />
erst Wasser einfüllen, bevor Sie Ihr Gerät programmieren.<br />
Wichtig: geben Sie Ihre Kanne nie in die Mikrowelle um den Kaffee aufzuwärmen. Sollten<br />
Sie es trotzdem machen, dann werden wir keine Haftung dafür tragen.<br />
(*) Fachmann: anerkannter Kundendienst des Lieferanten oder des Importeurs, der für derartige<br />
Reparaturen zuständig ist. Für eventuelle Reparaturen wenden Sie sich bitte an diesen<br />
Kundendienst.<br />
4 <strong>TEAM</strong> <strong>KM</strong> <strong>29</strong> T - 091201<br />
Assembly page 4/40
�<br />
Fax +32 2 359 95 50<br />
ANWENDUNGSBEREICH/TÄTIGKEITSBEREICH<br />
Copies of the I/B. Please reproduce them without any<br />
changes except under special instruction from Team<br />
International BELGIUM. The pages must be reproduced<br />
and folded in order to obtain a booklet A5 (+/- 148.5 mm<br />
width x 210 mm height). When folding, make sure you<br />
keep the good numbering when you turn the pages of<br />
the I/B. Don’t change the page numbering. Keep the<br />
language integrity.<br />
� Benutzen Sie das Gerät nur zu Haushaltszwecken, wie in der Bedienungsanleitung<br />
angegeben.<br />
� Dieses Gerät ist bestimmt für Haushaltsanwendungen und ähnliche Nutzanwendungen<br />
wie:<br />
Dem Personal vorbehaltene Küchenecken in Laden, Büros und anderen<br />
berufsmäßigen Umgebungen.<br />
Bauernhöfe.<br />
Die Benutzung durch Kunden von Hotels, Motels und anderen<br />
Wohnumgebungen.<br />
Umgebungen des Gästehaustyps.<br />
ERSTE INBETRIEBNAHME<br />
Vor der ersten Kaffeezubereitung führen Sie bitte einen Kochvorgang mit frischem Wasser<br />
durch (ohne Kaffeepulver). Ist das Wasser durchgelaufen, schalten Sie das Gerät ab und<br />
wiederholen Sie den Vorgang nach ca. 5 Minuten mit frischem Wasser. Führen Sie den<br />
Kochvorgang mindestens 2 mal durch.<br />
EINSTELLUNG DER UHR<br />
� Beim Anschluss der Kaffeemaschine an das Netz erscheint im Display die Zeit 12:00.<br />
� Die 24-Stunden-Anzeige ist der vorgegebene Standardwert. Um auf eine 12-Stunden-<br />
Anzeige umzuwandeln betätigen Sie gleichzeitig die Taste HOUR und die Taste MIN. “AM”<br />
oder “PM” erscheint im Display.<br />
� Um die aktuelle Uhrzeit einzustellen, drücken Sie auf die Programme-Taste. “12:00” blinkt.<br />
� Durch drücken der Tasten HOUR und MIN stellen Sie die aktuelle Uhrzeit ein (Hour: Stunden;<br />
Min: Minuten).<br />
� Die Uhr läuft am Anfang langsam weiter. Nach längerem Druck auf die Taste läuft sie<br />
schneller vorwärts.<br />
� Beim Erreichen der gewünschten Uhrzeit, lassen Sie die Tasten los und warten Sie etwa 3<br />
Sekunden oder drücken Sie zweimal auf die PROGRAMME-Taste. In beiden Fällen sehen<br />
Sie jetzt die aktuelle Uhrzeit im Display.<br />
KAFFEEZUBEREITUNG<br />
� Öffnen Sie den Deckel des Wassertanks.<br />
� Füllen Sie die gewünschte Wassermenge mit der gläsernen Kanne in den Wassertank ein.<br />
Überfüllen sie den Wassertank nicht, indem Sie das Maximumniveau auf dem Wassertank<br />
respektieren. Die Anzahl der Tassen lesen Sie an der Wasserstandskala ab.<br />
� Schwenken Sie den Heißwassergießer, so dass er sich über dem Wassertank befindet.<br />
� Fügen Sie einen Filter hinzu und füllen Sie ihn. Achten Sie darauf, dass der Filterträger korrekt<br />
am Platz ist. Schwenken Sie den Heißwassergießer, so dass er sich über der Mitte des Filters<br />
befindet.<br />
� Auf dem Heißwassergießer gibt es einen Aromaregler. Stellen Sie den Regler auf die leere<br />
Tasse ein, falls Sie leichten Kaffee wollen, oder auf die volle Tasse falls Sie starken Kaffee<br />
wollen.<br />
� Vergessen Sie nicht den Deckel zu schließen und die gläserne Kanne auf die Heizplatte zu<br />
stellen bevor Sie das Gerät einschalten.<br />
� Sie können die Aroma-Funktion ein- oder ausschalten, indem Sie auf die Aroma-Taste<br />
drücken. Die rote AROMA-Kontrollleuchte leuchtet auf, wenn die Aroma-Funktion aktiviert<br />
ist. Bei der Aroma-Funktion ist der Wasserfluss langsamer, so dass Ihr Kaffee extra Geschmack<br />
bekommt.<br />
5 <strong>TEAM</strong> <strong>KM</strong> <strong>29</strong> T - 091201<br />
Assembly page 5/40
�<br />
Fax +32 2 359 95 50<br />
Copies of the I/B. Please reproduce them without any<br />
changes except under special instruction from Team<br />
International BELGIUM. The pages must be reproduced<br />
and folded in order to obtain a booklet A5 (+/- 148.5 mm<br />
width x 210 mm height). When folding, make sure you<br />
keep the good numbering when you turn the pages of<br />
the I/B. Don’t change the page numbering. Keep the<br />
language integrity.<br />
� Drücken Sie zweimal auf den Ein-/Ausschalter (Taste 0/I) um das Gerät anzuschalten. Die<br />
Kontrollleuchte des Schalters geht an, und zeigt also, dass das Gerät in Betrieb ist. Die<br />
Warmhaltefunktion ermöglicht Ihnen den Kaffee warm zu halten wenn die<br />
Kaffeemaschine angeschaltet ist und die Kanne sich auf der Warmhalteplatte befindet.<br />
� Eine Tropf-Stoppautomatik verhindert, dass Kaffee auf die Heizplatte tropft wenn die Kanne<br />
entfernt wird; der Tropf-Stopp wird wieder geöffnet, wenn Sie die Kanne auf die Heizplatte<br />
zurückstellen.<br />
� Nach Beendigung des Brühvorganges warten Sie, bis der Filter leergelaufen ist bevor Sie<br />
die Kanne entfernen.<br />
� Sie können jederzeit das Gerät ausschalten, indem Sie einmal auf den Ein-/Ausschalter<br />
drücken (alle Kontrollleuchten sind dann aus).<br />
� Ihr Gerät schaltet automatisch ab 1 Stunde nach Beendigung des Brühvorganges.<br />
PROGRAMMIERUNG DER KAFFEEMASCHINE<br />
Um die Kaffeemaschine zu programmieren um frischen Kaffee an einer vorprogrammierten Zeit<br />
zu kochen, gehen Sie zunächst vor wie beschrieben in den Stufen 1 bis 7 des Abschnitts<br />
“KAFFEEZUBEREITUNG”.<br />
Kontrollieren Sie, ob die Uhr der Kaffeemaschine auf die richtige Uhrzeit eingestellt ist.<br />
Drücken Sie zweimal auf die PROGRAMME-Taste. Im Display erscheint dann 12:00. Anhand der<br />
Tasten HOUR und MIN können Sie die gewünschte Kochzeit einstellen. Sobald die Einstellung<br />
beendet ist, lassen Sie die Tasten los und warten Sie etwa 3 Sekunden oder drücken Sie einmal<br />
auf die PROGRAMME-Taste. In beiden Fällen verschwindet die Programmierzeit und erscheint<br />
jetzt die aktuelle Uhrzeit im Display.<br />
Drücken Sie einmal auf den Ein-/Ausschalter (0/I) um den vorprogrammierten Kochvorgang zu<br />
aktivieren. Die rote AUTO-Kontrollleuchte leuchtet auf, wenn die Kochzeit richtig eingestellt ist.<br />
Sobald die vorprogrammierte Kochzeit erreicht worden ist und die Kaffeemaschine mit dem<br />
Kochvorgang anfängt, erlischt die rote AUTO-Kontrollleuchte und die rote Kontrollleuchte des<br />
Ein-/Ausschalters leuchtet auf.<br />
Wie bei dem normalen Kochvorgang fängt nach dem Ende des Kochprozesses eine<br />
automatische Warmhaltefunktion von einer Stunde an. Nach einer Stunde schaltet sich die<br />
Kaffeemaschine automatisch aus.<br />
Achtung: Um die Programmierzeit zu kontrollieren, nachdem Sie sie eingestellt haben, drücken<br />
Sie auf die Taste PROGRAMME und sie erscheint im Display.<br />
PRAKTISCHE HINWEISE<br />
� Bei der Aroma-Funktion ist der Wasserfluss langsamer, so dass Ihr Kaffee extra Geschmack<br />
bekommt.<br />
� Sobald man die Glaskanne von der Platte wegnimmt, schließt sich automatisch ein Ventil,<br />
das vermeidet, dass Kaffee auf die Warmhalteplatte tropft. Wenn man den Krug wieder<br />
auf die Platte stellt, öffnet sich das Tropfstoppsystem wieder und gestattet dem im Filter<br />
verbliebenen Kaffee weiter in die Kanne zu laufen.<br />
� Wenn der Wassertank leer ist, warten Sie, bis der Kaffee vollkommen durchgelaufen ist.<br />
� Die integrierte Warmhalteplatte fängt an zu heizen wenn Sie die Kaffeemaschine<br />
einschalten (wenn die rote Kontrollleuchte des Ein-/Ausschalters angeht). Sowohl bei<br />
manueller Bedienung als bei Vorprogrammierung, wird sich diese Platte nach etwa 1<br />
Stunde ausschalten.<br />
� Stellen Sie niemals eine (fast) leere Kanne auf die Warmhalteplatte zurück, wenn letztere<br />
noch heiß ist.<br />
� Achtung! Wenn Sie das Gerät ausschalten, bleibt die Platte eine gewisse Zeit heiß. Seien<br />
Sie daher vorsichtig, und warten Sie, bis die Platte vollständig erkaltet hat, bevor Sie diese<br />
reinigen oder das Gerät wegräumen.<br />
6 <strong>TEAM</strong> <strong>KM</strong> <strong>29</strong> T - 091201<br />
Assembly page 6/40
�<br />
Fax +32 2 359 95 50<br />
ENTKALKUNG UND REINIGUNG<br />
Copies of the I/B. Please reproduce them without any<br />
changes except under special instruction from Team<br />
International BELGIUM. The pages must be reproduced<br />
and folded in order to obtain a booklet A5 (+/- 148.5 mm<br />
width x 210 mm height). When folding, make sure you<br />
keep the good numbering when you turn the pages of<br />
the I/B. Don’t change the page numbering. Keep the<br />
language integrity.<br />
� Wir empfehlen Ihnen, zur Verlängerung der Lebensdauer des Gerätes, regelmäßig das<br />
Gerät zu entkalken. Verwenden Sie hierzu nur handelsübliche Entkalkungsmittel und<br />
beachten Sie die entsprechenden Gebrauchsanweisungen.<br />
� Stellen Sie niemals das Gerät und das Zubehör in die Spülmaschine. Reinigen Sie die<br />
Kaffeekanne mit Seifenwasser.<br />
� Zur einfachen Reinigung können Sie den Filterträger abnehmen. So können Sie ihn unter<br />
fließendem Wasser reinigen, und den Filter ins Mülleimer entsorgen ohne den Filter<br />
anzufassen.<br />
� Die Plastikteile waschen Sie am besten mit einem feuchten Tuch.<br />
PRAKTISCHE HINWEISE<br />
Wenn Sie bemerken, dass der Kaffee träger durchfließt, sollten Sie den Kaffeeautomaten<br />
entkalken. Warten Sie nicht, bis es noch schlimmer wird. Wie oft Sie die Kaffeemaschine<br />
entkalken müssen, hängt von der Kalkmenge im Wasser ab, und ist daher von Familie zu<br />
Familie unterschiedlich. Seien Sie darauf deshalb aufmerksam. Die Pflege Ihres<br />
Kaffeeautomaten verlängert seine Lebensdauer, und der Ersatz eines verkalkten Heizelementes<br />
ist von der Garantie ausgeschlossen.<br />
UMWELTSCHUTZ – RICHTLINIE 2002/96/EG<br />
Zum Schutz unserer Umwelt und unserer Gesundheit sind Elektro- und Elektronik-Altgeräte nach<br />
bestimmten Regeln zu entsorgen. Dies fordert den Einsatz sowohl des Herstellers bzw.<br />
Lieferanten als auch des Verbrauchers. Aus diesem Grund darf dieses Gerät, wie das Symbol<br />
auf dem Typenschild bzw. auf der Verpackung zeigt, nicht in den unsortierten Restmüll<br />
gegeben werden. Der Verbraucher hat das Recht, dieses Gerät über kommunale<br />
Sammelstellen zu entsorgen; von dort aus wird die spezifische Behandlung, Verwertung bzw.<br />
das Recycling gem. den Erfordernissen der Richtlinie sichergestellt.<br />
7 <strong>TEAM</strong> <strong>KM</strong> <strong>29</strong> T - 091201<br />
Assembly page 7/40
�<br />
Fax +32 2 359 95 50<br />
IMPORTANT SAFEGUARDS<br />
Copies of the I/B. Please reproduce them without any<br />
changes except under special instruction from Team<br />
International BELGIUM. The pages must be reproduced<br />
and folded in order to obtain a booklet A5 (+/- 148.5 mm<br />
width x 210 mm height). When folding, make sure you<br />
keep the good numbering when you turn the pages of<br />
the I/B. Don’t change the page numbering. Keep the<br />
language integrity.<br />
Please read these instructions carefully before using the appliance, and always follow the<br />
safety and operating instructions.<br />
Important: People (including children) who are not able to use the appliance in a safe way,<br />
due to their physical, sensorial or mental capacity or their lack of experience or knowledge,<br />
must never use the appliance except if they are supervised by a person responsible for their<br />
safety or if they previously received instructions concerning the safe use of the appliance.<br />
Close supervision is necessary to prevent children from using the appliance as a toy.<br />
� Check that your mains voltage corresponds to that stated on the appliance.<br />
� Never leave the appliance unsupervised when in use.<br />
� From time to time check the cord for damages. Never use the appliance if cord or<br />
appliance shows any signs of damage. All repairs should be made by a competent<br />
qualified electrician (*) .<br />
� Only use the appliance for domestic purposes and in the way indicated in these<br />
instructions.<br />
� Never immerse the appliance in water or any other liquid for any reason whatsoever.<br />
Never place it into the dishwasher.<br />
� Never use the appliance near hot surfaces.<br />
� Before cleaning or storing the appliance, always unplug the appliance from the power<br />
supply and let it cool down.<br />
� Never use the appliance outside and always place it in a dry environment.<br />
� Never use accessories that are not recommended by the producer. They could constitute<br />
a danger to the user and risk to damage the appliance.<br />
� Never move the appliance by pulling the cord. Stand the appliance on a table or flat<br />
surface. Make sure the cord cannot get caught in any way. Do not wind the cord around<br />
the appliance and do not bend it.<br />
� Do not use your appliance if the carafe is cracked or broken. Use only the carafe<br />
delivered with your appliance. Attention, your carafe becomes hot during the use. Take it<br />
only by the handle.<br />
� Never touch the hot parts of the appliance (be careful, also the warming plate is a hot<br />
part!), only touch the plastic parts and take the jug by the handle.<br />
� Make sure the appliance never comes into contact with inflammable materials such as<br />
curtains, textiles, ... when it is in use as they might catch fire.<br />
� When removing lime scale, only use special products for the removal of lime scale. Never<br />
use ammonia or any other substance that might damage your health.<br />
� Only put ground coffee in the filter.<br />
� Never use your coffee maker without water in it. If you have a programmable coffee<br />
maker, make sure to fill it with water before programming it.<br />
Important: never put the jug in a microwave oven to warm up the coffee. We will not take<br />
any responsibility if you do so.<br />
(*) Competent qualified electrician: after-sales department of the producer or importer or any<br />
person who is qualified, approved and competent to perform this kind of repairs in order to<br />
avoid all danger. In case of need you should return the appliance to this electrician.<br />
8 <strong>TEAM</strong> <strong>KM</strong> <strong>29</strong> T - 091201<br />
Assembly page 8/40
�<br />
Fax +32 2 359 95 50<br />
FIELD OF APPLICATION/OF OPERATION<br />
Copies of the I/B. Please reproduce them without any<br />
changes except under special instruction from Team<br />
International BELGIUM. The pages must be reproduced<br />
and folded in order to obtain a booklet A5 (+/- 148.5 mm<br />
width x 210 mm height). When folding, make sure you<br />
keep the good numbering when you turn the pages of<br />
the I/B. Don’t change the page numbering. Keep the<br />
language integrity.<br />
� Use the appliance for domestic purposes only and in the way indicated in these<br />
instructions.<br />
� This appliance is intended to be used for domestic applications and similar applications<br />
such as:<br />
Kitchen corners reserved for personnel in shops, offices and other professional<br />
environments.<br />
Farms.<br />
The use by clients of hotels, motels and other environments with a residential<br />
character.<br />
Environments of the “bed and breakfast” type.<br />
INITIAL OPERATION<br />
When you use your appliance for the first time, pour fresh water into the water tank and switch<br />
on the appliance (without coffee).<br />
Once all the water has passed through, switch the appliance off and let it cool down. When it<br />
is cold enough, repeat the process with fresh water. Repeat this process twice.<br />
SETTING THE CLOCK<br />
� Plug in your coffee maker. The time "12:00" will be displayed on the electronic digital clock.<br />
� The 24 hour clock system is the default setting. To change to the 12 hour clock system,<br />
press the HOUR button and the MIN button at the same time. “AM” or “PM” will appear on<br />
the display.<br />
� To set the current time, press the PROGRAMME button once. “12:00” flickers.<br />
� Then press the HOUR button to set the hours, and the MIN button to change the minutes.<br />
� By each impulse on one of those buttons, the hour or minutes will increase by 1 unit but if<br />
you keep the pressure, the time will roll forward more quickly.<br />
� When the setting is finished, wait about 3 seconds or press twice successively the<br />
PROGRAMME button. In both cases, the set clock will stay displayed.<br />
PREPARATION OF COFFEE<br />
� Open the lid of the water tank.<br />
� Using the glass carafe, pour the desired amount of water into the water tank. Make sure<br />
not to overfill by respecting the maximum level indicated on the water tank.<br />
� Swing the shower head so that it hangs above the water tank.<br />
� Put a filter in the filter holder and add the desired quantity of ground coffee in the filter.<br />
Make sure the filter holder is placed correctly in the appliance. Swing the shower head so<br />
that it hangs above the center of the filter.<br />
� On the shower head there is an aroma regulator; put it on the empty cup setting for mild<br />
coffee or on the filled cup setting for strong coffee.<br />
� Never forget to close the lid of the water tank and to place the glass carafe on the<br />
warming plate before switching on your coffee maker.<br />
� You can activate or deactivate the aroma function by pressing the AROMA button. The<br />
red AROMA indicator lamp will come on when the aroma function is activated. If you use<br />
the aroma function, the water flow will be slower which will give your coffee extra flavour.<br />
� Press the on-off switch (0/I) twice to switch on the coffee maker. The pilot light of the<br />
switch will be illuminated, indicating that your appliance is working. A device allows you to<br />
keep coffee warm for as long as the coffee maker is working and the jug is standing on<br />
the appliance.<br />
9 <strong>TEAM</strong> <strong>KM</strong> <strong>29</strong> T - 091201<br />
Assembly page 9/40
�<br />
Fax +32 2 359 95 50<br />
Copies of the I/B. Please reproduce them without any<br />
changes except under special instruction from Team<br />
International BELGIUM. The pages must be reproduced<br />
and folded in order to obtain a booklet A5 (+/- 148.5 mm<br />
width x 210 mm height). When folding, make sure you<br />
keep the good numbering when you turn the pages of<br />
the I/B. Don’t change the page numbering. Keep the<br />
language integrity.<br />
� When you remove the jug from the appliance, a non-drip valve will automatically operate<br />
to stop any drops of coffee dripping onto the hotplate. Replacement of the carafe<br />
automatically opens the non-drip valve and allows remaining coffee to filter through into<br />
the jug.<br />
� Wait until the brewing process is finished and the filter has run empty before removing the<br />
jug.<br />
� You can switch off your appliance anytime simply by pressing the on-off switch once (all<br />
pilot lights will be off).<br />
� Your coffee maker will switch off automatically 1 hour after it has stopped brewing coffee.<br />
PROGRAMMING THE COFFEE MAKER<br />
To programme your coffee maker to brew fresh coffee at a preset time, first follow steps 1 to 7<br />
in the “PREPARATION OF COFFEE” section.<br />
Make sure the coffee maker’s clock is set to the right time.<br />
Press the PROGRAMME button twice. The clock will now display 12:00. Use the HOUR and MIN<br />
buttons to set the desired brew time. Once the setting is finished, wait about 3 seconds or press<br />
once the PROGRAMME button. In both cases the programming time will disappear and will be<br />
replaced by the clock time.<br />
Press the on-off switch (0/I) once to activate the preset brew cycle. The red AUTO light will<br />
illuminate when the brew time is properly set.<br />
When your preset brew time is reached and the coffee maker starts its brew cycle, the AUTO<br />
light will go out and the red pilot light of the on-off switch will illuminate.<br />
As with the regular brew cycle, an automatic one-hour keep-warm cycle will commence after<br />
your coffee maker has finished brewing. When the hour is over, the coffee maker will<br />
automatically shut itself off.<br />
Note: to check the programming time after you have set it, press the PROGRAMME button and<br />
it will be displayed.<br />
USE COMFORT<br />
� If you use the aroma function, the water flow will be slower which will give your coffee<br />
extra flavour.<br />
� When you remove the carafe from this appliance, a non-drip valve will automatically<br />
operate to stop any drops of coffee dripping onto the hotplate. Replacement of the<br />
carafe automatically opens the non-drip valve and allows any remaining coffee to filter<br />
through into the carafe.<br />
� When the water tank is empty, wait a few seconds before removing the carafe in order to<br />
let the water in the filter flow totally.<br />
� Once the coffee ready, you can keep it warm by letting it on the hotplate. This will start to<br />
heat up as soon as the coffee maker is on (red pilot light of the on-off switch on). With the<br />
automatic or the manual operation, the duration won’t exceed about 1 hour because<br />
your coffee maker will switch off automatically after that.<br />
� Never put an (almost) empty jug back on the hotplate when the latter is still hot.<br />
� Caution: when you switch your coffee maker off, the hotplate will also switch off, but it will<br />
still stay hot for a short while. So pay attention and wait until the hotplate has completely<br />
cooled down before cleaning or storing the appliance.<br />
10 <strong>TEAM</strong> <strong>KM</strong> <strong>29</strong> T - 091201<br />
Assembly page 10/40
�<br />
Fax +32 2 359 95 50<br />
DESCALING AND CLEANING<br />
Copies of the I/B. Please reproduce them without any<br />
changes except under special instruction from Team<br />
International BELGIUM. The pages must be reproduced<br />
and folded in order to obtain a booklet A5 (+/- 148.5 mm<br />
width x 210 mm height). When folding, make sure you<br />
keep the good numbering when you turn the pages of<br />
the I/B. Don’t change the page numbering. Keep the<br />
language integrity.<br />
� Descaling the coffee maker prolongs its lifespan. For decalcification, only use products<br />
especially made for the decalcification of coffee makers and follow their instruction<br />
manual carefully.<br />
� Never put any part of the appliance in the dishwasher. Clean the jug with soapy water<br />
and rinse it with clear water.<br />
� The filter holder of your coffee maker is removable in order to clean it more easily under a<br />
water pipe for example but also to avoid the manipulation of a dirty paper filter.<br />
� To clean the plastic parts of the appliance, use a humid, non-abrasive cloth.<br />
PRACTICAL HINTS<br />
When you notice that the coffee making process is longer than it should be, it is probably time<br />
to decalcify the appliance. Do not wait until the situation gets worse. The decalcifying<br />
frequency depends on the amount of lime in the water and therefore can be different from<br />
family to family. Therefore it is important to pay attention to this. A good maintenance of your<br />
appliance will prolong its lifespan. Guarantee claims will not be accepted for the replacement<br />
of a heating element full of scale.<br />
PROTECTION OF THE ENVIRONMENT – DIRECTIVE 2002/96/EC<br />
In order to preserve our environment and protect human health, the waste electrical and<br />
electronic equipment should be disposed of in accordance with specific rules with the<br />
implication of both suppliers and users. For this reason, as indicated by the symbol on the<br />
rating label or on the packaging, your appliance should not be disposed of as unsorted<br />
municipal waste. The user has the right to bring it to a municipal collection point performing<br />
waste recovery by means of reuse, recycling or use for other applications in accordance with<br />
the directive.<br />
11 <strong>TEAM</strong> <strong>KM</strong> <strong>29</strong> T - 091201<br />
Assembly page 11/40
�<br />
Fax +32 2 359 95 50<br />
POUR VOTRE SECURITE<br />
Copies of the I/B. Please reproduce them without any<br />
changes except under special instruction from Team<br />
International BELGIUM. The pages must be reproduced<br />
and folded in order to obtain a booklet A5 (+/- 148.5 mm<br />
width x 210 mm height). When folding, make sure you<br />
keep the good numbering when you turn the pages of<br />
the I/B. Don’t change the page numbering. Keep the<br />
language integrity.<br />
Lisez attentivement cette notice avant toute utilisation, et respectez bien à la fois les consignes<br />
de sécurité et d'usage.<br />
Important: Votre appareil n’est pas prévu pour être utilisé par des personnes (y compris les<br />
enfants) dont les capacités physiques, sensorielles ou mentales sont réduites, ou des personnes<br />
dénuées d’expérience ou de connaissance, sauf si elles ont pu bénéficier, par l’intermédiaire<br />
d’une personne responsable de leur sécurité, d’une surveillance ou d’instructions préalables<br />
concernant son utilisation en toute sécurité.<br />
Il convient de surveiller les enfants pour s’assurer qu’ils ne jouent pas avec l’appareil.<br />
� Avant d'utiliser l'appareil, vérifiez que la tension du réseau correspond bien à celle de<br />
l'appareil.<br />
� Ne laissez jamais votre appareil sans surveillance lorsque celui-ci est en fonctionnement ou<br />
sous tension.<br />
� Vérifiez régulièrement l’état de votre appareil et s’il est endommagé de quelque façon<br />
que ce soit, faites le vérifier et réparer par un service qualifié compétent (*) . Si le câble est<br />
endommagé, il doit être obligatoirement remplacé par un service qualifié compétent (*) .<br />
� Utilisez l'appareil uniquement pour des usages domestiques et de la manière indiquée dans<br />
la notice.<br />
� Ne plongez jamais l'appareil dans l'eau ou dans tout autre liquide ni pour son nettoyage ni<br />
pour toute autre raison. Ne le mettez jamais dans le lave-vaisselle.<br />
� N'utilisez pas l'appareil près de sources de chaleur.<br />
� L’appareil doit obligatoirement être débranché et refroidi avant de le nettoyer ou de le<br />
ranger.<br />
� Veillez à ne pas utiliser l'appareil à l'extérieur et entreposez-le dans un endroit sec.<br />
� Ne pas utiliser des accessoires non recommandés par le fabricant, cela peut présenter un<br />
danger pour l’utilisateur et risque d’endommager l’appareil.<br />
� Ne déplacez jamais l’appareil en tirant sur le câble. Posez cet appareil sur une table ou<br />
un support suffisamment stable et veillez à ce que le cordon d’alimentation ne puisse être<br />
accidentellement accroché afin d’éviter toute chute de l’appareil. Evitez d’enrouler le<br />
cordon autour de l’appareil, ne le placez pas contre des parties chaudes et ne le tordez<br />
pas.<br />
� N’utilisez pas votre appareil si la verseuse est fissurée ou cassée. Utilisez uniquement la<br />
verseuse livrée avec votre appareil. Attention, votre verseuse devient chaude pendant le<br />
fonctionnement. Saisissez-la uniquement par sa poignée.<br />
� Veillez à ce que l’appareil n’entre pas en contact avec des matériaux facilement<br />
inflammables comme les rideaux, les tissus,... lorsqu’il est en fonctionnement car le feu<br />
pourrait se déclarer.<br />
� Lors d’un éventuel détartrage, ne faites usage que de produits spécialement étudiés pour<br />
le détartrage de cafetières. Ne faites pas usage d’ammoniac ou de toute autre<br />
substance qui pourrait nuire à votre santé.<br />
� Ne mettez rien d’autre que du café moulu dans le filtre à café.<br />
� Ne faites pas fonctionner votre cafetière sans eau. Si votre cafetière est programmable,<br />
veillez à ne pas oublier de mettre de l’eau avant la programmation.<br />
Important: votre verseuse ne peut en aucun cas être placée dans un four à micro-ondes<br />
pour réchauffer le café. Nous ne saurions être tenus comme responsables des dégâts<br />
causés par le non-respect de cette consigne.<br />
(*) Service qualifié compétent: service après-vente du fabricant ou de l'importateur ou une<br />
personne qualifiée, reconnue et habilitée à faire ce genre de réparation afin d'éviter tout<br />
danger. Dans tous les cas, veuillez retourner l'appareil auprès de ce service.<br />
12 <strong>TEAM</strong> <strong>KM</strong> <strong>29</strong> T - 091201<br />
Assembly page 12/40
�<br />
Fax +32 2 359 95 50<br />
DOMAINE D'APPLICATION/D'UTILISATION<br />
Copies of the I/B. Please reproduce them without any<br />
changes except under special instruction from Team<br />
International BELGIUM. The pages must be reproduced<br />
and folded in order to obtain a booklet A5 (+/- 148.5 mm<br />
width x 210 mm height). When folding, make sure you<br />
keep the good numbering when you turn the pages of<br />
the I/B. Don’t change the page numbering. Keep the<br />
language integrity.<br />
� Utilisez l'appareil uniquement pour des usages domestiques et de la manière indiquée<br />
dans la notice.<br />
� Cet appareil est destiné à être utilisé dans des applications domestiques et analogues<br />
telles que :<br />
Des coins cuisines réservés au personnel dans des magasins, bureaux et autres<br />
environnements professionnels.<br />
Des fermes.<br />
L’utilisation par les clients des hôtels, motels et autres environnements à caractère<br />
résidentiel.<br />
Des environnements du type chambre d’hôtes.<br />
AVANT LA PREMIÈRE UTILISATION<br />
� Lorsque vous utilisez votre appareil pour la première fois, versez de l’eau dans le réservoir<br />
et mettez l'appareil en fonctionnement (sans mettre de café).<br />
� Dès que l’eau est passée, éteignez votre appareil et répétez cette opération 2 fois<br />
successivement en attendant à chaque fois qu’il soit suffisamment refroidi.<br />
REGLAGE DE L’HORLOGE<br />
� Dès sa mise sous tension, l'affichage va indiquer "12:00".<br />
� Par défaut l’horloge est en mode 24 heures. Pour changer vers le mode de 12 heures,<br />
appuyez simultanément sur le bouton HOUR et le MIN. “AM” ou “PM” apparaîtra à<br />
l’écran.<br />
� Pour ajuster l'heure, appuyez 1 fois sur la touche PROGRAMME. “12:00” clignotera.<br />
� Ensuite appuyez sur la touche HOUR pour régler les heures, et sur la touche MIN pour les<br />
minutes.<br />
� A chaque impulsion sur l’un de ces boutons, l’heure ou les minutes avanceront de 1 unité<br />
mais si vous maintenez la pression, l’affichage progressera plus rapidement.<br />
� Une fois le réglage terminé, attendez environ 3 secondes ou appuyez 2 fois<br />
successivement sur le bouton PROGRAMME. Dans les deux cas, l’heure réglée restera<br />
affichée.<br />
POUR FAIRE LE CAFÉ<br />
� Soulevez le couvercle du réservoir.<br />
� Versez la quantité d’eau désirée dans le réservoir en utilisant la verseuse. Ne dépassez pas<br />
la valeur maximale indiquée car le café déborderait de la verseuse.<br />
� Pivotez le verseur d’eau chaude de façon qu’il se trouve au-dessus du réservoir.<br />
� Mettez un filtre dans le porte-filtre et remplissez-le avec la quantité de café moulu désirée.<br />
Vérifiez que le porte-filtre est correctement positionné. Pivotez le verseur d’eau chaude de<br />
façon qu’il se trouve au-dessus du centre du filtre.<br />
� Sur le verseur d’eau chaude se trouve un sélecteur d’arôme; mettez-le sur la tasse vide<br />
pour du café léger ou sur la tasse remplie pour du café fort.<br />
� N’oubliez jamais de refermer le couvercle du réservoir et de placer la verseuse sur la<br />
plaque chauffante avant de mettre l’appareil en marche.<br />
� Vous pouvez activer ou désactiver la fonction d’arôme en appuyant sur le bouton<br />
AROMA. Le témoin lumineux rouge AROMA s’allumera lorsque la fonction d’arôme est<br />
activée. Si vous utilisez la fonction d’arôme, l’eau coulera moins vite ce qui donnera plus<br />
d’arôme à votre café.<br />
� Ensuite, allumez la cafetière en appuyant deux fois sur l’interrupteur marche-arrêt (0/I). Le<br />
témoin lumineux de l'interrupteur s’allumera vous indiquant que votre appareil est en<br />
13 <strong>TEAM</strong> <strong>KM</strong> <strong>29</strong> T - 091201<br />
Assembly page 13/40
�<br />
Fax +32 2 359 95 50<br />
Copies of the I/B. Please reproduce them without any<br />
changes except under special instruction from Team<br />
International BELGIUM. The pages must be reproduced<br />
and folded in order to obtain a booklet A5 (+/- 148.5 mm<br />
width x 210 mm height). When folding, make sure you<br />
keep the good numbering when you turn the pages of<br />
the I/B. Don’t change the page numbering. Keep the<br />
language integrity.<br />
fonctionnement. Un dispositif vous permet de conserver le café au chaud tant que la<br />
cafetière est en fonctionnement et que la verseuse est placée sur la plaque chauffante.<br />
� Lorsque vous retirez la verseuse de l’appareil, une valve anti-gouttes se ferme<br />
automatiquement pour éviter que toute goutte de café ne tombe sur la plaque<br />
chauffante. La remise en place de la verseuse ouvre automatiquement le système antigouttes<br />
et permet au café restant dans le filtre de passer dans la verseuse.<br />
� Lorsque le réservoir d’eau est vide, attendez que le café cesse de couler avant de retirer<br />
la verseuse.<br />
� Vous pourrez éteindre votre appareil à tout moment en appuyant une fois sur<br />
l’interrupteur 0/I (tous les voyants s’éteignent).<br />
� Votre cafetière se coupera automatiquement 1 heure après que votre cafetière aie fini<br />
de passer le café.<br />
PROGRAMMATION DE LA CAFETIERE<br />
Pour programmer votre cafetière pour qu’elle passe le café à un moment prédéfini, suivez<br />
d’abord les étapes 1 à 7 du paragraphe “POUR FAIRE LE CAFÉ”.<br />
Assurez-vous que l’horloge de la cafetière est réglée à la bonne heure.<br />
Appuyez deux fois sur le bouton PROGRAMME. L’horloge affichera 12:00. Utilisez les boutons<br />
HOUR et MIN pour régler le moment où vous voulez que la cafetière passe le café. Une fois le<br />
réglage terminé, attendez environ 3 secondes ou appuyez 1 fois sur le bouton PROGRAMME.<br />
Dans les deux cas, l’heure de réglage s’effacera et sera remplacée par celle de l’horloge.<br />
Appuyez une fois sur l’interrupteur 0/I pour activer la programmation. Le témoin lumineux<br />
rouge AUTO s’allumera.<br />
Lorsque l’heure programmée pour le passage du café sera atteinte, la cafetière commencera<br />
à passer le café, le témoin lumineux AUTO s’éteindra et le témoin lumineux rouge de<br />
l’interrupteur 0/I s’allumera.<br />
Comme pour le passage normal du café, un cycle de maintien au chaud d’une heure<br />
commencera après que votre cafetière a fini de passer le café. Au bout de l’heure, la<br />
cafetière s’éteindra automatiquement.<br />
Remarque: pour vérifier l’heure de programmation après que vous l’ayez réglée, appuyez une<br />
fois sur le bouton PROGRAMME et celle-ci s’affichera.<br />
CONFORT D’USAGE<br />
� Si vous utilisez la fonction d’arôme, l’eau coulera moins vite ce qui donnera plus d’arôme<br />
à votre café.<br />
� Lorsque vous retirez la verseuse de l’appareil, une valve anti-gouttes se ferme<br />
automatiquement pour éviter que toute goutte de café ne tombe sur la plaque<br />
chauffante. La remise en place de la verseuse ouvre automatiquement le système antigouttes<br />
et permet au café restant dans le filtre de passer dans la verseuse.<br />
� Lorsque le réservoir d’eau est vide, attendez quelques instants avant de retirer la verseuse<br />
afin de permettre à l’eau présente dans le filtre de s’écouler en totalité.<br />
� Une fois le café prêt, vous pouvez le conserver au chaud en le laissant sur la plaque<br />
chauffante. Celle-ci commence à chauffer dès que la cafetière est mise en<br />
fonctionnement (témoin lumineux de fonctionnement rouge allumé). Que ce soit en<br />
mode manuel ou automatique, la durée ne pourra excéder 1h environ car votre cafetière<br />
se coupe automatiquement passé ce délai.<br />
� Ne replacez jamais la verseuse (presque) vide sur la plaque chauffante quand celle-ci est<br />
chaude.<br />
� Attention, lorsque vous éteindrez votre cafetière, la plaque chauffante se coupera aussi<br />
mais elle restera chaude encore pendant quelques instants. Par conséquent, prenez<br />
14 <strong>TEAM</strong> <strong>KM</strong> <strong>29</strong> T - 091201<br />
Assembly page 14/40
�<br />
Fax +32 2 359 95 50<br />
Copies of the I/B. Please reproduce them without any<br />
changes except under special instruction from Team<br />
International BELGIUM. The pages must be reproduced<br />
and folded in order to obtain a booklet A5 (+/- 148.5 mm<br />
width x 210 mm height). When folding, make sure you<br />
keep the good numbering when you turn the pages of<br />
the I/B. Don’t change the page numbering. Keep the<br />
language integrity.<br />
garde lors de manipulations à proximité et attendez son refroidissement complet avant<br />
nettoyage ou rangement.<br />
DETARTRAGE ET NETTOYAGE<br />
� Nous vous conseillons de détartrer votre appareil régulièrement pour le garder en bon<br />
état. Pour cela, utilisez un détartrant pour cafetières électriques que vous trouverez dans<br />
le commerce et conformez-vous à son mode d’emploi.<br />
� Ne mettez aucune partie de votre cafetière dans le lave-vaisselle. Nettoyez la verseuse à<br />
l’eau chaude savonneuse et rincez-la à l’eau claire.<br />
� Le porte-filtre de votre cafetière est amovible afin de pouvoir le nettoyer plus facilement<br />
en le passant sous un jet d’eau par exemple mais aussi pour vous éviter de manipuler le<br />
filtre papier usagé.<br />
� Pour les parties plastiques et la plaque chauffante, utilisez une éponge non abrasive ou un<br />
chiffon humide.<br />
CONSEILS PRATIQUES<br />
Lorsque vous constatez une augmentation du temps de passage du café, effectuez un<br />
détartrage complet de votre appareil et n’attendez surtout pas que la situation s’aggrave. La<br />
fréquence de détartrage est fonction de la dureté de l’eau et varie par conséquent selon les<br />
foyers. Il est par conséquent important de porter une attention particulière au phénomène<br />
d’entartrage. L’entretien de votre cafetière est important pour sa durée de vie et le<br />
remplacement d’une résistance entartrée ne sera pas pris en compte dans le cadre de la<br />
garantie.<br />
PROTECTION DE L’ENVIRONNEMENT – DIRECTIVE 2002/96/CE<br />
Afin de préserver notre environnement et notre santé, l’élimination en fin de vie des appareils<br />
électriques et électroniques doit se faire selon des règles bien précises et nécessite<br />
l’implication de chacun, qu’il soit fournisseur ou utilisateur. C’est pour cette raison que votre<br />
appareil, tel que le signale le symbole apposé sur sa plaque signalétique ou sur<br />
l'emballage, ne doit en aucun cas être jeté dans une poubelle publique ou privée destinée<br />
aux ordures ménagères. L'utilisateur a le droit de déposer l'appareil dans des lieux publics de<br />
collecte procédant à un tri sélectif des déchets pour être soit recyclé, soit réutilisé pour<br />
d’autres applications conformément à la directive.<br />
15 <strong>TEAM</strong> <strong>KM</strong> <strong>29</strong> T - 091201<br />
Assembly page 15/40
�<br />
Fax +32 2 359 95 50<br />
BELANGRIJKE VEILIGHEIDSVOORSCHRIFTEN<br />
Copies of the I/B. Please reproduce them without any<br />
changes except under special instruction from Team<br />
International BELGIUM. The pages must be reproduced<br />
and folded in order to obtain a booklet A5 (+/- 148.5 mm<br />
width x 210 mm height). When folding, make sure you<br />
keep the good numbering when you turn the pages of<br />
the I/B. Don’t change the page numbering. Keep the<br />
language integrity.<br />
Lees de gebruiksaanwijzing aandachtig alvorens u uw toestel gebruikt, en respecteer altijd de<br />
veiligheids- en de gebruiksvoorschriften.<br />
Belangrijk: Personen (kinderen inbegrepen) die wegens hun fysieke, sensoriële of mentale<br />
capaciteiten, of wegens hun gebrek aan ervaring of kennis, het toestel niet veilig kunnen<br />
gebruiken, mogen dit toestel niet zonder toezicht of instructies van een verantwoordelijke<br />
persoon gebruiken. Hou kinderen goed in het oog om te vermijden dat ze met het toestel<br />
spelen.<br />
� Controleer of de netspanning overeenkomt met deze van het toestel vooraleer u het<br />
gebruikt.<br />
� Laat uw toestel tijdens het gebruik nooit zonder toezicht.<br />
� Controleer regelmatig of het snoer niet beschadigd is. Gebruik het toestel niet indien het<br />
snoer en/of het toestel zelf enige beschadiging zouden vertonen. Laat het in dat geval<br />
nakijken en herstellen door een bekwame gekwalificeerde dienst (*).<br />
� Gebruik het toestel enkel voor huishoudelijk gebruik en op de wijze zoals vermeld in de<br />
gebruiksaanwijzing.<br />
� Dompel het toestel nooit onder in water of in enige andere vloeistof, noch om het te<br />
reinigen, noch om welke andere reden ook. Steek het nooit in een afwasmachine.<br />
� Gebruik het toestel niet in de nabijheid van warmtebronnen.<br />
� Haal de stekker uit het stopcontact en laat het toestel afkoelen vooraleer u het reinigt of<br />
opbergt.<br />
� Gebruik het toestel niet buiten en berg het op in een droge plaats.<br />
� Gebruik geen accessoires die niet door de fabrikant aanbevolen werden. Dit kan het<br />
toestel beschadigen en gevaarlijk zijn voor de gebruiker.<br />
� Trek nooit aan het snoer om het toestel te verplaatsen. Plaats het toestel op een tafel of<br />
op een voldoende stabiel oppervlak zodat het niet valt en zorg ervoor dat het<br />
elektriciteitssnoer nergens kan achterhaken en daardoor de val van het toestel<br />
veroorzaken. Draai het snoer niet rond het toestel en plooi het niet.<br />
� Gebruik uw toestel niet indien de koffiekan gescheurd of gebroken is. Gebruik enkel de<br />
koffiekan die met uw toestel meegeleverd is. Opgepast: uw koffiekan wordt heet<br />
gedurende het gebruik. Gebruik het handvat om de koffiekan op te heffen.<br />
� Let erop dat u de warme onderdelen van het toestel niet aanraakt (opgepast: de plaat<br />
waarop de koffiekan gezet wordt, is eveneens warm!). Hanteer enkel de plastic delen.<br />
Gebruik het handvat om de koffiekan op te heffen.<br />
� Zorg ervoor dat het toestel nooit in contact komt met ontvlambare stoffen zoals gordijnen<br />
en dergelijke wanneer het in gebruik is om brand te vermijden.<br />
� Gebruik voor het ontkalken enkel speciaal hiertoe bestemde producten. Gebruik geen<br />
ammoniak of andere stof die uw gezondheid zou kunnen schaden.<br />
� Schep enkel gemalen koffie in de filter.<br />
� Laat uw koffiezetapparaat niet werken zonder water. Als uw koffiezetapparaat<br />
programmeerbaar is, zorg er dan voor dat u er water ingiet alvorens het te<br />
programmeren.<br />
Opgelet: plaats de koffiekan nooit in een microgolfoven om de koffie op te warmen.<br />
Indien u dat wel doet, zullen wij daar geen enkele verantwoordelijkheid voor dragen.<br />
(*) Bekwame gekwalificeerde dienst: klantendienst van de fabrikant of de invoerder, die erkend<br />
en bevoegd is om dergelijke herstellingen te doen zodat elk gevaar vermeden wordt. Gelieve<br />
het toestel bij problemen naar deze dienst terug te brengen.<br />
16 <strong>TEAM</strong> <strong>KM</strong> <strong>29</strong> T - 091201<br />
Assembly page 16/40
�<br />
Fax +32 2 359 95 50<br />
TOEPASSINGS-/GEBRUIKSDOMEIN<br />
Copies of the I/B. Please reproduce them without any<br />
changes except under special instruction from Team<br />
International BELGIUM. The pages must be reproduced<br />
and folded in order to obtain a booklet A5 (+/- 148.5 mm<br />
width x 210 mm height). When folding, make sure you<br />
keep the good numbering when you turn the pages of<br />
the I/B. Don’t change the page numbering. Keep the<br />
language integrity.<br />
� Gebruik het toestel enkel voor huishoudelijk gebruik en op de wijze zoals vermeld in de<br />
gebruiksaanwijzing.<br />
� Dit toestel is bestemd om te worden gebruikt voor huishoudelijke toepassingen en<br />
gelijkaardige toepassingen zoals:<br />
Keukenhoeken voorbehouden voor het personeel in winkels, kantoren en<br />
andere professionele omgevingen.<br />
Boerderijen.<br />
Het gebruik door de klanten van hotels, motels en andere omgevingen met een<br />
residentieel karakter.<br />
Omgevingen van het gastenverblijf-type.<br />
EERSTE INGEBRUIKNAME<br />
� Wanneer u uw koffiezetapparaat voor de eerste keer gebruikt, giet dan vooreerst water in<br />
het waterreservoir en schakel het toestel in (zonder koffie).<br />
� Is het water doorgelopen, schakel het apparaat dan uit, en herhaal deze handeling 2<br />
maal waarbij u telkens wacht tot het apparaat afgekoeld is.<br />
INSTELLING VAN DE KLOK<br />
� Bij het aansluiten op het elektriciteitsnet zal op het display van het apparaat “12:00”<br />
verschijnen.<br />
� Het 24-uren-systeem is de standaardinstelling. Om te veranderen naar het 12-uren-systeem<br />
drukt u tegelijk op de HOUR-toets en de MIN-toets. “AM” of “PM” verschijnt op het scherm.<br />
� Om de huidige tijd in te stellen, druk dan één keer op de PROGRAMME-toets. “12:00”<br />
flikkert.<br />
� Druk vervolgens op de HOUR-toets om de uren in te stellen en op de MIN-toets voor de<br />
instelling van de minuten.<br />
� Bij elke druk op een van deze toetsen zal het uur of de minuten met één eenheid<br />
vooruitgaan maar indien u de knop ingedrukt houdt, zal de tijd sneller vooruitgaan.<br />
� Als de gewenste tijd bereikt is, wacht dan ongeveer 3 seconden of druk 2 keer<br />
achtereenvolgens op de PROGRAMME-toets. In beide gevallen zal de ingestelde tijd op<br />
het display blijven staan.<br />
KOFFIE ZETTEN<br />
� Open het deksel van het waterreservoir.<br />
� Giet de gewenste hoeveelheid water in het reservoir met behulp van de koffiekan.<br />
Overschrijd het maximumpeil niet, want anders zal de koffiekan overlopen.<br />
� Draai de douchekop zodat hij boven het waterreservoir hangt.<br />
� Doe een filter in de filterhouder en vul hem met de gewenste hoeveelheid gemalen koffie.<br />
Zorg dat de filterhouder goed vastzit. Draai de douchekop zodat hij boven het midden van<br />
de filter hangt.<br />
� Op de douchekop bevindt zich een aromaregelaar. Zet de regelaar op de stand met de<br />
lege tas voor milde koffie of op de stand met de volle tas voor straffe koffie.<br />
� Vergeet nooit het deksel van het waterreservoir te sluiten en de glazen kan op de<br />
warmhoudplaat te zetten alvorens het toestel aan te zetten.<br />
� U kunt de aromafunctie aan- of uitzetten door op de AROMA-toets te drukken. Het rode<br />
AROMA-controlelampje licht op wanneer de aromafunctie geactiveerd is. Als u de<br />
aromafunctie gebruikt, zal het doorstromen van het water trager gaan waardoor uw koffie<br />
extra smaak verkrijgt.<br />
� Schakel het koffiezetapparaat in door twee keer op de aan-/uitschakelaar (0/I) te<br />
drukken. Het lichtje van de schakelaar zal branden om aan te duiden dat het toestel in<br />
17 <strong>TEAM</strong> <strong>KM</strong> <strong>29</strong> T - 091201<br />
Assembly page 17/40
�<br />
Fax +32 2 359 95 50<br />
Copies of the I/B. Please reproduce them without any<br />
changes except under special instruction from Team<br />
International BELGIUM. The pages must be reproduced<br />
and folded in order to obtain a booklet A5 (+/- 148.5 mm<br />
width x 210 mm height). When folding, make sure you<br />
keep the good numbering when you turn the pages of<br />
the I/B. Don’t change the page numbering. Keep the<br />
language integrity.<br />
werking is getreden. Dankzij de warmhoudfunctie blijft de koffie warm zolang het toestel<br />
ingeschakeld is en de koffiekan op de warmhoudplaat staat.<br />
� Wanneer u de kan wegneemt, zal het antidrupklepje zich automatisch sluiten zodat geen<br />
enkele druppel op de warmhoudplaat valt. Het terugplaatsen van de kan opent<br />
automatisch het antidrupsysteem en laat toe dat de overgebleven koffie in de filter<br />
verder in de kan loopt.<br />
� Wacht na het doorlopen van het warme water tot de filter is leeggelopen vooraleer u de<br />
koffiekan weghaalt.<br />
� U kunt uw toestel altijd uitschakelen door eenvoudigweg één keer op de aan-/<br />
uitschakelaar te drukken (alle controlelampjes zijn dan uit).<br />
� Uw koffiezetapparaat schakelt zich automatisch uit 1 uur nadat het doorlopen van het<br />
warme water gestopt is.<br />
HET KOFFIEZETAPPARAAT PROGRAMMEREN<br />
Om uw koffiezetapparaat te programmeren voor het zetten van verse koffie op een<br />
voorgeprogrammeerd tijdstip, dient u om te beginnen stap 1 t.e.m. 7 van de paragraaf<br />
“KOFFIE ZETTEN” te volgen.<br />
Controleer of de klok de tijd correct weergeeft.<br />
Druk twee keer op de PROGRAMME-toets. Op het scherm verschijnt 12:00. Gebruik de toetsen<br />
HOUR en MIN om het gewenste tijdstip van het koffiezetten in te stellen. Zodra het instellen<br />
gedaan is, wacht u ongeveer 3 seconden of drukt u één keer op de PROGRAMME-toets. In<br />
beide gevallen verdwijnt de programmeertijd en wordt die vervangen door de kloktijd.<br />
Druk één keer op de aan-/uitschakelaar (0/I) om de voorgeprogrammeerde koffiezetcyclus te<br />
activeren. Het rode AUTO-controlelampje licht op wanneer het tijdstip van koffiezetten correct<br />
is ingesteld.<br />
Zodra het voorgeprogrammeerde tijdstip bereikt is en het koffiezetapparaat de cyclus begint,<br />
gaat het rode AUTO-controlelampje uit en het rode controlelampje van de aan-/uitschakelaar<br />
licht op.<br />
Net als bij de gewone koffiezetcyclus begint een automatische warmhoudfunctie van één uur<br />
nadat het koffiezetten afgelopen is. Na afloop van het uur schakelt het koffiezetapparaat zich<br />
automatisch uit.<br />
Opmerking: om de programmeertijd te controleren nadat u die hebt ingesteld, drukt u op de<br />
PROGRAMME-toets en de programmeertijd verschijnt op het scherm.<br />
GEBRUIKSCOMFORT<br />
� Als u de aromafunctie gebruikt, zal het doorstromen van het water trager gaan waardoor<br />
uw koffie extra smaak verkrijgt.<br />
� Wanneer u de kan wegneemt, zal het antidrupsysteem zich automatisch sluiten zodat<br />
geen enkele druppel op de warmhoudplaat valt. Het terugplaatsen van de kan opent<br />
automatisch het antidrupsysteem en laat toe dat de overgebleven koffie vanuit de filter<br />
verder in de kan loopt.<br />
� Wanneer het waterreservoir leeg is, wacht dan enkele seconden alvorens de kan weg te<br />
nemen zodat het overgebleven water uit de filter nog kan wegvloeien.<br />
� Wanneer de koffie klaar is, kunt u deze warm houden. Daarvoor laat u de koffiekan op de<br />
verwarmingsplaat. Deze plaat begint warm te worden wanneer het toestel ingeschakeld<br />
is (rode controlelampje van de aan-/uitschakelaar aan). Zowel bij handbediening als bij<br />
programmering zal de warmhoudplaat zich echter na 1 uur automatisch uitschakelen.<br />
� Zet nooit een (bijna) lege kan terug op de warmhoudplaat wanneer deze nog heet is.<br />
� Opgepast, wanneer u uw koffiezetapparaat uitschakelt, zal de verwarmingsplaat ook<br />
uitgeschakeld worden, maar ze zal nog enkele minuten warm blijven. Wees voorzichtig.<br />
18 <strong>TEAM</strong> <strong>KM</strong> <strong>29</strong> T - 091201<br />
Assembly page 18/40
�<br />
Fax +32 2 359 95 50<br />
Copies of the I/B. Please reproduce them without any<br />
changes except under special instruction from Team<br />
International BELGIUM. The pages must be reproduced<br />
and folded in order to obtain a booklet A5 (+/- 148.5 mm<br />
width x 210 mm height). When folding, make sure you<br />
keep the good numbering when you turn the pages of<br />
the I/B. Don’t change the page numbering. Keep the<br />
language integrity.<br />
Wacht tot het toestel volledig afgekoeld is alvorens het te reinigen, op te bergen of<br />
opnieuw te vullen.<br />
ONTKALKING EN REINIGING<br />
� Wij raden u aan het apparaat regelmatig te ontkalken. Dit verlengt de levensduur van het<br />
apparaat. Gebruik hiervoor de in de handel zijnde ontkalkingsmiddelen en lees hun<br />
gebruiksaanwijzing aandachtig.<br />
� Plaats geen enkel onderdeel van uw koffiezetapparaat in de vaatwasmachine. Reinig de<br />
koffiekan in een warme sop en spoel goed af.<br />
� Om de reiniging van de filterhouder te vergemakkelijken, en om de papieren filter in de<br />
vuilnisbak te kunnen gooien zonder deze aan te raken, kunt u de filterhouder afnemen.<br />
� Gebruik een vochtige doek om de plastieken delen en de warmhoudplaat te reinigen.<br />
PRAKTISCHE TIPS<br />
Indien u merkt dat de koffie trager doorloopt dan gewoonlijk, dan ontkalkt u best het<br />
apparaat. Wacht in geen geval tot het erger wordt. De ontkalkingsfrequentie hangt af van het<br />
kalkgehalte van het water en varieert bijgevolg van gezin tot gezin. Het is dus heel belangrijk<br />
om de kalkaanslag in het oog te houden. Een regelmatig onderhoud verlengt de levensduur<br />
van het toestel. Op de garantie kan geen aanspraak gemaakt worden voor de vervanging<br />
van een verwarmingselement met kalkaanslag.<br />
MILIEUBESCHERMING – RICHTLIJN 2002/96/EC<br />
Om ons milieu en onze gezondheid te beschermen, moet afgedankte elektrische en<br />
elektronische apparatuur in overeenstemming met welbepaalde regels weggegooid worden.<br />
Dit vergt zowel de inzet van de leveranciers als van de gebruikers. Om deze reden mag uw<br />
apparaat, zoals op het typeplaatje of op de verpakking aangegeven door het symbool ,<br />
niet met het gewone huisvuil weggegooid worden. De gebruiker heeft het recht het toestel<br />
naar een gemeentelijk centrum van gescheiden inzameling te brengen waar het<br />
overeenkomstig de richtlijn hergebruikt, gerecycleerd of voor andere doeleinden gebruikt zal<br />
worden.<br />
19 <strong>TEAM</strong> <strong>KM</strong> <strong>29</strong> T - 091201<br />
Assembly page 19/40
�<br />
Fax +32 2 359 95 50<br />
CONSEJOS DE SEGURIDAD<br />
Copies of the I/B. Please reproduce them without any<br />
changes except under special instruction from Team<br />
International BELGIUM. The pages must be reproduced<br />
and folded in order to obtain a booklet A5 (+/- 148.5 mm<br />
width x 210 mm height). When folding, make sure you<br />
keep the good numbering when you turn the pages of<br />
the I/B. Don’t change the page numbering. Keep the<br />
language integrity.<br />
Lea detenidamente el modo de empleo antes de utilizar el aparato, y siempre siga las<br />
medidas de seguridad y el modo de funcionamiento.<br />
Importante: Las personas (incluidos niños) con incapacidades físicas, sensoriales o mentales, o<br />
sin experiencia o conocimiento nunca deben utilizar el aparato, salvo si están bajo la<br />
vigilancia de una persona responsable de su seguridad o si recibieron previamente<br />
instrucciones con respecto al uso seguro del aparato.<br />
Es necesario vigilar a los niños para que no jueguen con el aparato.<br />
� Antes de utilizar el aparato, compruebe que el voltaje de la red eléctrica coincide con el<br />
aparato.<br />
� No deje nunca su aparato sin vigilancia cuando esté en marcha.<br />
� Compruebe de vez en cuando que el aparato no esté dañado y no utilice su aparato si<br />
el cable o el aparato están dañados por el motivo que sea. Cualquier reparación debe<br />
ser realizada por un servicio cualificado competente(*). Si el cable está dañado, debe ser<br />
reemplazado por un servicio cualificado competente(*).<br />
� Utilice el aparato sólo para usos domésticos y de la manera indicada en el modo de<br />
empleo.<br />
� No sumerja nunca el aparato en el agua o en cualquier otro líquido ni para su limpieza ni<br />
por cualquier otra razón. No lo introduzca nunca en el lavavajillas.<br />
� No utilice el aparato cerca de fuentes de calor.<br />
� La clavija eléctrica debe ser desenchufada y el aparato debe ser frío antes de limpiarlo o<br />
recogerlo.<br />
� Procure no utilizar el aparato en el exterior y colóquelo en un sitio seco.<br />
� No utilice accesorios no recomendados por el fabricante, ello puede conllevar un riesgo<br />
para el usuario y dañar el aparato.<br />
� No mueva nunca el aparato estirando del cable. Coloque el aparato sobre una mesa o<br />
un soporte lo suficiente estable y procure que el cable no se enganche en alguna parte,<br />
a fin de evitar posibles caídas del mismo. Evite enrollar el cable alrededor del aparato,<br />
procure que el cable no entre en contacto con las superficies calientes del aparato y no<br />
lo tuerza.<br />
� No utilice el aparato si la jarra está cascada o rota. El aparato está concebido para ser<br />
utilizado con esta jarra. No utilice otra jarra. Cuidado, la jarra se vuelve caliente durante<br />
el funcionamiento. Agárrela sólo con el asa.<br />
� Procure que el aparato no entre en contacto con materiales fácilmente inflamables<br />
como cortinas, tejidos, etc. …, cuando esté en funcionamiento, ya que podría provocar<br />
un incendio.<br />
� Si quiere eliminar la cal del aparato utilice solamente un producto especialmente<br />
concebido para este fin. No utilice amoniaco o cualquier otro producto que pueda<br />
perjudicar la salud.<br />
� Ponga sólo café molido en el filtro.<br />
� No haga funcionar la cafetera sin agua. Si su cafetera es programable, no olvide ponerle<br />
agua antes de la primera programación.<br />
Importante: nunca ponga la jarra en un microondas para calentar el café. No tomaremos<br />
ninguna responsabilidad si no respeta esta instrucción.<br />
(*) Servicio técnico cualificado: servicio técnico del fabricante o del importador o una<br />
persona cualificada, reconocida y habilitada a fin de evitar cualquier peligro. En cualquier<br />
caso devuelva el aparato al servicio técnico.<br />
20 <strong>TEAM</strong> <strong>KM</strong> <strong>29</strong> T - 091201<br />
Assembly page 20/40
�<br />
Fax +32 2 359 95 50<br />
CAMPO DE APLICACIÓN/DE FUNCIONAMIENTO<br />
Copies of the I/B. Please reproduce them without any<br />
changes except under special instruction from Team<br />
International BELGIUM. The pages must be reproduced<br />
and folded in order to obtain a booklet A5 (+/- 148.5 mm<br />
width x 210 mm height). When folding, make sure you<br />
keep the good numbering when you turn the pages of<br />
the I/B. Don’t change the page numbering. Keep the<br />
language integrity.<br />
� Utilice el aparato sólo para usos domésticos y de la manera indicada en el modo de<br />
empleo.<br />
� Este aparato está diseñado para uso doméstico o aplicaciones similares como:<br />
Cocinas reservadas para personal en tiendas, oficinas y otros profesionales.<br />
Granjas.<br />
El uso por clientes de hoteles, moteles, y otros con un carácter residencial.<br />
Profesionales tipo de “camas y desayunos”.<br />
ANTES DE SU PRIMERA UTILIZACION<br />
� Antes de utilizar el aparato por primera vez, eche agua en el depósito (pero sin poner<br />
café) y ponga el aparato en funcionamiento.<br />
� Repita esta operación 3 veces después de 5 minutos.<br />
COMO REGULAR EL RELOJ<br />
� Enchufe su aparato. La hora "12:00" aparece sobre el reloj digital.<br />
� Para regular la hora presione el botón PROGRAMME una vez. “12:00” parpadeará.<br />
� Entonces presione el botón de HORA y el botón de MIN para cambiar los minutos.<br />
� Para cada presión en uno de estos botones, la hora o los minutos incrementará por 1<br />
unidad pero si mantiene la presión, el tiempo cambiará más rapido.<br />
� Cuando la regulación haya terminado, espere 3 segundos o presione dos veces<br />
sucesivamente el botón PROGRAMME. En ambos casos la hora seleccionada<br />
permanecerá en al pantalla.<br />
PARA HACER CAFÉ<br />
� Levante la tapa del depósito.<br />
� Con la jarra, eche el agua deseada en el aparato. No supere el nivel máximo indicado,<br />
ya que el café podría desbordarse.<br />
� Balancee la cabeza de la ducha.<br />
� Coloque el porta-filtro en la cafetera. Ponga un filtro en el porta-filtro y llénelo con la<br />
cantidad de café deseada. Ponga el porta-filtro en su lugar y compruebe que está bien<br />
instalado. Balancee la cabeza de la ducha, de modo que esto cuelgue en el centro del<br />
filtro.<br />
� En la otra cabeza de la ducha hay un regulador de aroma; pongalo en la taza vacia<br />
para café suave o en el ajuste de taza lleno para café fuerte.<br />
� No olvide cerrar la tapadera y coloque la jarra en la placa calentadora antes de<br />
encender su cafetera.<br />
� Usted puede activar o desactivar la función de aroma presionando el botón AROMA. La<br />
luz roja de AROMA aparecerá cuando la función de aroma está activada. Si usted utiliza<br />
la función de aroma, la salida de agua será menor con lo cual le dará un sabor extra a su<br />
café.<br />
� Enciende el aparato, pulsando el botón on-off (0/1) dos veces. El interruptor luminoso se<br />
enciende para indicarle que el aparato funciona. Un dispositivo está previsto para<br />
mantener el café caliente mientras la cafetera esté funcionando y la jarra colocada en<br />
la resistencia.<br />
� Cuando retire la jarra del aparato, una válvula antigoteo se cierre automáticamente<br />
para evitar que caiga alguna gota de café sobre la placa calentadora. Cuando vuelve<br />
a poner la jarra, el sistema antigoteo se detiene y el café que queda pasa en la jarra.<br />
� Cuando ya no haya agua en el depósito, espere que el café deje de pasar antes de<br />
retirar la jarra.<br />
21 <strong>TEAM</strong> <strong>KM</strong> <strong>29</strong> T - 091201<br />
Assembly page 21/40
�<br />
Fax +32 2 359 95 50<br />
Copies of the I/B. Please reproduce them without any<br />
changes except under special instruction from Team<br />
International BELGIUM. The pages must be reproduced<br />
and folded in order to obtain a booklet A5 (+/- 148.5 mm<br />
width x 210 mm height). When folding, make sure you<br />
keep the good numbering when you turn the pages of<br />
the I/B. Don’t change the page numbering. Keep the<br />
language integrity.<br />
� Usted puede parar su aparato a cualquier hora simplemente presionando on-off una vez<br />
(todas las luces luminosas se apagarán).<br />
� Su cafetera se apagará automáticamente 1 hora después de que haya preparado el<br />
café.<br />
PROGRAMAR SU CAFETERA<br />
Para programar su aparato para que pase el café a un momento predefinido, siga las étapas<br />
1 a 7 del párrafo “PARA HACER CAFÉ”.<br />
Asegúrese que el reloj del aparato esté bien ajustado.<br />
Pulse el botón PROGRAMME dos veces. El reloj está ahora en las 12:00. Utilice los botones<br />
HOUR y MINUTE para ajustar el momento en que desea que pase el café. Una vez el<br />
programa haya terminado, espere sobre 3 segundos o presione una vez el botón<br />
PROGRAMME. En ambos casos el tiempo programado desaparecerá y será reemplazado por<br />
el reloj de hora.<br />
Pulse el botón ON/OFF (0/1) una vez. La luz roja AUTO se encenderá en cuanto el momento<br />
de pasaje del café esté bien definido.<br />
Cuando llega su tiempo predefinido de pasaje del café y que el aparato empieza su ciclo de<br />
pasaje, la luz se apagará y la luz roja se encenderá.<br />
Cómo con el ciclo regular de pasaje del café, un ciclo automático de mantenimiento de<br />
calor de una hora empieza después de que su aparato haya terminado su pasaje del café.<br />
Cuando el tiempo haya terminado, el aparato se apagará automáticamente.<br />
Nota: para comprobar la programación del tiempo después de haberlo programado,<br />
presione PROGRAMME y se mostrará en la pantalla.<br />
MANTENER EL CAFE CALIENTE<br />
� Si utiliza la función aroma, el agua saldrá más despacio lo que le dará un savor extra de<br />
su café.<br />
� Cuando retire su jarra del aparato, una válvula anti-goteo se cierra automáticamente<br />
para evitar la caída de café sobre la placa eléctrica. Cuando vuelva a colocar la jarra<br />
sobre la placa, la válvula de goteo se abre automáticamente dejando pasar de nuevo el<br />
café restante que se encuentra en el filtro.<br />
� Cuando el depósito de agua esté vacío, espere algunos instantes antes de retirar la jarra<br />
a fin de permitir que el agua del filtro no se derrame en su totalidad.<br />
� Cuando el café esté listo, lo puede mantener caliente dejándolo en la placa eléctrica<br />
(2). Esta empieza a calentarse apenas la cafetera esté en funcionamiento (testigo<br />
luminoso rojo encendido). En modo manual o automático, la duración no puede superar<br />
1 hora, porque su cafetera se para automáticamente después de ese límite de tiempo.<br />
� Nunca ponga la jarra negra vacía en la placa de calor si todavía está caliente.<br />
� Atención: cuando apague la cafetera, la placa eléctrica se apagará también, pero se<br />
quedará caliente durante unos minutos todavía. Por lo tanto, cuídese cuando esté cerca<br />
del aparato y espere que enfríe completamente antes de limpiar o guardarlo.<br />
DESCALCIFICACION Y LIMPIEZA<br />
� Le aconsejamos descalcificar su aparato con regularidad para guardar la cafetera en<br />
buen estado. Para ello utilice cualquier producto que venden en el mercado para este<br />
fin y siga sus instrucciones.<br />
� No introduzca el aparato en el lavavajillas.<br />
� El porta-filtro de la cafetera es amovible, a fin de poder limpiarlo más fácilmente<br />
pasándolo bajo el agua por ejemplo, pero también para que no toque el filtro sucio.<br />
22 <strong>TEAM</strong> <strong>KM</strong> <strong>29</strong> T - 091201<br />
Assembly page 22/40
�<br />
Fax +32 2 359 95 50<br />
Copies of the I/B. Please reproduce them without any<br />
changes except under special instruction from Team<br />
International BELGIUM. The pages must be reproduced<br />
and folded in order to obtain a booklet A5 (+/- 148.5 mm<br />
width x 210 mm height). When folding, make sure you<br />
keep the good numbering when you turn the pages of<br />
the I/B. Don’t change the page numbering. Keep the<br />
language integrity.<br />
� Para limpiar la placa eléctrica, utilice una esponja no abrasiva a fin de no arañarla.<br />
Proceda de la misma manera para limpiar la jarra, pero añada un detergente clásico<br />
para aumentar su eficacia.<br />
CONSEJO<br />
Cuando empiece a notar que el café tarda en pasar más tiempo de lo habitual, decalcifique<br />
su aparato y no espere, sobre todo, a que la situación se agrave, con ello mantendrá más<br />
tiempo la vida de su aparato. El mantenimiento de su cafetera es importante para la<br />
duración de vida de su aparato. Tenga en cuenta que la garantía no cubre los deterioros<br />
causado por el mal uso, ni el recambio de la resistencia por estar cubierta de cal.<br />
PROTECCIÓN DEL MEDIO AMBIENTE – DIRECTIVA 2002/96/CE<br />
Para poder preservar nuestro medio ambiente y proteger la salud humana, los residuos<br />
eléctricos y equipos electrónicos deberían ser destruidos de acuerdo con unas normas<br />
especificas con la implicación de ambos proveedores y consumidores. Por esta razón, como<br />
indica el símbolo en la placa de datos técnicos, su aparato no debería ser tirado en un<br />
contenedor municipal sino que debería ser devuelto a la tienda, o dejado en un punto de<br />
recolección para ser reciclado o usado para otras aplicaciones conforme a la directiva.<br />
23 <strong>TEAM</strong> <strong>KM</strong> <strong>29</strong> T - 091201<br />
Assembly page 23/40
�<br />
Fax +32 2 359 95 50<br />
PARA A SUA SEGURANÇA<br />
Copies of the I/B. Please reproduce them without any<br />
changes except under special instruction from Team<br />
International BELGIUM. The pages must be reproduced<br />
and folded in order to obtain a booklet A5 (+/- 148.5 mm<br />
width x 210 mm height). When folding, make sure you<br />
keep the good numbering when you turn the pages of<br />
the I/B. Don’t change the page numbering. Keep the<br />
language integrity.<br />
Antes de utilizar o aparelho leia com sentido de responsabilidade as instruções de<br />
funcionamento e respeite sempre as orientações de segurança e de utilização dadas no<br />
manual das instruções.<br />
Importante: As pessoas (incluídas as crianças) com incapacidades físicas, sensoriais ou<br />
mentais, ou sem experiência ou conhecimento não devem utilizar o aparelho excepto se<br />
estiverem a ser vigiadas por uma pessoa responsável pela sua segurança ou se receberam<br />
previamente instruções relativas ao uso seguro do aparelho.<br />
Convém vigiar as crianças para que elas não brinquem com o aparelho.<br />
� Antes de ligar a ficha do cabo da alimentação à tomada eléctrica certifique-se que a<br />
corrente eléctrica tem a potência igual à indicada na placa sinalética do aparelho.<br />
� Mantenha o aparelho sob vigilância quando em funcionamento.<br />
� Verifique com regularidade o estado do aparelho e em caso de danos leve-o a um<br />
serviço técnico competente para o analisar e reparar(*). Se o cabo da alimentação<br />
estiver danificado este tem de ser obrigatoriamente substituído pelo que deve levar o<br />
aparelho a um serviço técnico competente(*).<br />
� O aparelho destina-se ao uso doméstico e tem de respeitar as instruções de utilização.<br />
� O aparelho nunca deve ser mergulhado na água ou em qualquer outro líquido seja para<br />
a limpeza ou por qualquer outra razão. Nunca meta o aparelho na máquina de lavar<br />
louça.<br />
� Não ponha o aparelho próximo de fontes de calor.<br />
� Na limpeza, o aparelho tem de estar frio, desligado e com a ficha do cabo da<br />
alimentação do aparelho retirada da tomada eléctrica.<br />
� O aparelho não deve ser utilizado ao ar livre e deve ser guardado em locais secos.<br />
� Use sempre os acessórios recomendados pelo fabricante ou pelos serviços técnicos<br />
competentes (*).<br />
� Nunca retire a ficha do cabo da alimentação da tomada eléctrica puxando pelo cabo<br />
da alimentação. Coloque o aparelho assente numa superfície estável e resistente e<br />
verifique se o cabo da alimentação se encontra enrolado ou preso. Nunca enrole o<br />
cabo da alimentação à volta do aparelho nem o coloque em contacto com as partes<br />
quentes do aparelho.<br />
� Não utilize o aparelho se a taça estiver rachada ou partida. Utilize apenas a taça que<br />
vem com o aparelho. Cuidado, a taça torna-se quente durante o funcionamento.<br />
Agarre-a com a asa.<br />
� Mantenha o aparelho afastado de materiais inflamáveis como cortinados ou tecidos que<br />
se posam incendiar.<br />
� Na descalcificação use apenas produtos especialmente concebidos para esse efeito.<br />
Não use amoníaco ou outras substâncias que põem em causa a saúde.<br />
� O filtro da cafeteira só recebe café moído de forma apropriada.<br />
� A cafeteira nunca deve funcionar sem água. Se a cafeteira é programável não se<br />
esqueça de pôr água no depósito antes de a programar.<br />
Importante: a taça do café nunca pode ser colocada no micro ondas para aquecer o<br />
café. Todos os danos causados pelo não cumprimentos dos cuidados a ter com o<br />
aparelho ou a má utilização da taça do café são da responsabilidade exclusiva do<br />
consumidor.<br />
(*) Serviço técnico habilitado: serviço técnico do fabricante ou do importador, ou uma pessoa<br />
qualificada, reconhecida e habilitada para evitar qualquer perigo. Em qualquer caso devolva<br />
o aparelho ao serviço técnico.<br />
24 <strong>TEAM</strong> <strong>KM</strong> <strong>29</strong> T - 091201<br />
Assembly page 24/40
�<br />
Fax +32 2 359 95 50<br />
UTILIZAÇÃO/FUNCIONAMENTO<br />
Copies of the I/B. Please reproduce them without any<br />
changes except under special instruction from Team<br />
International BELGIUM. The pages must be reproduced<br />
and folded in order to obtain a booklet A5 (+/- 148.5 mm<br />
width x 210 mm height). When folding, make sure you<br />
keep the good numbering when you turn the pages of<br />
the I/B. Don’t change the page numbering. Keep the<br />
language integrity.<br />
� Utilize o aparelho unicamente para os fins domésticos e respeite sempre as informações<br />
dadas no manual das instruções sobre a utilização e o funcionamento do aparelho.<br />
� Este aparelho foi concebido exclusivamente para o uso doméstico incluindo:<br />
Espaços reservados aos empregados das lojas, escritórios e outras profissões.<br />
Habitação rural.<br />
Clientes dos hotéis, apartamentos de férias, motel e residenciais.<br />
Também em refeições nos quartos ou no serviço de pequenos almoços.<br />
NA PRIMEIRA UTILIZAÇÃO<br />
Ao utilizar o seu aparelho pela primeira vez, ponha água no reservatório e coloque o aparelho<br />
a funcionar.<br />
A máquina faz uma primeira passagem de água de seguida pare a máquina e volte a repetir<br />
esta operação passado 5 minutos. Repetir esta operação 3 vezes.<br />
COMO REGULAR O RELÓGIO<br />
� Ligue o seu aparelho. A hora “12:00” aparece no relógio digital.<br />
� O sistema de relógio de 24 horas é a configuração padrão. Para mudar para o sistema<br />
de relógio de 12 horas, pressione o botão HOUR e o botão MIN, ao mesmo tempo. "AM"<br />
ou "PM" aparecerá no visor.<br />
� Para ajustar no relógio da hora na cafeteira, pressione o botão PROGRAMME e “12:00”<br />
piscará.<br />
� Depois disso, pressiona os botões HOUR e MIN.<br />
� As horas mudarão lentamente ao principio e rapidamente depois de 1 segundo.<br />
� Quando a hora estiver marcada no ecrã, espere 3 segundos ou pressione duas vezes<br />
sucessivamente o botão PROGRAMME. Em ambos os casos, a configuração do relógio<br />
ficará visível.<br />
PARA FAZER CAFÉ<br />
� Abra a tampa do reservatório.<br />
� Usando a taça de vidro, coloque a quantidade de água potável desejada no depósito.<br />
O nível da água está indicado na escala. A água nunca pode estar acima do nível<br />
máximo indicado no aparelho.<br />
� Meneie a cabeça de gotejo.<br />
� Coloque o filtro de plástico na máquina de café. Coloque um filtro de papel próprio para<br />
máquinas de café no interior do filtro de plástico de forma a que o cone encaixe no bico<br />
da saída do café do filtro de plástico. Encha-o com a quantidade desejada de café<br />
moído para estas máquinas. Reponha a porta do filtro na posição inicial e verifique que<br />
ela fica bem ajustada. Meneie a cabeça de gotejo de modo que esta fique encima do<br />
centro do filtro.<br />
� Na cabeça de gotejo existe um regulador de aroma; colocar no indicador chávena<br />
vazia para obter um café suave ou sobre o indicador chávena cheia para um café forte.<br />
� Feche sempre a tampa antes de utilizar o aparelho e coloque a taça de vidro por baixo<br />
da saída do café antes de por a funcionar a máquina.<br />
� Você pode ativar ou desativar a função de aroma, pressionando o botão AROMA. A luz<br />
indicadora vermelha AROMA aparecerá quando a função aroma é ativada. Se você<br />
usar a função de aroma, o fluxo de água será mais lento o que dará ao seu café um<br />
sabor extra.<br />
25 <strong>TEAM</strong> <strong>KM</strong> <strong>29</strong> T - 091201<br />
Assembly page 25/40
�<br />
Fax +32 2 359 95 50<br />
Copies of the I/B. Please reproduce them without any<br />
changes except under special instruction from Team<br />
International BELGIUM. The pages must be reproduced<br />
and folded in order to obtain a booklet A5 (+/- 148.5 mm<br />
width x 210 mm height). When folding, make sure you<br />
keep the good numbering when you turn the pages of<br />
the I/B. Don’t change the page numbering. Keep the<br />
language integrity.<br />
� Pressione o botão regulador ON-OFF (0 / I) duas vezes para ligar a cafeteira. O<br />
sinalizador luminoso acende-se indicando que o aparelho está em funcionamento.<br />
Enquanto o aparelho estiver ligado e a taça com café sobre a placa, o café manter-se-á<br />
quente.<br />
� Sempre que retira a taça de vidro do aparelho a válvula anti-gotas fecha-se<br />
automaticamente de modo a evitar que o café caia sobre a placa quente. Quando<br />
colocamos a taça sobre a placa a válvula abre-se automaticamente.<br />
� Logo que o café termine, espere que o filtro esteja completamente vazio antes de retirar<br />
a taça.<br />
� Pode desligar o seu aparelho a qualquer momento, basta pressionar o botão ON-OFF<br />
uma vez (todas as luzes-indicadoras serão apagadas).<br />
� A cafeteira desliga automaticamente após 1 hora da preparação do café.<br />
PROGRAMAÇÃO DA CAFETEIRA DE CAFÉ<br />
Para programar a preparação do café, para um tempo pré-desejado, proceda como<br />
indicado no parágrafo « PARA FAZER CAFÈ » seguindo os passos de 1 a 7.<br />
Verifique que o relógio está com a hora correta.<br />
Prima duas vezes sobre o botão PROGRAMME. No ecrã do relógio surge 12:00. Utilize os botões<br />
HOUR e MINUTE para registrar as horas a que o aparelho deve preparar o café. Uma vez que<br />
concluída a configuração, espere cerca de 3 segundos ou prima uma vez o botão de<br />
PROGRAMME. Em ambos os casos, o tempo de programação irá desaparecer e será<br />
substituído pelo tempo do relógio.<br />
Regule em ON-OFF (0/1) para confirmar o tempo desejado para o arranque da máquina. O<br />
sinalizador AUTO, de cor vermelho, acender-se-à assim que as horas pré-programadas para o<br />
arranque da máquina esteja corretamente registrado.<br />
Assim que as horas desejadas para o arranque da máquina sejam alcançadas e que o café<br />
comece a ser preparado, o sinalizador AUTO apagar-se-à e o indicador do regulador ON-OFF<br />
acender-se-à.<br />
Quando a preparação do café terminar, inicia-se o ciclo de uma hora de aquecimento para<br />
manter o café quente. Quando passe este tempo, máquina desliga automaticamente.<br />
Nota: Para verificar o tempo de programação depois de o definir, pressione o botão de<br />
PROGRAMME e será exibido.<br />
MANTER O CAFÉ QUENTE<br />
� Se usar a função aroma, o fluxo de água será mais lento o que dará ao seu café um<br />
sabor extra.<br />
� Quando retirar a jarra do aparelho, uma válvula anti-gota atuará automaticamente para<br />
evitar que qualquer gota de café continue escorrendo para a placa. A substituição da<br />
chávena, abre automaticamente a válvula anti-gotejamento e permite que o café<br />
escorra para o meio da chávena.<br />
� Quando o deposito está vazio, aguarde alguns segundos antes de retirar o jarro, a fim de<br />
deixar a água no filtro de fluxo total.<br />
� Após o café pronto, você pode mantê-lo aquecido, deixando-o sobre a placa. O<br />
aparelho vai começar a aquecer, logo que a cafeteira esteja ligada (a luz vermelha do<br />
interruptor ON-OFF acender-se-á). O processo de aquecimento automático, ou o<br />
manual, não será superior a cerca de 1 hora, porque a sua cafeteira desliga-se<br />
automaticamente após esse tempo.<br />
� Nunca coloque um jarro vazio (ou quase vazio) sobre a placa de aquecimento,<br />
enquanto este ainda estiver quente.<br />
� Atenção: quando mudar sua cafeteira de sitio desligue-a, a placa também se<br />
apagará, apesar de manter-se quente por algum tempo. Tome atenção e espere até<br />
26 <strong>TEAM</strong> <strong>KM</strong> <strong>29</strong> T - 091201<br />
Assembly page 26/40
�<br />
Fax +32 2 359 95 50<br />
Copies of the I/B. Please reproduce them without any<br />
changes except under special instruction from Team<br />
International BELGIUM. The pages must be reproduced<br />
and folded in order to obtain a booklet A5 (+/- 148.5 mm<br />
width x 210 mm height). When folding, make sure you<br />
keep the good numbering when you turn the pages of<br />
the I/B. Don’t change the page numbering. Keep the<br />
language integrity.<br />
que a placa de aquecimento esteja completamente fria antes de limpar ou guardar o<br />
aparelho.<br />
DESCALCIFICAÇÃO E LIMPEZA<br />
� Aconselha-se a descalcificar o aparelho regularmente para o manter em bom estado.<br />
Para tal, utilize um descalcificante para cafeteiras eléctricas que encontrará no<br />
comércio.<br />
� Não coloque nenhum acessório da cafeteira na máquina de lavar louça. Lave-os em<br />
sabonária e passe-os por água limpa.<br />
� O suporte do filtro de sua cafeteira é removível, a fim de poder limpá-lo com maior<br />
comodidade numa tubulação de água, por exemplo, mas também para evitar a<br />
manipulação de um filtro de papel sujo.<br />
� Para as restantes partes use um esfregão humedecido e não abrasivo.<br />
ALGUNS CONSELHOS<br />
Quando verificar que o tempo para a obtenção do café está a aumentar tem de fazer<br />
uma descalcificação do aparelho para evitar danos maiores. A descalcificação é feita<br />
sempre que o aparelho dê sinais de que a preparação do café se prolonga no tempo,<br />
i e, demora mais tempo a sair. Deve ter sempre em atenção o problema da<br />
calcificação e usar produtos próprios para a descalcificação. A limpeza e o cuidado a<br />
ter com o aparelho permitem aumentar a sua durabilidade e lembramos que a<br />
substituição das resistências calcificadas não estão abrangidas pela garantia.<br />
PROTECÇÃO DO MEIO AMBIENTE – DIRECTIVA 2002/96/CE<br />
Para a preservação do ambiente e da nossa saúde, a eliminação no fim da vida útil dos<br />
aparelhos eléctricos e electrónicos, deve-se efectuar no cumprimento das legislações em<br />
vigor e pela participação de todos quer sejam produtores ou utilizadores. É por esta razão<br />
que o vosso aparelho tem na placa sinalética o símbolo , informando que em caso<br />
algum o aparelho deve ser colocado no caixote do lixo camarário ou privado para que não<br />
vá para as lixeiras comuns mas sim devolvido ao revendedor ou depositado nos locais<br />
apropriados e identificados para a recolha destes aparelhos para que uma vez recolhidos<br />
sejam reciclados, reutilizados ou lhe sejam dados outras aplicações.<br />
27 <strong>TEAM</strong> <strong>KM</strong> <strong>29</strong> T - 091201<br />
Assembly page 27/40
�<br />
AVVERTENZE<br />
Fax +32 2 359 95 50<br />
Copies of the I/B. Please reproduce them without any<br />
changes except under special instruction from Team<br />
International BELGIUM. The pages must be reproduced<br />
and folded in order to obtain a booklet A5 (+/- 148.5 mm<br />
width x 210 mm height). When folding, make sure you<br />
keep the good numbering when you turn the pages of<br />
the I/B. Don’t change the page numbering. Keep the<br />
language integrity.<br />
Vi invitiamo a leggere attentamente le istruzioni prima di utilizzare l’apparecchio, e vi<br />
preghiamo di seguire sempre attentamente le istruzioni di sicurezza e di utilizzo.<br />
Importante: L’apparecchio non è destinato a essere usato da persone (bambini compresi) le<br />
cui capacità fisiche, sensoriali o mentali siano ridotte, oppure con mancanza di esperienza o<br />
di conoscenza, a meno che esse abbiano potuto beneficiare, attraverso l’intermediazione di<br />
una persona responsabile della loro sicurezza, di una sorveglianza o di istruzioni riguardanti<br />
l’uso dell’apparecchio. I bambini devono essere sorvegliati per sincerarsi che non giochino<br />
con l’apparecchio.<br />
� Prima di mettere in funzione l’apparecchio, controllare che la tensione della rete elettrica<br />
corrisponda esattamente a quella dell’apparecchio.<br />
� Non lasciare l’apparecchio incustodito durante il funzionamento.<br />
� Verificare regolarmente che l'apparecchio non sia danneggiato. Non accendere<br />
l’apparecchio qualora il cavo o l’apparecchio stesso dovessero presentare un qualsiasi<br />
danneggiamento. Tutte le riparazioni devono essere eseguite da un servizio qualificato(*).<br />
Un cavo danneggiato deve essere sostituito da un servizio qualificato(*).<br />
� Questo apparecchio dovrà essere destinato solo all’uso domestico e secondo le indicazioni<br />
riportate nel presente libretto d'istruzioni.<br />
� Non immergere l'apparecchio in acqua o in altro liquido, né per pulirlo né per qualsiasi<br />
altra ragione. Non mettere l’apparecchio in lavastoviglie.<br />
� Non usare l’apparecchio in prossimità di sorgenti di calore.<br />
� Staccare la spina dalla presa elettrica e lasciare l'apparecchio raffreddare<br />
completamente prima di pulirlo o riporlo.<br />
� Non usare l’apparecchio all’aperto e riporlo sempre in un luogo asciutto.<br />
� Non utilizzare accessori se non quelli consigliati dal fabbricante; l’utilizzo di accessori<br />
diversi potrebbe essere pericoloso per l’utente ed inoltre potrebbe danneggiare<br />
l’apparecchio.<br />
� Non tirare il cavo per spostare l’apparecchio. Posizionare l’apparecchio su un tavolo o un<br />
supporto abbastanza stabile, e assicurarsi che il cavo elettrico non possa impigliarsi per<br />
evitare una caduta dell’apparecchio. Non avvolgere il cavo intorno all’apparecchio, non<br />
metterlo in contatto con le parti calde e non storcerlo.<br />
� Non utilizzare l'apparecchio se la brocca è incrinata o rotta. Non utilizzare una brocca<br />
diversa di quella in dotazione con l'apparecchio. Attenzione, la brocca diventa calda<br />
durante il funzionamento. Prenderla solo con la maniglia.<br />
� Assicurarsi che le parti calde dell’apparecchio non entrino in contatto con materiali<br />
facilmente infiammabili come tende, tovaglie...poiché durante il funzionamento<br />
potrebbero incendiarsi.<br />
� Per decalcificare l'apparecchio, occorre usare unicamente prodotti specialmente<br />
concepiti a quel fine. Non utilizzare ammoniaca né altre sostanze nocive alla salute.<br />
� Mettere soltanto caffè macinato nel filtro.<br />
� Non far funzionare la caffettiera senza acqua. Se la caffettiera è programmabile, non<br />
dimenticare di versare acqua prima della programmazione.<br />
� Se il cavo di alimentazione è danneggiato, esso deve sostituito dal costruttore o dal suo<br />
servizio assistenza tecnica o comunque da una persona con qualifica similare, in modo<br />
da prevenire ogni rischio.<br />
� Importante: non mettere la brocca in un forno a microonde per riscaldare il caffè. Non<br />
porteremo qualunque responsabilità in caso di danni causati per mancato rispetto di<br />
quest’ultima istruzione.<br />
(*) Servizio assistenza qualificato: servizio assistenza tecnica del fabbricante o dell’importatore o<br />
una persona qualificata, riconosciuta ed autorizzata ad effettuare riparazioni. Rivolgere in ogni<br />
caso l’apparecchio a questo servizio.<br />
28 <strong>TEAM</strong> <strong>KM</strong> <strong>29</strong> T - 091201<br />
Assembly page 28/40
�<br />
Fax +32 2 359 95 50<br />
AVVERTENZE DI UTILIZZO<br />
Copies of the I/B. Please reproduce them without any<br />
changes except under special instruction from Team<br />
International BELGIUM. The pages must be reproduced<br />
and folded in order to obtain a booklet A5 (+/- 148.5 mm<br />
width x 210 mm height). When folding, make sure you<br />
keep the good numbering when you turn the pages of<br />
the I/B. Don’t change the page numbering. Keep the<br />
language integrity.<br />
� Quest'apparecchio dovrà essere destinato solo all’uso domestico ed utilizzato nella<br />
maniera indicata in queste istruzioni.<br />
� L’apparecchio potrà essere utilizzato nei luoghi sotto riportati:<br />
- Angolo cottura riservato al personale di negozi, uffici, e altri ambienti professionali.<br />
- Fattorie.<br />
- Da parte di clienti di Hotel, motel and altri ambienti a carattere residenziale.<br />
- Ambienti come “bed & breakfast”.<br />
PRIMA DI UTILIZZARE L'APPARECCHIO PER LA PRIMA VOLTA<br />
Versare acqua fredda nel recipiente (senza mettere il caffè) e accendere l'apparecchio.<br />
Quando l'acqua è travasata spegnere l'apparecchio e ripetere l'operazione dopo 5 minuti.<br />
Ripetere l’operazione 3 volte.<br />
COME REGOLARE L'OROLOGIO<br />
� All'accensione dell'apparecchio, "12:00" appare nell'indicatore.<br />
� Il sistema di orologio a 24 ore è il programma predefinito. Per passare alle 12 ore,<br />
premere il pulsante ORA e il pulsante MIN contemporaneamente. “AM” o “PM” apparirà<br />
sul display.<br />
� Per regolare l'ora attuale, premere una volta sul tasto PROGRAMME. “12:00” lampeggerà<br />
sul display.<br />
� In seguito, premere sul tasto HOUR per le ore, e MIN per i minuti.<br />
� L’ora scorrerà lentamente in un primo tempo. Dopo 1 secondo senza rilasciare, l’ora<br />
scorrerà più velocemente.<br />
� Una volta giunta l'ora desiderata, aspettare 3 secondi o premere 2 volte successive sul<br />
tasto PROGRAMME. Nei due casi, l’ora regolata rimarrà indicata.<br />
PER FARE IL CAFFÈ<br />
� Aprire il coperchio del serbatoio per l’acqua.<br />
� Versare la quantità d'acqua desiderata nel serbatoio. Il numero di tazze è visibile<br />
sull'indicatore che si trova sul serbatoio. Non riempire oltre il livello massimo.<br />
� Oscillare l’erogatore d’acqua calda.<br />
� Posizionare il porta-filtro nella caffettiera. Mettere un filtro di carta o un filtro permanente<br />
(a seconda del modello) nel porta-filtro e riempire con la quantità di caffè macinato<br />
desiderata. Rimettere il porta-filtro al suo posto, assicurandosi che sia correttamente<br />
posizionato. Oscillare l’erogatore d’acqua calda affinché non si posizioni al centro del<br />
filtro.<br />
� Sopra l’erogatore d’acqua calda vi è un regolatore d’aroma; premere sul simbolo della<br />
tazzina vuota per un caffè leggero, mentre la tazza piena indica un caffè intenso.<br />
� Non dimenticare di chiudere il coperchio del serbatoio.<br />
� È possibile attivare o disattivare la funzione aroma premendo il pulsante AROMA. Il<br />
segnalatore luminoso di colore rosso “AROMA” lampeggerà quando questa funzione<br />
sarà attivata. Se si usa la funzione aroma, l’acqua scorrerà lentamente in modo tale da<br />
dare un gusto intenso al vostro caffè.<br />
� Accendere l’apparecchio, premendo l’interruttore (0/I) due volte; il segnalatore luminoso<br />
dell’interruttore si illuminerà ad indicare che la caffettiera è in funzione. L’apparecchio è<br />
in grado di mantenere il caffè caldo finché è in funzione e la brocca posta sulla<br />
resistenza.<br />
<strong>29</strong> <strong>TEAM</strong> <strong>KM</strong> <strong>29</strong> T - 091201<br />
Assembly page <strong>29</strong>/40
�<br />
Fax +32 2 359 95 50<br />
Copies of the I/B. Please reproduce them without any<br />
changes except under special instruction from Team<br />
International BELGIUM. The pages must be reproduced<br />
and folded in order to obtain a booklet A5 (+/- 148.5 mm<br />
width x 210 mm height). When folding, make sure you<br />
keep the good numbering when you turn the pages of<br />
the I/B. Don’t change the page numbering. Keep the<br />
language integrity.<br />
� Quando si toglie la brocca dall'apparecchio, una valvola antigoccia si chiude<br />
automaticamente per evitare che cadano gocce di caffè sulla piastra. Quando si rimette<br />
la brocca sulla resistenza, il sistema antigoccia si riapre, consentendo al caffè che rimane<br />
nel filtro di passare.<br />
� Quando il serbatoio è vuoto, aspettare che il caffè smetta di scorrere e che il filtro sia<br />
completamente vuoto prima di togliere la brocca.<br />
� È possibile spegnere l’apparecchio in qualsiasi momento premendo il tasto on-off (tutte le<br />
spie luminose si spegneranno).<br />
� La vostra caffettiera si spegnerà automaticamente un ora dopo aver terminato di<br />
erogare il caffè.<br />
PROGRAMMAZIONE DELLA CAFFETTIERA<br />
Prima di programmare la caffettiera accertarsi che l’apparecchio sia già pronto, come<br />
descritto nei punti elencati (1-7) nel paragrafo « PER FARE IL CAFFE ».<br />
Assicurarsi che l’orologio sia impostato correttamente.<br />
Premere due volte il tasto PROGRAMME. L’orologio mostrerà 12:00. Utilizzare i tasti ORA/HOUR e<br />
MINUTE per regolare l’ora in cui volete che la caffettiera si accenda. Una volta terminata<br />
l’impostazione predefinita, attendere 3 secondi o premere una volta il tasto PROGRAMME. In<br />
entrambi i casi, il tempo di programmazione scomparirà e verrà sostituito dall’orologio.<br />
Premere una volta il tasto ON-OFF (0/I) per attivare la programmazione della caffettiera. La<br />
spia luminosa AUTO si accenderà quando sarà terminata la programmazione in modo<br />
corretto.<br />
Nel momento in cui si accenderà la caffettiera e comincerà a filtrare il caffè la spia AUTO si<br />
spegnerà e si accenderà quella rossa ed il del tasto ON-OFF si illuminerà.<br />
Come per la produzione di caffè in modalità normale anche nella modalità<br />
PROGRAMMAZIONE la caffettiera manterrà caldo il caffè per una ora dalla fine del passaggio<br />
dal filtro. Dopo questo periodo, la caffettiera si spegnerà automaticamente.<br />
NOTA: per controllare il tempo programmato dopo averlo selezionato, premere il pulsanta<br />
PROGRAMME e verrà visualizzato.<br />
PER TENERE IL CAFFÈ AL CALDO<br />
� Se si usa la funzione aroma, l’acqua scorrerà lentamente in modo tale da dare un gusto<br />
intenso al vostro caffè.<br />
� Quando si toglie la brocca dall'apparecchio, una valvola antigoccia si chiude<br />
automaticamente per evitare che non cadano gocce di caffè sulla piastra. Quando si<br />
rimette la brocca il sistema antigoccia si riapre, consentendo al caffè che rimane nel filtro<br />
di passare.<br />
� Quando il serbatoio d’acqua sarà vuoto, aspettare qualche istante prima di togliere la<br />
brocca per permettere all’acqua presente nel filtro di scorrere totalmente.<br />
� Quando il caffè sarà pronto, la piastra (2) manterrà il caffè al caldo finché non si<br />
spengano l'apparecchio e la spia luminosa del tasto ON-OFF, oppure fino a circa 1 ora di<br />
funzionamento. Dopo questo periodo, la caffettiera si spegnerà automaticamente.<br />
� Non posizionare mai la caraffa vuota (o quasi) quando la base è ancora calda.<br />
� Attenzione: quando spegnete la caffettiera, la piastra riscaldante si spegnerà pure ma<br />
rimarrà calda ancora qualche istante. State attenti quando fate manipolazioni vicino<br />
all’apparecchio e aspettate che raffreddi completamente prima di pulirlo o di riporlo.<br />
30 <strong>TEAM</strong> <strong>KM</strong> <strong>29</strong> T - 091201<br />
Assembly page 30/40
�<br />
Fax +32 2 359 95 50<br />
PULIZIA E MANUTENZIONE<br />
Copies of the I/B. Please reproduce them without any<br />
changes except under special instruction from Team<br />
International BELGIUM. The pages must be reproduced<br />
and folded in order to obtain a booklet A5 (+/- 148.5 mm<br />
width x 210 mm height). When folding, make sure you<br />
keep the good numbering when you turn the pages of<br />
the I/B. Don’t change the page numbering. Keep the<br />
language integrity.<br />
Attenzione: prima di pulire l’apparecchio spegnerlo, disinserire la spina dalla presa di corrente<br />
ed attendere che si sia raffreddato.<br />
� Si consiglia di disincrostare regolarmente la caffettiera per prolungare la sua longevità. Per<br />
la pulizia utilizzare i prodotti disincrostanti che si trovano in commercio, rispettando le<br />
istruzioni indicate. Il fabbricante non può essere tenuto per responsabile delle riparazioni<br />
dovute a una manutenzione sbagliata della caffettiera.<br />
� Non mettere mai nessuna parte della caffettiera nella lavastoviglie. Pulire le parti di<br />
plastico con un panno morbido leggermente umido.<br />
� Il portafiltro è amovibile per poterlo pulire più facilmente passandolo sott’acqua per<br />
esempio, ma anche per évitare di manipolare il filtro sporco.<br />
� Per pulire la piastra riscaldante senza graffiarla, utilizzare una spugna non abrasiva.<br />
Procedere nello stesso modo per pulire la brocca ma aggiungere un detergente classico<br />
per aumentare la sua efficacia.<br />
SUGGERIMENTI PRATICI<br />
Quando la preparazione del caffè risulta troppo lunga, potrebbe essere il caso di procedere<br />
alla decalcificazione. Non attendere un peggioramento della situazione. Questa operazione e<br />
la sua frequenza dipendono dalla durezza dell’acqua. Il fenomeno del calcare è da tenere<br />
costantemente sotto controllo. Una costante manutenzione del prodotto prolungheranno la<br />
durata. La garanzia non avrà valore per la sostituzione di un elemento riscaldante pieno di<br />
calcare.<br />
DIRETTIVA 2002/96/CE PER LO SMALTIMENTO DELLE APPARECCHIATURE ELETTRICHE ED<br />
ELETTRONICHE<br />
Per preservare l'ambiente e la nostra salute, l'eliminazione dei vecchi apparecchi elettrici e<br />
elettronici non più utilizzati, va fatta secondo la direttiva sopra citata che impone l'obbligo al<br />
costruttore, al commerciante e a l'utilizzatore di consegnare gli apparecchi ai centri di<br />
raccolta specializzati, i quali saranno in grado di smaltire e riciclare i vecchi prodotti come la<br />
legge prescrive.<br />
Per questa ragione troverete apposto sull’etichetta segnaletica il simbolo che indica di<br />
non gettare il vecchio apparecchio non più utilizzato, in pattumiera o nel cassonetto delle<br />
immondizie.<br />
Per eliminare il vecchio apparecchio non più utilizzato, potete consegnarlo al rivenditore il<br />
cambio di quello nuovo acquistato, o direttamente nei centri di raccolta specializzati messi a<br />
disposizione dal vostro comune di residenza.<br />
31 <strong>TEAM</strong> <strong>KM</strong> <strong>29</strong> T - 091201<br />
Assembly page 31/40
�<br />
Fax +32 2 359 95 50<br />
MĂSURI DE SIGURANŢĂ<br />
Copies of the I/B. Please reproduce them without any<br />
changes except under special instruction from Team<br />
International BELGIUM. The pages must be reproduced<br />
and folded in order to obtain a booklet A5 (+/- 148.5 mm<br />
width x 210 mm height). When folding, make sure you<br />
keep the good numbering when you turn the pages of<br />
the I/B. Don’t change the page numbering. Keep the<br />
language integrity.<br />
Va rugam cititi cu atentie aceste instructiuni inainte de a folosi aparatul si intotdeauna urmati<br />
instructiunile de siguranta si operare.<br />
Important: persoanele ( inclusiv copii) care nu sunt capabile sa folosească produsul in<br />
siguranţa, datorita capacităţii lor fizice, senzoriale sau mentale, sau datorita lipsei de<br />
experienţa sau cunoaştere, nu trebuie niciodată sa folosească produsul decât daca sunt<br />
supravegheaţi de o persoana responsabila cu siguranţa lor sau daca ei anterior au primit<br />
instrucţiuni privind folosirea aparatului.<br />
Supravegherea îndeaproape este necesara pentru a împiedica copiii sa folosească aparatul<br />
ca pe o jucărie.<br />
� Verificaţi daca tensiunea la care conectaţi aparatul corespunde cu tensiunea<br />
recomandata.<br />
� Nu lăsaţi aparatul nesupravegheat in timpul folosirii. Nu îl lăsaţi la indemâna copiilor sau<br />
persoanelor neavizate.<br />
� Verificaţi periodic starea aparatului si in cazul in care se observa semne de deteriorare a<br />
acestuia nu-l mai utilizaţi; repararea aparatului poate fi făcuta doar de o persoana<br />
calificata si competenta. In cazul in care cablul de alimentare este deteriorat, trebuie sa<br />
fie înlocuit obligatoriu de către o persoana calificata.<br />
� Folosiţi aparatul numai in scop domestic si in modul specificat in aceste instrucţiuni.<br />
� Nu scufundaţi niciodată aparatul in nici un fel de lichid pentru nici un motiv. Nu îl puneţi in<br />
maşina de spălat vase.<br />
� Înainte de curăţare sau depozitare, întotdeauna deconectaţi aparatul de la sursa de<br />
curent si lăsaţi-l sa se răcească.<br />
� Nu folosiţi aparatul in exterior si plasaţi-l întotdeauna intr-un loc uscat.<br />
� Nu folosiţi niciodată accesorii care nu sunt recomandate de producător. Pot constitui un<br />
pericol in uz si exista riscul deteriorării aparatului.<br />
� Nu uitaţi niciodată aparatul trăgând de cablu. Plasaţi aparatul pe o masa sau pe o<br />
suprafaţa plana. Nu răsuciţi cablul in jurul aparatului si nu îl îndoiţi.<br />
� Nu folosiţi aparatul daca vasul este spart sau crăpat. Folosiţi numai cana livrata împreuna<br />
cu aparatul. Atenţie,cana devine fierbinte in timpul folosirii. Apucaţi-o numai de mâner.<br />
� Nu atingeţi niciodată părţile fierbinţi ale aparatului (fiţi atenţi de asemeni la plita care se<br />
înfierbânta foarte tare!), folosiţi numai părţile din plastic si ţineţi cana de mâner.<br />
� Asiguraţi-vă ca aparatul nu intra in contact cu materiale inflamabile ca de exemplu<br />
perdele, materiale textile, etc., deoarece acestea pot lua foc.<br />
� Când îndepărtaţi pelicula folosiţi numai produse speciale. Nu folosiţi amoniac sau orice<br />
alta substanţa care poate dauna sănătăţii.<br />
� Puneţi numai cafea măcinata in filtru.<br />
� Nu folosiţi niciodată cafetiera fără apa in ea. Daca aveti o cafetierea programabila,<br />
asigurativa sa o umpleti cu apa inainte de a o programa.<br />
Important: nu puneţi niciodată cana in cuptorul cu microunde pentru a încălzi cafeaua.<br />
Nu ne asumam nici o responsabilitate in cazul in care procedaţi aşa.<br />
(*) Electrician calificat: departamentul de vânzări al producătorului sau importatorului sau orice<br />
persoana care este calificata, competenta si aprobata de aceştia sa execute astfel de<br />
reparaţii in scopul de a evita orice fel de pericol. In orice caz trebuie sa returnaţi aparatul<br />
acestui electrician.<br />
32 <strong>TEAM</strong> <strong>KM</strong> <strong>29</strong> T - 091201<br />
Assembly page 32/40
�<br />
Fax +32 2 359 95 50<br />
CAMPUL DE APLICARE/OPERARE<br />
Copies of the I/B. Please reproduce them without any<br />
changes except under special instruction from Team<br />
International BELGIUM. The pages must be reproduced<br />
and folded in order to obtain a booklet A5 (+/- 148.5 mm<br />
width x 210 mm height). When folding, make sure you<br />
keep the good numbering when you turn the pages of<br />
the I/B. Don’t change the page numbering. Keep the<br />
language integrity.<br />
� Utilizati aparatul numai in scopuri domestice si conform cu instructiunile de folosire.<br />
� Scopul acestui aparat este de a fi folosit pentru aplicatii domestic si aplicatii similar cum ar fi:<br />
Colturi de bucatarii rezervate pentru personal in magazine, birouri si alte medii<br />
profesionale.<br />
Ferme.<br />
Utilizat de clientii hotelurilor, motelurilor si alte meddi cu character residential.<br />
Medii tip“pat si mic-dejun”.<br />
PRIMA FOLOSIRE<br />
Atunci când folosiţi aparatul pentru prima oara, puneţi apă fierbinte in rezervorul de apă (fără<br />
cafea) si porniţi aparatul.<br />
După ce a trecut toata apa, opriţi aparatul si lăsaţi-l sa se răcească. După ce este suficient de<br />
rece repetaţi operaţia cu apa proaspătă. Repetaţi aceasta operaţiune de trei ori.<br />
SETAREA CEASULUI<br />
� Conectati la priza cafetiera. Ora "12:00" va aparea pe display.<br />
� Setarea din fabrica este pentru 24 ore. Pentru a schimba la system de 12 ore, apasati<br />
butonul HOUR si butonul MIN in acelasi timp. Va apare pe display “AM” sau “PM”.<br />
� Pentru a regla ora curenta apasati butonul PROGRAMME odata. “12:00” clipeste.<br />
� Apasati apoi butonul HOUR pentru a regla orele, si butonul MIN pentru a regla minutele.<br />
� Pentru fiecare apasare al unuia dintre aceste butoane orele sau minutele vor creste cu<br />
cate o unitate daca tineti apasat butonul valoarea va creste mai repede.<br />
� Cand ati terminat reglarea, asteptati 3 secunde sau apasati de doua ori succesiv butonul<br />
PROGRAMME. In ambele cazuri ora reglata va ramane afisata.<br />
PREPARAREA CAFELEI<br />
� Deschideţi capacul rezervorului de apă şi plasaţi suportul de filtru în acesta.<br />
� Folosind cana, turnaţi cu ea cantitatea dorită de apă în rezervorul de apă. Aveţi grijă sa<br />
nu-l umpleţi peste linia de maxim.<br />
� Deschideţi capacul şi amplasaţi suportul de filtru în aparat. Rotiţi ca să-l blocaţi. Puneţi un<br />
filtru de hârtie sau permanent în suportul de filtru si folosind linguriţa adăugaţi cantitatea<br />
dorită de cafea măcinată în filtru. Puneţi la loc suportul de filtru asigurându-vă că acesta<br />
este amplasat corect. Rotiti picuratorul de apa in asa fel incat jetul sa fie in centrul filtrului.<br />
� In capul picuratorului este un regulator de aroma; daca il fixati pe zero cani obtineti o<br />
cafea mai slaba si invers pe pozitia cani pline obtineti o cafea mai tare.<br />
� Niciodată să nu uitaţi să închideţi capacul rezervorului de apă şi să puneţi carafa de sticlă<br />
pe placa de încălzire înainte de a porni filtrul.<br />
� Puteti active sau deyactiva functia aroma apasand butonul AROMA. Becul rosu AROMA<br />
se va aprinde cand functia este activate. Daca folositi aceasta functie apa va circula<br />
mai incet si veti obtine o cafea mai aromata.<br />
� Apăsaţi butonul pornit/oprit (0/I) de doua ori pentru a aprinde aparatul. Lampa se va<br />
aprinde, indicând faptul că aparatul funcţionează. Mecanismul aparatului vă permite să<br />
păstraţi cafeaua caldă atât cât filtrul funcţionează şi cana este pe plită.<br />
� Atunci când scoateţi cana din aparat, o valva anti-picurare va opera automat pentru a<br />
opri orice picătura de cafea sa cada pe plita încinsa. Repunerea cănii va deschide<br />
automat valva anti-picurare si va permite cafelei ramase in filtru sa curgă.<br />
� Aşteptaţi până când procesul de fierbere este încheiat si filtrul s-a golit înainte de a<br />
scoate cana.<br />
33 <strong>TEAM</strong> <strong>KM</strong> <strong>29</strong> T - 091201<br />
Assembly page 33/40
�<br />
Fax +32 2 359 95 50<br />
Copies of the I/B. Please reproduce them without any<br />
changes except under special instruction from Team<br />
International BELGIUM. The pages must be reproduced<br />
and folded in order to obtain a booklet A5 (+/- 148.5 mm<br />
width x 210 mm height). When folding, make sure you<br />
keep the good numbering when you turn the pages of<br />
the I/B. Don’t change the page numbering. Keep the<br />
language integrity.<br />
� Puteti opri cafetiera oricand apasand o singura data butonul pornit oprit (toate lampile<br />
indicatoare se vor stinge).<br />
� Cafetiera dvs se va opri automat dupa o ora dup ace a terminat de preparat cafeaua.<br />
PROGRAMAREA CAFETIEREI<br />
Pentru a programa cafetiera sa fiarba cafeaua la un timp setat, urmati pentru inceput pasi de<br />
la 1-6 din sectiunea „PREPARAREA CAFELEI”.<br />
Asigurati-va ca timpul setat al cafetierei este corect.<br />
Apasati butonul PROGRAMME de doua ori. Ceasul acum va arata 12:00. Folositi butoanele<br />
HOUR si MIN pentru a seta timpul dorit de fierbere. Odata ce ati terminat reglarea asteptati 3<br />
secunde sau apasati odata butonul PROGRAMME. In ambele cazuri timpul programat nu va<br />
mai fi afisat si afisat timpul real.<br />
Apasati butonul oprit-pornit (0/I) ca sa activati ciclul de fierbere. Lumina rosie AUTO se va<br />
aprinde cand timpul de fierbere este bine setat.<br />
Cand timpul setat de fierbere este atins cafetiera va porni ciclul de fierbere, lumina AUTO se<br />
va stinge si lumina rosie indicatoare va lumina.<br />
La ciclul normal de fierbere, porneste automat un alt ciclu de mentinere a cafelei fierbinti timp<br />
de o ora dupa ce ciclul de fierbere s-a terminat. Dupa o ora cafetiera se va inchide automat.<br />
Nota: pentru a verifica ce ora ati programat apasati butonul PROGRAMME si aceasta va fi<br />
afisata.<br />
FOLOSIRE CONFORTABILA<br />
� Daca folositi functia mai aromat, scurgerea apei va fi mai inceata ceea ce va da cafelei<br />
dvs. mai multa savoare.<br />
� Cand scoateti carafe din aparat, o valva antipicurare va intra in functiune automat ca sa<br />
evite orice picurare pe placa calda. Punerea carafei la loc deschide automat valva<br />
antipicurare si permite cafelei ramase in filtru sa se scurga in carafe.<br />
� Cand rezervorul de apa este complet gol asteptati cateva secunde pentru a permite<br />
intrgii ape din filtru sa se scurga in carafe.<br />
� Odata ce cafeaua este gata puteti sa o mentineti calda mentinand carafa pe plita<br />
calda. Aceasta incepe sa se incalzeasca din momentul in care ati pornit cafetiera<br />
(lampa rosie de pe butonul de pornit oprit este aprinsa). Indiferent de modul de operare<br />
automat sau manual, durata nu va depasi o ora deoarece cafetiera se va opri automat.<br />
� Nu puneti niciodata carafe goal ape placa calda cand aceasta nu s-a racit complet.<br />
� Atentie: cand opriti cafetiera se opreste si placa calda dar aceasta mai ramane ceva<br />
timp calda. Deci aveti grija si asteptati ceva timp pana cand aceasta se raceste complet<br />
inainte de curatare sau depozitare.<br />
DECALCIFIERE SI CURATARE<br />
� Decalcifierea cafetierei ii prelungeste durata de viata. Pentru decalcifiere folositi numai<br />
produse special destinate pentru cafetiere si urmati in totalitate instructiunile date de<br />
catre producatorul acestora.<br />
� Nu puneti niciodata orice parte a cafetierei in masina de spalat vase. Spalati carafe cu<br />
apa si detergent si clatiti-o cu apa curata.<br />
� Suportul filtrului al cafetierei este detasabil pentru a permite curatarea mai usoara a<br />
acestuia sub jet de apa si de asemeni pentru a permite o mai usoara operare a filtrului de<br />
hartie.<br />
� Pentru curatarea partilor din plastic ale aparatului, folositi o carpa umeda non abraziva.<br />
34 <strong>TEAM</strong> <strong>KM</strong> <strong>29</strong> T - 091201<br />
Assembly page 34/40
�<br />
SUGESTII PRACTICE<br />
Fax +32 2 359 95 50<br />
Copies of the I/B. Please reproduce them without any<br />
changes except under special instruction from Team<br />
International BELGIUM. The pages must be reproduced<br />
and folded in order to obtain a booklet A5 (+/- 148.5 mm<br />
width x 210 mm height). When folding, make sure you<br />
keep the good numbering when you turn the pages of<br />
the I/B. Don’t change the page numbering. Keep the<br />
language integrity.<br />
Cand observati ca procesul de fierbere dureaza mai mult ca de obicei, este probabil timpul sa<br />
decalcificati aparatul. Nu asteptati pana situatia se inrautateste. Frecventa decalcificarii<br />
depinde de cantitatea de var din apa asadar poate fi diferita de la o familie la alta. Asadar<br />
este important sa acordati atentie acesteia. Va sfatuim sa descalati aparatul de cafea pentru<br />
a ii prelungi durata de functionare.<br />
Plangerile pentru garantie nu se iau in considerare daca decalcificarea nu a fost facuta.<br />
PROTECTIA MEDIULUI – DIRECTIVA 2002/96/EC<br />
Simbolul de pe tăbliţa cu datele tehnice înseamnă că produsul nu se poate arunca<br />
împreună cu alte reziduuri menajere. Legea pedepseşte cu amendă persoanele care aruncă<br />
aparatele electrice şi electronice împreună cu alte reziduuri.<br />
Debarasarea corespunzătoare a produselor uzate previne formarea unor efecte negative<br />
pentru mediul natural şi sănătatea umană, care pot fi produse de manipularea nepotrivită a<br />
reziduurilor rămase din uzarea aparatelor electronice.<br />
35 <strong>TEAM</strong> <strong>KM</strong> <strong>29</strong> T - 091201<br />
Assembly page 35/40
�<br />
Fax +32 2 359 95 50<br />
ВАЖНИ БЕЛЕЖКИ ЗА БЕЗОПАСНОСТ<br />
Copies of the I/B. Please reproduce them without any<br />
changes except under special instruction from Team<br />
International BELGIUM. The pages must be reproduced<br />
and folded in order to obtain a booklet A5 (+/- 148.5 mm<br />
width x 210 mm height). When folding, make sure you<br />
keep the good numbering when you turn the pages of<br />
the I/B. Don’t change the page numbering. Keep the<br />
language integrity.<br />
ПРОЧЕТЕТE ВНИМАТЕЛНО ПРЕДИ УПОТРЕБА.<br />
ВАЖНО! : Уреда не е преназначен за употреба от хора (включително деца) с увреждания<br />
или с липса на опит и умения, доколкото те не са наблюдавани или инструктирани от<br />
човек, отговарящ за тяхната безопасност.<br />
Деца не трябва да играят с уреда!<br />
� Преди употреба, проверете дали волтажа и захранването да отговарят на това на<br />
уреда.<br />
� Уреда да не се оставя без наблюдение, когато е включен в ел. мрежа.<br />
� Редовно проверявайте уреда за повреди. Уреда не трябва да се използва ако<br />
кабела е повреден. Уреда трябва да се поправи от квалифициран ел. техник (*) . Ако<br />
кабела е повреден, смяната му става само в упълномощения сервиз.<br />
� Уреда е предназначен само за домашна употреба, по начин описан в упътването.<br />
� Уреда не трябва да се потапя във вода или друга течност, без значение на причината.<br />
Също така уреда не трябва да се мие в миялна машина.<br />
� Не използвайте уреда в близост до горещи повърхности.<br />
� Изключете уреда преди да го почистите или съхраните и изчакайте да изстине.<br />
� Уреда не трябва да се използва навън, и трябва да се съхранява в сухи помещения.<br />
� Не използвайте приставки, които не са одобрени от производителя. Те може да се<br />
опасни за потребителя и да повредят уреда.<br />
� Уреда не трябва да се мести чрез дърпане на кабела. В никакъв случай не дърпайте,<br />
не вдигайте уреда за кабела и не изключвайте щепсела от електрическата мрежа по<br />
този начин. Не навивайте кабела около уреда, не го прегъвайте, не го усуквайте.<br />
� Не използвайте уреда ако каната е пукната или счупена. Използвайте само каната,<br />
която е в комплект с Вашия уред. Внимание, каната се загрява по време на<br />
употреба. Хващайте я само за дръжката.<br />
� Никога не докосвайте горещите части на уреда (внимавайте, котлона е гореща<br />
част!), пипайте само пластмасовите части и хващайте каната за дръжката.<br />
� Дръжте уреда настрана от запалителни материали – като завеси, текстил ..., защото<br />
когато уреда работи може да възникне пожар.<br />
� За отстраняване на котления камък използвайте само пригодените за целта<br />
продукти. Никога не трябва да използвате амоняк или други вещества, които могат<br />
да влошат здравето Ви.<br />
� Слагайте само смляно кафе във филтъра.<br />
� Никога не използвайте кафе машината без вода.<br />
Важно: Никога не слагайте каната в микровълнова печка за загряване на кафето.<br />
Производителя не носи отговорност при повреда на каната.<br />
(*) Квалифициран ел. техник: Сервизния отдел на производителя или вносителя<br />
упълномощава лице, което е квалифицирано и компетентно да извърши поправки, зада<br />
предотврати опасност. Повредения уред трябва да се върне в сервиза.<br />
36 <strong>TEAM</strong> <strong>KM</strong> <strong>29</strong> T - 091201<br />
Assembly page 36/40
�<br />
Fax +32 2 359 95 50<br />
МЯСТО НА ИЗПОЛЗВАНЕ<br />
Copies of the I/B. Please reproduce them without any<br />
changes except under special instruction from Team<br />
International BELGIUM. The pages must be reproduced<br />
and folded in order to obtain a booklet A5 (+/- 148.5 mm<br />
width x 210 mm height). When folding, make sure you<br />
keep the good numbering when you turn the pages of<br />
the I/B. Don’t change the page numbering. Keep the<br />
language integrity.<br />
� Използвайте уреда САМО за домакински цели, по начин указан в това упътване.<br />
� Уреда е предназначен за домашна употреба а също и за:<br />
Кухни, резервирани за персонал в магазини, офиси и друга<br />
професионална среда.<br />
Ферми.<br />
Използване от клиенти в хотели, мотели и други от жилищен характер.<br />
Заведения от типа „нощувка и закуска” (“bed and breakfast”)<br />
ПЪРВА УПОТРЕБА<br />
� Когато използвате уреда за пръв път, насипете прясна вода в резервоара (без кафе)<br />
и включете уреда.<br />
� След като водата премине в каната, изключете уреда и изчакайте да изстине. След<br />
като уреда е изстинал, повторете процедурата още 2 пъти.<br />
НАСТРОЙКА НА ЧАСОВНИКА<br />
� Включете кафе машината. Цифровия часовник ще показва "12:00".<br />
� Часовника автоматично е настроен на 24 часа система. За промяна към 12 часова<br />
система, натиснете едновременно бутон HOUR и бутон MIN. На дисплея ще се<br />
изпише “AM” или “PM”.<br />
� За настройка на точния час, натиснете един път бутон ROGRAMME. “12:00” ще<br />
започне да мига.<br />
� След това натиснете бутона за настройка на час (HOUR) и бутона за минутите (MIN)<br />
за промяна на минутите.<br />
� С всяко натискане на един от тези бутони, часа или минутите ще се увеличат с 1, но<br />
ако задържите часа ще се върти по-бързо.<br />
� След като настройката е завършена, изчакайте около 3 секунди или натиснете два<br />
пъти последователно програмния бутон (PROGRAMME). И в двата случая ще остане<br />
настроения час.<br />
ПРИГОТВЯНЕ НА КАФЕ<br />
� Отворете капака на резервоара.<br />
� Налейте с каната желаното количество вода в резервоара. Внимавайте да не<br />
препълните максималното ниво, означено на резервоара.<br />
� Сложете филтърната поставка на кафе машината. Поставете хартиен филтър и<br />
добавете желаното количество смляно кафе във филтъра. Затворете добре<br />
филтъра. Завъртете главата на душа, така че да е по средата на филтъра.<br />
� На самата глава има регулатор за аромата на кафето; сложете го на позиция<br />
празна чаша за леко кафе или на пълна чаша за силно кафе.<br />
� Не забравяйте да затворите капака на резервоара и да сложите каната върху<br />
нагревателната плоча, преди да включите кафе машината.<br />
� Може да включите или да изключите функцията за аромат чрез натискане на бутона<br />
АROMA. Червената лампа AROMA ще се включи при работеща функция за аромат.<br />
При използване на функцията за аромат, водата ще тече по-бавно, което ще даде<br />
на кафето допълнителен вкус.<br />
� Натиснете два пъти ключа за вкл./изкл. (0/I), за да включите кафе машината.<br />
Сигналната лампа ще се включи, което показва че уреда Ви работи. Устройство ще<br />
запази кафето топло, докато кафе машината работи и каната стой на уреда.<br />
� Когато свалите каната от кафе машината, функция за спиране на капките ще се<br />
задейства, което ще спре капките от кафе върху котлончето. Поставянето отново на<br />
37 <strong>TEAM</strong> <strong>KM</strong> <strong>29</strong> T - 091201<br />
Assembly page 37/40
�<br />
Fax +32 2 359 95 50<br />
Copies of the I/B. Please reproduce them without any<br />
changes except under special instruction from Team<br />
International BELGIUM. The pages must be reproduced<br />
and folded in order to obtain a booklet A5 (+/- 148.5 mm<br />
width x 210 mm height). When folding, make sure you<br />
keep the good numbering when you turn the pages of<br />
the I/B. Don’t change the page numbering. Keep the<br />
language integrity.<br />
каната автоматично отваря вентила за спиране на капките, което позволява на<br />
останалото кафе да се премине от филтрира в каната.<br />
� Изчакайте докато филтрирането спре, преди да отместите каната.<br />
� Може да изключите уреда с едно натискане на бутона за вкл./изкл. (сигналната<br />
лампа ще изключи).<br />
� Кафе машината ще се изключи автоматично 1 час след като е приключил процеса<br />
на варена на кафе.<br />
ПРОГРАМИРАНЕ НА КАФЕ МАШИНАТА<br />
За програмирана на кафе машината за програмиране варенето на прясно смляно<br />
кафе в момента, следвайте стъпките от 1 до 6 в отдела “ПРИГОТВЯНЕ НА КАФЕ”.<br />
Проверете дали часовника на кафе машината е настроен на точния час.<br />
Натиснете два пъти бутона за програмиране (PROGRAMME). Часовника ще показва 12:00.<br />
Използвайте бутоните HOUR и MIN за да нагласите желаното време на варене. След като<br />
настройката е завършена, изчакайте около 3 секунди или натиснете едно кратно бутона<br />
PROGRAMME. И в двата случая програмираното време ще изчезне и ще се появи<br />
часовник.<br />
Натиснете един път бутона за вкл./изкл. (0/I) за активиране на зададения цикъл на варене.<br />
Червена светлина AUTO ще се включи, когато времето за варене е точно настроено.<br />
След като настройката на време за сваряване приключи и кафе машината започне да<br />
вари кафето, светлината AUTO ще се изключи и червената сигнална лампа на ключа за<br />
вкл./изкл. ще свети.<br />
Както и при нормален цикъл на варене, след сваряване на кафето се включва едно<br />
часов цикъл за поддържане топлината на кафето. След изтичането на този час, кафе<br />
машината ще се изключи автоматично.<br />
Забележка: за да проверите програмираното време, след настройката натиснете бутон<br />
PROGRAMME и времето ще се покаже.<br />
КОМФОРТ<br />
� Ако използвате функцията за аромат, водата ще тече по-бавно, което добавя на<br />
Вашето кафе допълнителен вкус.<br />
� След снемане на каната от уреда, автоматично се включва вентил за спиране на<br />
капките, като по този начин спира капките кафе капе върху котлон. Поставянето на<br />
каната автоматично отваря вентила и позволява филтрирането на останалото кафе в<br />
каната.<br />
� След изпразване на резервоара, изчакайте няколко секунди преди да снемете<br />
каната, като дадете възможност на останалата вода да премине през филтъра.<br />
� След като кафето е готово, можете да го запазите горещо като каната остане на<br />
котлона. Той се включва след като кафе машината е включена (червената сигнална<br />
лампа на бутона за вкл./изкл. е включена). При автоматична или ръчна работа,<br />
продължителността няма да превиши 1 час, понеже кафе машината ще се изключи<br />
автоматично след това.<br />
� Никога не слагайте (почти) празна кана обратно на котлона, ако той е все още<br />
горещ.<br />
� Внимание: когато изключите кафе машината, котлона също се изключва, но остава<br />
горещ за кратко. За това изчакайте докато котлона напълно изстине, преди да<br />
почистите или приберете уреда.<br />
38 <strong>TEAM</strong> <strong>KM</strong> <strong>29</strong> T - 091201<br />
Assembly page 38/40
�<br />
Fax +32 2 359 95 50<br />
ОТСТРАНЯВАНЕ НА КОТЛЕНИЯ КАМЪК И ПОЧИСТВАНЕ<br />
Copies of the I/B. Please reproduce them without any<br />
changes except under special instruction from Team<br />
International BELGIUM. The pages must be reproduced<br />
and folded in order to obtain a booklet A5 (+/- 148.5 mm<br />
width x 210 mm height). When folding, make sure you<br />
keep the good numbering when you turn the pages of<br />
the I/B. Don’t change the page numbering. Keep the<br />
language integrity.<br />
� Отстраняване на котления камък удължава живота на кафе машината. Използвайте<br />
само продукти, които са предназначени за тази цел, като прочетете внимателно<br />
упътването.<br />
� Никога не слагайте уреда или части от него в миялна машина. Почиствайте кафе<br />
машината с хладка сапунена вода, изплакнете с чиста вода.<br />
� Държача на филтъра на кафе машината се сваля, като по този начин може полесно<br />
да се почиства под водна струя, а също така и за снемане на мръсния<br />
хартиен филтър.<br />
� За почистване на пластмасовите части, използвайте влажна, не абразивна кърпа.<br />
ПРАКТИЧНИ СЪВЕТИ<br />
Ако забележите, че процеса за приготвяне на кафе е по-дълъг от обикновено, това<br />
означава че трябва да отстраните котления камък. Не чакайте положението се влоши!<br />
Отстраняването на налепа, зависи от варовика във водата. Добрата поддръжка на уреда<br />
гарантира неговия по-дълъг живот. Гаранционни оплаквания поради смяна на<br />
нагревателния елемент няма да се приемат.<br />
ЗАЩИТА НА ОКОЛНАТА СРЕДА – ДИРЕКТИВА 2002/96/EC<br />
За защита на околната среда и човешкото здраве, отпадъчното електрическо и<br />
електронно оборудване трябва да се съхранява в съответствие със специални правила,<br />
които засягат доставчика и потребителя. Поради тази причина, ако Вашия уред има<br />
символ на табелката или опаковката, то същия не трябва да се изхвърля заедно с<br />
общия боклук. Потребителя има право да занесе уреда до мястото, където се събиране<br />
такъв отпадък, който се рециклира, преработва или се използва за други цели съгласно<br />
директивата.<br />
39 <strong>TEAM</strong> <strong>KM</strong> <strong>29</strong> T - 091201<br />
Assembly page 39/40
�<br />
Fax +32 2 359 95 50<br />
Copies of the I/B. Please reproduce them without any<br />
changes except under special instruction from Team<br />
International BELGIUM. The pages must be reproduced<br />
and folded in order to obtain a booklet A5 (+/- 148.5 mm<br />
width x 210 mm height). When folding, make sure you<br />
keep the good numbering when you turn the pages of<br />
the I/B. Don’t change the page numbering. Keep the<br />
language integrity.<br />
<strong>TEAM</strong> <strong>KM</strong> <strong>29</strong> T<br />
�<br />
Deutsch 4<br />
English 8<br />
Français 12<br />
Nederlands 16<br />
Español 20<br />
Português 24<br />
Italiano 28<br />
Română 32<br />
Български 36<br />
�<br />
Back cover page (last page)<br />
Assembly page 40/40