Image Analysis and Computer Vision Short Tutorial to the CImg ...
Image Analysis and Computer Vision Short Tutorial to the CImg ...
Image Analysis and Computer Vision Short Tutorial to the CImg ...
Create successful ePaper yourself
Turn your PDF publications into a flip-book with our unique Google optimized e-Paper software.
<strong>Image</strong> <strong>Analysis</strong> <strong>and</strong> <strong>Computer</strong> <strong>Vision</strong><br />
<strong>Short</strong> <strong>Tu<strong>to</strong>rial</strong> <strong>to</strong> <strong>the</strong> <strong>CImg</strong> & Argstream Libraries<br />
March 22, 2007<br />
1 The <strong>CImg</strong> Library<br />
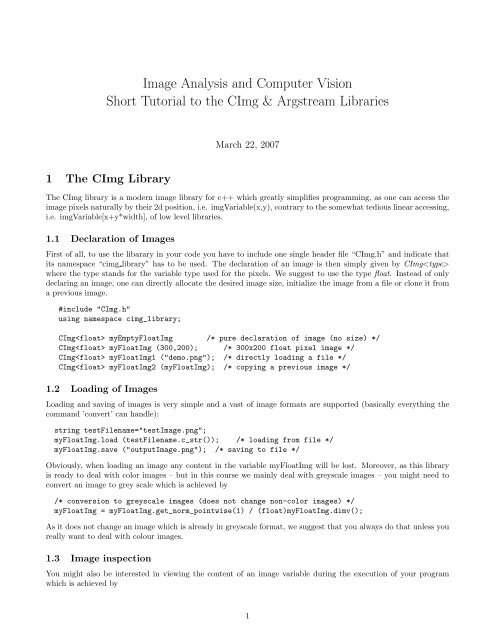
The <strong>CImg</strong> library is a modern image library for c++ which greatly simplifies programming, as one can access <strong>the</strong><br />
image pixels naturally by <strong>the</strong>ir 2d position, i.e. imgVariable(x,y), contrary <strong>to</strong> <strong>the</strong> somewhat tedious linear accessing,<br />
i.e. imgVariable[x+y*width], of low level libraries.<br />
1.1 Declaration of <strong>Image</strong>s<br />
First of all, <strong>to</strong> use <strong>the</strong> libarary in your code you have <strong>to</strong> include one single header file “<strong>CImg</strong>.h” <strong>and</strong> indicate that<br />
its namespace “cimg library” has <strong>to</strong> be used. The declaration of an image is <strong>the</strong>n simply given by <strong>CImg</strong><br />
where <strong>the</strong> type st<strong>and</strong>s for <strong>the</strong> variable type used for <strong>the</strong> pixels. We suggest <strong>to</strong> use <strong>the</strong> type float. Instead of only<br />
declaring an image, one can directly allocate <strong>the</strong> desired image size, initialize <strong>the</strong> image from a file or clone it from<br />
a previous image.<br />
#include "<strong>CImg</strong>.h"<br />
using namespace cimg_library;<br />
<strong>CImg</strong> myEmptyFloatImg /* pure declaration of image (no size) */<br />
<strong>CImg</strong> myFloatImg (300,200); /* 300x200 float pixel image */<br />
<strong>CImg</strong> myFloatImg1 ("demo.png"); /* directly loading a file */<br />
<strong>CImg</strong> myFloatImg2 (myFloatImg); /* copying a previous image */<br />
1.2 Loading of <strong>Image</strong>s<br />
Loading <strong>and</strong> saving of images is very simple <strong>and</strong> a vast of image formats are supported (basically everything <strong>the</strong><br />
comm<strong>and</strong> ’convert’ can h<strong>and</strong>le):<br />
string testFilename="test<strong>Image</strong>.png";<br />
myFloatImg.load (testFilename.c_str()); /* loading from file */<br />
myFloatImg.save ("output<strong>Image</strong>.png"); /* saving <strong>to</strong> file */<br />
Obviously, when loading an image any content in <strong>the</strong> variable myFloatImg will be lost. Moreover, as this library<br />
is ready <strong>to</strong> deal with color images – but in this course we mainly deal with greyscale images – you might need <strong>to</strong><br />
convert an image <strong>to</strong> grey scale which is achieved by<br />
/* conversion <strong>to</strong> greyscale images (does not change non-color images) */<br />
myFloatImg = myFloatImg.get_norm_pointwise(1) / (float)myFloatImg.dimv();<br />
As it does not change an image which is already in greyscale format, we suggest that you always do that unless you<br />
really want <strong>to</strong> deal with colour images.<br />
1.3 <strong>Image</strong> inspection<br />
You might also be interested in viewing <strong>the</strong> content of an image variable during <strong>the</strong> execution of your program<br />
which is achieved by<br />
1
myFloatImg.display ("Window Title"); /* displaying <strong>the</strong> image */<br />
which opens a window (with specified title) on your screen. The program execution is <strong>the</strong>n blocked until you press<br />
any key (while that window has focus). It also gives you a little interface <strong>to</strong> inspect <strong>the</strong> pixel values of <strong>the</strong> image<br />
at particular position which might be helpful.<br />
1.4 Processing <strong>the</strong> image<br />
After having dealt with <strong>the</strong> variable declaration, input/output matters, one can actually start processing <strong>the</strong> image.<br />
The dimensions of <strong>the</strong> image can be accessed by<br />
/* .. .. .. do some processing .. .. .. */<br />
unsigned width = myFloatImg.dimx(); // access image width<br />
unsigned height = myFloatImg.dimy(); // access image height<br />
Sometimes it is necessary <strong>to</strong> initialize <strong>the</strong> image, such that all pixels have a particular value.<br />
achieved by <strong>the</strong> function call<br />
This can be<br />
myFloatImg.fill(0.0f);<br />
which, in this example, sets every pixel <strong>to</strong> zero.<br />
As already mentioned, <strong>the</strong> access of <strong>the</strong> pixels is intuitively like one would access a 2-dimensional array, i.e.<br />
for (unsigned y=0; y < height; y++) {<br />
for (unsigned x=0; x < width; x++) {<br />
myFloatImg(x,y) = x*y;<br />
}<br />
}<br />
1.5 Compilation <strong>and</strong> Linking<br />
For convenience, we provide a simple script which deals with all matters of compiling <strong>and</strong> linking a source-code <strong>to</strong><br />
an executable. This is achieved by invoking <strong>the</strong> comm<strong>and</strong><br />
biwicompile<br />
yourSourceFile.cc<br />
where <strong>the</strong> argument obviously is <strong>the</strong> file containing your code. The resulting binary will have <strong>the</strong> same name, but<br />
without <strong>the</strong> extension, in this example it would be ”yourSourceFile”.<br />
2 Argument Reading using Argstream<br />
“argstream.h” is a c++-template based library designed for simple comm<strong>and</strong> line argument reading. Its usage is<br />
very simple <strong>and</strong> is explained by <strong>the</strong> following code snippet:<br />
1 #include "argstream.h"<br />
2<br />
3 int main(int argc, char**argv) {<br />
5 argstream as(argc, argv);<br />
6<br />
7 string sFilename="defaultFile.png";<br />
8 int nNumber=3;<br />
9 float dFloat;<br />
10 as >> parameter("i", sFilename, "Path <strong>to</strong> a local file ", true);<br />
11 as >> parameter("n", nNumber, "some number ", false);<br />
12 as >> parameter("d", dFloat, "a floating point", false);<br />
13<br />
14 as >> help();<br />
15 as.defaultErrorH<strong>and</strong>ling();<br />
16 return 0;<br />
17 }<br />
2
Firstly, <strong>to</strong> use <strong>the</strong> library one has <strong>to</strong> include its header file ’argstream.h’ (line 1). Line 5 defines an argstream object<br />
<strong>and</strong> <strong>the</strong> lines 14 <strong>and</strong> 15 deal with <strong>the</strong> error h<strong>and</strong>ling <strong>and</strong> displaying of an au<strong>to</strong>matically generated usage text which<br />
is displayed when <strong>the</strong> program is called with <strong>the</strong> option – –help. This lines will always be <strong>the</strong> same <strong>and</strong> you do not<br />
have <strong>to</strong> care about <strong>the</strong>m; just copy <strong>the</strong>m as <strong>the</strong>y are!<br />
The interesting part is in <strong>the</strong> middle, i.e. lines 7 <strong>to</strong> 12. Basically, for every comm<strong>and</strong> line option you have<br />
<strong>to</strong> declare a variable. You may already initialize it with some value (which will result in a default value for that<br />
option). Then, <strong>the</strong> actual argument reading is achieved by <strong>the</strong> lines 10..12. The syntax is identical for all types of<br />
variables you’d like <strong>to</strong> read from cmdline <strong>and</strong> is simply<br />
as >> parameter (,<br />
,<br />
,<br />
);<br />
where <strong>the</strong> first argument indicates <strong>the</strong> option name (which will be given on <strong>the</strong> comm<strong>and</strong> line, eg. – –Name value)<br />
<strong>the</strong> second specifies <strong>the</strong> variable where <strong>the</strong> value provided on <strong>the</strong> comm<strong>and</strong> line has <strong>to</strong> be s<strong>to</strong>red. The third argument<br />
gives a short description about <strong>the</strong> option (which is displayed when giving <strong>the</strong> option –help) <strong>and</strong> <strong>the</strong> last argument<br />
indicates whe<strong>the</strong>r <strong>the</strong> user always has <strong>to</strong> provide that comm<strong>and</strong> line option, i.e. it is m<strong>and</strong>a<strong>to</strong>ry, or if it is optional.<br />
In case of an optional variable you have <strong>to</strong> put ’false’ <strong>and</strong> if it s m<strong>and</strong>a<strong>to</strong>ry, <strong>the</strong> argument has <strong>to</strong> be set <strong>to</strong> ’true’.<br />
3 References<br />
Fur<strong>the</strong>r, more detailed information for <strong>the</strong> two libraries can be found on <strong>the</strong> web at <strong>the</strong> following two web sites:<br />
• http://cimg.sourceforge.net/<br />
• http://artis.imag.fr/ Xavier.Decoret/resources/argstream/<br />
3
4 Sample Program<br />
/∗ ∗∗∗∗∗∗∗∗∗∗∗∗∗∗∗∗∗∗∗∗∗∗∗∗∗∗∗∗∗∗∗∗∗∗∗∗∗∗∗∗∗∗∗∗∗∗∗∗∗∗∗∗∗∗∗∗∗∗∗∗∗∗∗∗∗∗∗<br />
∗ warp . cc<br />
∗ compile with :<br />
∗ b i w i c o m p i l e warp . cc<br />
∗ e x e c u t e <strong>the</strong> program ( example ) :<br />
∗ warp −−i ˜ cvcourse / p i c / s t p e t e r . r g i −−o warped . r g i −−s t r e n g t h 5.3<br />
∗ S t r e n g t h should be a v a l u e between 0 <strong>and</strong> 16 ( d e f a u l t : 8 ) .<br />
∗∗∗∗∗∗∗∗∗∗∗∗∗∗∗∗∗∗∗∗∗∗∗∗∗∗∗∗∗∗∗∗∗∗∗∗∗∗∗∗∗∗∗∗∗∗∗∗∗∗∗∗∗∗∗∗∗∗∗∗∗∗∗∗∗∗∗ ∗/<br />
#include <br />
#include <br />
#include ” argstream . h” // comm<strong>and</strong> l i n e parameter reading<br />
#include ”<strong>CImg</strong> . h” // C++ image l i b r a r y<br />
using namespace c i m g l i b r a r y ;<br />
using namespace std ;<br />
int main ( int argc , char ∗∗ argv ) {<br />
argstream as ( argc , argv ) ;<br />
s t r i n g i n f i l e=”” ,<br />
o u t f i l e=” out . r g i ” ;<br />
float s t r e n g t h =8.0 f ;<br />
as >> parameter ( ” i ” , i n f i l e , ” input f i l e name” , true ) ;<br />
as >> parameter ( ”o” , o u t f i l e , ” output f i l e name” , f a l s e ) ;<br />
as >> parameter ( ” s t r e n g t h ” , strength , ”warp s t r e n g t h ” , f a l s e ) ;<br />
as >> help ( ) ;<br />
as . defaultErrorH<strong>and</strong>ling ( ) ;<br />
<strong>CImg</strong> in ( i n f i l e . c s t r ( ) ) ;<br />
const int width = in . dimx ( ) ;<br />
const int height = in . dimy ( ) ;<br />
i f ( ( width==0) | | ( height ==0)) {<br />
c e r r


