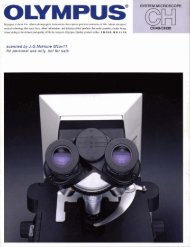
Olympus BH2-UMA Universal Vertical Illuminator Instruction Manual
Olympus BH2-UMA Universal Vertical Illuminator Instruction Manual
Olympus BH2-UMA Universal Vertical Illuminator Instruction Manual

Create successful ePaper yourself
Turn your PDF publications into a flip-book with our unique Google optimized e-Paper software.
<strong>BH2</strong>-<strong>UMA</strong><br />
<strong>Universal</strong> <strong>Vertical</strong><br />
IDuminator<br />
<strong>Instruction</strong><br />
<strong>Manual</strong><br />
OLYMPUS CORPORATION
TABLE OF CONTENTS<br />
PAGE<br />
Prerace 5<br />
Precautions S<br />
I. Standard Configurations 6-13<br />
A Univeml (BF/DFII'OLlfLUORJDIC) Version 6·7<br />
lIluSb'abon 7<br />
I,l. Brightfield/Darklield/DIC/POL Version 8<br />
Illustration 9<br />
C. Brightfield/Darkfield Version 10<br />
JIIustrabon • II<br />
O. BrightfieldJFluorescence Version 12<br />
Illustration 13<br />
II. IdentifICation ofComponenls 13<br />
Ill. Assembly 14·19<br />
A. General 14·16<br />
1. Mounting the <strong>Universal</strong> Vcnicalllluminator 14<br />
2. Mounting the <strong>Vertical</strong>llluminalOr Lamp 14<br />
Housing<br />
3. Mounting the Bulb 14-15<br />
A. For the Halogen Lamp<br />
B. For the Mercury Owner<br />
4. Mounting the Bulb Socket 15<br />
A. For the Halogen Lamp<br />
B. For the Mercury Owner<br />
5. Connecting the Vutical <strong>Illuminator</strong> Bulb 16<br />
Socke.Cord<br />
A. For the Halogen Lamp<br />
B. For the Mercury Burner<br />
2
B. <strong>Universal</strong> Version (BF/DF/P01.../F1..UOR/Dle) 16-18<br />
or BF/DF/DIC/POL Version<br />
I. Inserting the Half-Mirror UnilS 16-17<br />
2. Inserting the Polarizer 17<br />
A. For RenecLed Light Nomarski OIC<br />
Observation<br />
B. For Renected Light Simple Polarizing<br />
ObseJ'\lation<br />
3. Inserting the Analyzer 17<br />
4. Inserting the Tint Plate 17<br />
5. Mounting the NomarsJc:i Prism Ring Adapters 17<br />
6. Mounting the Nomarski Prism AltaChmenLS 18<br />
7. Mounting the Objectives 18<br />
8. Mounting the Revolving Nosepiece 18<br />
C. BrighlfieJd/DartJield DC 18-19<br />
BrighlfieldlFloorescence Versions<br />
1. Inserting the HaI(·MiJror Uniu 18-19<br />
2. Inserting the NO Filter Slider 19<br />
3. Mounting the Objectives. 19<br />
IV. Oper.uioo 2ll-24<br />
1. Switching the Light Sourte On 20<br />
A. Fer the Halogen Lamp<br />
B. For the Mercury Burner<br />
2. Centering the Light Source 21-22<br />
A. For the Halogen Lamp<br />
B. For the Mercury Burner<br />
C. Without Centering Screen<br />
3. Centering the Fttld Iris Diaphragm 22<br />
4. Adjusting the Fttld Iris Diaphragm 23<br />
A. For Reneclt.d Light Brightfield<br />
Observation<br />
B. For Reflecled Light Darklield<br />
Observatior:<br />
)
S. Adjusting the Aperture Iris Diaphragm 23<br />
A. For Reflected Light Brightfield<br />
Observation<br />
B. For Reflected Light Darkfleld<br />
Observation<br />
6. Inserting the Fillers 24<br />
V. Observation 25·30<br />
A. Reflected Light Brightfteld/Darkfield Observation 25·26<br />
Preparation<br />
Summary ofReflected Light BrightlieldJDarkfield<br />
Observation Procedme<br />
B. Reflected Light Nomarski Differential Interference 26-27<br />
Contrast<br />
Prepamtion<br />
Summary ofReflected Light Nomarski ole<br />
Proced...<br />
C. Reflected Light Simple Polarizing Observatioo 27·28<br />
Prepamtion<br />
Summary ofReflected Light Simple Polarizing<br />
Proced...<br />
D. Reflected Light Floorcscence Observation 29-30<br />
Preparation<br />
Summary ofReflected Light Fluorescence<br />
Observation<br />
4
PREFACE<br />
As l1lis insuuction manual describes the operation aCme <strong>BH2</strong>·<strong>UMA</strong><br />
<strong>Universal</strong> <strong>Vertical</strong>llluminatOf attachment OIIly, it is recommended<br />
!.hat Lhe user read the insuuclion m..nuals for the miclOscopc being<br />
used as well, in order 10 obtain optimum performance from the<br />
integrated use of these inSlIumenLS.<br />
PRECAUTIONS<br />
Observe lhe Following Points Carefully<br />
I. Always handle this auaehment with as much care as you would a<br />
microscope. Handle it carefully and avoid subjecting it 10 sudden or<br />
severe impact.<br />
2. When replacing the bulb or the fuse, be sure 10 Wlplug the power<br />
cord first<br />
3. Do noc. use organic solvents such as xylene. ether, or alcohol 10<br />
clean Lhe microscope components. If componenLS are heavily soiLed.<br />
wipe wilh a cloch moistened wiLh neuuaJ detergent.<br />
4. To clean the half-mirror units (e. g. rel1ecting surfaces of the<br />
mirrors), blow wilh a hand blower. If the dust cannOl be removed by<br />
blowing, contact <strong>Olympus</strong> repair sttvice or your authorized local<br />
agent<br />
S. Make sure 1hal no dirt, fingerprints. CIC. are left on the bulb<br />
surface. Ifit is stained, wipe the bulb surface dean wiLh a small<br />
amount or an alcohol-ether mixuue or benzine.<br />
6. While the <strong>BH2</strong>·<strong>UMA</strong> and me microscope arc not in usc, be sure<br />
10 slOre it under a dust cover, awa), from moistw-c and hwnidit)'.
J. STANDARD CONFIGURATIONS<br />
A. UNIVERSAL (BFIDFIPOIlFLUORlDlC) VERSION<br />
Unil<br />
<strong>Universal</strong> vertical illuminator<br />
Brighlfield half-mirror unit<br />
Brightfield half-mirror unit<br />
with ND05 filter<br />
Darkfield half-mirror unit<br />
Blue nuorescence half-mirror unit<br />
Green fluorescence half-mirror unit<br />
Violet fluocesoence half-mirror unit<br />
NO filler sUder, including ND 12 ftJter<br />
lint plate. including NO 12 filter<br />
Polarizer<br />
Analyzer<br />
Light balancing daylight filler<br />
Halogen lamp housing (wilh halogen<br />
coUeclor lens)<br />
Halogen bulb<br />
Transformer·<br />
fluorescence supplementary unit.:<br />
Supplementary exciter slider<br />
Aoorescence collector lens<br />
Supporting block<br />
UV proIective shield<br />
Extension tube ••<br />
Mercury lamp housing<br />
Mercury lamp<br />
Power supply unit<br />
Centering screen<br />
Nomarski prism attachment!:<br />
Nomarski5X<br />
Nomarski tOX<br />
Nomarski 20X<br />
Nomarski SOX<br />
Nomarski tOOX<br />
<strong>BH2</strong>·<strong>UMA</strong><br />
<strong>BH2</strong>-UBF<br />
<strong>BH2</strong>-UBFL<br />
<strong>BH2</strong>-UDF<br />
<strong>BH2</strong>-UOMB<br />
<strong>BH2</strong>·UOMG<br />
<strong>BH2</strong>-UOMV<br />
<strong>BH2</strong>-UNO<br />
<strong>BH2</strong>-lJIl' s3Il<br />
<strong>BH2</strong>-UFO<br />
<strong>BH2</strong>-UAN<br />
20LB03-W<br />
<strong>BH2</strong>-ULSHgO<br />
12V SOW HAL<br />
<strong>BH2</strong>-TGH<br />
<strong>BH2</strong>-URF<br />
<strong>BH2</strong>-UFF<br />
<strong>BH2</strong>-UL<br />
<strong>BH2</strong>-UA<br />
<strong>BH2</strong>-UCCV<br />
<strong>BH2</strong>-UET<br />
<strong>BH2</strong>-LSRF<br />
USH IQZO<br />
<strong>BH2</strong>-RFL<br />
<strong>BH2</strong>-SGRF<br />
U-NICs-N<br />
U-NICIO-N<br />
U-NIC2O-N<br />
U-NICSO-N<br />
U-NIClOO-N
<strong>Universal</strong> objectives:<br />
Nco S Plan 5X NIC<br />
Nco S Plan lOX NIC<br />
Nco S Plan 20X NIC<br />
Nco S Plan SOX NIC<br />
Nco S Plan lOOX NIC<br />
-Required for BHT-M. BHM. BHMJ. only.<br />
"For use wilh We <strong>BH2</strong>·WLT. <strong>BH2</strong>·WL, BHMJL.<br />
NEOSPL5X-NIC<br />
NEOSPLlOX-NIC<br />
NEOSPL20X-NIC<br />
NEOSPL50X-NIC<br />
NEOSPLlOOX-NIC<br />
<strong>BH2</strong>-<strong>UMA</strong> UNIVERSAL VERTICAL ILLUMINATOR<br />
BF/DF/POlJFLOURlDlC Version
C. IlRIGHTFIELDIDARKFlELD VERSION<br />
Unil<br />
<strong>Universal</strong> verticaJ ilIumirwor<br />
Brightlield haJr·mirror unit<br />
Darkfield hair-mirror unit<br />
NO filter slider. including NO 12 fdte:r<br />
light balancing daylight fLIler<br />
Halogen lamp housing(wilh halogen<br />
collector lel13)<br />
Halogen bulb<br />
Transronner·<br />
Objcctives:<br />
Nco S Plan Ach SX<br />
Nco S Plan Acb lOX· T<br />
Nco S Plan Ach 20X . T<br />
Nco S Plan Ach SOX<br />
·Required r(l' BHT·M, BHM, BHMJ only.<br />
<strong>BH2</strong>·<strong>UMA</strong><br />
<strong>BH2</strong>·UBF<br />
<strong>BH2</strong>-UOF<br />
<strong>BH2</strong>·UNO<br />
20l.B03·W<br />
<strong>BH2</strong>-ULSH80<br />
12V SOW HAL<br />
<strong>BH2</strong>·TGH<br />
NEOSPL5X<br />
NEOSPLIOX·T<br />
NEOSPI.2OX·T<br />
NEOSPLSOX<br />
'0
D. DRIGHTFIELDIFLUORESCENCE VERSION<br />
Unit<br />
<strong>Universal</strong> vertical illuminator<br />
Brighlfield half-mirror unit<br />
with ND05 fl.Iltr<br />
Bluc fluorescence half-mirror unit<br />
Grecn fluorescence Ilalf-mirror unit<br />
Violet fluorescence haIr-mirror unit<br />
NO filler slider, including NO 12 ftlter<br />
Light balancing daylight edrer<br />
Ruorescence supplementary unit:<br />
Supplementary exciter slider<br />
Ruorescence collector lens<br />
Supporting block<br />
UV protective shield<br />
Extension tube·<br />
Mercury lamp hopsing<br />
Mercury lamp<br />
Power supply unit<br />
Centering screen<br />
Objectives:<br />
MS Plan Ach 5X<br />
MS Plan Ach IOX·T<br />
MS Plan Ach 20X·T<br />
MS Plan Ach 50X<br />
MS Plan Ach lOOX<br />
or,<br />
MO Plan Ach 5X<br />
MO Plan Ach lOX<br />
MO Plan Aeh 20X<br />
MO Plan Ach 50X<br />
MD Plan Ach SOX<br />
<strong>BH2</strong>·<strong>UMA</strong><br />
<strong>BH2</strong>·UBFL<br />
<strong>BH2</strong>·UDMB<br />
<strong>BH2</strong>·UDMG<br />
<strong>BH2</strong>-UDMV<br />
<strong>BH2</strong>-UNO<br />
20LBD3-W<br />
<strong>BH2</strong>·UHF<br />
<strong>BH2</strong>·UFF<br />
B2·ULA<br />
B2-UA<br />
B2-UCCV<br />
<strong>BH2</strong>-UET<br />
<strong>BH2</strong>·LSRF<br />
USHIOZD<br />
<strong>BH2</strong>-RFL<br />
<strong>BH2</strong>·SGRF<br />
MSPLSX<br />
MSPLlOX·T<br />
MSPL20X·T<br />
MSPL50X<br />
MSPLlOOX<br />
MDPLSX<br />
MDPLIOX<br />
MDPL20X<br />
MDPL50X<br />
MOPL80X<br />
• For use with the <strong>BH2</strong>-MJLT, <strong>BH2</strong>-MJL. BHMlL
III. ASSEMBLY<br />
A. GENERAL<br />
I. Moonling the Univusal Vc.rticaIIlluminall:w<br />
a. Loosen the clamping screw 00 the microscope frame and fit<br />
the universal vertical illuminator in place on the microscope<br />
stand. and clamp firmly with the clamping screw.<br />
b. Tum the revolving nosepiece by hand to make sure thai it<br />
moves freely. Use nosepiece mOlor switch on 8H2-MJI.. 8H<br />
MJL.<br />
c. Screw the collector lens supplied wim the lamp housing into<br />
the universal vertical illuminator.<br />
2. Mounting the <strong>Vertical</strong> U1uminalOr Lamp Housing<br />
a. Loosen the clamping screw on the lamp housing.<br />
b. Insen the lamp housing aU the way inlo the universal<br />
vertical iUuminaKJ'. and funlly clamp with the clamping<br />
screw.<br />
• To allach the lOOW mercury lamp house to the ·V·groove of<br />
the noorescence collector lens. or the Cllccnsion lube.<br />
depending on the ffitcroscope used, tighten the two mounting<br />
screws on the LSRF Mercury Lamp House.<br />
3. Mounting the Bulb<br />
A. FOR THE HALOGEN LAMP<br />
a. Be sure 10 tum off tho ON-oFF switch of the transformer.<br />
b. Remove the socket and cord assembly from the lamp<br />
housing.<br />
c. Push the bulb clamping levers on the lamp socket ()'Ward,<br />
against the body of the bulb socket. Insert the Icnninals or the<br />
halogen bulb (12V SOW HAL) into the socket<br />
• Do not hokllhc bulb with bare fingers.<br />
d. Rekase the clamping leven to clamp the bulb.<br />
• tr the bulb isstained with dirt, fingerprinlS. ele., wipe the<br />
bulb surface with a small amount or a1cohol-ether mixture or<br />
benzine.<br />
e. Insert the bulb and sockel into the halogen lamp<br />
housing and ughlen the locking SClCW.<br />
14
B. For lhe Mercury Burner<br />
• Always swiu:h of( the power supply unit prior to mercury<br />
burner replat:emenl. Replace lhe burner afu:r about 200<br />
working haUlS.<br />
a. Be sure to lurn off the power SlIpply switch.<br />
b. Remove the burner socket assembly from lhe lamp housing.<br />
c. Insert the burner with its lower eleclrOde (marked "+") into<br />
me bouom Ienninal and tighten me clamping screws securely.<br />
• Ascenain that no din, fingerprints, etc. are lefl on lhe burner<br />
surface. and when ioslalJing, be careful nO( 10 touch the quartt<br />
glass ponion. If the burner is stained, wipe its sUiface clean<br />
with a small amount of alcohol-ether muture or benzine.<br />
d. Attach lhe conn«:ting wire to lhe top pole of lhe bulb and<br />
tighten the locking screws.<br />
e. Insert me burner and socket into the mercury lamp housing<br />
and tighten with the locking screw.<br />
• Prior 10 fuse replacement in the power supply Wlil,<br />
disconnect the power cord from the AC outJeL<br />
4. Mounting the Bulb Socket<br />
A. For lhe Halogen Lamp<br />
a. Loosen lhe bulb socket clamping screw on lhe bulb socket<br />
in advance.<br />
b. Insert me socket. with the locating groove in the lamp<br />
housing aligned with me clamping screw.<br />
c. Tighten clamping screw 10 fix bulb socket in place.<br />
B. For lhe Mercury Bwner<br />
a. Insert the socket into the lamp housing by first seuing me<br />
hooks at the base of the socket. which acts as a binge. into the<br />
lamp house.<br />
b. Tighten the clamping screw at me top of the socket into the<br />
side of the lamp bouse to fax the bulb socket in place.<br />
IS
5. Connocting the <strong>Universal</strong> <strong>Illuminator</strong> Bulb Socket Cord<br />
A. For the Halogen Lamp<br />
a. Plug in the halogen lamp bulb socket cord inlo the<br />
connoctor on the rear of the microscope stand.<br />
• If a separate transformer is used, plug the lamp bulb socket<br />
cord into the t2V 50W transformer and plug the transformer<br />
cord into the mains.<br />
B. For the Mercury Bumer<br />
a. Plug in the mercury burner socket cord into the connector<br />
.on the reM of the mercury power supply uniL.<br />
b. Plug the mercury burner power supply cord into the mains.<br />
B. UNIVERSAL VERSION (BFfDFIPOUFLUORlDlC) OR<br />
BF/DF/DlClPOL VERSION<br />
I. Inserting the Half-Mirror Unit<br />
a. Remove the half-mirror housing cover plates on the right<br />
and left sides ofthe universal illuminator.<br />
• The covers arc kept in place by magnets. Be careful not to<br />
lose them.<br />
b. Unscrew the half-mirror unit handling screw from the<br />
universal iIIwninator housing and screw it into the desired<br />
half-mirror uniL<br />
cw.:<br />
BrightflCld (BHl·UBF)<br />
BrightflCld (<strong>BH2</strong>·UBFL)<br />
Darkfield (<strong>BH2</strong>·UDF)<br />
Blue (<strong>BH2</strong>-UDMB)<br />
Green (BHl-UDMG)<br />
V.,lel (BHl-UDMVj<br />
Observation Tecbnique<br />
Brigbtfield, Polarized, DIe<br />
Brigbtfield, (usc with<br />
mercury burner)<br />
Darkfield<br />
Blue Fluorescence<br />
Green Fluorescence<br />
Violet Fluorescence<br />
c. Holding the handling screw, carefully slide the half-mirror<br />
unit into the universal illuminator until it clicks.<br />
• The half-minor unit can be inserted from either side of the<br />
universal illwninator.<br />
• At the clicking IX'sition, the half-mirror unit is nusb with the<br />
side of the balf·mirror housing.
6. Mounting the Nomarsti Prism AuaehmenLS on the Detaehed<br />
Nosepiece<br />
a. Moum Ihc Nomarsk.i prisms by inscning them over Ihc<br />
circular dovewl guides or Ihe Nomatski ring adapcers, one by<br />
one in ascending order ofmagnifICation. in clockwise<br />
direction. and Ihcn tighten the prism damping screws firmly<br />
with Ihe Allen wrench.<br />
• To simplify the mounting or the Nomarski prisms. rully<br />
damp the prisms only afaer aU orIhe prisms have been<br />
moonted on the nosepiece.<br />
7. Mounting the Objectives<br />
a. Screw the ob;eeuves fumly into the threads orIhe Nomarski<br />
prisms. acrording to corresponding magnification power.<br />
8. Mounting lbe Revolving Nosepiece<br />
a. Lower the stage by lUming the coarse rocus adjustmcnl<br />
knob.<br />
b. CarefuUy instSt Ihe revolving nosepiece inlD the dovcl3i1<br />
guideway or the microscope stand.<br />
c. Push the nosepiece all the way in. and lighten it fannly wilh<br />
the nosepiece clamping screw.<br />
C. BRIGIIT/DARKFIELD/FLUORESCENCE VERSIONS<br />
(Bfffif OR BflFLUOR ONLY)<br />
I. Inserting the Half·Mi.m:Jr Unlts<br />
a. Remove Lhe halr·mirror housing cover plates on the right<br />
and left sides or lbe univcrsal iIIwninator.<br />
• The covers are kept in place by magneu. Be carerul not to<br />
lose Ihem.<br />
b. Unscrew the half·minu unit handHng screw rrom the<br />
uruvusal i1huninalOr and screw it inlo IDe desired half·mirror<br />
unit.<br />
18
IV. OPERATION<br />
I. Switching the Light Source On<br />
A. For lbe Halogen Lamp<br />
a. Set the line vollage sek:ctor switch on the transfonner lO<br />
conform with the local mains Yahage.<br />
b. Set the voltagc adjustment knob at the lowest voltage<br />
position. and twn on me ON-QFF switch.<br />
c. Turning the volcage adjustment koob clockwise increases<br />
voltage and the voItmelU LED lights up. accordingly.<br />
B. For the Men:ury Burner<br />
a. Make sure that the line voltage selector switch on the power<br />
supply unit is set to conform with the kx:a1 mains vahage.<br />
(This switch can be turned with a screwdriver. and can be set<br />
to the raUowing voltages;lOOV /lIOV /l20V or220V I<br />
240V).<br />
b. Set the fn:quency sdoclOl' switeh 10 conform with lhe kJcal<br />
mains frequency. (This switeh can be adjusted with a<br />
screwdriver).<br />
c. Ascouin that the connecting cord from the power supply<br />
unit to the lamp socket. and the mains cord are correcLly<br />
connccled.<br />
d. Tum on the main switeh ofthe power supply unit. The<br />
switeh will light up green.<br />
• The burner sometimes may not ignite lhe first lime, due to<br />
the electrode condition, etc. Ir your bwner does not ignite.<br />
repeat (tuning on the main switch several limes.<br />
• To protect Ihe circuitry ofytU autexnotic photomicrographic<br />
auachmenlS, turn them on only aflel the mercury burner has<br />
been ignited.<br />
•. 2 or 3 minuleS aflU ignilion. the arc will be stabilized.<br />
• Do not switch olTLhe burner within 15 minuleS after<br />
ignition.<br />
• Once !.he mercwy burner is swilChcd ofT, do nol re-ignite il<br />
for 3 minulCS or more in order 10 give it time 10 cool.<br />
e. Tum ofTLhe main switch 10 switch olfthe powu supply.<br />
• At each burner replacemenl, zero the life meter.<br />
20
focusing knob and center the brightest SJX>1 of the 31C with the<br />
centering knobs of the mercury lamp housing.<br />
g. Remount analyzer. JX>larizer. and filters in the illuminator as<br />
applicable.<br />
C. If A Centering Screen Is Not Available<br />
The following process for centering the bulb applies to both<br />
the 12V SOW Halogen bulb (BFIDFIDICIPOL) and the WOW<br />
HBO Men:ury bulb (FLUOR).<br />
a Remove the analyzer, JX>larazer, and all filters from the light<br />
path.<br />
b. Slide the half-mirror selector knob to engage the brightfield<br />
half-mirror unit in the light path.<br />
e. Swing the lOX objective into the light path.<br />
d. Place a mirror or anolher high-reflectivity specimen on the<br />
stage, and roughly focus on it<br />
e. Remove one ofthe eyepieces, and while observing the bulb<br />
filament image in the observation tube, bring the image 10 the<br />
center of the objective pupil by turning the bulb centering<br />
knob and the socket clamping knob•<br />
• A centering telescope is helpful since it enlarges the image<br />
of the filament for easy centering.<br />
f. Remount the analyzer, JX>larizer, and filters in the<br />
illwninalOr, as applicable.<br />
3. Centering the Field Iris Diaphragm<br />
a. Tum the revolving nosepiece to bring the lOX objective into<br />
the light path, and approximately focus on the specimen on the<br />
stage.<br />
b. Tum the field iris diaphragm lever on the universal venieal<br />
illwninalOr clockwise to fully stop down the iris diaphragm.<br />
c. Tum the two diaphragm centering knobs on the universal<br />
iIlwninator and make the diaphragm image concentric with the<br />
field of view.<br />
d. Tum the diaphragm lever counterclockwise until the image<br />
coincides with me field of view. U it is eccentric, fine tune<br />
with the centering knobs again.<br />
c. Open the field iris diaphragm until it just disappears from<br />
the field of view.
4. Adjusting the Field Iris Diaphragm<br />
To obtain images with improved contrast, the illumination area<br />
must be properly adjusted.<br />
A. Renccted Ught Brightfield Observation<br />
a. Ck>se lhe field iris diaphragm with the diaphragm lever o(<br />
the universal venK:aJ iIIuminatOf to barely enclose the flCld o(<br />
view, with the respective objective lenses, to minimize stray<br />
lighl<br />
B. Renected Light Dartfield Observation<br />
L Be sure to tum the field iris lever on the universal vertic.aJ<br />
illuminator counterclockwise to (ully open the iris diaphragm.<br />
S. Adjusting the Aperture Iris Diaphragm<br />
Adjust the numerical aperture of the illumination system to<br />
optimum image resolution, contrast and field depth.<br />
A. Renectcd Ught Brightfield Observation<br />
8. Remove one of the eyepieces from the observation tube, and<br />
while looking at the exit pupil ofthe objective through the<br />
empty tube, adjust the opening of the aperture iris diaphragm<br />
with lhe diaphragm lever of the universal vertical illuminator.<br />
Clockwise rotation o( the diaphragm lever reduces the<br />
diaphragm opening.<br />
• Generally by opening the diameter o(the aperture iris<br />
diaphragm 10 70% to 80CIt of the diameter of me objective exit<br />
pupil, best image contrast will be achieved.<br />
B. Renccted Light DarkfieJd Observation<br />
L Tum the aperture iris lever counterclockwise to fully open<br />
the aperture iris diaphragm.<br />
• With some specimens, a slight closing gives good narefree<br />
darkfteld images. Since the aperture iris cannot be seen even<br />
when the objective is removed, make this adjusuncm to<br />
minimize nare while observing the image.<br />
2'
6. Inserting the Filters<br />
a. Open the filler cover, located in front of the lamp housing,<br />
on the universal illuminator.<br />
b. Insert desired filters into the filter well.<br />
For specifK: pwposes, use the following filters:<br />
EilW:<br />
20LBD3·W Color temperature conversion to<br />
daylight quality.<br />
20 1F55Q.W<br />
2ON[)6.W<br />
20ND25·W<br />
Green illumination. Increases image<br />
CQnU3St for observation and black<br />
and white photography.<br />
Reduces illumination intensity<br />
(transmission 6%).<br />
Reduces illumination intensity<br />
(transmission 25%).<br />
• When no Cdter is in use, be sure to close the filter cover to<br />
prevent the entry of dust<br />
24
V. OBSERVATION<br />
A. REFLECTED LIGHT BRIGHTFIELDIDARKFIELD<br />
OBSERVATION<br />
Preparation<br />
I. Selocling the Half·Mirror Units<br />
3. Make sure that the brighlfield half-mirror unit and the<br />
darkfield half-mirror unit are in the half-mirror housing, and<br />
move ihe desired half-mirror into the light path wilh. the half·<br />
mirror seloclOr knob.<br />
2. Selecting the NO Filler Slider<br />
3. Engage the NO filter slider wilb the NO filter to minimize<br />
glare by reducing lIle brightness difference between the<br />
darkT.eld and the brightficld.<br />
• If the light inlensity is insufficient in brightfield observation<br />
or when shortening lhe exposure time in phoLOmicrography is<br />
desireable, move the slider with the empty opening into the<br />
light path.<br />
Summary of Renecled Light Drighlneld/Darkrield Obstrvalton<br />
Procedure<br />
1. Move the required half-mirror into the light palh with the halrmirror<br />
selector knob.<br />
2. Remove the analyzer, polarizer, tint plate, and Nomarski prism<br />
rrom the light path.<br />
3. Tum on the power switch. and light the halogen bulb.<br />
4. Place the specimen on the stage.<br />
S. Bring the lOX objective inlO the light path and rocus.<br />
6. Set interpupillary distance and diopter adjustment on the<br />
observation tube.<br />
7. Make sure that the iIIumir.ation is even.<br />
8. Insert lhe desired filter into the universal vertical illuminator.<br />
9. Bring lhe objective or choice into lhe optical path and rocus.
10. Adjust the iUuminalion inlensily wilh the vohage adjustment<br />
koob.<br />
II. BrightflCkJ Observation: Adjusc the field iris diaptuagm and the<br />
apenun: iris diaphragm.<br />
Darkfleld Obsuvation: Fully open the field iris diaphragm and<br />
lhe apenure iris diaphragm.<br />
D. REFLECTED LIGHT NOMARSKI DIFFERENTIAL<br />
INTERFERENCE CONTRAST<br />
Preparalioa<br />
I. Selting the Half-Mirror<br />
a. Move the brightfidd half·mirror unit into the light palh by<br />
sliding the half·mirror selecaor knob.<br />
2. Checking Ihe Analyut and Polariut<br />
a. Make sW't that the anaJyzer slider and polarizer siMSer arc<br />
properly placed in Ihe light palh of the universal vettical<br />
illwninalOr.<br />
• Make sure that the polarizer slider is inserted wilh lhe<br />
marking "NIC" facing forward.<br />
3. Inserting the Nomarski Prism<br />
a. Swing the Nomarski prism inlo the light path by turning the<br />
prism conlrOllever to the "IN" position.<br />
4. Setting the Background CollX<br />
a. With the tint plate engaged. tum the polarizer ring of the<br />
polarizer to change the field of view background color until<br />
the optimum conlfaSt for the specimen is obtained.<br />
Backgroynd Color Observation Effect<br />
llIack<br />
Image similar to darkfield is obtained.<br />
Grey<br />
Best contrast and pseduo-relief.<br />
Red-pwple sensitive color<br />
Very slight optical difference<br />
(refractive index.lhickness) can be<br />
obser\Ied as difference in color.<br />
• When the tint plate slider is inserted ioto the NO fiher/linl<br />
plalC slot, and set in the ligtu: palh. sensitive cobs appear for<br />
observation.<br />
• The background cob's can be changed continuously from<br />
().order black 10 2nd order blue (0 to 700 om).
5. Changing 10 Brightfiel
• Make sure lhat the polarizer slider is inserted with the<br />
marking "PO" facing forward.<br />
3. Removing lhe Nomarslri Prism from the Light Pam<br />
a. If lhe Nomarski prism is engaged, disengage it by moving<br />
me prism conuollever to me "OlIT" position.<br />
4. Placing me Polarizer and Analyzer into Crossed POIMS Position<br />
a. Altain the"crossed polars position by rotating the knurled<br />
dial of the polarizer slider. The fteld of view should appear<br />
black. when there is no specimen in the light path.<br />
Summary or Retlected Light Simple Polarizing Procedure<br />
I. Bring the brighlliekl half-mirror into the light path with the half<br />
mirror selector knob.<br />
2. Engage the analyzer and the polarizer.<br />
3. Take the Nomars.lc.i prism out of the light path.<br />
4. Tum on the power switch and light the haklgen bulb.<br />
5. Place the specimen on the stage.<br />
6. Bring the lOX objective into the light path.<br />
7. SCl interpupillary distance and diopter adjusunent on the<br />
observation tube.<br />
K. Make sure that lhe illumination is even.<br />
I). Insert the desired fllters into the universal vertical illuminator.<br />
10. Tum the knurled dial or the polarizer slider to achieve crossed<br />
polars position.<br />
II. tiring the objective of the required magniftcation into the light<br />
path and focus.<br />
12. Adjust the iIIumirialion intensity with the voltage adjustment<br />
koob.<br />
13. AdjUSl the field iris diaphragm and the aperwre iris diaphragm.
D. REFLECTED LIGHT FLUORESCENCE OBSERVATION<br />
.. Make it a practice to use the UV protective shade provided to<br />
protect your eyes from possible ambient UV light.<br />
Preparation<br />
I. Focus on the Specimen with Transmitted Light<br />
.. On microscopes without transmiued light capabilities.<br />
proceed to step 2.<br />
a. Using the lOX objective and transmitted light. bring the area<br />
of the specimen to be observed into the field of view and focus.<br />
.. Make sure mal the brightfield with ND05 filler (<strong>BH2</strong><br />
URFL) half-mirror unit is in the light path.<br />
• Make sure all filters. analyzer, polarizer and Nomarski prism<br />
are removed from the light path.<br />
The Nomarski prism is removed from the light path by<br />
moving the prism control lever to the "OlIT" position.<br />
2. Positioning lhe Half-Mirror<br />
a Bring the desired nuorescence half-mirror unit into the light<br />
path by sliding the half-mirror selector knob.<br />
.. The universal illuminator is capable ofhousing two half·<br />
mirror units. If two nuorescence half·mirror units are required,<br />
remove the brighlfield hair-mirror unil rrom the universal<br />
illuminator and insert the two desired fluorescence units.<br />
3. Preparing the lIIuminalion<br />
a. Install the Fluorescence Supplementary Unil components on<br />
the universal illuminator: extension lube adapter, supporting<br />
block, UV protective shield, supplementary exciter slider, and<br />
nuorescence collector lens.<br />
.. Prior to installing the extension tube adapter, ascertain that<br />
the h..l.Iogen collector toas been removed.<br />
b.lnslall the IOOW mcrcury lamp house on the universal<br />
iIIum;nator.<br />
.. An extension tube (lIH2-UE1) is required between the<br />
universal illuminator and the mercury lamp house ror models<br />
<strong>BH2</strong>·MJLT. <strong>BH2</strong>-MJL., BHMJL.<br />
c. SwiLCh on the mercury light source.<br />
d. Switch off the transmiued light source.<br />
e. Cenler the mercury burner.<br />
29