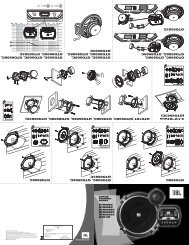
VL2-CCC BMW Monitors With 10pin LVDS ... - AlarmService.ro
VL2-CCC BMW Monitors With 10pin LVDS ... - AlarmService.ro
VL2-CCC BMW Monitors With 10pin LVDS ... - AlarmService.ro

You also want an ePaper? Increase the reach of your titles
YUMPU automatically turns print PDFs into web optimized ePapers that Google loves.
2.3. Installation p<strong>ro</strong>cedure – function check<br />
Follow the below p<strong>ro</strong>cedure using the “Connections” scheme f<strong>ro</strong>m chapter 2.2. as reference.<br />
Before the installation of the sources and the interface we recommend a first quick<br />
connection of the interface and test run to ensure that vehicle and p<strong>ro</strong>duct are compatible.<br />
Due to changes in p<strong>ro</strong>duction of the vehicle manufacturer there is always the possibility of<br />
incompatibility.<br />
- Switch off ignition and disconnect vehicles’s battery<br />
- Remove vehicle monitor<br />
- Plug vehicle harness of the factory monitor to interface’s<st<strong>ro</strong>ng>10pin</st<strong>ro</strong>ng> <st<strong>ro</strong>ng>LVDS</st<strong>ro</strong>ng> connector<br />
- Plug interface’s connection cable to <st<strong>ro</strong>ng>10pin</st<strong>ro</strong>ng> <st<strong>ro</strong>ng>LVDS</st<strong>ro</strong>ng> connector of the factory monitor<br />
- Connect 4pin CAN box harness to vehicle monitor power connector<br />
- Plug 4pin harness into CAN box<br />
- Plug 6pin female connector of 6pin to 8pin cable into CAN box<br />
- If camera is (to be) connected, plug green wire of 6pin to 8pin cable into pin 3 of the<br />
8pin female connector, if not isolate the green wire (see chapter 1.3.3.)<br />
- Plug 8pin female connector of “6pin to 8pin cable” into video interface<br />
- Plug keypad into “Switch” connector. Even if the keypad shall not be used, its<br />
installation (e.g. in a hidden spot) is recommended for support reasons<br />
- If audio switch SW-A2X1 shall be used, connect it according to chapter 2.6.<br />
- Plug the connection cable into the video interface<br />
- Reconnect battery and turn on ignition<br />
- Check LEDs on CAN box and video interface, one on each must be on<br />
- Try to activate video sources by infotainment buttons (see chapter 3.1.) and by<br />
keypad (see chapter 3.2.), using a test picture source<br />
- If camera is (to be) connected try to engage reverse gear with test picture source<br />
connected<br />
- If audio switch SW-A2X1 shall be used, connect the audio wires and check the audio<br />
function<br />
- ONLY after positive function check p<strong>ro</strong>ceed with final installation of the video<br />
sources!<br />
- After installation and connection of the real video source(s), adjust picture settings<br />
(see chapter 2.4.)<br />
2.4. Picture settings<br />
After installing the sources the picture settings can be changed using a pen on the buttons of<br />
the video interface. Press the MENU button to open settings menu on the OSD and to<br />
switch to the next setting. UP and DOWN change the corresponding values.<br />
The buttons are in the housing to avoid accidental changes during of after installation.<br />
Version 21.05.2010 <st<strong>ro</strong>ng>VL2</st<strong>ro</strong>ng>-<st<strong>ro</strong>ng>CCC</st<strong>ro</strong>ng><br />
page7