17680 Torqueflite 727, 904, 998 & 999 Manual SP ... - Turbo Action
17680 Torqueflite 727, 904, 998 & 999 Manual SP ... - Turbo Action
17680 Torqueflite 727, 904, 998 & 999 Manual SP ... - Turbo Action

You also want an ePaper? Increase the reach of your titles
YUMPU automatically turns print PDFs into web optimized ePapers that Google loves.
1535 Owens Road, Jacksonville, FL 32218<br />
Phone (<strong>904</strong>) 741-4850 *** FAX (<strong>904</strong>) 741-4853<br />
www.turboaction.com<br />
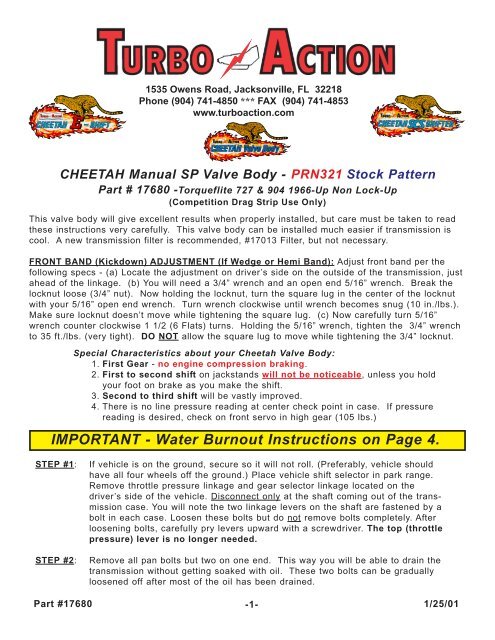
CHEETAH <strong>Manual</strong> <strong>SP</strong> Valve Body - PRN321 Stock Pattern<br />
Part # <strong>17680</strong> -<strong>Torqueflite</strong> <strong>727</strong> & <strong>904</strong> 1966-Up Non Lock-Up<br />
(Competition Drag Strip Use Only)<br />
This valve body will give excellent results when properly installed, but care must be taken to read<br />
these instructions very carefully. This valve body can be installed much easier if transmission is<br />
cool. A new transmission filter is recommended, #17013 Filter, but not necessary.<br />
FRONT BAND (Kickdown) ADJUSTMENT (If Wedge or Hemi Band): Adjust front band per the<br />
following specs - (a) Locate the adjustment on driver’s side on the outside of the transmission, just<br />
ahead of the linkage. (b) You will need a 3/4” wrench and an open end 5/16” wrench. Break the<br />
locknut loose (3/4” nut). Now holding the locknut, turn the square lug in the center of the locknut<br />
with your 5/16” open end wrench. Turn wrench clockwise until wrench becomes snug (10 in./lbs.).<br />
Make sure locknut doesn’t move while tightening the square lug. (c) Now carefully turn 5/16”<br />
wrench counter clockwise 1 1/2 (6 Flats) turns. Holding the 5/16” wrench, tighten the 3/4” wrench<br />
to 35 ft./lbs. (very tight). DO NOT allow the square lug to move while tightening the 3/4” locknut.<br />
Special Characteristics about your Cheetah Valve Body:<br />
1. First Gear - no engine compression braking.<br />
2. First to second shift on jackstands will not be noticeable, unless you hold<br />
your foot on brake as you make the shift.<br />
3. Second to third shift will be vastly improved.<br />
4. There is no line pressure reading at center check point in case. If pressure<br />
reading is desired, check on front servo in high gear (105 lbs.)<br />
IMPORTANT - Water Burnout Instructions on Page 4.<br />
STEP #1:<br />
STEP #2:<br />
If vehicle is on the ground, secure so it will not roll. (Preferably, vehicle should<br />
have all four wheels off the ground.) Place vehicle shift selector in park range.<br />
Remove throttle pressure linkage and gear selector linkage located on the<br />
driver’s side of the vehicle. Disconnect only at the shaft coming out of the transmission<br />
case. You will note the two linkage levers on the shaft are fastened by a<br />
bolt in each case. Loosen these bolts but do not remove bolts completely. After<br />
loosening bolts, carefully pry levers upward with a screwdriver. The top (throttle<br />
pressure) lever is no longer needed.<br />
Remove all pan bolts but two on one end. This way you will be able to drain the<br />
transmission without getting soaked with oil. These two bolts can be gradually<br />
loosened off after most of the oil has been drained.<br />
Part #<strong>17680</strong> -1-<br />
1/25/01
STEP #3: Carefully remove the ten 7/16” bolts which hold the valve body in place (Fig. #1).<br />
Slowly pull valve body out of transmission, noting the hole that the long swinging rod<br />
came from (Fig. #2, maybe necessary to turn drive shaft to release long swinging<br />
rod). The rod controls your car’s park function. Most <strong>Torqueflite</strong>s will have a large<br />
spring between one end of the valve body and the case (Fig. #3). This spring should<br />
not be put back in the vehicle when using this valve body.<br />
STEP #4:<br />
STEP #5:<br />
STEP #6:<br />
STEP #7:<br />
STEP #8:<br />
STEP #9:<br />
STEP #10:<br />
STEP #11:<br />
STEP #12:<br />
STEP #13:<br />
The transmission valve body is a very intricate piece of your transmission and<br />
therefore care should be taken to keeping it clean while working on it. Lay old valve<br />
body on a bench or table so that the swinging park arm is laying towards you.<br />
Remove small e-clip that holds the park arm in place (Fig.#4). Install this arm on the<br />
new valve body. The arm should fit the same as it did on the old valve body.<br />
Remove the three screws that hold the old filter on the old valve body. Take the<br />
three screws and either the old filter or a new filter (recommend <strong>Turbo</strong> <strong>Action</strong><br />
#17013 Filter) and place onto the new valve body and tighten down with the three<br />
screws. NOTE: Be sure the filter you install has only one pick-up hole. If you<br />
are using a deep pan, be sure the pick-up has only one hole.<br />
If transmission is out of vehicle, the governor valves can be removed.<br />
Before reinstalling valve body into transmission, take note of the plastic half ball or<br />
square shaped neutral switch on the driver’s side of the transmission inside of the<br />
transmission case (Fig. #5). When installing the valve body, make sure this plastic<br />
does not get damaged (Fig. #6). Either remove the neutral switch or merely slide the<br />
valve body carefully over the plastic. The plastic will retract if you put pressure on it.<br />
Also, do not install large spring which was between valve body and case.<br />
Place valve body back into transmission pushing rod into hole that was mentioned in<br />
STEP #3 (Fig. #2). The rod should be angled toward the outside in the rear of<br />
transmission and towards the center of the transmission in the front. Push rod firmly<br />
towards rear while turning drive shaft. BUT DO NOT FORCE ROD OR VALVE BODY.<br />
With valve body in place, install ten valve body bolts and tighten to 8-10 ft./lbs.<br />
Be sure valve body sits flat before tightening.<br />
Clean pan and install with a new pan gasket.<br />
Replace shift linkage (large piece) and tighten bolt. Adjust linkage to be sure that<br />
shifter is selecting all gears properly. Especially critical is the 2 to 3 shift adjustment.<br />
Remove all throttle linkage from carburetor down to the transmission.<br />
Refill transmission with a good Dexron III fluid, Mopar #7176 or type “F” ATF. It will<br />
usually take about 5-9 quarts of oil depending on type of pan (stock or deep).<br />
DO NOT OVERFILL! Warm transmission up, select all gears and then recheck oil<br />
level. Always check level of transmission fluid when in neutral, but put parking<br />
brake on as a safety measure or have someone sit in car with the foot brake<br />
applied.<br />
FEATURES: THIS VALVE BODY IS FULL MANUAL WITH STOCK PATTERN (PRN321)<br />
AND HAS NO ENGINE COMPRESSION BRAKING IN FIRST GEAR.<br />
Part #<strong>17680</strong> -2- 1/25/01, 7/23/02
Fig. #1 Remove Ten Bolts<br />
Fig. #2 Park Rod<br />
Fig. #3 Remove Spring(s)<br />
Fig. #4 Remove E-Clip<br />
Fig. #5 Neutral Safety Switch<br />
Fig. #6 Do Not Damage<br />
Part #<strong>17680</strong> -<br />
1/25/01<br />
3-
Water Burnout Instructions<br />
Tire development brought about the need to get tires hot in order to get maximum traction. This<br />
started the use of water to get tire speed up quickly. Now tires are getting hot, but automatic<br />
transmissions are subject to destruction if not careful! Please read carefully the following<br />
suggestions for your transmission:<br />
Chrysler/Amer. Mtrs. “<strong>727</strong>”, “<strong>904</strong>”, “<strong>998</strong>” & “<strong>999</strong>” Transmissions<br />
All water burnouts should be started in second gear and shift to third if necessary. If you should<br />
start burnout in first, shift immediately to second before tires come out of water. No matter whether<br />
it be second or third gear you are in as you come out of the water, you should start to deaccelerate<br />
engine or do a power burnout directly to the staging line being sure tires never grab dry pavement.<br />
The power burnout provides the best E.T.’s if no dry burnouts are done. No matter if you have a<br />
tranz brake or not, we suggest not doing dry burnouts!<br />
Note -<br />
Rear End Breakage & Driveshaft Breakage: If rear end or driveshaft breaks while in first<br />
gear acceleration or burnout, remove transmission and check rear roller clutch for<br />
damage.<br />
Chrysler<br />
Flexplates<br />
Chrysler<br />
Special Support<br />
Transmissions<br />
Torque Converters<br />
Valve Bodies<br />
Tranz Boxes<br />
CHEETAH SCS Shifters<br />
CHEETAH E-Shift Controller<br />
Part #<strong>17680</strong> -4-<br />
1/25/01