SPL Vitalizer MK2-T Manual.pdf
SPL Vitalizer MK2-T Manual.pdf
SPL Vitalizer MK2-T Manual.pdf

You also want an ePaper? Increase the reach of your titles
YUMPU automatically turns print PDFs into web optimized ePapers that Google loves.
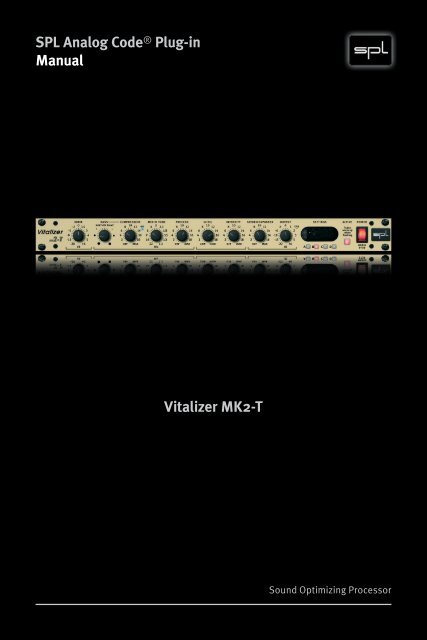
<strong>SPL</strong> Analog Code ® Plug-in<br />
<strong>Manual</strong><br />
<strong>Vitalizer</strong> <strong>MK2</strong>-T<br />
Sound Optimizing Processor
<strong>Manual</strong><br />
<strong>Vitalizer</strong> ® <strong>MK2</strong>-T<br />
Analog Code Plug-in<br />
<strong>Manual</strong> Version 1.1 – 11 /2010<br />
This user‘s guide contains a description of the product. It in no<br />
way represents a guarantee of particular characteristics or results<br />
of use. The information in this document has been carefully compiled<br />
and verified and, unless otherwise stated or agreed upon,<br />
correctly describes the product at the time of packaging with this<br />
document.<br />
Sound Performance Lab (<strong>SPL</strong>) continuously strives to improve its<br />
products and reserves the right to modify the product described in<br />
this manual at any time without prior notice. This document is the<br />
property of <strong>SPL</strong> and may not be copied or reproduced in any way, in<br />
part or fully, without authorization by <strong>SPL</strong> electronics GmbH.<br />
<strong>SPL</strong> electronics GmbH<br />
Sohlweg 80, 41372 Niederkruechten, Germany<br />
Phone: +49 (0)2163 983 40<br />
Fax: +49 (0)2163 983 420<br />
E-Mail: software@spl.info<br />
Website: www.spl.info<br />
<strong>Vitalizer</strong> ® Patents<br />
EU: 1407544<br />
USA: 7.352.872<br />
Japan: 2003-514695<br />
China: ZL02814524.0<br />
© 2010 <strong>SPL</strong> electronics GmbH. All rights reserved. The <strong>SPL</strong> logo, The Analog<br />
Code, Transient Designer, <strong>Vitalizer</strong> and Atmos are trademarks of <strong>SPL</strong><br />
electronics GmbH. All other logos and brand names are registered trademarks<br />
of their respective owners.<br />
2 <strong>Vitalizer</strong> ®
Introduction ..................................................... 5<br />
Glossary ....................................................... 5<br />
<strong>SPL</strong> Analog Code Plug-ins, The <strong>Vitalizer</strong> ..................... 5<br />
<strong>Vitalizer</strong> Technology .......................................... 6<br />
Special Features, Applications .............................. 6<br />
Operation ........................................................ 8<br />
Mouse wheel control for all rotary knobs ................... 8<br />
Keyboard Shortcuts .......................................... 8<br />
Mono, stereo or multi-channel operation ................... 9<br />
Basics ......................................................... 9<br />
Default Settings, First Steps ................................. 10<br />
Control Elements ................................................ 11<br />
Active, Drive ................................................... 11<br />
Bass, Compression ........................................... 12<br />
Mid-Hi Tune .................................................... 13<br />
Process, LC-EQ ................................................ 14<br />
Intensity ....................................................... 15<br />
Stereo Expander, Output ..................................... 16<br />
Settings ........................................................ 17<br />
<strong>Vitalizer</strong> ®<br />
Content<br />
3
4 <strong>Vitalizer</strong> ®
Glossary<br />
Loudness = perceived volume<br />
Unmasking = here: enhancement of overlapping sounds<br />
Audiometry = procedure to measure hearing ability<br />
Psychoacoustics = relation between sound and its perception<br />
Host Program = program on which the plug-in is running<br />
<strong>SPL</strong> Analog Code ® Plug-ins<br />
While <strong>SPL</strong> hardware products have been fascinating audio professionals<br />
from home studio owners to mastering engineers in<br />
the world’s most renowned facilities for years, the need for this<br />
technology in the form of plug-ins has also been an ever-growing<br />
demand. With the Analog Code® plug-ins we have finally accomplished<br />
our much desired goal: to transfer to the digital domain the<br />
high quality we have striven to achieve with our analog processors<br />
throughout several decades.<br />
The first time we ever heard a software that fulfilled our expectations,<br />
one of our hardware developers said to the programmers:<br />
“you have cracked the Analog Code” — thus was coined the name<br />
of our digital products.<br />
The <strong>Vitalizer</strong> ®<br />
The <strong>Vitalizer</strong> applies psychoacoustic and audiometric principles<br />
to achieve a verifiable improvement while enhancing the sound.<br />
The <strong>Vitalizer</strong> processes only the original signal and generates no<br />
artifacts. Patented filtering techniques highlight the richness of<br />
the audio signal in all its detail, while the interactive parameters<br />
make it possible to alter the sound in a musical and effective way.<br />
This unique combination of precise filtering and intuitive usability<br />
enable you to instantly make any music production more stimulating<br />
and natural. Music and speech are made clearly distinguishable<br />
and comprehensible, loudness more intense, and the whole<br />
soundscape becomes wider.<br />
<strong>Vitalizer</strong> ® 5<br />
Introduction
Introduction<br />
Music emphasizing technique<br />
One of the <strong>Vitalizer</strong>’s main features is the unmasking of overlapping<br />
sounds. The way it works is, in principle, opposite to the way<br />
compression formats (MP3, etc.) do: instead of deleting allegedly<br />
unnecessary information, it enhances it. In order to do that, the<br />
<strong>Vitalizer</strong> takes into account the perception of a frequency in relation<br />
to its volume. By shifting louder frequencies slightly in time,<br />
softer and formerly overlapping sounds are “unmasked” and<br />
made audible. The audible effect of unmasking could be described<br />
in general terms as more clarity and depth in a mix. Lows sound<br />
more powerful and better defined, mids more focused and differentiated<br />
and highs more vivid and brilliant. It can be used on<br />
individual channels to emphasize the sound character of instruments<br />
or vocals. The clarity and definition achieved guarantee an<br />
adequately perceptible presence in the mix.<br />
Another characteristic of the <strong>Vitalizer</strong>’s sound optimization process<br />
is the adaptation of the sound spectrum to the non-linear<br />
sensitivity of human hearing. This phenomenon was audiometrically<br />
proved in the 1930’s thanks to the equal loudness contours,<br />
also known as the Fletcher-Munson curves after their discoverers.<br />
According to these curves, the human ear is most sensitive to mid<br />
frequencies, i.e. to the frequency range of speech. As a result, frequencies<br />
below 200 Hz and above 6000 Hz need reinforcement<br />
in order to achieve a well-balanced auditory impression – frequencies<br />
between 6 kHz and approximately 11 kHz are perceived<br />
as being 5 dB softer, for example. The <strong>Vitalizer</strong> uses the equalloudness<br />
contours to balance the frequency spectrum according<br />
to human hearing, which in turn improves loudness. As a result,<br />
individual elements of a mix can sound more present without an<br />
actual increase in level. At the same time, the sum signal also benefits<br />
from the <strong>Vitalizer</strong> processing since it can achieve the same<br />
loudness with less sound pressure level.<br />
6 <strong>Vitalizer</strong> ®
Special Features<br />
• Patented technology for automatic sound correction and optimization<br />
• Simple control of complex processes<br />
• Processing of mid and high frequencies plus harmonics<br />
• Unmasking of overlapping sounds for more detail and clarity<br />
• Reinforcement of less audible frequency ranges to achieve more<br />
loudness<br />
• Adjustable soft or contoured low frequency sounds<br />
• Independent processing of high frequencies and harmonics<br />
• Ideal sound structures for electronic sounds and music genres<br />
• Mono, stereo or multi-channel operation<br />
Applications<br />
• Suitable for all sound production stages (recording, mixdown,<br />
mastering or playback)<br />
• Enhance individual signals, subgroups or sum signals<br />
• Give clarity and presence to a mix<br />
• Emphasize the sound character of instruments and vocals<br />
• Create impressive sounding lows<br />
• Separate several low signals effortlessly<br />
• Restore old recordings<br />
• Give intensity to sound effects (samples)<br />
• Improve spatial impression<br />
<strong>Vitalizer</strong> ® 7<br />
Introduction
Operation<br />
General Information<br />
Mouse wheel control for all rotary knobs<br />
All <strong>SPL</strong> Analog Code plug-ins support mouse wheel control for<br />
rotary controls and faders. Place the mouse cursor over a rotary<br />
control and move the scroll wheel of your mouse to adjust the<br />
setting. Hold the shift key while moving the scroll wheel to make<br />
fine adjustments; the resolution of the mouse wheel is increased,<br />
making fine-tuning easier.<br />
Keyboard Shortcuts<br />
All <strong>SPL</strong> Analog Code plug-ins support format and OS specific functions<br />
for value reset, fine adjustment and mouse control. For more<br />
detailed information please refer to the host program’s documentation.<br />
8 <strong>Vitalizer</strong> ®
Basics Operation<br />
Mono, stereo or multi-channel operation<br />
The <strong>Vitalizer</strong> plug-in can be used either for mono or stereo operation.<br />
In stereo operation each control element governs both channels<br />
simultaneously. The Stereo Expander function is active for<br />
stereo applications, whereas it is grayed out for mono applications<br />
due to the fact that you cannot control stereo elements in mono<br />
mode. This can help you identify immediately if you are using the<br />
<strong>Vitalizer</strong> in stereo or mono mode. You can also use the <strong>Vitalizer</strong><br />
as a „Multi-Mono“ or multi-channel plug-in, as long as your host<br />
program supports this function.<br />
Basics<br />
The frequency spectrum is usually divided into three frequency<br />
bands: highs, mids and lows, all of which are provided in the <strong>Vitalizer</strong>,<br />
even though, as opposed to conventional usage, low and mid<br />
filter settings are interrelated. The high frequency control allows<br />
processing of high frequencies and harmonics. You can adjust each<br />
of the three frequency bands separately and control the intensity<br />
of the process independently.<br />
The low and mid filters share the same intensity control (PROCESS).<br />
The fact that you can set the filters and the intensity independently<br />
allows for many sound possibilities with only two controls: when<br />
processing low signals you can choose between a deep, soft or dry<br />
sound. In conjunction with the PROCESS control, strong amplification<br />
of low frequencies with a low intensity setting results in a<br />
totally different sound than if you were to have low amplification<br />
with high intensity. The connection to the mid filter is always given<br />
by the PROCESS control. This means that you can optimize low and<br />
mid frequencies jointly for the sake of psychoacoustic and audiometric<br />
relevance. For example, the mid frequency band, to which<br />
the human hearing is specially sensitive, can be automatically<br />
damped when you choose a SOFT setting.<br />
<strong>Vitalizer</strong> ® 9
Operation<br />
Default Settings<br />
The following are the default settings of the plug-in and they have<br />
no impact on the audio signal:<br />
• DRIVE at “0” (center position)<br />
• BASS at “0” (center position)<br />
• COMPRESSION at OFF (hard left)<br />
• MID-HI TUNE at 3 kHz (center position)<br />
• PROCESS at OFF (hard left)<br />
• LC-EQ at LOW (hard left)<br />
• INTENSITY at OFF (hard left)<br />
• STEREO EXPANDER at OFF (hard left)<br />
• OUTPUT at “0” (center position)<br />
First Steps<br />
The instructions provided here are based on the default settings<br />
and are meant to help you get to know the <strong>Vitalizer</strong>.<br />
1) Slowly turn up the PROCESS control. The intensity of all frequencies<br />
above 3 kHz will increase (since MID-HI TUNE is set to<br />
3 kHz). Set PROCESS to 10.<br />
2) Turn the BASS control to the right: the lows sound tight and dry.<br />
Turn it to the left and the lows sound soft and round. Choose a<br />
sound character and level for the low end. You can compensate<br />
any level fluctuations in the lows with the COMPRESSION control.<br />
3) Start varying the MID-HI TUNE control. Turn it to the right and<br />
the program material sounds brighter and with more mids (from<br />
about 1.5 kHz onwards). Turn the control to the left to shift the<br />
cut-off frequency upwards; the sound turns duller.<br />
4) Turn the LC-EQ control hard left (to LOW) and set INTENSITY to 10<br />
to emphasize high frequencies moderately.<br />
5) As its name implies, STEREO EXPANDER expands the stereo<br />
image – common settings are between 7 and 12.<br />
6) Use the ACTIVE control to make A/B comparisons between processed<br />
and unprocessed signals. Now you can start making your<br />
own settings.<br />
10 <strong>Vitalizer</strong> ®
Active<br />
Use the ACTIVE function to turn the <strong>Vitalizer</strong> on and off. The <strong>Vitalizer</strong><br />
is on when the ACTIVE switch is on. The POWER switch is always<br />
on and has no effect on the plug-in. When you open the plug-in,<br />
the ACTIVE switch blinks for a couple of seconds before remaining<br />
permanently on. This is meant to indicate the tube warming<br />
phase which takes place on the original hardware. The main purpose<br />
of the ACTIVE function is to allow A/B comparisons between<br />
processed and unprocessed signals. We recommend to make such<br />
comparisons regularly. The risk of overprocessing is higher in comparison<br />
to common processors given that the <strong>Vitalizer</strong> sounds very<br />
pleasant. A/B comparisons are therefore indispensable to avoid<br />
exaggerations. Furthermore, we also recommend the use of reference<br />
recordings.<br />
Drive<br />
Control Elements<br />
The DRIVE control enables you to set the level at which<br />
the <strong>Vitalizer</strong> filters operate. You can adjust fluctuating<br />
input levels to 0 dB or work with lower/higher levels<br />
depending on the sound effect you want to achieve.<br />
The level can be set between -20 dB and +6 dB. When<br />
set to 0 dB (center position) the output level is equal<br />
to the input level. With higher DRIVE settings you can<br />
achieve extreme effects. If you work with a too low<br />
DRIVE level you will not be able to achieve an adequate processing<br />
intensity, even with the PROCESS control set to its maximum - in<br />
which case you will need to increase the DRIVE setting.<br />
<strong>Vitalizer</strong> ® 11
Control Elements<br />
Bass<br />
With the BASS control you can emphasize two different<br />
sound colors in the low end. When set to the center position<br />
the signal is not processed. If you turn the BASS control<br />
to the left you will achieve a warmer and softer sound;<br />
referred to as SOFT. This roundness is symbolized on the<br />
left side of the control by circles that increase in size as<br />
you turn further left. If you turn the BASS control to the<br />
right you will achieve a drier and more percussive sound;<br />
referred to as TIGHT. This tightness is symbolized on the right side<br />
of the control by squares that increase in size as you turn further<br />
right. The BASS control is directly related to the PROCESS control.<br />
The latter determines the amount of processed BASS signal mixed<br />
with the original signal. As a consequence, you can obtain plenty<br />
of completely distinct sounds: a high BASS setting with a low PRO-<br />
CESS setting results in a totally different sound than a low BASS<br />
setting with a high PROCESS setting. You need only two controls<br />
to enjoy a vast array of sound possibilities; all of which can be listened<br />
to and set in no time.<br />
Compression<br />
The <strong>Vitalizer</strong> features a compressor that affects the<br />
low frequency path of the processed signal exclusively.<br />
Neither the low end of the original signal nor the mids<br />
or highs are affected. Thus, the COMPRESSION control<br />
allows you to compensate level fluctuations caused by<br />
the processing of low frequency signals. The compressor<br />
is therefore a very important component in the optimization<br />
of the processing level. The GR (Gain Reduction) LED indicates<br />
that the compressor is active. The compressor is a so-called “soft<br />
knee” compressor with a smooth curve to achieve almost unnoticeable<br />
sound results. As you increase the COMPRESSION setting, the<br />
compression ratio is increased while the attack threshold is lowered.<br />
In order to ease operation, additional parameters have been<br />
preset so you only have to deal with one single knob.<br />
12 <strong>Vitalizer</strong> ®
Mid-Hi Tune<br />
Control Elements<br />
Use the MID-HI TUNE control to set the cut-off frequency.<br />
Frequencies above this frequency are amplified whereas<br />
frequencies below are attenuated. The intensity is set<br />
with the PROCESS control. The frequencies affected<br />
range from 1.1 kHz (hard right) to 22 kHz (hard left). Consequently,<br />
the sound becomes brighter the more you turn<br />
the control to the right. From 1.5 kHz upwards, mid frequencies<br />
become more emphasized. The MID-HI TUNE<br />
control allows you to tone down excessively bright sounding material<br />
by setting it to somewhere around 10 kHz and combining it with<br />
a very high PROCESS setting.<br />
The MID-HI TUNE filter is not a static filter, unlike common EQ<br />
filters, and therefore it cannot be operated like one. It is integrated<br />
within a filter network and affects frequency and phase response<br />
over a very broad frequency range. The setting never affects the<br />
selected value exclusively. It focuses on a given point but spreads<br />
throughout the whole frequency spectrum. Setting the MID-HI<br />
TUNE requires more attention than setting a simple graphic EQ:<br />
you have to always listen to the sound as a whole. The advantage<br />
is that, together with the BASS and PROCESS controls, you can<br />
process signals to a significant extent. As we mentioned before,<br />
the <strong>Vitalizer</strong> is based on psychoacoustic and audiometric principles<br />
so all processing is aimed at optimizing your sound – faster<br />
than with any other technique – to make it sound better.<br />
<strong>Vitalizer</strong> ® 13
Control Elements<br />
Process<br />
Both BASS and MID-HI TUNE work with two different<br />
signal paths: the original signal and the processed<br />
signal, both of which are mixed together at the output.<br />
The PROCESS control determines the amount of processed<br />
signal used, i.e. the intensity of the effect generated<br />
by the BASS and MID-HI TUNE filters. Furthermore,<br />
the PROCESS control also determines the damping intensity<br />
of dominant mid frequencies (see the previous section).<br />
Dominant mid frequencies are reduced with higher PROCESS<br />
settings. All frequencies below the cut-off frequency selected with<br />
the MID-HI TUNE control are affected.<br />
LC-EQ<br />
The high frequency filter is a broad band filter too and<br />
can actually affect mid frequencies to add presence and<br />
sharpness, specially to vocals. The frequencies affected<br />
range from 2 kHz (hard left) to 20 kHz (hard right). The<br />
INTENSITY control determines the intensity of the LC-EQ<br />
(see the next section). The LC-EQ gets its name from the<br />
hardware version’s high frequency filter, which is based<br />
on a passive coil filter. Coil filters are inductive filters<br />
and the symbol for inductance is “L”. The abbreviation for coil filter<br />
is “LC” (where C stands for capacitor). This type of filters are well<br />
known for their pleasant, soft sound. Coil filters were standard components<br />
up to the 1960’s, when they were quickly replaced with the<br />
advent of cheaper resistor-capacitor (RC) filters. The sound of classic<br />
“vintage” gear has a lot to do with the use of these components.<br />
When programming the <strong>Vitalizer</strong> plug-in we payed special attention<br />
to faithfully emulating the sound character of the original LC-EQ. The<br />
LC-EQ can improve the brilliance of individual or sum signals without<br />
making them sound too sharp. No signal artifacts are created in the<br />
process, as opposed to other high frequency enhancement systems,<br />
like the so-called exciters, in order to avoid ear fatigue. The <strong>Vitalizer</strong><br />
simply improves the sound structure of the original signal.<br />
14 <strong>Vitalizer</strong> ®
Intensity<br />
Control Elements<br />
The LC-EQ works with two different signal paths: the original<br />
signal and the processed signal, both of which are<br />
mixed together at the output. Use the INTENSITY knob to<br />
adjust the amount of LC-EQ effect mixed with the original<br />
signal, i.e. the intensity of the effect. Due to their design<br />
and broad frequency range, you can use the MID-HI TUNE<br />
and LC-EQ filters as perfectly complementary tools. For<br />
example, if you use the MID-HI TUNE filter to generate a<br />
notch in the mid frequencies and amplify the high frequencies from<br />
5-8 kHz, vocals could lose presence, in which case you could use<br />
the LC-EQ filter for the vocal frequency range and enhance it with<br />
the INTENSITY control.<br />
<strong>Vitalizer</strong> ® 15
Control Elements<br />
Stereo Expander<br />
The STEREO EXPANDER function is meant to create the<br />
impression of a wider stereo image. The space image<br />
is improved by doubling signals originally placed left<br />
or right in the stereo image, inverting their phase and<br />
summing them with the opposite channel. This results<br />
in a better perception of the original signals while<br />
the stereo image seems to reach out of the speakers’<br />
plane. Mono signals placed in the center of the stereo<br />
image are diminished during the process. We recommend settings<br />
between 6 and 14. For high settings, and depending on the nature<br />
of the source signal, you should always check the mono compatibility<br />
of the signal with the help of a goniometer.<br />
Output<br />
The OUTPUT knob reduces or increases the output level.<br />
The control ranges from -20 dB to +6 dB. The 0 dB mark<br />
is set at the center position. Generally speaking, you will<br />
need to reduce the level, considering that the <strong>Vitalizer</strong><br />
processing tends to increase it. If you set the input level<br />
to 0 dB with the DRIVE control – which ought to be a good<br />
starting point for filtering – there will undoubtedly be an<br />
increase in level after the processing occurs.<br />
IMPORTANT: Use the OUTPUT control to exploit the dynamic range<br />
available, but try to avoid distortion. The OVL (Overload) LED next<br />
to the OUTPUT control can be very useful at that. The OVL LED<br />
indicates overloading is occurring at the plug-in’s output, which<br />
can result in distortion. You should always avoid the OVL LED from<br />
turning on. If it does, use the OUTPUT control to reduce the output<br />
level until it turns off.<br />
16 <strong>Vitalizer</strong> ®
Settings<br />
The four SETTINGS buttons allow you to<br />
save all your settings with a simple mouse<br />
click. The <strong>Vitalizer</strong> saves the current settings<br />
permanently. As soon as you click on<br />
another SETTINGS button, the current settings<br />
are saved under the previously active<br />
preset. For example: In the image shown<br />
here, all parameters would be saved under<br />
preset “B” if you were to click on another button.<br />
Control Elements<br />
Any previously saved preset can be recalled with a simple mouse<br />
click on the corresponding button; you can then use or edit the<br />
settings. If the host program allows it, the presets can also be<br />
automated so you can use different settings at different points.<br />
As long as you work in a specific session of the host program and<br />
the plug-in is installed, the settings are saved and can be recalled<br />
afterwards. When opened, the plug-in loads the active preset settings<br />
instead of the default settings. If you remove the plug-in from<br />
the host program all presets are lost. To erase all presets at once<br />
you can remove the plug-in from the host program and then reinstall<br />
it.<br />
<strong>Vitalizer</strong> ® 17
<strong>Vitalizer</strong> <strong>MK2</strong>-T<br />
<strong>SPL</strong> Analog Code ® Plug-in<br />
<strong>Manual</strong><br />
<strong>SPL</strong> – Sound Performance Lab<br />
Sohlweg 80, 41372 Niederkruechten, Germany<br />
Phone: +49 21 63 98 34 0<br />
Fax: +49 21 63 98 34 20<br />
Email: software@spl.info, Website: www.spl.info