Conforms To ANSI STD Z21.58a - Smoke Hollow Smokers by ...
Conforms To ANSI STD Z21.58a - Smoke Hollow Smokers by ...
Conforms To ANSI STD Z21.58a - Smoke Hollow Smokers by ...

Create successful ePaper yourself
Turn your PDF publications into a flip-book with our unique Google optimized e-Paper software.
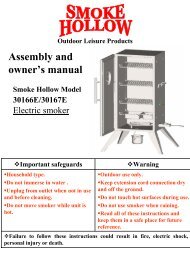
<strong>To</strong>ols needed for assembly:<br />
Phillips screwdriver, Pliers or<br />
Adjustable Wrench<br />
<strong>Conforms</strong> to <strong>ANSI</strong> <strong>STD</strong> <strong>Z21.58a</strong>-2008<br />
Certified to CSA <strong>STD</strong> 1.6a-2008<br />
OUTDOOR COOKING GAS APPLIANCES<br />
DANGER<br />
If you smell gas:<br />
1. Shut off gas to the appliance.<br />
2. Extinguish any open appliance.<br />
3. Open lid.<br />
4. If odor continues, keep away from the<br />
appliance and immediately call your<br />
fire department.<br />
Failure to follow these instructions could<br />
result in fire or explosion which could<br />
cause property damage, personal injury<br />
or death.<br />
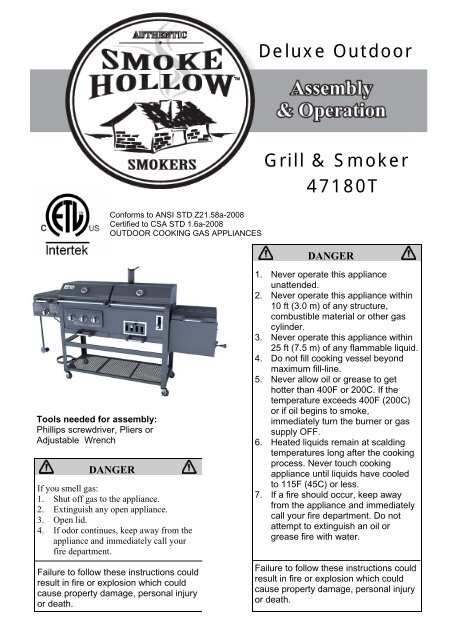
Deluxe Outdoor<br />
Grill & <strong>Smoke</strong>r<br />
47180T<br />
DANGER<br />
1. Never operate this appliance<br />
unattended.<br />
2. Never operate this appliance within<br />
10 ft (3.0 m) of any structure,<br />
combustible material or other gas<br />
cylinder.<br />
3. Never operate this appliance within<br />
25 ft (7.5 m) of any flammable liquid.<br />
4. Do not fill cooking vessel beyond<br />
maximum fill-line.<br />
5. Never allow oil or grease to get<br />
hotter than 400F or 200C. If the<br />
temperature exceeds 400F (200C)<br />
or if oil begins to smoke,<br />
immediately turn the burner or gas<br />
supply OFF.<br />
6. Heated liquids remain at scalding<br />
temperatures long after the cooking<br />
process. Never touch cooking<br />
appliance until liquids have cooled<br />
to 115F (45C) or less.<br />
7. If a fire should occur, keep away<br />
from the appliance and immediately<br />
call your fire department. Do not<br />
attempt to extinguish an oil or<br />
grease fire with water.<br />
Failure to follow these instructions could<br />
result in fire or explosion which could<br />
cause property damage, personal injury<br />
or death.
WARNING<br />
For Outdoor Use Only<br />
(outside of any type of enclosure)<br />
WARNING<br />
If you smell gas –<br />
● Turn off the gas supply to the<br />
appliance<br />
● Extinguish any and all open flames<br />
● Open the Lid of the Grill<br />
● If the odor remains, stay away from<br />
the grill and notify your gas supplier<br />
and/or the Fire Department.<br />
WARNING<br />
● Do not use or store gasoline,<br />
kerosene, alcohol, or other<br />
flammable liquids or vapors in the<br />
vicinity of this appliance or any<br />
other appliance.<br />
● Any LP Gas Cylinder NOT<br />
connected for use with the<br />
appliance, shall not be stored in the<br />
same vicinity of this or any other<br />
appliance.<br />
A LP Propane Gas Cylinder is<br />
needed for operating the gas side of<br />
this grill.<br />
The LP Gas Cylinder is NOT<br />
included.<br />
This gas grill is only intended for<br />
Domestic use, not to be used for any<br />
commercial purpose.<br />
2<br />
DANGER<br />
● Never use the gas or charcoal grill<br />
for INDOOR cooking or heating<br />
● Never use the grill on or in a boat or<br />
recreational vehicle<br />
The combustion fumes from either<br />
the gas or charcoal grill are toxic and<br />
can cause severe illness and possibly<br />
death.<br />
WARNING<br />
The combustion of Propane gas can<br />
yield the formation of chemical<br />
compounds known in the state of<br />
California,U.S.A., to cause birth<br />
defects,cancer,and other serious<br />
health matters.<br />
WARNING<br />
Read this installation manual before<br />
assembling or servicing this appliance.<br />
Failure to follow these instructions may<br />
result in an faulty installation, which<br />
could cause damage to property,<br />
IMPORTANT<br />
Save these instructions after reading<br />
them in case you need to refer to them<br />
in the future.
Read all safeguards and assembly<br />
instructions before assembling and<br />
operating your grill/smoker.<br />
Before assembling your new grill/smoker,<br />
unpack all the parts from the box.<br />
Carefully remove all packing material and<br />
lay out all the parts for easy access and<br />
identification. Do not discard the carton or<br />
packaging until your smoker is fully<br />
assembled and operating to your<br />
satisfaction.<br />
3<br />
In order to properly assemble your<br />
smoker, you will only need two tools:<br />
● Phillips head screwdriver<br />
● Pliers or adjustable wrench<br />
(tools not included)<br />
The grill/smoker is heavy and must be<br />
moved around during assembly and<br />
before use. Be sure to have a friend<br />
help.<br />
Outdoor Leisure Products, Inc.<br />
5400 Doniphan Drive<br />
Neosho, MO 64850<br />
<strong>To</strong>ll Free: 866-475-5180<br />
Website: www.olp-inc.com<br />
8:30am to 4:30pm, Central Time<br />
Monday through Friday
SAFETY WARNINGS<br />
1. The installation of this grill must conform to local codes, or in the absence of local codes, with either<br />
the National Fuel Gas Code, <strong>ANSI</strong> Z223.1 / NFPA 54, Natural Gas and Propane Installation Code, CSA<br />
B149.1, or Propane Storage and Handling Code, B 149.2, or The Standard for recreational Vehicles,<br />
<strong>ANSI</strong> 119.2 / NFPA, and CSA Z240 RV Series, Recreational Vehicle Code, as Acceptable.<br />
2. The Gas Grill side of the 47180T is for use with LP (Propane) Gas ONLY! LP Gas Cylinder is NOT<br />
included with the Grill.<br />
3. Never use lighter fluid, gasoline, kerosene, or alcohol for lighting the gas grill.<br />
4. The LP Gas supply Cylinder used must be constructed and marked in accordance with<br />
the Specifications of the U.S. Department of Transportation (D.O.T.) or The Standard for<br />
Cylinders, Spheres and Tubes for Transportation of Dangerous Goods; and<br />
Commission, CAN/CSA-B339, as applicable. It MUST be provided with a Listed Overfilling<br />
Device. Only use 20 pound cylinders that have a type 1 cylinder connection device compatible with the<br />
Connection for Outdoor Cooking Appliances.<br />
5. The LP gas cylinder must be arranged for vapor withdrawal, purging and have an overfilling<br />
prevention device.<br />
6. LP Gas Cylinders must be stored outdoors, out of the reach of children, and must not be<br />
stored in a building, garage or any other enclosed area.<br />
7. The Pressure regulator and Hose Assembly supplied with the Grill, must be<br />
used. Any replacement regulator and hose assemblies must be those specified <strong>by</strong> the<br />
outdoor cooking gas appliance manufacturer.<br />
8. The LP Gas Cylinder must include a collar to protect the cylinder valve.<br />
9. Do not store a spare LP Gas Cylinder under or near this grill.<br />
10. Never fill the LP Gas Cylinder beyond 80% full. For vapor withdrawal /purging, The cylinder should be<br />
in the upright position.<br />
11. This outdoor cooking gas appliance must only be used outdoors, and must not be<br />
used in a building, garage or any enclosed area<br />
12. The following distances for proper clearance must be maintained :<br />
● Minimum distance from back and sides of the outdoor cooking gas appliance<br />
● to walls is 36" ( 1 meter )<br />
● Do not use under any overhead combustible constructions<br />
● For outdoor use only<br />
● Remove LP Gas Cylinder from grill if storing grill indoors<br />
13. This outdoor cooking gas appliance is not intended to be installed in or on boats<br />
14. Inspect the Gas Hose before each use. If the Hose has any leak, cut or wear,<br />
it must be replaced BEFORE using the grill<br />
15. Do not try to move the grill while either gas, charcoal or smoker firebox is lit.<br />
16. Wait one hour minimum before touching any metal parts, until they are cool.<br />
17. NEVER leave the grill unattended when in use.<br />
18. Keep children and pets away from the grill when in use.<br />
IF THESE INSTRUCTIONS ARE NOT FOLLOWED EXACTLY, A FIRE CAUSING<br />
DEATH OR SERIOUS INJURIES MAY OCCUR!<br />
4
READ ALL SAFEGUARDS AND INSTRUCTIONS THOROUGHLY!<br />
YOUR SAFETY IS VERY IMPORTANT – FAILURE TO FOLLOW PROPER PROCEDURES AND<br />
SAFEGUARDS MAY RESULT IN PROPERTY DAMAGE, PERSONAL INJURY OR DEATH.<br />
● The<br />
● Do<br />
● Do<br />
● Do<br />
● Never<br />
● Keep<br />
● Grill<br />
● Keep<br />
● Do<br />
● Always<br />
● Never<br />
● The<br />
● When<br />
● Do<br />
DANGER DANGER<br />
GRILL is for outdoor use only!<br />
NOT use this grill for other than its intended<br />
purpose.<br />
not leave grill unattended when in use.<br />
not use gasoline, kerosene or alcohol for<br />
lighting charcoal, use of any of these or similar<br />
products may cause an explosion possibly leading<br />
to severe bodily harm.<br />
operate this grill under any overhead roof<br />
covering, awning or overhang. Never use inside<br />
an enclosed area such as screen patios, garages,<br />
buildings or tents.<br />
the area clear of all flammable liquids,<br />
combustible material including but not limited to<br />
wood, dry plants including grass, brush, paper,<br />
and canvas.<br />
is HOT while in use and after use – Avoid<br />
touching hot surfaces. Always wear protective<br />
gloves or mitts when operating the smoker.<br />
children and pets away from the grill at all<br />
times.<br />
not allow anyone to conduct activities around<br />
the grill during or following its use until the unit<br />
has cooled. The grill is hot during operation and<br />
remains hot for a period of time following its use.<br />
wear shoes and protective clothing during<br />
operation of this smoker.<br />
use glassware, plastic, or ceramic<br />
cookware in this grill.<br />
firebox lid will be extremely hot.<br />
grilling, grease from meat may drip into the<br />
charcoal and cause a grease fire. If this should<br />
happen, close the lid and dampers to suffocate<br />
the flame.<br />
not use water to extinguish grease fires.<br />
5<br />
● Do<br />
● Do<br />
● Use<br />
● Before<br />
● Use<br />
● Be<br />
● Store<br />
● Check<br />
● When<br />
● Do<br />
● Close<br />
● Never<br />
● Use<br />
● Properly<br />
not move the unit while it is being used.<br />
not use in windy conditions.<br />
caution when opening the lid, as hot stream<br />
or a flame flare-up could cause burns.<br />
each use, make sure the unit is in good<br />
working condition.<br />
caution after the fire has been extinguished,<br />
the surface will remain hot for some time.<br />
sure all charcoals are cold before emptying, if<br />
necessary pour water on coals before moving<br />
grill.<br />
the grill out of reach of children and in a dry<br />
location when not in use.<br />
grease and or ash level in ash pan often<br />
and empty. Use extreme caution as the smoker,<br />
and metal ash pan will be hot.<br />
opening the lids, keep hands, face and<br />
body a safe distance from hot steam and flame<br />
flare-ups.<br />
not allow charcoal and or wood to rest on the<br />
walls of the firebox and cooking chamber. Doing<br />
so will greatly reduce the life of the metal and<br />
finish of you smoker.<br />
lids and all dampers to suffocate flame.<br />
leave coals and ashes in grill unattended.<br />
Before grill can be left unattended, remaining<br />
coals and ashes must be removed from smoker.<br />
caution when lifting or moving smoker to<br />
prevent strains and back injuries.<br />
dispose of all packaging material.<br />
USE CAUTION AND COMMON SENSE WHEN OPERATING YOUR SMOKER. READ ALL INSTRUCTIONS,<br />
WARNINGS AND SAFEGUARDS PRIOR TO ASSEMBLING AND OPERATING YOUR SMOKER.<br />
SAVE THESE INSTRUCTIONS
47180T Parts List<br />
Note: For assistance, including missing or damaged parts, call toll free - 866-475-5180<br />
from 8:30 am - 4:30 pm Central Time, Monday - Friday<br />
Hardware Pack<br />
Item Number Quantity Description<br />
1 76 M6 x 15 Combo Truss Head Bolts, Black Nickel Plated<br />
2 24 M6 x 8 Combo Truss Head Bolts, Black Nickel Plated<br />
3 2 M6 x 25 Combo Truss Head Bolts, Black Nickel Plated<br />
4 2 ST4.2 x 10 Screws. Black Nickel Plated<br />
5 14 M6 KEPS Nuts, Black Nickel Coated<br />
6 2 Hinge Pins, Black Nickel Coated<br />
7 2 "R" Clips, Black Nickel Coated<br />
8 1 M6 Metal Lock Nut, Black Nickel Plated<br />
6
47180T Parts List<br />
Item NO. Quantity Description Part NO.<br />
1 1 Gas and Charcoal Cabinet and Lid Assembly TR001<br />
2 1 Left Front Leg TR002<br />
3 1 Left Rear Leg TR003<br />
4 1 Right Front Leg TR004<br />
5 1 Right Rear Leg TR005<br />
6 1 Bottom Shelf TR006<br />
7 4 Locking Caster Wheel TR007<br />
8 12 Handle Stand-off TR008<br />
9 2 Gas and Charcoal Lid Handle Tube (Long) TR009<br />
10 1 <strong>Smoke</strong> Stack Assembly TR010<br />
11 1 Grease Pan Connector TR011<br />
12 1 Left Side, Drip Tray Guide TR012<br />
13 1 Right Side, Drip Tray Guide TR013<br />
14 1 Center Drip Tray Guide TR014<br />
15 1 Firebox Support Brace TR015<br />
16 1 Firebox Door Handle TR016<br />
17 4 Handle Tube for Firebox, Sear Burner, and Drip Trays TR017<br />
18 1 Firebox Assembly and lid TR018<br />
19 1 Charcoal Basket Lift Handle TR019<br />
20 1 Charcoal Basket Lift System TR020<br />
21 1 Sear Burner Housing and Lid Assembly TR021<br />
22 1 Gas Hose, Regulator,(4) Control Valves, Control Knobs, and Manifold Assembly TR022<br />
23 1 Sear Burner TR023<br />
24 1 Retaining Bracket for LP Gas Cylinder TR024<br />
25 1 Retaining Wire for LP Gas Cylinder TR025<br />
26 2 Long Fence Rail ( for Front and Back of Grill) TR026<br />
27 2 Short Fence Rail ( for both Side Ends of Grill) TR027<br />
28 2 Drip Tray TR028<br />
29 1 Match Holder and Chain TR029<br />
30 1 Charcoal Basket TR030<br />
31 1 Firebox Wood Rack TR031<br />
32 3 Burner Heat Tent TR032<br />
33 1 Firebox Cooking Grid TR033<br />
34 5 Cooking Grid - for Gas / Charcoal /Sear Burner TR034<br />
35 1 Warming Rack Assembly TR035<br />
36 1 Charcoal Damper Handle TR036<br />
37 4 Burner Control Knob TR037<br />
38 1 Hardware Pack TR038<br />
39 1 Installation and Instruction Manual TR039<br />
40 3 Burner, (factory installed in Cabinet) TR040<br />
41 2 Heat Indicator with wing nut TR041<br />
42 1 Igniter TR042<br />
7
Assembly<br />
Note: Carefully cut the straps holding the carton together. Cut the carton sleeve so that it can<br />
lay flat on the ground to provide a clean surface for assembling your Grill. Remove the packing<br />
materials and all the parts from inside the Cabinet. After unpacking all the parts, check to make<br />
sure you HAVE all the parts. If anything is damaged or missing, contact our toll free number:<br />
866-475-5180. Discard all packing material in a safe and recyclable manner. Save this<br />
Assembly Manual for future reference.<br />
<strong>To</strong>ols Required: Phillips Head Screwdriver, Adjustable Wrench or Pliers<br />
Step 1<br />
Left Front Leg<br />
Fig. 1<br />
Right Front Leg<br />
8<br />
Step 1: Front Leg Assembly<br />
Locate: Cabinet and Lid Assembly, Left Front<br />
Leg and Right Front Leg and (7) M6x15 bolts.<br />
Note: Each leg will have an identification<br />
label. Do not fully tighten any leg bolts until<br />
instructed to do so later in the assembly.<br />
Procedure:<br />
Position cabinet on its back and attach left<br />
front leg using (3) M6x15 bolts and right front<br />
leg using (4) M6x15 bolts as shown in Figure<br />
1.<br />
Step 2 Step 2: Rear Leg Assembly<br />
Fig. 2<br />
Left Rear Leg<br />
Right Rear Leg<br />
Locate: Left Rear Leg and Right Rear Leg<br />
and (6) M6x15 bolts.<br />
Procedure:<br />
Position cabinet as shown in Figure 2 and<br />
attach left rear leg using (2) M6x15 bolts and<br />
right rear leg using (4) M6x15 bolts.
Assembly<br />
Step 3<br />
Fig. 3<br />
Step 4<br />
Fig.4<br />
Step 5<br />
Fig. 5<br />
Reinforcing Plate<br />
Bottom Shelf<br />
9<br />
Step 3: Bottom Shelf Assembly<br />
Locate: Bottom Shelf and (8) M6x15 bolts.<br />
Procedure:<br />
Attach bottom shelf as shown in Figure 3.<br />
Note: The end of the Bottom Shelf with the<br />
reinforcement plates must be positioned at<br />
the left end of the grill as shown in figure 3.<br />
FULLY TIGHTEN ALL BOLTS USED IN<br />
STEPS 1, 2 AND 3.<br />
Step 4: Caster Wheel Assembly<br />
Locate: 4 Caster Wheels<br />
Procedure:<br />
Insert the threaded end of the caster wheel<br />
into the bottom of each leg as shown in Figure<br />
4 and fully tighten with the wrench provided in<br />
the hardware pack.<br />
Step 5: Check your Progress<br />
Stand the grill up onto its caster wheels and it<br />
should look like the image in Figure 5.
Assembly<br />
Step 6<br />
Grill Lid<br />
Fig. 6<br />
Step 7<br />
Fig. 7A<br />
Fig. 7B Fig. 7C<br />
10<br />
Step 6: Attach Long Handles to Gas and<br />
Charcoal Grill Lids<br />
Locate: (4) Handle Stand-offs, (2) Long Lid<br />
Handle Tubes, (8) M6x8 bolts.<br />
Procedure:<br />
Open the grill lids and place the handle standoffs<br />
over the holes in each end of the lids.<br />
Then insert an M6x8 bolt through each hole.<br />
Step 7: Attach the <strong>Smoke</strong> Stack<br />
Locate: <strong>Smoke</strong> Stack Assembly, (4) M6x15<br />
bolts and (4) M6 KEPS nuts.<br />
Procedure:<br />
Remove smoke stack lid as shown in Figure 7A.<br />
Then insert smoke stack through grill lid from the<br />
inside as shown in Figure 7B. Attach smoke<br />
stack to the lid. M6x15 bolts will be inserted<br />
through the lid from the outside and the M6<br />
KEPS nuts will be positioned on the inside as<br />
shown in Figure 7C. Then replace smoke stack<br />
lid.
Assembly<br />
Step 8 Step 8: Install Grease Pan Connector<br />
Fig.8<br />
Step 9<br />
Fig.9C<br />
Fig.9D<br />
Fig.9E<br />
Fig. 9A Fig. 9B<br />
Stop tab<br />
11<br />
Locate: Grease Pan Connector and (2)<br />
M6x15 bolts.<br />
Procedure:<br />
Place the grease pan connector inside the left<br />
end of the cabinet just below the horizontal<br />
slot and insert (2) M6x15 bolts from outside<br />
the cabinet as shown in Figure 8.<br />
Step 9: Install the Drip Tray Guides (Right,<br />
Left and Center)<br />
Locate: Left Side Drip Tray Guide, Right Side<br />
Drip Tray Guide, Center Drip Tray Guide and<br />
(10) M6x15 bolts.<br />
Procedure:<br />
Place right side drip tray guide inside the right<br />
legs as shown in Figure 9A and attach using<br />
(4) M6x15 bolts.<br />
Place left side drip tray guide inside the left<br />
legs as shown in Figure 9B and attach using<br />
(4) M6x15 bolts. Be sure the LP gas line is<br />
positioned outside the left drip tray guide as<br />
shown in Figure 9B.<br />
From in front of the grill, find the threaded hole<br />
on the underside of the cabinet and partially<br />
insert an M6x15 bolt as shown in Figure 9C.<br />
Position the center drip tray guide so that the<br />
keyhole fits over the partially installed bolt<br />
(See Figure 9D). Then push the guide toward<br />
the back of the grill cabinet so that the tab fits<br />
over the threaded hole in the lower back side<br />
of the cabinet and insert an M6x15 bolt as<br />
shown in Figure 9E. Fully tighten both M6x15<br />
bolts.
Assembly<br />
Step 10<br />
Drip tray<br />
Firebox lid<br />
Sear burner lid<br />
12<br />
Step 10: Attach the Handles to the Drip<br />
Trays, Firebox Lid and Sear Burner Lid<br />
Locate: (8) Handle Stand-offs, (4) Short<br />
Handle Tubes, (16) M6x8 bolts .<br />
Procedure:<br />
Place a stand-off onto each end of the short<br />
handle tubes as shown. The handle<br />
assemblies will be attached to the drip trays,<br />
firebox lid and sear burner lid <strong>by</strong> placing the<br />
handle stand-offs over the holes and inserting<br />
an M6x8 bolt through each hole as shown.<br />
This is the same procedure you used in Step 6<br />
to attach the grill lid handles.
Assembly<br />
Step 11<br />
Fig. 11<br />
Step 12<br />
Fig. 12<br />
Fig. 13<br />
Ledge<br />
Lock nut<br />
Firebox<br />
door handle<br />
13<br />
Step: 11 Install Firebox Support Brace<br />
Locate: Firebox Support Brace, (4) M6x15<br />
bolts and (4) M6 KEPS nuts.<br />
Procedure:<br />
Place the firebox support brace between the<br />
legs on the right end of the grill so that the<br />
ledge is at the bottom and facing to right as<br />
shown in Figure 11. Insert M6x15 bolts<br />
through the legs and then through the brace<br />
as shown. Attach M6 KEPS nuts on the<br />
inside and fully tighten.<br />
Step 12: Attach Firebox to Charcoal Side<br />
of Cabinet<br />
Locate: Firebox Assembly (Part #18), (6)<br />
M6x15 bolts and (6) M6 KEPS nuts.<br />
Procedure:<br />
Align firebox assembly with rectangular hole in<br />
right side of cabinet so that it is resting on the<br />
ledge of the firebox support bracket. Insert (3)<br />
M6x15 bolts through the firebox and cabinet<br />
wall. Then attach an M6 KEPS nut to each of<br />
the (3) bolts.<br />
Insert (3) M6x15 bolts through the firebox and<br />
firebox support brace. Then attach an M6<br />
KEPS nut to each of the (3) bolts. Make sure<br />
the (6) M6x15 bolts are fully tightened.<br />
Step 13: Attach Firebox Door Handle<br />
Locate: Firebox Door Handle (Shown in<br />
Figure 13), (1) M6x15 bolt and (1) M6 metal<br />
lock nut.<br />
Procedure:<br />
Place firebox door handle on the outside of<br />
the firebox door and insert an M6x15 bolt<br />
through the door handle and door as shown.<br />
Attach an M6 metal lock nut and tighten using<br />
an adjustable wrench or pliers.
Assembly<br />
Step 14<br />
Fig.14C<br />
Inside Cabinet<br />
Fig.14A<br />
Fig.14D<br />
Hole<br />
Fig.14 B<br />
14<br />
Step 14: Installing the Charcoal Basket<br />
Lifting System<br />
Locate: Charcoal Basket Lift Handle, Charcoal<br />
Basket Lifting System, (4) M6x15 bolts, (2)<br />
Hinge Pins and (2) “R” Clips<br />
Procedure:<br />
Slide the charcoal basket lift handle through the<br />
adjusting slot and through the hole of the inside<br />
plate as shown in Figure 14A. Align the hole in<br />
the end of the lift handle with the holes in the “U”<br />
shaped bracket located at the back of the<br />
cabinet. Join the lift handle and the “U” shaped<br />
bracket <strong>by</strong> inserting a hinge pin as shown in<br />
Figure 14B. Then insert an “R” clip though<br />
the hole in the hinge pin.<br />
Place the charcoal basket lifting system into the<br />
cabinet and attach it to the back wall <strong>by</strong> inserting<br />
(4) M6x15 bolts through the back side of the<br />
cabinet wall as shown in Figure 14C.<br />
Attach the charcoal basket lift handle to the<br />
charcoal basket lifting system <strong>by</strong> inserting a<br />
hinge pin through the “U” shaped lifting arm and<br />
the hole in the center of the lifting handle as<br />
shown in Figure 14D. Then insert an “R” clip<br />
through the hole in the hinge pin.<br />
You should now be able to adjust the charcoal<br />
basket lifting system to your desired height <strong>by</strong><br />
moving the lifting handle to the left and raising or<br />
lowering it.
Assembly<br />
Step 15<br />
Fig. 15C<br />
Fig. 15A<br />
Fig. 15B<br />
Fig. 15E<br />
Fig. 15D<br />
15<br />
Step 15: Sear Burner Assembly<br />
Locate: Sear Burner Housing and Lid (Part<br />
21), Sear Burner, Sear Burner Control Knob,<br />
(5) M6x15 bolts and (2) M4x10 bolts.<br />
Procedure:<br />
Attach the sear burner housing to the left end<br />
of the grill cabinet with (5) M6x15 bolts (See<br />
Figure 15A). Insert (1) M6x15 bolt through the<br />
hole in the grill cabinet and into the sear<br />
burner housing as shown in Figure 15B. Then<br />
insert (2) M6x15 bolts through the sear burner<br />
housing and into the grill cabinet. The last (2)<br />
M6x15 bolts are inserted through the<br />
underside of the sear burner housing and<br />
through the leg into the grill cabinet.<br />
The next step is to attach the sear burner<br />
valve to the sear burner housing. Remove the<br />
(2) M4x8 screws from the sear burner valve<br />
as shown in Figure 15C. Then position the<br />
valve in place between the front panel of the<br />
sear burner housing and the inner wall as<br />
shown in Figure 15D. Align the threaded<br />
holes in the valve with the holes in the sear<br />
burner housing and attach using the (2) M4x8<br />
bolts that were removed earlier.<br />
Place the sear burner control knob over the<br />
valve stem, making sure to align flat portion of<br />
both components, and push the control knob<br />
over the stem until it is firmly seated. See<br />
Figure 15E. Use this same procedure to<br />
install the (3) gas control knobs on the gas<br />
grill control panel.<br />
(Sear Burner Assembly continued on next<br />
page)
Assembly<br />
Step 16<br />
Fig.16A<br />
Fig. 15 F Fig. 15 G<br />
Fig. 15 H Fig. 15 I<br />
Fig.16B<br />
Fig. 15 J<br />
Retaining Wire<br />
16<br />
(Step 15: Sear Burner Assembly Continued)<br />
Locate the sear burner, tilt the sear burner up<br />
and slide the tube through the inner wall and<br />
onto the valve as shown in Figure 15F. From the<br />
underside of the sear burner housing, check to<br />
make sure the valve is inside the tube as shown<br />
in Figure 15G.<br />
Now attach the Sear Burner to the bracket<br />
located on the back wall of the Sear Burner<br />
Housing using (2) M4.2 x10 Screws as shown in<br />
Figure 15H.<br />
Remove the large nut from the igniter as shown in<br />
Figure 15I, push the other end of the wire through<br />
the hole into the underside of the housing. And<br />
slide the wire through the nut and through the hole<br />
on the outside of the housing.<br />
Attach the wire to the stem of the igniter. Push<br />
the igniter and wire through the hole and attach it<br />
to the housing <strong>by</strong> screwing the nut back onto the<br />
igniter. Figure 15J.<br />
Step 16: Attach Retaining Bracket and<br />
Retaining Wire for LP Gas Cylinder<br />
Locate: Retaining Bracket (Part # 24), Retaining<br />
Wire (Part #25) and (2) M6x15 bolts.<br />
Procedure: Attach the retaining bracket to the<br />
left end of the bottom shelf using (2) M6x15 bolts<br />
as shown in Figure 16A.<br />
Attach retaining wire to legs at left end of grill as<br />
shown in Figure 16B. Position the retaining wire<br />
inside the legs and under the grill body with the<br />
curved side up. Then insert the ends of the wire<br />
through the holes in the legs and rotate the wire<br />
toward you.
Assembly<br />
Step 17<br />
Fig.17<br />
Step 18<br />
Fig.18<br />
Step 19<br />
Fig.19<br />
Drip Trays<br />
17<br />
Step 17: Attach Match Holder and Chain<br />
Locate: Match Holder & Chain and (1) M6x15<br />
bolt.<br />
Procedure: Attach match holder and chain to<br />
the top rear hole in the left rear leg <strong>by</strong><br />
inserting an M6x15 bolt through the loop at<br />
the end of the chain and securely tightening.<br />
See Figure 17.<br />
Step 18: Attach Fence<br />
Locate: (2) Long Fence Pieces, (2) Short<br />
Fence Pieces and (16) M6x15 bolts.<br />
Procedure:<br />
Attach the four pieces <strong>by</strong> aligning the holes at<br />
the end of each piece with the corresponding<br />
holes in each leg and inserting (2) M6x15<br />
bolts at each end. See figure 18.<br />
Step 19: Install Drip Trays<br />
Locate: (2) Drip Trays<br />
Procedure: Slide the drip trays under each<br />
grill using the drip tray guides.
Assembly<br />
Step 20<br />
Step 21<br />
Fig. 21B<br />
Fig. 21A<br />
Fig. 21C<br />
18<br />
Step 20: Attach Charcoal Damper Handle<br />
Locate: Charcoal Damper Handle<br />
Procedure:<br />
Screw the handle into the hole located above<br />
the vertical slots on the charcoal side of the<br />
grill. The handle should slide back and forth<br />
to open and close the damper.<br />
Step 21: Install Warming Rack<br />
Locate: Warming Rack and (2) M6x25 bolts<br />
Procedure: The warming rack can be<br />
attached to either side of the grill. <strong>To</strong> attach<br />
the warming rack, insert (1) of the M6x25 bolts<br />
through the lid from the outside as shown in<br />
Figure 21A and position the warming rack so<br />
that the bolt is going through the wire loop as<br />
shown in Figure 21B. Then align the wire loop<br />
on the opposite end of the warming rack with<br />
the opposite lid hole and insert the other<br />
M6x25 bolt.<br />
Insert the wire legs into the holes on the sides<br />
of the cabinet as shown in Figure 21C.
Assembly<br />
Step 22<br />
Cooking grids<br />
Heat Indicators<br />
Burner Heat Tents<br />
Step 22: Install (2) Heat Indicators, (3) Heat Tents, (1) Charcoal Basket, (1) Firebox Wood Rack and<br />
(6) Cooking Grids.<br />
· Locate (2) Heat Indicators and remove wing nuts from each. Insert one heat indicator through gas<br />
grill lid and one through charcoal grill lid. Securely fasten each heat indicator with the wing nuts.<br />
· Place one heat tent onto the tabs located above each burner in the gas grill cabinet.<br />
· Place the charcoal basket into the charcoal cabinet so that it rests on the charcoal basket lifting<br />
system.<br />
· Place firebox wood rack inside firebox.<br />
· Place the cooking grids in the sear burner, firebox, charcoal grill and gas grill.<br />
Assembly of your grill & smoker is now complete.<br />
FOR YOUR SAFETY, FOLLOW ALL SAFEGUARDS AND INSTRUCTIONS.<br />
19<br />
Firebox Cooking grid<br />
Firebox<br />
wood<br />
rack<br />
Charcoal Tray
OPERATING INSTRUCTIONS<br />
Connecting the LP gas cylinder to the grill<br />
● The LP Gas Cylinder must be a 20 pound cylinder and have a Type 1 Cylinder Valve Outlet<br />
Connector<br />
● Handle the Cylinder with care - do not drop it<br />
● When you are not using the grill, the LP Gas Cylinder should be<br />
disconnected<br />
● Connect the regulator and hand tighten firmly<br />
● Do a leak test each time you connect a LP Gas Cylinder and before<br />
lighting the grill<br />
● Never use a match or lit flame to test for leaks<br />
● <strong>To</strong> test, prepare a weak solution of detergent and water. Spray or<br />
swab the<br />
● solution onto the connection of the regulator to the LP Gas Cylinder valve, and<br />
● on all the joints in the hose connections up to the burner valves (which MUST be<br />
● closed in the "OFF" position). Open the LP Gas Cylinder valve, and watch for any<br />
● bubbles to appear at all the connection points. No bubbles indicate - All Clear!<br />
● If there are any bubbles, there is a leak which must be fixed.<br />
● Never obstruct the flow of combustion and ventilation air.<br />
Lighting the grill<br />
● Always open the Lid before lighting the grill.<br />
● All burner knobs should be in the "OFF" position.<br />
● Open the LP Gas Cylinder valve.<br />
● Note: EACH of the 3 main burners on your grill has its own automatic igniter.<br />
● Push the knob in fully, and slowly turn it counter-clockwise (to the left) to the "HIGH" position.<br />
You will hear a loud "Click" as the igniter sparks and lights the burner<br />
● You can then adjust the knob to your desired setting.<br />
● If the burner did not light, turn the knob back to the “OFF” position, wait 5 minutes for any gas<br />
to clear away, and then repeat the lighting procedure.<br />
● For Sear Burner, turn the knob counter-clockwise (to the left) and then PUSH the Black<br />
Igniter Button several times to light the burner. If the burner does not light ,then turn the knob<br />
to the “OFF” position, wait 5 minutes and then try again.<br />
● After using the grill, - turn all burner knobs to the "HIGH" position and then push fully in and<br />
●<br />
turn to the "OFF" position.<br />
At once turn the valve on the LP Gas Cylinder OFF.<br />
Good Flame<br />
YELLOW<br />
Bad Flame<br />
● IF the auto-igniter does NOT light the burner, you can light<br />
it<br />
BLUE<br />
● with a match or a piece of burning paper - hold the match<br />
or paper with the Match Holder ( attached at the side of the<br />
grill) , put it through the openings in the Cooking Grid and<br />
next to the Flame Tent covering the burner. Then follow the<br />
lighting procedure above.<br />
Burner<br />
● Observe the proper burner flame - it should be a blue/yellow color about 1/2” long.<br />
Sear Burner Operation<br />
● ALWAYS be sure to OPEN the Lid before lighting the Sear Burner<br />
● Preheat the Burner for 5 minutes<br />
● Sear one side of the food, turn the food over and sear the other side. Then continue cooking<br />
each side of the food on the standard burners until done to your satisfaction<br />
● When finished, leave the Sear Burner on for a few minutes to burn off grease or food residue<br />
20<br />
OFF<br />
OFF<br />
"click”
OPERATING INSTRUCTIONS<br />
CARE AND CLEANING<br />
! WARNING !<br />
● Do not do any cleaning or maintenance on any grill parts until all parts are cool! Be sure<br />
that the valve on the LP Gas Cylinder is closed and in the OFF position<br />
● After every cooking session, you may run the gas grill on HIGH, or set the Charcoal<br />
Coals into the HIGH position to burn off any food residue, keeping the residue from<br />
building up.<br />
CLEANING<br />
● Use only mild dishwashing detergents, hot water, a nylon scrub pad and a BBQ wire<br />
brush cleaning tool<br />
● Always rinse all surfaces thoroughly after cleaning<br />
● Handle Porcelain coated surfaces gently and carefully- they are made from high<br />
temperature glass and can chip easily<br />
Burners<br />
1. Turn the gas OFF at the LP Gas Cylinder and the burner control knobs<br />
2. Lift off the cooking grids and the heat tents covering the burners<br />
3. Remove the screw attaching the burners at the back of the grill<br />
4. Gently and carefully, tilt the back of the Burner up and slide it backwards off the valve<br />
orifice, then lift out of the grill<br />
5. Wipe clean the orifice face<br />
6. Clean out any of the Burner holes which may have clogged. Use a toothpick or thin wire<br />
7. Remove and clean off any and all food residue or other coating on the Burner<br />
TROUBLE SHOOTING THE GAS GRILL<br />
Burner does not light :<br />
1. Check if LP Gas Cylinder is empty?<br />
2. Check Igniter wire – is there a spark?<br />
3. Check for spider webs or insect nests inside, clogging the Burner<br />
Flame color is Yellow, should be Blue:<br />
1. Check for spider webs or insect nests inside, clogging the Burner<br />
2. Close Lid and run on HIGH to burn off residue on Burner<br />
Flame flares up:<br />
1. Cooking temperature is set too high<br />
2. Food being cooked is too fatty<br />
3. Grease has accumulated in the grill. Clean and burn off<br />
21
OPERATING INSTRUCTIONS<br />
! IMPORTANT ! CURING PROCESS<br />
Prior to your first use, follow these 3 steps to cure the finish as well as rid the grill of paint odor.<br />
STEP 1: Lightly coat ALL INTERIOR surfaces with vegetable oil or vegetable oil spray.<br />
STEP 2: Start your first fire with 3-6 lbs of charcoal in both the Fire Box and <strong>Smoke</strong>r Chamber.<br />
Adjust the vent dampers to 1/2 open.<br />
STEP 3: Maintain the fire for 1 hour. NOTE: It is important not to scrape or rub any surface during<br />
the curing process.<br />
CHARCOAL GRILL OPERATING INSTRUCTION<br />
The charcoal offset Fire Box Grill & <strong>Smoke</strong>r can be used to cook food either <strong>by</strong>:<br />
CHARCOAL AND DIRECT HEAT –OR- SMOKE AND INDIRECT HEAT<br />
Please read all steps before cooking.<br />
TO COOK USING CHARCOAL AND DIRECT HEAT<br />
(The fire is in the <strong>Smoke</strong>r Chamber and the food in the <strong>Smoke</strong>r chamber.) Follow these steps<br />
for cooking with charcoal and direct heat in the main <strong>Smoke</strong>r Chamber.<br />
1. For best results use a metal charcoal starter and fill the starter with about 3 lbs of charcoal<br />
and light the charcoal.<br />
2. After 30 minutes, dump the charcoal into the bottom of the <strong>Smoke</strong>r Chamber on the<br />
charcoal grates, which should be at the lowest adjustment.<br />
3. Adjust the Fire Box and <strong>Smoke</strong>r Chamber dampers to 1/4 to 1/3 open.<br />
4. Immediately and carefully place another 3 lbs of charcoal on top of the burning coals in the<br />
<strong>Smoke</strong>r Chamber.<br />
5. Once the temperature reaches your desired level, food can be placed on the cooking<br />
grates.<br />
6. Cook meat and food to your personal preference.<br />
The adjustable charcoal grate in the <strong>Smoke</strong>r Chamber allows the charcoal grate to be<br />
moved to within a few inches of the cooking grate allowing you to sear your meat and<br />
lock in the juices. Searing takes only a few minutes on each side. Don’t allow the meat or<br />
food to burn. After searing, crank the charcoal grate back to the bottom and cook the food<br />
to your personal preference.<br />
For smaller cookouts, the Fire Box can be used instead of the larger <strong>Smoke</strong>r Chamber for<br />
cooking with charcoal and direct heat. Follow the same steps above for cooking in the<br />
main <strong>Smoke</strong>r Chamber.<br />
FOR YOUR SAFETY, FOLLOW ALL SAFEGUARDS AND INSTRUCTIONS.<br />
22
OPERATING INSTRUCTIONS<br />
TO COOK USING SMOKE AND INDIRECT HEAT<br />
(The fire is in the Fire Box and the food is cooked or smoked in the <strong>Smoke</strong>r/Cooking<br />
Chamber. The smoke and the indirect heat pass through the opening between the Fire Box<br />
and <strong>Smoke</strong>r/Cooking Chamber. Follow the steps below for smoking and/or cooking . Note<br />
that the indirect cooking or smoking process will take longer than traditional barbecuing. At<br />
225 to 250 degrees, it will take approximately 30 minutes per pound of meat.)<br />
1. Fully open all dampers<br />
2. Using your desired flavoring wood (hickory, mesquite, pecan, apple, alder, etc.), start a fire in<br />
the fire box <strong>by</strong> placing the wood on the log rack. Use sticks of wood that are approximately 14<br />
- 18 inches in length and 3 - 5 inches in diameter.<br />
3. Allow the wood to burn for 20 to 30 minutes and then check the temperature gauge on the<br />
cooking chamber lid. For indirect cooking, we recommend 225 to 250 degrees Fahrenheit.<br />
For smoking, the desired temperature may be lower. The heat and smoke can be regulated<br />
<strong>by</strong> adding more wood and <strong>by</strong> opening or closing the dampers.<br />
4. Once the desired temperature is achieved, place the food in the cooking chamber. Continue<br />
to monitor the temperature as the food smokes/cooks. For the best heat and smoke flow,<br />
close the bottom left damper and the top right damper. At 225 to 250 degrees, it will take<br />
approximately 30 minutes per pound to cook the food. Time will vary depending on the<br />
temperature at which food is smoked/cooked. The level of desired doneness will also affect<br />
the cooking time.<br />
5. For best results, try to maintain a constant temperature inside the cooking chamber <strong>by</strong> adding<br />
wood as necessary and adjusting the damper openings. Check the internal food temperature<br />
periodically <strong>by</strong> inserting a meat thermometer into the food. Use caution when checking the<br />
food temperature to avoid injury.<br />
6. Once the food has reached the desired temperature, remove from cooking chamber and let<br />
stand 30 minutes. The USDA Standard temperature chart for properly cooked meat can be<br />
found at the back of this manual.<br />
Either charcoal or wood may be used in the fire box, but wood is recommended since it<br />
will provide more heat and flavor. Bark should be removed or burned off first as it<br />
contains a high acid content and can impart an acrid flavor.<br />
FOR YOUR SAFETY, FOLLOW ALL SAFEGUARDS AND INSTRUCTIONS.<br />
23
Operation: Smoking food<br />
Rules for smoking:<br />
We recommend that most smoking be done at 225 to 250 degrees. We also recommend the use<br />
of an oven thermometer to verify the inside temperature of your smoker and a meat thermometer<br />
to check the temperature of the meat. The heat indicator will give you an indication of the<br />
temperature inside the smoker but it is best to use an oven thermometer to ensure that the<br />
temperature is correct. A good rule of thumb for smoking is to cook the meat for 30 to 45 minutes<br />
per pound. As the weight of the meat increases so will the amount of time needed. For instance,<br />
2 or 3 pounds of meat might take 30 minutes per pound or while 7 or 8 pound will require closer<br />
to 45 minutes per pound. Refer to the temperature chart in the Assembly Manual to make sure<br />
that the meat is at an acceptable temperature.<br />
Types of wood to use for smoke:<br />
1. Always use a hardwood that has been seasoned for at least 6 months.<br />
2. What type of hardwood should you use?<br />
3. Can I use Oak pallets?<br />
4. NO, because pallet wood is dried out before it is used for making pallets. You need the<br />
natural moisture in wood to create flavor in your smoke.<br />
5. Can I use Pine, Cedar or any other wood that smells good?<br />
6. NO, never use any resin woods.<br />
What are the main items I need to smoke meats?<br />
1. Internal meat thermometer .<br />
An internal meat thermometer is a must to cook large pieces of meat to make sure it is done<br />
internally.<br />
Cooked Ham-140 degrees<br />
Ham, Beef-Med, Ground Beef- 160 degrees<br />
Veal, Lamb, Pork, Beef-Well done – 170 degrees<br />
Poultry- 180 degrees<br />
2. Good tongs or meat hook.<br />
Use a heavy-duty set of tongs to rotate meat in the smoker because in some cases you may<br />
be smoking a very large cut of meat. I prefer a meat hook for ease of use and it does not<br />
knock any rub or sauce off of the meat.<br />
3. Good oven mitts.<br />
Heavy-duty mitts will assist you in moving hot smoker racks and large pieces of meats and<br />
assist in adding water and wood chips.<br />
4. Aluminum foil.<br />
When the outside color of your meat product is at your desired color or look to suit your taste,<br />
wrap meat product in aluminum foil to keep any more wood resins from turning your meat any<br />
darker.<br />
24
Operation: Smoking food<br />
Classic Recipes:<br />
Pork<br />
<strong>Smoke</strong>d Pork Tenderloin<br />
Take outside wrapper off of meat and wash thoroughly in cold water. Place tenderloin on a<br />
paper towel to soak up excess water. Rub your favorite pork rub on the loin (we recommend<br />
Head Country Pork seasoning). Preheat smokers to 225 degrees and place loin in the center of<br />
the smoker. Cook until internal meat temperature reaches 165 degrees. Take out of smoker and<br />
let stand on the cutting platter until meat reaches 170 degrees serving temperature. Slice like<br />
bread in 1/4” pieces and it will melt in your mouth.<br />
Pork Ribs- Ba<strong>by</strong> Backs or Spare Ribs<br />
Take ribs out of wrapper and drain all liquid off of the ribs and then wash in cold water. Place on<br />
cutting board and cut away any excess fat or skin from the bottom of ribs. Turn ribs with bone<br />
side up and peel the membrane from the back of the bone until all is gone. Rub your favorite<br />
pork rub on both sides of the ribs (we recommend Head Country Pork seasoning). Preheat<br />
smoker until it reaches 225 degrees and place rib bone side down in smoker. After one hour,<br />
turn the rib over with bone side up and cook for one hour. After 2 1/2 hours, depending on the<br />
color of the rib you like, pour a one-inch wide strip of your favorite BBQ sauce down the length of<br />
the rib and wrap tightly in aluminum foil. Place back in smoker and check every 15 to 20 minutes<br />
to see if the rib bones separate <strong>by</strong> using your finger to pull them apart. If they pull apart with<br />
ease your ribs are done. Take out of smoker and let stand on serving platter until cool enough to<br />
eat. <strong>To</strong>tal cooking time should not be more than 3 1/2 hours total.<br />
Beef<br />
<strong>Smoke</strong>d Beef Brisket<br />
Select a 6 to 8 lb. packer trimmed brisket that has a little marble to it but not too much. Feel free<br />
to trim as much fat as desired. Use your favorite beef rub (we recommend using Head Country<br />
All-Purpose rub) and rub it on liberally. Heat the smoker to 225 degrees and place the brisket in<br />
the smoker for 3 hours. Place brisket in an aluminum foil pan and pour approximately 8oz. Of<br />
Allegro over the brisket. Cover the pan tightly with aluminum foil and continue cooking until<br />
internal meat temperature reaches 165 to 170 degrees. Take pan out of the smoker and let<br />
brisket stand. Remove brisket from pan and cut 1/4” slices against the grain. Use juice from pan<br />
to poor over sliced meat or for dipping.<br />
Prime Rib<br />
Select a 6 to 8 lb prime rib (we like the bone on). Rub the prime rib with your favorite beef rub<br />
(we recommend using Head Country All-Purpose rub). Pre-heat the smoker to 225 degrees and<br />
place the prime rib in the smoker. After 3 hours, place the prime rib in aluminum foil pan and<br />
cover with aluminum foil. When internal meat temperature reaches 145 degrees take out of<br />
smoker and let stand until your desired doneness is reached. Medium rare is 155 to 160<br />
degrees. While standing, the temperature of the meat will rise internally up to 10 degrees. Slice<br />
prime rib to desired thickness and serve with juice from the pan in which it was cooked.<br />
25
Operation: Smoking food<br />
Classic Recipes:<br />
(Continued)<br />
Fish<br />
<strong>Smoke</strong>d Halibut<br />
Select a nice fresh 3/4” thick filet. Wash filet thoroughly in cold water and lay on paper towel until<br />
water is not visible. Melt a whole stick of butter in the microwave and sprinkle a liberal amount of<br />
Dill weed in the melted butter. Lay filets on Aluminum foil and fold a lip around edges to contain<br />
the butter. With a basting brush, brush melted butter and dill weed mixture on both sides of the<br />
fish filet. Preheat smoker to 225 degrees and place fish in the smoker. Check the filets every 15<br />
minutes for visible moist look on filets. Brush with butter and dill weed mix when needed. Fish<br />
should start to flake in about 45 minutes. When fish flakes very easy take out of smoker and<br />
serve.<br />
Poultry<br />
<strong>Smoke</strong>d Chicken<br />
Chicken breasts and thighs are my favorite. Take chicken parts out of package and wash<br />
thoroughly and place on paper towel to dry. Sprinkle Head Country Original rub on both sides of<br />
chicken parts. Preheat smoker to 225 degrees and place chicken parts in smoker. After 1/2 hour<br />
turn chicken over. With your internal temperature gauge, check internal temperature <strong>by</strong> pushing<br />
temperature probe into the meat nearest the bone. When temperature reaches 180 degrees<br />
chicken is done. You may brush your favorite BBQ sauce on the chicken during the last 15<br />
minutes of your cooking process to spice it up.<br />
<strong>Smoke</strong>d Turkey<br />
Select a 12 to 15 lb. turkey for best results in a smoker. Take the turkey out of the package and<br />
remove all internal parts and packaging. Wash turkey thoroughly and place it on paper towel to<br />
dry. Rub olive oil inside and out on the turkey and apply Head Country Original Rub inside body<br />
cavity and on the outside skin. Preheat smoker to 225 degrees and place turkey in smoker. You<br />
may baste with butter for more moisture, if you like. When turkey skin reaches your desired<br />
color,remove turkey from smoker,place in aluminum foil pan and cover with aluminum foil<br />
tightly. Place covered pan in smoker and continue cooking at 225 degrees. Check internal meat<br />
temperature, where the thigh meets the side of the turkey,every half hour for doneness. Turkey<br />
should take around 45 minutes per lb to reach 180 degrees serving temperature.<br />
26
Operation: Cooking<br />
Temperature Chart<br />
Refer to this USDA Standard chart for properly cooked meat temperature.<br />
IMPORTANT: Measure the meat temperature using a meat probe thermometer. The heat<br />
indicator on the smoker gives the heat temperature inside the smoker cabinet, but is not an<br />
accurate measurement of the meat temperature.<br />
Temperature on Meat Thermometer<br />
Beef Roasts, Beef Brisket 3-4 lbs. 4-5 hours 140° rare<br />
Lamb Roasts, Venison 5-7 lbs. 5-6 hours 160°medium<br />
Large cuts of Game 7-9 lbs. 7-10 hours 170°well done<br />
Pork Roasts 3-4 lbs.<br />
5-6 hours 170°<br />
5-8 lbs.<br />
7-8 hours 170°<br />
Pork/Beef Ribs Full grill 4-6 hours Meat pulls from bone<br />
Pork Chops Full grill 4-6 hours Meat pulls from bone<br />
Sausage Links Full grill 4-5 hours 170°for fresh sausage<br />
Ham, Fresh 10 lbs. 7-8 hours 170°<br />
Ham, Cooked All sizes 3-4 hours 130°<br />
Chicken (Cut up or split) 1-4 fryers,<br />
cut up or split<br />
4-5 hours 180°/leg moves easily in joint<br />
Chicken (Whole) 1-4 fryers 5-6 hours 180°/leg moves easily in joint<br />
Turkey (Unstuffed) 8-12 lbs. 7-8 hours 180°/leg moves easily in joint<br />
Fish, small whole Full grill 2-3 hours Flakes with fork<br />
Fish, filets, steak Full grill 1-3 hours Flakes with fork<br />
Duck 3-5 lbs. 5-6 hours 180°/leg moves easily in joint<br />
Small game birds Full grill 4-5 hours 180°/leg moves easily in joint<br />
27
This <strong>Smoke</strong>r <strong>Hollow</strong> TM Grill is guaranteed against broken or<br />
damaged parts at time of purchase. All parts carry a 1-year<br />
limited warranty. Paint is guaranteed to be free of defects for 90<br />
days except for rust, which may appear after repeated use.<br />
This warranty does not cover damage or issues related to neglect, abuse, or modifications to the product.<br />
Repair labor is not covered.<br />
All parts that meet the warranty requirements will be shipped at no-charge via the discretion of the<br />
Customer Service Department (ground shipments, US Mail, or Parcel Post Only). Any special handling<br />
charges (i.e. Second Day, Overnight, etc.) will be the responsibility of the consumer.<br />
All warranty claims apply only to the original purchaser and require a proof of purchase verifying purchase<br />
date. Do not return parts to our address without first obtaining a return authorization number from our<br />
customer service.<br />
This service is available <strong>by</strong> calling 866-475-5180, 8:30am to 4:30pm, Central Time, Monday through Friday,<br />
or write to Outdoor Leisure Products, Inc.,5400 Doniphan Drive, Neosho, MO64850.<br />
This warranty may give you specific legal rights that vary <strong>by</strong> state.<br />
Outdoor Leisure Products, Inc<br />
5400 Doniphan Drive<br />
Neosho, MO 64850<br />
www.olp-inc.com<br />
©2009 Outdoor Leisure Products, Inc. <strong>Smoke</strong> <strong>Hollow</strong> and the <strong>Smoke</strong> <strong>Hollow</strong><br />
logo are trademarks of Outdoor Leisure Products, Inc. and are not to be used<br />
without express permission <strong>by</strong> Outdoor Leisure Products, Inc.<br />
28