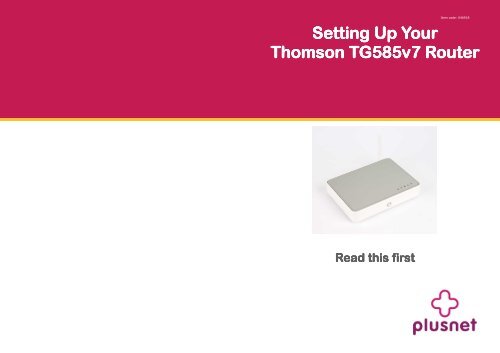
Setting Up Your Setting Up Your Thomson TG585v7 Router - Plusnet
Setting Up Your Setting Up Your Thomson TG585v7 Router - Plusnet
Setting Up Your Setting Up Your Thomson TG585v7 Router - Plusnet
Create successful ePaper yourself
Turn your PDF publications into a flip-book with our unique Google optimized e-Paper software.
Item code: 046918<br />
<strong>Setting</strong> <strong>Setting</strong> <strong>Up</strong> <strong>Up</strong> <strong>Your</strong><br />
<strong>Your</strong><br />
<strong>Thomson</strong> <strong>Thomson</strong> <strong>TG585v7</strong> <strong>TG585v7</strong> <strong>Router</strong><br />
<strong>Router</strong><br />
Read Read this this first first<br />
first
Troubleshooting<br />
Connection Check<br />
From the Internet Services page you<br />
can start an automatic check of your<br />
broadband connection. This can help<br />
identify where problems are occurring.<br />
To start the check, open your web browser and<br />
enter http://192.168.1.254 as the web address<br />
to load the router homepage.<br />
Click on Broadband Connection on the left menu.<br />
The link to the Checker is on the ‘Pick a task…’ list.<br />
Connection Check Results<br />
<strong>Your</strong> line connection is not in sync<br />
with the local exchange. Check your<br />
microfilters and telephone cables.<br />
No network connection detected<br />
on your DSL line. Check your<br />
microfilters and cables. Try restarting<br />
your router.<br />
Authentication has failed. Enter your<br />
router settings and type your broadband<br />
username and password in<br />
Traffic to our gateway is failing.<br />
Check your NAT settings and firewall.<br />
DNS traffic is failing. Check your<br />
NAT settings and firewall.<br />
6<br />
Status Lights<br />
Power State<br />
Off <strong>Router</strong> not powered, check power cable and power<br />
socket.<br />
Blinking Green <strong>Router</strong> is starting up, should stop blinking after a<br />
short time.<br />
Blinking Orange<br />
<strong>Router</strong> is updating its firmware, wait till router<br />
restarts.<br />
Red System error, restart the router.<br />
Broadband State<br />
Off No DSL cable connected/ Microfilter or phone line<br />
problem.<br />
Blinking<br />
Green<br />
Internet State<br />
Off No broadband service connected.<br />
Solid Green Broadband service connected.<br />
Blinking<br />
Green<br />
<strong>Router</strong> is attempting to connect to local telephone<br />
exchange<br />
Solid Green <strong>Router</strong> broadband connection is OK.<br />
Attempting to connect to broadband service.<br />
Solid Red Connection to broadband failed.<br />
Recheck username and password.<br />
Ethernet / Wireless State<br />
Off No device connected.<br />
Solid Green Device connected.<br />
Item code: 046918<br />
Flashing Green Device sending / receiving data.<br />
Resetting your router<br />
If you’re having problems with your router, you can<br />
return everything to the default settings by using<br />
the reset button.<br />
Make sure you have note of your broadband<br />
username and password before you start<br />
1) Check the router is switched on (power light<br />
green).<br />
2) Use a paperclip, pen or pointed object to press<br />
into the reset pin hole on the back of the router.<br />
3) Keep the button pressed in for at least 7 seconds.<br />
When the powerlight goes red, release the<br />
button and wait until the power light turns<br />
green again.<br />
4) You now need to apply your settings again.<br />
Just follow this guide again from the beginning.<br />
Introduction<br />
Hello, thanks for choosing our wireless router. With<br />
this guide we’ll take you through the setup, don’t<br />
let all the wires intimidate you, putting it together<br />
is a piece of cake.<br />
If at any time you do get stuck, there’s lots more<br />
help on our website — http://support.plus.net<br />
<strong>Your</strong> Starter Pack contains:<br />
You’ll also find:<br />
A quick install guide and a sticker showing your<br />
Wireless Security Keys.<br />
Before you start<br />
Has your service gone live?<br />
Hold off using this guide until your broadband<br />
service is ready to use. We send you an email<br />
when it happens.<br />
Got your broadband username and<br />
password?<br />
You’ll need them to get connected. It’s in the<br />
email we sent after you signed up, it looks like<br />
this:<br />
Service Broadband username format<br />
<strong>Plusnet</strong> username@plusdsl.net<br />
Madasafish username@madasafish.com<br />
Force9 username@f9.co.uk<br />
Free-Online username@freeonline.net<br />
3<br />
Fitting <strong>Your</strong> Microfilters<br />
Item code: 046918<br />
1) Plug a microfilter into your<br />
telephone socket. If you had<br />
to unplug something, you can<br />
plug it back into the “Phone”<br />
socket of the<br />
microfilter. It’s best to leave it<br />
out until you’ve got<br />
everything working though.<br />
Microfilters look small and<br />
unimportant but they’re what<br />
keep your phone and Internet<br />
services from interfering with each other.<br />
Follow these golden rules to keep your<br />
broadband fast and reliable.<br />
* Put a microfilter on all the telephone extensions<br />
that have something plugged into them.<br />
* Avoid using old extension cables, the less internal<br />
wiring involved the better.<br />
* Don’t plug one microfilter into the socket of<br />
another microfilter.<br />
2) Plug the Power Adapter into Power socket of the<br />
router then plug the other end of the Adapter into<br />
the nearest mains power socket.<br />
3) Plug one end of the grey broadband cable into<br />
the DSL socket on the back of the router, then plug<br />
the other end into the microfilter (attached to your<br />
phone line in step 1). The microfilter socket is also<br />
marked DSL.<br />
4) Ensure that the power button, on the back of<br />
the Speedtouch router is switched on and<br />
watch the lights on the front flash on.<br />
5) Wait till the power light stops flashing and turns<br />
green. The Broadband (broadband status) light will<br />
flash.<br />
Wait until it stops flashing before proceeding.<br />
If the Broadband light doesn’t stop flashing, read<br />
the troubleshooting section found at the end of this<br />
guide before continuing.<br />
6) If the Broadband light is on, and is not flashing,<br />
your broadband service has been detected. You can<br />
now connect your computer to the router. You can<br />
connect using either Wireless or one of the four<br />
Ethernet sockets (using the yellow cable).
Connecting your <strong>Router</strong> Connecting to the Internet<br />
With an Ethernet cable<br />
Follow these steps to use the network cable to<br />
connect the router to your computer. Go to the<br />
next part entitled ‘With Wireless’ If you want to<br />
use your computers wireless features instead.<br />
1) Plug the Ethernet cable into any of the 4<br />
available Ethernet ports on the router.<br />
2) Plug the other end of the Ethernet cable into<br />
your computer’s Ethernet port.<br />
An Ethernet status light on the front of the router<br />
will now light up.<br />
3) Jump to the section called Connecting to the<br />
Internet.<br />
With Wireless networking<br />
Follow these steps to connect using wireless. <strong>Your</strong><br />
computer will need to be equipped with a wireless<br />
adapter.<br />
1) Make sure your computer’s wireless adapter<br />
card is installed and working OK.<br />
2) Use your wireless adapter’s connection utility,<br />
or, if you are using Windows, click the Start Button,<br />
go to My Network Places, and click Connect to a<br />
network.<br />
3) <strong>Your</strong> network will show up as the SSID listed on<br />
the bottom of the router. Click on your network so<br />
it’s highlighted and click Connect.<br />
4) A window will open, asking you to type in the<br />
network security key or pass phrase.<br />
Enter the WPA-PSK key shown on the bottom of<br />
the router and click Connect.<br />
Click Connect and move onto the next section.<br />
4<br />
2) The router setup screen will appear.<br />
3) Click <strong>Thomson</strong> Gateway on the menu.<br />
Item code: 046918<br />
1) Open up a web browser and you’ll see the router<br />
welcome page. Click on Set up my <strong>Thomson</strong><br />
Gateway and move to step 5 (see top of page 3)<br />
of this setup guide.<br />
If you are not redirected or you see a page cannot<br />
be displayed error type http://192.168.1.254<br />
into your browser’s address line and click return.<br />
4) Next, Click Set <strong>Up</strong> from the ‘Pick a task…’ list.<br />
5) The Easy Setup wizard will open in a new<br />
browser window. Click on Next.<br />
6) Make sure that Data (Default) is selected in<br />
the top box, then click Next.<br />
7) On the <strong>Router</strong> Internet Connection screen,<br />
make sure that VPI/VCI is set to 0.38 and that<br />
Connection Type is set to PPPoA (UK Default).<br />
Enter your Broadband Username and Password<br />
in the final two boxes and click Next. <strong>Your</strong> username<br />
will look like this: (see the box at the top of<br />
the next column)<br />
5<br />
Service Broadband username format<br />
<strong>Plusnet</strong> username@plusdsl.net<br />
Madasafish username@madasafish.com<br />
Force9 username@f9.co.uk<br />
Free-Online username@freeonline.net<br />
Item code: 046918<br />
8) Now choose the level of wireless security you<br />
wish to use. Leave this as WPA-PSK, as it’s the<br />
most secure method. Click Next.<br />
9) Next choose a username and password, this is to<br />
stop unauthorised access to your router settings.<br />
You should change these to something that’s easy to<br />
remember as you’ll need to enter them every time<br />
you want to check or change your router settings.<br />
When you’ve made your choice click Next.<br />
If you don’t change the username in step 9, it’ll be<br />
set to: Administrator (note the uppercase A).<br />
The password will be the serial number of your<br />
router. You’ll find the serial number on the bottom<br />
of the router, it looks like this:<br />
CP123456789 (12)<br />
Ignore the part in brackets, the part you need is:<br />
CP123456789 - note the uppercase CP.<br />
10) Finally you’ll see a summary page, make sure<br />
everything is correct and press Start. The router will<br />
restart, and ask you for login details.<br />
These are the details you chose in step 9.<br />
Enter these and press OK. When the wizard finishes<br />
you’ll see a confirmation screen, click Finish.<br />
That’s it! You’re now connected to broadband—happy<br />
surfing!


