Motorola V3 RAZR Disassembly Tutorial 1 - Broadband Reports
Motorola V3 RAZR Disassembly Tutorial 1 - Broadband Reports
Motorola V3 RAZR Disassembly Tutorial 1 - Broadband Reports

You also want an ePaper? Increase the reach of your titles
YUMPU automatically turns print PDFs into web optimized ePapers that Google loves.
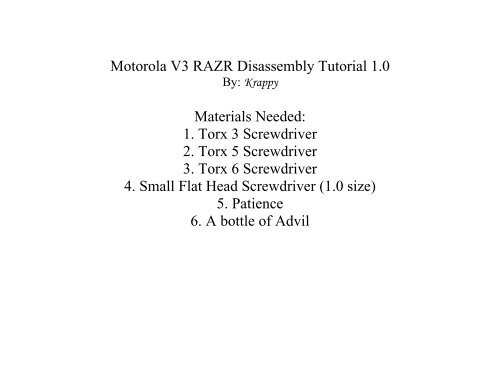
<strong>Motorola</strong> <strong>V3</strong> <strong>RAZR</strong> <strong>Disassembly</strong> <strong>Tutorial</strong> 1.0<br />
By: Krappy<br />
Materials Needed:<br />
1. Torx 3 Screwdriver<br />
2. Torx 5 Screwdriver<br />
3. Torx 6 Screwdriver<br />
4. Small Flat Head Screwdriver (1.0 size)<br />
5. Patience<br />
6. A bottle of Advil
1. Start by removing the “M” logo where the<br />
earpiece is. Simply slip a small flat head<br />
where you see the small hole underneath<br />
the logo and lift it up. (Simply a sticker.)<br />
2. Now to the inside where the main LCD<br />
screen is. There are 4 rubber stoppers that<br />
cover up the 4 screws that hold the front<br />
plate to the phone. (as shown) Remove<br />
these stoppers.
3. When all 4 screws have been revealed take<br />
a Torx 5 and unscrew these 4 screws.<br />
4. Now flip the phone closed and find a small<br />
whole on the side of the phone near the<br />
earpiece. (As pictured) Stick the flat head<br />
screw driver into this small and lift the<br />
faceplate up, use your fingers to help pull it<br />
up, it is a little tight so you might need to<br />
use a little force, but be careful to not mess<br />
up anything.
5. Continue getting your faceplate off.<br />
6. When your faceplate if off, you will see the<br />
LCD assembly. Along with the buttons that<br />
control the volume, etc. Remove the<br />
buttons and keep them in a safe place<br />
where you won’t lose them.
7. Now you disconnect the 2 cables that<br />
connect to the screen, one if for the camera<br />
and the other connects it to the main board.<br />
By simply lifting the silver cable up and<br />
away from the LCD, and the camera you<br />
will need to left up the brown bracket then<br />
take the cable out.<br />
8. Now you will remove the LCD, 1 st off you<br />
will need to move the side buttons (actual<br />
buttons) away from the housing, you will<br />
1 st need to get a flat head and slide then<br />
under the button and lift it up. You will<br />
need to do a total of 4 buttons. Now on you<br />
will need to lift up the earpiece and back up<br />
battery. Do the same thing you did with the<br />
buttons, slide a flat head under then and lift<br />
it up
9. Now you are ready to remove the LCD just<br />
lift it up and away from the housing. Put<br />
this aside where it can’t be damaged or<br />
scratched.<br />
10. Now you will need to remove the 2 hinges that<br />
hold the top of the phone to the bottom. You will<br />
need to 1 st unscrew a screw where the battery is<br />
towards the back of the phone. You will need a<br />
Torx 3 screwdriver. Now you will remove one of<br />
the two hinges and to do that you must remove<br />
that screw then take a flat head and the hinge that<br />
has the whole so you can loop something in it,<br />
slide the flat head into the hole and gently pull it<br />
outward. Then on the other hinge you have to<br />
look on the inside where the LCD silver<br />
connector was you will see a chrome part, take<br />
the flat head and push it outward, and it will pop<br />
out.
11. Now remove the upper part of the housing<br />
from the bottom. By simply lifting it up on<br />
the left side where the silver film cable is.<br />
12. When the top half of the phone is removed<br />
look to the side of one of the hinges you<br />
will see a white stub, get some tweezers<br />
and pull this out, it is the flipping<br />
mechanism helps with flipping the phone.
13.Now that the top part of the <strong>V3</strong> is gone,<br />
down to the bottom part. 1 st you can start<br />
off with taking off the 2 Torx6 screws, and<br />
removing the main board. To remove the<br />
main board you unscrew the 2 Torx6<br />
screws and you unclip some clips that hold<br />
that back piece on. You gently pull it away<br />
and when you take it off there is a cable<br />
connecting to the main board, disconnect<br />
this cable.<br />
14. Now to take off the internal antenna and remove the<br />
main board away from the back piece. 1 st you have to<br />
remove the 2 rubber stoppers that are covering up 2 of<br />
the clips. Then around the outside of the antenna there<br />
are clips that hold it in place, use your flat head and<br />
unhook the antenna from the back plate. Once the<br />
antenna is removed take off the speaker, and the main<br />
board.
15.Now to remove the keypad from the last<br />
part. There are 6 clips that hold it in place 4<br />
of then are underneath the white sticker<br />
where your battery goes, and the other 2 are<br />
visible. You will have to use your flat head<br />
to pry up the clip and pull it out from the<br />
other side.<br />
16.Now you will take off the antenna cover.<br />
To do that you will remove 4 Torx5 screws<br />
and the 2 pieces of the antenna cover and<br />
Mic whole come off.
17. Last of all I forgot to take pictures of this<br />
part but you remove the EL panel with the<br />
keypad on it. I’ll let you figure for yourself.<br />
I’ve walked you through most of it, time for<br />
you to challenge yourself.<br />
18.You are finally done here how everything<br />
should look.
JUST A REMINDER IF ANYONE IS CHANING THEIR HOUSING REMEMBER TO TAKE<br />
THESE SMALL PIECES OFF THEIR OLD ONE.<br />
ENJOY. PLEASE PM OR EMAIL ME ANY MISTAKES I HAD MADE OR ANYTHING I LEFT<br />
OUT.<br />
EMAIL: KRAPPY@GMAIL.COM<br />
HOFO: KRAPPY