
Create successful ePaper yourself
Turn your PDF publications into a flip-book with our unique Google optimized e-Paper software.
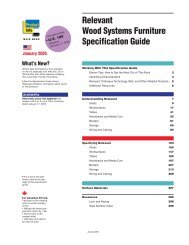
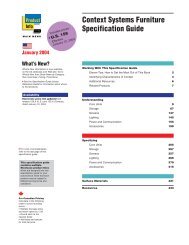
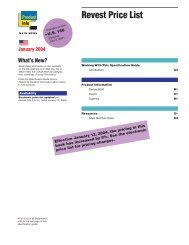
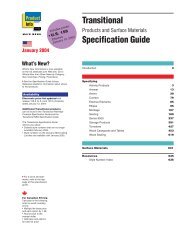
Product Info CD<br />
Product<br />
Info<br />
MAIN MENU<br />
New<br />
cSix Reasons why Digital Spec <strong>Guide</strong>s Make Sense<br />
cWhat is Adobe Acrobat Reader<br />
Copy the contents of this CD to your dealership server<br />
Electronic Swatches!<br />
for quick reference!<br />
b<br />
cInstalling Acrobat Reader Windows 3.1 and 95<br />
cOpening the Product Info CD Windows 3.1 and 95<br />
cAccessing the Product Info CD directly from the<br />
Program Manager in Windows 3.1<br />
User’s <strong>Guide</strong><br />
cInstalling Acrobat Reader/Opening the Product Info CD Macintosh and Unix<br />
cViewing the Document<br />
cBrowsing the Document<br />
cWhere am I The Status Bar<br />
cHow to Print<br />
cCapturing Graphics from Acrobat PDF Files Windows and Macintosh<br />
cMore Information<br />
Copyright 1998 Steelcase Inc., Grand Rapids MI 49501-1967<br />
Product details and data subject to change without notice.<br />
Printed in U.S.A.
SIX REASONS WHY DIGITAL<br />
SPEC GUIDES MAKE SENSE<br />
1 Easy Updates<br />
We send you updated disks that include the latest changes.<br />
No more shuffling loose update sheets.<br />
4 Color Interface<br />
Color makes information quicker to find, easier<br />
to understand.<br />
2 CD-ROM Format<br />
You can stick a whole bookshelf full of spec guides and price lists—<br />
over 5,300 pages—in your CD-ROM or your pocket.<br />
5 Cut and Paste<br />
Copy text and illustrations from the CD right into<br />
your proposal. You can’t damage the originals.<br />
3 Quick and Easy Interface<br />
Want to snap right to an item Just browsing<br />
Either way, you can find what you need in a hurry:<br />
• Jump directly between related topics.<br />
• Move around with Go Forward and Go Back buttons.<br />
• Use Find to scan for any word or phrase.<br />
• Need an outline to locate topics you’re interested in Bookmarks gives it to you.<br />
6 Printable<br />
Output any page on your laser printer.<br />
c More Information<br />
1
WHAT IS ADOBE ®<br />
ACROBAT ® READER<br />
INSTALLING ACROBAT READER<br />
Windows 3.1 and 95<br />
OPENING THE PRODUCT INFO CD<br />
Windows 3.1 and 95<br />
Acrobat Reader allows you to<br />
read documents created with<br />
other Acrobat programs.<br />
These documents are called<br />
PDFs (Portable Document<br />
Formats) because they are<br />
easy to distribute and can be<br />
opened on virtually any<br />
platform.<br />
You can read the book exactly<br />
as it would appear in print,<br />
zoom in, move from page to<br />
page, copy text, and print<br />
entire pages. All you have to<br />
do is load Reader, free of<br />
charge, onto your Windows,<br />
Macintosh, or Unix computer<br />
system from the enclosed CD.<br />
This CD contains installation<br />
files for Acrobat Reader 3.0,<br />
the upgrade to Reader 2.1,<br />
for Windows, Macintosh, and<br />
Unix computers. The PDF<br />
files on this CD are compatible<br />
with both Reader 2.1<br />
and 3.0. Use either version to<br />
access these PDF files,<br />
though some of the functionality<br />
described is available<br />
only in Reader 3.0.<br />
SYSTEM REQUIREMENTS<br />
• 386-, 486-, or Pentium-based<br />
personal computer<br />
• Microsoft Windows 3.1,<br />
Windows 95 or greater, or<br />
Windows NT 3.5 or greater<br />
• 4 MB of RAM<br />
• 5 MB of hard disk space<br />
• CD-ROM drive<br />
Installation<br />
1 Choose Run from the File<br />
menu (Windows 3.1) or Start<br />
menu (Windows 95).<br />
2 Type: [your CD-ROM drive<br />
letter]:\_PDFPROG\WIN\<br />
READER\16BIT\SETUP.EXE<br />
(Windows 3.1), or<br />
[your CD-ROM drive<br />
letter]:\_PDFPROG\WIN\<br />
READER\32BIT\SETUP.EXE<br />
(Windows 95). Press Enter or<br />
click on the OK button.<br />
3 Follow the instructions on<br />
your screen. You’ll be asked<br />
to read and accept the terms<br />
of the electronic end-user<br />
license agreement.<br />
Note: An icon for the Product<br />
Info CD main menu will<br />
not appear automatically in<br />
the Acrobat Reader window<br />
in Program Manager. To<br />
create a window and icon<br />
for the Product Info CD,<br />
which will appear in Program<br />
Manager, see “Accessing<br />
the Product Info CD Directly<br />
from Program Manager in<br />
Windows 3.1” on page 4.<br />
4 After installation, return<br />
to Program Manager or<br />
File Manager (Windows 3.1)<br />
or My Computer on the<br />
desktop (Windows 95) to<br />
open the Product Info CD<br />
main menu.<br />
From Program Manager in<br />
Windows 3.1:<br />
1 Double-click on the Acrobat<br />
Reader icon to start Acrobat<br />
Reader.<br />
2 In Reader, choose Open<br />
under the File menu. Navigate<br />
to the PRODINFO.PDF file on<br />
the CD-ROM drive.<br />
3 Double-click on<br />
PRODINFO.PDF to open the<br />
main menu file.<br />
From File Manager in<br />
Windows 3.1:<br />
1 Click on your CD-ROM drive<br />
icon to display the contents of<br />
the Product Info CD.<br />
2 Double-click on the<br />
PRODINFO.PDF file to start<br />
Acrobat Reader and open the<br />
Product Info CD main menu.<br />
From My Computer in<br />
Windows 95:<br />
1 Double-click on<br />
PRODINFO.CD (your CD-<br />
ROM drive) to open the<br />
Product Info CD window.<br />
2 Double-click on the<br />
PRODINFO.PDF icon to start<br />
Acrobat Reader and open the<br />
Product Info CD main menu.<br />
2<br />
c More Information<br />
3
ACCESSING THE PRODUCT INFO CD DIRECTLY<br />
FROM THE PROGRAM MANAGER IN WINDOWS 3.1<br />
INSTALLING ACROBAT ® READER/OPENING THE PRODUCT INFO CD<br />
Macintosh and Unix<br />
At this time the Product Info<br />
CD does not automatically<br />
load its own window and icon<br />
in Program Manager. To<br />
access the Product Info CD<br />
main menu directly from<br />
Program Manager, make a<br />
program group and item<br />
for it:<br />
From Program Manager<br />
in Windows 3.1:<br />
1 Under File, choose New.<br />
2 Select New Program Group,<br />
and click on the OK button.<br />
3 In the Description field, type<br />
“Product Info CD” and click<br />
on the OK button. (Leave the<br />
Group File field blank.<br />
Windows will fill it in later.)<br />
4 With the Product Info CD<br />
window open, choose New<br />
under the File menu.<br />
5 Select New Program Item,<br />
and click the OK button.<br />
6 In the Description field, type<br />
“Product Info CD.” Leave the<br />
Command Line and Working<br />
Directory fields blank.<br />
Windows will fill them in later.<br />
7 Click on the Browse button.<br />
8 Under List files of type,<br />
select All Files (*.*).<br />
9 Under Drives, select your<br />
CD-ROM drive letter.<br />
10 Highlight PRODINFO.PDF and<br />
click on the OK button; click<br />
the next OK button.<br />
11 Windows will display the<br />
message: “The specified path<br />
points to a file that may not<br />
be available during later<br />
Windows sessions. Do you<br />
want to continue” Click on<br />
Yes. Windows is warning you<br />
that this program item will<br />
not be available unless the<br />
Product Info CD is in your<br />
CD-ROM drive.<br />
12 This program item may have<br />
a different icon than that for<br />
Acrobat Reader, since its path<br />
is not the C:\ drive. It will still<br />
open the Product Info CD<br />
main menu, as long as the<br />
Product Info CD is in your<br />
CD-ROM drive.<br />
This CD contains installation<br />
files for Acrobat Reader 3.0,<br />
the upgrade to Reader 2.1, for<br />
Windows, Macintosh, and<br />
Unix computers. The PDF<br />
files on this CD are compatible<br />
with both Reader 2.1<br />
and 3.0. Use either version to<br />
access these PDF files,<br />
though some of the functionality<br />
described is available<br />
only in Reader 3.0.<br />
MACINTOSH<br />
System Requirements<br />
• Macintosh computer with<br />
68020 or greater processor<br />
• System software version<br />
7.0 or greater<br />
• 6.5 MB of RAM<br />
• 5 MB of hard disk space<br />
• CD-ROM drive<br />
Installation<br />
1 To install Acrobat Reader 3.0<br />
on your hard drive, double<br />
click on the file icon called<br />
Install Acrobat Reader 3.0,<br />
inside the _PDFPROG\MAC\<br />
READER folders.<br />
2 Follow the instructions on<br />
your screen. You’ll be asked<br />
to read and accept the terms<br />
of the electronic end-user<br />
license agreement.<br />
3 After installation is complete,<br />
double-click on the Product<br />
Info icon in the Product Info<br />
CD window to open the PDF.<br />
UNIX<br />
Acrobat Reader is available<br />
for the Unix platform for<br />
Sun®, HP, Silicon Graphics®,<br />
or IBM RISC System/6000®<br />
workstations.<br />
To install Reader on your Unix<br />
system, follow the instructions<br />
in the INSTGUID.TXT<br />
file, located in the<br />
_PDFPROG\UNIX\READER<br />
directory. This guide also<br />
contains system requirements,<br />
system administration<br />
information, and troubleshooting<br />
information.<br />
4<br />
c More Information<br />
5
VIEWING THE DOCUMENT<br />
These tools control how you view the pages.<br />
Page Only<br />
Only the page you are reading<br />
appears on screen.<br />
Fit Visible<br />
This selection, under the View<br />
menu, makes the page a fullscreen<br />
display. The pull-down<br />
menu, toolbar, and status bar<br />
remain visible.<br />
Full Screen<br />
This selection, under the View<br />
menu, fills the screen with the<br />
page and hides the pull-down<br />
menu, toolbar, and status bar.<br />
To return to another view once<br />
your tool bar is hidden, press<br />
the Escape key.<br />
Acrobat Reader Help<br />
Additional information about<br />
Acrobat Reader is available from<br />
the Reader Online <strong>Guide</strong> under<br />
the pull-down Help menu.<br />
Fit Width to Window<br />
The page will fill the screen<br />
horizontally. If the page is too big<br />
to fit, the top will be visible and<br />
the bottom will extend beyond the<br />
lower edge of the screen. You can<br />
scroll to see portions of the page<br />
that are off your screen.<br />
Bookmarks and Page<br />
Bookmarks allows you to see<br />
an outline of the contents of the<br />
document. Bookmarks appears<br />
as a list in a panel next to the<br />
document page. Click on a topic<br />
in the Bookmarks list, and<br />
Acrobat Reader will take you<br />
directly to that topic. Choose<br />
Page Only to make Bookmarks<br />
disappear.<br />
Thumbnails and Page<br />
Thumbnails lets you see<br />
the format and layout of the<br />
pages in the document. These<br />
miniature page views appear<br />
in a panel next to the page<br />
you are viewing. Click on a<br />
thumbnail to go to that page.<br />
Choose Page Only to make<br />
Thumbnails disappear.<br />
Hand<br />
Grabs the page so that it can be<br />
scrolled up and down or across<br />
the screen. After clicking on the<br />
icon, hold down your mouse<br />
button and move the hand in<br />
the direction you want the page<br />
to scroll.<br />
Actual Size<br />
Displays the page at 100<br />
percent (actual size). If the page<br />
is too big to fit your screen, the<br />
top will be visible and the<br />
bottom will extend beyond the<br />
lower edge of the screen. You<br />
can scroll to see portions of the<br />
page that are off your screen.<br />
Fit Page to Window<br />
Displays the full page on screen.<br />
In most cases, the page will be<br />
reduced to fit. The reduction<br />
size is shown as a percentage in<br />
the status bar along the bottom<br />
of your screen.<br />
Acrobat Reader Help for<br />
Macintosh Users<br />
Macintosh users will find Help<br />
under the question-mark<br />
balloon.<br />
6 c More Information 7
BROWSING THE DOCUMENT<br />
These tools help you move from page to page.<br />
Select Graphics<br />
This selection, in the Tools<br />
menu, captures or highlights<br />
graphics so you can copy them<br />
to other documents.<br />
First Page<br />
Takes you to the first page of<br />
the document.<br />
Previous Page<br />
Goes back to the previous page<br />
in the numerical order of pages<br />
that make up the document. If<br />
you’re on page 15, selecting this<br />
icon will take you to page 14.<br />
Next Page<br />
Goes forward to the next page<br />
in the numerical sequence of the<br />
document. If you’re on page 15,<br />
selecting this icon will take you<br />
to page 16.<br />
Find<br />
Searches a document for part of<br />
a word, a complete word, or<br />
multiple words.<br />
Zoom In, Zoom Out<br />
Magnifies your page, giving you<br />
a closer view. Click on the area<br />
you want to see enlarged; each<br />
click will zoom in closer. Or,<br />
click and drag your mouse to<br />
define a rectangle that outlines<br />
the area you want to enlarge.<br />
To zoom out, hold down the<br />
Control key (Windows) or<br />
Option key (Macintosh) and<br />
click to reduce your page, giving<br />
you an overview. Each click will<br />
zoom out a little further.<br />
Select Text<br />
Allows you to highlight and<br />
capture text. Hold down the<br />
Control key (Windows) or<br />
Option key (Macintosh) and<br />
drag your mouse to define a<br />
rectangle that contains the text<br />
you want. While the text is<br />
highlighted, it can be copied and<br />
pasted into another document.<br />
Last Page<br />
Goes to the last page of the<br />
document.<br />
Go Back/Go Forward<br />
The Go Back and Go Forward<br />
icons will retrace the path you<br />
have taken through the<br />
document, taking you only to<br />
pages that you have already<br />
viewed, in the order in which<br />
you viewed them.<br />
Hypertext Links and Buttons<br />
Clicking on a word or phrase<br />
that is a hypertext link will<br />
take you to related information<br />
on another page in the<br />
document. Your cursor will<br />
turn into a pointing finger<br />
when it is over a hypertext<br />
link. In these Steelcase<br />
documents, many hypertext<br />
links are indicated by a red<br />
arrowhead. In other documents<br />
hypertext links are<br />
often a contrasting text color.<br />
To return to your place in the<br />
document, click on the<br />
Go Back icon.<br />
8<br />
c More Information<br />
9
WHERE AM I THE STATUS BAR<br />
Tools at bottom of screen monitor status of your document.<br />
HOW TO PRINT<br />
Magnification Box<br />
Shows the current magnification<br />
of the document. Click on<br />
this box to bring up the Zoom<br />
To pop-up menu, which allows<br />
you to choose an exact<br />
percentage of magnification.<br />
Page Size Box<br />
Shows the size of the current page<br />
in inches. Click on this box<br />
(Windows) or click and hold down<br />
the mouse button (Macintosh) to<br />
show the three page layout<br />
options: Single Page, Continuous,<br />
and Continuous Facing Pages.<br />
Scroll to Page<br />
Pop-Up Window<br />
Click, hold, and drag on the<br />
scroll bar button, and this<br />
pop-up window will tell you<br />
what page number you will go<br />
to if you release the mouse.<br />
Simply choose Print from the<br />
File menu, and print the<br />
pages you need.<br />
Window Splitter<br />
Slides to allow you to change<br />
the width of the document and<br />
the Bookmarks or Thumbnails.<br />
Page Number Box<br />
Displays current page number<br />
and the total number of pages in<br />
the document. An easy way to<br />
jump to a page when you know<br />
the page number is to click on<br />
the Page Number box. The Go<br />
To Page dialog box will pop up.<br />
Type in the page number that is<br />
your destination.<br />
10<br />
c More Information<br />
11
CAPTURING GRAPHICS FROM ACROBAT PDF FILES<br />
Windows and Macintosh<br />
MORE INFORMATION<br />
Capturing Graphics with<br />
the Select Graphics Tool in<br />
Acrobat Reader<br />
Built into Acrobat Reader<br />
is a tool for copying graphics<br />
into files created by other<br />
applications, such as a word<br />
processor.<br />
1Choose Select Graphics<br />
under the Tools menu. The<br />
cursor changes to the crosshair<br />
icon.<br />
2Drag a rectangle around the<br />
graphic to select it. When<br />
you release the mouse<br />
button, the selected graphic is<br />
highlighted. (To deselect the<br />
graphic and start over, click<br />
anywhere outside the selected<br />
graphic.)<br />
3Under Edit choose Copy to<br />
copy the selected graphic to<br />
the Clipboard. To view the<br />
graphic, choose Show<br />
Clipboard under the Window<br />
menu. The graphic is copied<br />
in the WMF (Windows) and<br />
PICT (Macintosh) formats.<br />
In UNIX the graphic is copied<br />
in the XPIXMAP format. With<br />
UNIX, the graphic is pasted in<br />
the primary selection.<br />
Capturing EPS files from an<br />
Acrobat PDF with Adobe<br />
Illustrator<br />
You can capture a graphic<br />
from a PDF file and save it in<br />
the EPS format using Adobe<br />
Illustrator.<br />
1In Acrobat Reader, identify<br />
the page that contains the<br />
illustrations you wish to<br />
capture as an EPS file.<br />
2Open Adobe Illustrator<br />
version 6.0 or later<br />
(Macintosh) or version 7.0 or<br />
later (Windows).<br />
3Under File choose Open.<br />
4Navigate to the _pdfdocs<br />
folder on the Product Info CD.<br />
Open the _pdfdocs folder and<br />
select the PDF file containing<br />
the graphics you want to<br />
capture. (It may take a few<br />
moments for Illustrator to<br />
open the PDF file.)<br />
5Illustrator will prompt you for<br />
the number of the page you<br />
want to open. Navigate to the<br />
page using the arrow buttons<br />
and click the OK button. Or<br />
click on the page number,<br />
1 of 100, for a dialog box in<br />
which you can enter the page<br />
number. Type in the page<br />
number, press Enter, and<br />
click the OK button.<br />
6Illustrator will open the page<br />
from the PDF file. Delete<br />
elements you do not want,<br />
and save the rest as an<br />
EPSfile.<br />
•Help is available in the Reader Online <strong>Guide</strong> (Acrobat Reader 3.0), or Acrobat Reader<br />
Help (Reader 2.1), under the pull-down Help menu in Acrobat Reader programs.<br />
(Macintosh users will find Help under the question-mark balloon.)<br />
•The electronic version of this instruction booklet, created as a PDF, is available on this<br />
CD for your convenience by clicking on About PDFs on the Product Info CD main menu<br />
screen, PRODINFO.PDF.<br />
•Updated versions of Reader are always available from the Adobe site on the World Wide<br />
Web. For updates and information, go to<br />
http://www.Adobe.com.<br />
Copyright 1998 Steelcase Inc., Grand Rapids MI 49501-1967<br />
Product details and data subject to change without notice.<br />
Printed in U.S.A.<br />
Acrobat ® Reader ©1987–1996 Adobe Systems Incorporated. All rights reserved.<br />
Adobe and Acrobat are registered trademarks of Adobe Systems Incorporated.<br />
Some portions copyrighted to and reprinted with permission from Adobe Systems Incorporated.<br />
12<br />
cMore Information