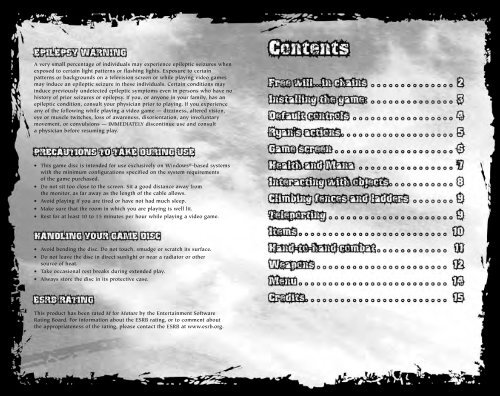
A very small percentage of individuals may experience epileptic ...
A very small percentage of individuals may experience epileptic ...
A very small percentage of individuals may experience epileptic ...
Create successful ePaper yourself
Turn your PDF publications into a flip-book with our unique Google optimized e-Paper software.
A <strong>very</strong> <strong>small</strong> <strong>percentage</strong> <strong>of</strong> <strong>individuals</strong> <strong>may</strong> <strong>experience</strong> <strong>epileptic</strong> seizures when<br />
exposed to certain light patterns or flashing lights. Exposure to certain<br />
patterns or backgrounds on a television screen or while playing video games<br />
<strong>may</strong> induce an <strong>epileptic</strong> seizure in these <strong>individuals</strong>. Certain conditions <strong>may</strong><br />
induce previously undetected <strong>epileptic</strong> symptoms even in persons who have no<br />
history <strong>of</strong> prior seizures or epilepsy. If you, or anyone in your family, has an<br />
<strong>epileptic</strong> condition, consult your physician prior to playing. If you <strong>experience</strong><br />
any <strong>of</strong> the following while playing a video game — dizziness, altered vision,<br />
eye or muscle twitches, loss <strong>of</strong> awareness, disorientation, any involuntary<br />
movement, or convulsions — IMMEDIATELY discontinue use and consult<br />
a physician before resuming play.<br />
• This game disc is intended for use exclusively on Windows®-based systems<br />
with the minimum configurations specified on the system requirements<br />
<strong>of</strong> the game purchased.<br />
• Do not sit too close to the screen. Sit a good distance away from<br />
the monitor, as far away as the length <strong>of</strong> the cable allows.<br />
• Avoid playing if you are tired or have not had much sleep.<br />
• Make sure that the room in which you are playing is well lit.<br />
• Rest for at least 10 to 15 minutes per hour while playing a video game.<br />
• Avoid bending the disc. Do not touch, smudge or scratch its surface.<br />
• Do not leave the disc in direct sunlight or near a radiator or other<br />
source <strong>of</strong> heat.<br />
• Take occasional rest breaks during extended play.<br />
• Always store the disc in its protective case.<br />
This product has been rated M for Mature by the Entertainment S<strong>of</strong>tware<br />
Rating Board. For information about the ESRB rating, or to comment about<br />
the appropriateness <strong>of</strong> the rating, please contact the ESRB at www.esrb.org.
In the Eternal War between Good and Evil…Hell Wants You.<br />
You are Ryan Lennox, a renegade angel recruited by Hell to restore<br />
the balance between Good and Evil.<br />
Etherlight, Heaven’s own secret agency, has eliminated most <strong>of</strong> Hell’s<br />
earthly agents and is preparing its final blow against its eternal rival.<br />
Armed with diabolic supernatural powers and military grade weaponry,<br />
enter a dangerous world <strong>of</strong> deception and betrayal, and unleash Hell<br />
on Earth!<br />
The president <strong>of</strong> EtherLight — the armed hands <strong>of</strong> Heaven on Earth —<br />
has created technology that can remove mankind’s free will.<br />
He intends to use it during the Millennium Eclipse, when Earth will be<br />
out <strong>of</strong> Heaven’s sight for a short period <strong>of</strong> time.<br />
The natural infernal enemy <strong>of</strong> EtherLight — the Abyss — must defend<br />
itself, but EtherLight has assassinated all its elite forces.<br />
Hell’s power is now seriously under threat. The only top agent who can<br />
help Abyss is you, Ryan Lennox — once fired by EtherLight for your<br />
unorthodox way <strong>of</strong> solving problems.<br />
During this battle, you will find out not only what EtherLight’s real aim is<br />
— but also the real reason behind Abyss’ decision to hire you.<br />
1. Make sure the system requirements shown on the game packaging match<br />
those <strong>of</strong> your machine. Place the Infernal DVD into the DVD drive <strong>of</strong> your<br />
PC. The disc will autorun and display the installation screen. (Note: If the<br />
installation program does not launch automatically, double-click the MY<br />
COMPUTER icon on your desktop, double-click the DVD drive icon,<br />
and finally, double-click install.exe.)<br />
2. Accept the license agreement and then click Install Game to begin<br />
the installation process. Follow the on-screen instructions to complete<br />
installation, including the installation <strong>of</strong> additional programs. You need<br />
these to run Infernal.<br />
3. After installation, a shortcut icon <strong>of</strong> Infernal will appear on your desktop.<br />
Double-click the icon to launch the game. (Note: If you have problems<br />
launching the game after installation, try restarting your PC.)<br />
To uninstall the game, click Start # Programs # Playlogic # Infernal #<br />
Uninstall Infernal. Removing the game also deletes all your saved games.<br />
NOTE: This game supports the Ageia physics card for additional visual<br />
and physics effects. For more information about Ageia and Ageia hardware,<br />
please visit the Ageia website: http://www.ageia.com/<br />
Audio<br />
Infernal supports Sound Blaster ® audio. Sound Blaster ® X-Fi sound cards blur<br />
the line between gaming and reality. To truly <strong>experience</strong> audio beyond your<br />
imagination in Infernal, you must have one <strong>of</strong> the Sound Blaster ® X-Fi series.<br />
So upgrade your PC audio to one <strong>of</strong> Sound Blaster ® X-Fi series for the most<br />
thrilling gaming audio ever. To learn more about Sound Blaster ® X-Fi sound<br />
cards, please visit http://www.soundblaster.com.<br />
J Adjust your game audio volume settings through the Options Audio menu.<br />
Video — Important Note Regarding Graphics and Having<br />
the Best Possible Experience<br />
Infernal uses some <strong>of</strong> the most advanced rendering techniques available<br />
today for special effects and to achieve real-time performance for a great<br />
game-playing <strong>experience</strong>. The game was largely developed and tested on<br />
NVIDIA ® GeForceTM FX, 6 Series, and 7 Series graphics cards and the intended<br />
<strong>experience</strong> can be more fully realized on NVIDIA GeForce 7 Series graphics<br />
hardware. On a GeForce 7 series card you will be able to turn on all<br />
<strong>of</strong> the NVIDIA special effect features at higher resolutions in the game.
Forward/Back<br />
MOVEMENT<br />
W/S<br />
Left/Right A/D<br />
Jump Spacebar<br />
Action E<br />
Sneak left Shift<br />
Look around mouse<br />
Attack<br />
COMBAT<br />
left mouse button<br />
Infernal attack right mouse button<br />
Reload weapon R<br />
Cease fire left Alt<br />
Change weapon middle mouse wheel or 1, 2, 3, 4, 5, 6<br />
Use item<br />
MISCELLANEOUS ACTIONS<br />
F<br />
Inventory left Ctrl<br />
Teleportation Q<br />
Infernal Vision Z<br />
Objective Tab<br />
Quick save F5<br />
Quick load F9<br />
Pause<br />
MENUS<br />
P<br />
In-game menu Esc<br />
Moving the camera<br />
Use the mouse to move the camera in the direction you want to look.<br />
Ryan will turn his head in this direction too.<br />
Moving Ryan<br />
Use the keyboard to move Ryan. Default keys are: W/S for forward/back,<br />
A to move left, D to move right and Spacebar is to jump. You can change<br />
the key configuration at any time during the game by displaying<br />
the in-game menu (press Esc).<br />
Sneak<br />
Ryan will walk slowly and silently whenever you press and hold the Sneak<br />
key (default left Shift). Use this mode to hide behind objects.<br />
Back against the wall/Looking around corners<br />
Ryan will put his back against an object or a wall when you press<br />
the Forward key (default W) when Ryan is standing in front <strong>of</strong> the<br />
object/wall. This is a useful technique for sliding along walls or objects<br />
or for looking around corners. Press the Back key (default S), when you<br />
want Ryan to move normally again.<br />
Moving/Leaning out/Shooting from cover<br />
While standing against the wall, Ryan can move left/right (default A/D)<br />
and lean out from behind a corner. In addition, he will lean out above<br />
an object when you press the Forward key (default W), but you can only<br />
perform this action when the object is <strong>small</strong>er than the Ryan. When Ryan<br />
is leaning out, press and hold the Cover Fire key (default left Alt) to shoot<br />
from behind cover.<br />
Quick roll<br />
Quickly double-click any movement key (W/S/A/D) to have Ryan make<br />
a quick roll in the key’s direction. After Ryan receives Infernal powers,<br />
he will be invisible while doing a quick roll.<br />
Quick load<br />
You can quick-load (default F9) and quick-save (default F5) the game.<br />
You can alternately manually load and save by pressing Esc to display<br />
the in-game menu.
Once you either select a new game and difficulty level, or load a save<br />
game, you can start playing the game. You will find many different<br />
weapons and gain new powers as you advance through the game.<br />
The screenshot below shows the basic elements <strong>of</strong> the game’s interface.<br />
2<br />
4<br />
1<br />
5<br />
1 Visor — Move the visor with your mouse. The visor allows you to target<br />
enemies and objects, or just look around. The visor changes appearance<br />
to indicate its different functionalities. (See page 8.)<br />
2 Health bar — Shows Ryan’s level <strong>of</strong> health. If the health bar drops<br />
to zero, the game ends and it’s time to try again. (See page 7.)<br />
3 Mana bar — Indicates the amount <strong>of</strong> Mana Ryan has. You use Mana<br />
to perform Infernal Attacks and Teleportation. (See page 7.)<br />
4 Selected Weapon — Shows your currently selected weapon. You can<br />
select other weapons (if available) by using the mouse wheel<br />
or by pressing 1, 2, 3, 4, 5, or 6. (See pages 12-13.)<br />
5 Selected Item — Shows your currently selected item. Use this item<br />
by pressing the Use Item key (default F). To switch to other available<br />
items, press the Inventory key (default left Ctrl) and then use the mouse<br />
wheel or press the Forward/Back keys (default W/S) to select different<br />
items. (See pages 10-11.)<br />
3<br />
You lose health when you have been shot, stand too close to an explosion,<br />
or are burned. When your health is used up, you die. The Health Bar is in<br />
the lower left corner <strong>of</strong> the screen. You can regain health in three ways:<br />
• Retrieve Health from defeated enemies, once you have received Infernal<br />
powers. To do this, stand close to the fallen foe, aim your visor at the<br />
defeated enemy and press the Action key (default E). (See page 8.)<br />
• Use Infernal Vision to find Health sources. Press the Infernal Vision key<br />
(default Z) to activate Infernal Vision. Then search for blue floating Health<br />
sources. Walk through the Health sources during an Infernal Vision episode<br />
to automatically pick up the Health source.<br />
• Find medicine to heal yourself.<br />
Mana is the essential devilish power that the Abyss boss, Mister Lucius Black,<br />
has given to Ryan. It is the source <strong>of</strong> Ryan’s power and the basic element <strong>of</strong> his<br />
strength. You need Mana to carry out Infernal Attacks with your weapons, for<br />
teleporting Ryan, and to detonate an explosive during Teleportation. The Mana<br />
Bar is in the lower right corner <strong>of</strong> the screen. To collect Mana:<br />
• Defeat enemies. Defeating an enemy automatically gives you Mana.<br />
• Find Mana sources by using Infernal Vision. Press the Infernal Vision key<br />
(default Z) to activate Infernal Vision. All red floating objects are sources<br />
<strong>of</strong> Mana. Walk through the Mana sources during an Infernal Vision episode<br />
and your Mana will increase.<br />
• Obtain Mana automatically by entering dark or devilish surroundings,<br />
such as graveyards and certain dungeons. Entering angelic environments,<br />
such as churches or heavenly light, decreases your Mana. Neutral auras<br />
don’t influence your Mana level. (To identify what kind <strong>of</strong> aura surrounds<br />
you, check the Yin-Yang indicator next to the Mana Bar. Red indicates<br />
a devilish aura; gray, a neutral aura; and white, an angelic aura.)<br />
Find Health and Mana boosters while using Infernal Vision.<br />
Finding three Health boosters increases your total Health. Collecting<br />
three Mana boosters increases your total Mana.
Use the Action key (default E) to interact with different objects<br />
in your surroundings. For example, you can:<br />
• Open doors or gates.<br />
• Use computers.<br />
• Obtain Health, weapons and ammo from defeated enemies.<br />
• Use turrets.<br />
Stand within range <strong>of</strong> an object you can interact with, and point the Visor<br />
at it. The default Visor will change to the Interaction Visor. Press the Action<br />
key (default E) to interact with the object.<br />
Default Visor (for aiming and shooting).<br />
Interaction Visor (for interacting with objects).<br />
To retrieve Health, weapons, ammo and items from a defeated enemy:<br />
1. Stand close to a defeated enemy and aim your Visor at the fallen<br />
character. The Visor will change to the Interaction Visor.<br />
2. Press and hold the Action key (default E) while you retrieve all Health<br />
from the enemy. You might also obtain ammo and other items.<br />
Some doors can only be opened by using a password.<br />
Use Infernal Vision (default Z) to find the secret codes. Once you find<br />
the code, put your Visor on.<br />
• Climb fences and ladders by standing in front <strong>of</strong> them and pressing<br />
the Forward key (default W).<br />
• While on a fence, climb up, down, left or right by pressing the standard<br />
direction keys (default W/S/A/D).<br />
• To move to the other side <strong>of</strong> a fence, press the Forward key (default W)<br />
when Ryan is on top <strong>of</strong> the fence. (This is only possible when the fence is<br />
not protected by barbed wire, lasers or other security measures.)<br />
• To jump <strong>of</strong>f a fence or ladder, press the Jump key (default Spacebar).<br />
After obtaining the power <strong>of</strong> Teleportation, Ryan can teleport to other<br />
locations within sight for a short time. This power enables Ryan to reach<br />
hard-to-get-to locations and switches, and to teleport behind enemies.<br />
• Press the Teleport key (default Q) to activate Teleportation mode. You have<br />
only a short time to select a teleport location (by moving your Visor).<br />
Press the Attack key (default left mouse button) to confirm<br />
the teleport destination.<br />
• Teleporting consumes Mana. If you don’t have enough Mana,<br />
you can’t teleport.<br />
• Ryan can obtain the power to teleport to several locations in a row<br />
(the Teleport Visor will show one, two or three red markers, indicating<br />
the total amount <strong>of</strong> teleports possible). Select locations by pressing<br />
the Attack key (default left mouse button).<br />
To start single or multiple teleports quickly (without waiting<br />
through the location selection time), press the Infernal Attack key<br />
(default right mouse button).
Ryan is equipped with many Abyss hi-technology devices. These useful<br />
gadgets are vital to the completion <strong>of</strong> your mission. You can ID your<br />
currently selected item by checking the icon in the lower right corner<br />
<strong>of</strong> the screen.<br />
• Press the Use Item key (default F) to use the currently selected item.<br />
• To choose another item, press the Inventory key (default left Ctrl) to<br />
view the Inventory and hold it down while moving the mouse wheel<br />
up/down. If your mouse is not equipped with a mouse wheel, press<br />
the Forward/Back keys (default W/S) to choose the item while holding<br />
down the Inventory key.<br />
Items you get or can find during the game are:<br />
Goggles<br />
Once you activate the goggles, move the mouse wheel<br />
up/down to zoom in/out. Press the Use Item key<br />
(default F) again to de-activate the goggles.<br />
Teleportation Tool<br />
Use this tool to teleport <strong>small</strong> objects and humans.<br />
After activating the tool, use the Visor to aim it<br />
at the object or human you want to teleport.<br />
If the Visor changes to the Interaction Visor,<br />
you can teleport the object/human.<br />
• Press and hold the Attack key (default left mouse button), then move<br />
the mouse to move the object/human. Move the mouse wheel<br />
to teleport the object/human closer to Ryan or further away.<br />
• Release the Attack key to stop teleporting the object/person.<br />
Press the Use Item key (default F) to turn <strong>of</strong>f the Teleportation tool.<br />
During Teleportation, press the Infernal Attack key (default right<br />
mouse button) to detonate an explosive. Remember: you need Mana<br />
to detonate explosives.<br />
Grenades<br />
Once you have Grenades, press the Use Item key<br />
(default F) to deploy them.<br />
• The time lapse between pressing the Use Item key and the detonation is<br />
always the same, so don’t hold onto the Grenade too long once you’ve<br />
activated it!<br />
• However, remember that if you throw the Grenade too quickly, enemies<br />
will have enough time find cover.<br />
Bombs<br />
There are two kinds <strong>of</strong> Bombs: Motion Detection Bombs and Remote-<br />
Controlled Bombs.<br />
• Press the Use Item key (default F) to place a Motion<br />
Detection Bombs. It will activate automatically<br />
after a few seconds; a red laser beam indicates<br />
when the Bomb is active. The Bomb explodes when<br />
someone comes within range.<br />
• A Remote-Controlled Bombs become active<br />
immediately, once you placed them. Press the Use Item<br />
key again to detonate it. Remember to take cover<br />
before you detonate it. You can only use one Remote-<br />
Controlled Bomb at a time.<br />
When you are close to an enemy, or if you don’t have any weapons or ammo<br />
available, you can fight using hand-to-hand combat.<br />
• Press the Attack key (default left mouse button) when standing close<br />
to an enemy.<br />
• You can also use Infernal Attack (default right mouse button)<br />
during hand-to-hand combat.
Press the Attack key (default left mouse button) to fire weapons.<br />
Move the Visor to aim at a target.<br />
•You can boost the firepower <strong>of</strong> any weapon you are carrying by using<br />
Infernal Attack (default right mouse button). Remember: Infernal<br />
Attacks cost Mana.<br />
•To select a different weapon (if available), use the mouse wheel or press<br />
1, 2, 3, 4, 5 or 6 (most keys give access to different types <strong>of</strong> weapons).<br />
•Find additional weapons or ammunition inside boxes or crates,<br />
or by searching the bodies <strong>of</strong> defeated enemies (Action key; default E).<br />
Shurikens (1 key)<br />
Also known as ninja stars, these are metal<br />
with a feather edge. Can cause moderate<br />
wounds when thrown, but have limited range.<br />
And <strong>of</strong> course –they don’t need reloading.<br />
You can carry up to 50 shurikens.<br />
Pistol (2 key)<br />
Basic gun with good accuracy, average recoil and<br />
ability to cause moderate wounds. One clip holds<br />
12 bullets. You can carry up to 10 clips.<br />
Double pistol (2 key)<br />
Similar to the normal pistol, with twice the firing<br />
speed. Consumes a double amount <strong>of</strong> bullets per shot<br />
and is less precise due to the double backfire.<br />
Laser pistol (2 key)<br />
Light gun causing minor damage, but having<br />
minimum recoil, its accuracy is good. The interval is<br />
shorter than that <strong>of</strong> a regular pistol. One clip holds<br />
10 bullets. You can carry up to 8 clips.<br />
Submachine gun (3 key)<br />
Allows you to shoot fast, but when firing continually,<br />
it has some recoil. This caliber does not cause a lot<br />
<strong>of</strong> harm. One clip holds 30 bullets. You can carry<br />
up to 5 clips.<br />
Machine gun (3 key)<br />
Powerful weapon able to cause serious wounds. Shoots<br />
rapidly with moderate recoil moderate. One clip holds<br />
30 bullets. You can carry up to 4 clips.<br />
Assault rifle (3 key)<br />
The most powerful <strong>of</strong> all Ryan’s machine guns.<br />
A <strong>very</strong> effective combat gun, but its recoil is extreme.<br />
One clip holds 30 bullets. You can carry up to 3 clips.<br />
Flamethrower (4 key)<br />
With a close range <strong>of</strong> about 7 meters (about 7.5 yards),<br />
this weapon throws out a stream <strong>of</strong> burning gasoline.<br />
Though limited in range, it is <strong>very</strong> dangerous: any enemy<br />
caught in the flames will find his time rapidly running out.<br />
One can contains 50 units <strong>of</strong> gasoline. You can carry<br />
up to 3 cans. Reloading takes a relatively long time.<br />
Welder gun (4 key)<br />
Uses a concentrated heat ray to kill the target with<br />
a 1.5 second hit. Uses high-pressure gas cans. You can<br />
carry up to 4 cans. Reloading takes about 3 seconds.<br />
Heavy beam gun (5 key)<br />
Uses a concentrated beam <strong>of</strong> energy. You can load the<br />
gun with up to 5 energy cores; 1 core shoots 20 energy<br />
beams. The time interval between shots is quite long,<br />
but a single shot is <strong>very</strong> powerful. This weapon has fairly<br />
good accuracy, and when an energy beam reaches<br />
a target, it explodes, harming enemies nearby.<br />
Reloading takes about 1 second.<br />
Rocket launcher (5 key)<br />
Very powerful weapon. One hit can kill an entire group<br />
<strong>of</strong> enemies, but after you launch a rocket, reloading<br />
takes several seconds. You can carry up to 5 rockets.<br />
Sniper rifle with the spotting scope (6 key)<br />
One correct shot from the sniper rifle results in heavy<br />
damage. It has stronger firepower than the assault rifle,<br />
but also a longer interval and reloading.
Navigate through the menus by<br />
selecting various options with your<br />
mouse. Press Esc to cancel or go return<br />
the previous screen. You can find the<br />
following options in the in-game menu:<br />
• New Game — Start a new game,<br />
and select your difficulty level.<br />
• Load/Save Game — Save games and load save games manually.<br />
You can also access quick-save and autosave games.<br />
• Options — Adjust game sound and video settings, key and mouse<br />
configurations, language and subtitles.<br />
If you <strong>experience</strong> slow frame-rates or odd graphical glitches,<br />
try other or reduced video settings. Make sure you’ve installed<br />
the latest video drivers for your video graphics card.<br />
Project Leads<br />
Bartosz Brzostek<br />
Grzegorz Miechowski<br />
Przemyslaw Marszal<br />
Game Design<br />
Grzegorz Miechowski<br />
Przemyslaw Marszal<br />
Level Design<br />
Grzegorz Miechowski<br />
Lukasz Chmielewski<br />
Lead Programming<br />
Bartosz Brzostek<br />
Programming<br />
Robert Majewski<br />
Krzyszt<strong>of</strong> Major<br />
Bartlomiej Walecki<br />
Art Direction<br />
Przemyslaw Marsza∏<br />
Senior Artists<br />
Aleksander Budzynski<br />
Piotr Lesniewicz<br />
Lukasz Zdunowski<br />
Executive Vice President<br />
Rogier W. Smit<br />
Chief Technical Officer<br />
& Production Director<br />
Dominique Morel<br />
Chief Marketing<br />
& Sales Officer/Vice President<br />
Stefan Layer<br />
Producer<br />
Martin Janse<br />
Sales Manager<br />
Russell Beadle<br />
METROPOLIS SOFTWARE TEAM<br />
Graphic Artists<br />
Piotr Czech<br />
Pawel Kwiatek<br />
Lukasz Nowak<br />
Marcin Sapiejewski<br />
Senior Character Artist<br />
& Character Design<br />
Dominik Milecki<br />
Character Artist<br />
Lukasz Nowak<br />
Character Animation<br />
Artur Bielenica<br />
Motion Capture Recordings at<br />
Audiomotion Studios Ltd.<br />
Cutscene Editing<br />
Jaroslaw Kapuscinski<br />
Adam Krynski<br />
Lukasz Nowak<br />
Music<br />
Adam Skorupa<br />
Additional Music<br />
Pawel Blaszczak<br />
PLAYLOGIC<br />
Marketing Manager<br />
Beco Mulderij<br />
PR Manager<br />
Jean-Paul Hardy<br />
Product Support Services Manager<br />
Claire McGowan<br />
Corporate Communications<br />
& IR Manager<br />
Esther Berger<br />
Level Designer<br />
Michal Drozdowski<br />
Storyboard Artist<br />
Jurjen Kraan<br />
Session Musicians<br />
Aleksander Grochocki – electric<br />
guitars, bass guitar, ideas<br />
Pawel Blaszczak – electric guitars<br />
Sound Design<br />
Adam Skorupa<br />
Voice Post-Production<br />
Adam Skorupa<br />
PR<br />
Pawel Miechowski<br />
Dialogues & Text Editing<br />
Agnieszka Murawska<br />
Pawel Miechowski<br />
Additional Graphics<br />
Marcin Kalemba<br />
Lukasz Siudzinski<br />
Testers<br />
Elzbieta Pustul<br />
Maciej Stepnikowski<br />
Lukasz Chotnicki<br />
Office Manager<br />
Anna Chmielewska<br />
Testing Team<br />
RealQ Labs<br />
Lucas van Muiswinkel<br />
Special Thanks<br />
Willem M. Smit, Chief Executive<br />
Officer and e<strong>very</strong>one at Playlogic<br />
International<br />
Public Relations Europe<br />
IMC InteractiveMediaConsulting<br />
GmbH<br />
Public Relations USA<br />
Kohnke Communications
Localization Agency<br />
Translocacell – Localization<br />
Services<br />
Project Managers<br />
Jan-Benjamin Dörries<br />
Friedrich Klemme<br />
CEO & President,<br />
Eidos North America<br />
Bill Gardner<br />
Executive Vice President<br />
<strong>of</strong> Sales & Marketing<br />
Robert Lindsey<br />
Vice President <strong>of</strong> Legal<br />
& Business Affairs<br />
James O’Riordan<br />
Vice President <strong>of</strong> Finance<br />
Malcolm Dunne<br />
Vice President <strong>of</strong> Human Resources<br />
Edie Dykstra<br />
Director <strong>of</strong> Marketing<br />
Matt Gorman<br />
Marketing Manager<br />
Sam Tehrani<br />
Director <strong>of</strong> Public Relations<br />
Michelle Seebach Curran<br />
Manager <strong>of</strong> Public Relations<br />
Tali Fischer<br />
Media Manager<br />
Micheal Tran<br />
Creative Director<br />
Karl Stewart<br />
Senior Graphic Designer<br />
James Song<br />
Junior Graphic Designer<br />
Connie Cheung<br />
VOICEOVERS<br />
Office & Translation Manager<br />
Silke Hermanni<br />
Business Development<br />
Martin Ruiz Torreblanca<br />
EIDOS U.S. PUBLISHING<br />
Web Producer<br />
Roderick van Gelder<br />
Web Designer<br />
John Lerma<br />
Web Developer<br />
Danny Jiang<br />
National Sales Manager<br />
Joe Morici<br />
Sales & Marketing Analyst<br />
Ilana Budanitsky<br />
Sales Representative<br />
Paul Katich<br />
Channel Marketing CoordinatorS<br />
Rafal Dudziec<br />
David Bushee<br />
Operations Manager<br />
Gregory Wu<br />
Director <strong>of</strong> North American<br />
Developer Relations<br />
Nick Goldsworthy<br />
Associate Project Manager<br />
Clayton Palma<br />
Product Specialist Supervisor<br />
Jeff Lowe<br />
Product Specialists<br />
Katie Bieringer<br />
Stephen Cavoretto<br />
Sound Engineer<br />
Martin Kühn<br />
U.S. Mastering<br />
& Submissions Supervisor<br />
Jordan Romaidis<br />
Mastering & Submissions Assistant<br />
Patrick Goodspeed<br />
Events Manager<br />
Annie Meltzer<br />
Senior Business<br />
Development Manager<br />
Tom Marx<br />
New Media Project Administrator<br />
Francesca Zulueta<br />
Customer Support Supervisor<br />
Sean McCloskey<br />
Customer Support Representative<br />
Richard Campbell<br />
Special Thanks<br />
Lars Wittkuhn<br />
Clint Waasted<br />
Manuela Tehrani<br />
Jefferson Dong<br />
David Bamberger<br />
Patrick Laciste<br />
John Hayes<br />
Tilo Ortega<br />
Stephanie Komure<br />
Hanshaw Ink & Image<br />
the awesome team<br />
at B-Family Records
CONTACTING TECH SUPPORT<br />
If you have a technical problem with the<br />
game, our Support Department is here to<br />
help. Our web site contains up-to-date<br />
information on the most common<br />
difficulties with our products; this<br />
information is the same as that used<br />
by our support agents. If youare unable<br />
to find the information you need on our<br />
web site, please feel free to contact us<br />
via email, fax, telephone or letter. (When<br />
contacting us via email or fax, please be<br />
sure to put the game title in the subject<br />
<strong>of</strong> your message.)<br />
TECH SUPPORT<br />
NOTE: OUR SUPPORT AGENTS DO NOT HAVE AND WILL NOT GIVE<br />
GAME HINTS STRATEGIES OR CODES<br />
ASSISTANCE VIA<br />
THE WORLD WIDE WEB<br />
The fastest way to answer most questions<br />
is by visiting our online support. You can<br />
find the latest support information at<br />
http://support.eidosinteractive.com/. Our<br />
support FAQ’s are available 24/7 for your<br />
convenience. These pages are updated<br />
frequently and have the same information<br />
that our support techs will use to answer<br />
your question if you call or email us. The<br />
answers to about 90% <strong>of</strong> the questions<br />
we are asked can be found there, so it<br />
really is worth the time to take a look!<br />
The second fastest way to get an answer<br />
to your question is to email us. (You will<br />
find our email submission forms at our<br />
web site.) We typically respond to email<br />
queries within 24-48 hours during the<br />
business week. Response times can be<br />
considerably longer over the weekend,<br />
holidays and immediately after a product<br />
release. It all depends on how many<br />
people we have working and how much<br />
email is coming in at any one time, but<br />
we do try really hard to get you the right<br />
answer as quickly as possible. Weekdays,<br />
excluding holidays, during the hours<br />
when the phones are open, we still give<br />
email questions our highest priority.<br />
Through this site you will also have<br />
access to our FTP (File Transfer Protocol)<br />
area where you can download patches<br />
and new enhancements as soon as they<br />
become available.<br />
ASSISTANCE VIA TELEPHONE<br />
OR FAX<br />
We are available to take your calls<br />
Monday through Friday, 9:00 a.m. –<br />
12 noon and 1 p.m – 5:00 p.m.,<br />
Pacific Time at (415) 615-6220 (voice)<br />
or (415) 547-1201 (fax). Our tech support<br />
department is closed on all major<br />
holidays.<br />
Note: You are responsible for all toll<br />
charges when calling.<br />
To ensure the quickest service you will<br />
need to be at your computer and have<br />
the following information at hand:<br />
• A complete listing <strong>of</strong> your computer’s<br />
hardware. (Contact your computer<br />
manufacturer if you are unsure.)<br />
• What version <strong>of</strong> Windows® you<br />
are using.<br />
• A copy <strong>of</strong> your DirectX Diagnostics<br />
report.<br />
1. Click Start.<br />
2. Click Run.<br />
3. Type dxdiag.<br />
4. Click OK.<br />
5. Click the Save Information button<br />
and save the file to your computer.<br />
6. When you call our Technical<br />
Support line, either have this file<br />
open or have a printed copy. If you<br />
send an email query you <strong>may</strong> attach<br />
the file to the email.<br />
• What error message(s), if any, you<br />
have had.<br />
• How the game is currently configured.<br />
Register online at<br />
www.eidosregistration.com<br />
EIDOS, INC., LICENSE & LIMITED WARRANTY<br />
Eidos, Inc., warrants to you, the original purchaser <strong>of</strong> this disc, that for a period <strong>of</strong> ninety (90) days from<br />
the date <strong>of</strong> your purchase, this disc shall be free from defects in materials and workmanship. If, at any time<br />
during the applicable ninety (90) day warranty period you determine that this limited warranty has been<br />
breached, Eidos, Inc., agrees, in its sole option, to repair or replace, free <strong>of</strong> charge, any such disc, provided<br />
the disc is returned postage-paid to the Eidos, Inc., Factory Service Center and a pro<strong>of</strong> <strong>of</strong> date <strong>of</strong> purchase<br />
is included. This limited warranty is not applicable to normal wear and tear and shall be void with respect<br />
to any defects that arise from disc abuse, unreasonable use, mistreatment or neglect. This disc is sold “as<br />
is” without any warranties <strong>of</strong> any kind, express or implied, including implied warranties <strong>of</strong> merchantability<br />
or fitness for a particular purpose, other than the limited warranty expressly stated above.<br />
No other claims arising out <strong>of</strong> your purchase and use <strong>of</strong> this disc shall be binding on or obligate Eidos, Inc.,<br />
in any manner. Eidos, Inc., will not be liable to you for any losses or damages incurred for any reason<br />
as a result <strong>of</strong> your use <strong>of</strong> this disc, including, but not limited to, any special, incidental, or consequential<br />
damages resulting from your possession, use or malfunction <strong>of</strong> this disc.<br />
This limited warranty states the entire obligation <strong>of</strong> Eidos, Inc., with respect to the purchase <strong>of</strong> your disc.<br />
If any part <strong>of</strong> this limited warranty is determined to be void or illegal, the remainder shall remain in full<br />
force and effect.<br />
For warranty support please contact our Customer Support department at (650) 421-7670 or email us<br />
at support@support.eidosinteractive.com or visit our website at: support.eidosinterative.com. Our staff are<br />
available Monday through Friday, 9:00 a.m. to 12:00 noon and 1:00 p.m. to 5:00 p.m. Pacific Time. You are<br />
responsible for all toll charges. Customer Support Representatives will not provide game hints, strategies<br />
or codes.<br />
PRODUCT RETURN PROCEDURE<br />
In the event our support agents determine that your game disc is defective, you will need to forward<br />
material directly to us. Please include a brief letter explaining what is enclosed and why you are sending it<br />
to us. The agent you speak with will give you an authorization number that must be included and you will<br />
need to include a daytime phone number so that we can contact you if necessary. Any materials not<br />
containing this authorization number will be returned to you unprocessed and unopened.<br />
Send your postage-paid package to the following address:<br />
Eidos, Inc.<br />
RMA# (state your authorization number here)<br />
1300 Seaport Boulevard<br />
Redwood City, CA 94063<br />
You are responsible for postage <strong>of</strong> your game to our service center.<br />
Infernal ©2007 Playlogic International N.V. All rights reserved. Developed by Metropolis. Published by Playlogic<br />
International N.V. Distributed by Eidos Interactive. Infernal and Playlogic are registered trademarks <strong>of</strong> Playlogic<br />
International N.V. Eidos & the Eidos logo are trademarks <strong>of</strong> Eidos Interactive Ltd. All other trademarks are the property<br />
<strong>of</strong> their respective owners. The NVIDIA logo and the “The way it’s meant to be played” logo are registered trademarks<br />
or trademarks <strong>of</strong> NVIDIA Corporation. ©2007 Creative Technology Ltd. The Creative logo is a registered trademark <strong>of</strong><br />
Creative Technology Ltd. in the United States and/or other countries. All brands or product names listed are trademarks<br />
or registered trademarks and are property <strong>of</strong> their respective holders. Alienware and the Alienware logo are registered<br />
trademarks and trademarks <strong>of</strong> Alienware Corporation. Certified on XPSTM 710 and M1710. XPS is a registered trademark<br />
<strong>of</strong> Dell Inc. S<strong>of</strong>tware platform logo ( and ©) IEMA 2006. The rating icon is a registered trademark <strong>of</strong> the Entertainment<br />
S<strong>of</strong>tware Association.


