Domestic Loop System (DLS) - Hearing Loop
Domestic Loop System (DLS) - Hearing Loop
Domestic Loop System (DLS) - Hearing Loop

Create successful ePaper yourself
Turn your PDF publications into a flip-book with our unique Google optimized e-Paper software.
• The cable should ideally be fitted<br />
at floor or ceiling level, never at<br />
head height. The diagram shows<br />
both options as a green and a red<br />
loop.<br />
• Cable can run over doorways to<br />
prevent trip hazards, see the red<br />
loop in the diagram.<br />
• Run the free end of the cable<br />
back to the DLS amplifier.<br />
• Connect the cable ends to the<br />
amplifier – see the end of this<br />
section.<br />
• The room loop is now installed.<br />
Dealing with excess cable<br />
If there is a large amount of excess<br />
cable (more than half of the reel) then<br />
it needs to be wound carefully or<br />
removed. Please note that the<br />
minimum cable length for the system<br />
is 8m.<br />
The excess wire can be cut<br />
away with scissors or wire<br />
cutters. The end of the cable<br />
needs to have the plastic<br />
sheath removed to expose the metal<br />
ends as shown:<br />
If you can not or do not want to<br />
remove the excess wire, coil the<br />
remaining wire as follows:<br />
• Both ends should be connected to<br />
the amplifier as instructed above.<br />
• Identify the point of the free cable<br />
that is the end of the useful loop –<br />
fix or hold this temporarily to the<br />
amplifier.<br />
• Pull out the remaining cable into a<br />
loop and pull it away from the<br />
amplifier so it forms two parallel<br />
10<br />
cables with a sharp bend in the<br />
end.<br />
• Coil the two parallel cables<br />
together, tie, tape or otherwise fix<br />
the coil in place.<br />
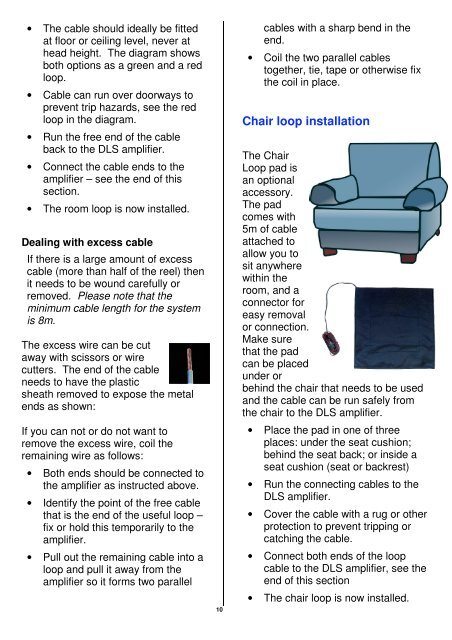
Chair loop installation<br />
The Chair<br />
<strong>Loop</strong> pad is<br />
an optional<br />
accessory.<br />
The pad<br />
comes with<br />
5m of cable<br />
attached to<br />
allow you to<br />
sit anywhere<br />
within the<br />
room, and a<br />
connector for<br />
easy removal<br />
or connection.<br />
Make sure<br />
that the pad<br />
can be placed<br />
under or<br />
behind the chair that needs to be used<br />
and the cable can be run safely from<br />
the chair to the DLS amplifier.<br />
• Place the pad in one of three<br />
places: under the seat cushion;<br />
behind the seat back; or inside a<br />
seat cushion (seat or backrest)<br />
• Run the connecting cables to the<br />
DLS amplifier.<br />
• Cover the cable with a rug or other<br />
protection to prevent tripping or<br />
catching the cable.<br />
• Connect both ends of the loop<br />
cable to the DLS amplifier, see the<br />
end of this section<br />
• The chair loop is now installed.