Domestic Loop System (DLS) - Hearing Loop
Domestic Loop System (DLS) - Hearing Loop
Domestic Loop System (DLS) - Hearing Loop

You also want an ePaper? Increase the reach of your titles
YUMPU automatically turns print PDFs into web optimized ePapers that Google loves.
Connecting the loop to the amplifier<br />
Once the loop has been installed the<br />
two cable ends must be connected to<br />
the loop connector on the DLS<br />
amplifier (shown below).<br />
First, terminate the cable ends if<br />
required so both cable ends have 5-<br />
15mm of exposed cable:<br />
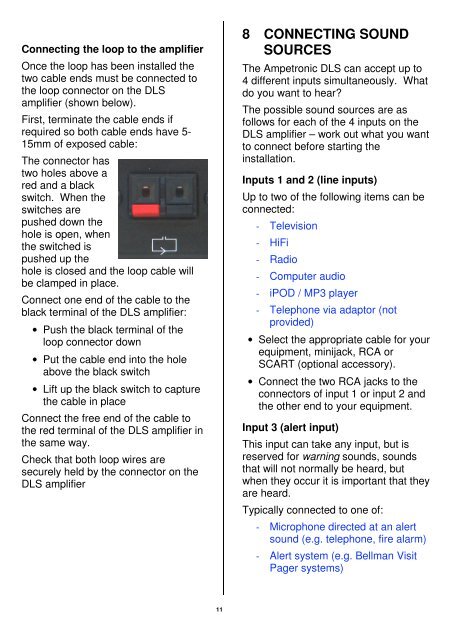
The connector has<br />
two holes above a<br />
red and a black<br />
switch. When the<br />
switches are<br />
pushed down the<br />
hole is open, when<br />
the switched is<br />
pushed up the<br />
hole is closed and the loop cable will<br />
be clamped in place.<br />
Connect one end of the cable to the<br />
black terminal of the DLS amplifier:<br />
• Push the black terminal of the<br />
loop connector down<br />
• Put the cable end into the hole<br />
above the black switch<br />
• Lift up the black switch to capture<br />
the cable in place<br />
Connect the free end of the cable to<br />
the red terminal of the DLS amplifier in<br />
the same way.<br />
Check that both loop wires are<br />
securely held by the connector on the<br />
DLS amplifier<br />
8 CONNECTING SOUND<br />
SOURCES<br />
The Ampetronic DLS can accept up to<br />
4 different inputs simultaneously. What<br />
do you want to hear<br />
The possible sound sources are as<br />
follows for each of the 4 inputs on the<br />
DLS amplifier – work out what you want<br />
to connect before starting the<br />
installation.<br />
Inputs 1 and 2 (line inputs)<br />
Up to two of the following items can be<br />
connected:<br />
- Television<br />
- HiFi<br />
- Radio<br />
- Computer audio<br />
- iPOD / MP3 player<br />
- Telephone via adaptor (not<br />
provided)<br />
• Select the appropriate cable for your<br />
equipment, minijack, RCA or<br />
SCART (optional accessory).<br />
• Connect the two RCA jacks to the<br />
connectors of input 1 or input 2 and<br />
the other end to your equipment.<br />
Input 3 (alert input)<br />
This input can take any input, but is<br />
reserved for warning sounds, sounds<br />
that will not normally be heard, but<br />
when they occur it is important that they<br />
are heard.<br />
Typically connected to one of:<br />
- Microphone directed at an alert<br />
sound (e.g. telephone, fire alarm)<br />
- Alert system (e.g. Bellman Visit<br />
Pager systems)<br />
11