
Create successful ePaper yourself
Turn your PDF publications into a flip-book with our unique Google optimized e-Paper software.
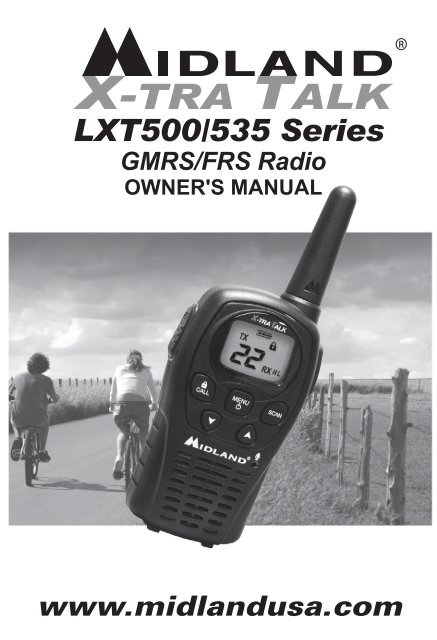
www.midlandusa.com
Welcome to the world of <strong>Midland</strong> electronics<br />
Congratulations on your purchase of a high quality MIDLAND product.<br />
Your 2-way radio represents state-of-the-art high-tech engineering.<br />
Designed for GMRS (General Mobile <strong>Radio</strong> Service) operation, this<br />
compact package is big on performance. It is a quality piece of electronic<br />
equipment, skillfully constructed with the finest components.<br />
The circuitry is all solid-state and mounted on a rugged printed circuit<br />
board. Your two-way radio is designed for reliable and trouble-free<br />
performance for years to come.<br />
Features<br />
--<br />
22 GMRS/FRS Channel<br />
--<br />
Call Alert<br />
--<br />
Scan Function<br />
--<br />
Roger Beep Tone<br />
--<br />
Silent Operation<br />
--<br />
Keypad Lock<br />
--<br />
Power HI/LO Settings<br />
--<br />
Auto Squelch<br />
--<br />
Speaker / Microphone Jacks<br />
--<br />
Battery Life Extender<br />
--<br />
Battery Low Indicator<br />
This device complies with Part 15 of the FCC Rules. Operation is<br />
subject to the following two conditions: (1) this device does not cause<br />
harmful interference, and (2) this radio must accept any interference<br />
that may cause undesired operation.<br />
To maintain compliance with FCC’s RF exposure guidelines, for bodyworn<br />
operation, this radio has been tested and meets the FCC RF<br />
exposure guidelines when used with <strong>Midland</strong> <strong>Radio</strong> Corp. accessories<br />
supplied or designated for this product. Use of other accessories may<br />
not ensure compliance with FCC RF exposure guidelines.
IMPORTANT NOTICE, FCC LICENSE REQUIRED FOR GMRS OPERATION<br />
(Only Applicable for GMRS <strong>Radio</strong> Use in the United States)<br />
The LXT500/535 Series operates on GMRS (General Mobile <strong>Radio</strong> Service)<br />
frequencies which require an FCC (Federal Communications Commission)<br />
license. You must be licensed prior to operating on channels 1 - 7 or 15 - 22,<br />
which comprise the GMRS channels of the LXT500/535 Series. Serious penalties<br />
could result from unlicensed use of GMRS channels, in violation of FCC rules, as<br />
stipulated in the Communications Acts Sections 501 and 502 (amended).<br />
You will be issued a call sign by the FCC which should be used for station identification<br />
when operating the radio on GMRS channels. You should also cooperate<br />
by engaging in permissible transmissions only, avoiding channel interference with<br />
other GMRS users, and being prudent with the length of your transmission time.<br />
To obtain a license or ask questions about the license application, contact the<br />
FCC at 1-888-CALL FCC or go to the FCC’s website:<br />
http://www.fcc.gov and request form 605.<br />
Exposure To <strong>Radio</strong> Frequency Energy<br />
Your <strong>Midland</strong> radio is designed to comply with the following national and<br />
international standards and guidelines regarding exposure of human beings to<br />
radio frequency electromagnetic energy:<br />
- United States Federal Communications Commission, Code of Federal<br />
Regulations: 47 CFR part 2 sub-part J<br />
- American National Standards Institute (ANSI)/Institute of Electrical & Electronic<br />
Engineers (IEEE) C95. 1-1992<br />
- Institute of Electrical and Electronic Engineers (IEEE) C95. 1-1999 Edition<br />
- National Council on Radiation Protection and Measurements (NCRP) of the<br />
United States, Report 86, 1986<br />
- International Commission on Non-lonizing Radiation Protection (ICNIRP) 1998<br />
To control your exposure and ensure compliance with the general population<br />
or uncontrolled environment exposure limits, transmit no more than 50% of<br />
the time. The radio generates measurable RF energy exposure only when<br />
transmitting.<br />
IMPORTANT: Changes or modifications to this unit not expressly approved by<br />
MIDLAND RADIO CORP. could void your right to operate this unit. Your radio is<br />
set up to transmit a regulated signal on an assigned frequency. It is against the<br />
law to alter or adjust the settings inside the COMMUNICATOR to exceed those<br />
limitations. Any adjustment to your radio must be made by qualified technicians.
LCD DISPLAY<br />
1<br />
2<br />
3<br />
CONTROLS<br />
7<br />
8<br />
9<br />
10<br />
11<br />
12<br />
13<br />
14<br />
15<br />
4<br />
5<br />
6<br />
1. LOW BATTERY ICON – Indicates the<br />
battery level is low.<br />
2. TRANSMIT (TX) ICON – Indicates<br />
radio is transmitting a signal.<br />
3. CHANNEL NUMBER – Changes from<br />
1~22 on GMRS/FRS band.<br />
4. KEY LOCK ICON – Indicates KEY<br />
LOCK mode is on.<br />
5. RECEIVE (RX) ICON – Indicates radio<br />
is receiving a transmission.<br />
6. TRANSMIT POWER LEVEL ICON –<br />
Indicates TX Power setting (H/L).<br />
7. PTT Button – Press and hold to transmit<br />
voice communication.<br />
8. ALL/LOCK Button – Press to send a<br />
CALL Alert signal. Press and hold to<br />
turn KEY LOCK on/off.<br />
9. MIC – Built-in microphone.<br />
10. SPEAKER – Built-in speaker.<br />
11. ANTENNA<br />
12. EXTERNAL SPEAKER/MIC/CHG.<br />
JACK<br />
13. POWER / MENU Button – Press and<br />
hold for at least 3 seconds to turn the<br />
radio on/off. Press momentarily to<br />
access Menu mode.<br />
14. SCAN Button – Press to enter SCAN<br />
mode.<br />
15. UP ▲ and DOWN ▼ Buttons – Make<br />
adjustments in MENU mode.<br />
BATTERY INSTALLATION<br />
Your LXT500/535 Series radio operates with either a NiMH battery pack<br />
or optional 4 “AAA” alkaline batteries. The belt clip should be removed<br />
to ease installation or removal of the batteries.<br />
To install the batteries:<br />
1. With the back of the radio facing you, remove the belt clip (see diagram<br />
on next page) for easy access, then remove the Battery Cover by pressing<br />
down on the top center and sliding it down from the radio.<br />
2. Insert 4 “AAA” batteries observing the polarity as shown. Installing<br />
the batteries incorrectly will prevent the unit from operating or may<br />
damage the unit.<br />
3. Return the Battery Cover by sliding it up on the radio. Replace the<br />
belt clip, making sure it locks into place.
BATTERY<br />
COMPARTMENT<br />
BELT CLIP<br />
LOCK TAB<br />
BATTERY<br />
COMPARTMENT<br />
COVER<br />
Press here and<br />
push down to open<br />
BELT CLIP<br />
LATCH<br />
INSTALLING THE BELT CLIP<br />
To install the BELT CLIP, slide the clip up into the slot on the back of the radio<br />
until the BELT CLIP LATCH clicks. To remove the BELT CLIP, press the<br />
LOCK TAB up, then gently pull the belt clip down toward the bottom of the radio.<br />
CHARGING THE BATTERY PACK<br />
Your LXT500/535 Series is equipped to use a rechargeable NiMH battery pack<br />
which can be recharged with the optional desktop charger (as described below).<br />
The LXT500/535 can also be charged by inserting the AC adapter into the radio<br />
charge jack. Initial charge time is 24 hours. Charge time is about 12 hours<br />
thereafter. For maximum battery life, we recommend charging the battery pack<br />
when the low battery icon comes on. Remove the radios from the charger when<br />
the charge time expires.<br />
To charge using a Desktop Charger:<br />
1. Place the rechargeable battery packs in the radios.<br />
2. Connect the AC adapter into an AC wall outlet.<br />
3. Insert the AC adapter plug (or DC Cigarette Lighter adapter if<br />
charging in vehicle) into the desktop charger jack.<br />
4. Place the units into the desktop charger slot and note that the LED<br />
indicator with RED color will light up, indicating charging function.
In order to ensure that the battery pack is fully charged, it is<br />
recommended that the battery pack be charged for at least 12<br />
hours with the radio turned OFF.<br />
!<br />
1. Only use our NiMH battery pack and AC adapter.<br />
2. Do not attempt to charge alkaline batteries or any batteries<br />
or battery packs other than the one indicated in the<br />
manual. This may cause leakage and damage to the radio.<br />
3. For long term storage of the radio, turn the radio OFF and<br />
remove the batteries from the radio.<br />
LOW BATTERY LEVEL INDICATOR<br />
Your LXT500/535 Series has a LOW BATTERY ICON which<br />
will only appear on the LCD display if the battery voltage level is low.<br />
At this point, the battery needs to be charged for at least 12 hrs.<br />
OPERATING YOUR RADIO<br />
POWER ON/OFF AND VOLUME<br />
Press the POWER/MENU button for at least 3 seconds to turn the<br />
radio on/off. During Power On, the radio will beep 3 times with<br />
different tones, the LCD will display all icons for 1 second and the LCD<br />
display will indicate the last channel selected.<br />
To increase/decrease the volume level, press the ▲\▼ buttons during<br />
RX or STANDBY mode.<br />
TRANSMITTING AND RECEIVING A CALL<br />
To communicate, all radios in your group must be set to the same<br />
channel.<br />
1. For maximum clarity, hold the radio 2 to 3 inches from your mouth.<br />
2. Press and hold the PTT button and speak in a normal voice into<br />
the microphone. The TX icon will appear continuously on the LCD<br />
display while transmitting.<br />
3. To receive a call, release the PTT button. The RX icon will appear<br />
on the display when your radio is receiving a transmission.
ABOUT RANGE<br />
Your LXT Series radios are designed to give you maximum range<br />
under optimum conditions.<br />
l Over water<br />
l Open rural areas without obstructions<br />
l Flat areas where you can see the other person<br />
To ensure you get maximum range:<br />
l Be sure to use fresh or fully charged batteries - low batteries will<br />
cause low power conditions.<br />
l Be sure you are on a GMRS channel - FRS channels are<br />
restricted by the FCC to low power.<br />
l Be sure to set your radio to use Hi power.<br />
LXT500/535 Series QUICK REFERENCE CHART<br />
MENU Channel Power Roger Beep<br />
Silent Operation<br />
1~22<br />
H/L<br />
On/Off<br />
On/Off<br />
SCAN<br />
Your LXT500/535 Series can scan all 22 channels for activity. To<br />
enter, quickly press the SCAN button. Repeat the same procedure<br />
to exit. Your radio will rapidly scan each of the 22 channels and<br />
stop on any active channel for 4 seconds before resuming scan.<br />
When you press the PTT button to transmit on an active channel,<br />
the scanning function will stop and remain on the active channel. To<br />
resume scanning, quickly press the SCAN button.
CALL ALERT<br />
Your LXT500/535 Series can transmit a call alert for a fixed length of<br />
time. To send a call alert, press the CALL button. The TX icon will<br />
appear while transmitting a call alert and a tone can be heard on the<br />
speaker for confirmation.<br />
KEYPAD LOCK<br />
To avoid accidentally changing the radio setting, press the LOCK<br />
button for 4 seconds. The KEY LOCK icon will appear on the display.<br />
PTT and CALL will still be active. Repeat the same procedure<br />
to unlock the keypad.<br />
CHANNEL SELECTION (GMRS/FRS BAND)<br />
Press the MENU button once, and then the ▲\▼ buttons to select<br />
one of the 22 GMRS/FRS channels. To confirm the selection, press<br />
the PTT button or press the MENU button again to move to the next<br />
feature setting.<br />
Note : To communicate between two LXT500/535 Series<br />
radios, all radios in your group must be set to the<br />
same channel.<br />
!TRANSMIT (TX) POWER LEVEL SELECTION<br />
Your LXT500/535 Series has 2 power level settings. To select the<br />
power level on channels 1~7 and 15~22, press the MENU button until<br />
a “Pr” icon appears blinking on the display. Then press the ▲\▼<br />
buttons to select TRANSMIT POWER LEVEL icon (H: Hi/L: Lo). To<br />
confirm, press the PTT button or press the MENU button again to<br />
move to the next feature setting.<br />
!<br />
Note : You cannot adjust the power setting on the FRS<br />
channels (8~14). They are set to Lo power per FCC<br />
regulations.
ROGER BEEP (end of transmission) TONE<br />
When the PTT button is released, the radio will beep to confirm to<br />
other users that your transmission has finished.<br />
To turn the ROGER BEEP tone on, press the MENU button until the<br />
display shows a “rb” icon while on the right of the “rb” display, an “oF”<br />
icon appears. Select “on” by pressing the ▲\▼ buttons and push<br />
the PTT key, or press the MENU button to move to the next feature<br />
setting.<br />
To turn the ROGER BEEP tone off, press the MENU button until the<br />
display shows a “rb” icon while on the right of the “rb” display, an “on”<br />
icon appears. Select “oF” by pressing the ▲\▼ buttons and push<br />
the PTT key, or press the MENU button to move to the next feature<br />
setting.<br />
SILENT OPERATION<br />
Your LXT500/535 Series has a SILENT OPERATION mode. In this<br />
mode, all “beeps” and “tones” are disabled.<br />
To turn the SILENT OPERATION mode on, press the MENU button<br />
until the display shows a “bP” icon while on the right of the “bP” display,<br />
an “on” icon appears. Select “oF” by pressing the ▲\▼ buttons<br />
and push the PTT key or the MENU button.<br />
To turn the SILENT OPERATION mode off, press the MENU button<br />
until the display shows a “bP” icon while on the right of the “bP” display,<br />
an “oF” icon appears. Select “on” by pressing the ▲\▼ buttons<br />
and push the PTT key or the MENU button.<br />
EXTERNAL SPEAKER/MICROPHONE JACK<br />
Your LXT500/535 Series can be used with an optional external<br />
speaker/microphone or headset, freeing your hands<br />
for other tasks. To use an optional speaker / microphone<br />
or headset:<br />
l Insert the plug(s) into the SPK/MIC jacks.<br />
l Place the earbud into your ear, and adjust the mic<br />
into your desired position.<br />
Note : You can charge a rechargeable NiMH<br />
battery pack thru the CHG Jack
TROUBLESHOOTING GUIDE<br />
PROBLEM<br />
SOLUTION<br />
No Power --<br />
Check battery installation and/or replace batteries<br />
Cannot Receive<br />
Messages<br />
<strong>Radio</strong> is not responding<br />
to button presses<br />
--<br />
Confirm the radios have the same channel settings.<br />
--<br />
Make sure that you are within range of the other<br />
transceivers.<br />
--<br />
Buildings and other structures may interfere with<br />
your communication.<br />
--<br />
Make sure key lock is not on (See Keypad Lock).<br />
--<br />
<strong>Radio</strong> might need to be reset. Turn radio off then<br />
on.<br />
Display is dim --<br />
Recharge or replace batteries.<br />
--<br />
Contacts on the bottom of the radio may require<br />
cleaning.<br />
--<br />
Ensure the outlet where the charger is plugged in is<br />
Charger not functioning<br />
functioning properly.<br />
--<br />
Check that the battery pack is installed in the radio<br />
properly.<br />
USE AND CARE<br />
1. Use a soft damp cloth to clean the radio<br />
2. Do not use alcohol or cleaning solutions to clean the radio.<br />
3. Do not immerse the radio in water.<br />
4. Dry the radio with a dry lint-free cloth should it get wet.<br />
5. Turn off the radio and remove the batteries during long-term<br />
storage.<br />
If you have a problem which you believe requires service,<br />
please call first and speak with a service technician at<br />
816-241-8500. Many problems can be remedied over the phone<br />
without returning the unit for service.
SPECIFICATIONS<br />
Channels<br />
22 GMRS/FRS Channels<br />
Operating Frequency UHF 462.5500 ~ 467.7125 MHz<br />
Power Source 4 AAA Alkaline or 4.8V Rechargeable NiMH<br />
battery pack<br />
GMRS/FRS FREQUENCY CHART (MHz)<br />
CH. No CH. Freq CH. No CH. Freq CH. No CH. Freq<br />
1 462.5625 9 467.5875 17 462.6000<br />
2 462.5875 10 467.6125 18 462.6250<br />
3 462.6125 11 467.6375 19 462.6500<br />
4 462.6375 12 467.6625 20 462.6750<br />
5 462.6625 13 467.6875 21 462.7000<br />
6 462.5875 14 467.7125 22 462.7250<br />
7 462.7125 15 462.5500<br />
8 467.5625 16 462.5750<br />
* Channels 8~14 are low-power FRS license free channels
LIMITED WARRANTY<br />
<strong>Midland</strong> <strong>Radio</strong> Corporation will repair or replace, at its option without<br />
charge, any <strong>Midland</strong> FRS/GMRS transceiver which fails due to a<br />
defect in material or workmanship within three years following the<br />
initial consumer purchase.<br />
This warranty does not apply to water damage, battery leak or abuse.<br />
Accessories have a 90 day warranty from date of purchase, including<br />
any antennas, chargers, or earphones.<br />
This warranty does not include the cost of labor for removal or<br />
re-installation of the product in a vehicle or other mounting.<br />
For Product Purchased in the USA:<br />
Performance of any obligation under this warranty may be obtained<br />
by returning the defective product, prepaid freight, along with proof<br />
of purchase to:<br />
<strong>Midland</strong> <strong>Radio</strong> Corporation<br />
Warranty Service Department<br />
5900 Parretta Drive<br />
Kansas City, MO 64120<br />
This warranty gives you specific legal rights, and you may also have<br />
other rights, which vary from state to state.<br />
Note: The above warranty applies only to merchandise purchased in<br />
the United States of America or any of the territories or possessions<br />
thereof, or from a U.S. Military exchange.<br />
For Product Purchased in Canada:<br />
Performance of any obligation under this warranty may be obtained<br />
by returning the warranted product, along with proof of purchase, to<br />
your dealer in Canada.<br />
This warranty gives you specified legal rights. Additional warranty<br />
rights may be provided by law in some areas.
ACCESSORIES<br />
Accessories can be purchased at www.midlandusa.com or by filling<br />
in the form on the following page and mailing it to the address on<br />
the form.<br />
AVP-1<br />
- 2 Over the Ear<br />
Mic. Headsets<br />
w/ PTT<br />
AVP-H4<br />
- 2 Ear Wrap<br />
Headsets<br />
- $19.99<br />
- $39.99<br />
AVP-H1<br />
- 1 Open<br />
Face Helmet<br />
Microphone Kit<br />
AVP-H5<br />
- 2 Behind the<br />
Head Headsets<br />
- $49.99<br />
- $39.99<br />
AVP-H2<br />
- 1 Closed<br />
Face Helmet<br />
Microphone Kit<br />
AVP-H7<br />
- 2 Mossy Oak<br />
Around the Ear<br />
Headsets with<br />
Boom Mic<br />
- $49.99<br />
- $39.99<br />
AVP-H3<br />
AVP-H8<br />
- 2 Surveillance<br />
Headsets<br />
- 1 Action Throat<br />
Mic with<br />
Acoustic Ear<br />
Tube<br />
- $39.99<br />
- $39.99
TACTICAL HEADSETS<br />
TH1<br />
- Earphone Mic<br />
with Boom<br />
- $39.99<br />
TH2<br />
- Tactical Action<br />
Boom Mic with<br />
Tactical PTT<br />
- $99.99<br />
TH3<br />
- Earphone Mic<br />
with PTT<br />
- $29.99<br />
TH4<br />
- Action Throat<br />
Mic with<br />
Tactical PTT<br />
and Pneumatic<br />
Earphone<br />
- $109.99<br />
AVP-6<br />
- 1 Dual Desk<br />
Charger<br />
- 2 Rechargeable<br />
Battery Packs<br />
- 1 AC Adapter<br />
- 1 DC Cigarette<br />
Lighter Adapter<br />
- $39.99
ACCESSORIES ORDER FORM<br />
Please send Money Order or fill in Visa/MasterCard information and<br />
mail to the address below. Please DO NOT send cash or checks.<br />
Make Money Order payable to <strong>Midland</strong> <strong>Radio</strong> Corporation.<br />
Name:<br />
Address:<br />
City: ___________________ State: _____Zip Code: <br />
Tel: ____________________ Email:<br />
CC#: ___________________Type: __________Exp.:<br />
Qty Item Price Total<br />
AVP-1 $19.99<br />
AVP-H1 $49.99<br />
AVP-H2 $49.99<br />
AVP-H3 $39.99<br />
AVP-H4 $39.99<br />
AVP-H5 $39.99<br />
AVP-H7 $39.99<br />
AVP-H8 $39.99<br />
AVP-6 39.99<br />
TH1 $39.99<br />
TH2 $99.99<br />
TH3 $29.99<br />
TH4 $109.99<br />
Sub-Total<br />
<br />
Tax (MO, FL, WA only) <br />
S & H $14.95<br />
(Applies to Domestic U.S. only.<br />
For Hawaii, Alaska, and Puerto<br />
Rico S&H will be $36.25 for 1lb<br />
and $64.25 for 2lbs or more).<br />
Mail To:<br />
<strong>Midland</strong> <strong>Radio</strong> Corporation<br />
Consumer Dept.<br />
5900 Parretta Drive<br />
Kansas City, MO 64120<br />
----------------<br />
Or Call 816.241.8500.<br />
----------------<br />
To order online go to<br />
www.midlandusa.com<br />
Total<br />
$
MIDLAND RADIO CORPORATION<br />
5900 Parretta Drive<br />
Kansas City, MO 64120<br />
Call 816.241.8500<br />
We’d love to hear from you! Let us know what you<br />
think of your new <strong>Midland</strong> product at<br />
or by visiting us at<br />
www.midlandusa.com<br />
Note: Features & Specifications are subject to change without<br />
notice. MIDLAND is not responsible for unintentional errors or<br />
omissions on its packaging.