MR HH325 VP - Cobra Electronics
MR HH325 VP - Cobra Electronics
MR HH325 VP - Cobra Electronics

You also want an ePaper? Increase the reach of your titles
YUMPU automatically turns print PDFs into web optimized ePapers that Google loves.
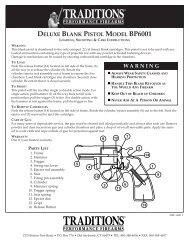
IntroductionOur Thanks to You andCustomer AssistanceOwner’s ManualOur Thanks to You•Thank you for purchasing a <strong>Cobra</strong>Marine ® VHF radio.Properly used, this <strong>Cobra</strong> ® product will give youmany years of reliable service.How Your <strong>Cobra</strong>Marine VHF Radio WorksThis radio is a battery-powered portable transceiver for use afloat. It gives youtwo-way vessel-to-vessel and vessel-to-shore station communications, primarilyfor safety and secondarily for navigation and operational purposes. With it, youcan call for help, get information from other boaters, talk to lock or bridge tenders,and make radiotelephone calls to anywhere in the world through a marine operator.Besides two-way communications, the radio can provide quick access to receiveall the NOAA (National Oceanographic and Atmospheric Administration) weatherchannels and alert you to weather emergencies with a tone on a weather channelyou can select for your area.Customer AssistanceCustomer Assistance•Should you encounter any problems with this product, or not understandits many features, please refer to this owner’s manual. If you require furtherassistance after reading this manual, <strong>Cobra</strong> <strong>Electronics</strong> offers the following customerassistance services:For Assistance in the U.S.A.Automated Help Desk English only.24 hours a day, 7 days a week 773-889-3087 (phone).Customer Assistance Operators English and Spanish.8:00 a.m. to 6:00 p.m. Central Time Mon. through Fri. (except holidays)773-889-3087 (phone).Questions English and Spanish.Faxes can be received at 773-622-2269 (fax).Technical Assistance English only.www.cobra.com (on-line: Frequently Asked Questions).English and Spanish. productinfo@cobra.com (e-mail).Printed in China Part No. 480-343-P Version BVHF MARINE RADIO<strong>MR</strong> <strong>HH325</strong> <strong>VP</strong>Nothing Comes Close to a <strong>Cobra</strong> ®EnglishFor Assistance Outside the U.S.A.Contact Your Local DealerA1 English©2007 <strong>Cobra</strong> <strong>Electronics</strong> Corporation6500 West Cortland StreetChicago, Illinois 60707 USAwww.cobra.com
IntroductionRadio Controlsand IndicatorsIntroductionBacklit LCD Screenand Product FeaturesAntennaBacklitLCDScreenChannel UpButtonPush toTalkButtonChannelDownButtonBacklight/Key LockButtonPowerLevel/WeatherButtonTri-WatchButtonSpeakerSpeaker/MicrophoneExternal CoverON/OFF/VolumeControlSquelchControlWristStrapConnectorBatteryInstantChannel16/9 ButtonSCANButtonBelt ClipEngagementCall/EnterButtonMemory/EscapeButtonMicrophoneBatteryClipBacklit LCD (Liquid Crystal Display) Screen•Transmit and Receive IconsLow/Medium/High Power IconsWeather IconFrequencyWeather Alert IconBand IconCall Tone IconMemory Channel IconActive ChannelNumbersMemory ChannelSimplex Operation IconTri-Watch IconBattery Power IconButton Lock IconScan IconKey Tone IconProduct FeaturesPower SettingsSelectable power settings produce1, 3 or 5 watts of output power for nearor distant calling.USA/International/Canada ChannelsAllows operation on any of the three (3)different channel maps established forthese areas.All NOAA Weather ChannelsInstant access to all National WeatherChannels, 24 hours a day.Submersible to JIS7 StandardsWaterproof to 3.3 ft (1 m) of water for 30minutes.Button/Key LockPrevents accidental setting changeswhen button lock is set.Channel Scan/Memory ScanUse to scan through unlimited channelsor memory locations to findconversations in progress.Roger Beep IconUIC Active Channel Map IconsInstant Channel 16/9Provides instant access to priorityChannel 16 and calling Channel 9.Tri-WatchUse to monitor three (3) channelsat once — Channel 16 and two (2)programmable channels.•NiMH (Nickel-Metal Hydride) BatterySealed battery pack provides extendedoperating time when compared to alkalinebatteries with no memory effect.Six (6) high-quality AA alkaline batteriesmay also be used for emergency backuppower — requires optional AA batterytray (P/N CM 110-011).120V/12V Charger IncludedUse to charge battery pack, at home, in acar or in a boat.Locking Desktop ChargerHolds the radio or battery in place whilecharging. Vertical or horizontal mounting.Call Tones (Selectable)10 selectable call tones.A2 EnglishA3 English
IntroductionProduct FeaturesProduct Features (continued)Emergency Weather AlertReceive NOAA alerts when threateningweather is nearby.Illuminated ButtonsAllows high visibility of all functionbuttons.•Speaker/Mic JackAllows connecting optional <strong>Cobra</strong> LapelSpeaker/Mic and other <strong>Cobra</strong>accessories.Unlimited Memory ChannelsAllows programming of unlimited VHFmemory channels.Signal Strength MeterShows the strength of incoming oroutgoing signals.Roger Beep Tone (Selectable)Confirmation tone indicates thecompletion of the user’s transmissionand signals to others it is clear to talk.On or Off selectable.Patented VibrAlert ®Provides a silent alert for incoming calls.Ideal for noisy or all-quiet environments.A4 English
Main IconsIntroductionTable of ContentsconsIconsconsSecondary IconsIntroductionOur Thanks to You . . . . . . . . . . . . . . . . . . . . . . . . . . . . . . . . . . . . . . . A1Customer Assistance . . . . . . . . . . . . . . . . . . . . . . . . . . . . . . . . . . . . . A1WarrantyAssistanceRadio Controls and Indicators . . . . . . . . . . . . . . . . . . . . . . . . . . . . . . A2Backlit LCD (Liquid Crystal Display) Screen . . . . . . . . . . . . . . . . . . . . A3Product Features . . . . . . . . . . . . . . . . . . . . . . . . . . . . . . . . . . . . . . . . A3Important Safety Customer Information . . . . . . . . . . . . . . . . . . . . . . . . . . . . . . . . 2InstallationAssistanceRecommendations for Marine Communication . . . . . . . . . . . . . . . . . . 5VHF Marine Radio ProtocolsFCC Licensing Information . . . . . . . . . . . . . . . . . . . . . . . . . . . . . . . . . . 6VHF Marine Radio Warranty Procedures . . . . . . . . . . . . . . . . . . . . . . . . . . . . . . . 8AssistanceVoice Notice Calling Caution . . . . . . . . . Warning . . . . . . . . . . . . . . . . . . . . . . . . . . . . . . . . . . . 10Radiotelephone Calls . . . . . . . . . . . . . . . . . . . . . . . . . . . . . . . . . . . . . 12Emergency Messages and Distress Procedure . . . . . . . . . . . . . . . . . . 13CustomerVHFAssistanceMarine Channel Assignments . . . . . . . . . . . . . . . . . . . . . . . . . . . 18WarrantyNOAA Assistance Weather Channels and Alert . . . . . . . . . . . . . . . . . . . . . . . . . . . 28InstallationIncluded in this Package . . . . . . . . . . . . . . . . . . . . . . . . . . . . . . . . . . . 30CustomerAntenna, Wrist Strap and Belt Clip . . . . . . . . . . . . . . . . . . . . . . . . . . . 31AssistanceCaution WarningBatteries and Charger . . . . . . . . . . . . . . . . . . . . . . . . . . . . . . . . . . . . . 32Operating Your RadioGetting Started . . . . . . . . . . . . . . . . . . . . . . . . . . . . . . . . . . . . . . . . . . 36Setup Mode Warranty Programming . . . . . . . . . . . . . . . . . . . . . . . . . . . . . . . . . .41AssistanceStandby/Receive Caution Warningand Transmit . . . . . . . . . . . . . . . . . . . . . . . . . . . . . . 47Advanced Operation . . . . . . . . . . . . . . . . . . . . . . . . . . . . . . . . . . . . . . 51Maintenance . . . . . . . . . . . . . . . . . . . . . . . . . . . . . . . . . . . . . . . . . . . . 59Troubleshooting Customer . . . . . . . . . . . . . . . . . . . . . . . . . . . . . . . . . . . . . . . . . 59AssistanceSpecifications . . . . . . . . . . . . . . . . . . . . . . . . . . . . . . . . . . . . . . . . . . . 60Warranty and TrademarkLimited 3-Year Warranty . . . . . . . . . . . . . . . . . . . . . . . . . . . . . . . . . . . 61Trademark Acknowledgement . . . . . . . . . . . . . . . . . . . . . . . . . . . . . . .61Caution WarningCustomer ServiceProduct Service . . . . . . . . . . . . . . . . . . . . . . . . . . . . . . . . . . . . . . . . . 62WarrantyAccessories . . . . . . . . . . . . . . . . . . . . . . . . . . . . . . . . . . . . . . . . . . . . . 63Intro Operation CustomerIntro Operation CustomerInstallationIntro Operation Customerdary Iconsdary IconsIntro Operation Customerdary IconsstomersistanceOperationstomersistanceInstallationNoticeNoticeInstallationWarrantyNoticeCustomerAssistanceInstallationCustomerAssistanceNothing Comes Close to a <strong>Cobra</strong> ®1
IntroductionImportant Safety InformationIntro Operation CustomerAssistanceWarrantyIntroductionImportant Safety Informationreon retionWarrantyCustomerAssistanceCustomerAssistanceWarningIntro Operation CustomerAssistanceNoticeCautionWarrantyImportant Safety InformationBefore installing and using your <strong>Cobra</strong>Marine VHF radio, please read theseSecondary Iconsgeneral precautions and warnings.CustomerInstallationWarning and Notice StatementsAssistanceTo make the Secondary most Icons of this radio, it must be installed and used properly.WarningInstallation•Please Warranty read the installation and operating instructions carefully before installing andusing the radio. Special attention must be paid to the WARNING and NOTICEstatements in this manual.e Caution WarningWARNINGStatements identify conditions that could result in personal injury or loss of life.NOTICEStatements identify conditions that could cause damage to the radioor other equipment.Safety Training InformationThis <strong>Cobra</strong>Marine ® radio is designed for, and classified as, “Occupational Use Only.”The radio must only be used in the course of employment by individuals aware ofboth the hazards and the ways to minimize those hazards. This radio is NOTintended for use in an uncontrolled environment by the “General Population.”This radio has been tested and complies with the FCC RF exposure limits for“Occupational Use Only.” This <strong>Cobra</strong>Marine VHF radio also complies with thefollowing guidelines and standards regarding RF energy and electromagneticenergy levels as well as evaluation of those levels for human exposure:■ FCC OET Bulletin 65 Edition 97-01 Supplement C, Evaluating Compliance withFCC Guidelines for Human Exposure to Radio Frequency ElectromagneticFields.■ American National Standards Institute (C95.1-1992), IEEE Standard for SafetyLevels with Respect to Human Exposure to Radio Frequency ElectromagneticFields, 3 kHz to 300 GHz.■ American National Standards Institute (C95.3-1992), IEEE RecommendedPractice for the Measurement of Potentially Hazardous ElectromagneticFields — RF and Microwave.NoticeCustomerAssistanceCautionWarningIntro Operation CustomerAssistanceNoticeCustomerAssistanceCautionWarrantyThe following WARNINGS and NOTICE information will make you aware of RFexposure hazards and how to assure you operate the radio within the FCC RFexposure limits established for the radio.InstallationWARNINGSYour radio generates electromagnetic RF (radio frequency) energy when it isSecondary Iconstransmitting. To ensure that you and those around you are not exposed toexcessive amounts of that energy, DO NOT touch the antenna when transmittingand KEEP yourself and all others on your vessel the required distance away fromthe antenna while transmitting. See page 31 in the antenna requirements sectionfor further information.WarningDO NOT operate the radio without a proper antenna or equivalent dummy loadattached. Doing so may expose you to excessive RF energy and will damage theradio.DO NOT transmit more than 50% of the time the radio is in use — 50% dutycycle. The radio is transmitting when the Talk button is pressed and the transmitinformation shows on the LCD screen.ALWAYS use only <strong>Cobra</strong> authorized accessories.DO NOT operate the radio in an explosive atmosphere, near blasting sites, or inany area where signs are posted prohibiting radio transmissions.NEVER connect the transceiver directly to AC power. It can be a fire hazard, maycause an electric shock and may damage the transceiver.NEVER mount the transceiver or microphone/speaker where they might interferewith operation of your vessel or cause injury.DO NOT allow children or anyone unfamiliar with proper procedures to operate theradio without supervision.Failure to observe any of these warnings may cause you to exceed FCC RFexposure limits or create other dangerous conditions.2 EnglishNothing Comes Close to a <strong>Cobra</strong> ®3
tionCustomerAssistanceIntroductionImportant Safety InformationIntroductionRecommendations forMarine Communicatione Caution WarningIntro Operation CustomerAssistanceWarrantyNOTICEYour radio is waterproof only when the antenna and batteries are properlyinstalled.CustomerInstallationAssistanceAVOID using or storing the radio at temperatures below -4˚F (-20˚C) or above140˚F (60˚C). Secondary IconsKEEP your radio at least 3 ft (0,9 m) away from your vessel’s magnetic navigationcompass.DO NOT attempt to service any internal parts yourself. Have any necessaryNotice Caution Warningservice performed by a qualified technician.This radio is supplied with an NiMH (Nickel-Metal Hydride) rechargeable batterypack.■ Use only the <strong>Cobra</strong> charger to recharge NiMH battery in the radio.■ Do not short circuit the battery pack.■ When replacing the battery, dispose of the old battery properly. The NiMHbattery may explode if disposed of in a fire.Intro Operation CustomerAssistanceInstallationNoticeCustomerAssistanceWarrantyRecommendations for Marine Communication•The frequencies your radio uses are set aside to enhance safety afloat and for vesselnavigation and operational messages over a range suitable for nearshore voyages. Ifthe 5 watt maximum output of your radio is not sufficient for the distances youtravel from the coast, consider installing a <strong>Cobra</strong>Marine fixed mount radio with up toSecondary Icons25 watts of output power. (Visit www.cobra.com or your local dealer for modelavailability.)If traveling far offshore, you should consider adding even more powerful radioequipment such as HF single side band or satellite radio for your vessel.CautionWarningThe U.S. Coast Guard does not endorse cellular telephones as substitutes for marineradios. They generally cannot communicate with rescue vessels and, if you make adistress call on a cellular telephone, only the party you call will be able to hear you.Additionally, cellular telephones may have limited coverage over water and can behard to locate. If you do not know where you are, the Coast Guard will have difficultyfinding you if you are using a cellular telephone.However, cellular telephones can have a place on board where cellular coverageis available — to allow social conversations and keep the marine frequenciesuncluttered and available for their intended uses.Changes or modifications to your radio MAY VOID its compliance with FCC (FederalCommunications Commission) rules and make it illegal to use.4 EnglishNothing Comes Close to a <strong>Cobra</strong> ®5
IntroductionFCC Licensing Information FCC Licensing InformationVHF Marine Radio ProtocolsIntro Operation Intro Operation Customer Customer WarrantyAssistance AssistanceFCC Licensing InformationCaution NoticeWarranty<strong>Cobra</strong>Marine VHF radios comply with the FCC (Federal CommunicationsCommission) requirements that regulate the Maritime Radio Service.CustomerInstallationCustomerThe radio operates Installation on allAssistancecurrently allocated Assistance marine channels and is switchable foruse according to U.S.A., International or Canadian regulations. It features instantSecondary Icons Secondary Iconsaccess to emergency Channel 16 and calling Channel 9 as well as NOAA (NationalOceanic and Atmospheric Administration) All Hazards Radio with Alert that can beaccessed by pressing one (1) button.Station LicenseNoticeCaution WarningWarningAn FCC ship station license is no longer required for any vessel traveling in U.S.A.waters which uses a VHF marine radio, RADAR, or EPIRB (Emergency PositionIndicating Radio Beacon), and which is not required to carry radio equipment.However, any vessel required to carry a marine radio on an international voyage,carrying an HF single side band radiotelephone, or carrying a marine satelliteterminal must obtain a station license.FCC license forms and applications for ship and land stations can be downloadedthrough the Internet at www.fcc.gov. Forms can also be obtained by calling the FCCat 888-225-5322.International Station LicenseIf your vessel will be entering the sovereign waters of a country other than theU.S.A. or Canada, you should contact that country’s communications regulatoryauthority for licensing information.Radio Call SignCurrently, the FCC does not require recreational boaters to have a license. TheUnited States Coast Guard recommends that the boat’s registration number andstate of registry (e.g., IL 1234 AB) be used as a call sign and be clearly visible onthe vessel.Canadian Ship Station LicenseYou need a Radio Operator’s Certificate if your vessel is operated in Canadian waters.Radio Operator training and certification is available from the Canadian PowerSquadron. Visit their website (http://www.cps-ecp.ca/english/newradiocard.html),contact the nearest field office or write: Industry of Canada, Radio RegulatoryBranch, Attn: DOSP, 300 Slater Street, Ottawa, Ontario, Canada K1A 0C8.•Secondary IconsVHF Introduction Marine Radio ProtocolsOperation Customer WarrantyIntroIntro AssistanceOperation Intro Operation CustomerAssistanceCustomer WarrantyAssistanceSecondary IconsWarrantyUser Responsibility and Operating LocationsAll users are responsible for observing domestic and foreign government regulationsand are subject CustomerInstallation to severe penalties for violations. The VHF frequencies on your radioAssistanceare reserved for marine use CustomerInstallationCustomerInstallation and require a special license to operate from land,Assistance Assistanceincluding when your boat is on its trailer.Secondary IconsNoticeNOTEThis device complies with part 15 of the FCC Rules. Operation is subject to theCaution Warningfollowing two (2) conditions:1. This device Notice may Caution not Noticecause harmful Caution Warning interference, Warning and2. This device must accept any interference received, including interference thatmay cause undesired operation.FCC Warnings: Replacement or substitution of transistors, regular diodes orother parts of a unique nature, with parts other than those recommended by<strong>Cobra</strong> may cause a violation of the technical regulations of part 80 of the FCCRules, or violation of type acceptance requirements of part 2 of the rules.6 EnglishNothing Comes Close to a <strong>Cobra</strong> ®7
VHF Introduction Marine Radio ProtocolsVHF Marine RadioProceduresVHF Marine Radio ProtocolsVHF Marine RadioProceduresIntro Operation Intro Operation Customer Customer WarrantyAssistance AssistanceSecondary IconsWarrantyVHF Marine Radio ProceduresMaintain Your WatchWhenever your boat is underway, the radio must be turned On and be tuned toCustomerInstallationCustomerChannel 16 except Installation when Assistance being used Assistance for messages.PowerSecondary IconsTry 1 watt first, if the station being called is within a few miles. If there is no answer,switch to 3 watts and call again. You have the ability to go up to 5 watts of outputpower to increase your calling distance. Remember, the lower wattage outputs willNotice Caution Warningconserve your battery Notice and Caution minimize Warning interference to other users.Calling Coast StationsCall a coast station on its assigned channel. You may use Channel 16 when you donot know the assigned channel.Calling Other VesselsCall other vessels on Channel 16 or on Channel 9. (Channel 9 is preferred forrecreational vessel use.) You may also call on ship-to-ship channels when you knowthat the vessel is listening on a ship-to-ship channel.Initial Calling on Channel 16 or 9The use of Channel 16 is permitted for making initial contact (hailing) anothervessel. The limits on calling must be followed. Be reminded, Channel 16’s mostimportant function is for Emergency Messages. If for some reason, Channel 16 iscongested, the use of Channel 9, especially in U.S. waters, may be used as the initialcontact (hailing) channel for non-emergency communication.Limits on CallingYou must not call the same station for more than 30 seconds at a time.If you do not get a reply, wait at least two (2) minutes before calling again.After three (3) calling periods, wait at least 15 minutes before calling again.Change ChannelsAfter contacting another station on a calling channel, change immediatelyto a channel which is available for the type of message you want to send.Station IdentificationIdentify, in English, your station by your FCC call sign, vessel name and the stateregistration number, at both the beginning and at the end of the message.•AssistanceProhibited CommunicationsYou MUST NOT transmit:■ False distress or emergency messages.Assistance■ Messages containing obscene, indecent or profane language.Secondary IconsIntro Operation CustomerInstallationWarranty■ General calls, signals or messages (messages not addressed to a particularstation) on Channel 16, except in an emergency or if you are testing your radio.■ When you are on land.NoticeCustomerCautionWarning8 EnglishNothing Comes Close to a <strong>Cobra</strong> ®9
Main IconsVHF Marine Radio ProtocolsIntro Operation Customer WarrantyIntro AssistanceOperation CustomerAssistancecondary IconsSecondary IconsVoice CallingWarrantyVoice Calling•You are required to listen to Channel 16 while standing by. Channel 16 is thedistress and CustomerInstallation safety channel used for establishing initial contact with another stationAssistanceand for emergency CustomerInstallation communication. The Coast Guard also monitors Channel 16 forAssistancesafety purposes for everyone on the water.NoticeNOTEChannel 9 may be used by recreational vessels for general-purpose calling. ThisCaution Warningfrequency should be used whenever possible to help relieve congestion onChannel 16. NoticeThe Coast CautionGuard generally Warning does not make urgent marineinformation broadcasts or weather warnings on Channel 9. Boaters are stillasked to “keep watch” on Channel 16 whenever the radio is turned on and notin use with another station.To call another vessel or shore installation (e.g, lock or bridge tender):■ Make sure the radio is On.■ Make sure you are in standby listening mode on Channel 16. Make sureChannel 16 is not in use.■ When the channel is open (quiet), press the Talk button and call a vessel. Holdthe radio or microphone several inches from your face and speak clearly anddistinctly in a normal voice tone. Say “name or station being called,” “THIS IS[your vessel name or call sign].”■ Once contact is made, you must leave Channel 16 and go to another workingchannel. See channel listing on pages 20-27.VHF Introduction Marine Radio ProtocolsVoice CallingIntro Operation Intro Customer Operation IntroWarrantyOperation Customer Customer WarrantyAssistance■Assistance AssistanceMain IconsWarrantyIf the other does not respond, wait two (2) minutes and repeat. You arepermitted to attempt contact three (3) times, two (2) minutes apart. If you stillhave not made contact, wait 15 minutes before trying again.CustomerInstallationAssistance■CustomerInstallationCustomerAfter communications Installation are completed, each vessel must sign off with its callAssistance AssistanceSecondary Intro Icons Operation sign Customer or vessel Warranty name and the word “out” and return to Channel 16.AssistanceSecondary Icons Secondary IconsSecondary IconsNoticeInstallationNoticeNOTEFor best sound quality at the station you are calling, hold the microphone onthe front of the radio at least 2 in. (51 mm) from your mouth and slightly off toCustomer Caution WarningAssistanceNotice Caution Notice Caution Warning Warningone (1) side. Speak in a normal tone of voice.NOTE“Over and Out”Caution WarningThe most commonly misused procedure words are “over and out” within thesame transmission. “Over” means you expect a reply. “Out” means you arefinished and do not expect a reply.For ExampleThe vessel Corsair is calling the vessel Vagabond:Corsair: “Vagabond, this is Corsair. Over.”Vagabond: “Please switch and answer on Channel 68 (or any proper workingchannel). Over.”Corsair: “Switching to Channel 68. Over.”10 EnglishNothing Comes Close to a <strong>Cobra</strong> ®11
VHF Introduction Marine Radio ProtocolsRadiotelephone CallsVHF Introduction Marine Radio ProtocolsEmergency Messages andDistress ProcedureontionCustomerAssistanceIntro Operation Intro Operation Customer Customer WarrantyAssistance AssistanceWarrantyRadiotelephone Calls•Boaters may make and receive radiotelephone calls to and from any number on thetelephone Warranty network by using the services of public coast stations. Calls can be made —for a fee — between your CustomerInstallationCustomerInstallation radio and telephones on land, sea and in the air. See pagesAssistance Assistance20 through 27 for the public correspondence (marine operator) channels.Secondary Icons Secondary IconsIf you plan to use these services, consider registering with the operator of theCustomerAssistancee Caution Warningpublic coast station that you plan to work through. These services can provideyou with detailed information and procedures to follow.NOTICE Notice Caution Notice Caution Warning WarningYou may disclose privileged information during a radiotelephone call.Keep in mind that your transmission is NOT private, as it is on a regulartelephone. Both sides of the conversation are being broadcast and can beheard by anyone who has a radio and tunes to the channel you are using.Intro Operation Intro Operation Customer Customer WarrantyAssistance AssistanceInstallationCustomerAssistanceCaution NoticeCustomerAssistanceWarrantyEmergency Messages and Distress ProcedureThe ability to summon assistance in an emergency is the primary reasonto have a VHF marine radio. The marine environment can be unforgiving,and what may initially be a minor problem can rapidly develop into aInstallationsituation beyond your control.Secondary Icons Secondary IconsThe Coast Guard monitors Channel 16, responds to all distress calls,and coordinates all search and rescue efforts. Depending on the availabilityof other capable vessels or commercial assistance operators in your vicinity,Coast Guard or Coast Guard Auxiliary craft may be dispatched.NoticeCaution WarningWarningIn any event, communicate with the Coast Guard as soon as you experiencedifficulties and before your situation becomes an emergency. Use the emergencymessage procedures only after your situation has become grave or you are facedwith a sudden danger threatening life or property and requiring immediate help. UseChannel 16 to communicate your emergency message. Make sure you transmit onhigh power. If you are merely out of gas, do not send an emergency message. Dropyour anchor and call a friend or marina to bring the fuel you need or to give you atow.•12 EnglishNothing Comes Close to a <strong>Cobra</strong> ®13
VHF Introduction Marine Radio ProtocolsEmergency Messagesand Distress ProcedureVHF Introduction Marine Radio ProtocolsEmergency Messagesand Distress ProcedureSecondary IconsIntro Operation Intro Operation Customer Customer WarrantyAssistance AssistanceSecondary IconsWarrantyMarine Emergency SignalsThe three (3) spoken international emergency signals are:MAYDAYCustomerInstallationCustomerInstallationThe distress signal MAYDAY Assistance is used Assistance to indicate that a station is threatened by graveand imminent danger and requests immediate assistance.PANThe urgency signal PAN is used when the safety of the vessel or person is injeopardy. (This Notice signal is properly Caution Notice pronounced Caution Warning pahn.) WarningSECURITEThe safety signal SECURITE is used for messages about the safety of navigation orimportant weather warnings. (This signal is properly pronounced see-cure-ee-tay.)When using an international emergency signal, the appropriate signal is to bespoken three (3) times prior to the message.If You Hear a Distress CallYou must give any message beginning with one (1) of these signals priority over anyother messages. ALL stations MUST remain silent on Channel 16 for the duration ofthe emergency unless the message relates directly to the emergency.If you hear a distress message from a vessel, stand by your radio. If it is notanswered, YOU should answer. If the distressed vessel is not nearby, wait a shorttime for others who may be closer to acknowledge. Even if you cannot render directassistance, you may be in a position to relay the message.Intro Operation Intro Operation Customer Customer WarrantyAssistance AssistanceMarine Distress ProcedureSpeak slowly — clearly — calmly.1. Make sure your radio is On.InstallationCustomerInstallationAssistance2. Select Channel 16.Secondary Icons Secondary Icons3. Press Talk button and say:Caution NoticeCustomerAssistanceCaution WarningWarranty“MAYDAY — MAYDAY — MAYDAY.”(Or “PAN — PAN — PAN,”or “SECURITE — SECURITE — SECURITE.”)NoticeWarning4. Say:“THIS IS [your vessel name or call sign],” repeated three (3) times.5. Say:“MAYDAY (or “PAN” or “SECURITE”)[your vessel name or call sign].6. Tell where you are:(what navigational aids or landmarks are nearby).7. State the nature of your distress.8. State the kind of assistance needed.9. Give number of persons aboard and conditions of any injured.10. Estimate present seaworthiness of your vessel.11. Briefly describe your vessel (length, type, color, hull).12. Say:“I WILL BE LISTENING ON CHANNEL 16.”13. End message by saying:“THIS IS [your vessel name or call sign]. OVER.”14. Release Talk button and listen. Someone should answer.If not, repeat the call, beginning at step 3 above.Keep the radio nearby. Even after your message has been received, the Coast Guardcan find you more quickly if you can transmit a signal for a rescue boat to hone in on.14 EnglishNothing Comes Close to a <strong>Cobra</strong> ®15
VHF Introduction Marine Radio ProtocolsEmergency Messagesand Distress ProcedureVHF Introduction Marine Radio ProtocolsIntro Operation Intro Operation Customer Customer WarrantyFor ExampleAssistance AssistanceWarranty“Mayday — Mayday — Mayday”“This is Corsair — Corsair — Corsair” [or “IL 1234 AB,” repeated three (3) times]CustomerInstallationCustomerInstallationAssistance Assistance“Mayday Corsair (or IL 1234 AB)”Secondary Icons Secondary Icons“Navy Pier bears 220 degrees magnetic — distance 5 miles”“Struck submerged object and flooding — need pump and tow”“Four (4) adults, three (3) children aboard — no one injured”Notice Caution Notice Caution Warning Warning“Estimate we will remain afloat one-half hour”“Corsair (or IL 1234 AB) is 26 ft sloop with blue hull and tan deck house”“I will be listening on Channel 16”“This is Corsair (or IL 1234 AB)”“Over”Secondary IconsIntro Operation Intro Operation Customer Customer WarrantyAssistance AssistanceInstallationSecondary IconsNoticeInstallationCustomerAssistanceCaution NoticeCustomerAssistanceCaution WarningWarrantyWarningIt is a good idea to write out a script of the message form and post it where youand others on your vessel can see it when an emergency message needs to be sent.This page intentionally left blank16 EnglishNothing Comes Close to a <strong>Cobra</strong> ®17
VHF Marine Radio ProtocolsVHF MarineChannel AssignmentsVHF Marine Radio ProtocolsVHF MarineChannel AssignmentsIntro Operation CustomerWarrantyAssistanceVHF Marine Channel Assignments•Three (3) sets of VHF channels have been established for marine use in the U.S.A.,Canada and the rest of the world (International). Most of the channels are the samefor all three (3) maps, but CustomerInstallation there are definite differences (see table on the followingAssistancepages). Your radio has all three (3) maps built into it and will operate correctly inSecondary Iconswhichever area you choose.The following is a brief outline of the channel assignments in the U.S.A.Channel Map.Distress, Safety, Notice and Caution CallingWarningChannel 16Getting the attention of another station (calling) or in emergencies(distress and safety).CallingChannel 9General-purpose (non-emergency) calling by non-commercial vessels.Recreational boaters are urged to use this channel to reduce congestionon Channel 16.Intership SafetyChannel 6Ship-to-ship safety messages and for search and rescue messages toCoast Guard ships and aircraft.Coast Guard LiaisonChannel 22ATo talk to the Coast Guard, Canadian Coast Guard (non-emergency) after makingcontact on Channel 16.Non-CommercialChannels 68*, 69, 71, 72, 78A, 79A*, 80A*Working channels for small vessels. Messages must be about needs of thevessel, such as fishing reports, berthing and rendezvous. Use Channel 72 onlyfor ship-to-ship messages.CommercialChannels 1A, 7A, 8, 9, 10, 11, 18A, 19A, 63A, 67, 72, 79A, 80A, 88A*Working channels for working ships only. Messages must be about business orneeds of the ship. Use Channels 8, 67, 72 and 88A only for ship-to-ship messages.Main IconsSecondary IconsAssistancePublic Correspondence (Marine Operator)Channels 24, 25, 26, 27, 28, 60, 61, 84, 84A, 85, 85A, 86, 86A, 87, 87A, 88*For calls to marine operators at public coast stations. You can make and receivetelephone calls through these CustomerInstallation stations.AssistancePort OperationsSecondary IconsChannels 1A*, 5A*, 12*, 14*, 18, 19, 20A, 21, 22, 63A*, 65A, 66A, 73, 74, 75, 76,77*, 79, 80, 81, 82Used for directing the movement of ships in or near ports, locks or waterways.Messages must Notice be about Caution operational Warning handling, movement and safety of ships.NavigationalChannels 13, 67Channels are available to all vessels. Messages must be about navigation, includingpassing or meeting other vessels. These are also the main working channels formost locks and drawbridges. You must keep your messages short and power outputat no more than 1 watt.Maritime ControlChannel 17For talking to vessels and coast stations operated by state or local governments.Messages must be about regulation and control, boating activities, or assistance.Digital Selective CallingChannel 70This channel is set aside for distress, safety and general calling using only digitalselective calling techniques. Warranty Voice communication is prohibited; your radio cannotAssistancetransmit voice messages on this channel.WeatherChannels CustomerInstallation Wx 1 Thru 9AssistanceReceive-only channels for NOAA and Canadian weather broadcasts. You cannottransmit on these channels.Intro Operation CustomerNoticeIntro Operation CustomerWarrantyNOTE* These channels are restricted to the listed uses in certain parts ofCaution Warningthe country or for certain types of users only. Consult FCC rulesor a knowledgeable radio operator before using them.18 EnglishNothing Comes Close to a <strong>Cobra</strong> ®19
VHF Introduction Marine Radio ProtocolsVHF MarineChannel AssignmentsVHF Introduction Marine Radio ProtocolsVHF MarineChannel AssignmentsSecondary IconsIntro Operation Intro Operation Customer Customer WarrantyAssistance AssistanceInstallationSecondary IconsNoticeInstallationCustomerAssistanceCaution NoticeCustomerAssistanceCaution WarningWarrantyChannel Channel Map Frequency PowerNumber USA Int’l Canada Transmit Receive Limits18 • 156.900 161.50018A • • 156.900 156.90019 • 156.950 161.55019A • • 156.950 156.95020 • • • 157.000 161.600 1 watt CANWarning20A • 157.000 157.00021 • • 157.050 161.65021A • • 157.050 157.05022 • 157.100 161.70022A • • 157.100 157.10023 • • 157.150 161.75023A • 157.150 157.15024 • • • 157.200 161.80025 • • • 157.250 161.85026 • • • 157.300 161.90027 • • • 157.350 161.95028 • • • 157.400 162.00060 • • 156.025 160.62561 • 156.075 160.67561A • • 156.075 156.07562 • 156.125 160.72562A • 156.125 156.125Secondary IconsIntro Operation Intro Operation Customer Customer WarrantyAssistance AssistanceChannelUse18 Port Operations, Ship Movement18AInstallationCommercialSecondary IconsNoticeInstallationCustomerAssistanceCaution NoticeCustomerAssistance19 Port Operations, Ship Movement19ACommercialCaution WarningWarranty20 Canada (Coast Guard Only); International (Port Operations, Ship Movement)20APort Operations21 Port Operations, Ship Movement21AWarningU.S. (Government Only); Canada (Coast Guard Only)22 Port Operations, Ship Movement22A U.S. and Canadian Coast Guard Liaison and Maritime Safety InformationBroadcasts that are announced on Channel 1623 Public Correspondence (Marine Operator)23A Government Only24 Public Correspondence (Marine Operator)25 Public Correspondence (Marine Operator)26 Public Correspondence (Marine Operator)27 Public Correspondence (Marine Operator)28 Public Correspondence (Marine Operator)60 Public Correspondence (Marine Operator)61 Public Correspondence (Marine Operator), Port Operation, Ship Movement61A U.S. (Government Only); Canada (Coast Guard Only);West Coast (Coast Guard Only); East Coast (Commercial Fishing)62 Public Correspondence (Marine Operator), Port Operations, Ship Movement62A West Coast (Coast Guard Only); East Coast (Commercial Fishing)22 EnglishNothing Comes Close to a <strong>Cobra</strong> ®23
VHF Introduction Marine Radio ProtocolsVHF MarineChannel AssignmentsVHF Introduction Marine Radio ProtocolsVHF MarineChannel AssignmentsSecondary IconsIntro Operation Intro Operation Customer Customer WarrantyAssistance AssistanceInstallationSecondary IconsNoticeInstallationCustomerAssistanceCaution NoticeCustomerAssistanceCaution WarningWarrantyChannel Channel Map Frequency PowerNumber USA Int’l Canada Transmit Receive Limits63 • 156.175 160.77563A • 156.175 156.17564 • • 156.225 160.82564A • • 156.225 156.22565 • 156.275 160.875Warning65A • • 156.275 156.27566 • 156.325 160.92566A • • 156.325 156.325 1 watt CAN67 • • • 156.375 156.375 1 watt USA68 • • • 156.425 156.42569 • • • 156.475 156.47570 • • • RX only 156.52571 • • • 156.575 156.57572 • • • 156.625 156.62573 • • • 156.675 156.67574 • • • 156.725 156.72575 • 156.775 156.775 1 watt Only Int.76 • 156.825 156.825 1 watt Only Int.77 • • • 156.875 156.875 1 watt USA and CANIntro Operation Intro Operation Customer Customer WarrantyAssistance AssistanceWarrantyChannel Use63 Public Correspondence (Marine Operator), Port Operations, Ship Movement63ACustomerInstallation InstallationCustomerAssistance AssistancePort Operations and Commercial, VTS in selected areasSecondary IconsSecondary Icons64 Public Correspondence (Marine Operator), Port Operations, Ship Movement64A U.S. (Government Only); Canada (Commercial Fishing)65 Public Correspondence (Marine Operator), Port Operations, Ship MovementNotice Caution Notice Caution Warning Warning65A Port Operations66 Public Correspondence (Marine Operator), Port Operations, Ship Movement66A Port Operations67 U.S. (Commercial). Used for bridge-to-bridge communications in lowerMississippi River (Intership Only); Canada (Commercial Fishing), S&R68 Non-Commercial (Recreational)69 U.S. (Non-Commercial, Recreational); Canada (Commercial Fishing Only);International (Intership, Port Operations, Ship Movement)70 Digital Selective Calling (Voice communications not allowed)71 U.S. and Canada (Non-Commercial, Recreational);International (Port Operations, Ship Movement)72 Non-Commercial (Intership Only)73 U.S. (Port Operations); Canada (Commercial Fishing Only);International (Intership, Port Operations, Ship Movement)74 U.S. (Port Operations); Canada (Commercial Fishing Only);International (Intership, Port Operations, Ship Movement)75 Port Operations (Intership Only)76 Port Operations (Intership Only)77 Port Operations (Intership only). Restricted to communicationswith pilots for movement and docking of ships.24 EnglishNothing Comes Close to a <strong>Cobra</strong> ®25
VHF Introduction Marine Radio ProtocolsVHF MarineChannel AssignmentsVHF Introduction Marine Radio ProtocolsVHF MarineChannel Assignmentsin IconsIntro Operation Intro Operation Customer Customer WarrantyAssistance AssistanceInstallationCustomerAssistanceCaution NoticeCustomerAssistanceWarrantyChannel Channel Map Frequency PowerNumber USA Int’l Canada Transmit Receive Limits78 • 156.925 161.52578A • • 156.925 156.925Secondary 79 Icons Secondary Icons• 156.975 161.575Intro Operation Customercondary IconsInstallationInstallation79A • • 156.975 156.97580 • 157.025 161.62580A • • 157.025 157.025NoticeCaution WarningWarning81 • 157.075 161.67581A • • 157.075 157.07582 • 157.125 161.72582A • • 157.125 157.12583 • • 157.175 161.77583A • • 157.175 157.17584 • • • 157.225 161.82584A • 157.225 157.22585 • • • 157.275 161.87585A • 157.275 157.27586 • • • 157.325 161.92586A • 157.325 157.32587 • • 157.375 161.97587 • 157.375 157.375Warranty87A Assistance • 157.375 157.37588 • • 157.425 162.025Customer88 Assistance • 157.425 157.42588A • 157.425 157.425Main IconsSecondary IconsIntro Operation Intro Operation Customer Customer WarrantyAssistance AssistanceChannelUseInstallationCustomerAssistanceSecondary 79 Icons SecondaryPortIconsOperations, Ship MovementCaution NoticeCustomerAssistanceCaution WarningWarranty78 Public Correspondence (Marine Operator)78A79ANon-Commercial (Recreational)Commercial (Also Non-Commercial only in Great Lakes)80 Port Operations, Ship Movement80ACommercial (Also Non-Commercial only in Great Lakes)81 Port Operations, Ship Movement81AWarningU.S. (Government Only; Environmental Protection Operations)82 Public Correspondence (Marine Operator), Port Operation, Ship Movement82AU.S. (Government Only); Canada (Coast Guard Only)83 Canada (Coast Guard Only)83AU.S. (Government Only); Canada (Coast Guard Only)84 Public Correspondence (Marine Operator)84APublic Correspondence (Marine Operator)85 Public Correspondence (Marine Operator)85APublic Correspondence (Marine Operator)86 Public Correspondence (Marine Operator)86AIntro Operation CustomerInstallationInstallationNoticePublic Correspondence (Marine Operator)87 Public Correspondence (Marine Operator)87 Public Correspondence (Marine Operator)Warranty87A Assistance Public Correspondence (Marine Operator)88 Public Correspondence (Ship to Coast). In U.S. only within75 miles of Canadian Border.Customer88 Assistance Commercial Intership only88A Commercial Intership onlyNoticeNOTEMany of the plain-numbered channels, such as 01, 02 and 03, transmit andCaution Warningreceive on different frequencies. This is termed duplex operation. The rest of theplain-numbered channels and all of the A channels, such as 01A, 03A and04A, transmit and receive on a single frequency, which is termed simplexoperation. Your radio automatically adjusts to these conditions. When in simplexoperation, the A icon will appear on the LCD (see illustration on page A3).NoticeNOTEAll channels are preprogrammed at the factory according to internationalCaution Warningregulations and those of the FCC (U.S.A.) and Industry Canada (Canada).They cannot be altered by the user nor can modes of operation be changedbetween simplex and duplex.26 EnglishNothing Comes Close to a <strong>Cobra</strong> ®27
VHF Introduction Marine Radio ProtocolsNOAA Weather Channelsand AlertVHF Introduction Marine Radio ProtocolsNOAA Weather Channelsand AlertIntro Operation Intro Operation Customer Customer WarrantyAssistance AssistanceInstallationCustomerAssistanceCustomerAssistanceWarrantyNOAA Weather Channels and Alert•Monitoring the weather will probably be a frequent use of your radio. NOAA providescontinuous, around-the-clock broadcasts of the latest weather information. Tapedweather messages run every four (4) to six (6) minutes and are revised every twoInstallation(2) or three (3) hours, or as needed. The Coast Guard also announces weather andSecondary Icons Secondary Iconsother safety warnings on Channel 16. Smart boaters keep an eye on safety and anear to the radio — and never let the weather catch them unaware.NOAA Emergency Weather AlertIn the event of a Notice major storm Caution Noticeor other Caution Warning weather Warning condition requiring vessels at seaor on other bodies of water to be notified, NOAA broadcasts a 1050 Hz tone thatreceivers such as your <strong>Cobra</strong>Marine VHF radio can detect and warn you of a weatheralert condition. When the Weather Alert mode on your radio is On, this signal willproduce a loud tone from the speaker in the radio and will automatically switch tothe alerting weather channel so the alert broadcast can be heard.Intro Operation Intro Operation Customer Customer WarrantyAssistance AssistanceNOAA Test Alert SystemInstallationCustomerAssistanceCustomerAssistanceWarrantyTo test this system, NOAA broadcasts the 1050 Hz signal every Wednesday sometimebetween 11 a.m. and 1 p.m. in each local time zone. Any receiver that can detect theweather alert tone may use this service to verify that this system is functioning properly.InstallationWeatherSecondaryFrequency/ChannelIconsSecondary IconsChannel RX Frequency MHz Weather Channel1 162.550 NOAA2 162.400 NOAANotice Caution Notice Caution Warning Warning3 162.475 NOAA4 162.425 NOAA5 162.450 NOAA6 162.500 NOAA7 162.525 NOAA8 161.650 Canadian9 161.775 Canadian10 163.275 NOAA28 EnglishNothing Comes Close to a <strong>Cobra</strong> ®29
Intro Operation CustomerAssistanceVHF Installation Marine Radio ProtocolsInstallationIncluded in this PackageCustomerWarrantyAssistanceIncluded in this Package•Secondary IconsYou should find all of the following items in the package withyour <strong>Cobra</strong>Marine VHF radio:Radio Notice CautionWrist Strap WarningDrop-In Battery ChargerInstallationIntroductionMain IconsSecondary IconsInstall AntennaWrist StrapSecondary IconsIntro Operation CustomerAssistanceIntro Operation Customer CustomerInstallationAssistance AssistanceIntro Operation CustomerAssistance InstallationSecondary Notice IconsInstallationNoticeAntenna, Wrist Strapand Belt ClipCustomerAssistanceCautionNoticeWarrantyAntenna, Wrist Strap and Belt ClipCautionWarrantyAntenna InstallationThe flexible Warranty antenna is shipped separately in the packageCustomerand must beAssistanceattached before you use the radio.1. Caution Align the base Warningof the antenna with the socket in thetop of the radio.2. Screw it all the way into the socket. Be sure thatthe seal seats properly.WarningNOTICEOperating the radio without the antenna in placeWarningmay damage the unit. The radio is not waterproofuntil the antenna and battery pack are in placewith their seals properly seated.•Flexible AntennaBattery Charger Power CordNiMH Battery PackBelt Clip Secured to BeltWrist StrapThe radio comes with the wrist strap already attached.It can be easily removed if you choose not to use it.Operating Instruction ManualFor connection to 12-volt and 120-voltpower sources.Spring-Loaded Belt ClipInsert Knob onto Belt ClipBelt ClipUse the spring-loaded belt clip to carry the radio on yourperson.1. Press open the belt clip, slide it over the belt andrelease the clip.2. Insert the round guide on the back of the radio into theguide channel on the back of the belt clip. The radio mustbe upside-down, as shown, to remove it from the beltclip.3. Once the knob is inserted all the way into the belt clipchannel, the radio swings free but remains secure.Secure Radio30 EnglishNothing Comes Close to a <strong>Cobra</strong> ®31
Batteries and Charger Batteries and ChargerIntro InstallationIntroduction Operation Customer WarrantyInstallationIntroductionAssistanceIntro Operation Customer Customer WarrantyIntro Operation Customer Customer WarrantyInstallationInstallationAssistance AssistanceAssistance AssistanceBatteries and ChargerPower SourcesInitial Charge•Secondary IconsSecondary IconsNiMH Battery PackThe radio is shipped with a sealed NiMH (Nickel-MetalCustomerInstallationAssistanceHydride) (P/N CM 110-009) battery pack that isrechargeable.Installation120V Installation power cord with the charger.Secondary IconsIntro Operation CustomerAssistanceNoticeInstall Battery PackSecondary Notice IconsCautionCautionWarningNoticeWarrantyCustomerAssistanceWarningWARNINGThe charger provided for this radio is only to be usedto charge the battery pack provided. Do Not chargeany other type of batteries in the charger as fire,Caution Warningexplosion or battery damage will occur. Avoidingextreme room temperatures will also help prolong thelife of the battery pack for the radio.When your rechargeable batteries begin to discharge tooquickly, it is time to install a new battery pack. Your radiowill also operate with six (6) high-quality AA alkalinebatteries, using the optional alkaline battery tray.Installing the Battery Pack1. Position the battery pack to line up the two (2) externalalignment tabs to the alignment slots in the radio.2. Engage the battery pack into the radio until battery packis fully seated against the radio housing.3. Pivot the locking tab up until it snaps into place on theback of the battery pack.Main IconsInitial Battery ChargeSecondary IconsIntro Operation CustomerAssistanceInstallationIntro Operation CustomerAssistanceNoticeSecondary Notice IconsCustomerAssistanceMain IconsCustomerAssistanceCaution WarningIntro Operation CustomerAssistanceSecondary IconsWarrantyThe <strong>Cobra</strong>-provided NiMH battery pack may be charged athome, in a car or in a boat using the appropriate 12V or1. Insert one (1) of the power cords into the back of theCaution Warningdrop-in charger.2. Insert the other end of the power cord into theappropriate 12V or 120V power source.3. Remove the spacer from the charger and insert the entireNotice Caution Warningradio/battery into the charger. The metal charge contactson the battery will contact the mating prongs in theWarrantycharger to transfer the charging current.4. Observe that the red light on the front of the chargerglows to indicate that the battery pack is properly seatedand the charger is operating.5. Allow the batteries to charge for 12 to 14 hours beforeuse.InstallationWARNINGOnly the rechargeable NiMH battery pack canbe recharged. You MUST use one of the chargingWarrantydevices provided with this radio. Do not substituteany other type of charging adapter or charger basefor this radio. Battery damage, fire or explosion mayresult. It is equally important to prevent the NiMHCustomerbattery Assistancepack from freezing to obtain best performancefrom the battery pack.NoticeNOTEIf the drop-in charger is used on a boat, <strong>Cobra</strong>Caution Warningrecommends you attach it to a horizontal shelf orvertical bulkhead (using the screw holes provided) toprevent possible damage due to the boat rolling orpitching. The charging base has been designed to holdthe battery pack in place during rough sea conditions.32 EnglishNothing Comes Close to a <strong>Cobra</strong> ®33
Main IconsSecondary IconsLocking TabInstallationIntroductionSecondary IconsMain IconsSecondary IconsIntro Operation CustomerAssistanceInstallationMain IconsBattery Pack Charging OnlyAlkaline Battery TrayIntro Operation CustomerAssistanceIntro Operation Customer CustomerInstallationAssistance AssistanceSecondary Icons NoticeSecondary IconsNoticeIntro Operation CustomerAssistanceInstallationNoticeCustomerAssistanceBatteries and ChargerNoticeCustomerAssistanceCautionWarrantyTo Remove Battery Pack from Radio1. Pivot the locking Warranty tab off of the back of the battery pack toAssistanceunlock.Customer2. Installation Lift the bottomAssistanceof the battery pack slightly to remove itfrom the radio housing.CustomerInstallation Caution WarningAssistance3. Pull battery pack out of the radio housing.Intro Operation CustomerWarrantyNOTECaution WarningThe NiMH battery pack can also be charged in theCaution Warranty Warningbattery charger without being installed in the radio.Insert the spacer into the battery charger to supportthe battery pack during this charging process. Followthe same procedures in “Initial Charge” to charge thebattery pack.NOTICENiMH batteries are toxic. Please dispose of properly.WarningSome marine suppliers accept old battery packs forrecycling and some municipal waste disposalagencies have special provisions for battery disposal.Alkaline BatteriesWarrantyAn optional alkaline battery tray (P/N CM 110-011) can bepurchased for this radio. The alkaline battery tray acts as abackup or “Emergency” power source should the batterypack run low on power and needs to be recharged. Theradio will transmit at full power when using six (6) new AAalkaline batteries.Intro Operation CustomerInstallationIntroductionAssistanceFully ChargedSecondary IconsSecondary IconsPartially ChargedFully DischargedIntro Operation CustomerAssistanceInstallationNoticeCautionWarrantyIntro Operation Customer CustomerInstallationAssistance AssistanceSecondary Notice IconsMain IconsSecondary IconsBatteries and ChargerInstallationNoticeCustomerAssistanceWarrantyMaintaining the Battery ChargeAs you use your radio, the battery power icon will show theCustomerAssistancebattery power remaining. When the icon begins to flash, it istime to recharge or change the batteries.CautionNOTICE WarningUse only the drop-in charger provided by <strong>Cobra</strong>. DoWarningnot use the charger with alkaline batteries; only theNiMH battery pack is rechargeable. Spent alkalinebatteries must be discarded and replaced.CautionWarningWarrantyIt is a good Assistance idea to keep a set of fresh, high-quality AAalkaline batteries with your radio. Should the rechargeablebattery pack become discharged and no electrical powersource is Customer available, you can insert the optional alkalineInstallationAssistancebattery tray with fresh alkaline batteries and continue to useyour radio.Intro Operation CustomerNoticeWarrantyNOTESome radios with NiMH batteries have AA or AAACaution Warningbattery packs which only allow low-power transmit.The optional AA battery tray for the <strong>MR</strong> <strong>HH325</strong> and afresh set of alkaline batteries will allow for full-poweremergency transmissions.NoticeCautionWarningWARNINGNever attempt to recharge alkaline batteries. They arenot made to be recharged, and should be disposed ofin a proper manner.34 EnglishNothing Comes Close to a <strong>Cobra</strong> ®35
Getting Started Getting StartedOperating Introduction Your RadioOperating Introduction Your RadioIntro Operation Intro Operation Customer Customer WarrantyAssistance AssistanceGetting Started<strong>MR</strong> <strong>HH325</strong> RadioSecondary IconsOn/Off/Volume Control(Clockwise)On/Off/Volume Control(Counterclockwise)InstallationSecondary IconsNoticeInstallationCustomerAssistanceCustomerAssistanceWarranty•Refer to the foldout at the front of this manual to identify thevarious controls and indicators on your radio. Throughoutthis manual you will be instructed to “Press” or to “Pressand Hold” various buttons (except “Push to Talk”) on theradio. “Press” means a momentary press of approximatelyone (1) second. “Press and Hold” means to hold the buttondown for approximately three (3) seconds.Whenever you press any button except the Talk button onCaution Notice Caution Warning Warningyour radio, a brief tone (beep) will sound to confirm thebutton press. With all button presses, the appropriate iconwill appear on the LCD and the backlight will turn On. Thebacklight will stay on for 10 seconds after the button isreleased.At times, you will hear two (2) other sounds. Two (2) beepswill sound to confirm your setting changes and three (3)beeps will sound to notify you of an error.Common Radio FunctionsThe following procedures define common operatingfunctions of the radio when in either Marine Standby orWeather (WX) Standby modes.Power/Volume/Squelch ControlsPower On/Off ControlThe On/Off/Volume control is located at the upper rightside of the radio. Turning the On/Off/Volume controlpast the detent position will turn the radio On or Off.Volume ControlVolume is controlled by turning the On/Off/Volumecontrol.■ To increase the volume, turn the On/Off/Volumecontrol clockwise.■ To decrease the volume, turn the On/Off/Volumecontrol counterclockwise.Intro Operation Intro Operation Customer Customer WarrantyAssistance AssistanceSquelch ControlSecondary IconsSpeaker/Mic PortTalk ButtonMain IconsInstallationSecondary IconsSecondary IconsInstallationCustomerAssistanceSquelch ControlIntro Operation CustomerNoticeCustomerAssistanceWarrantySquelch is controlled by turning the lower rotaryconcentric knob located directly below theOn/Off/Volume switch.With the power On, turn the knob counterclockwiseuntil you hear a hissing sound, then turn the knobclockwise until the hissing stops. This will establish a“Baseline” squelch. By turning the knob further in aWarrantyAssistanceclockwise direction, you will filter weak and medium-Caution Notice Caution Warning Warningstrength signals. By turning the knob in aInstallationcounterclockwise direction (further from your baselinesetting), Customer you will receive weaker signals. SquelchAssistanceControl filters weak signals and radio frequency (RF)noise so that you will clearly hear the signals you want.NOTEIf the Squelch is set so that you can hear aNotice Caution Warningcontinuous hissing sound, the Memory Scan andTri-Watch functions will be blocked.Radio Speaker and MicrophoneThe internal Radio Speaker and Microphone are located onthe bottom front face of the radio below the lower controlbuttons.An optional Speaker/Microphone port is located at the topof the radio between the antenna and the Power/Volume/Squelch control. Unthread the Speaker/Microphone portcover to access and install an optional speaker ormicrophone into this port.Talk ButtonPress and hold the Talk button to transmit messages.Release the Talk button to stop transmitting.36 EnglishNothing Comes Close to a <strong>Cobra</strong> ®37
Getting Started Getting StartedOperating Introduction Your RadioOperating Introduction Your RadioIntro Operation Intro Operation Customer Customer WarrantyAssistance AssistanceBacklight/Key Lock ButtonSecondary IconsKey Locked ButtonsKey Lock IconInstallationSecondary IconsNoticeInstallationCustomerAssistanceCaution NoticeCustomerAssistanceCaution WarningWarrantyBacklight/Key Lock ButtonThe LCD will be illuminated by the backlight as long as anybutton is pressed and will remain On for 10 seconds afterthe button is released.To Display the Backlight Momentarily:Press the Backlight/Key Lock button. The backlight willremain On for 10 seconds. If the backlight is alreadyOn, another press of the Backlight/Key Lock buttonwill turn it Off.WarningKey LockTo prevent accidental changes to your settings, youcan lock all of the following buttons:■ Channel Up Button■ Channel Down Button■ SCAN Button■ MEM/ESC Button■ WX/H-M-L Button■ 16/9 Button■ TRI-WATCH Button■ Call/Enter/Setup ButtonTo Lock or Unlock the Buttons:Press and hold the Backlight/Key Lock button for two(2) seconds. The Key Lock icon will appear ordisappear in the LCD. When Key Lock is On, pressingany of the listed buttons on the front of the radio willresult in a three (3) beep error message.Both the Backlight/Key Lock button and the Talkbutton are active — you can Receive (Rx) or Transmit(Tx) a message with Key Lock On, but you cannotchange the channel.Intro Operation Intro Operation Customer Customer WarrantyAssistance AssistanceChannel Up/Down ButtonSecondary IconsCurrently On Channel 88SCAN ButtonInstallationSecondary IconsMain IconsNoticeSecondary IconsInstallationCustomerAssistanceCaution NoticeCustomerAssistanceCaution WarningWarrantyChannel Up/Down ButtonYour radio will Receive (Rx) and Transmit (Tx) VHF signalson the channel indicated on the LCD display. You canchange the channel at any time using the Channel Up/Downbutton.To Change Channels:Press the Channel Up/Down button.If you are on Channel 88, pressing the Channel Upbutton will advance to Channel 01. If you are onWarningChannel 01, pressing the Channel Down button willadvance to Channel 88.You can press and hold the Channel Up/Down buttonfor fast advance. The beep sound will occur only at thefirst press of the button and not during fast advance.If the new channel selected is restricted to low power,the radio will automatically switch to Low Power modeand the Low Power icon will appear on the LCD.If the radio is in the Key Lock mode, the channel willnot change and the three (3) beep error signal willsound.SCAN ButtonPress and release the SCAN button to scan all channels. TheSCAN icon will display on the LCD display. Scanning beginsat lower channels, and scans to higher channels. PressChannel Up/Down button to change the scan direction.When a signal is received in SCAN mode, the radio willWarrantypause 10 Assistance seconds before resuming SCAN operation. Thescan will stop when the Talk button is pressed.In Memory mode, press and release the SCAN button toscan all memory CustomerInstallation channels. Because the unit is already in theAssistanceMemory Channel mode, only the channels in the memorybank will be displayed.Intro Operation CustomerNoticeNOTEMemory channels need to be saved to effectively enterCaution Warningthe Memory Channel mode and scan all memorychannels.38 EnglishNothing Comes Close to a <strong>Cobra</strong> ®39
Getting Started Intro Operation Customer WarrantySetup Mode ProgrammingOperating Introduction Your RadioOperating Introduction Your Assistance RadioIntro Operation Intro Operation Customer Customer WarrantyAssistance AssistanceH-M-L Power ButtonSecondary IconsCall/Enter/Setup ButtonMain IconsInstallationSecondary IconsSecondary IconsInstallationCustomerAssistanceCustomerAssistanceWarrantyHigh/Medium/Low (H-M-L) Power ButtonYour radio can transmit selectively at 1, 3 or 5 watts ofpower. <strong>Cobra</strong> suggests you maintain the low power settingfor short-range communications. You will conserve batterylife and avoid overpowering nearby stations with a lowpower setting signal. Use the high power setting for longrangecommunications or when you do not receive aresponse to a signal sent at 1 watt.Intro Operation CustomerNoticeWarrantyTo Toggle Assistance Between H-M-L Power Modes:Caution Notice Caution Warning WarningPress the H-M-L Power button. The LCD will showInstallationNoticewhich mode is in effect. Some channels are restrictedfor a Customer maximum use of 1 watt. Your radio willAssistanceautomatically set the power to Low Power mode whenyou select those channels.NOTESome channels, frequency bands and countries of useCaution Warningmight not be able to operate in High Power mode.Call /Enter/Setup ButtonThe Call/Enter/Setup button has multiple functions. It isgenerally used in the following ways:■ Press and release to transmit your unique Call Tonesignal to another radio.■ Press and hold to enter any Setup menu.■ Functions as an ENTER button when making a selectionin any Setup menu.Secondary IconsIntro Operation Intro Operation Customer Customer WarrantyAssistance AssistanceInstallationCustomerAssistanceCustomerAssistanceWarrantySetup Mode Programming•The following CustomerInstallation series of procedures is designed to allow you to set the programmableAssistancefeatures of your radio. Correctly following these steps results in a minimal amountof radio setup programming time.NoticeNOTESecondary IconsWhen in the Setup mode, if you stop programming for longer than 15 seconds,Caution Warningyour entry will be saved and the radio will go back to the Marine Standbymode. When you return to Setup mode and continue programming you will seeSecondary IconsInstallationthe last “value” Notice displayed. Caution Notice While Caution Warning in the Setup Warningmode, you will not receive anysignal reception.Marine (VHF) Mode ProgrammingProgramming these features will allow you to customize certain features of thisradio to enhance your “On-Water” audio needs.Start from Marine Standby mode to begin Marine (VHF) Setup programming. Pressand hold the Call/Enter/Setup button for two (2) seconds to enter the programmingmode.40 EnglishNothing Comes Close to a <strong>Cobra</strong> ®41
Operating Introduction Your RadioSetup Mode ProgrammingOperating Introduction Your RadioSetup Mode ProgrammingIntro Operation Intro Operation Customer Customer WarrantyAssistance AssistanceSet Channel MapSecondary IconsActive Channel Map IconChannel Up/Down ButtonInstallationSecondary IconsMain IconsNoticeSecondary IconsInstallationCustomerAssistanceCustomerAssistanceWarrantyUSA/International/Canada Channel MapsThree (3) sets of VHF Channel Maps have been establishedfor marine use in the USA, Canada, and the rest of the world(International). Most of the channels are the same for allthree (3) maps, but there are definite differences (see tableon pages 20 through 27). Your radio has all three (3) mapsbuilt into it and will operate correctly in whichever area youchoose.To Set Channel Map Operating Area:Caution Notice Caution Warning Warning1. The Channel Map mode is the first mode thatIntro Operation CustomerInstallationNoticebegins the Marine (VHF) Setup programming.Warranty2. U, I and C will display, with the current setting (theAssistanceU icon is the default) flashing.3. Press Channel Up/Down button to select the U, I orCCustomericon.Assistance4. Press Call/Enter/Setup button to save this entry andmove to the next setup programming mode.NOTEOne or two of the channel maps might have beenCaution Warningdisabled for sales of this radio in some countries.Intro Operation Intro Operation Customer Customer WarrantyAssistance AssistanceVibrAlert ® Tone AlertSecondary IconsInstallationSecondary IconsNoticeVibrAlert ® ModeInstallationCustomerAssistanceCaution NoticeCustomerAssistanceWarrantyIn VibrAlert ® mode, your radio can alert you to incomingsignals by sounding an audible call tone, a silent vibration orboth.To set VibrAlert ® :1. The display will show either the Vibrate icon (shakebars), Call Tone icon (bell shape) or a combinationVibrAlert ® icon.2. The present setting of either, 01, 02 or 03 will beCaution Warning Warningflashing.3. Press Channel Up/Down button to select one of thefollowing:01 = VibrAlert ® On (both shake bars and bellshape).02 = Vibrate On (shake bars only).03 = Call Tone Only On (bell shape only).4. Press Call/Enter/Setup button to save this entry andmove to the next setup programming mode.42 EnglishNothing Comes Close to a <strong>Cobra</strong> ®43
Operating Introduction Your RadioSetup Mode ProgrammingOperating Introduction Your RadioStandby/Receiveand TransmitIntro Operation Intro Operation CustomerAssistanceCustomer WarrantyAssistanceCall Tone ModeSecondary IconsInstallationSecondary IconsMain IconsNoticeSecondary IconsCall Tone ModeInstallationCustomerAssistanceCaution NoticeCustomerAssistanceWarrantyIn Call Tone mode, your radio can alert you to incomingsignals by sounding an audible call tone, a silent vibration orboth. This setting will also allow you to transmit a uniqueCall Tone alert to identify your radio when you transmitmessages. You can select from one of 10 different Call Tonesignals.To Set Call Tone:Intro Operation CustomerAssistanceInstallationNotice1. From the previous press of the Call/Enter/SetupCaution Warning Warningbutton, the LCD will display the letter “C” and theWarrantycurrent Call Tone number (01 through 10).2. Press the Channel Up/Down button to select adifferent Call Tone. An example of each call tone willsound Customer for 1.5 seconds.Assistance3. Press Call/Enter/Setup button to save this entry andmove to the next setup programming mode.NOTECall Tones are not usually used for Marine VHFCaution Warningcommunications. We allow you to turn it On for yourunique communication needs.Intro Operation Intro Operation Customer Customer WarrantyAssistance AssistanceRoger Beep ModeSecondary IconsKey Tone ModeInstallationSecondary IconsNoticeRoger Beep ModeInstallationCustomerAssistanceCaution NoticeCustomerAssistanceWarrantyIn Roger Beep mode, your listener will hear an audible tonewhen you release the Talk button. This alerts your listenerthat you are finished talking and it is OK for them to speak.To Set Roger Beep On or Off:1. Display will show ROG icon and ON or OFF flashing.2. Press Channel Up/Down button to select ON orOFF. ROG will be displayed when On.3. Press Caution Warning Call/Enter/Setup Warning button to save this entry andmove to the next setup programming mode.Key Tone ModeIn Key Tone mode, an audible tone will sound each time abutton is pressed or you change a setting.To Set Key Tone On or Off:1. Display will show Key Tone icon and ON or OFFflashing.2. Press Channel Up/Down button to select ON orOFF.3. Press Call/Enter/Setup button to save entry.You have now ended Marine (VHF) Setupprogramming mode and will enter Marine Standbymode.44 EnglishNothing Comes Close to a <strong>Cobra</strong> ®45
Operating Introduction Your RadioStandby/Receiveand TransmitMain IconsOperating Introduction Your RadioStandby/Receiveand TransmitSecondary IconsWX Alert On/OffWX Auto Search (SCAN)Intro Operation Intro Operation Customer Customer WarrantyAssistance AssistanceInstallationSecondary IconsMain IconsNoticeSecondary IconsCaution NoticeWarrantyWeather (WX) Alert Mode ProgrammingProgramming these features will allow your radio to listen toall NOAA Hazard Alert radio channels.CustomerInstallationCustomerAssistance AssistanceStart from WX Alert Standby mode to begin WX Alert Setupprogramming. Press and hold the Call/Enter/Setup buttonfor two (2) seconds to enter the programming mode.To Set WX Alert On or Off:1. WX Alert mode is the first mode that begins WXIntro Operation CustomerInstallationCaution Warning WarningAlert Setup programming.2. Display will show WX Alert icon and ON or OFFflashing.3. Press Channel Up/Down button to select ON orOFF.4. Press Call/Enter/Setup button to save this entry andmove to the next setup programming mode.To Set WX Auto Search (SCAN) On or Off:1. Display will show WX Alert icon and SCAN, ON orOFF is flashing. WarrantyAssistance2. Press Channel Up/Down button to select SCAN, ONor OFF.3. Press the Call/Enter/Setup button to save entry.CustomerAssistanceYou have now ended the WX Alert Setup programmingmode and will enter the WX Alert Standby mode.Secondary IconsIntro Operation Intro Operation Customer Customer WarrantyAssistance AssistanceCaution NoticeCaution WarningWarrantyStandby/Receive and Transmit•Marine Standby and Receive (Rx) ModeMarine Standby mode is the default mode for the radio whenever it is turned on.Intro Operation Customer WarrantyCustomerAssistanceFrom this mode, you canInstallationCustomerInstallationAssistance change current Assistancesettings by becoming familiar with thedifferent key functions in Marine Standby mode. While in Marine Standby mode,Secondary Icons Secondary Iconsthe user will be able to transmit by pressing the Push to Talk (Talk) button. Signalsin Receive CustomerInstallation (Rx) mode will be received on the selected channel(s) and alertsAssistancebroadcast by the Coast Guard and will activate the corresponding NOAA weatheralert channels in your radio.NoticeNoticeWarningNOTECoast Guard alerts are broadcast on Channel 16 and you need to have the WXCaution WarningAlert turned On to receive NOAA weather alerts. While in Marine Standbymode, you will receive any messages sent on the channel to which you aretuned.NoticeNOTEWhen WX Auto Search (SCAN) is set to On, weatherCaution Warningchannel scanning will start automatically and scan allavailable weather channels until the strongest channelis found. This will happen under the followingconditions:■ WX Alert is engaged.■ Radio is in VHF Standby.■ WX received signal level falls below a presetlevel.■ Radio is in Power Saver mode.46 EnglishNothing Comes Close to a <strong>Cobra</strong> ®47
Operating Introduction Your RadioStandby/Receiveand TransmitOperating Introduction Your RadioStandby/Receiveand TransmitCheck Channel NumberSecondary IconsLow Power ModeTalk ButtonTransmit (Tx) IconIntro Operation Intro Operation Customer Customer WarrantyAssistance AssistanceInstallationSecondary IconsMain IconsNoticeSecondary IconsInstallationCustomerAssistanceCaution NoticeCustomerAssistanceWarrantyTransmit (Tx) ModeTransmit (Tx) mode gives you the ability to interact withsafety services, other vessels and shore stations. When youuse this capability, be sure to follow the procedures and toobserve the courtesies that govern its use so everyonebenefits. (See pages 20 through 27) to help you select theproper channels.To Transmit a Message:Intro Operation CustomerInstallationNotice1. Check to see that your radio is set to a properCaution Warning Warningchannel for the type of message you plan to send.2. Toggle to the Low Power setting.3. With the microphone about 2 in. [51 mm] from yourmouth, press and hold the Talk button and speakinto the microphone. The Transmit icon will appearon the LCD.4. Release the Talk button when you are finishedspeaking. Your radio can only operate in eitherWarrantyAssistanceTransmit (Tx) or Receive (Rx) mode at any giventime. You will not hear the response to yourmessage unless the Talk button is released. If theBattery Customer Power icon begins blinking on the LCDAssistancewhen the Talk button is pressed, the radio will NOTtransmit.NOTEIf the Talk button is held down for five (5) minutes,Caution Warningthe radio will automatically sound a series of beepsand cease transmitting to prevent unwanted signalgeneration and battery drain. As soon as the Talkbutton is released, it can be pressed again to resumetransmission.Intro Operation Intro Operation Customer Customer WarrantyAssistance AssistanceWX/H-M-L ButtonSecondary IconsInstallationSecondary IconsMain IconsNoticeMain IconsInstallationCustomerAssistanceCustomerAssistanceWarrantyWeather (WX) Standby ModeTo enter the WX Standby mode, press and hold theWX/H-M-L button. All common operating functions of theradio will work the same in WX Standby mode as they do inthe normal Marine Standby mode. The radio will bemonitoring for all alerts in the background when in the WXStandby mode.WX Alert Standby ModeNOAA Caution NoticebroadcastsCaution Warning weatherWarninginformation as described in theNOAA weather channels section on page 29 of this manual.When NOAA broadcasts a weather alert signal and yourradio is in WX Alert Standby mode, the following items willbe displayed on the LCD display:■■■Secondary Icons■Intro Operation CustomerAssistanceSecondary IconsIntro Operation CustomerInstallationNoticeInstallationNoticeWarrantyAssistanceThe WX icon (cloud/sun) icon will be displayed.The last used weather channel will be displayed.The Customer bar graph will display received signal strengthAssistancelevel.The WX Alert icon (safety triangle) will be displayed.WarrantyNOTEOnly one (1) or two (2) of the weather channels willCaution Warningbe Customer operating in any given location (only in ReceiveAssistance(Rx) mode). You will need to select the channel withthe strongest signal in your location.NOTEWhen in the WX Alert mode, and NOAA sends theCaution Warning1050Hz alert tone, the radio will sound a series ofloud beeps regardless of the volume control setting.Receive (Rx) Icon48 EnglishNothing Comes Close to a <strong>Cobra</strong> ®49
Operating Introduction Your RadioStandby/Receiveand TransmitOperating Introduction Your RadioAdvanced OperationIntro Operation Intro Operation Customer Customer WarrantyAssistance AssistanceWX Auto Search (SCAN)Secondary IconsInstallationSecondary IconsNoticeInstallationCustomerAssistanceCaution NoticeCustomerAssistanceCaution WarningWarrantyWX Auto Search (SCAN) Mode Function:The purpose of the WX Auto Search (SCAN) functionis to enable the receiver to automatically scan for anactive WX channel under the following conditions:1. WX Auto Search (SCAN) function is On.2. WX Alert is On.3. The radio is tuned to a Marine VHF channel and hasentered Power Save mode (meaning there is nosignal activity or user input for 10 seconds).Warning4. The radio software has detected that the current WXchannel signal level has dropped below a presetminimum level or is gone completely.Once these conditions have been met, the software willthen scan the WX channels looking for an active WXchannel. When an active WX channel is found, it willstop the scan and use the new WX channel to look forthe standard 1050Hz alert tone.Intro Operation Intro Operation Customer Customer WarrantyAssistance AssistanceSecondary IconsInstallationCustomerAssistanceCaution NoticeCustomerAssistanceChannel Caution Warning9.WarrantyAdvanced OperationChannel 16/9 ModeChannel 16/9 mode gives you quick access to calling onInstallation Channel 16 and Channel 9 from any operational mode.Channel Secondary 16/9 Button IconsChannel 16 or Channel 9NoticeTo Switch to Channel 16 or Channel 9:1. Press the Channel 16/9 button to change toChannel 16.2. Press the Channel 16/9 button again to change toWarning3. Press the Channel 16/9 button a third time andreturn to the last used Standby channel.•50 EnglishNothing Comes Close to a <strong>Cobra</strong> ®51
Main IconsOperating Your RadioAdvanced OperationOperating Your Radio Main IconsAdvanced OperationSecondary IconsTRI-WATCH ButtonTRI and MEM IconsChannel Up/Down ButtonIntro Operation CustomerAssistanceInstallationMain IconsSecondary IconsNoticeSecondary IconsWarrantyTri-Watch ModeTri-Watch mode gives you one (1) button access to scan aWarrantyAssistancetotal of three (3) channels of most importance to you.Channel Customer 16 is preprogrammed and will always be one (1) ofAssistancethe scanned locations. Two (2) other channels of yourchoice can CustomerInstallation be stored in the radio. These channels can beAssistanceedited and/or recalled during future engagements ofTri-Watch mode.Intro Operation CustomerCaution NOTEWarningThe radio must be squelched for Tri-Watch mode toNotice Caution Warningfunction. See Warranty page 37 for Squelch procedure.AssistanceTri-Watch SetupTo Program or Edit the Tri-Watch Channels:1. Press CustomerInstallation and hold the TRI-WATCH button for two (2)Assistanceseconds to activate Tri-Watch Setup mode. The TRIand MEM icons on the display will turn On.Intro Operation CustomerNoticeNOTEThe main channel number will flash to indicate channelCaution Warningposition. If there is no input activity for 15 seconds, theradio will sound two (2) beeps and return to MarineStandby mode.2. Press Channel Up/Down button to select the desiredTri-Watch channel.3. Press and release TRI-WATCH button orCall/Enter/Setup button to confirm entry.4. Repeat steps 2 and 3 to program the remainingadditional Tri-Watch memory channel.5. After programming both Tri-Watch memorychannels the radio will immediately engageTri-Watch mode. (See page 53 for further details.)TRI-WATCH ButtonSecondary IconsTri-Watch Scan ModeIntro Operation CustomerAssistanceNoticeCautionWarrantyUsing Tri-WatchTri-Watch Scan Mode:1. From Marine Standby mode, press the TRI-WATCHWarrantybutton. The TRI icon will appear on the LCD displayand the radio will scan through the three (3) Tri-Watch memory channels.IntroInstallationOperationCustomerAssistanceCustomerAssistanceSecondary IconsInstallationNotice2. A Customer signal on any one (1) of the three (3) channelsAssistancewill stop the scan for 10 seconds to allow you tolisten to the traffic on that location.WarningNOTEAfter the Tri-Watch scan stops to monitor a channel,Caution Warningas long as you do not press any buttons within 10seconds, your radio will automatically resumescanning the Tri-Watch channels.3. Press the Channel Up/Down button to resumescanning the Tri-Watch channels or to change thescan direction.4. To EXIT the Tri-Watch scan, press the TRI-WATCHbutton again. The TRI icon will disappear from theLCD and the radio will return to Marine Standbymode.52 EnglishNothing Comes Close to a <strong>Cobra</strong> ®53
Operating Your RadioAdvanced OperationOperating Your RadioAdvanced OperationSecondary IconsMEM/ESC ButtonMemory Location NumberChannel Up/Down ButtonChannel NumberIntro Operation CustomerInstallationNoticeWarrantyAssistanceMemory Location ModeYour radio has unlimited memory locations for storing yourmost frequently used channels. These memory locations canbe Customer selected individually or can be scanned. (See page 57Assistanceunder Memory Location Scan.)To enter Memory mode, press MEM/ESC button. The displaywill show the MEM icon and the Memory Channel bank willbe activated and displayed.To Program Memory Locations:Caution Warning1. Press and hold the MEM/ESC button for two (2)seconds. The memory location number will startflashing and the MEM icon will be turned On.2. Use the Channel Up/Down button to advance to thememory location (00-99) you want to program.3. Press the MEM/ESC button to select the memorylocation. The memory channel number will stopflashing and the channel number will start flashing.4. Use the Channel Up/Down button to change to thechannel you want to store into the selected memorylocation.5. Press the MEM/ESC button to program that channel.The memory location number will flash again.Repeat steps 2 through 5 to program as manyadditional memories as you want.6. Press and hold the MEM/ESC button for two (2)seconds. This will return the radio to Memory mode.7. Press and release the MEM/ESC button again toreturn to Marine Standby mode.MEM IconSecondary IconsIntro Operation CustomerAssistanceInstallationNoticeCustomerAssistanceCautionWarrantyTo Recall a Stored Memory Location:1. Press the MEM/ESC button. The MEM icon will beturned On.2. Press the Channel Up/Down button to select thememory location. If a memory location has beenprogrammed, its associated channel will display onthe LCD. Your radio is now in Marine Standby modeon the selected memory location.To Exit Memory Location Mode:WarningPress the MEM/ESC button to return the radio toMarine Standby mode. The last channel used inMarine Standby mode will now be displayed on theLCD and the MEM icon will disappear.To Erase Stored Memory Locations:1. Press and hold the MEM/ESC button for two (2)seconds. The memory location number will startflashing and the MEM icon will be turned On.2. Use the Channel Up/Down button to advance to thememory location you want to erase.3. Press the MEM/ESC button to select the memorylocation. The memory channel number will stopflashing and the channel number will start flashing.4. Use the Channel Up/Down button to change to thechannel to read “00” at the selected memorylocation.5. Press the MEM/ESC button to erase that channel.Repeat steps 2 through 5 to erase as many additionalmemories as you want.6. Press and hold the MEM/ESC button for two (2)seconds. This will return the radio to Memory mode.7. Press and release the MEM/ESC button again toreturn to Marine Standby mode.54 EnglishNothing Comes Close to a <strong>Cobra</strong> ®55
Main IconsOperating Your RadioProduct FeaturesMain IconsOperating Your RadioProduct FeaturesScanningSecondary IconsIntro Operation CustomerSecondary IconsAssistanceChannel Scan ModeWarrantyAssistanceDuring Channel Scan mode, the radio will rapidly switchfrom channel to channel through all the channels. Wheneverany Customer activity is detected, the radio will stop the scan for 10Assistanceseconds CustomerInstallation to allow you to listen briefly on that channel. TheAssistanceradio will then continue to scan unless you switch out of theChannel Scan mode.Intro Operation CustomerInstallationWarrantyMemory Location ScanMain IconsIntro Operation CustomerASecondary IconsIntro Operation CustomerInstallationASecondary IconsAssistanceMemory Location Scan ModeWarrantyAssistanceDuring Memory Location Scan mode, the radio will rapidlyscan through all pre-assigned memory channels. Wheneverany Customer activity is detected on a channel, the radio will stop theAssistancescan for 10 CustomerInstallation seconds to allow you to listen briefly on thatAssistancechannel. It will then Warranty continue to scan unless you switch outAssistanceof Memory Location Scan mode.Intro Operation CustomerWarrantySCAN ButtonSCAN IconNoticeCautionNoticeNOTEThe radio Warningmust be squelched for Channel Scan modeCaution Warningto function. See page 37 for Squelch procedure.To Enter Channel Scan:1. From Marine Standby mode, press the SCANbutton. The radio will immediately begin to scan theentire channel map selected in the active channelmap. The SCAN icon will show on the LCD.2. A signal on any channel will stop the scan for 10seconds to allow you to listen to the traffic on thatlocation.3. Press the Channel Up/Down button to resumescanning the Channel Scan channels or to changethe scan direction.4. To EXIT Channel Scan mode, press the SCANbutton again. The SCAN icon will disappear from theLCD and the radio will return to Marine Standbymode.NoticeSecondary IconsInstallationCautionNoticeNoticeNOTECustomerThe Assistance radio Warningmust be squelched for Memory LocationCaution WarningScan mode to function. See page 37 for Squelchprocedure.NOTEIf there are fewer than two (2) memory locationsCaution Warningprogrammed in the radio, the Memory Location Scanoption will not be available. To program at least two(2) memory locations, see page 54.Channel Up/Down Button56 EnglishNothing Comes Close to a <strong>Cobra</strong> ®57
Operating Your RadioProduct FeaturesOperating Introduction Your RadioMaintenance andTroubleshootingIntro Operation CustomerAssistanceMEM/ESC ButtonSCAN ButtonSecondary IconsInstallationNoticeCustomerAssistanceCautionWarrantyTo Enter Memory Location Scan:1. From Marine Standby mode, press the MEM/ESCbutton.2. Press the SCAN button. The radio will immediatelybegin to scan all pre-assigned memory channels.The SCAN and MEM icons will show on the LCD.3. A signal on any channel will stop the scan for 10seconds to allow you to listen to the traffic on thatlocation.Warning4. Press the Channel Up/Down button to resumescanning the Memory Location Scan channels or tochange the scan direction.5. To EXIT Memory Location Scan mode, press theSCAN button again. The SCAN and MEM icons willdisappear from the LCD and the radio will return toMarine Standby mode.Intro Operation Intro Operation Customer Customer WarrantyAssistance AssistanceMaintenanceSecondary Icons Secondary Iconscase or scratch the LCD screen.WarrantyVery little maintenance is required to keep your <strong>Cobra</strong>Marine VHF radioin good operating condition:CustomerInstallationCustomer■ Keep the radio Installation and chargerAssistanceclean Assistance by wiping with a soft cloth and mild detergent.Do not use solvents or harsh or abrasive cleaners, which could damage the■ If the radio is exposed to salt water, wipe with a soft, moist cloth at least once a day toprevent buildup of salt deposits, which could interfere with button operation.■ Notice Caution Notice Caution Warning WarningIf the radio will be stored for a long period, such as over the winter,remove the batteries from the battery tray and store them in a separatepackage. This is especially important if you are using alkaline batteries.TroubleshootingProblem Possible Cause(s) Solution(s)No display on LCD whenradio is turned OnNiMH batteries rundown quicklyWill transmit atone (1) or three (3) watts,but not at five (5) wattsBatteries are exhaustedBatteries not installedproperlyBatteries are at theend of their lifeBatteries are lowSelected channel is imitedto one (1) wattRecharge orreplace batteriesRemove batteries andreinstall according topolarity markingsReplace with newbatteriesRecharge orreplace batteriesSwitch toanother channel••Will not transmitNo sound from speakerNo response tobutton pressNo answer to callsSelected channel islimited to receive onlyVolume level is too low orsquelch level is too deepButton lock is OnOut of range ofother stationSignal is blockedby terrainSwitch toanother channelRe-adjust volumeand squelchPress Backlight/Key Lock buttonSwitch to three (3) or five(5) watts or move closerMove until you have a “lineof-sight”to the other station58 EnglishNothing Comes Close to a <strong>Cobra</strong> ®59
Operating Introduction Your RadioSpecificationsWarranty IntroductionWarranty and TrademarkAcknowledgementIntro Operation Intro Operation Customer Customer WarrantyAssistance AssistanceSpecificationsGeneralNumber of ChannelsChannel SpacingModulationInput VoltageBattery Life:Secondary IconsInstallationSecondary IconsInstallationCustomerAssistanceCustomerAssistanceWarrantyAll U.S., Canadian, International andNOAA Weather Channels25 kHz5 kHz Max.7.2 VDCNiMH: 11 hours @ 5 watts,5% TX, 5% RX, Notice 90% Standby Caution Notice Caution Warning 18.5 hours Warning @ 1 wattAlkaline: 20 hours @ 5 watts,35 hours @ 1 wattCurrent Drain:Standby40 mAReceive (Rx)200 mATransmit (Tx)1.8 A @ High Power, 700 mA @ Low PowerTemperature Range-20˚C to 50˚CRadio Dimensions 4.8" x 2.4" x 1.4"(123 mm x 62 mm x 36 mm) notincluding antennaRadio Weight0 lbs 8 oz. (228 g) without batteriesReceiverFrequency Range156.050 to 163.275 MHzReceiver TypeDouble Conversion Super-HeterodyneSensitivity:20 dB Quieting 0.35 uV12 dB Sinad 0.30 uVAdjacent Channel Selectivity -60 dBIntermodulation and Rejection -60 dBSpurious and Image Rejection -60 dBAF Output250 mW @ 8 OhmsTransmitterFrequency Range (Tx):156.025 to 157.425 MHzRF Output Power1, 3 or 5 wattsSpurious Emissions-60 dB @ High Power, -55 dB @ LowPowerMicrophone TypeCondenserFrequency Stability+/-10 ppmFM Hum and Noise40 dB•Secondary IconsIntro Operation CustomerNoticeWarranty Intro Operation CustomerAssistanceNoticeCautionWarrantyAssistanceLimited 3-Year WarrantyFor Products Purchased In The U.S.A.<strong>Cobra</strong> <strong>Electronics</strong> Corporation warrants that its <strong>Cobra</strong>Marine VHF radio, and theCustomerCustomerInstallation component parts thereof,InstallationAssistancewill be free Assistance of defects in workmanship and materialsfor a period of three (3) years from the date of first consumer purchase. This warrantySecondary Iconsmay be enforced by the first consumer purchaser, provided that the product isutilized within the U.S.A.<strong>Cobra</strong> will, without charge, repair or replace, at its option, defective radios,products or component parts upon delivery to the <strong>Cobra</strong> Factory ServiceCautionWarningWarningdepartment, accompanied by proof of the date of first consumer purchase,such as a duplicated copy of a sales receipt.You must pay any initial shipping charges required to ship the product forwarranty service, but the return charges will be at <strong>Cobra</strong>’s expense, if theproduct is repaired or replaced under warranty. This warranty gives youspecific legal rights, and you may also have other rights which may varyfrom state to state.Exclusions: This limited warranty does not apply:1. To any product damaged by accident.2. In the event of misuse or abuse of the product, or as a resultof unauthorized alterations or repairs.3. If the serial number has been altered, defaced, or removed.4. If the owner of the product resides outside the U.S.A.All implied warranties, including warranties of merchantability and fitness for aparticular purpose are limited in duration to the length of this warranty. <strong>Cobra</strong>shall not be liable for any incidental, consequential or other damages; including,without limitation, damages resulting from loss of use or cost of installation.Some states do not allow limitations on how long an implied warranty lasts and/ordo not allow the exclusion or limitation of incidental or consequential damages,so the above limitations may not apply to you.For Products Purchased Outside The U.S.A.Please contact your local dealer for warranty information.Trademark Acknowledgement•<strong>Cobra</strong> ® , <strong>Cobra</strong>Marine ® , Nothing Comes Close to a <strong>Cobra</strong> ® , and the snake design areregistered trademarks of <strong>Cobra</strong> <strong>Electronics</strong> Corporation, USA.<strong>Cobra</strong> <strong>Electronics</strong> Corporation is a trademark of <strong>Cobra</strong> <strong>Electronics</strong> Corporation,USA.•60 EnglishNothing Comes Close to a <strong>Cobra</strong> ®61
Customer Introduction ServiceProduct ServiceIntroductionCustomer ServiceAccessoriesSecondary IconsIntro Operation Customer Intro Warranty Operation CustomerAssistanceAssistanceSecondary IconsWarning NoticeCautionWarrantyProduct Service•If you have any questions about operation or installing yournew <strong>Cobra</strong>Marine VHF product or if you are missing parts…CustomerCustomerInstallationInstallationPlease call <strong>Cobra</strong> Assistancefirst! DO NOT RETURN Assistance THIS PRODUCT TO THE STORE!See customer assistance on page A1.If your product should require factory service, please call <strong>Cobra</strong> first beforesending your radio. This will ensure the fastest turn-around time on your repair.You may be asked to send your radio to the <strong>Cobra</strong> factory. It will be necessary tofurnish the following to have the product serviced and returned:NoticeCautionWarning1. For warranty repair, include some form of proof-of-purchase, such as aphotocopy of a sales receipt. If you send the original receipt, it cannot bereturned.2. Send the entire product.3. Enclose a description of what is happening with the radio. Include a typedor clearly printed name and address of where the radio is to be returned.4. Pack radio securely to prevent damage in transit. If possible, use theoriginal packing material.5. Ship prepaid and insured by way of a traceable carrier such as United ParcelService (UPS) or Priority Mail to avoid loss in transit to: <strong>Cobra</strong> Factory Service,<strong>Cobra</strong> <strong>Electronics</strong> Corporation, 6500 West Cortland Street, Chicago, Illinois60707 U.S.A.6. If the radio is in warranty, upon receipt of your radio, it will either be repairedor exchanged depending on the model. Please allow approximately three (3)to four (4) weeks before contacting <strong>Cobra</strong> for status. If the radio is out ofwarranty, a letter will automatically be sent informing you of the repaircharge or replacement charge.7. If your radio is returned for factory repair, it will be returned to you withdefault settings restored.If you have any questions, please call 773-889-3087 for assistance.Secondary IconsIntro Operation Customer Intro Operation Warranty CustomerMain IconsAssistanceAssistanceInstallationAlkaline Battery TrayNoticeCustomerCustomerInstallationAssistanceAssistanceIntro Operation CustomerAssistanceSecondary IconsSecondary Caution IconsWarrantyAccessories•Your <strong>Cobra</strong> radio comes with several accessories that will enhance the use of theradio and also offer convenience to the end user.Lapel Speaker/MicrophoneAlkaline Battery Warranty TrayA special alkaline battery tray (P/N CM 110-011) isavailable as an optional accessory to have as anemergency Customer backup. By using six (6) high-quality AAInstallationAssistancealkaline batteries, you can have a spare battery backupWarning Notice Caution Warningsource for your radio.NoticeNOTEAlkaline batteries are not rechargeable.CautionWarningLapel Speaker/MicrophoneA speaker/microphone, that attaches to your lapel, byordering P/N CM 330-001.This unique accessory allows you to wear the radio onyour belt while still being able to communicate with othervessels. A small Push to Talk button on the lapel speaker/microphone allows you to answer any incoming call.62 EnglishNothing Comes Close to a <strong>Cobra</strong> ®63