Celestron Nexstar GPS 11 Removal and Replacement of ... - DD1US
Celestron Nexstar GPS 11 Removal and Replacement of ... - DD1US
Celestron Nexstar GPS 11 Removal and Replacement of ... - DD1US

You also want an ePaper? Increase the reach of your titles
YUMPU automatically turns print PDFs into web optimized ePapers that Google loves.
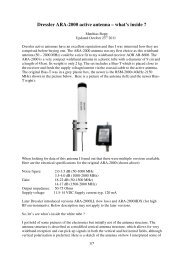
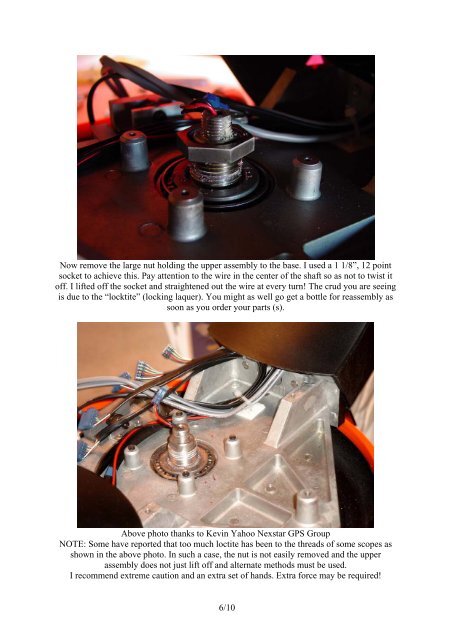
Now remove the large nut holding the upper assembly to the base. I used a 1 1/8”, 12 point<br />
socket to achieve this. Pay attention to the wire in the center <strong>of</strong> the shaft so as not to twist it<br />
<strong>of</strong>f. I lifted <strong>of</strong>f the socket <strong>and</strong> straightened out the wire at every turn! The crud you are seeing<br />
is due to the “locktite” (locking laquer). You might as well go get a bottle for reassembly as<br />
soon as you order your parts (s).<br />
Above photo thanks to Kevin Yahoo <strong>Nexstar</strong> <strong>GPS</strong> Group<br />
NOTE: Some have reported that too much loctite has been to the threads <strong>of</strong> some scopes as<br />
shown in the above photo. In such a case, the nut is not easily removed <strong>and</strong> the upper<br />
assembly does not just lift <strong>of</strong>f <strong>and</strong> alternate methods must be used.<br />
I recommend extreme caution <strong>and</strong> an extra set <strong>of</strong> h<strong>and</strong>s. Extra force may be required!<br />
6/10