Doll Or Stuffed Toy Car Seat - Joovy
Doll Or Stuffed Toy Car Seat - Joovy
Doll Or Stuffed Toy Car Seat - Joovy

Create successful ePaper yourself
Turn your PDF publications into a flip-book with our unique Google optimized e-Paper software.
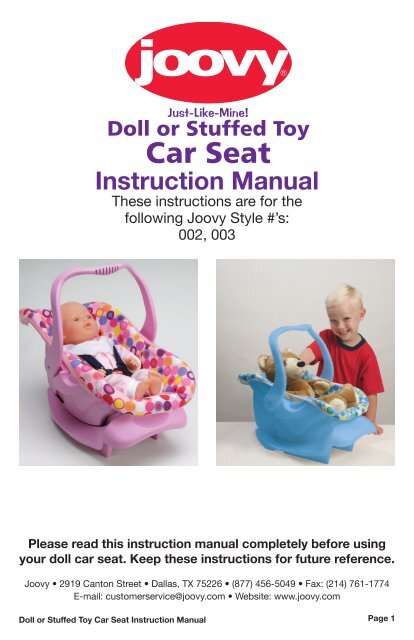
Just-Like-Mine!<br />
<strong>Doll</strong> or <strong>Stuffed</strong> <strong>Toy</strong><br />
<strong>Car</strong> <strong>Seat</strong><br />
Instruction Manual<br />
These instructions are for the<br />
following <strong>Joovy</strong> Style #’s:<br />
002, 003<br />
Please read this instruction manual completely before using<br />
your doll car seat. Keep these instructions for future reference.<br />
<strong>Joovy</strong> • 2919 Canton Street • Dallas, TX 75226 • (877) 456-5049 • Fax: (214) 761-1774<br />
E-mail: customerservice@joovy.com • Website: www.joovy.com<br />
<strong>Doll</strong> or <strong>Stuffed</strong> <strong>Toy</strong> <strong>Car</strong> <strong>Seat</strong> Instruction Manual<br />
Page
!<br />
WARNINGS<br />
• This product is a TOY car seat and carrier for dolls or stuffed toys<br />
ONLY.<br />
• NEVER use this toy to carry a baby or child for any purpose<br />
whatsoever.<br />
• NEVER use this toy to hold a baby or child in a vehicle. Death or Serious<br />
injury may occur.<br />
• NEVER leave the doll carrier and base unsecured in a vehicle. An<br />
unsecured doll, doll carrier or base can be thrown around and may injure<br />
you or your child in a sharp turn, sudden stop, or accident.<br />
• Discard this product if it is ever involved in an actual vehicle accident.<br />
• The maximum weight that can be carried in the doll car seat is 5 pounds.<br />
Exceeding this weight limit may result in an unsafe condition.<br />
• Discard all packaging materials properly. Do not allow children to play<br />
with them.<br />
Although this is a TOY and must NEVER be used for a baby or<br />
child, other warnings are provided throughout this manual to<br />
promote your child’s safe use of this product for their doll or<br />
stuffed toy. For your child’s understanding of the safe use of<br />
this product, please read and adhere to these warnings and<br />
insure that your child also understands and follows them.<br />
Please do not return this product to the store<br />
If you experience any difficulty with the assembly or use of this product, or if<br />
you have a question regarding these instructions, please contact our Customer<br />
Service Department at (877) 456-5049 between the hours of 8:30 am and 5:00<br />
pm Central Time.<br />
Page <br />
<strong>Doll</strong> or <strong>Stuffed</strong> <strong>Toy</strong> <strong>Car</strong> <strong>Seat</strong> Instruction Manual
Assembling and Using your <strong>Doll</strong> <strong>Car</strong> <strong>Seat</strong><br />
To insure safe operation of your doll car seat, please follow these instructions<br />
carefully.<br />
Unpacking the Product<br />
• <strong>Car</strong>efully remove doll car seat from the box and plastic bag.<br />
• Discard all packaging materials properly. Do not allow children to play<br />
with them.<br />
<strong>Car</strong>rier Removal From and Attachment To the Base<br />
• To remove the doll carrier from the base, reach under the foot end of the base<br />
and press the release button on the carrier while lifting the carrier from the<br />
base. See Figure 1.<br />
• To place the doll carrier in the base, line up the carrier with the base and push<br />
it down onto the base until an audible click is heard. See Figure 2.<br />
• Pull up on the doll carrier to be sure it is latched securely to the base.<br />
Figure 1 Figure 2<br />
<strong>Doll</strong> or <strong>Stuffed</strong> <strong>Toy</strong> <strong>Car</strong> <strong>Seat</strong> Instruction Manual<br />
Page
Adjusting the Handle<br />
The handle can be positioned in two<br />
modes: Up as a carrier/rocker and<br />
down as a sitter/feeder.<br />
• To adjust the handle, pull outward on<br />
the round sections of the handle on<br />
BOTH sides of the carrier. Continue<br />
to hold these two sections outward<br />
while starting to rotate the handle in<br />
the desired direction. See Figure 3.<br />
• Once the handle begins to rotate,<br />
release these sections, allowing<br />
them to lock back into their new<br />
Figure 3<br />
positions with an audible click.<br />
Attempt to move the handle forward<br />
or backward to insure it is securely<br />
latched.<br />
Positioning the Shoulder Straps<br />
• Remove the carrier from the base and rotate the handle down to the sitting<br />
position.<br />
• Place doll or stuffed toy in doll carrier on top of the safety harness.<br />
• Determine which pair of shoulder harness slots is even with or just below the<br />
doll’s shoulders. DO NOT use upper harness slots if they are above the doll’s<br />
shoulders. They will not hold the doll securely in a sudden stop or crash.<br />
• If the shoulder straps need to be adjusted, remove doll from carrier.<br />
• From the back of the carrier, unthread harness straps from the sliding buckle.<br />
REMEMBER THE CORRECT ROUTING OF THE STRAPS.<br />
• Remove the straps from the slots in the seat and re-route them through the<br />
desired slots, making sure they are not twisted.<br />
• Rethread the straps through the buckle.<br />
• Check that straps are secure by pulling on harness straps from the front.<br />
Securing <strong>Doll</strong> in <strong>Car</strong>rier<br />
• With the handle in the sitting position, unbuckle the harness by pressing the<br />
button in the center of the buckle. See Figure 4.<br />
• Place the doll in the carrier with the shoulder straps over its shoulders and<br />
chest. Then place the crotch strap between the doll’s legs.<br />
• Bring the seat belt around the doll’s waist and insert the male end of each<br />
waist strap buckle into the female buckle. Insure that they snap into place.<br />
See Figure 5. Tighten the waist belt to be snug around the doll’s waist.<br />
• Both the shoulder straps and the waist straps may be adjusted using the<br />
sliding buckle on these straps, located under the bottom of the carrier.<br />
See Figure 6.<br />
Page <br />
<strong>Doll</strong> or <strong>Stuffed</strong> <strong>Toy</strong> <strong>Car</strong> <strong>Seat</strong> Instruction Manual
Figure 4<br />
Figure 5 Figure 6<br />
Using your <strong>Doll</strong> <strong>Car</strong> <strong>Seat</strong> in <strong>Car</strong>rier Mode<br />
• To use the product in carrier mode, position the handle in the UP position as<br />
described previously.<br />
• The carrier may then be transported by holding on to the center of he handle<br />
and carrying it wherever your child goes.<br />
WARNINGS<br />
• NEVER use this toy to carry a baby or child for any purpose whatsoever.<br />
• DO NOT use as a carrier for any dolls or stuffed toys that weigh more than 5<br />
pounds.<br />
• As with a real carrier, this toy carrier should never be placed near the edges of<br />
counter tops, tables, or other elevated surfaces.<br />
Using your <strong>Doll</strong> <strong>Car</strong> <strong>Seat</strong> in the Vehicle<br />
Vehicle <strong>Seat</strong> Requirements<br />
• The doll car seat should be placed in the center position of the seat directly<br />
behind the front seat whenever possible. This is the same location that a real<br />
car seat would be placed.<br />
• Because a real car seat would not be placed in a vehicle location that has a<br />
front airbag, do not place this doll car seat in a similar location.<br />
• The vehicle seat should always be a forward facing seat and the seat should<br />
lock in an upright position.<br />
<strong>Doll</strong> or <strong>Stuffed</strong> <strong>Toy</strong> <strong>Car</strong> <strong>Seat</strong> Instruction Manual<br />
Page
Installing the <strong>Doll</strong> <strong>Car</strong>rier and Base Using Vehicle Belts<br />
To install the doll carrier and base in a vehicle, you must carefully follow the<br />
instructions provided by your vehicle manufacturer in addition to the information<br />
in this manual. Before proceeding, be sure you have read and understand all of<br />
the instructions in this section.<br />
• Remove doll carrier from base.<br />
• Place the base in a rear-facing position in the vehicle seat.<br />
• Thread the vehicle seat belt inside and through the curved plastic piece under<br />
the base. See Figure 6.<br />
• Buckle the vehicle seat belt, making sure the buckle tongue goes into the<br />
correct buckle. The vehicle belt should not be twisted. See Figure 7.<br />
• Secure the base tightly into position by pushing down on the middle of the<br />
base with one knee or free hand while tightening the vehicle belt. Refer to<br />
your vehicle owner’s manual for instructions to properly tighten the vehicle<br />
belt.<br />
• Place the doll carrier in the base and make sure that it “clicks.” Pull up on<br />
the doll carrier to be sure it is latched securely in the base.<br />
Figure 7<br />
Figure 8<br />
WARNINGS<br />
• NEVER use this toy to hold a baby or child in a vehicle. Death or Serious<br />
Injury may occur.<br />
• DO NOT use as a car seat for any dolls or stuffed toys that weigh more than 5<br />
pounds.<br />
• NEVER leave the doll carrier and base unsecured in vehicle. An unsecured<br />
doll, doll carrier, and base can be thrown around and may injure you or your<br />
child in a sharp turn, sudden stop, or crash.<br />
• DO NOT use this product if the carrier does not securely latch into the base.<br />
Contact <strong>Joovy</strong> Customer Service for assistance.<br />
Page <br />
<strong>Doll</strong> or <strong>Stuffed</strong> <strong>Toy</strong> <strong>Car</strong> <strong>Seat</strong> Instruction Manual
Acceptable Vehicle Belt Systems<br />
The following belt systems are acceptable for use with your doll car seat. You<br />
should refer to your vehicle owner’s manual to determine which type of seat<br />
belts your vehicle has.<br />
• Lap Belts-Manually Adjusted: When buckled, the belt is tightened manually<br />
by pulling on the excess belt while pushing down hard on the doll carrier and<br />
base.<br />
• Lap Belts with Automatic Locking Retractor (ALR): The automatic locking<br />
retractor will not allow the lap belt to lengthen once it is buckled. Tighten the<br />
belt by feeding the belt back into the retractor while pushing down hard on the<br />
doll carrier and base.<br />
• Combination Lap/Shoulder Belt with Locking Latch Plate: Once it is<br />
buckled, this type of belt has a latch plate that will not allow the lap portion of<br />
the belt to loosen. Belt is tightened by pulling hard on the shoulder portion of<br />
the vehicle belt while pushing down hard on the doll carrier and base.<br />
• Combination Lap/Shoulder Belt with Sliding Latch Plate: This type of belt<br />
has a latch plate that slides freely along the belt. To prevent movement of<br />
the lap portion of this type belt, the belt MUST be converted through the use<br />
of a Locking Clip, unless your vehicle belt can be converted in another way as<br />
described in your vehicle owner’s manual.<br />
To Install the Locking Clip<br />
• Tighten the buckled belt by pushing down hard on the doll carrier and base<br />
and pulling hard on the shoulder belt.<br />
• While pushing down on doll carrier and base, pinch the two straps together<br />
behind the buckle tongue. Unbuckle the belt without allowing it to slip.<br />
• Connect lap and shoulder belts with locking clip as shown. See Figure 9.<br />
• Re-buckle belt. Check that the lap belt does not move by pulling and pushing<br />
hard on the doll carrier and base. If belt loosens or lengthens, repeat<br />
procedure.<br />
Figure 9<br />
<strong>Doll</strong> or <strong>Stuffed</strong> <strong>Toy</strong> <strong>Car</strong> <strong>Seat</strong> Instruction Manual<br />
Page
Unacceptable Vehicle Belt Systems<br />
DO NOT use any of the following systems to secure the doll carrier and base.<br />
• Lap Belts with Emergency Locking Retractor (ELR): This lap belt stays<br />
loose and can move until it locks in a sudden stop or crash.<br />
• Combination Lap/Shoulder Belt with Retractor: Each strap has a retractor<br />
at one end and is attached to the latch plate at the other end.<br />
• Passive Restraint-Lap or Shoulder Belt Mounted on Door.<br />
• Passive Restraint-Lap Belt with Motorized Shoulder Belt.<br />
• Lap Belts Installed Forward of <strong>Seat</strong> Crease.<br />
LATCH System for Securing the <strong>Doll</strong> <strong>Car</strong> <strong>Seat</strong><br />
Newer vehicles may have one or more seating positions with LATCH anchorage<br />
systems. If your vehicle is equipped with these, you may want to purchase the<br />
LATCH Attachment Strap that can be used in place of the vehicle belt system to<br />
secure the <strong>Doll</strong> <strong>Car</strong> <strong>Seat</strong> in place.<br />
The LATCH Attachment Strap is sold separately. To purchase one, please visit<br />
our website at www.joovy.com or contact us at (877) 456-5049.<br />
Maintenance<br />
The locking mechanism and all plastic parts on both the doll carrier and base<br />
should be inspected periodically to insure that they are secured properly and not<br />
damaged or malfunctioning. The safety harness, fabric items and their stitching<br />
should also be inspected periodically to insure that they are secured properly<br />
and not loose, torn or otherwise damaged.<br />
Fabric fading may occur if the <strong>Doll</strong> <strong>Car</strong> <strong>Seat</strong> is left in direct sunlight for long<br />
periods of time. When not in use, store the <strong>Doll</strong> <strong>Car</strong> <strong>Seat</strong> out of direct sun.<br />
Page <br />
<strong>Doll</strong> or <strong>Stuffed</strong> <strong>Toy</strong> <strong>Car</strong> <strong>Seat</strong> Instruction Manual
Cleaning your <strong>Doll</strong> <strong>Car</strong> <strong>Seat</strong><br />
<strong>Seat</strong> Pad: The fabric material on this carrier can be cleaned using mild<br />
household soap or detergent and warm water on a sponge or clean cloth.<br />
Always allow the fabric to completely air dry before using the carrier.<br />
If the carrier seat pad becomes heavily soiled it can be removed for more<br />
extensive cleaning. To remove the pad, unbuckle the straps from the safety<br />
harness buckle. Pull the shoulder straps and waist/crotch straps through the<br />
slots in the pad and remove the pad. Machine wash on a delicate cycle and line<br />
dry. DO NOT USE BLEACH. Reverse steps to reinstall the seat pad.<br />
Harness Straps: Harness straps can be spot cleaned with a mild soap and<br />
water solution. DO NOT MACHINE WASH OR IMMERSE HARNESS STRAPS IN<br />
WATER. Doing so may weaken the straps.<br />
Plastic Parts: Parts can be cleaned by wiping with a mild soap and water<br />
solution. DO NOT USE BLEACH. Bleach may weaken plastic parts.<br />
SATISFACTION GUARANTEED<br />
We want you to be completely satisfied with your purchase of this product.<br />
Should you experience any difficulty in assembling or using this product, or<br />
if you have any questions, please contact our Customer Service Department<br />
at (877) 456-5049 between the hours of 8:30 am and 5:00 pm Central Time.<br />
<strong>Doll</strong> or <strong>Stuffed</strong> <strong>Toy</strong> <strong>Car</strong> <strong>Seat</strong> Instruction Manual<br />
Page
2919 Canton Street • Dallas, TX 75226 • (877) 456-5049 • Fax: (214) 761-1774<br />
E-mail: customerservice@joovy.com • Website: www.joovy.com<br />
©<strong>Joovy</strong> 2005 • Document Version 1.0<br />
Page 10<br />
<strong>Doll</strong> or <strong>Stuffed</strong> <strong>Toy</strong> <strong>Car</strong> <strong>Seat</strong> Instruction Manual