Groove Ultralight Instruction Manual - Joovy
Groove Ultralight Instruction Manual - Joovy
Groove Ultralight Instruction Manual - Joovy
Create successful ePaper yourself
Turn your PDF publications into a flip-book with our unique Google optimized e-Paper software.
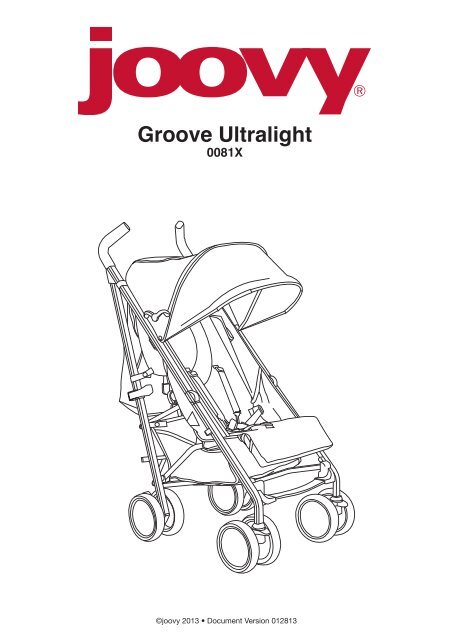
<strong>Groove</strong> <strong>Ultralight</strong><br />
0081X<br />
©joovy 2013 • Document Version 012813
! WARNING<br />
Please read this instruction manual completely before using this stroller. Keep these instructions for future reference.<br />
• Failure to follow these instructions could result in serious injury or death.<br />
• Never leave child unattended.<br />
• Avoid serious injury from falling or sliding out.<br />
• Always use safety belts and ensure the child is positioned according to these instructions.<br />
• Be certain that the stroller is fully opened, the primary lock is secured and the wheel brakes are on before allowing children near the stroller.<br />
• The maximum weight of the child that can be seated in the stroller is 55 lbs.<br />
• Use of the stroller with a child weighing more than 55 lbs. will cause excessive wear and stress on the stroller and may cause a hazardous<br />
unstable condition.<br />
• Never allow a child to step on the footrest to get into or out of the stroller.<br />
• Do not use the stroller on stairways or escalators.<br />
• Keep children away from the front of the stroller when folding.<br />
• Hanging purses, shopping bags, parcels, diaper bags or other accessory items from the handles or any other parts of the stroller may change<br />
the balance of the stroller and cause a hazardous unstable condition.<br />
• The maximum weight that can be carried in the storage basket is 5 lbs. Excessive weight may result in a hazardous unstable condition.<br />
• The total weight that can be placed in the zipper pocket should be less than 1 lb.<br />
• The total weight that can be placed in the cup holder should be less than 1 lb.<br />
• Never carry hot beverages or open containers in the cup holder.<br />
• The total weight that can be placed in the in-seat mesh pockets should be less than 2 lbs.<br />
• Never allow your stroller to be used as a toy.<br />
• Discard all packaging materials properly. Do not allow children to play with them.<br />
• Check your stroller for loose rivets, snaps, worn parts, and torn material or stitching on a regular basis.<br />
• Discontinue use of the stroller should it malfunction or become damaged.<br />
If you have a question regarding these instructions, please contact our Customer Service Department at<br />
customerservice@joovy.com or your local distributor. To locate your local distributor, go to www.joovy.com/locator.aspx.<br />
1 Unpacking the Product<br />
• Remove everything from the box and identify the parts using Figure 1.1. (not to scale)<br />
A: stroller, B: two front wheels sets, C: canopy, D: shoulder carry strap and documents (not shown).<br />
• Discard all packaging materials properly including plastic coverings.<br />
• DO NOT allow children to play with any packaging materials.<br />
! CAUTION<br />
Adult assembly is required for this product. No Tools Required.<br />
2 Unfolding the Stroller<br />
• Keep children away from stroller while unfolding.<br />
• Release the folding lock latch located on the right side by lifting the latch off of the extended rivet. See Figure 2.1.<br />
• Lift up on the handle bars of the stroller until it is upright. Then push down with your foot on the primary lock at the rear center of the stroller<br />
to engage the lock. See Figure 2.2.<br />
CAUTION: While unfolding the stroller, be careful to keep your fingers from being pinched by moving parts.<br />
NOTE: Remove packing foam from rear frame assembly to ensure stroller locks in the open position.<br />
• Ensure the primary lock is secured before ANY use of the product.<br />
! WARNING<br />
ALWAYS keep children away from the stroller when unfolding.<br />
3 Installing the Front Wheels<br />
• Tilt the stroller so it is resting on the rear wheels and the handle bars.<br />
• Place the front wheel sets onto the front wheel posts until they click in place. See Figure 3.1.<br />
• Pull on the wheel sets to ensure they are installed properly.<br />
• To remove a front wheel set, press the release tab below the front wheel housing and pull the wheel from the post. See Figure 3.2.<br />
<strong>Groove</strong> <strong>Ultralight</strong> <strong>Instruction</strong> <strong>Manual</strong>
4 Front Wheel Locks<br />
The front wheels can be set to swivel or lock.<br />
• To lock the front wheels, push down on the locking lever located between the wheels until a click is heard. See Figure 4.1. Rotate the wheel<br />
set until it locks automatically in the straight position.<br />
• To unlock the wheels (swivel mode) pull up on the lever.<br />
5 Installing and Operating the Canopy<br />
• Locate the plastic slide locks on the bottom of each side of the canopy and slide them onto the plastic fittings on each side of the stroller.<br />
Ensure that the clips are secure. See Figure 5.1.<br />
• Secure the Velcro® tabs at the top of the canopy to the handle tubes. See Figure 5.2.<br />
• The canopy can be adjusted forward and back, and locked open using the canopy locks on BOTH sides. See Figure 5.3.<br />
NOTE: The top rear portion of the canopy has a roll back window. To open, pull the forward edge up, roll the flap back and secure it using<br />
the Velcro® tabs.<br />
• To close the canopy, unlock the sides, then collapse. See Figure 5.4.<br />
• To remove the canopy, unfasten the Velcro® tabs from the handle tubes. Then, slide the canopy up off both fittings on the sides of the seat.<br />
See Figure 5.5.<br />
6 Rear Wheel Brakes<br />
! WARNING<br />
Possible pinching hazard - Be careful of the side hinges when opening and closing the canopy.<br />
• Always engage rear brakes before placing child in or removing a child from the stroller.<br />
• To engage the brakes, push down on both of the brake levers until the brake snaps in place. See Figure 6.1.<br />
• Check that BOTH wheel brakes are properly engaged.<br />
• To release the brakes, lift up on the brake lever. See Figure 6.2.<br />
! WARNING<br />
Always make sure the wheel brakes are engaged when the stroller is not being pushed so that the stroller will not roll away.<br />
Never leave stroller unattended, especially on a hill or incline, as the stroller may tip over or slide.<br />
7 Seat back Positioning<br />
The seat can be adjusted to any position from fully upright to reclining. The seat should only to be used for a child that is at least 6 months old.<br />
• Locate the recline mechanism near the backside of the seat.<br />
• To recline the seat, grasp the recline mechanism, press the top release button, and gently pull toward the rear of the stroller until the seat<br />
is in the desired position. See Figure 7.1.<br />
• If seat is fully reclined, secure the Velcro® on BOTH sides of the seat to the Velcro® on the inside of the canopy’s apron. See Figure 7.2.<br />
• To adjust the seat to a more upright position, first detach the apron from the seat if it is attached. Then pull the strap at the end of the recline<br />
mechanism upward while pushing the mechanism forward until the seat is in the desired position. See Figure 7.3. If the canopy’s apron is<br />
attached, detach the apron from the seat.<br />
NOTE: To get the seat in it most upright position you may need to push the seat toward the front of the stroller before pulling the straps.<br />
! WARNING<br />
ALWAYS ensure that the seat back is secured into position before placing a child in the seat. Push down on the seat back to be sure it is<br />
secure. NEVER adjust the seat back when the child is in the seat.<br />
8 Adjusting the Leg Support<br />
The leg support can be adjusted fully up or down.<br />
• To place the leg support into the up (horizontal) position, pull up on BOTH sides of the leg support until it is locked into position. Ensure<br />
BOTH sides are locked into place. See Figure 8.1.<br />
• To place the leg support into the down position, locate the trigger mechanism underneath BOTH sides of the leg support. Pull BOTH triggers<br />
and rotate the leg support down. See Figure 8.2.<br />
! WARNING<br />
NEVER allow a child to step onto or sit on the leg support. This may cause the stroller to tip over and injure the child.
9 Using and Adjusting the Restraint System<br />
• There are three height adjustment positions for the shoulder harness. Adjust the height to the closest height of your child’s shoulders.<br />
• To remove the shoulder harness, turn the plastic ends sideways and push them through the slots in the seat back. Re-attach the harness<br />
at the proper height by reinserting the plastic ends through the slots. See Figure 9.1.<br />
• To remove the crotch strap, push the plastic end up through the slot in the seat bottom. Re-attach the crotch strap by pushing the plastic<br />
end down through the slot.<br />
• Remove the waist straps by sliding the strap through the small opening in the metal D-ring, then pull the strap away from the seat.<br />
See Figure 9.2. Re-attach by pushing the metal-D ring through the slot in the seat, wrap the strap around the seat rear tube. Slide the strap<br />
through the small opening of the metal D-Ring and pull the strap to secure it to the tube. Repeat for the other end of the strap.<br />
• Ensure that BOTH shoulder straps are attached to the waist strap buckles. See Figure 9.3.<br />
• Unlatch both sides of the waist buckle by squeezing the latch releases.<br />
• Place the child in the seat with the shoulder straps over their shoulders and the crotch strap between the child’s legs.<br />
• Attach the waist belt to the crotch strap. See Figure 9.4. Tighten the belts to be snug around the child’s waist/crotch/shoulders.<br />
• Both the shoulder straps and the waist/crotch straps may be adjusted using the sliding buckles on these straps. See Figures 9.5 and 9.6.<br />
! WARNING<br />
Avoid serious injury from falling or sliding out. Always use the safety harness.<br />
10 Storage Basket<br />
The maximum weight that can be carried in the storage basket is 5 lbs.<br />
11 Folding the Stroller<br />
• Keep children away from stroller while folding.<br />
• Close the canopy.<br />
• Put seat into the most upright position.<br />
• Make sure both rear wheel brakes are set to their locked positions.<br />
• Lock BOTH front wheel sets in place with locking levers facing forward.<br />
• To fold, pull UP on the primary locking handle in the rear center of the stroller. See Figure 11.1. Then push down on the secondary locking<br />
lever on the right side of the stroller and push the handle fully forward. See Figure 11.2.<br />
• The locking latch on the right side of the stroller should automatically engage. If it is not engaged, gently push the stroller together until the<br />
lock catches the extended rivet. See Figure 11.3.<br />
CAUTION: While folding the stroller, be careful to keep your fingers from being pinched by moving parts.<br />
! WARNING<br />
ALWAYS keep children away from the stroller when folding.<br />
12 Shoulder Carry Strap<br />
• Locate the shoulder carry strap.<br />
• On the right side of the stroller there are 2 strap attachments. One is near the handle bar and the second is near the rear wheel.<br />
See Figure 12.1.<br />
• Clip the shoulder carry strap to both attachments by using the clips at each end of the shoulder carry strap.<br />
• The shoulder carry strap length can be adjusted using the sliding buckle on the strap.<br />
<strong>Groove</strong> <strong>Ultralight</strong> <strong>Instruction</strong> <strong>Manual</strong>
Maintenance<br />
All of the fittings, snaps, locks, rivets, and other hardware and plastic parts on the stroller should be inspected periodically to ensure that they<br />
are secured properly and not damaged or malfunctioning. The safety harness, as well as all other straps and fabric items and their stitching<br />
should also be inspected periodically to ensure that they are secured properly and not loose, torn or otherwise damaged. All moving parts,<br />
such as wheels, brakes, and hinges should also be checked periodically to ensure they are operating properly.<br />
Any missing, broken, or worn components should be replaced immediately, and the stroller should not be used until they are replaced. Only<br />
original manufacturer’s components should be used. If needed, please contact <strong>Joovy</strong> at our toll-free phone number.<br />
Cleaning<br />
The fabric material on this stroller can be cleaned using mild household soap or detergent and warm water on a sponge or clean cloth. Always<br />
allow the fabric to completely air dry before using the stroller.<br />
The frame and wheels should always be kept clean and free of dirt and foreign matter, especially after operating the stroller in rain, snow, or<br />
other harsh environments. Use a sponge or cloth dampened with warm water and a mild detergent cleaner to clean the wheels after such use.<br />
SATISFACTION GUARANTEED<br />
We want you to be completely satisfied with your purchase of this product. Should you experience any<br />
difficulty in assembling or using this product, or if you have any questions, please contact our Customer<br />
Service Department at (877) 456-5049 between the hours of 8:30 am and 5:00 pm Central Time.<br />
Please log onto www.joovy.com to register your new <strong>Joovy</strong> product.
moon<br />
<strong>Groove</strong> <strong>Ultralight</strong> <strong>Instruction</strong> <strong>Manual</strong>
too


