M20R 3810 Rev A page.. - Delta Aviation LLC
M20R 3810 Rev A page.. - Delta Aviation LLC
M20R 3810 Rev A page.. - Delta Aviation LLC

Create successful ePaper yourself
Turn your PDF publications into a flip-book with our unique Google optimized e-Paper software.
MOONEY<br />
<strong>M20R</strong> - OVATION 2 GX<br />
SECTION VIII<br />
HANDLING, SERVICE AND MAINTENANCE<br />
e.) Soak filter in non--sudsing detergent for 15 minutes; then agitate filter back and forth<br />
for two to five minutes to free filter element of deposits.<br />
NOTE:<br />
A Donaldson D-1400 Filter Cleaner is also recommended. Do not use solvents.<br />
f.) Rinse filter element with a stream of clear water until rinse water is clear.<br />
g.) Dry filter thoroughly. Do not use a light bulb or air heated above 180 o F. for filter drying.<br />
h.) Inspect for damage and ruptures by holding light bulb inside filter. If damage is evident,<br />
replace filter with a new one.<br />
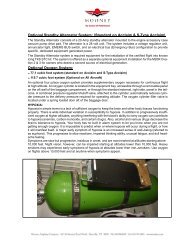
Challenger <strong>Aviation</strong> Products Rechargable Air Filters<br />
Re--charging instructions must be followed carefully for maximum air filter life. Air filter must be<br />
recharged every 100 hours or 12 months or sooner if operated in extreme dusty conditions. Air<br />
filter assembly must be replaced after 25 cleanings or sooner if any deterioration or damage is<br />
found during pre--flight, post flight or any other aircraft inspections.<br />
To clean the Challenger <strong>Aviation</strong> Products filter:<br />
1. Remove engine cowling.<br />
2. Remove the air filter assembly from the aircraft air box. DO NOT REMOVE filter element from<br />
inside its frame. Remove the old sealing gasket from filter assembly with frame.<br />
3. Begin re--charging air filter by “gently” tapping the filter assembly on a hard surface to remove<br />
any loose dust that will easily fall off the filter. Visually inspect the filter for any damage,<br />
cracks, broken wires or missing fibers. If any of those conditions are visible, the filter assembly<br />
must be scrapped and replaced with a new filter assembly.<br />
4. Begin cleaning with Challenger Re--charger Kit P/N CP--99--5050, the only FAA approved re--<br />
charge kit. Inside are two squeeze bottles, one for cleaning and one red in color for re--oiling<br />
the filter element. Remove the bottle containing cleaning fluid and thoroughly saturate the<br />
filter. Allow the filter to soak for approximately 15 minutes. DO NOT USE ANY OTHER<br />
CLEANING FLUID.<br />
5. Flush the filter with low non--pressurized warm water starting from inside out. After flush, gently<br />
shake the water out of the filter and allow to air dry only. DO NOT USE ANY OTHER DRY-<br />
ING METHOD.<br />
6. Remove the bottle from the Re--charger Kit P/N CP--99--5050 containing oil red in color. Begin<br />
re--oiling the dry filter by applying a bead or line of red oil along the top only of each pleat of the<br />
filter. The oil will soak into the length of each pleat. It may be necessary to apply oil on filter<br />
material that has not received oil from the wicking action. The entire filter medium must be<br />
covered with red oil. DO NOT OVER OIL. If oil drips from the filter, it has been over oiled. Allow<br />
the filter to drain the excess oil onto a clean rag or paper towel until the red oil stops dripping.<br />
Replace gasket with a new on the frame surface to be mounted to the air box assembly.<br />
7. Re--install air filter. Make sure the air filter assembly is properly seated and is mounted securely<br />
to the filter air box assembly.<br />
8. Re--install engine cowling.<br />
NOTE:<br />
Do not use gasoline, jet fuel, or caustic cleaning solutions or shop solvents. Use<br />
only FAA approved Challenger cleaning solution in Challenger Re -charger Kit<br />
P/N CP -99 -5050.<br />
Do not use steam cleaning equipment or any other cleaning devices. When drying<br />
the filter after cleaning, let the filter dry naturally. Pressurized equipment will<br />
strip the cotton of critical microfilaments.<br />
ORIGINAL ISSUE - 12-11-07<br />
<strong>Rev</strong>ision A -- 08-03-2010<br />
AIRPLANE FLIGHT MANUAL<br />
8--7