Panasonic KX-T76XX Series Telephone User Guide - Atcom
Panasonic KX-T76XX Series Telephone User Guide - Atcom
Panasonic KX-T76XX Series Telephone User Guide - Atcom

Create successful ePaper yourself
Turn your PDF publications into a flip-book with our unique Google optimized e-Paper software.
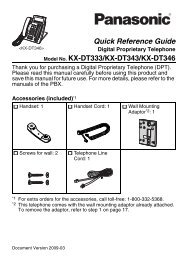
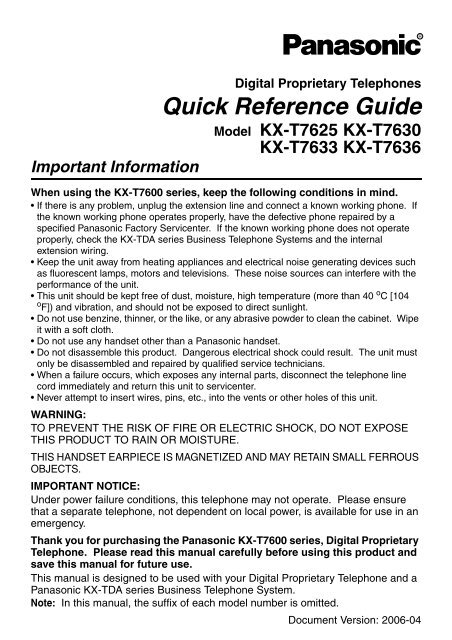
Digital Proprietary <strong>Telephone</strong>s<br />
Quick Reference <strong>Guide</strong><br />
Model <strong>KX</strong>-T7625 <strong>KX</strong>-T7630<br />
<strong>KX</strong>-T7633 <strong>KX</strong>-T7636<br />
Important Information<br />
When using the <strong>KX</strong>-T7600 series, keep the following conditions in mind.<br />
• If there is any problem, unplug the extension line and connect a known working phone. If<br />
the known working phone operates properly, have the defective phone repaired by a<br />
specified <strong>Panasonic</strong> Factory Servicenter. If the known working phone does not operate<br />
properly, check the <strong>KX</strong>-TDA series Business <strong>Telephone</strong> Systems and the internal<br />
extension wiring.<br />
• Keep the unit away from heating appliances and electrical noise generating devices such<br />
as fluorescent lamps, motors and televisions. These noise sources can interfere with the<br />
performance of the unit.<br />
• This unit should be kept free of dust, moisture, high temperature (more than 40 o C [104<br />
o F]) and vibration, and should not be exposed to direct sunlight.<br />
• Do not use benzine, thinner, or the like, or any abrasive powder to clean the cabinet. Wipe<br />
it with a soft cloth.<br />
• Do not use any handset other than a <strong>Panasonic</strong> handset.<br />
• Do not disassemble this product. Dangerous electrical shock could result. The unit must<br />
only be disassembled and repaired by qualified service technicians.<br />
• When a failure occurs, which exposes any internal parts, disconnect the telephone line<br />
cord immediately and return this unit to servicenter.<br />
• Never attempt to insert wires, pins, etc., into the vents or other holes of this unit.<br />
WARNING:<br />
TO PREVENT THE RISK OF FIRE OR ELECTRIC SHOCK, DO NOT EXPOSE<br />
THIS PRODUCT TO RAIN OR MOISTURE.<br />
THIS HANDSET EARPIECE IS MAGNETIZED AND MAY RETAIN SMALL FERROUS<br />
OBJECTS.<br />
IMPORTANT NOTICE:<br />
Under power failure conditions, this telephone may not operate. Please ensure<br />
that a separate telephone, not dependent on local power, is available for use in an<br />
emergency.<br />
Thank you for purchasing the <strong>Panasonic</strong> <strong>KX</strong>-T7600 series, Digital Proprietary<br />
<strong>Telephone</strong>. Please read this manual carefully before using this product and<br />
save this manual for future use.<br />
This manual is designed to be used with your Digital Proprietary <strong>Telephone</strong> and a<br />
<strong>Panasonic</strong> <strong>KX</strong>-TDA series Business <strong>Telephone</strong> System.<br />
Note: In this manual, the suffix of each model number is omitted.<br />
Document Version: 2006-04
Table of Contents<br />
Features for the Digital Proprietary<br />
<strong>Telephone</strong>s................................................ 2<br />
Features List ............................................. 3<br />
Using the Display Proprietary <strong>Telephone</strong>.. 5<br />
Using the Call Log or Directories ............ 5<br />
Accessing the System Features ............. 6<br />
Entering Characters ................................ 7<br />
Settings on the Programming Mode....... 9<br />
Before Initial Use<br />
Setting Features ..................................... 9<br />
Location of Controls .............................. 11<br />
Connection.............................................. 13<br />
Setting ..................................................... 13<br />
Tilt Angle Adjustment ............................ 14<br />
Wall Mounting......................................... 14<br />
Installing the <strong>KX</strong>-T7601/<strong>KX</strong>-T7603 ........ 15<br />
When you ship the product<br />
Carefully pack and send it prepaid, adequately insured and preferably in the original carton.<br />
Attach a postage-paid letter, detailing the symptom to the outside of the carton.<br />
DO NOT send the product to the Executive or Regional Sales offices. They are NOT<br />
equipped to make repairs.<br />
Product service<br />
<strong>Panasonic</strong> Factory Servicenters for this product are listed in the servicenter directory.<br />
Consult your authorized <strong>Panasonic</strong> dealer for detailed instructions.<br />
Accessories (included) For extra orders, call toll-free: 1-800-332-5368.<br />
Handset<br />
Handset<br />
Cord<br />
<strong>Telephone</strong><br />
Line Cord<br />
Wall<br />
Mounting<br />
Adaptor *<br />
Lock Plate<br />
One<br />
One<br />
One<br />
One<br />
One<br />
* This telephone comes with the wall mounting adaptor already attached. To remove the adaptor for<br />
desktop operation, push the adaptor toward the top of the unit while pressing the two tabs.<br />
Features for the Digital Proprietary <strong>Telephone</strong>s<br />
Model<br />
<strong>KX</strong>-T7636*<br />
<strong>KX</strong>-T7633*<br />
<strong>KX</strong>-T7630<br />
<strong>KX</strong>-T7625<br />
Description<br />
DPT with Speakerphone, 6-Line Display with Backlight (24-CO)<br />
DPT with Speakerphone, 3-Line Display with Backlight (24-CO)<br />
DPT with Speakerphone, 3-Line Display (24-CO)<br />
DPT with Speakerphone (24-CO)<br />
2<br />
* Optional USB Module and Add-on Key Module are available.
Features List<br />
(CO)<br />
Outside (CO) Line button<br />
Off-hook<br />
On-hook Feature number Talk<br />
(G-DN)<br />
Group Directory Number<br />
(DSS)<br />
Direct Station Selection button<br />
Feature<br />
Operation<br />
Making Calls<br />
Calling<br />
Confirmation Tone<br />
C. Tone D. Tone<br />
Dial Tone<br />
To an extension<br />
extension no.<br />
R.B. Tone<br />
Ringback Tone<br />
To an outside party<br />
(CO)<br />
outside<br />
phone no.<br />
Redial<br />
Quick Dialing<br />
quick dial no.<br />
One-touch<br />
Dialing<br />
To store<br />
PROG<br />
To dial<br />
PROGRAM<br />
OR<br />
—<br />
(CO)<br />
2<br />
assigned as a<br />
One-touch Dialing button<br />
desired no.<br />
(max. 32 digits)<br />
EXIT<br />
OR<br />
PROGRAM<br />
Operator Call<br />
0<br />
Personal<br />
Speed Dialing<br />
To store<br />
To dial<br />
3<br />
0<br />
personal speed<br />
dial no. (2 digits)<br />
desired no.<br />
(max. 32 digits) #<br />
personal speed dial no. (2 digits)<br />
C. Tone<br />
System<br />
Speed Dialing<br />
To dial<br />
system speed dial no. (3 digits)<br />
Doorphone Call<br />
Automatic<br />
Callback Busy<br />
Call Hold<br />
To set<br />
6<br />
3 1 doorphone no. (2 digits)<br />
While hearing a busy tone<br />
C. Tone<br />
To cancel<br />
4 6<br />
To answer from an idle extension To answer from an idle outside line<br />
While hearing a callback ring<br />
While hearing a callback ring<br />
outside phone no.<br />
R.B. Tone<br />
During a Conversation<br />
To hold<br />
To retrieve a call at the holding extension<br />
HOLD<br />
C. Tone<br />
(CO)<br />
To retrieve an outside call from another extension<br />
/ /<br />
C. Tone<br />
(G-DN)<br />
C. Tone<br />
(CO)<br />
Call Transfer<br />
TRANSFER<br />
C. Tone<br />
(CO)<br />
extension no.<br />
outside<br />
phone no.<br />
To an extension<br />
To an outside party<br />
3
Features List<br />
Feature<br />
Off-hook Monitor<br />
To set/cancel<br />
Operation<br />
Useful Features<br />
During a conversation using the handset<br />
Call Park<br />
Multiple Party<br />
Conversation<br />
To set<br />
TRANSFER<br />
To retrieve<br />
During a conversation<br />
C. Tone<br />
desired<br />
phone no.<br />
5 2<br />
5 2<br />
Talk to the<br />
new party.<br />
parking zone no.<br />
(2 digits)<br />
stored parking<br />
zone no. (2 digits)<br />
C. Tone<br />
Talk with<br />
multiple parties.<br />
Specified<br />
Auto<br />
C. Tone C. Tone<br />
To add other parties during a conversation<br />
C. Tone<br />
To leave a conference<br />
C. Tone<br />
(DSS)<br />
Call Pickup<br />
4 1<br />
4 0<br />
extension no.<br />
group no. (2 digits)<br />
Directed<br />
Group<br />
C. Tone<br />
Sending a Call While hearing a busy tone<br />
Waiting Tone 1 Wait for an answer.<br />
To page<br />
3 3<br />
paging group<br />
no. (2 digits)<br />
C. Tone<br />
Announce.<br />
Wait for<br />
an answer.<br />
C. Tone<br />
Paging<br />
To answer<br />
4 3<br />
C. Tone<br />
To allow/deny a paged announcement<br />
7 2 1 1<br />
Deny<br />
7 2 1<br />
0<br />
Allow<br />
C. Tone<br />
Message<br />
Waiting<br />
Caller<br />
Called<br />
extension<br />
To leave a message waiting indication<br />
When the called extension is busy or does not answer<br />
To call back<br />
C. Tone<br />
Log-in/Log-out<br />
7 3 6<br />
7 3 6<br />
1<br />
0<br />
For Log-in<br />
For Log-out<br />
ICD Group<br />
Specified<br />
extension no.<br />
All<br />
C. Tone<br />
4<br />
Consult your dealer for more details about the feature numbers.*<br />
You can change the flexible CO buttons to feature buttons.<br />
“Location of Controls” is shown on page 11.
Using the Call Log or Directories<br />
You can make a call with the call log or directories as follows:<br />
Outgoing Call Log<br />
Incoming Call Log<br />
Extension Number Directory<br />
System Speed Dialing Directory<br />
Personal Speed Dialing Directory<br />
Calling with a call log or directory<br />
While on-hook<br />
Using the Display Proprietary <strong>Telephone</strong><br />
Press Left or Right<br />
until desired log/<br />
directory appears.<br />
Press ENTER.<br />
Press Up or Down until<br />
desired item appears.<br />
Off-hook.<br />
CANCEL<br />
EXIT<br />
• To cancel or exit, press or .<br />
Clearing the log information<br />
While confirming the log information<br />
CLEAR<br />
Press Up or Down until<br />
desired item appears.<br />
Press “CLEAR”.<br />
Storing the caller’s information for the Personal Speed Dialing Directory<br />
While confirming the log information<br />
AUTO DIAL<br />
AUTO DIAL<br />
EXIT<br />
STORE<br />
OR<br />
name<br />
STORE<br />
OR<br />
OR<br />
PAUSE<br />
Press Up or<br />
Down until<br />
desired item<br />
appears.<br />
Press STORE or<br />
ENTER.<br />
Enter name *<br />
(max. 20<br />
characters).<br />
Press STORE or<br />
ENTER.<br />
Press “EXIT” or<br />
PAUSE.<br />
• * To enter characters, refer to “Entering Characters”.<br />
5
Using the Display Proprietary <strong>Telephone</strong><br />
Storing names and numbers for the Personal Speed Dialing Directory<br />
While on-hook<br />
AUTO DIAL<br />
AUTO DIAL<br />
EXIT<br />
phone no.<br />
STORE<br />
OR<br />
name<br />
STORE<br />
OR<br />
OR<br />
PAUSE<br />
Enter phone<br />
number<br />
(max. 32 digits).<br />
Press STORE<br />
or ENTER.<br />
Enter name *<br />
(max. 20<br />
characters).<br />
Press STORE<br />
or ENTER.<br />
Press “EXIT” or<br />
PAUSE.<br />
• * To enter characters, refer to “Entering Characters”.<br />
Accessing the System Features<br />
You can access these features with the “Feature Access” menu:<br />
Automatic Callback Busy Cancel<br />
Group Call Pickup<br />
Directed Call Pickup<br />
Doorphone Call<br />
Door Open<br />
External Background Music<br />
Paging<br />
While on-hook<br />
Input a<br />
parameter.<br />
Press Right<br />
four times.<br />
Press ENTER.<br />
Press Up or Down<br />
until desired feature<br />
appears.<br />
Press ENTER.<br />
• For further information, refer to the Business <strong>Telephone</strong> System <strong>User</strong> Manual.<br />
6
Using the Display Proprietary <strong>Telephone</strong><br />
Entering Characters<br />
You can enter alphabetic characters and digits using the dialing buttons. Pressing a<br />
dialing button repeatedly displays different characters, as shown in the following tables.<br />
While entering characters, you can move the cursor with the left and right Navigator keys<br />
and delete a character with the TRANSFER button.<br />
To toggle between Table 1 and Table 2, press the Soft button (S1) at any time while<br />
entering characters.<br />
Table 1 (Standard mode)<br />
Times<br />
Buttons<br />
1<br />
2<br />
1 2 3<br />
!<br />
A<br />
4 5 6 7 8 9<br />
" 1<br />
B C a b c 2<br />
3<br />
4<br />
5<br />
D<br />
G<br />
J<br />
E F d e f 3<br />
H I g h i 4<br />
K L j k l 5<br />
6<br />
7<br />
8<br />
9<br />
0<br />
#<br />
M<br />
P<br />
T<br />
W<br />
N<br />
Q<br />
U<br />
X<br />
O<br />
R<br />
V<br />
Y<br />
m<br />
S<br />
t<br />
Z<br />
n<br />
p<br />
u<br />
w<br />
o<br />
q<br />
v<br />
x<br />
6<br />
r<br />
8<br />
y<br />
s<br />
z<br />
7<br />
9<br />
. , ’ : ; 0<br />
/ + — = < ><br />
$ % & @ ( ) £ #<br />
(space)<br />
7
Using the Display Proprietary <strong>Telephone</strong><br />
Table 2 (Option mode)*<br />
Times<br />
Buttons<br />
1<br />
1 2 3 4 5 6 7 8 9<br />
!<br />
" ä<br />
ö ü 1<br />
10 11 12 13 14 15<br />
2<br />
A<br />
B C a b c À<br />
Á Â Ã Ä Å Æ Ç 2<br />
3<br />
D<br />
E F d e f Ð<br />
È É Ê Ë 3<br />
4<br />
G<br />
H I g h i Ì<br />
Í Î Ï 4<br />
5<br />
J<br />
K L j k l 5<br />
6<br />
M<br />
N O m n o Ñ<br />
Ò Ó Ô Õ Ö Ø Œ 6<br />
7<br />
P<br />
Q R S p q r s<br />
Š<br />
ß 7<br />
8<br />
T<br />
U V t u v<br />
Ù Ú Û Ü 8<br />
9<br />
0<br />
W X Y Z w x y z ý Z 9<br />
(space) . , ’ : ; 0<br />
/ + — = < ><br />
#<br />
$<br />
% & @ ( ) £ #<br />
* Some characters may not be displayed depending on the software version of the connected<br />
Business <strong>Telephone</strong> System.<br />
8
Settings on the Programming Mode<br />
Setting Features<br />
You can customize many features of your telephone as shown in the following tables.<br />
Original settings are shown in the gray boxes. For later reference, place a check mark in<br />
the boxes below to indicate your customized settings.<br />
To enter the<br />
programming mode<br />
PROG<br />
To programme<br />
To exit<br />
EXIT<br />
OR<br />
PROGRAM<br />
OR<br />
program no.<br />
OR<br />
AUTO DIAL<br />
OR<br />
program no.<br />
OR<br />
AUTO DIAL<br />
OR<br />
PROGRAM<br />
Press<br />
“PROG”or<br />
PROGRAM.<br />
Follow<br />
Programming<br />
Input.<br />
STORE<br />
Press ENTER<br />
or STORE.<br />
Follow Selection<br />
& Parameter.<br />
STORE<br />
Press ENTER<br />
or STORE.<br />
Press<br />
“EXIT”or<br />
PROGRAM.<br />
Item<br />
Would you like to turn on the<br />
display backlight of the <strong>KX</strong>-<br />
T7633/<strong>KX</strong>-T7636<br />
(Display Backlight Selection)<br />
How do you prefer to<br />
receive an intercom call<br />
(Alternate Receiving–Ring/<br />
Voice)<br />
Do you prefer to receive call<br />
waiting for outside calls<br />
Programming<br />
Input<br />
0 4<br />
[Back light]<br />
2 1<br />
[Voice Call]<br />
3 0<br />
[C.Wait CO]<br />
0<br />
1<br />
2<br />
0<br />
1<br />
2<br />
Selection & Parameter<br />
Yes–ON in use [Automatic]<br />
Yes–Always ON [Always On]<br />
No–Always OFF [Always Off]<br />
Ringing [Tone Call]<br />
Directly–The party's voice is heard<br />
without ringing. [Voice Call]<br />
Ring only–Prohibiting the caller<br />
switching to the voice mode.<br />
[Voice Call Deny]<br />
0 No (No tone) [CW Tone Off]<br />
1 Yes (Tone) [CW Tone On]<br />
0<br />
No call [CW Tone Off]<br />
Which type of call waiting<br />
for intercom calls do you<br />
prefer<br />
(Call Waiting Selection)<br />
Which type of call waiting<br />
tone do you prefer<br />
(Call Waiting Tone Type<br />
Selection)<br />
3 1<br />
[C.Wait Ext]<br />
3 2<br />
[C.Wait Tone]<br />
1<br />
2<br />
3<br />
Tone [CW Tone On]<br />
Voice announcement through the built-in<br />
speaker [OHCA (Announce)]<br />
Voice announcement through the<br />
handset [Whisper OHCA]<br />
0 Tone 1 [CW Tone 1]<br />
1 Tone 2 [CW Tone 2]<br />
9
Settings on the Programming Mode<br />
Item<br />
Would you like to show<br />
a message on the<br />
caller's telephone<br />
display<br />
(Absent Message)<br />
Programming<br />
Input<br />
4 0<br />
message no. (1-8)<br />
[Absent Msg]<br />
9<br />
0<br />
Selection & Parameter<br />
No–Off [Absent Msg Off]<br />
Yes–Shows the selected message.<br />
Yes–Shows your personal message.<br />
5 0<br />
0 Off [Fwd/DND Off]<br />
OR<br />
FWD/DND<br />
1<br />
Do Not Disturb (DND) [Do Not Disturb]<br />
Where are your<br />
incoming calls<br />
forwarded or refused<br />
(Call Forwarding<br />
[FWD]/Do Not Disturb<br />
[DND])<br />
Do you use the<br />
headset<br />
(Headset Operation)<br />
Would you like to set<br />
your extension PIN or<br />
change a stored<br />
extension PIN to new<br />
one (Extension PIN<br />
[Personal Identification<br />
Number])<br />
Would you like to<br />
prevent others from<br />
seeing your personal<br />
directory and call log<br />
(Directory and Call Log<br />
Lock)<br />
(for both calls) 2 + desired no.<br />
[Fwd/DND Both] (max. 32 digits)<br />
5 1<br />
(for outside<br />
calls)<br />
[Fwd/DND CO]<br />
5 2<br />
(for intercom<br />
calls)<br />
[Fwd/DND Ext]<br />
6 1<br />
[Headset Mode]<br />
extension PIN<br />
(max. 10 digits) To set an<br />
+ ENTER/STORE extension PIN<br />
+ same PIN<br />
9 0<br />
stored extension<br />
[Extension PIN]<br />
PIN + new PIN To change a<br />
(max. 10 digits) stored extension<br />
+ ENTER/STORE PIN to new one<br />
+ same PIN<br />
extension PIN<br />
(max. 10 digits)<br />
To unlock<br />
+ 0<br />
[Display Lock Off]<br />
9 2<br />
extension PIN<br />
[Display Lock]<br />
(max. 10 digits) To lock<br />
+ 1<br />
[Display Lock On]<br />
All–Forward all calls [Fwd All:]<br />
3 + desired no. Busy–Forwarded when your<br />
(max. 32 digits) extension is busy. [Fwd Busy:]<br />
4 + desired no. No Answer–Forwarded when<br />
(max. 32 digits) you do not answer. [Fwd N/A:]<br />
5 + desired no.<br />
(max. 32 digits)<br />
0<br />
Busy/No Answer–Forwarded when<br />
you do not answer or when your<br />
extension is busy. [Fwd B/NA:]<br />
No–Headset off [Headset Mode Off]<br />
1 Yes–Headset on [Headset Mode On]<br />
WARNING<br />
When a third party<br />
discovers the password<br />
(extension PIN) of the<br />
Business <strong>Telephone</strong> System,<br />
there will be a risk that<br />
they will make fraudulent<br />
phone calls using the<br />
telephone line, and the<br />
cost will be charged to<br />
your own account. In order<br />
to avoid this problem, we<br />
strongly recommend the<br />
following points:<br />
a) Carefully maintain the<br />
secrecy of the PIN.<br />
b) Specify a complicated<br />
PIN as long and random as<br />
you can make it.<br />
c) Change the PIN frequently.<br />
• If nothing is entered for one minute in the programming mode, the telephone<br />
returns to normal status.<br />
• To exit the mode at any time, lift the handset.<br />
• For further information on “Settings on the Programming Mode”, refer to the<br />
Business <strong>Telephone</strong> System <strong>User</strong> Manual.<br />
10
Location of Controls<br />
<strong>KX</strong>-T7636<br />
LCD (Liquid Crystal Display)<br />
Soft Buttons<br />
(S1 through S4)<br />
PAUSE<br />
Message/<br />
Ringer<br />
Lamp<br />
FWD/DND<br />
CONF<br />
INTERCOM<br />
AUTO ANS<br />
/MUTE<br />
AUTO DIAL<br />
/STORE<br />
Ringer Switch<br />
(<strong>KX</strong>-T7625)<br />
*On the bottom<br />
of the unit.<br />
Flexible<br />
CO Buttons<br />
TRANSFER<br />
REDIAL<br />
MESSAGE<br />
Headset Jack<br />
* Headset (option)<br />
Recommended: <strong>KX</strong>-TCA86, <strong>KX</strong>-TCA91,<br />
<strong>KX</strong>-TCA92<br />
Do not use a <strong>KX</strong>-T7090 headset.<br />
To order, call toll-free 1-800-332-5368<br />
FLASH/<br />
RECALL<br />
HOLD Microphone<br />
SP-PHONE<br />
ENTER<br />
CANCEL<br />
Navigator<br />
Key<br />
<strong>KX</strong>-T7625<br />
VOL<br />
PROGRAM<br />
Volume Key<br />
11
Location of Controls<br />
PAUSE<br />
FWD/DND<br />
PAUSE:<br />
Used to insert a pause when<br />
storing a telephone number. This<br />
button also functions as the<br />
PROGRAM button when there is<br />
no PROGRAM button on your<br />
telephone.<br />
FWD/DND (Call Forwarding/Do<br />
Not Disturb):<br />
Used to perform Call Forwarding<br />
or Do Not Disturb.<br />
HOLD<br />
SP-PHONE<br />
ENTER<br />
HOLD:<br />
Used to place a call on hold.<br />
SP-PHONE (Speakerphone):<br />
Used for the hands-free operation.<br />
Navigator Key (<strong>KX</strong>-T7630/7633/<br />
7636):<br />
Used to adjust the volume and the<br />
display contrast or select desired<br />
items.<br />
CONF<br />
INTERCOM<br />
AUTO ANS<br />
MUTE<br />
AUTO DIAL<br />
STORE<br />
TRANSFER<br />
CONF (Conference):<br />
Used to establish a multiple-party<br />
conversation.<br />
INTERCOM:<br />
Used to make or receive intercom<br />
calls.<br />
AUTO ANS (Auto Answer)/<br />
MUTE:<br />
Used to receive an incoming call in<br />
hands-free mode or mute the<br />
microphone/handset during a<br />
conversation.<br />
AUTO DIAL/STORE:<br />
Used for System/Personal Speed<br />
Dialing or storing program<br />
changes.<br />
TRANSFER:<br />
Used to transfer a call to another party.<br />
VOL<br />
CANCEL<br />
PROGRAM<br />
ENTER<br />
(CO)<br />
Volume Key (<strong>KX</strong>-T7625):<br />
Used to adjust the volume.<br />
CANCEL (<strong>KX</strong>-T7630/7633/7636):<br />
Used to cancel the selected item.<br />
PROGRAM (<strong>KX</strong>-T7625):<br />
Used to enter and exit the<br />
personal programming mode.<br />
ENTER (<strong>KX</strong>-T7630/7633/7636):<br />
Used to confirm the selected item.<br />
CO:<br />
Used to make or receive an<br />
outside call. Pressing this button<br />
seizes an idle outside line<br />
automatically. (Button assignment<br />
is required.)<br />
Also used as feature buttons.<br />
(Button assignment is required.)<br />
REDIAL<br />
MESSAGE<br />
FLASH/<br />
RECALL<br />
REDIAL:<br />
Used to redial the last dialed<br />
number.<br />
MESSAGE:<br />
Used to leave a message waiting<br />
indication or call back the party<br />
who left the message waiting<br />
indication.<br />
FLASH/RECALL:<br />
Used to disconnect the current call<br />
and make another call without<br />
hanging up.<br />
Message/Ringer Lamp:<br />
When you receive an intercom<br />
call, the lamp flashes green, and<br />
on an outside call, the lamp<br />
flashes red. When someone has<br />
left you a message, the lamp stays<br />
on red.<br />
Soft Buttons (<strong>KX</strong>-T7630/7633/<br />
7636):<br />
Used to select the item displayed<br />
on the bottom line on the display.<br />
12
The telephone line cord (included)<br />
CAUTION<br />
Ensure the cords<br />
are inserted in<br />
the grooves to<br />
prevent damage<br />
to the<br />
connector.<br />
Connection<br />
Connect to a <strong>KX</strong>-TDA series Business <strong>Telephone</strong> System<br />
( TO MAIN UNIT<br />
/ PABX<br />
).<br />
Connect to a single line telephone for<br />
XDP or parallel connections ( ).<br />
TO TEL<br />
< Back view><br />
CAUTION<br />
Ensure the handset<br />
cord is inserted in<br />
the hook to prevent<br />
damage to the<br />
connector.<br />
• Consult your dealer for more details about XDP.<br />
Setting<br />
Speaker volume<br />
Handset/Headset<br />
volume*<br />
Ringer volume<br />
While in hands-free conversation<br />
While using the handset or headset Press Up or Down.<br />
<strong>KX</strong>-T7625 While on-hook or receiving a call<br />
RINGER Slide the lever of<br />
If On is selected,<br />
the Ringer switch<br />
press Up or Down.<br />
to (Off/On).<br />
<strong>KX</strong>-T7630/7633/7636 While on-hook or receiving a call<br />
Press Up or Down.<br />
LCD Contrast<br />
<strong>KX</strong>-T7630/7633/7636<br />
While on-hook<br />
PROG<br />
0 1<br />
EXIT<br />
Ring Tone<br />
PROG<br />
(CO)<br />
OR<br />
OR<br />
PROGRAM<br />
0 1<br />
3 0<br />
OR<br />
AUTO DIAL<br />
STORE<br />
Press Twice.<br />
* If you hear your own voice through the handset or headset, decrease the volume.<br />
EXIT<br />
OR<br />
PROGRAM<br />
13
Tilt Angle Adjustment<br />
The tilt angle of the operation board can be<br />
adjusted to one of four angles.<br />
4 32<br />
1<br />
To lift: Lift up the operation board to the desired<br />
step-angle (1 2 3 4).<br />
To set down: Lift up the operation board to the<br />
highest angle and then press down to<br />
step-angle 1. Be careful not to get your<br />
fingers caught between the base and<br />
the operation board.<br />
Pull down the handset hook until it locks to prevent the<br />
handset from slipping down from the operation board when at<br />
step-angle 4.<br />
Wall Mounting<br />
1 Set the operation board to step-angle 1.<br />
4 Mount the unit on the wall.<br />
100 mm 83 mm<br />
(3-15/16 in) (3-1/4 in)<br />
2 Connect the telephone line cord, and<br />
set the lock plate on the wall mounting<br />
adaptor. While the lock plate is in the<br />
up position, perform and then to<br />
attach the wall mounting adaptor to<br />
the telephone.<br />
Screw<br />
5 Pull down the handset hook until it<br />
locks, so the tab holds the handset.<br />
To temporarily place the handset down<br />
during a conversation, hook it over the<br />
top edge of the phone as shown.<br />
3 Slide the lock plate down until it clicks.<br />
To remove the mounting wall adaptor,<br />
slide the lock<br />
plate ( )<br />
into the up<br />
position, then<br />
push and<br />
remove the<br />
wall mounting<br />
adaptor from<br />
the<br />
telephone.<br />
14
Installing the <strong>KX</strong>-T7601/<strong>KX</strong>-T7603<br />
To prevent damage to the telephone, be sure to unplug the extension line<br />
before you set up or remove the USB Module or the Add-on Key Module.<br />
<strong>KX</strong>-T7603 (For <strong>KX</strong>-T7633/7636)<br />
<strong>KX</strong>-T7601 (For <strong>KX</strong>-T7633/7636)<br />
includes USB cable<br />
The USB Module can be connected between<br />
the digital proprietary telephone and the<br />
personal computer through USB interface to<br />
implement personal CTI (Computer<br />
Telephony Integration).<br />
1 Remove the connector cover<br />
using a screwdriver.<br />
The Add-on Key Module has<br />
12 CO buttons. These<br />
buttons are used to seize<br />
an outside line, make a<br />
call using One-touch<br />
Dialing, or access<br />
certain features.<br />
<br />
1 Open the cover.<br />
2 Insert the flat cable<br />
into the connector.<br />
2 Attach the <strong>KX</strong>-T7603 to<br />
your telephone with<br />
screws.<br />
3 Couple both hinges<br />
and slide in the<br />
unit.<br />
3 Insert the flat cable into<br />
the connector.<br />
4 Push down the cover until it locks,<br />
and connect the USB cable to<br />
USB port.<br />
Connect to PC<br />
4 Close the cover.<br />
L<br />
PULL<br />
* Please use a USB cable shorter than 3 m (3.28 yards).<br />
15
SERIAL NO.<br />
(found on the bottom of the unit)<br />
DATE OF PURCHASE<br />
NAME OF DEALER<br />
DEALER’S ADDRESS<br />
For your future reference<br />
DEALER’S TEL. NO.<br />
Copyright:<br />
This material is copyrighted by <strong>Panasonic</strong> Communications Co., Ltd., and may be<br />
reproduced for internal use only. All other reproduction, in whole or in part, is<br />
prohibited without the written consent of <strong>Panasonic</strong> Communications Co., Ltd.<br />
© 2003 <strong>Panasonic</strong> Communications Co., Ltd. All Rights Reserved.<br />
<strong>Panasonic</strong> Consumer Electronics Company,<br />
Division of <strong>Panasonic</strong> Corporation of North America<br />
One <strong>Panasonic</strong> Way, Secaucus, New Jersey 07094<br />
<strong>Panasonic</strong> Puerto Rico, Inc.<br />
San Gabriel Industrial Park, Ave. 65 de Infantería, Km. 9.5,<br />
Carolina, Puerto Rico 00985<br />
http://www.panasonic.com/csd<br />
PSQX2607WA KK0703TT3036