1-2-Trio Awning Erection Instructions - Thomson Caravans
1-2-Trio Awning Erection Instructions - Thomson Caravans
1-2-Trio Awning Erection Instructions - Thomson Caravans
You also want an ePaper? Increase the reach of your titles
YUMPU automatically turns print PDFs into web optimized ePapers that Google loves.
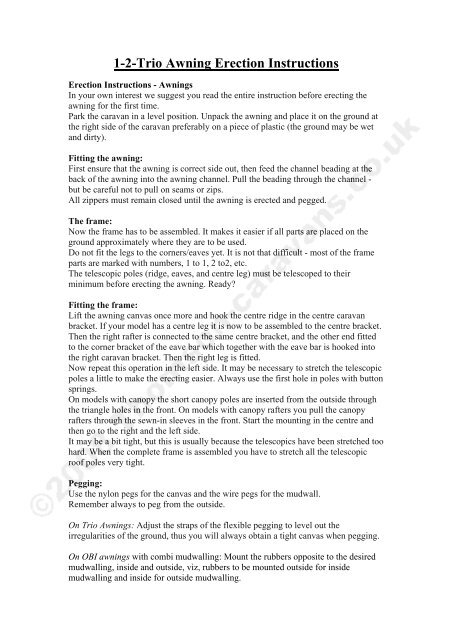
1-2-<strong>Trio</strong> <strong>Awning</strong> <strong>Erection</strong> <strong>Instructions</strong><br />
<strong>Erection</strong> <strong>Instructions</strong> - <strong>Awning</strong>s<br />
In your own interest we suggest you read the entire instruction before erecting the<br />
awning for the first time.<br />
Park the caravan in a level position. Unpack the awning and place it on the ground at<br />
the right side of the caravan preferably on a piece of plastic (the ground may be wet<br />
and dirty).<br />
Fitting the awning:<br />
First ensure that the awning is correct side out, then feed the channel beading at the<br />
back of the awning into the awning channel. Pull the beading through the channel -<br />
but be careful not to pull on seams or zips.<br />
All zippers must remain closed until the awning is erected and pegged.<br />
The frame:<br />
Now the frame has to be assembled. It makes it easier if all parts are placed on the<br />
ground approximately where they are to be used.<br />
Do not fit the legs to the corners/eaves yet. It is not that difficult - most of the frame<br />
parts are marked with numbers, 1 to 1, 2 to2, etc.<br />
The telescopic poles (ridge, eaves, and centre leg) must be telescoped to their<br />
minimum before erecting the awning. Ready<br />
Fitting the frame:<br />
Lift the awning canvas once more and hook the centre ridge in the centre caravan<br />
bracket. If your model has a centre leg it is now to be assembled to the centre bracket.<br />
Then the right rafter is connected to the same centre bracket, and the other end fitted<br />
to the corner bracket of the eave bar which together with the eave bar is hooked into<br />
the right caravan bracket. Then the right leg is fitted.<br />
Now repeat this operation in the left side. It may be necessary to stretch the telescopic<br />
poles a little to make the erecting easier. Always use the first hole in poles with button<br />
springs.<br />
On models with canopy the short canopy poles are inserted from the outside through<br />
the triangle holes in the front. On models with canopy rafters you pull the canopy<br />
rafters through the sewn-in sleeves in the front. Start the mounting in the centre and<br />
then go to the right and the left side.<br />
It may be a bit tight, but this is usually because the telescopics have been stretched too<br />
hard. When the complete frame is assembled you have to stretch all the telescopic<br />
roof poles very tight.<br />
Pegging:<br />
Use the nylon pegs for the canvas and the wire pegs for the mudwall.<br />
Remember always to peg from the outside.<br />
On <strong>Trio</strong> <strong>Awning</strong>s: Adjust the straps of the flexible pegging to level out the<br />
irregularities of the ground, thus you will always obtain a tight canvas when pegging.<br />
On OBI awnings with combi mudwalling: Mount the rubbers opposite to the desired<br />
mudwalling, inside and outside, viz, rubbers to be mounted outside for inside<br />
mudwalling and inside for outside mudwalling.
Start pegging at the caravan corners i.e., the inner corners of the awning. Then peg the<br />
front corners - watch the direction of the side walls - and stretch well. Finally you peg<br />
the side and the front.<br />
Important: At all the zippers the rubber straps should be cross pegged:<br />
Now the erecting of the awning is almost finished - only pegging of the mudwall and<br />
the triangles at the caravan corners remain to be done.<br />
Finally you fit the curtains and if necessary stretch the telescopic poles once more.<br />
Now sit down and enjoy the sight of a beautiful awning - you have many camping<br />
adventures ahead of you. Have a nice camping holiday!<br />
Should you need further advice or instructions don't hesitate to contact your dealer.<br />
WARRANTY<br />
The factory guarantee against defects in material and workmanship within a period of<br />
12 months from the date of purchase against presentation of a receipt.<br />
Take care of the instruction, which has to be followed. If any of these conditions are<br />
ignored, factory warranty will not apply.<br />
TREATMENT AND MAINTENANCE<br />
The awnings are manufactured of carefully selected materials, but even then you have<br />
to treat your awning with care to ensure maximum satisfaction.<br />
<strong>Instructions</strong> have to be followed.<br />
Keep the tent cool and dry when not in use. Clean the frame after each use.<br />
The best way to dry a wet tent is over the frame.<br />
Clean the awning with pure water and a soft brush. For the windows you can add a<br />
little vinegar and nothing else.<br />
Spots on the canvas can be removed with mild soap. You must rinse carefully and<br />
then re-proof. Never use detergents.<br />
The canvas is impregnated in order to make it water-repellent. A brand new tent - or<br />
an extremely dry tent - requires some moisture before it is fully water-repellent.<br />
The fibres have to expand. Heavy night dew or a light shower will make the tent<br />
water tight.


