2005-2010 Ford 4.6L 3v Mustang GT - Vortech Superchargers
2005-2010 Ford 4.6L 3v Mustang GT - Vortech Superchargers
2005-2010 Ford 4.6L 3v Mustang GT - Vortech Superchargers

You also want an ePaper? Increase the reach of your titles
YUMPU automatically turns print PDFs into web optimized ePapers that Google loves.
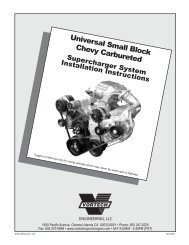
<strong>Ford</strong> <strong>4.6L</strong> 3V<br />
<strong>Mustang</strong> <strong>GT</strong><br />
Supercharger System<br />
Installation Instructions<br />
<strong>2005</strong>-<strong>2010</strong> Model Year*<br />
50-State Smog Legal per C.A.R.B. EO #D-213-27<br />
* 2007-<strong>2010</strong> Models legal in California only for racing vehicles which may never be used upon a highway.<br />
®<br />
1650 Pacific Avenue, Channel Islands CA 93033-9901 • Phone: 805 247-0226<br />
Fax: 805 247-0669 • www.vortechsuperchargers.com • M-F 8:00AM - 4:30PM (PST)<br />
DP/N: 4FU020-010 - v6.2, 06/08/10<br />
ENGINEERING, LLC
FOREWORD<br />
This manual provides information on the installation, maintenance and service of the<br />
<strong>Vortech</strong> supercharger kit expressly designed for this vehicle. All information, illustrations<br />
and specifications contained herein are based on the latest product information<br />
available at the time of this publication. Changes to the manual may be made at any time<br />
without notice. Contact <strong>Vortech</strong> Engineering for any additional information regarding this kit<br />
and any of these modifications at (805) 247-0226 8:00am-4:30pm PST.<br />
Take note of the following before proceeding:<br />
1. Proper installation of this supercharger kit requires general automotive<br />
mechanic knowledge and experience. Please browse through each step<br />
of this instruction manual prior to beginning the installation to determine if<br />
you should refer the job to a professional installer/technician. Please contact<br />
your dealer or <strong>Vortech</strong> Engineering for possible installers in your<br />
area.<br />
2. This product was designed for use on stock (un-modified, OEM) vehicles. The PCM<br />
(computer), engine, transmission, drive axle ratios and tire O.D. must be stock. If the<br />
vehicle or engine has been modified in any way, check with <strong>Vortech</strong> prior to installation<br />
and use of this product.<br />
3. Use only premium grade fuel with a minimum of 91 octane (R+M/2).<br />
4. Always listen for any sign of detonation (knocking/pinging) and discontinue hard use<br />
(no boost) until problem is resolved.<br />
5. <strong>Vortech</strong> is not responsible for any clutch, transmission, drive-line or engine damage.<br />
Exclusions from <strong>Vortech</strong> warranty coverage considerations include, but not limited to:<br />
1. Neglect, abuse, lack of maintenance, abnormal operation or improper installation.<br />
2. Continued operation with an impaired vehicle or sub-system.<br />
3. The combined use of <strong>Vortech</strong> components with other modifications such as, but not limited<br />
to, exhaust headers, aftermarket camshafts, nitrous oxide, third party PCM programming<br />
or other such changes.<br />
©<strong>2010</strong> b VORTECH ENGINEERING, LLC<br />
All rights reserved. No part of this publication may be reproduced, transmitted, transcribed, or translated<br />
into another language in any form, by any means without written permission of <strong>Vortech</strong> Engineering, LLC.<br />
P/N: 4FU020-010 v6.2, 06-08-10<br />
©<strong>2010</strong> <strong>Vortech</strong> Engineering, LLC<br />
All Rights Reserved, Intl. Corp. Secured<br />
ii
TABLE OF CONTENTS<br />
FOREWORD ....................................................................ii<br />
TABLE OF CONTENTS. ...........................................................<br />
IMPORTANT NOTES. .............................................................iv<br />
TOOL & SUPPLY REQUIREMENTS. .................................................v<br />
PARTS LIST (<strong>2005</strong>-2006 <strong>Mustang</strong> <strong>GT</strong>, Standard) . . . . . . . . . . . . . . . . . . . . . . . . . . . . . . . . . . . . . . .vi<br />
PARTS LIST (<strong>2005</strong>-2006 <strong>Mustang</strong> <strong>GT</strong>, Standard) Internally Lubricated ..................... vii<br />
PARTS LIST (<strong>2005</strong>-2006 <strong>Mustang</strong> <strong>GT</strong>, H.O.). ......................................... vii<br />
PARTS LIST (<strong>2005</strong>-2006 <strong>Mustang</strong> <strong>GT</strong>, H.O.) Internally Lubricated ..........................x<br />
PARTS LIST (2007-2008 <strong>Mustang</strong> <strong>GT</strong>, Standard) . . . . . . . . . . . . . . . . . . . . . . . . . . . . . . . . . . . . . . .ix<br />
PARTS LIST (2007-2008 <strong>Mustang</strong> <strong>GT</strong>, Standard) Internally Lubricated .....................xiii<br />
PARTS LIST (2007-2008 <strong>Mustang</strong> <strong>GT</strong>, H.O.). ..........................................x<br />
PARTS LIST (2007-2008 <strong>Mustang</strong> <strong>GT</strong>, H.O.) Internally Lubricated .........................xvi<br />
PARTS LIST (2008 <strong>Mustang</strong> Bullitt) Internally Lubricated ................................xviii<br />
PARTS LIST (<strong>2010</strong> <strong>Mustang</strong> <strong>GT</strong>, Standard) Internally Lubricated .......................... xx<br />
PARTS LIST (<strong>2010</strong> <strong>Mustang</strong> <strong>GT</strong>, H.O.) Internally Lubricated .............................xxii<br />
1. PREPARATION/REMOVAL ....................................................1<br />
2. OIL FEED INSTALLATION. ....................................................5<br />
3. OIL DRAIN ASSEMBLY INSTALLATION ..........................................6<br />
4. POWER STEERING RELOCATION .............................................7<br />
4.1 POWER STEERING RELOCATION (<strong>2010</strong> Only) ...................................8<br />
5.1 COOLANT TUBE RELOCATION (<strong>2005</strong>-2006 Only). ................................9<br />
5.2 THERMOSTAT HOUSING/RADIATOR HOSE MODIFICATION<br />
(2007-<strong>2010</strong> Model Year Only) .................................................12<br />
6.1 PULLEY AND SPACER REPLACEMENT (Bullet/V-Power Only) ......................14<br />
6.2 SUPERCHARGER MOUNTING PLATE INSTALLATION ............................18<br />
7. THERMOSTAT HOUSING RELOCATION (<strong>2005</strong>-2006 Only). ........................21<br />
8. CHARGE AIR COOLER INSTALLATION (H.O. Kits Only). ..........................23<br />
8.A BUMPER COVER AND SPLASH PAN. ....................................23<br />
8.B CHARGE AIR COOLER ASSEMBLY INSTALLATION (H.O. Kits Only) ...........26<br />
8.C ENGINE COOLANT RESERVOIR INSTALLATION (<strong>2005</strong>-2006<br />
Models Only). ........................................................34<br />
8.D RADIATOR HOSE MODIFICATIONS (<strong>2005</strong>-2006 Models Only) ................37<br />
8.E ENGINE COOLANT RESERVOIR INSTALLATION (2007-<strong>2010</strong><br />
Models Only). ........................................................38<br />
8.F COOLER CORE INSTALLATION ........................................41<br />
8.G COOLANT RESERVOIR FILL ...........................................42<br />
8.1 <strong>2010</strong> MUSTANG BUMPER TRIMMING (<strong>2010</strong> Models Only) .........................43<br />
8.2 COMPRESSOR BYPASS VALVE ASSEMBLY INSTALLATION .......................45<br />
8.3 COMPRESSOR BYPASS VALVE ASSEMBLY INSTALLATION (V-Power/Bullitt). .........46<br />
9. AIR DISCHARGE ASSEMBLY (Non-cooled Kits Only) .............................47<br />
10. COMPRESSOR BY-PASS VALVE INSTALLATION (Non-cooled kits only) . . . . . . . . . . . . . . 48<br />
11. COOLANT RESERVOIR RE-INSTALLATION (Non-cooled Kits Only). .................49<br />
12. CRANK CASE BREATHER AND PCV INSTALLATION .............................50<br />
13. AIR INLET ASSEMBLY ......................................................51<br />
14. FUEL PUMP UPGRADE .....................................................54<br />
15. REFLASH COMPUTER. .....................................................57<br />
16. FINAL CHECK .............................................................58<br />
iii<br />
P/N: 4FU020-010 v6.2, 06-08-10<br />
©<strong>2010</strong> <strong>Vortech</strong> Engineering, LLC<br />
All Rights Reserved, Intl. Corp. Secured
NOTICE<br />
This product is protected by state common law, copyright and/or patent.<br />
All legal rights therein are reserved. The design, layout, dimensions,<br />
geometry, and engineering features shown in this product are the exclusive<br />
property of <strong>Vortech</strong> Engineering, LLC. This product may not be<br />
copied or duplicated in whole or part, abstractly or fundamentally, intentionally<br />
or fortuitously, nor shall any design, dimension, or other information<br />
be incorporated into any product or apparatus without prior written<br />
consent of <strong>Vortech</strong> Engineering, LLC.<br />
P/N: 4FU020-010 v6.2, 06-08-10<br />
©<strong>2010</strong> <strong>Vortech</strong> Engineering, LLC<br />
All Rights Reserved, Intl. Corp. Secured<br />
iv
<strong>2005</strong>-<strong>2010</strong> <strong>Mustang</strong> <strong>GT</strong><br />
Installation Instructions<br />
Congratulations on selecting the best performing and best backed automotive<br />
supercharger available today... the VORTECH® supercharger!<br />
Before beginning this installation, please read through this entire instruction booklet and the Street<br />
Supercharger System Owner’s Manual which includes the Limited Warranty Program, the Warranty<br />
Registration form and return envelope.<br />
<strong>Vortech</strong> supercharger systems are performance improving devices. In most cases, increases in<br />
torque of 30-35% and horsepower between 35-45% can be expected with the boost levels specified<br />
by <strong>Vortech</strong> Engineering. This product is intended for use on healthy, well maintained engines.<br />
Installation on a worn-out or damaged engine is not recommended and may result in failure of the<br />
engine as well as the supercharger. <strong>Vortech</strong> Engineering is not responsible for engine damage.<br />
Installation on new vehicles will not harm or adversely affect the break-in period so long as factory<br />
break-in procedures are followed.<br />
For best performance and continued durability, please take note of the following key points:<br />
1. Use only premium grade fuel 91 octane or higher (R+M/2).<br />
2. The engine must have stock compression ratio.<br />
3. If the engine has been modified in any way, check with <strong>Vortech</strong> prior to using this product.<br />
4. Always listen for any sign of detonation (pinging) and discontinue hard use (no boost) until<br />
problem is resolved.<br />
5. Perform an oil and filter change upon completion of this installation and prior to test driving<br />
your vehicle. Thereafter, always use a high grade SF rated engine oil or a high quality synthetic,<br />
and change the oil and filter at least every 3,000 miles. Never attempt to extend the<br />
oil change interval beyond 3,000 miles, regardless of oil manufacturer’s claims as potential<br />
damage to the supercharger may result.<br />
6. Before beginning installation, replace all spark plugs that are older than 1-year or 15,000<br />
miles with original heat range plugs as specified by the manufacturer and reset timing to<br />
factory specifications (follow the procedures indicated within the factory repair manual and/<br />
or as indicated on the factory underhood emissions tag). Do not use platinum spark plugs<br />
unless they are original equipment. Change spark plugs every 20,000 miles.<br />
TOOL & SUPPLY REQUIREMENTS<br />
• Factory repair manual<br />
• 3/8" socket and drive set: SAE & metric<br />
• 1/2" socket and drive set: SAE & metric<br />
• 3/8"NPT tap, 3/8-18 tap & handle<br />
• Adjustable wrench<br />
• Open end wrenches: 3/8", 7/16", 1/2", 9/16"<br />
• Center punch and a 5/8" tapered punch<br />
• 6 quarts (or what is specified in your owner’s manual)<br />
SF rated quality engine oil, oil filter and wrench<br />
ENGINEERING, LLC<br />
®<br />
If it has been 15,000 miles or more since your vehicle’s last spark plug change, then you will<br />
also need:<br />
• Spark plug socket<br />
• NEW spark plugs<br />
v<br />
P/N: 4FU020-010 v6.2, 06-08-10<br />
©<strong>2010</strong> <strong>Vortech</strong> Engineering, LLC<br />
All Rights Reserved, Intl. Corp. Secured
®<br />
ENGINEERING, LLC<br />
<strong>2005</strong>-2006 <strong>Mustang</strong> <strong>GT</strong>, Standard<br />
Part No. 4FU218-010SQ/018SQ<br />
PARTS LIST<br />
IMPORTANT: Before beginning installation, verify that all parts are included in the kit. Report any shortages or damaged<br />
parts immediately.<br />
Part No. Description Qty. Part Number Description Qty.<br />
2E229-230 V2-S SUPERCHARGER ASY 1<br />
4FU130-036 OIL DRAIN ASSY 1<br />
7U030-036 1/2" OIL DRAIN HOSE 2.5<br />
7R001-008 #8 HOSE CLAMP 2<br />
7P375-017 3/8NPT X 1/2 BEADED HSE BRB 1<br />
4FU130-026 OIL FEED ASY 1<br />
7U250-090-260 OIL FEED HOSE, 26" -4X90° 1<br />
7P125-005 1/8 NPT STR. X -4 JIC FTG STL 1<br />
7P250-091 1/4 NPT 90° X -4JIC FTG STL 1<br />
7P250-034 1/4 NPT X 1/4 NPT STRT T 1<br />
4FU112-020 DISCHARGE ASY 1<br />
4FU012-020 DUCT, DISCH, MUST <strong>GT</strong> STD 1<br />
7S450-200 SLEEVE, 4 1/2 X 2, BLUE 1<br />
7S300-276 REDUCER, 3.0 X 2.75 X 2.5L 1<br />
7R002-044 #44 HOSE CLAMP 1<br />
7R002-048 #48 HOSE CLAMP 1<br />
7R002-072 #72 HOSE CLAMP 2<br />
7R002-016 #16 HOSE CLAMP 4<br />
7U030-046 5/32" VACUUM LINE 5<br />
8D001-001 STD COMPRESS BYPASS VALVE 1<br />
7U034-016 1" GS HEATER HOSE 1.25<br />
7U034-016 1" GS HEATER HOSE 0.583<br />
7P218-156 VAC TEE, 7/32,7/32,5/32 1<br />
4FU112-010 AIR INTAKE ASY 1<br />
4FU012-010 INLET DUCT,"A" 1<br />
4FU012-015 INLET DUCT,"B" 1<br />
7R002-056 #56 HOSE CLAMP 1<br />
7S400-200 SLEEVE, 4 X 2, BLUE 2<br />
7S400-351 REDUCER SLV 4.00 X 3.5 X 2.35L 1<br />
7R002-064 #64 HOSE CLAMP 5<br />
8H040-235 AIR FILTER, 4.0FLG X 7.0L 1<br />
8A003-071 MAF, 3.8 I.D. MUSTANG <strong>GT</strong> 1<br />
7P750-102 3/4NPT X 1" X 90° HSE FIT 1<br />
7P250-047 1/4NPT TO 3/8"BARB 90° 1<br />
4FU010-071 BRKT, INTAKE SUPPORT 1<br />
7U032-016 3/8" EFI FUEL HSE HI-PSR 4<br />
4FU013-010 COVER, AIR FILTER, MUST <strong>GT</strong> 1<br />
7C040-008 M4-.7X8MM SCHD SS 2<br />
4FU111-044 S/C MOUNTING BRKT ASY 1<br />
4FU010-044 S/C MOUNT PLT, MUST <strong>GT</strong> 1<br />
4FU010-034 IDLER MOUNT PLATE, MUST 1<br />
4FU017-011 SPACER, STUDDED MUST <strong>GT</strong> 2<br />
2A017-750-05 SPACER, .750 OD X 2.691 LONG 2<br />
2A017-750-06 SPACER, .750 OD X 2.712 LONG 1<br />
2A017-879-08 SPACER, .875 OD X 1.776 LONG 1<br />
2A017-750-07 SPACER, .750 OD X .097 LONG 1<br />
4FU017-021 SPACER, IDLER, MUST <strong>GT</strong> 1<br />
4PCS016-160 PULLEY, IDLER 1<br />
2A046-120 BELT, GATES K061203 1<br />
7A375-375 3/8-16 X 3-3/4 HX HD 1<br />
7C080-150 M8 X 1.25 X 150MM HXHD CL10.9 1<br />
7C080-140 M8 X 1.25 X 140 HXHD CL8.8 2<br />
7A375-100 3/8-16 X 1 G5 HHCS, PLT 7<br />
7K312-030 5/16 AN WASHER, S.S. 2<br />
7K375-040 3/8 AN960 FLAT WASHR PLATED 10<br />
4FU139-096 PCV MOD ASY 1<br />
7P375-106 PCV VALVE, FORD, 3/8" HOSE 1<br />
7P625-377 5/8" -3/8" REDUCER BARB UNION 1<br />
7R004-002 STEPLESS CLAMP, 17.0-70 2<br />
7R004-004 STEPLESS CLAMP, 1.0 OD HOSE 3<br />
7R004-007 STEPLESS CLAMP, 28.6 X 7MM WID 1<br />
7U032-016 3/8" EFI FUEL HSE HI-PSR 0.25<br />
7U033-020 HOSE, 5/8"ID CLASS 1 EMISSIONS 0.66667<br />
4FU214-021 COOL BYP HOSE RELOC ASY 1<br />
4FU114-021 ASY, WATER OUTLET, 05 MUST <strong>GT</strong> 1<br />
7J875-010 7/8 SEALING WASHER 1<br />
7F875-010 NUT, 7/8-14, SHORT/JAM 1<br />
7U133-050 1.5" X 90° HOSE, LONG LEG 1<br />
7U133-190 HOSE, COOLNT DRIV SIDE 05 MUST 1<br />
7U038-000 3/4" HEATER HOSE 3.5<br />
7P375-075 3/4" HOSE BARB UNION, BRASS 1<br />
7R002-020 #20 HOSE CLAMP 4<br />
7R002-024 #24 HOSE CLAMP 2<br />
7P125-002 FREEZE PLUG, 1.25 DIA, .25 TAL 1<br />
7R002-010 #10 HOSE CLAMP 4<br />
7P125-016 1/8 NPT PLUG 1<br />
4FU110-010 P/S RESERVOIR RELOCATION 1<br />
7P375-075 3/4" HOSE BARB UNION, BRASS 1<br />
7P375-050 3/8" HOSE UNION, BRASS 1<br />
7R001-004 #4 HOSE CLAMP 2<br />
7R001-008 #8 HOSE CLAMP 2<br />
7U038-030 HOSE, P/S, 3/4 ID 3<br />
7U032-016 3/8" EFI FUEL HSE HI-PSR 3<br />
7A250-075 1/4-20 X .75 SHCS PLTD 1<br />
7J250-001 1/4 WASHER, SAE, PLTD 2<br />
7F250-021 1/4-20 NYLOCK NUT ZINC PLATED 1<br />
4FU010-010 P/S RELOC BRKT, 05 <strong>GT</strong> MUST 1<br />
7U100-055 TIE WRAP, 7.5" NYLON 4<br />
8F060-048 FUEL INJ, 39LB EV6, OEM 03 COB 8<br />
008110 SMALL SILVER DIE CUT DECAL 2<br />
008444 3 YR S/C WARRANTY PKG 1<br />
008130 LICENSE PLATE FRAME, VORTECH 1<br />
4FU020-010 INSTR MAN 05-08 MUST <strong>GT</strong> 1<br />
5A003-035 PREDATOR, 05-08 MUSTANG 1<br />
8F101-262 FUEL PMP ASY,05 MUST TWIN INTA 1<br />
7U032-018 3/8" SUBMERSIBLE EFI FUEL HOSE 2.75<br />
7U100-055 TIE WRAP, 7.5" NYLON 4<br />
7R004-002 STEPLESS CLAMP, 17.0-70 2<br />
8F001-255 255 INTANK FUEL PUMP '86-'97 1<br />
7R002-044 #44 HOSE CLAMP 1<br />
7R004-006 STEPLESS CLAMP, 11.3 X 5MM WID 4<br />
5W001-022 T-TAP CONN,14-16 AWG 2<br />
5W001-009 16-14GA MALE SLIDE INSULATED 2<br />
5W001-080 FUSE, 20 AMP. MINI BLADE 1<br />
7P375-099 Y-UNION, 3/8" BARBED TEFLON 1<br />
7U032-025 HOSE, 5/16" ID,3/8"OD, 1/32" W 0.125<br />
7U032-030 HOSE,SPIRAL 3/8" CUFF ID, 1' L 2<br />
4FU101-001 MAF EXT MOD 05+ MUSTANG 1<br />
5W018-030 18GA STRD WIRE GREY 1<br />
5W018-010 18GA STRD WIRE RED 1<br />
5W018-020 18GA STRD WIRE BLK, UL1015 1<br />
5W018-080 18GA STRD WIRE BLUE BULK 1<br />
5W018-090 18GA STRD WIRE BROWN BULK 1<br />
5W018-100 18GA STRD WIRE PURPLE 1<br />
5W001-007 3/16" HEAT-SHRINK TUBING 1.5<br />
5W001-005 3/8" PLASTIC WIRE LOOM 1.5<br />
5W001-012 18-22 GA BUTT CONN RED INSUL 12<br />
P/N: 4FU020-010 v6.2, 06-08-10<br />
©<strong>2010</strong> <strong>Vortech</strong> Engineering, LLC<br />
All Rights Reserved, Intl. Corp. Secured<br />
vi
®<br />
ENGINEERING, LLC<br />
<strong>2005</strong>-2006 <strong>Mustang</strong> <strong>GT</strong>, Standard<br />
Part No. 4FU218-010L/018L<br />
PARTS LIST<br />
IMPORTANT: Before beginning installation, verify that all parts are included in the kit. Report any shortages or damaged<br />
parts immediately.<br />
Part No. Description Qty. Part Number Description Qty.<br />
008110 SMALL SILVER DIE CUT DECAL 2<br />
008130 LICENSE PLATE FRAME 1<br />
008447 1 YR S/C WARRANTY PKG 1<br />
009035 S/C LUBE, BOTTLED, 3-PACK 1<br />
2F329-010 V3 SUPERCHARGER ASY, STD 1<br />
4FU020-010 INSTR MAN 05-08 MUST <strong>GT</strong> 1<br />
4FU110-010 P/S RESERVOIR RELOCATION 1<br />
7P375-075 3/4" HOSE BARB UNION, BRASS 1<br />
7P375-050 3/8" HOSE UNION, BRASS 1<br />
7R001-004 #4 HOSE CLAMP 2<br />
7R001-008 #8 HOSE CLAMP 2<br />
7U038-030 HOSE, P/S, 3/4 ID 3<br />
7U032-016 3/8" EFI FUEL HSE HI-PSR 3<br />
7A250-075 1/4-20 X .75 SHCS PLTD 1<br />
7J250-001 1/4 WASHER, SAE, PLTD 2<br />
7F250-021 1/4-20 NYLOCK NUT ZINC PLATED 1<br />
4FU010-010 P/S RELOC BRKT, 05 <strong>GT</strong> MUST 1<br />
7U100-055 TIE WRAP, 7.5" NYLON 4<br />
4FU111-044 S/C MOUNTING BRKT ASY 1<br />
4FU010-044 S/C MOUNT PLT, MUST <strong>GT</strong> 1<br />
4FU010-034 IDLER MOUNT PLATE, MUST 1<br />
4FU017-011 SPACER, STUDDED MUST <strong>GT</strong> 2<br />
2A017-750-05 SPACER, .750 OD X 2.691 LONG 2<br />
2A017-750-06 SPACER, .750 OD X 2.712 LONG 1<br />
2A017-879-08 SPACER, .875 OD X 1.776 LONG 1<br />
2A017-750-07 SPACER, .750 OD X .097 LONG 1<br />
4FU017-021 SPACER, IDLER, MUST <strong>GT</strong> 1<br />
4PCS016-160 PULLEY, IDLER 1<br />
2A046-120 BELT, GATES K061203 1<br />
7A375-375 3/8-16 X 3-3/4 HX HD 1<br />
7C080-150 M8 X 1.25 X 150MM HXHD CL10.9 1<br />
7C080-140 M8 X 1.25 X 140 HXHD CL8.8 2<br />
7A375-100 3/8-16 X 1 G5 HHCS, PLT 7<br />
7K312-030 5/16 AN WASHER, S.S. 2<br />
7K375-040 3/8 AN960 FLAT WASHR PLATED 10<br />
4FU112-010 AIR INTAKE ASY 1<br />
4FU012-010 INLET DUCT,"A" 1<br />
4FU012-015 INLET DUCT,"B" 1<br />
7R002-056 #56 HOSE CLAMP 1<br />
7S400-200 SLEEVE, 4 X 2, BLUE 2<br />
7S400-351 REDUCER SLV 4.00 X 3.5 X 2.35L 1<br />
7R002-064 #64 HOSE CLAMP 5<br />
8H040-235 AIR FILTER, 4.0FLG X 7.0L 1<br />
8A003-071 MAF, 3.8 I.D. MUSTANG <strong>GT</strong> 1<br />
7P750-102 3/4NPT X 1" X 90° HSE FIT 1<br />
7P250-047 1/4NPT TO 3/8"BARB 90° 1<br />
4FU010-071 BRKT, INTAKE SUPPORT 1<br />
7U032-016 3/8" EFI FUEL HSE HI-PSR 4<br />
4FU013-010 COVER, AIR FILTER, MUST <strong>GT</strong> 1<br />
7C040-008 M4-.7X8MM SCHD SS 2<br />
4FU112-020 DISCHARGE ASY 1<br />
4FU012-020 DUCT, DISCH, MUST <strong>GT</strong> STD 1<br />
7S450-200 SLEEVE, 4 1/2 X 2, BLUE 1<br />
7S300-276 REDUCER, 3.0 X 2.75 X 2.5L 1<br />
7R002-044 #44 HOSE CLAMP 1<br />
7R002-048 #48 HOSE CLAMP 1<br />
7R002-072 #72 HOSE CLAMP 2<br />
7R002-016 #16 HOSE CLAMP 4<br />
7U030-046 5/32" VACUUM LINE 5<br />
8D001-001 STD COMPRESS BYPASS VALVE 1<br />
7U034-016 1" GS HEATER HOSE 1.25<br />
7U034-016 1" GS HEATER HOSE 0.583<br />
7P218-156 VAC TEE, 7/32,7/32,5/32 1<br />
4FU139-096 PCV MOD ASY 1<br />
7P375-106 PCV VALVE, FORD, 3/8" HOSE 1<br />
7P625-377 5/8" -3/8" REDUCER BARB UNION 1<br />
7R004-002 STEPLESS CLAMP, 17.0-70 2<br />
7R004-004 STEPLESS CLAMP, 1.0 OD HOSE 3<br />
7R004-007 STEPLESS CLAMP, 28.6 X 7MM WID 1<br />
7U032-016 3/8" EFI FUEL HSE HI-PSR 0.25<br />
7U033-020 HOSE, 5/8"ID CLASS 1 EMISSIONS 0.66667<br />
4FU214-021 COOL BYP HOSE RELOC ASY 1<br />
4FU114-021 ASY, WATER OUTLET, 05 MUST <strong>GT</strong> 1<br />
7J875-010 7/8 SEALING WASHER 1<br />
7F875-010 NUT, 7/8-14, SHORT/JAM 1<br />
7U133-050 1.5" X 90° HOSE, LONG LEG 1<br />
7U133-190 HOSE, COOLNT DRIV SIDE 05 MUST 1<br />
7U038-000 3/4" HEATER HOSE 3.5<br />
7P375-075 3/4" HOSE BARB UNION, BRASS 1<br />
7R002-020 #20 HOSE CLAMP 4<br />
7R002-024 #24 HOSE CLAMP 2<br />
7P125-002 FREEZE PLUG, 1.25 DIA, .25 TAL 1<br />
7R002-010 #10 HOSE CLAMP 4<br />
7P125-016 1/8 NPT PLUG 1<br />
5A003-035 PREDATOR, 05-08 MUSTANG 1<br />
8F060-048 FUEL INJ, 39LB EV6, OEM 03 COB 8<br />
8F101-262 FUEL PMP ASY,05 MUST TWIN INTA 1<br />
7U032-018 3/8" SUBMERSIBLE EFI FUEL HOSE 2.75<br />
7U100-055 TIE WRAP, 7.5" NYLON 4<br />
7R004-002 STEPLESS CLAMP, 17.0-70 2<br />
8F001-255 255 INTANK FUEL PUMP '86-'97 1<br />
7R002-044 #44 HOSE CLAMP 1<br />
7R004-006 STEPLESS CLAMP, 11.3 X 5MM WID 4<br />
5W001-022 T-TAP CONN,14-16 AWG 2<br />
5W001-009 16-14GA MALE SLIDE INSULATED 2<br />
5W001-080 FUSE, 20 AMP. MINI BLADE 1<br />
7P375-099 Y-UNION, 3/8" BARBED TEFLON 1<br />
7U032-025 HOSE, 5/16" ID,3/8"OD, 1/32" W 0.125<br />
7U032-030 HOSE,SPIRAL 3/8" CUFF ID, 1' L 2<br />
4FU101-001 MAF EXT MOD 05+ MUSTANG 1<br />
5W018-030 18GA STRD WIRE GREY 1<br />
5W018-010 18GA STRD WIRE RED 1<br />
5W018-020 18GA STRD WIRE BLK, UL1015 1<br />
5W018-080 18GA STRD WIRE BLUE BULK 1<br />
5W018-090 18GA STRD WIRE BROWN BULK 1<br />
5W018-100 18GA STRD WIRE PURPLE 1<br />
5W001-007 3/16" HEAT-SHRINK TUBING 1.5<br />
5W001-005 3/8" PLASTIC WIRE LOOM 1.5<br />
5W001-012 18-22 GA BUTT CONN RED INSUL 12<br />
vii<br />
P/N: 4FU020-010 v6.2, 06-08-10<br />
©<strong>2010</strong> <strong>Vortech</strong> Engineering, LLC<br />
All Rights Reserved, Intl. Corp. Secured
®<br />
ENGINEERING, LLC<br />
<strong>2005</strong>-2006 <strong>Mustang</strong> <strong>GT</strong>, H.O.<br />
Part No. 4FU218-020SQ<br />
PARTS LIST<br />
IMPORTANT: Before beginning installation, verify that all parts are included in the kit. Report any shortages or damaged<br />
parts immediately.<br />
Part No. Description Qty. Part Number Description Qty.<br />
008110 SMALL SILVER DIE CUT DECAL 2<br />
008130 LICENSE PLATE FRAME 1<br />
008444 3 YR S/C WARRANTY PKG 1<br />
2E229-240 V2-S SUPERCHARGER ASY, H.O. 1<br />
4FU020-010 INSTR MAN 05-08 MUST <strong>GT</strong> 1<br />
4FU110-010 P/S RESERVOIR RELOCATION 1<br />
7P375-075 3/4" HOSE BARB UNION, BRASS 1<br />
7P375-050 3/8" HOSE UNION, BRASS 1<br />
7R001-004 #4 HOSE CLAMP 2<br />
7R001-008 #8 HOSE CLAMP 2<br />
7U038-030 HOSE, P/S, 3/4 ID 3<br />
7U032-016 3/8" EFI FUEL HSE HI-PSR 3<br />
7A250-075 1/4-20 X .75 SHCS PLTD 1<br />
7J250-001 1/4 WASHER, SAE, PLTD 2<br />
7F250-021 1/4-20 NYLOCK NUT ZINC PLATED 1<br />
4FU010-010 P/S RELOC BRKT, 05 <strong>GT</strong> MUST 1<br />
7U100-055 TIE WRAP, 7.5" NYLON 4<br />
4FU111-044 S/C MOUNTING BRKT ASY 1<br />
4FU010-044 S/C MOUNT PLT, MUST <strong>GT</strong> 1<br />
4FU010-034 IDLER MOUNT PLATE, MUST 1<br />
4FU017-011 SPACER, STUDDED MUST <strong>GT</strong> 2<br />
2A017-750-05 SPACER, .750 OD X 2.691 LONG 2<br />
2A017-750-06 SPACER, .750 OD X 2.712 LONG 1<br />
2A017-879-08 SPACER, .875 OD X 1.776 LONG 1<br />
2A017-750-07 SPACER, .750 OD X .097 LONG 1<br />
4FU017-021 SPACER, IDLER, MUST <strong>GT</strong> 1<br />
4PCS016-160 PULLEY, IDLER 1<br />
2A046-120 BELT, GATES K061203 1<br />
7A375-375 3/8-16 X 3-3/4 HX HD 1<br />
7C080-150 M8 X 1.25 X 150MM HXHD CL10.9 1<br />
7C080-140 M8 X 1.25 X 140 HXHD CL8.8 2<br />
7A375-100 3/8-16 X 1 G5 HHCS, PLT 7<br />
7K312-030 5/16 AN WASHER, S.S. 2<br />
7K375-040 3/8 AN960 FLAT WASHR PLATED 10<br />
4FU112-010 AIR INTAKE ASY 1<br />
4FU012-010 INLET DUCT,"A" 1<br />
4FU012-015 INLET DUCT,"B" 1<br />
7R002-056 #56 HOSE CLAMP 1<br />
7S400-200 SLEEVE, 4 X 2, BLUE 2<br />
7S400-351 REDUCER SLV 4.00 X 3.5 X 2.35L 1<br />
7R002-064 #64 HOSE CLAMP 5<br />
8H040-235 AIR FILTER, 4.0FLG X 7.0L 1<br />
8A003-071 MAF, 3.8 I.D. MUSTANG <strong>GT</strong> 1<br />
7P750-102 3/4NPT X 1" X 90° HSE FIT 1<br />
7P250-047 1/4NPT TO 3/8"BARB 90° 1<br />
4FU010-071 BRKT, INTAKE SUPPORT 1<br />
7U032-016 3/8" EFI FUEL HSE HI-PSR 4<br />
4FU013-010 COVER, AIR FILTER, MUST <strong>GT</strong> 1<br />
7C040-008 M4-.7X8MM SCHD SS 2<br />
4FU114-010 RAD PIPE RELOC ASY, MUST <strong>GT</strong> 1<br />
4FU014-010 RADIATOR PIPE, 05 <strong>GT</strong> MUST 1<br />
7R002-024 #24 HOSE CLAMP 2<br />
4FU130-026 OIL FEED ASY 1<br />
7U250-090-260 OIL FEED HOSE, 26" -4X90° 1<br />
7P125-005 1/8 NPT STR. X -4 JIC FTG STL 1<br />
7P250-091 1/4 NPT 90° X -4JIC FTG STL 1<br />
7P250-034 1/4 NPT X 1/4 NPT STRT T 1<br />
4FU130-036 OIL DRAIN ASSY 1<br />
7U030-036 1/2" OIL DRAIN HOSE 2.5<br />
7R001-008 #8 HOSE CLAMP 2<br />
7P375-017 3/8NPT X 1/2 BEADED HSE BRB 1<br />
4FU139-096 PCV MOD ASY 1<br />
7P375-106 PCV VALVE, FORD, 3/8" HOSE 1<br />
7P625-377 5/8" -3/8" REDUCER BARB UNION 1<br />
7R004-002 STEPLESS CLAMP, 17.0-70 2<br />
7R004-004 STEPLESS CLAMP, 1.0 OD HOSE 3<br />
7R004-007 STEPLESS CLAMP, 28.6 X 7MM WID 1<br />
7U032-016 3/8" EFI FUEL HSE HI-PSR 0.25<br />
7U033-020 HOSE, 5/8"ID CLASS 1 EMISSIONS 0.66667<br />
4FU214-021 COOL BYP HOSE RELOC ASY 1<br />
4FU114-021 ASY, WATER OUTLET, 05 MUST <strong>GT</strong> 1<br />
7J875-010 7/8 SEALING WASHER 1<br />
7F875-010 NUT, 7/8-14, SHORT/JAM 1<br />
7U133-050 1.5" X 90° HOSE, LONG LEG 1<br />
7U133-190 HOSE, COOLNT DRIV SIDE 05 MUST 1<br />
7U038-000 3/4" HEATER HOSE 3.5<br />
7P375-075 3/4" HOSE BARB UNION, BRASS 1<br />
7R002-020 #20 HOSE CLAMP 4<br />
7R002-024 #24 HOSE CLAMP 2<br />
7P125-002 FREEZE PLUG, 1.25 DIA, .25 TAL 1<br />
7R002-010 #10 HOSE CLAMP 4<br />
7P125-016 1/8 NPT PLUG 1<br />
5A001-025 DIABLO MAFIA 1<br />
5A003-035 PREDATOR, 05-08 MUSTANG 1<br />
8F060-048 FUEL INJ, 39LB EV6, OEM 03 COB 8<br />
8F101-262 FUEL PMP ASY,05 MUST TWIN INTA 1<br />
7U032-018 3/8" SUBMERSIBLE EFI FUEL HOSE 2.75<br />
7U100-055 TIE WRAP, 7.5" NYLON 4<br />
7R004-002 STEPLESS CLAMP, 17.0-70 2<br />
8F001-255 255 INTANK FUEL PUMP '86-'97 1<br />
7R002-044 #44 HOSE CLAMP 1<br />
7R004-006 STEPLESS CLAMP, 11.3 X 5MM WID 4<br />
5W001-022 T-TAP CONN,14-16 AWG 2<br />
5W001-009 16-14GA MALE SLIDE INSULATED 2<br />
5W001-080 FUSE, 20 AMP. MINI BLADE 1<br />
7P375-099 Y-UNION, 3/8" BARBED TEFLON 1<br />
7U032-025 HOSE, 5/16" ID,3/8"OD, 1/32" W 0.125<br />
7U032-030 HOSE,SPIRAL 3/8" CUFF ID, 1' L 2<br />
8N101-290 WELDED CORE ASY 1<br />
8N104-125 SUPRT PCS, 05-08 MUST <strong>GT</strong> CLR G 1<br />
4FE014-010 RADIATOR PIPE-STAINLESS 1<br />
5W001-009 16-14GA MALE SLIDE INSULATED 1<br />
5W001-011 16-14 GA RING TERM .26" HOLE 1<br />
5W001-015 FUSE, BLADE TYPE 20 AMP 1<br />
5W001-022 T-TAP CONN,14-16 AWG 1<br />
5W001-032 1/4" PLASTIC WIRE LOOM 60<br />
5W001-050 HARNESS, FUEL INJ PLUG W/WIRES 1<br />
5W001-071 FUSE HOLDER,16GA WIRE 1<br />
5W018-010 18GA STRD WIRE RED 5<br />
7A250-050 1/4-20 X .50 SHCS ZINC PLTD 3<br />
7A250-051 1/4-20 X .50 HHCS ZINC PLTD 2<br />
7A250-074 1/4-20 X .75 HHCS PLTD 2<br />
7F250-020 1/4-20 HEX NUT 2<br />
7J006-093 6MM WASHER, PLATED 5<br />
7J250-001 1/4 WASHER, SAE, PLTD 4<br />
7P156-082 5/32 TEE 1<br />
7P218-156 VAC TEE, 7/32,7/32,5/32 1<br />
7P375-075 3/4" HOSE BARB UNION, BRASS 4<br />
7P500-026 1/2NPT X 3/4 BARB 90° BRASS 2<br />
7P500-078 1/2NPT X 3/4 HOSE FIT STRT 2<br />
7R002-016 #16 HOSE CLAMP 4<br />
7R002-024 #24 HOSE CLAMP 2<br />
7R002-044 #44 HOSE CLAMP 2<br />
7R002-072 #72 HOSE CLAMP 2<br />
7R003-016 ADEL CLAMP, 1.0" 1<br />
7R003-028 ADEL CLAMP, 2-3/8" .26 HOLE 2<br />
7R007-001 NYLON RATCHET CLAMP 1-1/8" 16<br />
7S275-055 ELBOW, Ø2.75 X 55° SILICONE 1<br />
7S450-200 SLEEVE, 4 1/2 X 2, BLUE 1<br />
7U030-046 5/32" VACUUM LINE 5<br />
7U030-065 3/4"X90° RUBBER HOSE, SHORT 1<br />
7U034-016 1" GS HEATER HOSE 1<br />
P/N: 4FU020-010 v6.2, 06-08-10<br />
©<strong>2010</strong> <strong>Vortech</strong> Engineering, LLC<br />
All Rights Reserved, Intl. Corp. Secured<br />
viii
®<br />
ENGINEERING, LLC<br />
<strong>2005</strong>-2006 <strong>Mustang</strong> <strong>GT</strong>, H.O. cont’d<br />
Part No. 4FU218-020SQ<br />
PARTS LIST<br />
IMPORTANT: Before beginning installation, verify that all parts are included in the kit. Report any shortages or damaged<br />
parts immediately.<br />
Part No. Description Qty.<br />
7U034-016 1" GS HEATER HOSE 1.25<br />
7U038-000 3/4" HEATER HOSE 12<br />
7U038-012 HOSE,3/4"DIA 90°,4X12 LEGS 1<br />
7U038-020 HOSE, Ø3/4 'S' MOLDED RUBBER 1<br />
7U038-150 HOSE, 3/4"X150° MOLDED HOSE 1<br />
7U100-055 TIE WRAP, 7.5" NYLON 6<br />
7U375-054 3/4" VINYL CAP 1<br />
8D001-001 STD COMPRESS BYPASS VALVE 1<br />
8F001-403 PUMP, WATER, BOSCH 1<br />
8N010-160 SURGE TANK BRKT, MUST <strong>GT</strong> 1<br />
8N010-220 MTG BRKT, 05-07 MUST BOSCH PMP 1<br />
8N055-050 PLASTIC CAP, SURGE TANK 1<br />
8N056-061 SURGE TANK INTEGRA GSR MODIFIE 1<br />
8N106-135 WATER CLR ASY, MUST GEN.II 1<br />
8N006-020 WATER COOLR, FLDYN DUAL PASS 1<br />
8N010-171 BRACKET, DRVR SIDE CLR MNT,PLT 1<br />
8N010-173 BRACKET, PASS SIDE CLR MNT 1<br />
2A017-036 SPACER,PLT.BRG.HSG.,0.186" 4<br />
7C080-030 M8 X 1.25 X 30 HXHD CL10.9 6<br />
7F008-020 NUT, M8 X 1.25 6<br />
7J312-000 5/16 FLAT WASHER-SAE 12<br />
7A250-051 1/4-20 X .50 HHCS ZINC PLTD 4<br />
7J250-001 1/4 WASHER, SAE, PLTD 4<br />
8N155-080 COOLANT RES RELOC, MUST 1<br />
4FU010-051 MTG BRKT A, RES RELOC MUST 1<br />
4FU010-061 BRKT B, COOL RES RELOC MUST 1<br />
7A250-051 1/4-20 X .50 HHCS ZINC PLTD 4<br />
7C060-020 M6 X 1.0 X 20MM HHCS ZN 3<br />
7J006-093 6MM WASHER, PLATED 4<br />
7J006-093 6MM WASHER, PLATED 3<br />
7P250-045 1/4 MALE NPT X 3/8 MALE BARB 1<br />
7P375-050 3/8" HOSE UNION, BRASS 1<br />
7R002-010 #10 HOSE CLAMP 1<br />
7R004-002 STEPLESS CLAMP, 17.0-70 3<br />
7U030-056 3/8 PCV/VAC RUBBER HOSE 2.5<br />
8N055-080 TANK, RAD OVERFLOW, MUST 1<br />
008341 CHARGE COOLER DECAL 1<br />
ix<br />
P/N: 4FU020-010 v6.2, 06-08-10<br />
©<strong>2010</strong> <strong>Vortech</strong> Engineering, LLC<br />
All Rights Reserved, Intl. Corp. Secured
®<br />
ENGINEERING, LLC<br />
<strong>2005</strong>-2006 <strong>Mustang</strong> <strong>GT</strong>, H.O.<br />
Part No. 4FU218-020L/028L<br />
PARTS LIST<br />
IMPORTANT: Before beginning installation, verify that all parts are included in the kit. Report any shortages or damaged<br />
parts immediately.<br />
Part No. Description Qty. Part Number Description Qty.<br />
008110 SMALL SILVER DIE CUT DECAL 2<br />
008130 LICENSE PLATE FRAME 1<br />
008341 CHARGE COOLER DECAL 1<br />
008447 1 YR S/C WARRANTY PKG 1<br />
009035 S/C LUBE, BOTTLED, 3-PACK 1<br />
2F329-020 V3 SUPERCHARGER ASY, H.O. 1<br />
4FU020-010 INSTR MAN 05-08 MUST <strong>GT</strong> 1<br />
4FU110-010 P/S RESERVOIR RELOCATION 1<br />
7P375-075 3/4" HOSE BARB UNION, BRASS 1<br />
7P375-050 3/8" HOSE UNION, BRASS 1<br />
7R001-004 #4 HOSE CLAMP 2<br />
7R001-008 #8 HOSE CLAMP 2<br />
7U038-030 HOSE, P/S, 3/4 ID 3<br />
7U032-016 3/8" EFI FUEL HSE HI-PSR 3<br />
7A250-075 1/4-20 X .75 SHCS PLTD 1<br />
7J250-001 1/4 WASHER, SAE, PLTD 2<br />
7F250-021 1/4-20 NYLOCK NUT ZINC PLATED 1<br />
4FU010-010 P/S RELOC BRKT, 05 <strong>GT</strong> MUST 1<br />
7U100-055 TIE WRAP, 7.5" NYLON 4<br />
4FU111-044 S/C MOUNTING BRKT ASY 1<br />
4FU010-044 S/C MOUNT PLT, MUST <strong>GT</strong> 1<br />
4FU010-034 IDLER MOUNT PLATE, MUST 1<br />
4FU017-011 SPACER, STUDDED MUST <strong>GT</strong> 2<br />
2A017-750-05 SPACER, .750 OD X 2.691 LONG 2<br />
2A017-750-06 SPACER, .750 OD X 2.712 LONG 1<br />
2A017-879-08 SPACER, .875 OD X 1.776 LONG 1<br />
2A017-750-07 SPACER, .750 OD X .097 LONG 1<br />
4FU017-021 SPACER, IDLER, MUST <strong>GT</strong> 1<br />
4PCS016-160 PULLEY, IDLER 1<br />
2A046-120 BELT, GATES K061203 1<br />
7A375-375 3/8-16 X 3-3/4 HX HD 1<br />
7C080-150 M8 X 1.25 X 150MM HXHD CL10.9 1<br />
7C080-140 M8 X 1.25 X 140 HXHD CL8.8 2<br />
7A375-100 3/8-16 X 1 G5 HHCS, PLT 7<br />
7K312-030 5/16 AN WASHER, S.S. 2<br />
7K375-040 3/8 AN960 FLAT WASHR PLATED 10<br />
4FU112-010 AIR INTAKE ASY 1<br />
4FU012-010 INLET DUCT,"A" 1<br />
4FU012-015 INLET DUCT,"B" 1<br />
7R002-056 #56 HOSE CLAMP 1<br />
7S400-200 SLEEVE, 4 X 2, BLUE 2<br />
7S400-351 REDUCER SLV 4.00 X 3.5 X 2.35L 1<br />
7R002-064 #64 HOSE CLAMP 5<br />
8H040-235 AIR FILTER, 4.0FLG X 7.0L 1<br />
8A003-071 MAF, 3.8 I.D. MUSTANG <strong>GT</strong> 1<br />
7P750-102 3/4NPT X 1" X 90° HSE FIT 1<br />
7P250-047 1/4NPT TO 3/8"BARB 90° 1<br />
4FU010-071 BRKT, INTAKE SUPPORT 1<br />
7U032-016 3/8" EFI FUEL HSE HI-PSR 4<br />
4FU013-010 COVER, AIR FILTER, MUST <strong>GT</strong> 1<br />
7C040-008 M4-.7X8MM SCHD SS 2<br />
4FU114-010 RAD PIPE RELOC ASY, MUST <strong>GT</strong> 1<br />
4FU014-010 RADIATOR PIPE, 05 <strong>GT</strong> MUST 1<br />
7R002-024 #24 HOSE CLAMP 2<br />
4FU139-096 PCV MOD ASY 1<br />
7P375-106 PCV VALVE, FORD, 3/8" HOSE 1<br />
7P625-377 5/8" -3/8" REDUCER BARB UNION 1<br />
7R004-002 STEPLESS CLAMP, 17.0-70 2<br />
7R004-004 STEPLESS CLAMP, 1.0 OD HOSE 3<br />
7R004-007 STEPLESS CLAMP, 28.6 X 7MM WID 1<br />
7U032-016 3/8" EFI FUEL HSE HI-PSR 0.25<br />
7U033-020 HOSE, 5/8"ID CLASS 1 EMISSIONS 0.66667<br />
4FU214-021 COOL BYP HOSE RELOC ASY 1<br />
4FU114-021 ASY, WATER OUTLET, 05 MUST <strong>GT</strong> 1<br />
7J875-010 7/8 SEALING WASHER 1<br />
7F875-010 NUT, 7/8-14, SHORT/JAM 1<br />
7U133-050 1.5" X 90° HOSE, LONG LEG 1<br />
7U133-190 HOSE, COOLNT DRIV SIDE 05 MUST 1<br />
7U038-000 3/4" HEATER HOSE 3.5<br />
7P375-075 3/4" HOSE BARB UNION, BRASS 1<br />
7R002-020 #20 HOSE CLAMP 4<br />
7R002-024 #24 HOSE CLAMP 2<br />
7P125-002 FREEZE PLUG, 1.25 DIA, .25 TAL 1<br />
7R002-010 #10 HOSE CLAMP 4<br />
7P125-016 1/8 NPT PLUG 1<br />
5A001-025 DIABLO MAFIA 1<br />
5A003-035 PREDATOR, 05-08 MUSTANG 1<br />
8F060-048 FUEL INJ, 39LB EV6, OEM 03 COB 8<br />
8F101-262 FUEL PMP ASY,05 MUST TWIN INTA 1<br />
7U032-018 3/8" SUBMERSIBLE EFI FUEL HOSE 2.75<br />
7U100-055 TIE WRAP, 7.5" NYLON 4<br />
7R004-002 STEPLESS CLAMP, 17.0-70 2<br />
8F001-255 255 INTANK FUEL PUMP '86-'97 1<br />
7R002-044 #44 HOSE CLAMP 1<br />
7R004-006 STEPLESS CLAMP, 11.3 X 5MM WID 4<br />
5W001-022 T-TAP CONN,14-16 AWG 2<br />
5W001-009 16-14GA MALE SLIDE INSULATED 2<br />
5W001-080 FUSE, 20 AMP. MINI BLADE 1<br />
7P375-099 Y-UNION, 3/8" BARBED TEFLON 1<br />
7U032-025 HOSE, 5/16" ID,3/8"OD, 1/32" W 0.125<br />
7U032-030 HOSE,SPIRAL 3/8" CUFF ID, 1' L 2<br />
8N101-290 WELDED CORE ASY 1<br />
8N104-125 SUPRT PCS, 05-08 MUST <strong>GT</strong> CLR G 1<br />
4FE014-010 RADIATOR PIPE-STAINLESS 1<br />
5W001-009 16-14GA MALE SLIDE INSULATED 1<br />
5W001-011 16-14 GA RING TERM .26" HOLE 1<br />
5W001-015 FUSE, BLADE TYPE 20 AMP 1<br />
5W001-022 T-TAP CONN,14-16 AWG 1<br />
5W001-032 1/4" PLASTIC WIRE LOOM 60<br />
5W001-050 HARNESS, FUEL INJ PLUG W/WIRES 1<br />
5W001-071 FUSE HOLDER,16GA WIRE 1<br />
5W018-010 18GA STRD WIRE RED 5<br />
7A250-050 1/4-20 X .50 SHCS ZINC PLTD 3<br />
7A250-051 1/4-20 X .50 HHCS ZINC PLTD 2<br />
7A250-074 1/4-20 X .75 HHCS PLTD 2<br />
7F250-020 1/4-20 HEX NUT 2<br />
7J006-093 6MM WASHER, PLATED 5<br />
7J250-001 1/4 WASHER, SAE, PLTD 4<br />
7P156-082 5/32 TEE 1<br />
7P218-156 VAC TEE, 7/32,7/32,5/32 1<br />
7P375-075 3/4" HOSE BARB UNION, BRASS 4<br />
7P500-026 1/2NPT X 3/4 BARB 90° BRASS 2<br />
7P500-078 1/2NPT X 3/4 HOSE FIT STRT 2<br />
7R002-016 #16 HOSE CLAMP 4<br />
7R002-024 #24 HOSE CLAMP 2<br />
7R002-044 #44 HOSE CLAMP 2<br />
7R002-072 #72 HOSE CLAMP 2<br />
7R003-016 ADEL CLAMP, 1.0" 1<br />
7R003-028 ADEL CLAMP, 2-3/8" .26 HOLE 2<br />
7R007-001 NYLON RATCHET CLAMP 1-1/8" 16<br />
7S275-055 ELBOW, Ø2.75 X 55° SILICONE 1<br />
7S450-200 SLEEVE, 4 1/2 X 2, BLUE 1<br />
7U030-046 5/32" VACUUM LINE 5<br />
7U030-065 3/4"X90° RUBBER HOSE, SHORT 1<br />
7U034-016 1" GS HEATER HOSE 1<br />
7U034-016 1" GS HEATER HOSE 1.25<br />
7U038-000 3/4" HEATER HOSE 12<br />
7U038-012 HOSE,3/4"DIA 90°,4X12 LEGS 1<br />
7U038-020 HOSE, Ø3/4 'S' MOLDED RUBBER 1<br />
7U038-150 HOSE, 3/4"X150° MOLDED HOSE 1<br />
P/N: 4FU020-010 v6.2, 06-08-10<br />
©<strong>2010</strong> <strong>Vortech</strong> Engineering, LLC<br />
All Rights Reserved, Intl. Corp. Secured<br />
x
®<br />
ENGINEERING, LLC<br />
<strong>2005</strong>-2006 <strong>Mustang</strong> <strong>GT</strong>, H.O. cont’d<br />
Part No. 4FU218-020L/028L<br />
PARTS LIST<br />
IMPORTANT: Before beginning installation, verify that all parts are included in the kit. Report any shortages or damaged<br />
parts immediately.<br />
Part No. Description Qty.<br />
7U100-055 TIE WRAP, 7.5" NYLON 6<br />
7U375-054 3/4" VINYL CAP 1<br />
8D001-001 STD COMPRESS BYPASS VALVE 1<br />
8F001-403 PUMP, WATER, BOSCH 1<br />
8N010-160 SURGE TANK BRKT, MUST <strong>GT</strong> 1<br />
8N010-220 MTG BRKT, 05-07 MUST BOSCH PMP 1<br />
8N055-050 PLASTIC CAP, SURGE TANK 1<br />
8N056-061 SURGE TANK INTEGRA GSR MODIFIE 1<br />
8N106-135 WATER CLR ASY, MUST GEN.II 1<br />
8N006-020 WATER COOLR, FLDYN DUAL PASS 1<br />
8N010-171 BRACKET, DRVR SIDE CLR MNT,PLT 1<br />
8N010-173 BRACKET, PASS SIDE CLR MNT 1<br />
2A017-036 SPACER,PLT.BRG.HSG.,0.186" 4<br />
7C080-030 M8 X 1.25 X 30 HXHD CL10.9 6<br />
7F008-020 NUT, M8 X 1.25 6<br />
7J312-000 5/16 FLAT WASHER-SAE 12<br />
7A250-051 1/4-20 X .50 HHCS ZINC PLTD 4<br />
7J250-001 1/4 WASHER, SAE, PLTD 4<br />
8N155-080 COOLANT RES RELOC, MUST 1<br />
4FU010-051 MTG BRKT A, RES RELOC MUST 1<br />
4FU010-061 BRKT B, COOL RES RELOC MUST 1<br />
7A250-051 1/4-20 X .50 HHCS ZINC PLTD 4<br />
7C060-020 M6 X 1.0 X 20MM HHCS ZN 3<br />
7J006-093 6MM WASHER, PLATED 4<br />
7J006-093 6MM WASHER, PLATED 3<br />
7P250-045 1/4 MALE NPT X 3/8 MALE BARB 1<br />
7P375-050 3/8" HOSE UNION, BRASS 1<br />
7R002-010 #10 HOSE CLAMP 1<br />
7R004-002 STEPLESS CLAMP, 17.0-70 3<br />
7U030-056 3/8 PCV/VAC RUBBER HOSE 2.5<br />
8N055-080 TANK, RAD OVERFLOW, MUST 1<br />
xi<br />
P/N: 4FU020-010 v6.2, 06-08-10<br />
©<strong>2010</strong> <strong>Vortech</strong> Engineering, LLC<br />
All Rights Reserved, Intl. Corp. Secured
®<br />
ENGINEERING, LLC<br />
2007-2008 <strong>Mustang</strong> <strong>GT</strong>, Standard<br />
Part No. 4FU218-030SQ/038SQ<br />
PARTS LIST<br />
IMPORTANT: Before beginning installation, verify that all parts are included in the kit. Report any shortages or damaged<br />
parts immediately.<br />
Part No. Description Qty. Part Number Description Qty.<br />
2E229-230 V2-S SUPERCHARGER ASY 1<br />
4FU130-036 OIL DRAIN ASSY 1<br />
7U030-036 1/2" OIL DRAIN HOSE 2.5<br />
7R001-008 #8 HOSE CLAMP 2<br />
7P375-017 3/8NPT X 1/2 BEADED HSE BRB 1<br />
4FU130-026 OIL FEED ASY 1<br />
7U250-090-260 OIL FEED HOSE, 26" -4X90° 1<br />
7P125-005 1/8 NPT STR. X -4 JIC FTG STL 1<br />
7P250-091 1/4 NPT 90° X -4JIC FTG STL 1<br />
7P250-034 1/4 NPT X 1/4 NPT STRT T 1<br />
4FU112-020 DISCHARGE ASY 1<br />
4FU012-020 DUCT, DISCH, MUST <strong>GT</strong> STD 1<br />
7S450-200 SLEEVE, 4 1/2 X 2, BLUE 1<br />
7S300-276 REDUCER, 3.0 X 2.75 X 2.5L 1<br />
7R002-044 #44 HOSE CLAMP 1<br />
7R002-048 #48 HOSE CLAMP 1<br />
7R002-072 #72 HOSE CLAMP 2<br />
7R002-016 #16 HOSE CLAMP 4<br />
7U030-046 5/32" VACUUM LINE 5<br />
8D001-001 STD COMPRESS BYPASS VALVE 1<br />
7U034-016 1" GS HEATER HOSE 1.25<br />
7U034-016 1" GS HEATER HOSE 0.583<br />
7P218-156 VAC TEE, 7/32,7/32,5/32 1<br />
4FU111-044 S/C MOUNTING BRKT ASY 1<br />
4FU010-044 S/C MOUNT PLT, MUST <strong>GT</strong> 1<br />
4FU010-034 IDLER MOUNT PLATE, MUST 1<br />
4FU017-011 SPACER, STUDDED MUST <strong>GT</strong> 2<br />
2A017-750-05 SPACER, .750 OD X 2.691 LONG 2<br />
2A017-750-06 SPACER, .750 OD X 2.712 LONG 1<br />
2A017-879-08 SPACER, .875 OD X 1.776 LONG 1<br />
2A017-750-07 SPACER, .750 OD X .097 LONG 1<br />
4FU017-021 SPACER, IDLER, MUST <strong>GT</strong> 1<br />
4PCS016-160 PULLEY, IDLER 1<br />
2A046-120 BELT, GATES K061203 1<br />
7A375-375 3/8-16 X 3-3/4 HX HD 1<br />
7C080-150 M8 X 1.25 X 150MM HXHD CL10.9 1<br />
7C080-140 M8 X 1.25 X 140 HXHD CL8.8 2<br />
7A375-100 3/8-16 X 1 G5 HHCS, PLT 7<br />
7K312-030 5/16 AN WASHER, S.S. 2<br />
7K375-040 3/8 AN960 FLAT WASHR PLATED 10<br />
4FU110-010 P/S RESERVOIR RELOCATION 1<br />
7P375-075 3/4" HOSE BARB UNION, BRASS 1<br />
7P375-050 3/8" HOSE UNION, BRASS 1<br />
7R001-004 #4 HOSE CLAMP 2<br />
7R001-008 #8 HOSE CLAMP 2<br />
7U038-030 HOSE, P/S, 3/4 ID 3<br />
7U032-016 3/8" EFI FUEL HSE HI-PSR 3<br />
7A250-075 1/4-20 X .75 SHCS PLTD 1<br />
7J250-001 1/4 WASHER, SAE, PLTD 2<br />
7F250-021 1/4-20 NYLOCK NUT ZINC PLATED 1<br />
4FU010-010 P/S RELOC BRKT, 05 <strong>GT</strong> MUST 1<br />
7U100-055 TIE WRAP, 7.5" NYLON 4<br />
4FU139-096 PCV MOD ASY 1<br />
7P375-106 PCV VALVE, FORD, 3/8" HOSE 1<br />
7P625-377 5/8" -3/8" REDUCER BARB UNION 1<br />
7R004-002 STEPLESS CLAMP, 17.0-70 2<br />
7R004-004 STEPLESS CLAMP, 1.0 OD HOSE 3<br />
7R004-007 STEPLESS CLAMP, 28.6 X 7MM WID 1<br />
7U032-016 3/8" EFI FUEL HSE HI-PSR 0.25<br />
7U033-020 HOSE, 5/8"ID CLASS 1 EMISSIONS 0.6667<br />
8F060-048 FUEL INJ, 39LB EV6, OEM 03 COB 8<br />
008110 SMALL SILVER DIE CUT DECAL 2<br />
008444 3 YR S/C WARRANTY PKG 1<br />
008130 LICENSE PLATE FRAME, VORTECH 1<br />
4FU020-010 INSTR MAN 05-08 MUST <strong>GT</strong> 1<br />
4FU114-030 WATER PIPE ASSY, 07-08 MUST <strong>GT</strong> 1<br />
4FU014-051 HOUSING, THRMST RELC 07 MUST G 1<br />
4FU014-060 WATER PIPE, Ø1.5 X 90°,07 MUST 1<br />
5W001-085 SLEEVE, FLEX BRD Ø1.5" NOM. 0.83<br />
7C060-015 M6 X 1.0 X 16MM SHCS CL10.9+ Z 2<br />
7C060-020 M6 X 1.0 X 20MM HX 2<br />
7J006-094 6MM WASHER S.S. 2<br />
7R002-024 #24 HOSE CLAMP 3<br />
7U012-018 O-RING, 07 MUST <strong>GT</strong> THERM HSG 1<br />
8F101-262 FUEL PMP ASY,05 MUST TWIN INTA 1<br />
7U032-018 3/8" SUBMERSIBLE EFI FUEL HOSE 2.75<br />
7U100-055 TIE WRAP, 7.5" NYLON 4<br />
7R004-002 STEPLESS CLAMP, 17.0-70 2<br />
8F001-255 255 INTANK FUEL PUMP '86-'97 1<br />
7R002-044 #44 HOSE CLAMP 1<br />
7R004-006 STEPLESS CLAMP, 11.3 X 5MM WID 4<br />
5W001-022 T-TAP CONN,14-16 AWG 2<br />
5W001-009 16-14GA MALE SLIDE INSULATED 2<br />
5W001-080 FUSE, 20 AMP. MINI BLADE 1<br />
7P375-099 Y-UNION, 3/8" BARBED TEFLON 1<br />
7U032-025 HOSE, 5/16" ID,3/8"OD, 1/32" W 0.125<br />
7U032-030 HOSE,SPIRAL 3/8" CUFF ID, 1' L 2<br />
5A003-035 PREDATOR, 05-08 MUSTANG 1<br />
4FU112-010 AIR INTAKE ASY 1<br />
4FU012-010 INLET DUCT,"A" 1<br />
4FU012-015 INLET DUCT,"B" 1<br />
7R002-056 #56 HOSE CLAMP 1<br />
7S400-200 SLEEVE, 4 X 2, BLUE 2<br />
7S400-351 REDUCER SLV 4.00 X 3.5 X 2.35L 1<br />
7R002-064 #64 HOSE CLAMP 5<br />
8H040-235 AIR FILTER, 4.0FLG X 7.0L 1<br />
8A003-071 MAF, 3.8 I.D. MUSTANG <strong>GT</strong> 1<br />
7P750-102 3/4NPT X 1" X 90° HSE FIT 1<br />
7P250-047 1/4NPT TO 3/8"BARB 90° 1<br />
4FU010-071 BRKT, INTAKE SUPPORT 1<br />
7U032-016 3/8" EFI FUEL HSE HI-PSR 4<br />
4FU013-010 COVER, AIR FILTER, MUST <strong>GT</strong> 1<br />
7C040-008 M4-.7X8MM SCHD SS 2<br />
4FU101-001 MAF EXT MOD 05+ MUSTANG 1<br />
5W018-030 18GA STRD WIRE GREY 1<br />
5W018-010 18GA STRD WIRE RED 1<br />
5W018-020 18GA STRD WIRE BLK, UL1015 1<br />
5W018-080 18GA STRD WIRE BLUE BULK 1<br />
5W018-090 18GA STRD WIRE BROWN BULK 1<br />
5W018-100 18GA STRD WIRE PURPLE 1<br />
5W001-007 3/16" HEAT-SHRINK TUBING 1.5<br />
5W001-005 3/8" PLASTIC WIRE LOOM 1.5<br />
5W001-012 18-22 GA BUTT CONN RED INSUL 12<br />
P/N: 4FU020-010 v6.2, 06-08-10<br />
©<strong>2010</strong> <strong>Vortech</strong> Engineering, LLC<br />
All Rights Reserved, Intl. Corp. Secured<br />
xii
®<br />
ENGINEERING, LLC<br />
2007-2008 <strong>Mustang</strong> <strong>GT</strong>, Standard<br />
Part No. 4FU218-030L/038L<br />
PARTS LIST<br />
IMPORTANT: Before beginning installation, verify that all parts are included in the kit. Report any shortages or damaged<br />
parts immediately.<br />
Part No. Description Qty. Part Number Description Qty.<br />
008110 SMALL SILVER DIE CUT DECAL 2<br />
008130 LICENSE PLATE FRAME 1<br />
008447 1 YR S/C WARRANTY PKG 1<br />
009035 S/C LUBE, BOTTLED, 3-PACK 1<br />
2F329-010 V3 SUPERCHARGER ASY, STD 1<br />
4FU020-010 INSTR MAN 05-08 MUST <strong>GT</strong> 1<br />
4FU110-010 P/S RESERVOIR RELOCATION 1<br />
7P375-075 3/4" HOSE BARB UNION, BRASS 1<br />
7P375-050 3/8" HOSE UNION, BRASS 1<br />
7R001-004 #4 HOSE CLAMP 2<br />
7R001-008 #8 HOSE CLAMP 2<br />
7U038-030 HOSE, P/S, 3/4 ID 3<br />
7U032-016 3/8" EFI FUEL HSE HI-PSR 3<br />
7A250-075 1/4-20 X .75 SHCS PLTD 1<br />
7J250-001 1/4 WASHER, SAE, PLTD 2<br />
7F250-021 1/4-20 NYLOCK NUT ZINC PLATED 1<br />
4FU010-010 P/S RELOC BRKT, 05 <strong>GT</strong> MUST 1<br />
7U100-055 TIE WRAP, 7.5" NYLON 4<br />
4FU111-044 S/C MOUNTING BRKT ASY 1<br />
4FU010-044 S/C MOUNT PLT, MUST <strong>GT</strong> 1<br />
4FU010-034 IDLER MOUNT PLATE, MUST 1<br />
4FU017-011 SPACER, STUDDED MUST <strong>GT</strong> 2<br />
2A017-750-05 SPACER, .750 OD X 2.691 LONG 2<br />
2A017-750-06 SPACER, .750 OD X 2.712 LONG 1<br />
2A017-879-08 SPACER, .875 OD X 1.776 LONG 1<br />
2A017-750-07 SPACER, .750 OD X .097 LONG 1<br />
4FU017-021 SPACER, IDLER, MUST <strong>GT</strong> 1<br />
4PCS016-160 PULLEY, IDLER 1<br />
2A046-120 BELT, GATES K061203 1<br />
7A375-375 3/8-16 X 3-3/4 HX HD 1<br />
7C080-150 M8 X 1.25 X 150MM HXHD CL10.9 1<br />
7C080-140 M8 X 1.25 X 140 HXHD CL8.8 2<br />
7A375-100 3/8-16 X 1 G5 HHCS, PLT 7<br />
7K312-030 5/16 AN WASHER, S.S. 2<br />
7K375-040 3/8 AN960 FLAT WASHR PLATED 10<br />
4FU112-010 AIR INTAKE ASY 1<br />
4FU012-010 INLET DUCT,"A" 1<br />
4FU012-015 INLET DUCT,"B" 1<br />
7R002-056 #56 HOSE CLAMP 1<br />
7S400-200 SLEEVE, 4 X 2, BLUE 2<br />
7S400-351 REDUCER SLV 4.00 X 3.5 X 2.35L 1<br />
7R002-064 #64 HOSE CLAMP 5<br />
8H040-235 AIR FILTER, 4.0FLG X 7.0L 1<br />
8A003-071 MAF, 3.8 I.D. MUSTANG <strong>GT</strong> 1<br />
7P750-102 3/4NPT X 1" X 90° HSE FIT 1<br />
7P250-047 1/4NPT TO 3/8"BARB 90° 1<br />
4FU010-071 BRKT, INTAKE SUPPORT 1<br />
7U032-016 3/8" EFI FUEL HSE HI-PSR 4<br />
4FU013-010 COVER, AIR FILTER, MUST <strong>GT</strong> 1<br />
7C040-008 M4-.7X8MM SCHD SS 2<br />
4FU112-020 DISCHARGE ASY 1<br />
4FU012-020 DUCT, DISCH, MUST <strong>GT</strong> STD 1<br />
7S450-200 SLEEVE, 4 1/2 X 2, BLUE 1<br />
7S300-276 REDUCER, 3.0 X 2.75 X 2.5L 1<br />
7R002-044 #44 HOSE CLAMP 1<br />
7R002-048 #48 HOSE CLAMP 1<br />
7R002-072 #72 HOSE CLAMP 2<br />
7R002-016 #16 HOSE CLAMP 4<br />
7U030-046 5/32" VACUUM LINE 5<br />
8D001-001 STD COMPRESS BYPASS VALVE 1<br />
7U034-016 1" GS HEATER HOSE 1.25<br />
7U034-016 1" GS HEATER HOSE 0.583<br />
7P218-156 VAC TEE, 7/32,7/32,5/32 1<br />
4FU114-030 WATER PIPE ASSY, 07-08 MUST <strong>GT</strong> 1<br />
4FU014-051 HOUSING, THRMST RELC 07 MUST G 1<br />
4FU014-060 WATER PIPE, Ø1.5 X 90°,07 MUST 1<br />
5W001-085 SLEEVE, FLEX BRD Ø1.5" NOM. 0.83<br />
7C060-015 M6 X 1.0 X 16MM SHCS CL10.9+ Z 2<br />
7C060-020 M6 X 1.0 X 20MM HX 2<br />
7J006-094 6MM WASHER S.S. 2<br />
7R002-024 #24 HOSE CLAMP 3<br />
7U012-018 O-RING, 07 MUST <strong>GT</strong> THERM HSG 1<br />
4FU139-096 PCV MOD ASY 1<br />
7P375-106 PCV VALVE, FORD, 3/8" HOSE 1<br />
7P625-377 5/8" -3/8" REDUCER BARB UNION 1<br />
7R004-002 STEPLESS CLAMP, 17.0-70 2<br />
7R004-004 STEPLESS CLAMP, 1.0 OD HOSE 3<br />
7R004-007 STEPLESS CLAMP, 28.6 X 7MM WID 1<br />
7U032-016 3/8" EFI FUEL HSE HI-PSR 0.25<br />
7U033-020 HOSE, 5/8"ID CLASS 1 EMISSIONS 0.6667<br />
5A003-035 PREDATOR, 05-08 MUSTANG 1<br />
8F060-048 FUEL INJ, 39LB EV6, OEM 03 COB 8<br />
8F101-262 FUEL PMP ASY,05 MUST TWIN INTA 1<br />
7U032-018 3/8" SUBMERSIBLE EFI FUEL HOSE 2.75<br />
7U100-055 TIE WRAP, 7.5" NYLON 4<br />
7R004-002 STEPLESS CLAMP, 17.0-70 2<br />
8F001-255 255 INTANK FUEL PUMP '86-'97 1<br />
7R002-044 #44 HOSE CLAMP 1<br />
7R004-006 STEPLESS CLAMP, 11.3 X 5MM WID 4<br />
5W001-022 T-TAP CONN,14-16 AWG 2<br />
5W001-009 16-14GA MALE SLIDE INSULATED 2<br />
5W001-080 FUSE, 20 AMP. MINI BLADE 1<br />
7P375-099 Y-UNION, 3/8" BARBED TEFLON 1<br />
7U032-025 HOSE, 5/16" ID,3/8"OD, 1/32" W 0.125<br />
7U032-030 HOSE,SPIRAL 3/8" CUFF ID, 1' L 2<br />
4FU101-001 MAF EXT MOD 05+ MUSTANG 1<br />
5W018-030 18GA STRD WIRE GREY 1<br />
5W018-010 18GA STRD WIRE RED 1<br />
5W018-020 18GA STRD WIRE BLK, UL1015 1<br />
5W018-080 18GA STRD WIRE BLUE BULK 1<br />
5W018-090 18GA STRD WIRE BROWN BULK 1<br />
5W018-100 18GA STRD WIRE PURPLE 1<br />
5W001-007 3/16" HEAT-SHRINK TUBING 1.5<br />
5W001-005 3/8" PLASTIC WIRE LOOM 1.5<br />
5W001-012 18-22 GA BUTT CONN RED INSUL 12<br />
xiii<br />
P/N: 4FU020-010 v6.2, 06-08-10<br />
©<strong>2010</strong> <strong>Vortech</strong> Engineering, LLC<br />
All Rights Reserved, Intl. Corp. Secured
®<br />
ENGINEERING, LLC<br />
2007-2008 <strong>Mustang</strong> <strong>GT</strong>, H.O.<br />
Part No. 4FU218-040SQ/048SQ<br />
PARTS LIST<br />
IMPORTANT: Before beginning installation, verify that all parts are included in the kit. Report any shortages or damaged<br />
parts immediately.<br />
Part No. Description Qty. Part Number Description Qty.<br />
008110 SMALL SILVER DIE CUT DECAL 2<br />
008130 LICENSE PLATE FRAME 1<br />
008444 3 YR S/C WARRANTY PKG 1<br />
2E229-240 V2-S SUPERCHARGER ASY, H.O. 1<br />
4FU020-010 INSTR MAN 05-08 MUST <strong>GT</strong> 1<br />
4FU110-010 P/S RESERVOIR RELOCATION 1<br />
7P375-075 3/4" HOSE BARB UNION, BRASS 1<br />
7P375-050 3/8" HOSE UNION, BRASS 1<br />
7R001-004 #4 HOSE CLAMP 2<br />
7R001-008 #8 HOSE CLAMP 2<br />
7U038-030 HOSE, P/S, 3/4 ID 3<br />
7U032-016 3/8" EFI FUEL HSE HI-PSR 3<br />
7A250-075 1/4-20 X .75 SHCS PLTD 1<br />
7J250-001 1/4 WASHER, SAE, PLTD 2<br />
7F250-021 1/4-20 NYLOCK NUT ZINC PLATED 1<br />
4FU010-010 P/S RELOC BRKT, 05 <strong>GT</strong> MUST 1<br />
7U100-055 TIE WRAP, 7.5" NYLON 4<br />
4FU111-044 S/C MOUNTING BRKT ASY 1<br />
4FU010-044 S/C MOUNT PLT, MUST <strong>GT</strong> 1<br />
4FU010-034 IDLER MOUNT PLATE, MUST 1<br />
4FU017-011 SPACER, STUDDED MUST <strong>GT</strong> 2<br />
2A017-750-05 SPACER, .750 OD X 2.691 LONG 2<br />
2A017-750-06 SPACER, .750 OD X 2.712 LONG 1<br />
2A017-879-08 SPACER, .875 OD X 1.776 LONG 1<br />
2A017-750-07 SPACER, .750 OD X .097 LONG 1<br />
4FU017-021 SPACER, IDLER, MUST <strong>GT</strong> 1<br />
4PCS016-160 PULLEY, IDLER 1<br />
2A046-120 BELT, GATES K061203 1<br />
7A375-375 3/8-16 X 3-3/4 HX HD 1<br />
7C080-150 M8 X 1.25 X 150MM HXHD CL10.9 1<br />
7C080-140 M8 X 1.25 X 140 HXHD CL8.8 2<br />
7A375-100 3/8-16 X 1 G5 HHCS, PLT 7<br />
7K312-030 5/16 AN WASHER, S.S. 2<br />
7K375-040 3/8 AN960 FLAT WASHR PLATED 10<br />
4FU112-010 AIR INTAKE ASY 1<br />
4FU012-010 INLET DUCT,"A" 1<br />
4FU012-015 INLET DUCT,"B" 1<br />
7R002-056 #56 HOSE CLAMP 1<br />
7S400-200 SLEEVE, 4 X 2, BLUE 2<br />
7S400-351 REDUCER SLV 4.00 X 3.5 X 2.35L 1<br />
7R002-064 #64 HOSE CLAMP 5<br />
8H040-235 AIR FILTER, 4.0FLG X 7.0L 1<br />
8A003-071 MAF, 3.8 I.D. MUSTANG <strong>GT</strong> 1<br />
7P750-102 3/4NPT X 1" X 90° HSE FIT 1<br />
7P250-047 1/4NPT TO 3/8"BARB 90° 1<br />
4FU010-071 BRKT, INTAKE SUPPORT 1<br />
7U032-016 3/8" EFI FUEL HSE HI-PSR 4<br />
4FU013-010 COVER, AIR FILTER, MUST <strong>GT</strong> 1<br />
7C040-008 M4-.7X8MM SCHD SS 2<br />
4FU114-030 WATER PIPE ASSY, 07-08 MUST <strong>GT</strong> 1<br />
4FU014-051 HOUSING, THRMST RELC 07 MUST G 1<br />
4FU014-060 WATER PIPE, Ø1.5 X 90°,07 MUST 1<br />
5W001-085 SLEEVE, FLEX BRD Ø1.5" NOM. 0.83<br />
7C060-015 M6 X 1.0 X 16MM SHCS CL10.9+ Z 2<br />
7C060-020 M6 X 1.0 X 20MM HX 2<br />
7J006-094 6MM WASHER S.S. 2<br />
7R002-024 #24 HOSE CLAMP 3<br />
7U012-018 O-RING, 07 MUST <strong>GT</strong> THERM HSG 1<br />
4FU130-026 OIL FEED ASY 1<br />
7U250-090-260 OIL FEED HOSE, 26" -4X90° 1<br />
7P125-005 1/8 NPT STR. X -4 JIC FTG STL 1<br />
7P250-091 1/4 NPT 90° X -4JIC FTG STL 1<br />
7P250-034 1/4 NPT X 1/4 NPT STRT T 1<br />
4FU130-036 OIL DRAIN ASSY 1<br />
7U030-036 1/2" OIL DRAIN HOSE 2.5<br />
7R001-008 #8 HOSE CLAMP 2<br />
7P375-017 3/8NPT X 1/2 BEADED HSE BRB 1<br />
4FU139-096 PCV MOD ASY 1<br />
7P375-106 PCV VALVE, FORD, 3/8" HOSE 1<br />
7P625-377 5/8" -3/8" REDUCER BARB UNION 1<br />
7R004-002 STEPLESS CLAMP, 17.0-70 2<br />
7R004-004 STEPLESS CLAMP, 1.0 OD HOSE 3<br />
7R004-007 STEPLESS CLAMP, 28.6 X 7MM WID 1<br />
7U032-016 3/8" EFI FUEL HSE HI-PSR 0.25<br />
7U033-020 HOSE, 5/8"ID CLASS 1 EMISSIONS 0.6667<br />
5A001-025 DIABLO MAFIA 1<br />
5A003-035 PREDATOR, 05-08 MUSTANG 1<br />
8F060-048 FUEL INJ, 39LB EV6, OEM 03 COB 8<br />
8F101-262 FUEL PMP ASY,05 MUST TWIN INTA 1<br />
7U032-018 3/8" SUBMERSIBLE EFI FUEL HOSE 2.75<br />
7U100-055 TIE WRAP, 7.5" NYLON 4<br />
7R004-002 STEPLESS CLAMP, 17.0-70 2<br />
8F001-255 255 INTANK FUEL PUMP '86-'97 1<br />
7R002-044 #44 HOSE CLAMP 1<br />
7R004-006 STEPLESS CLAMP, 11.3 X 5MM WID 4<br />
5W001-022 T-TAP CONN,14-16 AWG 2<br />
5W001-009 16-14GA MALE SLIDE INSULATED 2<br />
5W001-080 FUSE, 20 AMP. MINI BLADE 1<br />
7P375-099 Y-UNION, 3/8" BARBED TEFLON 1<br />
7U032-025 HOSE, 5/16" ID,3/8"OD, 1/32" W 0.125<br />
7U032-030 HOSE,SPIRAL 3/8" CUFF ID, 1' L 2<br />
8N101-290 WELDED CORE ASY 1<br />
8N104-125 SUPRT PCS, 05-08 MUST <strong>GT</strong> CLR G 1<br />
4FE014-010 RADIATOR PIPE-STAINLESS 1<br />
5W001-009 16-14GA MALE SLIDE INSULATED 1<br />
5W001-011 16-14 GA RING TERM .26" HOLE 1<br />
5W001-015 FUSE, BLADE TYPE 20 AMP 1<br />
5W001-022 T-TAP CONN,14-16 AWG 1<br />
5W001-032 1/4" PLASTIC WIRE LOOM 60<br />
5W001-050 HARNESS, FUEL INJ PLUG W/WIRES 1<br />
5W001-071 FUSE HOLDER,16GA WIRE 1<br />
5W018-010 18GA STRD WIRE RED 5<br />
7A250-050 1/4-20 X .50 SHCS ZINC PLTD 3<br />
7A250-051 1/4-20 X .50 HHCS ZINC PLTD 2<br />
7A250-074 1/4-20 X .75 HHCS PLTD 2<br />
7F250-020 1/4-20 HEX NUT 2<br />
7J006-093 6MM WASHER, PLATED 5<br />
7J250-001 1/4 WASHER, SAE, PLTD 4<br />
7P156-082 5/32 TEE 1<br />
7P218-156 VAC TEE, 7/32,7/32,5/32 1<br />
7P375-075 3/4" HOSE BARB UNION, BRASS 4<br />
7P500-026 1/2NPT X 3/4 BARB 90° BRASS 2<br />
7P500-078 1/2NPT X 3/4 HOSE FIT STRT 2<br />
7R002-016 #16 HOSE CLAMP 4<br />
7R002-024 #24 HOSE CLAMP 2<br />
7R002-044 #44 HOSE CLAMP 2<br />
7R002-072 #72 HOSE CLAMP 2<br />
7R003-016 ADEL CLAMP, 1.0" 1<br />
7R003-028 ADEL CLAMP, 2-3/8" .26 HOLE 2<br />
7R007-001 NYLON RATCHET CLAMP 1-1/8" 16<br />
7S275-055 ELBOW, Ø2.75 X 55° SILICONE 1<br />
7S450-200 SLEEVE, 4 1/2 X 2, BLUE 1<br />
7U030-046 5/32" VACUUM LINE 5<br />
7U030-065 3/4"X90° RUBBER HOSE, SHORT 1<br />
7U034-016 1" GS HEATER HOSE 1<br />
7U034-016 1" GS HEATER HOSE 1.25<br />
7U038-000 3/4" HEATER HOSE 12<br />
7U038-012 HOSE,3/4"DIA 90°,4X12 LEGS 1<br />
7U038-020 HOSE, Ø3/4 'S' MOLDED RUBBER 1<br />
P/N: 4FU020-010 v6.2, 06-08-10<br />
©<strong>2010</strong> <strong>Vortech</strong> Engineering, LLC<br />
All Rights Reserved, Intl. Corp. Secured<br />
xiv
®<br />
ENGINEERING, LLC<br />
7U038-150 HOSE, 3/4"X150° MOLDED HOSE 1<br />
7U100-055 TIE WRAP, 7.5" NYLON 6<br />
7U375-054 3/4" VINYL CAP 1<br />
8D001-001 STD COMPRESS BYPASS VALVE 1<br />
8F001-403 PUMP, WATER, BOSCH 1<br />
8N010-160 SURGE TANK BRKT, MUST <strong>GT</strong> 1<br />
8N010-220 MTG BRKT, 05-07 MUST BOSCH PMP 1<br />
8N055-050 PLASTIC CAP, SURGE TANK 1<br />
8N056-061 SURGE TANK INTEGRA GSR MODIFIE 1<br />
8N106-135 WATER CLR ASY, MUST GEN.II 1<br />
8N006-020 WATER COOLR, FLDYN DUAL PASS 1<br />
8N010-171 BRACKET, DRVR SIDE CLR MNT,PLT 1<br />
8N010-173 BRACKET, PASS SIDE CLR MNT 1<br />
2A017-036 SPACER,PLT.BRG.HSG.,0.186" 4<br />
7C080-030 M8 X 1.25 X 30 HXHD CL10.9 6<br />
7F008-020 NUT, M8 X 1.25 6<br />
7J312-000 5/16 FLAT WASHER-SAE 12<br />
7A250-051 1/4-20 X .50 HHCS ZINC PLTD 4<br />
7J250-001 1/4 WASHER, SAE, PLTD 4<br />
8N155-082 COOLANT RES RELOC, 07-08 MUST 1<br />
4FU010-061 BRKT B, COOL RES RELOC MUST 1<br />
4FU010-091 BRKT, COOL RES RELOC, 07 <strong>GT</strong> 1<br />
7A250-051 1/4-20 X .50 HHCS ZINC PLTD 4<br />
7A250-074 1/4-20 X .75 HHCS PLTD 3<br />
7F250-021 1/4-20 NYLOCK NUT ZINC PLATED 3<br />
7J006-093 6MM WASHER, PLATED 10<br />
7P100-076 HOSE REDUCER, 1"->3/4" PLSTC 1<br />
7P250-045 1/4 MALE NPT X 3/8 MALE BARB 1<br />
7P375-050 3/8" HOSE UNION, BRASS 1<br />
7R002-010 #10 HOSE CLAMP 2<br />
7R004-002 STEPLESS CLAMP, 17.0-70 3<br />
7U030-056 3/8 PCV/VAC RUBBER HOSE 2.5<br />
7U038-000 3/4" HEATER HOSE 1.83<br />
8N055-080 TANK, RAD OVERFLOW, MUST 1<br />
008341 VORTECH CHARGE COOLER DECAL 1<br />
2007-2008 <strong>Mustang</strong> <strong>GT</strong>, H.O. cont’d<br />
Part No. 4FU218-040SQ/048SQ<br />
PARTS LIST<br />
IMPORTANT: Before beginning installation, verify that all parts are included in the kit. Report any shortages or damaged<br />
parts immediately.<br />
Part No. Description Qty.<br />
xv<br />
P/N: 4FU020-010 v6.2, 06-08-10<br />
©<strong>2010</strong> <strong>Vortech</strong> Engineering, LLC<br />
All Rights Reserved, Intl. Corp. Secured
®<br />
ENGINEERING, LLC<br />
2007-2008 <strong>Mustang</strong> <strong>GT</strong>, H.O.<br />
Part No. 4FU218-040L/048L<br />
PARTS LIST<br />
IMPORTANT: Before beginning installation, verify that all parts are included in the kit. Report any shortages or damaged<br />
parts immediately.<br />
Part No. Description Qty. Part Number Description Qty.<br />
008110 SMALL SILVER DIE CUT DECAL 2<br />
008130 LICENSE PLATE FRAME, VORTECH 1<br />
008341 VORTECH CHARGE COOLER DECAL 1<br />
008447 1 YR S/C WARRANTY PKG 1<br />
009035 S/C LUBE, BOTTLED, VORT 3-PACK 1<br />
2F329-020 V3 SUPERCHARGER ASY, H.O. 1<br />
4FU020-010 INSTR MAN 05-08 MUST <strong>GT</strong> 1<br />
4FU110-010 P/S RESERVOIR RELOCATION 1<br />
7P375-075 3/4" HOSE BARB UNION, BRASS 1<br />
7P375-050 3/8" HOSE UNION, BRASS 1<br />
7R001-004 #4 HOSE CLAMP 2<br />
7R001-008 #8 HOSE CLAMP 2<br />
7U038-030 HOSE, P/S, 3/4 ID 3<br />
7U032-016 3/8" EFI FUEL HSE HI-PSR 3<br />
7A250-075 1/4-20 X .75 SHCS PLTD 1<br />
7J250-001 1/4 WASHER, SAE, PLTD 2<br />
7F250-021 1/4-20 NYLOCK NUT ZINC PLATED 1<br />
4FU010-010 P/S RELOC BRKT, 05 <strong>GT</strong> MUST 1<br />
7U100-055 TIE WRAP, 7.5" NYLON 4<br />
4FU111-044 S/C MOUNTING BRKT ASY 1<br />
4FU010-044 S/C MOUNT PLT, MUST <strong>GT</strong> 1<br />
4FU010-034 IDLER MOUNT PLATE, MUST 1<br />
4FU017-011 SPACER, STUDDED MUST <strong>GT</strong> 2<br />
2A017-750-05 SPACER, .750 OD X 2.691 LONG 2<br />
2A017-750-06 SPACER, .750 OD X 2.712 LONG 1<br />
2A017-879-08 SPACER, .875 OD X 1.776 LONG 1<br />
2A017-750-07 SPACER, .750 OD X .097 LONG 1<br />
4FU017-021 SPACER, IDLER, MUST <strong>GT</strong> 1<br />
4PCS016-160 PULLEY, IDLER 1<br />
2A046-120 BELT, GATES K061203 1<br />
7A375-375 3/8-16 X 3-3/4 HX HD 1<br />
7C080-150 M8 X 1.25 X 150MM HXHD CL10.9 1<br />
7C080-140 M8 X 1.25 X 140 HXHD CL8.8 2<br />
7A375-100 3/8-16 X 1 G5 HHCS, PLT 7<br />
7K312-030 5/16 AN WASHER, S.S. 2<br />
7K375-040 3/8 AN960 FLAT WASHR PLATED 10<br />
4FU112-010 AIR INTAKE ASY 1<br />
4FU012-010 INLET DUCT,"A" 1<br />
4FU012-015 INLET DUCT,"B" 1<br />
7R002-056 #56 HOSE CLAMP 1<br />
7S400-200 SLEEVE, 4 X 2, BLUE 2<br />
7S400-351 REDUCER SLV 4.00 X 3.5 X 2.35L 1<br />
7R002-064 #64 HOSE CLAMP 5<br />
8H040-235 AIR FILTER, 4.0FLG X 7.0L 1<br />
8A003-071 MAF, 3.8 I.D. MUSTANG <strong>GT</strong> 1<br />
7P750-102 3/4NPT X 1" X 90° HSE FIT 1<br />
7P250-047 1/4NPT TO 3/8"BARB 90° 1<br />
4FU010-071 BRKT, INTAKE SUPPORT 1<br />
7U032-016 3/8" EFI FUEL HSE HI-PSR 4<br />
4FU013-010 COVER, AIR FILTER, MUST <strong>GT</strong> 1<br />
7C040-008 M4-.7X8MM SCHD SS 2<br />
4FU114-030 WATER PIPE ASSY, 07-08 MUST <strong>GT</strong> 1<br />
4FU014-051 HOUSING, THRMST RELC 07 MUST G 1<br />
4FU014-060 WATER PIPE, Ø1.5 X 90°,07 MUST 1<br />
5W001-085 SLEEVE, FLEX BRD Ø1.5" NOM. 0.83<br />
7C060-015 M6 X 1.0 X 16MM SHCS CL10.9+ Z 2<br />
7C060-020 M6 X 1.0 X 20MM HX 2<br />
7J006-094 6MM WASHER S.S. 2<br />
7R002-024 #24 HOSE CLAMP 3<br />
7U012-018 O-RING, 07 MUST <strong>GT</strong> THERM HSG 1<br />
4FU139-096 PCV MOD ASY 1<br />
7P375-106 PCV VALVE, FORD, 3/8" HOSE 1<br />
7P625-377 5/8" -3/8" REDUCER BARB UNION 1<br />
7R004-002 STEPLESS CLAMP, 17.0-70 2<br />
7R004-004 STEPLESS CLAMP, 1.0 OD HOSE 3<br />
7R004-007 STEPLESS CLAMP, 28.6 X 7MM WID 1<br />
7U032-016 3/8" EFI FUEL HSE HI-PSR 0.25<br />
7U033-020 HOSE, 5/8"ID CLASS 1 EMISSIONS 0.6667<br />
5A001-025 DIABLO MAFIA 1<br />
5A003-035 PREDATOR, 05-08 MUSTANG 1<br />
8F060-048 FUEL INJ, 39LB EV6, OEM 03 COB 8<br />
8F101-262 FUEL PMP ASY,05 MUST TWIN INTA 1<br />
7U032-018 3/8" SUBMERSIBLE EFI FUEL HOSE 2.75<br />
7U100-055 TIE WRAP, 7.5" NYLON 4<br />
7R004-002 STEPLESS CLAMP, 17.0-70 2<br />
8F001-255 255 INTANK FUEL PUMP '86-'97 1<br />
7R002-044 #44 HOSE CLAMP 1<br />
7R004-006 STEPLESS CLAMP, 11.3 X 5MM WID 4<br />
5W001-022 T-TAP CONN,14-16 AWG 2<br />
5W001-009 16-14GA MALE SLIDE INSULATED 2<br />
5W001-080 FUSE, 20 AMP. MINI BLADE 1<br />
7P375-099 Y-UNION, 3/8" BARBED TEFLON 1<br />
7U032-025 HOSE, 5/16" ID,3/8"OD, 1/32" W 0.125<br />
7U032-030 HOSE,SPIRAL 3/8" CUFF ID, 1' L 2<br />
8N101-290 WELDED CORE ASY 1<br />
8N104-125 SUPRT PCS, 05-08 MUST <strong>GT</strong> CLR G 1<br />
4FE014-010 RADIATOR PIPE-STAINLESS 1<br />
5W001-009 16-14GA MALE SLIDE INSULATED 1<br />
5W001-011 16-14 GA RING TERM .26" HOLE 1<br />
5W001-015 FUSE, BLADE TYPE 20 AMP 1<br />
5W001-022 T-TAP CONN,14-16 AWG 1<br />
5W001-032 1/4" PLASTIC WIRE LOOM 60<br />
5W001-050 HARNESS, FUEL INJ PLUG W/WIRES 1<br />
5W001-071 FUSE HOLDER,16GA WIRE 1<br />
5W018-010 18GA STRD WIRE RED 5<br />
7A250-050 1/4-20 X .50 SHCS ZINC PLTD 3<br />
7A250-051 1/4-20 X .50 HHCS ZINC PLTD 2<br />
7A250-074 1/4-20 X .75 HHCS PLTD 2<br />
7F250-020 1/4-20 HEX NUT 2<br />
7J006-093 6MM WASHER, PLATED 5<br />
7J250-001 1/4 WASHER, SAE, PLTD 4<br />
7P156-082 5/32 TEE 1<br />
7P218-156 VAC TEE, 7/32,7/32,5/32 1<br />
7P375-075 3/4" HOSE BARB UNION, BRASS 4<br />
7P500-026 1/2NPT X 3/4 BARB 90° BRASS 2<br />
7P500-078 1/2NPT X 3/4 HOSE FIT STRT 2<br />
7R002-016 #16 HOSE CLAMP 4<br />
7R002-024 #24 HOSE CLAMP 2<br />
7R002-044 #44 HOSE CLAMP 2<br />
7R002-072 #72 HOSE CLAMP 2<br />
7R003-016 ADEL CLAMP, 1.0" 1<br />
7R003-028 ADEL CLAMP, 2-3/8" .26 HOLE 2<br />
7R007-001 NYLON RATCHET CLAMP 1-1/8" 16<br />
7S275-055 ELBOW, Ø2.75 X 55° SILICONE 1<br />
7S450-200 SLEEVE, 4 1/2 X 2, BLUE 1<br />
7U030-046 5/32" VACUUM LINE 5<br />
7U030-065 3/4"X90° RUBBER HOSE, SHORT 1<br />
7U034-016 1" GS HEATER HOSE 1<br />
7U034-016 1" GS HEATER HOSE 1.25<br />
7U038-000 3/4" HEATER HOSE 12<br />
7U038-012 HOSE,3/4"DIA 90°,4X12 LEGS 1<br />
7U038-020 HOSE, Ø3/4 'S' MOLDED RUBBER 1<br />
P/N: 4FU020-010 v6.2, 06-08-10<br />
©<strong>2010</strong> <strong>Vortech</strong> Engineering, LLC<br />
All Rights Reserved, Intl. Corp. Secured<br />
xvi
®<br />
ENGINEERING, LLC<br />
7U038-150 HOSE, 3/4"X150° MOLDED HOSE 1<br />
7U100-055 TIE WRAP, 7.5" NYLON 6<br />
7U375-054 3/4" VINYL CAP 1<br />
8D001-001 STD COMPRESS BYPASS VALVE 1<br />
8F001-403 PUMP, WATER, BOSCH 1<br />
8N010-160 SURGE TANK BRKT, MUST <strong>GT</strong> 1<br />
8N010-220 MTG BRKT, 05-07 MUST BOSCH PMP 1<br />
8N055-050 PLASTIC CAP, SURGE TANK 1<br />
8N056-061 SURGE TANK INTEGRA GSR MODIFIE 1<br />
8N106-135 WATER CLR ASY, MUST GEN.II 1<br />
8N006-020 WATER COOLR, FLDYN DUAL PASS 1<br />
8N010-171 BRACKET, DRVR SIDE CLR MNT,PLT 1<br />
8N010-173 BRACKET, PASS SIDE CLR MNT 1<br />
2A017-036 SPACER,PLT.BRG.HSG.,0.186" 4<br />
7C080-030 M8 X 1.25 X 30 HXHD CL10.9 6<br />
7F008-020 NUT, M8 X 1.25 6<br />
7J312-000 5/16 FLAT WASHER-SAE 12<br />
7A250-051 1/4-20 X .50 HHCS ZINC PLTD 4<br />
7J250-001 1/4 WASHER, SAE, PLTD 4<br />
8N155-082 COOLANT RES RELOC, 07-08 MUST 1<br />
4FU010-061 BRKT B, COOL RES RELOC MUST 1<br />
4FU010-091 BRKT, COOL RES RELOC, 07 <strong>GT</strong> 1<br />
7A250-051 1/4-20 X .50 HHCS ZINC PLTD 4<br />
7A250-074 1/4-20 X .75 HHCS PLTD 3<br />
7F250-021 1/4-20 NYLOCK NUT ZINC PLATED 3<br />
7J006-093 6MM WASHER, PLATED 10<br />
7P100-076 HOSE REDUCER, 1"->3/4" PLSTC 1<br />
7P250-045 1/4 MALE NPT X 3/8 MALE BARB 1<br />
7P375-050 3/8" HOSE UNION, BRASS 1<br />
7R002-010 #10 HOSE CLAMP 2<br />
7R004-002 STEPLESS CLAMP, 17.0-70 3<br />
7U030-056 3/8 PCV/VAC RUBBER HOSE 2.5<br />
7U038-000 3/4" HEATER HOSE 1.83<br />
8N055-080 TANK, RAD OVERFLOW, MUST 1<br />
2007-2008 <strong>Mustang</strong> <strong>GT</strong>, H.O. cont’d<br />
Part No. 4FU218-040L/048L<br />
PARTS LIST<br />
IMPORTANT: Before beginning installation, verify that all parts are included in the kit. Report any shortages or damaged<br />
parts immediately.<br />
Part No. Description Qty. Part Number Description Qty.<br />
xvii<br />
P/N: 4FU020-010 v6.2, 06-08-10<br />
©<strong>2010</strong> <strong>Vortech</strong> Engineering, LLC<br />
All Rights Reserved, Intl. Corp. Secured
®<br />
ENGINEERING, LLC<br />
2008 <strong>Mustang</strong> Bullitt<br />
Part No. 4FU218-050L/058L<br />
PARTS LIST<br />
IMPORTANT: Before beginning installation, verify that all parts are included in the kit. Report any shortages or damaged<br />
parts immediately.<br />
Part No. Description Qty. Part Number Description Qty.<br />
2F329-070 V3 SUPERCHARGER ASY 1<br />
008110 SMALL SILVER DIE CUT DECAL 2<br />
008130 LICENSE PLATE FRAME 1<br />
008341 CHARGE COOLER DECAL 1<br />
008447 1 YR S/C WARRANTY PKG 1<br />
009035 S/C LUBE, BOTTLED, 3-PACK 1<br />
4FU020-010 INSTR MAN 05-08 MUST <strong>GT</strong> 1<br />
4FU110-010 P/S RESERV RELOC MUST <strong>GT</strong> 1<br />
7P375-075 3/4" HOSE BARB UNION, BRASS 1<br />
7P375-050 3/8" HOSE UNION, BRASS 1<br />
7R001-004 #4 HOSE CLAMP 2<br />
7R001-008 #8 HOSE CLAMP 2<br />
7U038-030 HOSE, P/S, 3/4 ID 3<br />
7U032-016 3/8" EFI FUEL HSE HI-PSR 3<br />
7A250-075 1/4-20 X .75 SHCS PLTD 1<br />
7J250-001 1/4 WASHER, SAE, PLTD 2<br />
7F250-021 1/4-20 NYLOCK NUT ZINC PLATED 1<br />
4FU010-010 P/S RELOC BRKT 1<br />
7U100-055 TIE WRAP, 7.5" NYLON 4<br />
4FU111-051 S/C MTG BRKT ASSY, V-PWR 1<br />
4FU010-044 S/C MOUNT PLT 1<br />
4FU010-034 IDLER MOUNT PLATE 1<br />
4FU017-041 SPCR , STD BLT BRNG PLT 1.597" 2<br />
2A017-750-05 SPACER, .750 OD X 2.691 LONG 2<br />
2A017-750-06 SPACER, .750 OD X 2.712 LONG 1<br />
2A017-879-07 SPACER, .875 OD X 1.597 LNG 1<br />
2A017-750-07 SPACER, .750 OD X .097 LONG 1<br />
4FU017-031 SPACER, IDLR 1OD X .375 ID X . 1<br />
4FU016-021 PULLEY, IDLR 3.5" 8-RIB (SMOOT 1<br />
2A048-121 BELT, DAYCO-5081213, 8-RIB 1<br />
7A375-375 3/8-16 X 3-3/4 HX HD 1<br />
7C080-150 M8 X 1.25 X 150MM HXHD CL10.9 1<br />
7C080-140 M8 X 1.25 X 140 HXHD CL8.8 2<br />
7A375-100 3/8-16 X 1 G5 HHCS, PLT 2<br />
7A375-124 3/8-16 X 1-1/4 HHCS, G5, PLATE 5<br />
2A017-878-08 SPACER,.875OD X .406 ID X .280 5<br />
7K312-030 5/16 AN WASHER, S.S. 2<br />
7K375-040 3/8 AN960 FLAT WASHR PLATED 10<br />
4FR016-021 PULLEY,8 RIB A/C PLY 03 COBRA 1<br />
4FR016-031 PULLEY, 8 RIB P/S 03 COBRA 1<br />
4FR016-041 DAMPER, CRANK, 8 RIB 03 COBRA 1<br />
4FU016-011 PULLEY, FORD,ALT,8-RIB,2.5" OD 1<br />
7G016-150 NUT, M16 X 1.50 FLANGED 1<br />
4FU016-021 PULLEY, IDLR 3.5" 8-RIB (SMOOT 2<br />
4FU016-041 PULLEY, IDLR 3.5" 8-RIB (RIBD) 1<br />
2A017-882-02 SPACER, .875 OD X .101 LNG 3<br />
2A017-750-014 SPACER .75"OD X .328"ID X.140" 3<br />
7C080-041 M8 X 1.25 X 40 HXHD ZINC 3<br />
7J312-000 5/16 FLAT WASHER-SAE 3<br />
4FU116-031 IDLER ASSY, 3" 8-RIB (SMOOTH) 1<br />
4FU112-010 AIR INLET ASSY, 05 MUST <strong>GT</strong> 1<br />
4FU012-010 INLET DUCT,"A" 1<br />
4FU012-015 INLET DUCT,"B" 1<br />
7R002-056 #56 HOSE CLAMP 1<br />
7S400-200 SLEEVE, 4 X 2, BLUE 2<br />
7S400-351 REDUCER SLV 4.00 X 3.5 X 2.35L 1<br />
7R002-064 #64 HOSE CLAMP 5<br />
8H040-235 AIR FILTER, 4.0FLG X 7.0L 1<br />
8A003-071 MAF, 3.8 I.D., 05 MUSTANG <strong>GT</strong>, 1<br />
7P750-102 3/4NPT X 1" X 90° HSE FIT 1<br />
7P250-047 1/4NPT TO 3/8"BARB 90° 1<br />
4FU010-071 BRKT, INTAKE SUPPORT 1<br />
7U032-016 3/8" EFI FUEL HSE HI-PSR 4<br />
4FU013-010 COVER, AIR FILTER, MUST <strong>GT</strong> 1<br />
7C040-008 M4-.7X8MM SCHD SS 2<br />
4FU114-030 WATER PIPE ASSY, 07-08 MUST <strong>GT</strong> 1<br />
4FU014-051 HOUSING, THRMST RELC 07 MUST G 1<br />
4FU014-060 WATER PIPE, Ø1.5 X 90°,07 MUST 1<br />
5W001-085 SLEEVE, FLEX BRD Ø1.5" NOM. 0.83<br />
7C060-015 M6 X 1.0 X 16MM SHCS CL10.9+ Z 2<br />
7C060-020 M6 X 1.0 X 20MM HX 2<br />
7J006-094 6MM WASHER S.S. 2<br />
7R002-024 #24 HOSE CLAMP 3<br />
7U012-018 O-RING, 07 MUST <strong>GT</strong> THERM HSG 1<br />
4FU139-096 PCV MOD ASSY, 05 <strong>GT</strong> 1<br />
7P375-106 PCV VALVE, FORD, 3/8" HOSE 1<br />
7P625-377 5/8" -3/8" REDUCER BARB UNION 1<br />
7R004-002 STEPLESS CLAMP, 17.0-70 2<br />
7R004-004 STEPLESS CLAMP, 1.0 OD HOSE 3<br />
7R004-007 STEPLESS CLAMP, 28.6 X 7MM WID 1<br />
7U032-016 3/8" EFI FUEL HSE HI-PSR 0.25<br />
7U033-020 HOSE, 5/8"ID CLASS 1 EMISSIONS 0.6667<br />
5A001-025 DIABLO MAFIA, MUST 1<br />
5A003-035 PREDATOR, 05-08 MUSTANG 1<br />
8F060-061 FUEL INJ. 60 LB LONG, US CAR, 8<br />
8F101-262 FUEL PMP ASY,05 MUST TWIN INTA 1<br />
7U032-018 3/8" SUBMERSIBLE EFI FUEL HOSE 2.75<br />
7U100-055 TIE WRAP, 7.5" NYLON 4<br />
7R004-002 STEPLESS CLAMP, 17.0-70 2<br />
8F001-255 255 INTANK FUEL PUMP '86-'97 1<br />
7R002-044 #44 HOSE CLAMP 1<br />
7R004-006 STEPLESS CLAMP, 11.3 X 5MM WID 4<br />
5W001-022 T-TAP CONN,14-16 AWG 2<br />
5W001-009 16-14GA MALE SLIDE INSULATED 2<br />
5W001-080 FUSE, 20 AMP. MINI BLADE 1<br />
7P375-099 Y-UNION, 3/8" BARBED TEFLON 1<br />
7U032-025 HOSE, 5/16" ID,3/8"OD, 1/32" W 0.125<br />
7U032-030 HOSE,SPIRAL 3/8" CUFF ID, 1' L 2<br />
8N104-160 SUPPORT PCS, LG, 05+ MUST <strong>GT</strong> V 1<br />
4FE014-010 RADIATOR PIPE-STAINLESS 1<br />
5W001-009 16-14GA MALE SLIDE INSULATED 1<br />
5W001-011 16-14 GA RING TERM .26" HOLE 1<br />
5W001-015 FUSE, BLADE TYPE 20 AMP 1<br />
5W001-022 T-TAP CONN,14-16 AWG 1<br />
5W001-032 1/4" PLASTIC WIRE LOOM 60<br />
5W001-050 HARNESS, FUEL INJ PLUG W/WIRES 1<br />
5W001-071 FUSE HOLDER,16GA WIRE 1<br />
5W018-010 18GA STRD WIRE RED 5<br />
7A250-050 1/4-20 X .50 SHCS ZINC PLTD 3<br />
7A250-051 1/4-20 X .50 HHCS ZINC PLTD 2<br />
7A250-074 1/4-20 X .75 HHCS PLTD 2<br />
7F250-020 1/4-20 HEX NUT 2<br />
7J006-093 6MM WASHER, PLATED 5<br />
7J250-001 1/4 WASHER, SAE, PLTD 4<br />
7P156-082 5/32 TEE 1<br />
7P175-100 COMP BYPASS "Y", 1.75 X 1.00 1<br />
7P218-156 VAC TEE, 7/32,7/32,5/32 1<br />
7P375-075 3/4" HOSE BARB UNION, BRASS 4<br />
7P500-026 1/2NPT X 3/4 BARB 90° BRASS 3<br />
7P500-078 1/2NPT X 3/4 HOSE FIT STRT 1<br />
7P750-102 3/4NPT X 1" X 90° HSE FIT 1<br />
7R002-016 #16 HOSE CLAMP 10<br />
7R002-024 #24 HOSE CLAMP 2<br />
7R002-028 #28 HOSE CLAMP 2<br />
7R002-044 #44 HOSE CLAMP 1<br />
7R002-048 #48 HOSE CLAMP 1<br />
7R002-072 #72 HOSE CLAMP 2<br />
7R003-016 ADEL CLAMP, 1.0" 1<br />
7R003-028 ADEL CLAMP, 2-3/8" .26 HOLE 2<br />
P/N: 4FU020-010 v6.2, 06-08-10<br />
©<strong>2010</strong> <strong>Vortech</strong> Engineering, LLC<br />
All Rights Reserved, Intl. Corp. Secured<br />
xviii
®<br />
ENGINEERING, LLC<br />
2008 <strong>Mustang</strong> Bullitt cont’d<br />
Part No. 4FU218-050L/058L<br />
PARTS LIST<br />
IMPORTANT: Before beginning installation, verify that all parts are included in the kit. Report any shortages or damaged<br />
parts immediately.<br />
Part No. Description Qty.<br />
7R007-001 NYLON RATCHET CLAMP 1-1/8" 16<br />
7S175-400 SLEEVE, Ø1.75" X 4", BLUE 1<br />
7S300-055 SLEEVE, 3.0 X 55 SILICONE 1<br />
7S450-200 SLEEVE, 4 1/2 X 2, BLUE 1<br />
7U030-046 5/32" VACUUM LINE 5<br />
7U030-065 3/4"X90° RUBBER HOSE, SHORT 1<br />
7U034-016 1" GS HEATER HOSE 3<br />
7U038-000 3/4" HEATER HOSE 12<br />
7U038-012 HOSE,3/4"DIA 90°,4X12 LEGS 2<br />
7U038-150 HOSE, 3/4"X150° MOLDED HOSE 1<br />
7U100-055 TIE WRAP, 7.5" NYLON 6<br />
7U375-054 3/4" VINYL CAP 1<br />
8D204-001 RACE BYPASS VALVE-BLUE/SATIN 1<br />
8F001-403 PUMP, WATER, BOSCH 1<br />
8N010-160 SURGE TANK BRKT, MUST <strong>GT</strong> 1<br />
8N010-220 MTG BRKT, 05-07 MUST BOSCH PMP 1<br />
8N055-050 PLASTIC CAP, SURGE TANK 1<br />
8N056-061 SURGE TANK 1<br />
8N106-135 WATER CLR ASY, 05 MUST GEN.II 1<br />
8N006-020 WATER COOLR, FLDYN DUAL PASS 1<br />
8N010-171 BRACKET, DRVR SIDE CLR MNT,PLT 1<br />
8N010-173 BRACKET, PASS SIDE CLR MNT 1<br />
2A017-036 SPACER,PLT.BRG.HSG.,0.186" 4<br />
7C080-030 M8 X 1.25 X 30 HXHD CL10.9 6<br />
7F008-020 NUT, M8 X 1.25 6<br />
7J312-000 5/16 FLAT WASHER-SAE 12<br />
7A250-051 1/4-20 X .50 HHCS ZINC PLTD 4<br />
7J250-001 1/4 WASHER, SAE, PLTD 4<br />
8N155-082 COOLANT RES RELOC, 07-08 MUST 1<br />
4FU010-061 BRKT B, COOL RES RELOC MUST 1<br />
4FU010-091 BRKT, COOL RES RELOC, 07 <strong>GT</strong> 1<br />
7A250-051 1/4-20 X .50 HHCS ZINC PLTD 4<br />
7A250-074 1/4-20 X .75 HHCS PLTD 3<br />
7F250-021 1/4-20 NYLOCK NUT ZINC PLATED 3<br />
7J006-093 6MM WASHER, PLATED 10<br />
7P100-076 HOSE REDUCER, 1"->3/4" PLSTC 1<br />
7P250-045 1/4 MALE NPT X 3/8 MALE BARB 1<br />
7P375-050 3/8" HOSE UNION, BRASS 1<br />
7R002-010 #10 SAE TYPE F SS HOSE CLAMP 2<br />
7R004-002 STEPLESS CLAMP, 17.0-70 3<br />
7U030-056 3/8 PCV/VAC RUBBER HOSE 2.5<br />
7U038-000 3/4" HEATER HOSE 1.83<br />
8N055-080 TANK, RAD OVERFLOW, MUST 1<br />
8N201-200 CAC ASSY, LARGE, 05+ MUST <strong>GT</strong> P 1<br />
xix<br />
P/N: 4FU020-010 v6.2, 06-08-10<br />
©<strong>2010</strong> <strong>Vortech</strong> Engineering, LLC<br />
All Rights Reserved, Intl. Corp. Secured
®<br />
ENGINEERING, LLC<br />
<strong>2010</strong> <strong>Mustang</strong> <strong>GT</strong>, Standard<br />
Part No. 4FU218-080L/088L<br />
PARTS LIST<br />
IMPORTANT: Before beginning installation, verify that all parts are included in the kit. Report any shortages or damaged<br />
parts immediately.<br />
Part No. Description Qty. Part Number Description Qty.<br />
008110 SMALL SILVER DIE CUT DECAL 2<br />
008130 LICENSE PLATE FRAME 1<br />
008447 1 YR S/C WARRANTY PKG 1<br />
009035 S/C LUBE, BOTTLED, 3-PACK 1<br />
2F329-010 V3 SUPERCHARGER ASY, STD 1<br />
4FU020-010 INSTR MAN 05-10 MUST <strong>GT</strong> 1<br />
4FU110-101 P/S RELOCATE ASSY 1<br />
4FU010-101 BRACKET P/S <strong>2010</strong> <strong>GT</strong> 1<br />
7A250-075 1/4-20 X .75 SHCS PLTD 1<br />
7F250-021 1/4-20 NYLOCK NUT ZINC PLATED 1<br />
7J250-001 1/4 WASHER, SAE, PLTD 2<br />
7P375-050 3/8" HOSE UNION, BRASS 1<br />
7P375-075 3/4" HOSE BARB UNION, BRASS 2<br />
7R004-002 STEPLESS CLAMP, 17.0-70 2<br />
7R004-007 STEPLESS CLAMP, 28.6 X 7MM WID 4<br />
7U032-016 3/8" EFI FUEL HSE HI-PSR 3ft<br />
7U038-030 HOSE, P/S, 3/4 ID 4ft<br />
4FU111-044 S/C MOUNTING BRKT ASY 1<br />
4FU010-044 S/C MOUNT PLT, MUST <strong>GT</strong> 1<br />
4FU010-034 IDLER MOUNT PLATE, MUST 1<br />
4FU017-011 SPACER, STUDDED MUST <strong>GT</strong> 2<br />
2A017-750-05 SPACER, .750 OD X 2.691 LONG 2<br />
2A017-750-06 SPACER, .750 OD X 2.712 LONG 1<br />
2A017-879-08 SPACER, .875 OD X 1.776 LONG 1<br />
2A017-750-07 SPACER, .750 OD X .097 LONG 1<br />
4FU017-021 SPACER, IDLER, MUST <strong>GT</strong> 1<br />
4PCS016-160 PULLEY, IDLER 1<br />
2A046-120 BELT, GATES K061203 1<br />
7A375-375 3/8-16 X 3-3/4 HX HD 1<br />
7C080-150 M8 X 1.25 X 150MM HXHD CL10.9 1<br />
7C080-140 M8 X 1.25 X 140 HXHD CL8.8 2<br />
7A375-100 3/8-16 X 1 G5 HHCS, PLT 7<br />
7K312-030 5/16 AN WASHER, S.S. 2<br />
7K375-040 3/8 AN960 FLAT WASHR PLATED 10<br />
4FU112-010 AIR INTAKE ASY 1<br />
4FU012-010 INLET DUCT,"A" 1<br />
4FU012-015 INLET DUCT,"B" 1<br />
7R002-056 #56 HOSE CLAMP 1<br />
7S400-200 SLEEVE, 4 X 2, BLUE 2<br />
7S400-351 REDUCER SLV 4.00 X 3.5 X 2.35L 1<br />
7R002-064 #64 HOSE CLAMP 5<br />
8H040-235 AIR FILTER, 4.0FLG X 7.0L 1<br />
8A003-071 MAF, 3.8 I.D. MUSTANG <strong>GT</strong> 1<br />
7P750-102 3/4NPT X 1" X 90° HSE FIT 1<br />
7P250-047 1/4NPT TO 3/8"BARB 90° 1<br />
4FU010-071 BRKT, INTAKE SUPPORT 1<br />
7U032-016 3/8" EFI FUEL HSE HI-PSR 4<br />
4FU013-010 COVER, AIR FILTER, MUST <strong>GT</strong> 1<br />
7C040-008 M4-.7X8MM SCHD SS 2<br />
4FU112-020 DISCHARGE ASY 1<br />
4FU012-020 DUCT, DISCH, MUST <strong>GT</strong> STD 1<br />
7S450-200 SLEEVE, 4 1/2 X 2, BLUE 1<br />
7S300-276 REDUCER, 3.0 X 2.75 X 2.5L 1<br />
7R002-044 #44 HOSE CLAMP 1<br />
7R002-048 #48 HOSE CLAMP 1<br />
7R002-072 #72 HOSE CLAMP 2<br />
7R002-016 #16 HOSE CLAMP 4<br />
7U030-046 5/32" VACUUM LINE 5<br />
8D001-001 STD COMPRESS BYPASS VALVE 1<br />
7U034-016 1" GS HEATER HOSE 1.25<br />
7U034-016 1" GS HEATER HOSE 0.583<br />
7P218-156 VAC TEE, 7/32,7/32,5/32 1<br />
4FU114-030 WATER PIPE ASSY, 07-08 MUST <strong>GT</strong> 1<br />
4FU014-051 HOUSING, THRMST RELC 07 MUST G 1<br />
4FU014-060 WATER PIPE, Ø1.5 X 90°,07 MUST 1<br />
5W001-085 SLEEVE, FLEX BRD Ø1.5" NOM. 0.83<br />
7C060-015 M6 X 1.0 X 16MM SHCS CL10.9+ Z 2<br />
7C060-020 M6 X 1.0 X 20MM HX 2<br />
7J006-094 6MM WASHER S.S. 2<br />
7R002-024 #24 HOSE CLAMP 3<br />
7U012-018 O-RING, 07 MUST <strong>GT</strong> THERM HSG 1<br />
4FU139-096 PCV MOD ASY 1<br />
7P375-106 PCV VALVE, FORD, 3/8" HOSE 1<br />
7P625-377 5/8" -3/8" REDUCER BARB UNION 1<br />
7R004-002 STEPLESS CLAMP, 17.0-70 2<br />
7R004-004 STEPLESS CLAMP, 1.0 OD HOSE 3<br />
7R004-007 STEPLESS CLAMP, 28.6 X 7MM WID 1<br />
7U032-016 3/8" EFI FUEL HSE HI-PSR 0.25<br />
7U033-020 HOSE, 5/8"ID CLASS 1 EMISSIONS 0.6667<br />
5A003-035 PREDATOR, 05-08 MUSTANG 1<br />
8F060-048 FUEL INJ, 39LB EV6, OEM 03 COB 8<br />
8F101-262 FUEL PMP ASY,05 MUST TWIN INTA 1<br />
7U032-018 3/8" SUBMERSIBLE EFI FUEL HOSE 2.75<br />
7U100-055 TIE WRAP, 7.5" NYLON 4<br />
7R004-002 STEPLESS CLAMP, 17.0-70 2<br />
8F001-255 255 INTANK FUEL PUMP '86-'97 1<br />
7R002-044 #44 HOSE CLAMP 1<br />
7R004-006 STEPLESS CLAMP, 11.3 X 5MM WID 4<br />
5W001-022 T-TAP CONN,14-16 AWG 2<br />
5W001-009 16-14GA MALE SLIDE INSULATED 2<br />
5W001-080 FUSE, 20 AMP. MINI BLADE 1<br />
7P375-099 Y-UNION, 3/8" BARBED TEFLON 1<br />
7U032-025 HOSE, 5/16" ID,3/8"OD, 1/32" W 0.125<br />
7U032-030 HOSE,SPIRAL 3/8" CUFF ID, 1' L 2<br />
4FU101-001 MAF EXT MOD 05+ MUSTANG 1<br />
5W018-030 18GA STRD WIRE GREY 1<br />
5W018-010 18GA STRD WIRE RED 1<br />
5W018-020 18GA STRD WIRE BLK, UL1015 1<br />
5W018-080 18GA STRD WIRE BLUE BULK 1<br />
5W018-090 18GA STRD WIRE BROWN BULK 1<br />
5W018-100 18GA STRD WIRE PURPLE 1<br />
5W001-007 3/16" HEAT-SHRINK TUBING 1.5<br />
5W001-005 3/8" PLASTIC WIRE LOOM 1.5<br />
5W001-012 18-22 GA BUTT CONN RED INSUL 12<br />
P/N: 4FU020-010 v6.2, 06-08-10<br />
©<strong>2010</strong> <strong>Vortech</strong> Engineering, LLC<br />
All Rights Reserved, Intl. Corp. Secured<br />
xx
®<br />
ENGINEERING, LLC<br />
<strong>2010</strong> <strong>Mustang</strong> <strong>GT</strong>, H.O.<br />
Part No. 4FU218-100L/108L<br />
PARTS LIST<br />
IMPORTANT: Before beginning installation, verify that all parts are included in the kit. Report any shortages or damaged<br />
parts immediately.<br />
Part No. Description Qty. Part Number Description Qty.<br />
008110 SMALL SILVER DIE CUT DECAL 2<br />
008130 LICENSE PLATE FRAME, VORTECH 1<br />
008341 VORTECH CHARGE COOLER DECAL 1<br />
008447 1 YR S/C WARRANTY PKG 1<br />
009035 S/C LUBE, BOTTLED, VORT 3-PACK 1<br />
2F329-020 V3 SUPERCHARGER ASY, H.O. 1<br />
4FU020-010 INSTR MAN 05-10 MUST <strong>GT</strong> 1<br />
4FU110-101 P/S RELOCATE ASSY 1<br />
4FU010-101 BRACKET P/S <strong>2010</strong> <strong>GT</strong> 1<br />
7A250-075 1/4-20 X .75 SHCS PLTD 1<br />
7F250-021 1/4-20 NYLOCK NUT ZINC PLATED 1<br />
7J250-001 1/4 WASHER, SAE, PLTD 2<br />
7P375-050 3/8" HOSE UNION, BRASS 1<br />
7P375-075 3/4" HOSE BARB UNION, BRASS 2<br />
7R004-002 STEPLESS CLAMP, 17.0-70 2<br />
7R004-007 STEPLESS CLAMP, 28.6 X 7MM WID 4<br />
7U032-016 3/8" EFI FUEL HSE HI-PSR 3ft<br />
7U038-030 HOSE, P/S, 3/4 ID 4ft<br />
4FU111-044 S/C MOUNTING BRKT ASY 1<br />
4FU010-044 S/C MOUNT PLT, MUST <strong>GT</strong> 1<br />
4FU010-034 IDLER MOUNT PLATE, MUST 1<br />
4FU017-011 SPACER, STUDDED MUST <strong>GT</strong> 2<br />
2A017-750-05 SPACER, .750 OD X 2.691 LONG 2<br />
2A017-750-06 SPACER, .750 OD X 2.712 LONG 1<br />
2A017-879-08 SPACER, .875 OD X 1.776 LONG 1<br />
2A017-750-07 SPACER, .750 OD X .097 LONG 1<br />
4FU017-021 SPACER, IDLER, MUST <strong>GT</strong> 1<br />
4PCS016-160 PULLEY, IDLER 1<br />
2A046-120 BELT, GATES K061203 1<br />
7A375-375 3/8-16 X 3-3/4 HX HD 1<br />
7C080-150 M8 X 1.25 X 150MM HXHD CL10.9 1<br />
7C080-140 M8 X 1.25 X 140 HXHD CL8.8 2<br />
7A375-100 3/8-16 X 1 G5 HHCS, PLT 7<br />
7K312-030 5/16 AN WASHER, S.S. 2<br />
7K375-040 3/8 AN960 FLAT WASHR PLATED 10<br />
4FU112-010 AIR INTAKE ASY 1<br />
4FU012-010 INLET DUCT,"A" 1<br />
4FU012-015 INLET DUCT,"B" 1<br />
7R002-056 #56 HOSE CLAMP 1<br />
7S400-200 SLEEVE, 4 X 2, BLUE 2<br />
7S400-351 REDUCER SLV 4.00 X 3.5 X 2.35L 1<br />
7R002-064 #64 HOSE CLAMP 5<br />
8H040-235 AIR FILTER, 4.0FLG X 7.0L 1<br />
8A003-071 MAF, 3.8 I.D. MUSTANG <strong>GT</strong> 1<br />
7P750-102 3/4NPT X 1" X 90° HSE FIT 1<br />
7P250-047 1/4NPT TO 3/8"BARB 90° 1<br />
4FU010-071 BRKT, INTAKE SUPPORT 1<br />
7U032-016 3/8" EFI FUEL HSE HI-PSR 4<br />
4FU013-010 COVER, AIR FILTER, MUST <strong>GT</strong> 1<br />
7C040-008 M4-.7X8MM SCHD SS 2<br />
4FU114-030 WATER PIPE ASSY, 07-08 MUST <strong>GT</strong> 1<br />
4FU014-051 HOUSING, THRMST RELC 07 MUST G 1<br />
4FU014-060 WATER PIPE, Ø1.5 X 90°,07 MUST 1<br />
5W001-085 SLEEVE, FLEX BRD Ø1.5" NOM. 0.83<br />
7C060-015 M6 X 1.0 X 16MM SHCS CL10.9+ Z 2<br />
7C060-020 M6 X 1.0 X 20MM HX 2<br />
7J006-094 6MM WASHER S.S. 2<br />
7R002-024 #24 HOSE CLAMP 3<br />
7U012-018 O-RING, 07 MUST <strong>GT</strong> THERM HSG 1<br />
4FU139-096 PCV MOD ASY 1<br />
7P375-106 PCV VALVE, FORD, 3/8" HOSE 1<br />
7P625-377 5/8" -3/8" REDUCER BARB UNION 1<br />
7R004-002 STEPLESS CLAMP, 17.0-70 2<br />
7R004-004 STEPLESS CLAMP, 1.0 OD HOSE 3<br />
7R004-007 STEPLESS CLAMP, 28.6 X 7MM WID 1<br />
7U032-016 3/8" EFI FUEL HSE HI-PSR 0.25<br />
7U033-020 HOSE, 5/8"ID CLASS 1 EMISSIONS 0.6667<br />
5A001-025 DIABLO MAFIA 1<br />
5A003-035 PREDATOR, 05-08 MUSTANG 1<br />
8F060-048 FUEL INJ, 39LB EV6, OEM 03 COB 8<br />
8F101-262 FUEL PMP ASY,05 MUST TWIN INTA 1<br />
7U032-018 3/8" SUBMERSIBLE EFI FUEL HOSE 2.75<br />
7U100-055 TIE WRAP, 7.5" NYLON 4<br />
7R004-002 STEPLESS CLAMP, 17.0-70 2<br />
8F001-255 255 INTANK FUEL PUMP '86-'97 1<br />
7R002-044 #44 HOSE CLAMP 1<br />
7R004-006 STEPLESS CLAMP, 11.3 X 5MM WID 4<br />
5W001-022 T-TAP CONN,14-16 AWG 2<br />
5W001-009 16-14GA MALE SLIDE INSULATED 2<br />
5W001-080 FUSE, 20 AMP. MINI BLADE 1<br />
7P375-099 Y-UNION, 3/8" BARBED TEFLON 1<br />
7U032-025 HOSE, 5/16" ID,3/8"OD, 1/32" W 0.125<br />
7U032-030 HOSE,SPIRAL 3/8" CUFF ID, 1' L 2<br />
8N101-290 WELDED CORE ASY 1<br />
8N104-125 SUPRT PCS, 05-08 MUST <strong>GT</strong> CLR G 1<br />
4FE014-010 RADIATOR PIPE-STAINLESS 1<br />
5W001-009 16-14GA MALE SLIDE INSULATED 1<br />
5W001-011 16-14 GA RING TERM .26" HOLE 1<br />
5W001-015 FUSE, BLADE TYPE 20 AMP 1<br />
5W001-022 T-TAP CONN,14-16 AWG 1<br />
5W001-032 1/4" PLASTIC WIRE LOOM 60<br />
5W001-050 HARNESS, FUEL INJ PLUG W/WIRES 1<br />
5W001-071 FUSE HOLDER,16GA WIRE 1<br />
5W018-010 18GA STRD WIRE RED 5<br />
7A250-050 1/4-20 X .50 SHCS ZINC PLTD 3<br />
7A250-051 1/4-20 X .50 HHCS ZINC PLTD 2<br />
7A250-074 1/4-20 X .75 HHCS PLTD 2<br />
7F250-020 1/4-20 HEX NUT 2<br />
7J006-093 6MM WASHER, PLATED 5<br />
7J250-001 1/4 WASHER, SAE, PLTD 4<br />
7P156-082 5/32 TEE 1<br />
7P218-156 VAC TEE, 7/32,7/32,5/32 1<br />
7P375-075 3/4" HOSE BARB UNION, BRASS 4<br />
7P500-026 1/2NPT X 3/4 BARB 90° BRASS 2<br />
7P500-078 1/2NPT X 3/4 HOSE FIT STRT 2<br />
7R002-016 #16 HOSE CLAMP 4<br />
7R002-024 #24 HOSE CLAMP 2<br />
7R002-044 #44 HOSE CLAMP 2<br />
7R002-072 #72 HOSE CLAMP 2<br />
7R003-016 ADEL CLAMP, 1.0" 1<br />
7R003-028 ADEL CLAMP, 2-3/8" .26 HOLE 2<br />
7R007-001 NYLON RATCHET CLAMP 1-1/8" 16<br />
7S275-055 ELBOW, Ø2.75 X 55° SILICONE 1<br />
7S450-200 SLEEVE, 4 1/2 X 2, BLUE 1<br />
7U030-046 5/32" VACUUM LINE 5<br />
7U030-065 3/4"X90° RUBBER HOSE, SHORT 1<br />
7U034-016 1" GS HEATER HOSE 1<br />
7U034-016 1" GS HEATER HOSE 1.25<br />
7U038-000 3/4" HEATER HOSE 12<br />
7U038-012 HOSE,3/4"DIA 90°,4X12 LEGS 1<br />
7U038-020 HOSE, Ø3/4 'S' MOLDED RUBBER 1<br />
xxi<br />
P/N: 4FU020-010 v6.2, 06-08-10<br />
©<strong>2010</strong> <strong>Vortech</strong> Engineering, LLC<br />
All Rights Reserved, Intl. Corp. Secured
®<br />
ENGINEERING, LLC<br />
<strong>2010</strong> <strong>Mustang</strong> <strong>GT</strong>, H.O. cont’d<br />
Part No. 4FU218-108L/108L<br />
PARTS LIST<br />
IMPORTANT: Before beginning installation, verify that all parts are included in the kit. Report any shortages or damaged<br />
parts immediately.<br />
Part No. Description Qty. Part Number Description Qty.<br />
7U038-150 HOSE, 3/4"X150° MOLDED HOSE 1<br />
7U100-055 TIE WRAP, 7.5" NYLON 6<br />
7U375-054 3/4" VINYL CAP 1<br />
8D001-001 STD COMPRESS BYPASS VALVE 1<br />
8F001-403 PUMP, WATER, BOSCH 1<br />
8N010-160 SURGE TANK BRKT, MUST <strong>GT</strong> 1<br />
8N010-220 MTG BRKT, 05-07 MUST BOSCH PMP 1<br />
8N055-050 PLASTIC CAP, SURGE TANK 1<br />
8N056-061 SURGE TANK INTEGRA GSR MODIFIE 1<br />
8N106-135 WATER CLR ASY, MUST GEN.II 1<br />
8N006-020 WATER COOLR, FLDYN DUAL PASS 1<br />
8N010-171 BRACKET, DRVR SIDE CLR MNT,PLT 1<br />
8N010-173 BRACKET, PASS SIDE CLR MNT 1<br />
2A017-036 SPACER,PLT.BRG.HSG.,0.186" 4<br />
7C080-030 M8 X 1.25 X 30 HXHD CL10.9 6<br />
7F008-020 NUT, M8 X 1.25 6<br />
7J312-000 5/16 FLAT WASHER-SAE 12<br />
7A250-051 1/4-20 X .50 HHCS ZINC PLTD 4<br />
7J250-001 1/4 WASHER, SAE, PLTD 4<br />
8N155-082 COOLANT RES RELOC, 07-08 MUST 1<br />
4FU010-061 BRKT B, COOL RES RELOC MUST 1<br />
4FU010-091 BRKT, COOL RES RELOC, 07 <strong>GT</strong> 1<br />
7A250-051 1/4-20 X .50 HHCS ZINC PLTD 4<br />
7A250-074 1/4-20 X .75 HHCS PLTD 3<br />
7F250-021 1/4-20 NYLOCK NUT ZINC PLATED 3<br />
7J006-093 6MM WASHER, PLATED 10<br />
7P100-076 HOSE REDUCER, 1"->3/4" PLSTC 1<br />
7P250-045 1/4 MALE NPT X 3/8 MALE BARB 1<br />
7P375-050 3/8" HOSE UNION, BRASS 1<br />
7R002-010 #10 HOSE CLAMP 2<br />
7R004-002 STEPLESS CLAMP, 17.0-70 3<br />
7U030-056 3/8 PCV/VAC RUBBER HOSE 2.5<br />
7U038-000 3/4" HEATER HOSE 1.83<br />
8N055-080 TANK, RAD OVERFLOW, MUST 1<br />
8N104-127 SUPRT PCS, <strong>2010</strong> MUST <strong>GT</strong> CLR 1<br />
4FE014-010 RADIATOR PIPE-STAINLESS 1<br />
5W001-009 16-14GA MALE SLIDE INSULATED 1<br />
5W001-011 16-14 GA RING TERM .26" HOLE 1<br />
5W001-015 FUSE, BLADE TYPE 20 AMP 1<br />
5W001-022 T-TAP CONN,14-16 AWG 1<br />
5W001-032 1/4" PLASTIC WIRE LOOM 60in<br />
5W001-050 HARNESS, FUEL INJ PLUG W/WIRES 1<br />
5W001-071 FUSE HOLDER,16GA WIRE 1<br />
5W018-010 18GA STRD WIRE RED 5ft<br />
7A250-050 1/4-20 X .50 SHCS GR8 ZINC PLT 3<br />
7A250-051 1/4-20 X .50 HHCS GR5 ZINC PLT 2<br />
7A250-074 1/4-20 X .75 HHCS PLTD 2<br />
7F250-020 1/4-20 HEX NUT 2<br />
7J006-093 6MM WASHER, PLATED 5<br />
7J250-001 1/4 WASHER, SAE, PLTD 4<br />
7P156-082 5/32 TEE 1<br />
7P218-156 VAC TEE, 7/32,7/32,5/32 1<br />
7P375-075 3/4" HOSE BARB UNION, BRASS 5<br />
7P500-026 1/2NPT X 3/4 BARB 90° BRASS 2<br />
7P500-078 1/2NPT X 3/4 HOSE FIT STRT 2<br />
7R002-016 #16 SAE TYPE F SS HOSE CLAMP 4<br />
7R002-024 #24 SAE TYPE F SS HOSE CLAMP 2<br />
7R002-044 #44 SAE TYPE F SS HOSE CLAMP 2<br />
7R002-072 #72 SAE TYPE F SS HOSE CLAMP 2<br />
7R003-016 ADEL CLAMP, 1.0" 1<br />
7R003-028 ADEL CLAMP, 2-3/8" .26 HOLE 2<br />
7R007-001 NYLON RATCHET CLAMP 1-1/8" 18<br />
7S275-055 ELBOW, °2.75 X 55° SILICONE 1<br />
7S450-200 SLEEVE, 4 1/2 X 2, BLUE 1<br />
7U030-046 5/32" VACUUM LINE 5ft<br />
7U030-065 HOSE, 3/4 X 90° RUBBER, SHORT 1<br />
7U034-016 1" GS HEATER HOSE 1ft<br />
7U034-016 1" GS HEATER HOSE 1.25ft<br />
7U038-000 3/4" HEATER HOSE 12ft<br />
7U038-012 HOSE, 3/4 DIA 90°, 4 X 12 LEGS 1<br />
7U038-020 HOSE, 3/4 DIA 'S' MOLDED RUBBE 1<br />
7U038-150 HOSE, 3/4 D X 150° MOLDED HOSE 1<br />
7U100-055 TIE WRAP, 7.5" NYLON 6<br />
7U375-054 3/4" VINYL CAP 1<br />
8D001-001 STD COMPRESS BYPASS VALVE 1<br />
8F001-403 PUMP, WATER, BOSCH 1<br />
8N010-160 SURGE TANK BRKT, 05 MUST <strong>GT</strong> 1<br />
8N055-050 PLASTIC CAP, SURGE TANK 1<br />
8N056-061 SURGE TANK INTEGRA GSR MODIFIE 1<br />
8N010-340 MTG BRKT <strong>2010</strong> MUST <strong>GT</strong> BOSCH PM 1<br />
7U133-060 3/4" X 90° HOSE 5"x3.5" LEGS 1<br />
7A250-376 1/4-20 X 3/4 SHOULDER SHCS NYL 2<br />
7F250-021 1/4-20 NYLOCK NUT ZINC PLATED 2<br />
7C010-075 M8 x 1.25 x75 STUD 4<br />
2A017-753-02 SPACER,.750 OD x .880 Long 4<br />
7j008-001 5/16" fender washers 4<br />
7f008-023 nut, m8 x 1.25 nylock nut 8<br />
7A250-376 1/4-20 X 3/4 SHOULDER SHCS NYL 2<br />
7F250-021 1/4-20 NYLOCK NUT ZINC PLATED 2<br />
P/N: 4FU020-010 v6.2, 06-08-10<br />
©<strong>2010</strong> <strong>Vortech</strong> Engineering, LLC<br />
All Rights Reserved, Intl. Corp. Secured<br />
xxii
1. PREPARATION/REMOVAL<br />
A. Disconnect the battery before proceeding.<br />
B. Loosen the hose clamp at the throttle body.<br />
Disconnect the plastic 3/8" tube assembly<br />
attached to the passenger’s side valve cover.<br />
Remove the plastic 3/8" x 90° connector from the<br />
plastic tube that was connected at the passenger’s<br />
side valve cover. Set this connector aside to<br />
be re-used in a later step. Discard the remainder<br />
of the hose assembly, as it will not be re-used.<br />
(See Fig. 1-c.)<br />
NOTE: The preferred method of removing<br />
the 90° connector from its original<br />
plastic tube is to apply a small<br />
amount of heat to the tube and slide<br />
the connector free.<br />
C. Disconnect the mass air flow (MAF) sensor plug<br />
and remove the inlet duct and upper air filter<br />
cover from the car if applicable. (See Figs. 1-a,<br />
1-b, 1-c.)<br />
D1. Remove the 10mm headed bolt (located next to<br />
the inner fender) which secures the lower portion<br />
of the air filter enclosure. Remove the lower portion<br />
from the car - it will not be reused. (See Fig.<br />
1-d.)<br />
D2. (Bullitt Only) Remove silver nut washer securing<br />
the front of the intake shroud. (see Fig 1-d1.)<br />
E. Remove the six plastic push pins securing the<br />
radiator cover. Remove the cover and set aside to<br />
be reinstalled later. (See Fig. 1-e.)<br />
MAF<br />
CONNECTOR<br />
CRANKCASE<br />
BREATHER<br />
HOSE<br />
THROTTLE<br />
BODY<br />
CLAMP<br />
Fig. 1-a<br />
Fig. 1-b<br />
RETAIN THIS<br />
90° HOSE<br />
END<br />
Fig. 1-c<br />
10mm HEADED<br />
BOLT<br />
Fig. 1-d1 (Bullitt Only)<br />
Fig. 1-d<br />
1<br />
P/N: 4FU020-010 v6.2, 06-08-10<br />
©<strong>2010</strong> <strong>Vortech</strong> Engineering, LLC<br />
All Rights Reserved, Intl. Corp. Secured
1. PREPARATION/REMOVAL, cont’d<br />
F. Locate the coolant drain plug on the passenger’s<br />
side of the radiator. Next drain the coolant into a<br />
clean container. This coolant will be reused in a<br />
later step.<br />
NOTE: Loosening the coolant reservoir cap will allow for<br />
coolant to drain more freely.<br />
G. Remove the two 8mm headed bolts securing the<br />
coolant overflow reservoir to the plastic fan<br />
shroud. (See Fig. 1-f.)<br />
H. Disconnect the small overflow hose (running<br />
across the top of the radiator) from the overflow<br />
reservoir. (See Fig. 1-f.)<br />
I.1 (2007-<strong>2010</strong> Models and Bullitt Only) Remove the<br />
large hose connected to the bottom of the coolant<br />
overflow reservoir. (See Fig. 1-g.)<br />
I.2 (<strong>2005</strong>-2006 Only) Remove the large hose connecting<br />
the thermostat housing to the bottom of<br />
the overflow reservoir. Set the hose and reservoir<br />
aside to be reinstalled in a later step. (See Fig.<br />
1-g.)<br />
COOLANT<br />
OVERFLOW<br />
HOSE<br />
NYLON<br />
CLIPS<br />
Fig. 1-e<br />
NOTE: If you are installing H.O. (charge cooled) kit,<br />
the coolant reservoir will not be reused. Retain<br />
only the fill cap for reuse.<br />
J.1.<br />
J.2.<br />
(<strong>2005</strong>-2006 Only) Remove the two upper radiator<br />
hoses from the engine coolant crossover tube and<br />
set aside. The radiator hose located on the driver’s<br />
side will not be reused. (See Fig. 1-g.)<br />
(2007-<strong>2010</strong> Only) Remove single upper radiator<br />
hose. This host will be reused in a later step.<br />
K. (<strong>2005</strong>-2006 Only) Remove the thermostat housing<br />
from the large formed hose leading to the engine<br />
block and the lower outlet of the radiator. (See<br />
Fig. 1-h.) Set the thermostat housing aside to be<br />
reinstalled in a later step.<br />
L. (<strong>2005</strong>-2006 Only) Remove the lower hose on the<br />
radiator and set the hose aside, as it will not be<br />
reused.<br />
M. Drain and remove the power steering reservoir.<br />
This reservoir will be relocated in a later step.<br />
N.1 Disconnect and remove the factory 5/8" plastic<br />
breather hose assembly attached to the driver’s<br />
side valve cover and intake manifold. Remove the<br />
two fittings from the ends of the plastic tube for reuse.<br />
Discard the striped plastic tube. (See Fig.<br />
1-i.)<br />
N.2 (Bullitt Only) Remove strut tower brace two nuts<br />
each side with a 13mm socket.<br />
8mm HEADED<br />
BOLTS<br />
TWO UPPER<br />
RADIATOR<br />
HOSES<br />
HOSE TO<br />
THERMOSTAT<br />
Fig. 1-f<br />
Fig. 1-g<br />
P/N: 4FU020-010 v6.2, 06-08-10<br />
©<strong>2010</strong> <strong>Vortech</strong> Engineering, LLC<br />
All Rights Reserved, Intl. Corp. Secured<br />
2
1. PREPARATION/REMOVAL, cont’d<br />
O. The installation of this supercharger system<br />
requires the removal, in part or whole, of the<br />
intake manifold so that modifications can be made<br />
to the coolant crossover tube or thermostat housing<br />
depending on year of application:<br />
1. (<strong>2005</strong>-2006 Only) Unplug the wire connectors<br />
from each of the eight injectors. Remove<br />
all of the vacuum hoses and connectors located<br />
at the front and rear of the intake manifold.<br />
Remove the connector attached to the intake<br />
manifold runner control (IMRC) unit located at<br />
the rear of the manifold on the passeger’s<br />
side.<br />
2. (2007-<strong>2010</strong> Only): Unplug the wire connectors<br />
from each of the eight injectors.<br />
3. Remove the four 8mm headed bolts securing<br />
the injector rails to the intake manifold. Do not<br />
remove the small clips that retain the injectors<br />
to the fuel rails. Using a 5/8" spring lock tool,<br />
disconnect the fuel feed line from the fuel rail.<br />
Remove the vacuum line from the fuel regulator.<br />
Remove the rails and injectors as a complete<br />
unit and set aside. New injectors will be<br />
installed in a later step. (See Figs. 1-i, 1-j.)<br />
4. Locate and remove the remaining 10mm<br />
headed bolts retaining the intake manifold to<br />
the cylinder heads. There are five on each<br />
side.<br />
5. (<strong>2005</strong>-2006 Only): Remove the intake manifold<br />
and set aside so it can be reinstalled after<br />
modifications to the coolant crossover tube<br />
are made.<br />
REMOVED IN STEP<br />
“G”<br />
THERMOSTAT<br />
HOUSING<br />
Fig. 1-h<br />
8mm HEADED<br />
SCREWS<br />
RETAIN<br />
FACTORY<br />
HOSE ENDS<br />
Fig. 1-i<br />
LARGE<br />
FORMED<br />
HOSE TO<br />
ENGINE<br />
BLOCK<br />
NOTE: Modification to the crossover<br />
tube will be completed in a later<br />
step<br />
6. (2007-<strong>2010</strong> Only): It is not necessary to<br />
remove the intake manifold from the vehicle<br />
completely. Raise the front of the manifold<br />
3-4" and support between the throttle-body<br />
and alternator.<br />
Fig. 1-j<br />
NOTE: Modification to the thermostat<br />
will be completed in a later step.<br />
3<br />
P/N: 4FU020-010 v6.2, 06-08-10<br />
©<strong>2010</strong> <strong>Vortech</strong> Engineering, LLC<br />
All Rights Reserved, Intl. Corp. Secured
1. PREPARATION/REMOVAL, cont’d<br />
P. Using a 1/2" ratchet, release the tension from the<br />
accessory drive belt and remove it from the car.<br />
This drive belt will be replaced with a longer one<br />
later in the installation.<br />
Q. Locate and remove the stud bolt that secures the<br />
alternator in place as well as the bolt located to<br />
the right of the alternator. (See Fig. 1-o.) Using a<br />
15mm socket or wrench, remove the nut that<br />
secures the capacitor, resistor and coolant hose<br />
support bracket to the stud bolt. Using an 18mm<br />
socket or wrench, remove the stud bolt, it will be<br />
modified and replaced in a later step.<br />
On <strong>2010</strong> Models, no coolant hose support bracket<br />
is used.<br />
R. There is a small tab that secures the wiring harness<br />
in place on the valve cover that will need to<br />
be removed to gain clearance for the supercharger<br />
belt. This tab is best removed with a small air<br />
saw but a grinder will work. After removal, smooth<br />
the area to prevent damage to the belt. (See<br />
Figs. 1-r, 1-r1.)<br />
S. As seen in Fig. 1-o, the upper bolt is removed<br />
from the timing chain cover. This bolt will have to<br />
be modified by cutting off the threaded end where<br />
the resistor attaches. Modify and reinstall the bolt.<br />
(See Fig. 1-s.)<br />
T. Disconnect the plug to the cam position sensor.<br />
Remove the wiring harness from the retaining<br />
clips that hold it to the valve cover. Move the harness<br />
out of the way. This harness will have to be<br />
relocated to gain clearance for the supercharger.<br />
STUD<br />
BOLT<br />
REMOVE<br />
TAB<br />
Fig. 1-o<br />
Fig. 1-r<br />
MODIFY<br />
STUD<br />
REMOVE<br />
13mm<br />
HEADED<br />
BOLT<br />
REMOVE<br />
STUD<br />
BOLT<br />
TAB<br />
REMOVED<br />
Fig. 1-r1<br />
MODIFIED<br />
STUD BOLT<br />
Fig. 1-s<br />
P/N: 4FU020-010 v6.2, 06-08-10<br />
©<strong>2010</strong> <strong>Vortech</strong> Engineering, LLC<br />
All Rights Reserved, Intl. Corp. Secured<br />
4
2. OIL FEED INSTALLATION (Engine oil-fed kits only. Applications with V-3<br />
superchargers skip ahead to step 4.)<br />
A. Locate the factory oil sensor on the driver’s side<br />
of the vehicle near the oil filter.<br />
B. Remove the sending unit and set aside.<br />
C. Locate the supplied 1/4"NPT street TEE fitting.<br />
Install the TEE in the same location as the factory<br />
sending unit with the 1/4" x –4 x 90° installed on<br />
the TEE at the location noted. (See Fig. 2-a.)<br />
D. Attach the stainless steel –4 hose to the –4 fitting<br />
installed in the street TEE. (See Fig. 2-a.)<br />
E. Route the hose away from hot, sharp or moving<br />
parts and move to the top of the engine where it<br />
will be attached to the supercharger oil feed.<br />
F. Reinstall the factory sensor in the branch of the<br />
TEE as shown. (See Fig. 2-a.)<br />
NOTE: The oil feed hose to the S/C will<br />
be installed in a later step of the<br />
installation. Temporarily cap the<br />
open end of the hose to prevent<br />
contamination to the inside of the<br />
hose.<br />
Fig. 2-a<br />
5<br />
P/N: 4FU020-010 v6.2, 06-08-10<br />
©<strong>2010</strong> <strong>Vortech</strong> Engineering, LLC<br />
All Rights Reserved, Intl. Corp. Secured
3. OIL DRAIN ASSEMBLY INSTALLATION (Engine oil-fed kits only.<br />
Applications with V-3 superchargers skip ahead to step 4.)<br />
A. To provide an oil drain for the supercharger, it is necessary<br />
to make a hole in the oil pan. It is best to<br />
punch the hole rather than to drill it.<br />
B. Remove paint from the area around the hole.<br />
C. Mark the oil pan 5/8" down from the oil pan<br />
mounting rail on the driver’s side of the engine.<br />
Measure forward 3/4" from the first bolt on the<br />
side of the oil pan. (See Fig. 3-a.)<br />
D. Use a small center punch to perforate the pan and<br />
expand the hole. Switch to a larger diameter<br />
punch and expand the hole further to approximately<br />
Ø9/16". Most punches are made from<br />
hexagon material and may be placed in a socket<br />
with an extension to make this procedure easier.<br />
E. Tap the hole with a 3/8"NPT tap approximately 1/4"<br />
deep. Pack the flutes of the tap with heavy grease<br />
to hold chips. Use a small magnet to check for any<br />
stray chips.<br />
5/8"<br />
Fig. 3-a<br />
3/4"<br />
NOTE: This method of rolling over the lip of<br />
the hole and tapping it works very<br />
well if carefully done and should<br />
cause no problems.<br />
F. Thoroughly clean the threaded area. Apply a small<br />
amount of silicone sealer or teflon paste to the<br />
new threads. Apply more sealer to the 3/8"NPT<br />
hose fitting and secure in the hole. Make sure a<br />
seal is formed all around the fitting. (See Fig.<br />
3-b.)<br />
G. Drain the engine oil and change the filter.<br />
Fig. 3-b<br />
P/N: 4FU020-010 v6.2, 06-08-10<br />
©<strong>2010</strong> <strong>Vortech</strong> Engineering, LLC<br />
All Rights Reserved, Intl. Corp. Secured<br />
6
4. POWER STEERING RELOCATION (<strong>2010</strong> Models Skip to Step 4.1)<br />
A. Locate the power steering assembly 4FU110-010.<br />
B. Attach the power steering (P/S) relocation bracket<br />
4FU010-010<br />
with the hardware provided to the P/S reservoir<br />
removed in an earlier section. (See Fig.4-a.)<br />
C. Attach the 3/4" P/S hose along with the 3/8" P/S<br />
hose to the outlets of the reservoir with the<br />
clamps provided. (See Fig. 4-b.)<br />
D. Attach the 3/4" and the 3/8" hose barb unions to<br />
the factory hoses using the factory clamps.<br />
E. Attach the reservoir to the passenger’s side radiator<br />
core support using one of the factory ground<br />
strap retaining bolts. (See Fig. 4-c.)<br />
F. Attach the hoses from the reservoir to the factory<br />
P/S hoses and secure with the supplied clamps.<br />
Trim for best fit. Secure the hose to the fan<br />
shroud away from heat and moving objects.<br />
G. It will be necessary to trim the corner of the radiator<br />
core support cover to clear the relocated P/S<br />
reservoir. (See Fig. 4-d)<br />
Fig. 4-b<br />
Fig. 4-c<br />
Fig. 4-a<br />
TRIMMED<br />
AREA<br />
Fig. 4-d<br />
7<br />
P/N: 4FU020-010 v6.2, 06-08-10<br />
©<strong>2010</strong> <strong>Vortech</strong> Engineering, LLC<br />
All Rights Reserved, Intl. Corp. Secured
4.1 POWER STEERING RELOCATION (<strong>2010</strong> Models Only)<br />
A. Locate the power steering assembly 4FU110-010.<br />
B. Attach the power steering (P/S) relocation bracket<br />
P/N 4FU010-101 (R) with the hardware provided<br />
to the P/S reservoir removed in an earlier section.<br />
C. Locate the factory 3/4" PS hose and cut off the<br />
90º bend as shown. See fig 4.1a.<br />
D. Using a 3/4" brass union and two stepless<br />
clamps, attach the 90º bend to a length of supplied<br />
3/4" hose as shown. See fig 4.1b.<br />
E. Attach 90º 3/4" and a length of supplied 3/8” hose<br />
to reservoir using the factory clamps. Remove the<br />
inboard 13mm headed strut mount nuts and install<br />
PS reservoir assembly in location shown. See fig<br />
4.1c.<br />
F. Route hoses towards front of vehicle away from<br />
exhaust and moving objects.<br />
G. Connect previously installed PS hoses from reservoir<br />
to the factory PS hoses using the appropriate<br />
brass unions and hose clamps. See fig 4.1d.<br />
Fig. 4.1a<br />
Fig. 4.1b<br />
Fig. 4.1d Fig. 4.1c<br />
P/N: 4FU020-010 v6.2, 06-08-10<br />
©<strong>2010</strong> <strong>Vortech</strong> Engineering, LLC<br />
All Rights Reserved, Intl. Corp. Secured<br />
8
5.1 COOLANT TUBE RELOCATION (<strong>2005</strong>-2006 Models Years Only)<br />
NOTE: For 2007-<strong>2010</strong> Models skip to<br />
Section 5.2.<br />
A. Locate assembly 4FU214-021.<br />
B. Remove the hose connected to the back, lower<br />
portion of the engine coolant crossover tube.<br />
(See Fig. 5.1-a.)<br />
C. Remove the nylon clip retaining the wire harness<br />
to the alternator brace and the four 10mm headed<br />
bolts securing the alternator brace. Set the brace<br />
aside to be reinstalled. (See Fig. 5.1-b.)<br />
D. Remove the factory coolant bleed plug and set<br />
the plug aside. It will not be reused. (See Fig.<br />
5.1-c.)<br />
E. Remove the remaining two 10mm head bolts<br />
securing the crossover tube to the cylinder heads.<br />
NYLON<br />
ALIGNING<br />
CLIP<br />
Fig. 5.1-a<br />
HOSE<br />
CONNECTION<br />
10mm HEADED<br />
BOLTS<br />
Fig. 5.1-b<br />
BLEED<br />
PLUG<br />
Fig. 5.1-c<br />
9<br />
P/N: 4FU020-010 v6.2, 06-08-10<br />
©<strong>2010</strong> <strong>Vortech</strong> Engineering, LLC<br />
All Rights Reserved, Intl. Corp. Secured
5.1 COOLANT TUBE RELOCATION (<strong>2005</strong>-2006 Models Years Only), cont’d<br />
F. Remove the factory O-ring type gaskets to prevent<br />
damage from heat. Clamp the steel hose<br />
barb end of the coolant crossover tube in a vise<br />
as shown. Using a small amount of heat, heat the<br />
aluminum crossover tube. Using a twisting motion,<br />
remove the steel insert. (See Fig. 5.1-d.)<br />
Penetrating oil will also aid in this step.<br />
G. Locate the supplied 1-1/4" expansion plug<br />
(7P125-002).<br />
H. Coat the expansion plug with sealant. Using a tube<br />
or socket that matches the recessed diameter of<br />
the plug, install the plug flush with the machined<br />
surface sealing the outlet of the crossover tube.<br />
(See Figs. 5.1-e, 5.1-f.)<br />
I. Locate the supplied coolant relocation fitting, sealing<br />
nut and O-ring washer. (See Fig. 5.1-g.)<br />
J. Install the fitting in the location of the factory coolant<br />
bleed plug. (See Fig. 5.1-h.) Screw the jam<br />
nut all the way onto the fitting. Tighten the fitting in<br />
the position shown. (See Fig. 5.1-h.) Secure with<br />
the jam nut.<br />
Fig. 5.1-d<br />
NOTE: It is recommended that sealant be<br />
used to seal the thread of the fitting.<br />
K. Reinstall the factory O-ring gaskets to the crossover<br />
tube.<br />
L. Set the coolant crossover tube back in its original<br />
location.<br />
M. Reinstall the two 10mm headed bolts through the<br />
crossover tube into the cylinder heads.<br />
Temporarily install two intake manifold retaining<br />
bolts through the crossover tube into the cylinder<br />
heads, where the manifold will be secured. Leave<br />
these loose as they are there only as a pilot for<br />
the crossover tube.<br />
N. Tighten the crossover tube retaining bolts, and<br />
remove the two manifold retaining bolts.<br />
Fig. 5.1-e<br />
Fig. 5.1-f<br />
P/N: 4FU020-010 v6.2, 06-08-10<br />
©<strong>2010</strong> <strong>Vortech</strong> Engineering, LLC<br />
All Rights Reserved, Intl. Corp. Secured<br />
10
5.1 COOLANT TUBE RELOCATION (<strong>2005</strong>-2006 Models Years Only), cont’d<br />
O. Reconnect the coolant crossover tube hose at the<br />
lower rear portion of the coolant crossover tube.<br />
Remove any coolant that may have spilled into<br />
the engine valley.<br />
P. Reinstall the alternator support bracket and the<br />
four 10mm headed retaining bolts removed earlier.<br />
Attach the capacitor resistor removed from the<br />
stud bolt on the front cover to one of the 10mm<br />
bracket retainers. Route the resistor and its wire<br />
away from moving parts.<br />
NOTE: Leave two 10mm headed bolts that<br />
attach the bracket to the crossover<br />
tube loose.<br />
Q. Reinstall the Intake Manifold removed in a previous<br />
step. Check to see that the rubber intake runner<br />
gaskets are in place and undamaged. Make<br />
sure the cylinder head surface is clean.<br />
R. Lower the intake manifold onto the cylinder heads.<br />
S. Install the ten factory 10mm headed manifold<br />
retainers and tighten to factory specifications.<br />
Tighten the two 10mm headed bracket bolts that<br />
were previously left loose.<br />
T. Reconnect the IMRC control unit at the rear of the<br />
manifold along with the vacuum hose.<br />
U. Remove the small clips that retain the factory fuel<br />
injectors to the fuel rail. Remove the factory fuel<br />
injectors and set aside - they will not be reused.<br />
V. Locate the supplied fuel injectors. Lubricate the<br />
injector O-rings with clean motor oil and install<br />
into the fuel rail. Reinstall the small retaining clips<br />
onto the injectors.<br />
W. Lower the fuel rail/injector assembly onto the<br />
manifold, making sure that the injectors seat properly<br />
into the manifold. Secure with the four factory<br />
8mm headed bolts.<br />
X. Reconnect the fuel injector plugs and all other<br />
connections and vacuum lines previously removed<br />
from the manifold assembly.<br />
FACTORY<br />
COOLANT<br />
BLEED LOCATION<br />
Fig. 5.1-g<br />
Fig. 5.1-h<br />
RETAIN<br />
FACTORY<br />
HOSE END<br />
REMOVE:<br />
NOT<br />
REUSED<br />
11<br />
P/N: 4FU020-010 v6.2, 06-08-10<br />
©<strong>2010</strong> <strong>Vortech</strong> Engineering, LLC<br />
All Rights Reserved, Intl. Corp. Secured
5.2 THERMOSTAT HOUSING/RADIATOR HOSE MODIFICATION<br />
(2007-<strong>2010</strong> Model Year Only)<br />
A. Using an 8mm socket, remove the two 6mm<br />
screws that retain the thermostat housing. Set the<br />
housing aside to be reused later. Leave the factory<br />
thermostat and O-ring seal in place as they will<br />
be reused (provided they are in good condition).<br />
(See Fig. 5.2-a.)<br />
B. Locate the supplied thermostat housing adaptor<br />
and hardware. Using the two 6mm socket-head<br />
screws, install the housing adaptor as shown.<br />
(See Fig. 5.2-b.)<br />
C. Using the 6mm hardware, washers and<br />
O-ring provided, reinstall the thermostat housing.<br />
Attach the previously removed resistor to the<br />
housing as shown. (See Fig. 5.2-c.)<br />
D. Reinstall the intake manifold removed in a previous<br />
step. Check to see that the rubber intake runner<br />
gaskets are in place and undamaged. Make<br />
sure the cylinder head surface is clean.<br />
E. Lower the intake manifold onto the cylinder heads.<br />
F. Install the ten factory 10mm headed manifold<br />
retainers, and tighten to factory specifications.<br />
G. Remove the small clips that retain the factory fuel<br />
injectors to the fuel rail. Remove the factory fuel<br />
injectors and set aside. These will not be reused.<br />
H. Locate the supplied fuel injectors. Lubricate the<br />
injector O-rings with clean motor oil and install<br />
into the fuel rail. Reinstall the small retaining clips<br />
onto the injectors.<br />
I. Lower the fuel rail/injector assembly onto the<br />
manifold, making sure that the injectors seat properly<br />
into the manifold. Secure with the four factory<br />
8mm headed bolts.<br />
J. Reconnect the fuel injector plugs, all other connections<br />
and vacuum lines previously removed<br />
from the manifold assembly.<br />
K. Locate the 4FU114-030 water pipe assembly.<br />
MANIFOLD IN<br />
ELEVATED<br />
POSITION<br />
THERMOSTAT<br />
HOUSING<br />
Fig. 5.2-a<br />
Fig. 5.2-b<br />
THERMOSTAT<br />
HOUSING<br />
THERMOSTAT<br />
HOUSING<br />
ADAPTOR<br />
RESISTOR<br />
REMOVED IN AN<br />
EARLIER STEP<br />
THERMOSTAT<br />
HOUSING<br />
ADAPTOR<br />
Fig. 5.2-c<br />
P/N: 4FU020-010 v6.2, 06-08-10<br />
©<strong>2010</strong> <strong>Vortech</strong> Engineering, LLC<br />
All Rights Reserved, Intl. Corp. Secured<br />
12
5.2 THERMOSTAT HOUSING/RADIATOR HOSE MODIFICATION<br />
(2007-<strong>2010</strong> Model Year Only), cont’d<br />
L. Cut approximately 2.25" off the short 90° end of<br />
the factory radiator hose and set aside. (See Fig.<br />
5.2-l.)<br />
M. Cut the remainder of the short 90° bend from the<br />
factory radiator hose, approximately half way<br />
between the 90° bend and the 45° bend, and discard.<br />
(See Fig. 5.2-l.)<br />
N. Using the 2.25" section of radiator hose cut previously<br />
and two #24 hose clamps provided, install<br />
the short end of the 90° stainless tube (4FU014-<br />
060) onto the repositioned thermostat housing.<br />
(See Fig. 5.2-n.)<br />
O. Slide the protective sleeve provided over the modified<br />
hose. Install the remainder of the factory radiator<br />
hose using one factory hose clamp and one<br />
#24 hose clamp. (See Fig. 5.2-o.)<br />
END CONNECTED TO<br />
RADIATOR<br />
90° STAINLESS<br />
TUBE (4FU014-<br />
060)<br />
CUT APPROX.<br />
2.25" AND SET<br />
ASIDE<br />
90° BEND TO BE<br />
DISCARDED<br />
Fig. 5.2-l<br />
2.25" SECTION OF<br />
HOSE<br />
PREVIOUSLY<br />
TRIMMED<br />
#24 HOSE<br />
CLAMPS<br />
Fig. 5.2-n<br />
FACTORY<br />
RADIATOR<br />
HOSE<br />
END OF HOSE<br />
PREVIOUSLY<br />
TRIMMED<br />
#24 HOSE<br />
CLAMP<br />
FACTORY HOSE<br />
CLAMP<br />
Fig. 5.2-o<br />
13<br />
P/N: 4FU020-010 v6.2, 06-08-10<br />
©<strong>2010</strong> <strong>Vortech</strong> Engineering, LLC<br />
All Rights Reserved, Intl. Corp. Secured
6.1 PULLEY AND SPACER REPLACEMENT (Bullitt/V-Power/8-Rib Kits Only - All<br />
others skip to step 6.2)<br />
A. Unplug the cam sensor connector.<br />
B. Tensioner modification (skip to step c. if installing<br />
belt tensioner assist):<br />
1. Remove the three screws retaining the factory<br />
spring tensioner to the front of the engine.<br />
Remove the factory steel idler from the tensioner<br />
and replace with the supplied 3" idler<br />
(4FU116-031) using the factory hardware.<br />
(See Fig. 6.1-a.)<br />
2. Install the three M8 x 40mm bolts w/washers<br />
through the tensioner mounting holes.<br />
3. Slide the three .75"OD x .328"ID x .140" spacers<br />
onto the three bolts protruding through the<br />
tensioner. (See Fig. 6.1-a.)<br />
4. Secure the tensioner assembly to the front of<br />
the engine. Use Fig. 6.1-a as guide for spacer<br />
placement.<br />
Fig. 6.1-a<br />
P/N: 4FU020-010 v6.2, 06-08-10<br />
©<strong>2010</strong> <strong>Vortech</strong> Engineering, LLC<br />
All Rights Reserved, Intl. Corp. Secured<br />
14
6.1 PULLEY AND SPACER REPLACEMENT (Bullitt/V-Power/8-Rib Kits Only - All<br />
others skip to step 6.2)<br />
C. OPTIONAL Belt tensioner assist up-grade:<br />
1. Remove the three screws retaining the factory<br />
spring tensioner to the front of the engine.<br />
Remove the factory steel idler from the tensioner<br />
and replace with the supplied 3" idler<br />
(4FU116-031) using the factory hardware.<br />
(See Fig. 6.1-C1.)<br />
2. Locate the supplied tensioner assist plate.<br />
Install the supplied 3/8-16 x 2.5" screw and<br />
3/8-16 jam nut into the plate. Install the three<br />
M8 x 55mm bolts w/washers through the plate.<br />
Slide the three .75"OD x .328"ID x .927" long<br />
spacers onto the previously installed hardware.<br />
(See Fig. 6.1-C2.)<br />
3. Install the plate, hardware and spacers onto<br />
the factory spring tensioner. Slide the three<br />
.75"OD x .328"ID x .140" spacers onto the<br />
three bolts protruding through the tensioner.<br />
(See Fig. 6.1-C2.)<br />
4. Secure the tensioner assembly to the front of<br />
the engine. Use Figs. 6.1-C1, 6.1-C2 as<br />
guides for spacer placement.<br />
NOTE: Leave the 3/8" screw and jam nut<br />
loose at this time.<br />
D. Remove the factory idler pulley located just above<br />
the spring tensioner location. Replace with the<br />
supplied 3.5" idler (4FU016-021) and .875"OD x<br />
.663"ID x .101" thick spacer (2A017-882-02) using<br />
the factory hardware. (See Fig. 6.1-a.)<br />
E. Replace the alternator pulley:<br />
1. First remove the plastic cap from the end of<br />
the alternator pulley to reveal the splined hub.<br />
2. Rotate the pulley so that a round punch can<br />
be inserted through the front of the alternator<br />
into the alternator-cooling fan. This will hold<br />
the alternator assembly from turning. Using<br />
the appropriate splined hub tool (see notes on<br />
page iv), loosen and remove the alternator<br />
pulley. The threads are standard.<br />
3. Install the supplied 8-rib alternator pulley<br />
(4FU016-011) and secure using the M16 x<br />
1.50" flanged nut provided.<br />
3 x 2A017-750-014<br />
.75"OD x .328”ID<br />
x .140” THICK<br />
3/8-16 x 2.5"<br />
SCREW, WITH JAM<br />
NUT INSTALLED<br />
Fig. 6.1-C1 (optional)<br />
BETWEEN<br />
TENSIONER AND<br />
FRONTCONVER<br />
3 x 2A017-752-03<br />
.75"OD x .328”ID<br />
x.927" LONG<br />
BETWEEN<br />
TENSIONER AND<br />
TENSIONER ASSIST<br />
PLATE<br />
4FU010-081<br />
3.0" 8-RIB WIDE<br />
SMOOTH IDLER<br />
Fig. 6.1-C2 (optional)<br />
15<br />
P/N: 4FU020-010 v6.2, 06-08-10<br />
©<strong>2010</strong> <strong>Vortech</strong> Engineering, LLC<br />
All Rights Reserved, Intl. Corp. Secured
6.1 PULLEY AND SPACER REPLACEMENT (Bullitt/V-Power/8-Rib Kits Only - All<br />
others skip to step 6.2), cont'd<br />
F. Remove the two bolts that retain the factory<br />
idlers to the front cover. Discard the idlers and<br />
bolts. Replace the top idler with the 3.5"<br />
smooth idler (4FU016-021) .875"OD x .663"ID<br />
x .101" spacer and stud bolt provided. Replace<br />
the lower idler with the 3.5" ribbed idler<br />
(4FU016-041) .875"OD x .663"ID x .101" spacer<br />
and stud bolt provided. (See Fig. 6.1-c.)<br />
G. Using the appropriate pulley puller, remove the<br />
factory power steering pulley and discard.<br />
Replace with the supplied 8-rib power steering<br />
pulley with the appropriate installer tool.<br />
H. Remove the A/C clutch retaining screws.<br />
Carefully remove the clutch and set aside with<br />
the hardware and small spacer located<br />
between tip of A/C compressor drive shaft and<br />
A/C clutch spline. Replace with the supplied<br />
8-rib A/C pulley (4FR016-021), and secure<br />
using the factory hardware and spacer.<br />
I. Remove the crank pulley retaining bolt.<br />
Using the appropriate pulley puller,<br />
remove the crank pulley and discard.<br />
Install the supplied 8-rib crank pulley<br />
using the factory retaining bolt. (Thread<br />
locking compound must be applied to the<br />
screw threads.)<br />
J. Loosely install the 8-rib drive belt provided<br />
using Fig. 6.1-c for belt route reference.<br />
Not all pulleys are installed at this<br />
time.<br />
Fig. 6.1-c<br />
P/N: 4FU020-010 v6.2, 06-08-10<br />
©<strong>2010</strong> <strong>Vortech</strong> Engineering, LLC<br />
All Rights Reserved, Intl. Corp. Secured<br />
16
6.1 PULLEY AND SPACER REPLACEMENT (Bullitt/V-Power/8-Rib kits Only - All<br />
others skip to step 6.2), cont'd<br />
NOTE: See Fig. 6.1-d for the next few steps.<br />
K. S/C mounting plate installation:<br />
1. Install the two 140mm bolts into their mounting plate<br />
hole locations and slide the two 2.691" long spacers<br />
onto them. (See Figs. 6.1-d,<br />
6.2-a.)<br />
2. Install the idler plate onto the previously installed hardware<br />
and spacers.<br />
3. Install the .097" long spacer onto the bolt that will be<br />
secured through the alternator. (See Figs. 6.1-d, 6.2-a.)<br />
4. Loosely install the S/C mounting plate assembly using<br />
the original S/C mounting plate hardware, taking care to<br />
route the drive belt on the correct side of the spacers.<br />
(See Figs. 6.2-b, 6.2-c.)<br />
5. Locate the remaining 3.5" smooth idler (4FU017-031),<br />
.544" long pilot spacer, and 1.597" long spacer as<br />
depicted in Fig. 6.1-d.<br />
6. Install the idler pulley assembly referencing Figs. 6.1-d,<br />
6.2-a.<br />
Fig. 6.1-d<br />
17<br />
P/N: 4FU020-010 v6.2, 06-08-10<br />
©<strong>2010</strong> <strong>Vortech</strong> Engineering, LLC<br />
All Rights Reserved, Intl. Corp. Secured
6.2 SUPERCHARGER MOUNTING PLATE INSTALLATION<br />
A. The mounting plate is provided with the spacers and<br />
bolts as they would be installed on the vehicle. Keep<br />
these bolts and spacers marked as to their locations.<br />
They are all different in size and mismatching<br />
them will result is misalignment of the mounting<br />
plate.<br />
B. (Non V-Power/Bullitt Kits only) Locate the two supplied<br />
stud-bolt spacers (see Figs. 6.2-b, 6.2-c) in the<br />
S/C mounting plate assembly. Remove the factory<br />
screws retaining the idler pulleys on the driver’s side of<br />
the engine and replace with the stud spacers.<br />
C. It is necessary to install the supercharger accessory<br />
drive belt and loosely route it following Fig.<br />
6.2-c, as not all pulleys are currently in place.<br />
D. Locate the supercharger mounting plate 4FU010-<br />
044 from the supercharger mounting plate assembly.<br />
(See Fig. 6.2-a.)<br />
E. (Non V-Power/Bullitt Kits only) Locate the two 8mm<br />
x 140mm long bolts and washers from the mounting<br />
bracket assembly and install in the locations<br />
noted. (See Fig. 6.2-a.)<br />
F. Slide the two long spacers onto the bolts previously<br />
installed. (See Fig. 6-f.) Install the small triangle-shaped<br />
idler pulley mounting bracket to the<br />
spacers. Install the .093" spacer onto the bolt that<br />
will be attached in the alternator location.<br />
G. Lower the mounting plate assembly into position on<br />
the front of the engine. Be sure to route the drive<br />
belt on the correct side of the idler bracket and spacers.<br />
(See Fig. 6.2-g.)<br />
H. Loosely attach the plate using the previously<br />
installed 140mm hardware. Locate the two 3/8-16<br />
x 1.0" bolts and washers and install through the<br />
plate into the two stud bolt spacers retaining the<br />
factory idlers. (See Figs. 6.2-a, 6.2-c.)<br />
I. Locate the 8mm x 150mm bolt and washer.<br />
Loosely install the bolt through the mounting plate<br />
and remaining long spacer into the engine cover<br />
using Fig. 6.2-a for location reference.<br />
J. (Non V-Power/Bullitt Kits only) Locate the supplied<br />
idler, 1.776" idler spacer, idler pilot spacer, 3/8-16<br />
x 3.75" long bolt and washer. Install the bolt/washer<br />
through the mounting plate, 1.776" spacer, supplied<br />
idler, idler pilot spacer and into the triangleshaped<br />
bracket. (See Figs. 6.2-f to 6.2-h for<br />
assistance.)<br />
2 x 8mm x <strong>2005</strong>-2008 NON-COOLED & <strong>2010</strong><br />
140mm<br />
H.O. MODEL IDLER LOCATION<br />
SCREWS 3/8-16 x 3.75"<br />
SCREW<br />
2 x 3/8-16 x 1.0"<br />
SCREWS<br />
H.O. KIT SCREW<br />
LOCATION<br />
(NOT FOR <strong>2010</strong>)<br />
Fig. 6.2-a <strong>2005</strong>-2008 NON-COOLED & <strong>2010</strong><br />
H.O. MODEL IDLER LOCATION<br />
Fig. 6.2-b<br />
5 x 3/8-16<br />
x 1.0"<br />
SCREWS<br />
8mm x 150mm<br />
SCREW<br />
STUD<br />
BOLT<br />
SPACERS<br />
NOTE: This figure is just for reference.<br />
The small idler pulley mounting<br />
bracket will need to be installed at<br />
the same time as the supercharger<br />
(S/C) Mounting Plate. (See Fig.<br />
7-d.)<br />
STUD<br />
BOLT<br />
SPACERS<br />
INSTALLED<br />
NOTE: If installing a standard output kit (noncooled),<br />
the 3/8" x 3.75" bolt will be<br />
installed in the upper hole location. H.O.<br />
kits install in the lower hole.<br />
Fig. 6.2-c<br />
P/N: 4FU020-010 v6.2, 06-08-10<br />
©<strong>2010</strong> <strong>Vortech</strong> Engineering, LLC<br />
All Rights Reserved, Intl. Corp. Secured<br />
18
6.2 SUPERCHARGER MOUNTING PLATE INSTALLATION, cont’d<br />
SUPPLIED IDLER PULLEY 4PCS016-160<br />
SUPERCHARGER PULLEY<br />
ALTERNATOR PULLEY<br />
FACTORY IDLER PULLEYS<br />
FACTORY POWER<br />
STEERING PULLEY<br />
FACTORY TENSIONER PULLEY<br />
A/C COMPRESSOR PULLEY<br />
CRANK SHAFT PULLEY<br />
Fig. 6.2-e / Belt routing<br />
19<br />
P/N: 4FU020-010 v6.2, 06-08-10<br />
©<strong>2010</strong> <strong>Vortech</strong> Engineering, LLC<br />
All Rights Reserved, Intl. Corp. Secured
6.2 SUPERCHARGER MOUNTING PLATE INSTALLATION, cont’d<br />
K. Tighten all mounting plate hardware, making sure<br />
the drive belt is properly routed and no wiring or<br />
hoses are caught between the mounting surfaces.<br />
(See Fig. 6.2-g.)<br />
L1. (Non V-Power/Bullitt Kits only) Install the five 3/8-16<br />
x 1.0" bolts and washers through the back side of<br />
the mounting plate. (See Fig. 6.2-h.)<br />
L2. (V-Power/Bullitt Kits only) Install the five 3/8-16 x<br />
1.5" supplied bolts and washers through the back<br />
side of the mounting plate. Install the five .280"<br />
long spacers (2A017-878-08) onto the previously<br />
installed hardware. (See Fig 6.1-d)<br />
*M.<br />
*N.<br />
Attach the supplied length of 1/2" oil drain line<br />
hose, and one #8 hose clamp from the previously<br />
installed oil drain assembly, to the 1/2" barbed fitting<br />
in the supercharger.<br />
Install the supplied 1/8"NPT x -4 straight fitting<br />
from assembly 4FU130-026 to the oil feed fitting<br />
on the supercharger.<br />
NOTE: Use only clean engine oil on the pipe threads.<br />
Teflon tape or pipe sealant is not recommended<br />
as it might loosen and cause blockage of<br />
the small oil feed orifice resulting in possible<br />
supercharger failure.<br />
Fig. 6.2-f<br />
.093"<br />
SPACER<br />
O. Attach the supercharger assembly to the mounting<br />
plate using the previously installed hardware.<br />
A 9/16" ratcheting end wrench will greatly aid in<br />
this step.<br />
*P.<br />
Secure the oil drain hose to the prevously<br />
installed brass fitting in the oil pan, making sure to<br />
route in a smooth downward manner and away<br />
from moving or hot objects.<br />
Fig. 6.2-g<br />
SUPERCHARGER<br />
HARDWARE<br />
NOTE: Any dips, “uphill” sections, kinks or restrictions<br />
may cause drainage problems and possible<br />
supercharger failure.<br />
*Q.<br />
Attach the -4 oil feed hose to the straight -4 fitting<br />
previously installed in the supercharger. Secure<br />
away from moving or hot objects.<br />
R. Using a 1/2" ratchet, rotate the factory spring tensioner<br />
clockwise and install the accessory drive<br />
belt. (Refer to Fig. 6.2-e for proper belt routing.)<br />
S. Optional belt tensioner assist upgrade only:<br />
Once the drive belt has been installed, snug the<br />
tensioner assist bolt. Lock in place with the previously<br />
installed jam nut.<br />
NOTE: Do not overtension the tensioner assist bolt, as<br />
damage may occur to the OEM tensioner..<br />
T. Reconnect the cam sensor plug.<br />
**U.<br />
Secure the remote drain hose away from the belt<br />
and other hoses using tie-wraps<br />
Fig. 6.2-h<br />
* Applies to "engine oil-fed" units only. V-3<br />
applications skip these steps<br />
** Applies to V-3 applications only<br />
P/N: 4FU020-010 v6.2, 06-08-10<br />
©<strong>2010</strong> <strong>Vortech</strong> Engineering, LLC<br />
All Rights Reserved, Intl. Corp. Secured<br />
20
7. THERMOSTAT HOUSING RELOCATION (<strong>2005</strong>-2006 Only)<br />
A. It will be necessary to relocate the thermostat<br />
housing to gain clearance for the supercharger<br />
mounting bracket.<br />
B. Locate hose 7U133-050. This hose will be modified<br />
and replace the factory lower radiator hose<br />
removed in a previous step. (See Fig. 7-a.)<br />
C. Modify the supplied hose as seen in the figures<br />
below. (See Figs. 7-b, 7-c.)<br />
D. Trim approximately 5" off of the 9" end of the hose<br />
and 5-1/4" off the 13" end. (See Fig. 7-c.)<br />
7U133-050<br />
NOTE: Because of manufacturing tolerances,<br />
it is best to leave this hose long<br />
and trim to fit.<br />
Fig. 7-a<br />
E. Install the long end of the modified hose to the<br />
outlet of the radiator with a #24 hose clamp.<br />
Leave the clamp loose for adjustment.<br />
F. Install the thermostat housing to the open end of<br />
the new, lower radiator hose and the large formed<br />
factory hose. Adjust the thermostat’s location making<br />
sure it clears any moving parts.<br />
Fig. 7-b<br />
5.500<br />
5" SECTION<br />
TO BE REMOVED<br />
7.750<br />
7U133-050<br />
FORMED HOSE<br />
5-1/4" SECTION<br />
TO BE REMOVED<br />
Fig. 7-c<br />
21<br />
P/N: 4FU020-010 v6.2, 06-08-10<br />
©<strong>2010</strong> <strong>Vortech</strong> Engineering, LLC<br />
All Rights Reserved, Intl. Corp. Secured
7. THERMOSTAT HOUSING RELOCATION (<strong>2005</strong>-2006 Only), cont’d<br />
NOTE: The hose clamps will be left loose<br />
for adjustment of the thermostat’s<br />
location until after the installation of<br />
the supercharger and supercharger<br />
mounting bracket.<br />
G. Locate the 7U133-190 molded coolant hose.<br />
(See Fig. 7-c.)<br />
H. Install the end with the 90° bend onto the thermostat<br />
housing.<br />
I. Install the opposite end to the previously modified<br />
coolant crossover tube. Secure using the #20<br />
hose clamps provided. (See Fig. 7-c.)<br />
Fig. 7-d<br />
P/N: 4FU020-010 v6.2, 06-08-10<br />
©<strong>2010</strong> <strong>Vortech</strong> Engineering, LLC<br />
All Rights Reserved, Intl. Corp. Secured<br />
22
8. CHARGE AIR COOLER INSTALLATION (CHARGE COOLED KITS ONLY)<br />
NOTE: For non-cooled kits skip this section<br />
and proceed to Section 9.<br />
A. BUMPER COVER AND SPLASH PAN<br />
1. Raise the vehicle with a floor jack and set on<br />
jack stands.<br />
2. Remove the seven 5.5mm headed screws<br />
retaining the lower splash panel. (See Fig.<br />
8A-a.)<br />
3. Remove the six Phillips-head screws (three<br />
on each side) from the lower portions of the<br />
plastic innner fender liners. (See Fig. 8A-b.).<br />
SPLASH<br />
PANEL<br />
On <strong>2010</strong> Models, remove the four 7mm headed<br />
screws (2 per side) from the lower portions<br />
of the plastic inner fender liner.<br />
4. Remove the five plastic clips retaining the<br />
front portion of the fender liner. Both sides<br />
need to be removed. (See Fig. 8A-c.)<br />
5. Remove the four 10mm nuts (two on each<br />
side) retaining the bumper cover to the fenders.<br />
(See Fig. 8A-d.)<br />
<strong>2010</strong> models do not use the bracket depicted<br />
in Fig.8A-d. Pull outward from rear most portion<br />
of the bumper where it attaches to the<br />
inner fender to unsnap from retainers. The<br />
bumper detaches along the bumper to fender<br />
body line and underneath the headlights.<br />
Fig. 8A-a<br />
Fig. 8A-b<br />
INNER<br />
FENDER<br />
LINER<br />
Fig. 8A-c<br />
Fig. 8A-d<br />
10mm<br />
HEADED<br />
BOLTS<br />
23<br />
P/N: 4FU020-010 v6.2, 06-08-10<br />
©<strong>2010</strong> <strong>Vortech</strong> Engineering, LLC<br />
All Rights Reserved, Intl. Corp. Secured
8. CHARGE AIR COOLER INSTALLATION (CHARGE COOLED KITS ONLY), cont’d<br />
A. BUMPER COVER AND SPLASH PAN, cont’d<br />
6. Disconnect the connectors on the parking and<br />
the lower fog lights. (See Fig. 8A-e.)<br />
7. Remove the six nylon clips retaining the upper<br />
radiator core support cover. (See Fig. 8A-f.)<br />
8. Remove the two 10mm headed bolts (one on<br />
each side in the upper portion of the grill).<br />
(See Fig. 8A-g.)<br />
LIGHT<br />
CONNECTIONS<br />
Fig. 8A-e<br />
NYLON<br />
CLIPS<br />
Fig. 8A-f<br />
10mm HEADED<br />
BOLT<br />
Fig. 8A-g<br />
P/N: 4FU020-010 v6.2, 06-08-10<br />
©<strong>2010</strong> <strong>Vortech</strong> Engineering, LLC<br />
All Rights Reserved, Intl. Corp. Secured<br />
24
8. CHARGE AIR COOLER INSTALLATION (CHARGE COOLED KITS ONLY), cont’d<br />
A. BUMPER COVER AND SPLASH PAN, cont’d<br />
9. Lift up on the tabs releasing them from the<br />
clips. (See Fig. 8A-h.)<br />
10. Pull out on the bumper cover<br />
11. Remove the connector to the driving light in<br />
the grill (if equipped).<br />
12. Remove the bumper cover and set aside.<br />
(See Fig. 8A-i.)<br />
Fig. 8A-h<br />
Fig. 8A-i<br />
25<br />
P/N: 4FU020-010 v6.2, 06-08-10<br />
©<strong>2010</strong> <strong>Vortech</strong> Engineering, LLC<br />
All Rights Reserved, Intl. Corp. Secured
8. CHARGE AIR COOLER INSTALLATION (CHARGE COOLED KITS ONLY), cont’d<br />
B. WATER COOLER ASSEMBLY<br />
INSTALLATION<br />
NOTE: Refer to Fig. 8B-q throughout<br />
the following steps:<br />
1. Locate the water cooler assembly 8N106-135.<br />
2. Install the two mounting bracket 8N010-171<br />
and 8N010-173 to the water cooler using the<br />
supplied 1/4-20 x 1/2" screws, washers. (See<br />
Fig. 8B-a.)<br />
Fig. 8B-a<br />
NOTE: Leave these screws loose for<br />
adjustment when attaching the<br />
assembly to the vehicle.<br />
3. Remove four nylon push pins from the styrofoam<br />
bumper support and set the support and<br />
the pins aside to be reinstalled. (See Fig.<br />
8B-b.)<br />
4. Remove six of the eight 13mm headed inset<br />
bolts retaining the metal bumper support.<br />
(See Fig. 8B-c.)<br />
5. <strong>2005</strong>-2009 models: Replace the bolts previously<br />
removed with the six 8mm x 1.25" x<br />
35mm long bolts and washers provided.<br />
NYLON PUSH<br />
PINS<br />
Fig. 8B-b<br />
<strong>2010</strong> models: install four M8x1.25x75mm<br />
studs into the four inner bumper bolt holes.<br />
6. <strong>2005</strong>-2009 models: Install the four 2A017-<br />
036 spacers (two each side) onto the bolts<br />
that will secure the water cooler. (See Fig.<br />
8B-d.)<br />
<strong>2010</strong> models: use four 2A017-753-02 spacers<br />
(slightly longer than those depicted in Fig.<br />
8B-d) four 5/16" fender washers, and four<br />
nylock nuts<br />
13mm HEADED<br />
BOLTS<br />
Fig. 8B-c<br />
SPACERS<br />
PROVIDED<br />
Fig. 8B-d<br />
P/N: 4FU020-010 v6.2, 06-08-10<br />
©<strong>2010</strong> <strong>Vortech</strong> Engineering, LLC<br />
All Rights Reserved, Intl. Corp. Secured<br />
26
8. CHARGE AIR COOLER INSTALLATION (CHARGE COOLED KITS ONLY), cont’d<br />
B. WATER COOLER ASSEMBLY<br />
INSTALLATION, cont’d<br />
7. Attach the previously assembled water cooler<br />
to the bolts and spacers and secure with the<br />
8mm nuts and washers provided. Tighten all<br />
cooler hardware at this time. (See Fig. 8B-e.)<br />
NOTE: When installing the cooler, make<br />
sure that the water ports are<br />
configured as shown in Figs.<br />
8B-a, 8B-q. The “top cooler port”<br />
must be the highest point on the<br />
cooler for proper air purging.<br />
Fig. 8B-e<br />
8. Attach the supplied short 90° hose (7U030-<br />
065) to the top port on the CAC cooler as<br />
shown. (See Fig. 8B-f.)<br />
9. Install one of the supplied 3/4" hose unions<br />
into the open end of the previously installed<br />
90° hose and secure. (See Figs. 8B-f, 8B-q.)<br />
3/4" HOSE<br />
UNION<br />
SHORT 90°<br />
ELBOW<br />
Fig. 8B-f<br />
27<br />
P/N: 4FU020-010 v6.2, 06-08-10<br />
©<strong>2010</strong> <strong>Vortech</strong> Engineering, LLC<br />
All Rights Reserved, Intl. Corp. Secured
8. CHARGE AIR COOLER INSTALLATION (CHARGE COOLED KITS ONLY), cont’d<br />
B. WATER COOLER ASSEMBLY<br />
INSTALLATION, cont’d<br />
10. <strong>2005</strong>-2009 models: Locate assembly 8N104-<br />
125. Confirm that the assembly is complete.<br />
<strong>2010</strong> Models: use assembly 8N104-127.<br />
11. Attach the provided ring terminal to the ground<br />
wire on the suplied water pump plug harness.<br />
Connect the supplied length of 16GA wire to<br />
the positive wire using the supplied butt connector.<br />
Connect the water pump harness to<br />
the water pump.<br />
12. Locate the supplied water pump (8F001-403),<br />
two 2-3/8" adel clamps, and water pump<br />
mounting bracket. Place the adel clamps on<br />
the water pump. Using the supplied 1/4-20<br />
hardware, secure the water pump and clamps<br />
to the mounting bracket. When installing,<br />
attach the water pump ground wire to one of<br />
the water pump mounting clamps using the<br />
previously installed ring terminal. (See Fig.<br />
8B-g.)<br />
<strong>2010</strong> Models: use water pump bracket depicted<br />
in Fig. 8B-g2.<br />
13. Attach the pump assembly to the two 8mm x<br />
35mm long bolts previously installed and<br />
secure using the 8mm nuts and washers provided.<br />
(See Fig. 8B-h.)<br />
<strong>2010</strong> Models: see Fig. 8B-h2<br />
ADEL<br />
CLAMP<br />
MOUNTING<br />
BRACKET<br />
Fig. 8B-g<br />
PLUG<br />
HARNESS<br />
WATER<br />
PUMP<br />
Fig. 8B-g2 (<strong>2010</strong> Models)<br />
HOSE TO<br />
PASSENGER’S<br />
SIDE SHOCK<br />
TOWER<br />
8mm<br />
HARDWARE<br />
Fig. 8B-h2 (<strong>2010</strong> Models)<br />
Fig. 8B-h (<strong>2005</strong>-2009 Models)<br />
P/N: 4FU020-010 v6.2, 06-08-10<br />
©<strong>2010</strong> <strong>Vortech</strong> Engineering, LLC<br />
All Rights Reserved, Intl. Corp. Secured<br />
28
8. CHARGE AIR COOLER INSTALLATION (CHARGE COOLED KITS ONLY), cont’d<br />
B. WATER COOLER ASSEMBLY<br />
INSTALLATION, cont’d<br />
14. Route the positive wire up towards the driver’s<br />
side valve cover.<br />
15. Locate the ballast resistor plug. Install the supplied<br />
T-tap connector, cut the water pump positive<br />
wire (from the water pump) for best fit,<br />
attach the supplied male spayed connector<br />
and attach to the wire T-tap connnector. (See<br />
Fig., 8B-i.)<br />
16. Cut the water pump positive wire and install<br />
the inline fuse holder and fuse. Install the wire<br />
loom provided and secure away from heat and<br />
moving parts. (See Fig. 8B-i.)<br />
BALLAST<br />
RESISTOR<br />
POSITIVE WIRE<br />
TO WATER<br />
PUMP<br />
SUPPLIED<br />
FUSE<br />
HOLDER<br />
Fig. 8B-i<br />
29<br />
P/N: 4FU020-010 v6.2, 06-08-10<br />
©<strong>2010</strong> <strong>Vortech</strong> Engineering, LLC<br />
All Rights Reserved, Intl. Corp. Secured
8. CHARGE AIR COOLER INSTALLATION (CHARGE COOLED KITS ONLY), cont’d<br />
B. WATER COOLER ASSEMBLY INSTALLATION, cont’d<br />
17. Locate the 3/4" x 150° molded rubber hose<br />
(7U038-150). Connect the short end of the<br />
3/4" x 150° hose to the lower port on the previously<br />
installed water cooler. Install one of<br />
the provided 3/4" hose unions into the open<br />
end of the 150° hose. Attach a length of 3/4"<br />
hose approximately 24" between tthe hose<br />
union and the previously installed water pump<br />
discharge. Secure all hose connections using<br />
the nylon ratchet clamps provided. (See Fig.<br />
8B-j.)<br />
<strong>2010</strong> models will require the passenger side<br />
air diverter to be trimmed where the power<br />
steering cooler line passes through. Enlarge<br />
the bottom of this notch 1-1/2˝ for 3/4˝ hose to<br />
pass through<br />
18. Attach a length of 3/4" hose approximatelly<br />
48" long to the previously installed water<br />
pump feed port and secure. Route the open<br />
end of the installed hose toward the passenger’s<br />
side shock tower. This hose will be<br />
connnected in later step. (See Fig. 8B-h.)<br />
FRONT OF VEHICLE<br />
WATER COOLER<br />
HOSE TO<br />
WATER<br />
PUMP 3/4" x 150°<br />
3/4" HOSE<br />
UNION<br />
Fig. 8B-j | Viewed From Below<br />
HOSE (7U038-<br />
150)<br />
NOTE: The installation of this hose section<br />
should maintain an “uphill”<br />
routing wthout dips or kinks.<br />
P/N: 4FU020-010 v6.2, 06-08-10<br />
©<strong>2010</strong> <strong>Vortech</strong> Engineering, LLC<br />
All Rights Reserved, Intl. Corp. Secured<br />
30
8. CHARGE AIR COOLER INSTALLATION (CHARGE COOLED KITS ONLY), cont’d<br />
B. WATER COOLER ASSEMBLY INSTALLATION, cont’d<br />
19. Assemble the surge tank reservoir 8N056-060<br />
install a 1/2"NPT x 3/4" straight barbed fitting<br />
in the bottom of the surge tank and one<br />
1/2"NPT x 3/4" x 90° in the side. (See Fig.<br />
8B-k.)<br />
20. Locate and attach the surge tank mounting<br />
bracket 8N010-160. Attach the bracket with<br />
two 1/4-20 x 1/2" socket head cap screws and<br />
washers. (See Fig. 8B-l.)<br />
Fig. 8B-k<br />
Fig. 8B-l<br />
31<br />
P/N: 4FU020-010 v6.2, 06-08-10<br />
©<strong>2010</strong> <strong>Vortech</strong> Engineering, LLC<br />
All Rights Reserved, Intl. Corp. Secured
8. CHARGE AIR COOLER INSTALLATION (CHARGE COOLED KITS ONLY), cont’d<br />
B. WATER COOLER ASSEMBLY INSTALLATION, cont’d<br />
21. On the passenger’s side of the engine,<br />
attached to the valve cover, is a large wire<br />
harness. The harness will have to be relocated<br />
to gain clearance for the surge tank and<br />
the radiator overflow reservoir. (See Figs.<br />
8B-n, 8B-m.)<br />
22. Detach the wiring harness from the retaining<br />
clips and move the harness to the shock<br />
tower. Secure the harness to the A/C line with<br />
wire ties. (See Fig.<br />
8B-n.)<br />
23. Remove the small clip retaining the small wiring<br />
harness to the shock tower. (See Fig.<br />
8B-n.)<br />
24. Attach the small harness to the large harness<br />
with wire ties.<br />
25. To gain clearance for the coolant reservoir,<br />
the A/C line will need to be bent slightly<br />
towards the passenger’s side fender. (See<br />
Fig. 8B-n.)<br />
SECURE<br />
HARNESS<br />
WITH WIRE-TIES<br />
Fig. 8B-m<br />
(<strong>2005</strong>-2006 Only)<br />
NOTE: A/C line is under high pressure.<br />
Use caution not to kink<br />
or damage the line.<br />
26. Remove the 10mm headed screw retaining<br />
the ground strap to the bracket on the strut<br />
tower. (See Fig. 8B-o.)<br />
BENT<br />
A/C LINE<br />
Fig. 8B-n<br />
<strong>2005</strong>-2006<br />
LOCATION<br />
ONLY<br />
GROUND<br />
STRAP<br />
Fig. 8B-o<br />
P/N: 4FU020-010 v6.2, 06-08-10<br />
©<strong>2010</strong> <strong>Vortech</strong> Engineering, LLC<br />
All Rights Reserved, Intl. Corp. Secured<br />
32
8. CHARGE AIR COOLER INSTALLATION (CHARGE COOLED KITS ONLY), cont’d<br />
B. WATER COOLER ASSEMBLY INSTALLATION, cont’d<br />
27. Attach the 3/4" hose previously installed to the<br />
straight 1/2"NPT x 3/4" barb at the bottom of<br />
the surge tank reservoir. Secure with a nylon<br />
clamp. (See Fig. 8C-p.)<br />
Fig. 8B-p<br />
SURGE TANK (8N156-050)<br />
90°1/2 NPT TO 3/4"<br />
HOSE BARB<br />
(7P500-026)<br />
3/4 HOSE UNION<br />
BARBED 7P375-075<br />
8N101-100<br />
7U038-012<br />
3/4" X 4 X 12 FORMED<br />
HOSE<br />
8N003-111<br />
1/2 NPT TO 3/4"<br />
HOSE BARB<br />
(7P500-078)<br />
90°1/2 NPT TO 3/4"<br />
HOSE BARB<br />
(7P500-026)<br />
90°1/2 NPT TO 3/4"<br />
HOSE BARB<br />
(7P500-026)<br />
"S" SHAPED HOSE<br />
(7U038-020)<br />
3/4" X 4 X 12 FORMED HOSE<br />
(7U038-012)<br />
1/2 NPT TO 3/4"<br />
HOSE BARB<br />
(7P500-078)<br />
8N003-030<br />
BULLITT / V-POWER<br />
ONLY<br />
3/4" HOSE (7U038-000)<br />
CUT TO FIT<br />
(APPROX. 48")<br />
3/4 HOSE UNION<br />
BARBED 7P375-075<br />
3/4" HOSE (7U038-000)<br />
CUT TO FIT<br />
(APPROX. 24")<br />
3/4" HOSE (7U038-000)<br />
CUT TO FIT<br />
(APPROX. 24")<br />
3/4 HOSE UNION<br />
BARBED 7P375-075<br />
TOP PORT<br />
ON COOLER<br />
3/4 X 150°MOLDED<br />
HOSE 7U038-150<br />
WATER COOLER<br />
(8N006-020)<br />
BOTTOM PORT<br />
ON COOLER<br />
Fig. 8B-q<br />
33<br />
P/N: 4FU020-010 v6.2, 06-08-10<br />
©<strong>2010</strong> <strong>Vortech</strong> Engineering, LLC<br />
All Rights Reserved, Intl. Corp. Secured
8. CHARGE AIR COOLER INSTALLATION (CHARGE COOLED KITS ONLY)<br />
C. ENGINE COOLANT RESERVOIR INSTALLATION (<strong>2005</strong>-2006 Models Only)<br />
NOTE: For 2007-<strong>2010</strong> models skip to<br />
Section 8.E.<br />
1. Locate assembly 8N155-080.<br />
2. Attach the rear reservoir mounting bracket<br />
4FU010-051 to the reservoir with the 1/4-20 x<br />
1/2" long bolts and washers provided. (See<br />
Fig. 8C-a.)<br />
3. Attach bracket 4FU010-061 to the front of the<br />
reservoir with the hardware provided. (See<br />
Fig. 8C-b.)<br />
4. Locate and install 1/4"NPT x 3/8" barbed fitting<br />
in the tapped hole just above the previously<br />
installed mounting bracket. This hole<br />
may have to be opened using the appropriate<br />
drill bit. (See Fig. 8C-c.)<br />
Fig. 8C-a<br />
Fig. 8C-b<br />
Fig. 8C-c<br />
P/N: 4FU020-010 v6.2, 06-08-10<br />
©<strong>2010</strong> <strong>Vortech</strong> Engineering, LLC<br />
All Rights Reserved, Intl. Corp. Secured<br />
34
8. CHARGE AIR COOLER INSTALLATION (CHARGE COOLED KITS ONLY), cont’d<br />
C. ENGINE COOLANT RESERVOIR<br />
INSTALLATION (<strong>2005</strong>-2006 Models Only),<br />
cont’d<br />
5. Remove the 10mm headed bolt that secures<br />
the back of the ECU and the power distribution<br />
box. (See Fig. 8C-d.)<br />
6. Install the coolant reservoir. Secure the front<br />
of the reservoir with the factory fastener<br />
removed previously. (See Fig.<br />
8C-e.)<br />
NOTE: Leave this bolt loose for final<br />
adjustment in a later step.<br />
7. Attach the rear mounting bracket with the<br />
surge tank mounting bracket to the strut tower<br />
with the 6mm x 20mm long screws and washer<br />
provided. (See Fig. 8C-f.)<br />
10mm<br />
HEADED<br />
BOLT<br />
Fig. 8C-d<br />
RESERVOIR<br />
BRACKET<br />
NOTE: Reinstall the factory ground wire<br />
with one of the 6mm screws and<br />
washers.<br />
8. Attach a length of 3/4" hose (approximately 3'<br />
long) to the 3/4" bung on the front of the coolant<br />
reservoir. Route the hose to the 3/4" outlet<br />
on the thermostat housing secure the hose<br />
with the clamps provided. (See Fig. 8C-g.)<br />
Fig. 8C-e<br />
FACTORY<br />
GROUND STRAP<br />
NOTE: A/C line on the passenger side<br />
must be bent away from block<br />
for reservoir clearance. This can<br />
be done with a large screwdriver<br />
as depicted in figure 8C-g2.<br />
Fig. 8C-f<br />
3/4" HOSE ATTACHED<br />
TO THERMOSTAT HOUSING<br />
Fig. 8C-g2<br />
Fig. 8C-g<br />
35<br />
P/N: 4FU020-010 v6.2, 06-08-10<br />
©<strong>2010</strong> <strong>Vortech</strong> Engineering, LLC<br />
All Rights Reserved, Intl. Corp. Secured
8. CHARGE AIR COOLER INSTALLATION (CHARGE COOLED KITS ONLY), cont’d<br />
C. ENGINE COOLANT RESERVOIR<br />
INSTALLATION (<strong>2005</strong>-2006 Models Only),<br />
cont’d<br />
9. Modify the small hose removed from the factory<br />
coolant overflow reservoir. By cutting the<br />
"S” bend off the hose end. (See Fig. 8C-h.)<br />
10. Install a 3/8" union and a #17 stepless clamp.<br />
Secure the clamp. Using a length of 3/8"<br />
(approximately 40" long) hose that is provided,<br />
secure the hose to the union with a #17<br />
stepless clamp. (See Fig.<br />
8C-i.)<br />
11. Route the overflow hose across the radiator<br />
and under the radiator retaining bracket to the<br />
1/4"NPT x 3/8" hose barb fitting in the coolant<br />
reservoir securing with a clamp. (See Fig.<br />
8C-j.)<br />
Fig. 8C-h<br />
Fig. 8C-i<br />
TRIM FAN SHROUD AS NEEDED<br />
FOR HOSE CLEARANCE<br />
Fig. 8C-j<br />
P/N: 4FU020-010 v6.2, 06-08-10<br />
©<strong>2010</strong> <strong>Vortech</strong> Engineering, LLC<br />
All Rights Reserved, Intl. Corp. Secured<br />
36
8. CHARGE AIR COOLER INSTALLATION (CHARGE COOLED KITS ONLY), cont’d<br />
D. RADIATOR HOSE MODIFICATIONS ('05-'06<br />
Models Only)<br />
1. Remove the passenger’s side upper radiator<br />
hose. (See Fig. 8D-a.)<br />
2. Modify the upper hose by cutting the hose just<br />
after the bend. (See Fig. 8D-b.)<br />
3. Attach the hose to the formed stainless tube<br />
4FU014-010 with a #24 hose clamp.<br />
4. A section of 1-1/2"ID hose left from the coolant<br />
tube relocation will be cut to approximately<br />
2-3/4" long and attached to the outlet of the<br />
radiator reusing the factory spring clamp to<br />
secure the hose to the outlet.<br />
5. Install the formed coolant tube to the inlet on<br />
the engine and to the radiator. Secure with<br />
hose clamps. (See Fig. 8D-c.)<br />
Fig. 8D-a<br />
DISCARD THIS<br />
SECTION OF HOSE<br />
Fig. 8D-b<br />
Fig. 8D-c<br />
37<br />
P/N: 4FU020-010 v6.2, 06-08-10<br />
©<strong>2010</strong> <strong>Vortech</strong> Engineering, LLC<br />
All Rights Reserved, Intl. Corp. Secured
8. CHARGE AIR COOLER INSTALLATION (CHARGE COOLED KITS ONLY), cont’d<br />
E. ENGINE COOLANT RESERVOIR<br />
INSTALLATION (2007-<strong>2010</strong> Models Only)<br />
1. Locate assembly 8N155-082.<br />
2. Attach the rear reservoir mounting bracket<br />
4FU010-091 to the reservoir with the 1/4-20 x<br />
1/2" long bolts and washers provided. (See<br />
Fig. 8E-a.)<br />
3. Attach bracket 4FU010-061 to the front of the<br />
reservoir with the hardware provided. (See<br />
Fig. 8E-b.)<br />
4. Locate and install 1/4"NPT x 3/8" barbed fitting<br />
in the tapped hole just above the previously<br />
installed mounting bracket. This hole<br />
may have to be opened using the approppriate<br />
drill bit. (See Fig. 8E-c.)<br />
8N055-080<br />
OVERFLOW<br />
TANK<br />
Fig. 8E-a<br />
4FU010-091<br />
RESEVOIR<br />
BRACKET<br />
Fig. 8E-b<br />
Fig. 8E-c<br />
P/N: 4FU020-010 v6.2, 06-08-10<br />
©<strong>2010</strong> <strong>Vortech</strong> Engineering, LLC<br />
All Rights Reserved, Intl. Corp. Secured<br />
38
8. CHARGE AIR COOLER INSTALLATION (CHARGE COOLED KITS ONLY), cont’d<br />
E. ENGINE COOLANT RESERVOIR<br />
INSTALLATION (2007-<strong>2010</strong> Models Only),<br />
cont’d<br />
5. Remove the 10mm headed bolt that secures<br />
the back of the ECU and the power distribution<br />
box. (See Fig. 8E-d.)<br />
6. Install the coolant reservoir. Secure the front<br />
of the reservoir with the factory fastener<br />
removed previously. (See Fig.<br />
8E-e.)<br />
NOTE: Leave this bolt loose for final adjustment in a<br />
later step.<br />
7.1 Attach the rear mounting bracket with the<br />
surge tank mounting bracket to the strut tower<br />
using the factory strut mounting hardware.<br />
(See Fig. 8E-f.)<br />
7.2 (Bullitt Only) Attach bracket 4FU010-061 on<br />
the underside of the 4FU010-091 reservoir<br />
bracket to ensure clearance from strut tower<br />
brace.<br />
8. Attach a length of 3/4" hose (approximately<br />
22" long) to the 3/4" bung on the front of the<br />
coolant reservoir. Secure using one of the #10<br />
hose clamps provided. Route the open end of<br />
the hose to the 1" hose previously connected<br />
to the factory coolant reservoir. Connect and<br />
secure the two hoses using the 3/4" x 1" hose<br />
union, the factory 1" spring clamp and the #10<br />
hose clamp provided.<br />
10mm HEADED<br />
BOLT<br />
SURGE TANK<br />
RESERVOIR<br />
BRACKET<br />
Fig. 8E-d<br />
RESERVOIR<br />
BRACKET<br />
Fig. 8E-e<br />
COOLANT<br />
RESERVOIR<br />
Fig. 8E-f<br />
3/4" HOSE ATTACHED<br />
TO FACTORY 1" HOSE<br />
Fig. 8E-g<br />
39<br />
P/N: 4FU020-010 v6.2, 06-08-10<br />
©<strong>2010</strong> <strong>Vortech</strong> Engineering, LLC<br />
All Rights Reserved, Intl. Corp. Secured
8. CHARGE AIR COOLER INSTALLATION (CHARGE COOLED KITS ONLY), cont’d<br />
E. ENGINE COOLANT RESERVOIR<br />
INSTALLATION (2007-<strong>2010</strong> Models Only),<br />
cont’d<br />
9. Modify the small hose removed from the factory<br />
coolant overflow reservoir. By cutting the<br />
"S” bend off the hose end. (See Fig. 8E-h.)<br />
10. Install a 3/8" union and a #17 stepless clamp.<br />
Secure the clamp. Using a length of 3/8"<br />
(approximately 40" long) hose that is provided,<br />
secure the hose to the union with a #17<br />
stepless clamp. (See Fig.<br />
8E-i.)<br />
11. Route the overflow hose across the radiator<br />
and under the radiator retaining bracket to the<br />
1/4"NPT x 3/8" hose barb fitting in the coolant<br />
reservoir securing with a clamp. (See Fig.<br />
8E-j.)<br />
Fig. 8E-h<br />
Fig. 8E-i<br />
TRIM FAN SHROUD AS<br />
NEEDED<br />
FOR HOSE CLEARANCE<br />
Fig. 8E-j<br />
P/N: 4FU020-010 v6.2, 06-08-10<br />
©<strong>2010</strong> <strong>Vortech</strong> Engineering, LLC<br />
All Rights Reserved, Intl. Corp. Secured<br />
40
8. CHARGE AIR COOLER INSTALLATION (CHARGE COOLED KITS ONLY), cont’d<br />
F. COOLER CORE INSTALLATION<br />
1. Locate the charge air cooler assembly.<br />
2. Attach the 4.5" x 2" sleeve to the throttle body<br />
and secure with a #72 hose clamp.<br />
3.a (Non-V-Power/Bullitt Kits only) Install the<br />
1/2"NPT x 3/4" barb 90° and straight fittings into<br />
the charge cooler as shown. (See Fig. 8F-a.)<br />
3.b (V-Power/Bullitt Kits only) Install the two 1/2"<br />
NPT x 3/4" barb 90º fittings into the charge cooler<br />
as shown (See Fig. 8F-b)<br />
4. Attach the long end of the 2.75" (3" if V-Power)<br />
silicone elbow to the cooler inlet and loosely<br />
install a #44 (#48 on V-Power cars) hose clamp.<br />
The open end of the elbow should be facing up<br />
as it will be attached to the supercharger discharge.<br />
5. Lower the cooler assembly into position. Attach the<br />
open end of the previously installed 2.75" elbow to the<br />
supercharger discharge and loosely install a #44 hose<br />
clamp.<br />
6. Attach the cooler discharge to the previously<br />
installed sleeve on the throttle body. Secure with<br />
a #72 hose clamp.<br />
7. Tighten all cooler clamps at this time.<br />
8. Locate one of the remaining 3/4" molded 90°.<br />
Trim approximately 5" from the long end and<br />
attach the short end to the forward most 3/4" x<br />
90° fitting previously installed in the cooler.<br />
Secure with the nylon ratchet clamp provided.<br />
9. Install a 3/4" hose union into the open end of the<br />
previously installed hose. Attach a section of<br />
3/4" hose approximately 32" long to the union.<br />
Route the open end of the hose to the surge<br />
tank. Using the remaining adel clamp and factory<br />
hardware, secure the hose to the factory coolant<br />
reservoir mounting location. (See Figs. 8B-q,<br />
8F-c for assistance.) Secure all hose connections<br />
with the supplied nylon ratchet clamps.<br />
10a. (Non-V-Power/Bullitt Kits only) Locate the supplied<br />
“S” shaped hose. Trim approximately 1" from the short<br />
end and attach it to the straight fitting previously<br />
installed in the cooler. Install a 3/4" hose union into the<br />
open end of the “S” hose. Attach a section of 3/4"<br />
hose approximately 24" long to the union and route to<br />
the driver’s side and down to the water cooler. Trim for<br />
best fit and connect to the 3/4" hose union previously<br />
installed in the 90° short rubber hose attached to the<br />
top water port on the CAC cooler.<br />
ADEL<br />
CLAMP<br />
DISCHARGE<br />
3/4"<br />
STRAIGHT<br />
FITTING<br />
Fig. 8F-a<br />
Fig. 8F-b<br />
3/4" x 90°<br />
FITTING<br />
INLET<br />
“S”<br />
HOSE<br />
NOTE: The installation of this hose section<br />
should maintain an “uphill” routing<br />
without dips or kinks.<br />
Fig. 8F-c<br />
HOSE UNIONS<br />
10b<br />
(V-Power/Bullitt Kits only) Locate the remaining<br />
3/4" molded 90° hose and install on the rear<br />
most 3/4" x 90° fitting previously installed in the<br />
CAC. Secure with the nylon ratchet clamp provided.<br />
Trim as required. Using the supplied 3/4"<br />
barb union connect the other end of the molded<br />
90° hose to a section of 3/4" hose approximately<br />
24" long routed to the driver side and down to<br />
the top of the water cooler. trim for best fit and<br />
connect to the 3/4" hose union previously<br />
installed in the 90° short rubber hose attached to<br />
41<br />
P/N: 4FU020-010 v6.2, 06-08-10<br />
©<strong>2010</strong> <strong>Vortech</strong> Engineering, LLC<br />
All Rights Reserved, Intl. Corp. Secured
8. CHARGE AIR COOLER INSTALLATION (CHARGE COOLED KITS ONLY), cont’d<br />
the top port on the CAC water cooler.<br />
11. At this time, verify that all hose connections are<br />
secure using the nylon ratchet clamps provided.<br />
12. (2007-<strong>2010</strong> Models Only) To provide additional<br />
clearance for the CAC, you will need to cut the<br />
factory radiator hose approximately 4" from its<br />
connection at the radiator. Install the supplied<br />
Ø1.5" x 4" hose union and two #24 hose<br />
clamps. Adjust to allow CAC clearance and<br />
secure. (See Fig. 8F-c.)<br />
CAC<br />
#24 HOSE<br />
CLAMPS<br />
G. COOLANT RESERVOIR FILL<br />
1. Check to make sure all previously installed<br />
hose connections are secure.<br />
2. Fill the engine cooling system through the<br />
<strong>Vortech</strong> supplied coolant reservoir using the<br />
factory coolant previously drained.<br />
3. Locate the factory coolant reservoir cap<br />
removed in section 1 and install it on the<br />
<strong>Vortech</strong> supplied reservoir.<br />
4. (<strong>2005</strong>-2006 Only) Once the coolant system is<br />
filled and all trapped air expelled, install the<br />
1/8"NPT plug provided in the previoisly<br />
installed cross-over tube. Thread sealant<br />
should be used.<br />
5. CAC cooling system.<br />
a. Temporarily remove the 3/4" hose<br />
attached to the 3/4" x 90° fitting on the<br />
CAC surge tank.<br />
b. Cap the open end of the 3/4" x 90° fitting<br />
using the provided vinyl cap.<br />
c. Fill the CAC system using a 25%/75%<br />
antifreeze/water mix. Using a funnel, fill<br />
through the 3/4" hose removed from the<br />
surge tank fitting.<br />
d. Fill the system until the coolant level<br />
reaches the surge tank.<br />
e. Remove the vinyl cap from the surge<br />
tank fitting and reinstall the 3/4" hose<br />
previously removed and secure with the<br />
nylon ratchet clamp.<br />
6. Reinstall the front bumper assembly including<br />
the foam inner bumper, all plastic splash panels<br />
and light connections in the reverse order<br />
removed.<br />
<strong>2010</strong> Models skip this step and see section<br />
8H.<br />
TO<br />
THERMOSTAT<br />
HOUSING<br />
Ø1.5 HOSE<br />
UNION<br />
CONNECTED<br />
TO<br />
RADIATOR<br />
Fig. 8F-c (2007-10 MODELS ONLY)<br />
P/N: 4FU020-010 v6.2, 06-08-10<br />
©<strong>2010</strong> <strong>Vortech</strong> Engineering, LLC<br />
All Rights Reserved, Intl. Corp. Secured<br />
42
8. CHARGE AIR COOLER INSTALLATION (CHARGE COOLED KITS ONLY), cont’d<br />
H. BUMPER COVER MODIFICATION (<strong>2010</strong><br />
MODELS ONLY)<br />
1. <strong>2010</strong> Models will require the removal of the<br />
lower grill uprights and certain surronding<br />
areas to clear the water cooler. (See Fig.<br />
8H-a)<br />
2. Cut out vertical supports in lower grill opening.<br />
the upper lip of the grill should be trimmed<br />
back to approximately 4-1/4” when measured<br />
from the back side of the grill. (See Fig. 8H-b)<br />
3. The lower lip should be trimmed back approxi<br />
mately 4-1/4” measured from the front of the<br />
grill. (See Fig. 8H-c)<br />
Fig. 8H-a<br />
Fig. 8H-b<br />
Fig. 8H-c<br />
43<br />
P/N: 4FU020-010 v6.2, 06-08-10<br />
©<strong>2010</strong> <strong>Vortech</strong> Engineering, LLC<br />
All Rights Reserved, Intl. Corp. Secured
8. CHARGE AIR COOLER INSTALLATION (CHARGE COOLED KITS ONLY), cont’d<br />
H. BUMPER COVER MODIFICATION (<strong>2010</strong><br />
MODELS ONLY) con'td<br />
4.. Trial fit bumper and check for interference<br />
against intercooler. Additional removal of mate<br />
rial may be required to clear the intercooler<br />
end tanks and brackets (See Fig 8H-d,e).<br />
5. Remove bumper and mark on upper lip supports<br />
1” from edge. Drill a 1/4 “ hole from the<br />
top of the support through the lip of the grill.<br />
From the bottom drill a 5/16” hole through the<br />
lip only, being careful not to drill through the<br />
support. An angle drill using the shortest bit<br />
possible is recommended.<br />
5. Install the supplied 1/4-20 Nylon shouldered<br />
bolts from the lip side so that the threads pro<br />
trude through the supports and attach with the<br />
supplied 1-4/20 Nylock nut (See Fig. 8H-f). Do<br />
not over tighten nuts.<br />
6. Reinstall the front bumper assembly including<br />
the foam inner bumper, all plastic splash panels<br />
and light connections in the reverse order<br />
removed. See Fig. 8H-g for final installation<br />
reference.<br />
Fig. 8H-d<br />
Fig. 8H-e<br />
Fig. 8H-g<br />
Fig. 8H-f<br />
P/N: 4FU020-010 v6.2, 06-08-10<br />
©<strong>2010</strong> <strong>Vortech</strong> Engineering, LLC<br />
All Rights Reserved, Intl. Corp. Secured<br />
44
8. CHARGE AIR COOLER INSTALLATION (CHARGE COOLED KITS ONLY), cont’d<br />
I. COMPRESSOR BYPASS VALVE<br />
INSTALLATION (V-POWER/BULLIT KITS SKIP TO<br />
8J)<br />
1. Assemble the bypass using a piece of 1"<br />
hose cut to 11" long and a piece cut to<br />
13" long and four #16 hose clamps.<br />
2. Attach the 11" piece of hose to the inlet<br />
of the bypass and secure with a clamp.<br />
3. Secure the 13" piece to the outlet of the<br />
valve, securing it with a clamp. (See Fig.<br />
8I.)<br />
4. Attach the bypass assembly to the<br />
charge cooler. The 11" long piece will be<br />
attached to the charge cooler. Secure<br />
with clamps. Leave the 13" long section<br />
open for future attachement to the air<br />
inlet.<br />
5. Attach a length of 5/32" vacuum hose to<br />
the bypass valve and route to the vacuum<br />
port of the fuel rail sensor.<br />
11" x Ø1" HOS E<br />
(TRIM TO FIT)<br />
TO DISCHARGE<br />
TUBE<br />
6. Cut a section of the factory hose and<br />
install the vacuum TEE that is provided.<br />
(See Fig. 10-b)<br />
7. Attach the vacuum hose from the<br />
bypass valve to the TEE.<br />
BYPASS<br />
VALV E<br />
13" x Ø1" HOS E<br />
(TRIM TO FIT)<br />
TO INLET<br />
DUCT<br />
#16 HOSE CLAMPS<br />
TO MANIFOLD<br />
PRESSURE/VACUUM<br />
Fig. 8I<br />
45<br />
P/N: 4FU020-010 v6.2, 06-08-10<br />
©<strong>2010</strong> <strong>Vortech</strong> Engineering, LLC<br />
All Rights Reserved, Intl. Corp. Secured
8. CHARGE AIR COOLER INSTALLATION (CHARGE COOLED KITS ONLY), cont’d<br />
J. V-POWER/BULLIT COMPRESSOR BYPASS VALVE<br />
INSTALLATION<br />
1. Assemble the bypass using the supplied<br />
Maxflow Race Bypass valve, Ø 1.75" silicone<br />
coupler with two #28 hose clamps,<br />
Bypass "Y", and two lengths of 1" hose cut to<br />
lengths of 16" and 17.5" with four #16 hose<br />
clamps. (See Fig. 8J)<br />
2. Attach the Maxflow Race Bypass Valve to the<br />
flange located on the lower duct of the CAC<br />
using the supplied hardware and gasket.<br />
3. Attach one end of the Ø 1.75" silicone coupler<br />
to the outlet of the bypass valve and secure<br />
with #28 hose clamp.<br />
4. Insert the Ø 1.75" side of the bypass "Y" into<br />
the open end of the Ø 1.75" silicone coupler<br />
and secure with #28 hose clamp.<br />
5. Secure the two lengths of 1" hose cut to 16"<br />
and 17.5" to the two outlets on the bypass "Y"<br />
with #16 hose clamps (See Figure 8I-a for orientation).<br />
6. Leave the opposite ends of the 1" hose open<br />
for future attachment to the air inlet box.<br />
7. Attach a length of 5/32" vacuum hose to the<br />
bypass valve and route to the vacuum port of<br />
the fuel rail sensor.<br />
8. Cut a section of the factory hose and install<br />
the vacuum TEE that is provided (See Fig.<br />
10-b).<br />
9. Attach the vacuum hose from the bypass<br />
valve to the TEE<br />
FRONT OF CAR<br />
VIEWED FROM UNDERNEATH CAR<br />
RACE BYPASS VALVE<br />
(8D204-001)<br />
BLUE SLEEVE<br />
Ø 1.75" X 4.00"<br />
(7S175-400)<br />
BYPASS "Y"<br />
Ø 1.75" X Ø 1.00"<br />
(7P175-100)<br />
16" X Ø 1" HOSE<br />
TRIM TO FIT<br />
(7U034-016)<br />
#16 HOSE CLAMPS<br />
(7R002-016)<br />
#28 HOSE CLAMPS<br />
(7R002-028)<br />
17.5" X Ø 1" HOSE<br />
TRIM TO FIT<br />
(7U034-016)<br />
Fig. 8J<br />
P/N: 4FU020-010 v6.2, 06-08-10<br />
©<strong>2010</strong> <strong>Vortech</strong> Engineering, LLC<br />
All Rights Reserved, Intl. Corp. Secured<br />
46
9. AIR DISCHARGE ASSEMBLY (Non-cooled kits only)<br />
A. Attach the 4.5" sleeve to the discharge duct with<br />
the #72 clamps provided.<br />
B. Install the 3.0" x 2.75" reducer to the inlet of the<br />
discharge duct and secure the #48 hose clamp<br />
provided.<br />
C. Install the duct to the inlet of the throttle body and<br />
the outlet of the supercharger Secure the remaining<br />
#72, and #44 hose clamps provided. (See<br />
Fig. 9-a.)<br />
Fig. 9-a<br />
47<br />
P/N: 4FU020-010 v6.2, 06-08-10<br />
©<strong>2010</strong> <strong>Vortech</strong> Engineering, LLC<br />
All Rights Reserved, Intl. Corp. Secured
10. COMPRESSOR BY-PASS VALVE INSTALLATION (Non-cooled kits only)<br />
A. Assemble the compressor by-pass valve by using<br />
a piece of 1" hose cut 15" long and a piece cut to<br />
4.25" long, and four #16 hose clamps.<br />
B. Attach the 4.25" piece of hose to the inlet of the<br />
bypass and secure with a #16 clamp.<br />
C. Secure the 15" piece to the by-pass valve outlet<br />
using a #16 hose clamp. (See Fig.<br />
10-a.)<br />
D. Attach the open end of the 4.25" hose to the boss<br />
on the air discharge duct. Secure with a #16 hose<br />
clamp. The open end of the 15" long hose will be<br />
connected to the air inlet in a future step.<br />
E. Secure all hoses with the clamps provided.<br />
F. Connect the supplied length of 5/32" vacuum to<br />
the port on the bypass valve. Route the line to the<br />
fuel regulator vacuum hose. Using the supplied<br />
vacuum TEE, connect the bypass vacuum line.<br />
(See Figs. 10-a, 10-b, for assistance.)<br />
FUEL REGULATOR<br />
Fig. 10-b<br />
SUPPLIED<br />
VACUUM<br />
TEE<br />
4.25" x Ø1" HOSE<br />
(TRIM TO FIT)<br />
TO DISCHARGE<br />
TUBE<br />
BYPASS<br />
VALV E<br />
15" x Ø1" HOS E<br />
(TRIM TO FIT)<br />
TO INLET<br />
DUCT<br />
#16 HOSE CLAMPS<br />
TO MANIFOLD<br />
PRESSURE/VACUUM<br />
Fig. 10-a<br />
P/N: 4FU020-010 v6.2, 06-08-10<br />
©<strong>2010</strong> <strong>Vortech</strong> Engineering, LLC<br />
All Rights Reserved, Intl. Corp. Secured<br />
48
11. COOLANT RESERVOIR RE-INSTALLATION (Non-cooled kits only)<br />
A. Reinstall the factory coolant reservoir using factory hardware to secure.<br />
B. Reattach the large hose at the bottom of the reservoir using the factory hose clamp.<br />
C. Reconnect the small overflow hose at the top using the factory clamps.<br />
D. Check all cooling system hose connections to make sure they are secured with the appropriate<br />
hose clamps.<br />
E. Refill the cooling system using the previously drained coolant.<br />
F. (<strong>2005</strong>-2006 Only) Once the coolant system is filled and all trapped air expelled, install the<br />
1/8"NPT plug provided in the previously installed crossover tube. Thread sealant should be used.<br />
49<br />
P/N: 4FU020-010 v6.2, 06-08-10<br />
©<strong>2010</strong> <strong>Vortech</strong> Engineering, LLC<br />
All Rights Reserved, Intl. Corp. Secured
12. CRANK CASE BREATHER AND PCV INSTALLATION<br />
A. Locate PVC/MAF assembly 4FU139-096.<br />
B. Install the hose assembly between the driver’s<br />
side valve cover and the intake manifold. Secure<br />
hose connections as necessary using the supplied<br />
stepless clamps.<br />
(See Figs. 12-a, 12-b for assistance.)<br />
C. Locate the factory 3/8" x 90° fitting removed from<br />
the passenger’s side valve cover in a previous<br />
step.<br />
D. Connect the remainder of the supplied 3/8"ID<br />
hose to the 90° fitting and connect to the passenger’s<br />
side valve cover. (See Fig. 12-c.)<br />
E. Route the open end of the 3/8" hose behind the<br />
alternator and across to where the air inlet duct<br />
will be located.<br />
Fig. 12-a<br />
3/8" TO 5/8"<br />
UNION<br />
SUPPLIED PCV<br />
VALVE<br />
FACTORY 90° HOSE<br />
CONNECTOR<br />
Fig. 12-b<br />
CONNECTION ON<br />
PASSENGER’S SIDE<br />
FACTORY 90° HOSE<br />
CONNECTOR<br />
Fig. 12-c<br />
P/N: 4FU020-010 v6.2, 06-08-10<br />
©<strong>2010</strong> <strong>Vortech</strong> Engineering, LLC<br />
All Rights Reserved, Intl. Corp. Secured<br />
50
13. AIR INLET ASSEMBLY<br />
A. Locate assembly 4FU112-010.<br />
B. Remove two of the 3/8-16 x 1" bolts securing the<br />
supercharger in place. Install the air inlet support<br />
bracket and secure with the 3/8" bolts removed<br />
from the supercharger mounting plate. (See Fig.<br />
13-a.)<br />
C. Install the 3/4"NPT x 1" x 90° plastic fitting to the<br />
air inlet duct. (See Fig. 13-b.)<br />
D. Install the 1/4"NPT x 3/8" hose barb fitting in the<br />
location noted. (See Fig. 13-c.)<br />
D.2 (V-Power/Bullitt Kits Only) Drill out the second<br />
3/4" NPT location on the air inlet duct using caution<br />
not to damage the threads and install the second<br />
3/4" NPT x 1 x 90° plastic fitting to the air<br />
inlet duct. Orient both fittings as shown in Fig<br />
13-d2.<br />
E. Attach the 4.0" x 3.5" reducer sleeve to the inlet<br />
duct. Secure the sleeves with the clamps provided.<br />
(See Fig. 13-d.)<br />
Fig. 13-a<br />
3/4"NPT x 1" x 90°<br />
BARBED FITTING<br />
Fig. 13-b<br />
1/4"NPT x 3/8" x 90°<br />
HOSE BARBED<br />
FITTING<br />
Fig. 13-c<br />
Fig. 13-d2 (V-Power/Bullitt Kits Only)<br />
Fig. 13-d<br />
51<br />
P/N: 4FU020-010 v6.2, 06-08-10<br />
©<strong>2010</strong> <strong>Vortech</strong> Engineering, LLC<br />
All Rights Reserved, Intl. Corp. Secured
13. AIR INLET ASSEMBLY, cont’d<br />
F. Attach the 3/8" hose previously connected to the<br />
passenger’s side valve cover, to the 1/4"NPT x<br />
3/8" hose x 90° fitting installed in a previous step.<br />
G. Attach the 1" bypass outlet hose to the 90° plastic<br />
fitting and secure the hose with a #16 hose clamp.<br />
H. Install the duct to the inlet of the supercharger and<br />
secure in place with the clamps provided.<br />
I. Locate and install a 4.0" x 2.0" long sleeve to the<br />
inlet of duct 4FU012-010 and secure with two #64<br />
clamps. (See Fig. 13-e.)<br />
J. Remove the Factory MAF sensor element from<br />
the top portion of the air filter housing.<br />
K. Install the element using the 4mm hardware provided<br />
to the supplied MAF tube. (See Figs. 13-f,<br />
13-g.)<br />
FACING<br />
AIR<br />
FILTER<br />
Fig. 13-e<br />
TO MAF<br />
Fig. 13-g<br />
NOTE: Install the MAF sensor element so<br />
the inlet of the sensor faces the air<br />
filter. (See Fig. 10-h.)<br />
L. Install the MAF sensor and air filter to<br />
the 180° duct. (See Fig. 13-h.)<br />
M. Install the 180° duct and the MAF sensor<br />
with filter to the inlet duct leading<br />
to the Supercharger. (See Fig. 13-i.)<br />
Clock the MAF exactly as shown.<br />
(See Fig. 13-i.)<br />
N. Secure the rear clamp at the inlet duct<br />
union to the previously installed support<br />
bracket. (See Fig. 13-i.)<br />
O. MAF (Mass Air Meter) (Non-Cooled<br />
Kits Only) Harness Extension:<br />
1. Locate the supplied wire and butt<br />
connectors in assembly 4FU101-<br />
001.<br />
Fig. 13-f<br />
P/N: 4FU020-010 v6.2, 06-08-10<br />
©<strong>2010</strong> <strong>Vortech</strong> Engineering, LLC<br />
All Rights Reserved, Intl. Corp. Secured<br />
52
13. AIR INLET ASSEMBLY, cont’d<br />
NOTE: It is strongly recommended that the<br />
wires be soldered. Temporary solderless<br />
connectors have been provided<br />
in case you are unable to solder.<br />
2. Remove the split loom from the factory wires<br />
on the MAF sensor.<br />
3. Cut the wires to the connector approximately<br />
2" from the plug.<br />
4. Using the supplied connectors and wire,<br />
extend the connector to the MAF.<br />
5. Install the supplied 3/8" split-loom to the<br />
extended sensor plug harness. Secure the<br />
split-loom with wire-ties or tape.<br />
6. Route the lengthened wires and connector to<br />
the MAF, keeping the wires away from hot or<br />
moving parts.<br />
P. MAF Interface Adapter Installation (Charge<br />
Cooled kits only)<br />
1. Locate the MAFia (Interface Adapter) box.<br />
2. Plug the MAFia in between the factory MAF<br />
connector and the MAF sensor.<br />
3. Remove the small red cover in the middle of<br />
the supplied MAFia box.<br />
4. Verify that the MAFia box is set on number<br />
“2”.<br />
5. If you find that the MAFia box is not set, use<br />
the tool that is provided with the MAF<br />
Interface Adapter box and set to the number<br />
“2”.<br />
6. Replace the cover and secure the MAFia box<br />
and set to the number “2”.<br />
NOTE: It is critical that the MAF Interface<br />
Adapter box be set on number “2”,<br />
The calibration that is provided<br />
with this kit has been created to<br />
work at this setting. Any change to<br />
the MAF Interface Adapter box by<br />
setting it to a higher or lower number<br />
could cause damage to the<br />
engine.<br />
Fig. 13-h<br />
AIR INLET<br />
SUPPORT BRACKET<br />
Fig. 13-i<br />
90° BEND HERE<br />
Q. On <strong>2010</strong> models it will be neccesary to bend<br />
the hood latch cable bracket 90° for air filter<br />
clearence.(See Fig 13-j)<br />
Fig. 13-j<br />
53<br />
P/N: 4FU020-010 v6.2, 06-08-10<br />
©<strong>2010</strong> <strong>Vortech</strong> Engineering, LLC<br />
All Rights Reserved, Intl. Corp. Secured
14. FUEL PUMP UPGRADE<br />
NOTE: This section is best performed with<br />
the fuel level below half a tank.<br />
A. Remove the rear seat by depressing the two<br />
release buttons at the front edge of the seat.<br />
(See Fig. 14-a.)<br />
B. Remove the round plastic inspection cover on the<br />
driver’s side. (See Fig.14-b.)<br />
C. Unplug the sending unit harness and disconnect<br />
the fuel line connection.<br />
D. Using a small screwdriver or chisel and hammer,<br />
tap the retaining ring in a counter clockwise direction.<br />
Remove the retaining ring and set aside.<br />
(See Fig. 14-b.)<br />
E. Slowly pull the fuel pump assembly up. Locate the<br />
crossover fuel line connection on the fuel pump<br />
assembly and disconnect. (See Fig. 14-c.)<br />
F. Remove the pump assembly from the tank being<br />
careful not to damage or lose the rubber O-ring.<br />
G. Carefully cut the step-less clamps securing the<br />
short corrugated fuel line between the fuel pump<br />
outlet and distribution rail. Remove the fuel line<br />
and discard. (See Fig. 14-d.)<br />
RETAINING<br />
RING<br />
HARNESS<br />
CONNECTION<br />
Fig. 14-b<br />
RECEIVING DOTS<br />
ON EACH EAR<br />
FUEL LINE<br />
CONNECTION<br />
CROSSOVER<br />
LINE CONNECTION<br />
Fig. 14-c<br />
DISTRIBUTION<br />
RAIL<br />
Fig. 14-a<br />
PUMP<br />
DISCHARGE<br />
Fig. 14-d<br />
P/N: 4FU020-010 v6.2, 06-08-10<br />
©<strong>2010</strong> <strong>Vortech</strong> Engineering, LLC<br />
All Rights Reserved, Intl. Corp. Secured<br />
54
14. FUEL PUMP UPGRADE, cont’d<br />
H. Using the supplied 17.0 stepless clamps and<br />
2.75" length of Ø3/8" rubber hose, connect the<br />
supplied “Y” fitting to the distribution rail. (See<br />
Fig. 14-e.)<br />
I. Locate the supplied fuel pump and pump inlet<br />
screen. Attach the pump inlet screen to the pump<br />
and orient exactly as shown. (See Fig. 14-f.)<br />
J. Secure the supplied fuel pump to the side of the<br />
factory pump assembly using the #44 hose clamp<br />
supplied. Verify that the hose clamp is routed<br />
inside of the metal posts so that they can be<br />
pushed down without restriction. (See Fig. 14-f.)<br />
K. Slide the two supplied .75" long teflon sleeves<br />
over the discharge of each fuel pump. (See Fig.<br />
14-g.)<br />
Y-FITTING<br />
NOTE: The supplied 1.5" long Teflon tube<br />
will need to be cut into two .75" long<br />
pieces.<br />
Fig. 14-e<br />
PUMP INLET<br />
SCREEN<br />
#44 HOSE<br />
CLAMP<br />
Fig. 14-f<br />
55<br />
P/N: 4FU020-010 v6.2, 06-08-10<br />
©<strong>2010</strong> <strong>Vortech</strong> Engineering, LLC<br />
All Rights Reserved, Intl. Corp. Secured
14. FUEL PUMP UPGRADE, cont’d<br />
L. Slide the supplied 11.3 stepless clamps onto the<br />
two open legs of the Y-fitting. Connect the discharge<br />
of both pumps to the previously installed<br />
“Y” fitting using the two supplied Ø3/8" corrugated<br />
teflon hoses. Secure the remaining hose ends<br />
using the supplied 11.3 stepless clamps. (See<br />
Fig. 14-h.)<br />
M. Secure all hoses to the fuel pump assembly using<br />
the supplied ties. Make sure the lid is able to<br />
spring up and down without restriction and that<br />
the hoses do not kink. (See Fig.<br />
14-h.)<br />
N. Use the supplied T-splice and slide connectors to<br />
connect the black and red wires from the supplied<br />
pump to the corresponding power and ground on<br />
the factory pump. (See Fig. 14-h.)<br />
O. Reinstall the fuel pump assembly into the fuel<br />
tank in the reverse order of removal. Ensure that<br />
the fuel hoses do not rub on the sharp edges of<br />
the fuel tank. Take care not to damage the assembly.<br />
INSTALLATION WILL BE TIGHT. Connect all<br />
fuel and electrical connections. Verify that the fuel<br />
gauge float is able to move freely. Make sure the<br />
O-ring seal is in place and not damaged. There is<br />
an alignment arrow on the pump assembly top<br />
that will need to be aligned with the dot on the fuel<br />
tank. (See Fig. 14-b.)<br />
SUPPLIED<br />
.75" LONG<br />
TEFLON<br />
SLEEVES<br />
Fig. 14-g<br />
POWER AND<br />
GROUND<br />
CONNECTIONS<br />
NOTE: Retaining ring indents must engage<br />
their receivers for proper seal. (See<br />
Fig. 14-b.)<br />
P. Locate the power distribution box located on the<br />
passenger’s side of the engine compartment.<br />
Verify the #41 fuse is for the fuel pump.(<strong>2010</strong><br />
Model year uses #13) Replace the factory<br />
15AMP fuse with the supplied 20AMP fuse.<br />
Q. Cycle the ignition key and check for any fuel<br />
leaks, verify proper fuel gauge operation.<br />
R. Reinstall the plastic inspection cover and rear<br />
seat.<br />
HOSE FROM<br />
SUPPLIED<br />
PUMP<br />
HOSE FROM<br />
FACTORY PUMP<br />
Fig. 14-h<br />
P/N: 4FU020-010 v6.2, 06-08-10<br />
©<strong>2010</strong> <strong>Vortech</strong> Engineering, LLC<br />
All Rights Reserved, Intl. Corp. Secured<br />
56
15. REFLASH COMPUTER<br />
IMPORTANT! To ensure trouble-free programming of your vehicle's computer:<br />
• Make sure the vehicle's battery is sufficiently charged.<br />
• Turn off all accessories and close doors to prevent unnecessary drain on the battery.<br />
• Do not attempt to program your vehicle while a battery charger is connected.<br />
• Improper battery voltage will result in failure of the programming process.<br />
• Do not disconnect the cable or turn off the ignition during programming.<br />
A. Reconnect the battery.<br />
B. Locate the vehicle’s OBD2 connector located in the<br />
lower left hand corner of the dash on the driver’s<br />
side of the vehicle. (See Fig 15-a.)<br />
C. Attach the OBD2 connector from the Flash tool<br />
(provided in the kit) to the vehicle’s OBD2 port.<br />
(See Fig 15-b.) Make sure this connector is seated<br />
all the way into the vehicle’s OBD2 port. You<br />
do not want this connector coming out during programming<br />
or damage may occur to the vehicle’s<br />
ECM.<br />
D. The Reflash tool should power up and display<br />
three parameters:<br />
1. Performance Tune<br />
2. Diagnostics<br />
3. Options<br />
E. Select “Performance Tune” and press the enter<br />
button in the middle of the arrow keys. (See Fig<br />
15-c.)<br />
F. Read the disclaimer entirely, then select agree<br />
and press enter.<br />
G. At this point please read the screen displayed on<br />
the reflash tool. If you have any questions, either<br />
refer to the manual provided with the reflash tool<br />
or contact our service department for further<br />
assistance.<br />
H. Turn the ignition on (do not start the vehicle). Set<br />
the parking brake and press the “enter” button<br />
to continue.<br />
I. “SELECT TUNE” will be displayed at the top of<br />
the screen. Use the arrow keys to select the<br />
appropriate tune for your vehicle and press the<br />
enter button. You will have four choices to<br />
select from:<br />
1. STD OUTPUT (non charge-cooled)<br />
2. Charge-cooled, air/water<br />
3. Charge-cooled, air/air (this option is NOT<br />
used in this application)<br />
4. Original Backup<br />
J. Continue to follow the screen and when finished<br />
unplug the reflash tool from the vehicles OBD2<br />
port.<br />
ESCAPE<br />
ENTER<br />
OR<br />
SELECT<br />
Fig. 15-a<br />
Fig. 15-b<br />
ARROWKEYS<br />
NOTE: Do not disturb the cable, or turn the<br />
ignition off during this time. If the<br />
programming is disrupted, the computer<br />
will not start or run your vehicle!<br />
Fig. 15-c<br />
57<br />
P/N: 4FU020-010 v6.2, 06-08-10<br />
©<strong>2010</strong> <strong>Vortech</strong> Engineering, LLC<br />
All Rights Reserved, Intl. Corp. Secured
16. FINAL CHECK<br />
WARNING: Do not attempt to operate the<br />
vehicle until all components are<br />
installed and all operations are<br />
completed including the final<br />
check.<br />
A. If your vehicle has gone over 15,000 miles<br />
since its last spark plug change, you will need<br />
to change the spark plugs now before test<br />
driving the vehicle.<br />
B. Check all fittings, nuts, bolts and clamps for<br />
tightness. Pay particular attention to oil and<br />
fuel lines around moving parts, sharp edges<br />
and exhaust system parts. Make sure all<br />
wires and lines are properly secured with<br />
clamps or tie-wraps.<br />
C. Check all fluid levels, making sure that your<br />
tank(s) is/are filled with 91 octane or higher<br />
fuel before commencing test drive.<br />
D. Start the engine and allow to idle a few minutes,<br />
then shut off.<br />
H.O Charge Cooled Kits Only<br />
NOTE: Check to see that CAC coolant is<br />
flowing through the surge tank. If<br />
coolant is not flowing, remove the<br />
3/4" rubber hose from the side of the<br />
surge tank and apply light suction in<br />
an attempt to pass any trapped air in<br />
the system. Reconnect the hose and<br />
recheck coolant flow.<br />
E. Recheck to be sure that no hoses, wires, etc.<br />
are near exhaust headers or moving parts.<br />
Look also for any signs of fluid leakage.<br />
F. PLEASE TAKE SPECIAL NOTE: Operating<br />
the vehicle without ALL the subassemblies<br />
completely and properly installed may cause<br />
FAILURE OF MAJOR COMPONENTS.<br />
G. Test drive the vehicle.<br />
H. Always listen carefully for engine detonation.<br />
Discontinue heavy throttle usage if detonation<br />
is heard.<br />
I. Read the Street Supercharger<br />
System Owner's Manual and RETURN<br />
THE Warranty REGISTRATION FORM<br />
within thirty (30) days of purchasing your<br />
supercharger system to qualify.<br />
For internally lubricated V3 units only<br />
This supercharger has been factory pre-filled with<br />
special <strong>Vortech</strong> synthetic lubricant. Oil does not<br />
need to be added to a brand new unit; however a<br />
fluid level check should be performed.<br />
Prior to operating the supercharger on the vehicle<br />
and after installation onto the vehicle:<br />
Remove the factory installed flat-head brass shipping<br />
plug (not the dipstick) from the top of the<br />
supercharger case. Replace the sealed shipping<br />
plug with the supplied “vented” plug. Do not operate<br />
the supercharger without it. Check the supercharger<br />
fluid level.<br />
Fluid level checking procedure:<br />
1. Ensure that the .06” copper sealing washer<br />
is located on the dipstick base.<br />
2. Thread the clean dipstick into the unit until<br />
it seats.<br />
3. Once the dipstick has seated, remove the<br />
dipstick from the unit. Fluid should register<br />
in the crosshatched area on the dipstick.<br />
4. DO NOT OVERFILL!!! Drain excess fluid from<br />
the unit if it is above the maximum level on<br />
the dipstick.<br />
Check the fluid level using the dipstick at least every<br />
2,500 miles.<br />
Initial supercharger fluid change must be performed<br />
at 2,500 miles. The supercharger fluid must be<br />
changed at least every 7,500 miles.<br />
Drain the fluid, refill the unit with 4 oz. of <strong>Vortech</strong> V3<br />
lubricating fluid and then confirm proper oil level using<br />
the dipstick. DO NOT OVERFILL!!!<br />
WARNING:<br />
Use of any other fluid other<br />
than the special <strong>Vortech</strong> lubricant<br />
will void the warranty and<br />
may cause component failure.<br />
P/N: 4FU020-010 v6.2, 06-08-10<br />
©<strong>2010</strong> <strong>Vortech</strong> Engineering, LLC<br />
All Rights Reserved, Intl. Corp. Secured<br />
58
59<br />
P/N: 4FU020-010 v6.2, 06-08-10<br />
©<strong>2010</strong> <strong>Vortech</strong> Engineering, LLC<br />
All Rights Reserved, Intl. Corp. Secured
®<br />
1650 Pacific Avenue, Channel Islands CA 93033-9901 • Phone: 805 247-0226<br />
Fax: 805 247-0669 • www.vortechsuperchargers.com • M-F 8:00AM - 4:30PM (PST)<br />
DP/N: 4FU020-010 - v6.2, 06/0810<br />
ENGINEERING, LLC