
You also want an ePaper? Increase the reach of your titles
YUMPU automatically turns print PDFs into web optimized ePapers that Google loves.
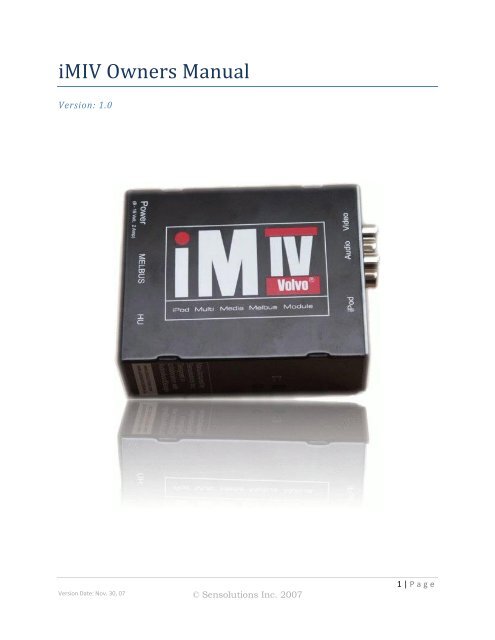
<strong>iMIV</strong> <strong>Owners</strong> <strong>Manual</strong><br />
Version: 1.0<br />
Version Date: Nov. 30, 07 © Sensolutions Inc. 2007<br />
1 | P a g e
Table of Contents<br />
1. Getting Started ...................................................................................................................................... 4<br />
1.1 Supported iPod Models ................................................................................................................ 4<br />
1.2 Known Issues ................................................................................................................................. 4<br />
2. iPod Operation ...................................................................................................................................... 6<br />
2.1 First Contact .................................................................................................................................. 6<br />
2.2 Simple Mode ................................................................................................................................. 6<br />
2.3 Advanced Mode ............................................................................................................................ 6<br />
2.3.1 How to operate in Advanced Mode ...................................................................................... 7<br />
2.4 Switch from Advanced Mode to Simple ..................................................................................... 11<br />
2.5 Ignition on/off ............................................................................................................................. 11<br />
2.6 Special Operations ...................................................................................................................... 11<br />
2.6.1 External 10 CD Changer (CDC) ............................................................................................ 12<br />
2.6.2 External MD Changer (MDC) ............................................................................................... 12<br />
2.6.3 External Satellite Receiver (SAT) ......................................................................................... 13<br />
2.7 AUX Input .................................................................................................................................... 14<br />
2.8 RTI And Video Signal ................................................................................................................... 14<br />
2.8.1 iPod Video (5 th Generation) ................................................................................................ 15<br />
2.8.2 Video While In Motion ........................................................................................................ 16<br />
2.8.3 Possible Issues And How To Resolve Them ........................................................................ 17<br />
3. All About Firmware ............................................................................................................................. 18<br />
3.1 Identify <strong>iMIV</strong> Revision ................................................................................................................. 18<br />
3.2 Firmware Update ........................................................................................................................ 18<br />
3.2.1 Get the right firmware ........................................................................................................ 18<br />
3.2.2 Update Process Over iPod – Nonemergency ...................................................................... 19<br />
3.2.3 Update Process – Emergency Update ................................................................................. 21<br />
3.2.4 Possible Issues And How To Resolve Them ........................................................................ 22<br />
4. Warranty, Disclaimer And Liability ...................................................................................................... 23<br />
4.1 Warranty ..................................................................................................................................... 23<br />
4.2 Disclaimer and Liability ............................................................................................................... 23<br />
4.3 Trademarks ................................................................................................................................. 24<br />
Version Date: Nov. 30, 07 © Sensolutions Inc. 2007<br />
2 | P a g e
Version Date: Nov. 30, 07 © Sensolutions Inc. 2007<br />
3 | P a g e
1. Getting Started<br />
Thank you for purchasing the <strong>iMIV</strong>-Volvo adapter!<br />
By reading this manual and using the adapter you will soon find that this adapter has the most feature<br />
rich and multipurpose functionality of any available adapter. The <strong>iMIV</strong> takes full advantage of the<br />
extendible Volvo audio system and was designed to seamlessly integrate into the factory audio and<br />
video components without any of the limitations found in similar products.<br />
These are the adapter’s main features:<br />
- Seamless integration into the OEM Volvo audio system.<br />
- Works with RTI (navigation), the external 10 CD Changer (CDC), MD Changer (MDC), Satellite<br />
(SAT) and Television (TV) channel.<br />
- All HU-xxx models supported (S40(classic), V40, S60, V/XC70, S80).<br />
- User selectable HU-channel configuration. The iPod can be controlled via CDC, MDC or SAT and<br />
VIDEO/AUDIO integration through the TV channel.<br />
- ALL described iPod features controlled via HU.<br />
- Steering wheel controls can be used to select tracks and playlists.<br />
- Integration of VIDEO and AUDIO utilized via the HU TV-channel<br />
1.1 Supported iPod Models<br />
The following iPod models are supported and will work with the <strong>iMIV</strong>:<br />
iPod Model Audio Playback Video over Dock Connector<br />
iPod G3<br />
iPod Mini (Generation 1 and 2)<br />
iPod Nano (Generation 1 and 2)<br />
iPod Nano (Generation 3)<br />
iPod Photo (iPod Generation 4)<br />
iPod Video (iPod Generation 5)<br />
iPod Classic (iPod Generation 6)<br />
iPod touch (iPod Generation 6)<br />
…. supported<br />
… not supported<br />
1.2 Known Issues<br />
Despite the variety of different HU models the <strong>iMIV</strong> integrates just fine and operates quite similar on all<br />
radios. However there might be slight differences in the <strong>iMIV</strong> operation that is described in the following<br />
Version Date: Nov. 30, 07 © Sensolutions Inc. 2007<br />
4 | P a g e
chapters. For instance there has been feedback about minor deviations in displaying song and album<br />
titles on the HU display over the mini disc changer channel (MDC).<br />
Also there are HU models with so called preset buttons that are available to operate the <strong>iMIV</strong>. One of<br />
those would be the HU-650 (see picture below). An HU-803 looks quite different as this model has a 1-<br />
20/DISC knob that is used for <strong>iMIV</strong> operation.<br />
HU-650:<br />
HU-803:<br />
All following instructions about <strong>iMIV</strong> operations are explained for the use of the preset buttons and the<br />
1-20/DISC knob.<br />
Version Date: Nov. 30, 07 © Sensolutions Inc. 2007<br />
5 | P a g e
2. iPod Operation<br />
2.1 First Contact<br />
The <strong>iMIV</strong> works in the way that it emulates free channels on the MELBUS for the radio. Depending on<br />
the firmware that is installed on the <strong>iMIV</strong> there should be 2 new channels available when rotating the<br />
source knob. With the pre-installed CDC-TV firmware for-instance the 10 CD Changer and Television<br />
channel are added to the radios sources.<br />
With that you are now able to use the <strong>iMIV</strong> and its different modes:<br />
2.2 Simple Mode<br />
In Simple Mode the iPod can be controlled manually as you would normally do. As soon as the iPod<br />
channel is selected on the HU (using the source knob) the iPod starts playing and then pauses when the<br />
channel is deselected. The iPod will also pause if the HU is interrupted, e.g. by a telephone call (if you<br />
have telephone mute or the integrated car phone/hands free kit installed) or by a traffic announcement<br />
via the radio (if TP has been enabled). Once the interruption is finished the iPod resumes playing.<br />
Always connect the iPod to the adapter when the iPod is paused. The adapter expects this<br />
and will otherwise reverse the Play/Pause operation.<br />
Besides operating the iPod with its controls directly the iPod can be controlled by the HU as well as the<br />
audio controls on the steering wheel.<br />
Button HU Button Steering Wheel Button iPod Operation<br />
Skip to next track<br />
Skip to previous track<br />
Fast forward in current track<br />
Fast reverse in current track<br />
2.3 Advanced Mode<br />
In the Advanced Mode the iPod is locked and displays the <strong>iMIV</strong>-Volvo logo. The iPod cannot be manually<br />
operated. All iPod control is accomplished by using the HU buttons and all relevant information is shown<br />
on the HU display.<br />
The Advanced Mode of the <strong>iMIV</strong> adapter is used to access the playlists on your iPod. Up to 99 are<br />
supported by the adapter.<br />
Version Date: Nov. 30, 07 © Sensolutions Inc. 2007<br />
6 | P a g e
iPod in Advanced Mode<br />
2.3.1 How to operate in Advanced Mode<br />
While the iPod is connected to the dock connector press the following button to get from Simple Mode<br />
into Advanced Mode:<br />
With the 1-20/DISC knob:<br />
With the preset buttons:<br />
Description Button<br />
Rotate 1 click clockwise to switch from Simple to Advanced Mode.<br />
Channel Description Button<br />
Ext. 10 CD Changer (CDC) Press preset button 1 once<br />
Satellite Channel (SAT) Press preset button 3 once<br />
When Advanced Mode has been activated the <strong>iMIV</strong> adapter initializes the Advanced Mode and the iPod<br />
gets locked and displays the <strong>iMIV</strong> logo (see picture above). This will take a few seconds. After that the<br />
Advanced Mode starts in Playlist View with CD01 flashing. The desired Playlist can now be selected.<br />
2.3.1.1 Display View Types<br />
It is important to understand the purpose of the CD and TRK numbers in Advanced Mode. The CD<br />
portion on the HU screen will always be either CD01 or CD02. The TRK portion will vary from TRK01 to<br />
TRK99. CD01 indicates that the number displayed after “TRK” is the Playlist number; this is the Playlist<br />
View. CD02 indicates that the number displayed after “TRK” is the current Song; this is called the Song<br />
View. The HU display is able to show TRK numbers from TRK01 to TRK99. Therefore, if a song number in<br />
a Playlist is greater than 100, only the last two digits are visible. The song numbers 100, 200, 300, etc.<br />
are displayed as TRK01.<br />
Version Date: Nov. 30, 07 © Sensolutions Inc. 2007<br />
7 | P a g e
View Type CD# Display Indication (Adv. Mode) TRK# Display Indication (Adv. Mode)<br />
Playlists CD01 Indicates the iPod’s current playlist.<br />
E.g. with CD01 TRK15 playlist 15<br />
is selected.<br />
Songs CD02 Indicates the iPod’s current song. E.g.<br />
with CD02 TRK33 song 33 is currently<br />
playing.<br />
2.3.1.2 Playlists<br />
Playlists names have to be set in a certain way that is called Indexed Enumeration Mode.<br />
When the playlist enumeration starts, the <strong>iMIV</strong> adapter always checks the name of the first playlist. If<br />
the first two characters of this playlist name are numbers the playlist is not assigned to index number 1<br />
but to the index number that is formed by the first two numbers in the name. This index will show on<br />
the HU as Playlist number.<br />
For example, if your first playlist is named “28 – Pop classics” then it is displayed on the HU as: CD01<br />
TRK28. If the first two characters of the playlist name had not been numbers, it would have displayed as:<br />
CD01 TRK01).<br />
A few rules apply to use this type of enumeration:<br />
1. You have to make sure that the first playlist in the list begins with two numbers. This means<br />
index number one has to be typed as “01”, not “1”. Change the names of your playlists<br />
accordingly if this is not the case.<br />
2. Number “00” as first characters in the Playlist name cannot be used for indexed enumeration,<br />
because this can be confused with “Simple Mode” operation.<br />
3. The enumeration will stop as soon as a playlist name is found where one or both of the first two<br />
characters are not numeric. It is important to understand that when the first playlist begins with<br />
two numbers, all successive playlists that do not begin with two numbers will not be<br />
enumerated and then cannot be accessed.<br />
Playlist example:<br />
Do not use Playlist names that exceed 50 characters in length. The <strong>iMIV</strong>-Volvo adapter may<br />
not function correctly in this case.<br />
- Imagine your playlists would look like this:<br />
o “10 - Miscellaneous pop music”<br />
o “11 - Number one hits from the 90’s”<br />
o “12 - Pop Classics”<br />
o “20 - Modern classical”<br />
Version Date: Nov. 30, 07 © Sensolutions Inc. 2007<br />
8 | P a g e
o “21 - Mozart’s symphonies”<br />
o “30 - Greatest hits of Jazz”<br />
o “31 - North Sea Jazz Festival 2000”<br />
o “32 - The best of Miles Davis”<br />
o “40 - Birthday songs for kids”<br />
o “41 - Sing along songs”<br />
o “On-The-Go 1”<br />
o “On-The-Go 2”<br />
o “On-The-Go 3”<br />
o “On-The-Go 4”<br />
- Scrolling through the playlists on the HU will show:<br />
CD01 TRK10 → CD01 TRK11 → CD01 TRK12 → CD01 TRK20 → CD01 TRK21 → CD01 TRK30<br />
→ CD01 TRK31 → CD01 TRK32 → CD01 TRK40 → CD01 TRK41<br />
Note that the On-The-Go playlists are not enumerated, because their name does not begin with two<br />
numbers. The enumeration stopped at “On-The-Go 1”.<br />
2.3.1.3 Using Playlists and Songs in Advanced Mode<br />
During normal operation, when the iPod plays songs, the Song View is active and the HU display<br />
represents the current playing Song no.<br />
For example, CD02 TRK13 shows that Song no. 13 of the selected Playlist is playing currently. As soon as<br />
the next Song starts playing, the HU display will update the Song number accordingly.<br />
Selecting songs<br />
You can search through the songs using the HU buttons, when the Song View is active. The HU display<br />
will immediately update the song number to the one you have selected.<br />
Button iPod Operation<br />
Skip to next track<br />
Skip to previous track<br />
* 1. Press button short: Skips 10 songs forward<br />
2. Hold button down: Fast forward in current track<br />
* 1. Press button short: Skips 10 songs backwards<br />
2. Hold button down: Fast reverse in current track<br />
* not existent on all HUs<br />
A short delay follows, when searching through the Songs is finished, before the Song actually starts<br />
playing on the iPod. The delay is approximately 0.5 seconds and within this timeframe search buttons<br />
can be combined to scroll to your favorite Song fast and convenient.<br />
For example, if your current song is no. 11 and you want to scroll to song no. 32 press twice shortly<br />
and immediately press once after that.<br />
Version Date: Nov. 30, 07 © Sensolutions Inc. 2007<br />
9 | P a g e
Changing from Song View to Playlist View<br />
o Using the 1-20/Disc rotary knob<br />
The 1-20/Disc rotary knob on the HU is used to change from Song View to Playlist View. By<br />
turning the 1-20/Disc knob once (1 click) clockwise or counterclockwise, the Playlist View is<br />
activated and the HU displays the current selected Playlist.<br />
Description Button<br />
Rotate 1 click clockwise or counter clockwise to change from Song View<br />
back to Playlist View.<br />
o Using the preset button<br />
If your HU doesn’t have the 1-20/Disc knob, but has the 1-6 preset buttons instead you will have<br />
to use preset buttons to activate Playlist View.<br />
Channel Description Button<br />
Ext. 10 CD Changer (CDC) Get from Song View into Playlist View with<br />
preset button (see right for button number)<br />
Satellite Channel (SAT)<br />
Selecting playlists<br />
Once the current view is Playlist View, the playlist can be changed. Either the rotary 1-20/Disc knob, the<br />
and buttons or the steering wheel controls may be used to change the playlist.<br />
Button Operation<br />
Use the 1-20/Disc knob to search through the playlists. CD01 starts blinking<br />
to indicate that a new playlist can be selected. Turning the knob clockwise<br />
goes to the next and turning the knob counterclockwise goes to the previous<br />
playlist.<br />
Button Channel Operation<br />
CDC Operation after the preset button has been pressed in order to get<br />
into Playlist View<br />
SAT<br />
Skip to next playlist (Radio or Steering Wheel button)<br />
Skip to previous playlist (Radio or Steering Wheel button)<br />
You can search through the available playlists by using any of the buttons above as long as CD01<br />
blinks.CD01 will continue to blink for a few seconds after you stopped scrolling. Once the blinking stops<br />
Version Date: Nov. 30, 07 © Sensolutions Inc. 2007<br />
10 | P a g e
the playlist you selected becomes the active playlist and after a short delay the iPod starts playing the<br />
first song of the new playlist.<br />
Automatic playlist turnover<br />
The <strong>iMIV</strong> adapter will turn over automatically to the next indexed playlist if the current playlist has<br />
reached the end. The adapter switches to Simple Mode if it is through the last indexed and the iPod<br />
starts playing the first song of all available music.<br />
Tip!<br />
If you want the playlist to turn over to the first song of that playlist after you played the<br />
last song set the “Repeat” option on your iPod to “All”.<br />
2.4 Switch from Advanced Mode to Simple<br />
The Simple Mode is seen as an extra playlist in the Advanced Mode, which is indexed between the first<br />
and the last playlist.<br />
For example (using the CDC firmware): Simply just switch to Display View Types, select playlist CD01<br />
TRK99 and wait until the iPod screen unlocks and the <strong>iMIV</strong> logo disappears. While doing that the iPod<br />
will pause for a few seconds and after that continues to play the current song.<br />
2.5 Ignition on/off<br />
The adapter is powered on and the indication LED lights up green when ignition is switched on. The<br />
adapter charges the iPod immediately once it is connected.<br />
When ignition is switched off the adapter remains powered for approximately 15-20 seconds, before it<br />
shuts down completely and switches off the indication LED. Your cars battery is never drained because<br />
the adapter does not use any power when the ignition is off.<br />
In case the iPod was playing it pauses as soon as the ignition is switched off. The adapter will continue to<br />
charge the iPod for about 6 seconds and then the adapter switches off and stops charging the iPod.<br />
In Advanced Mode the adapter unlocks the iPod display at the same time the power is switched off to<br />
the iPod (so after approximately 6 seconds). By doing so, the iPod can always be operated when it is<br />
disconnected - regardless of the mode that had been active before and regardless of the adapter being<br />
powered or not.<br />
2.6 Special Operations<br />
Some firmware versions for different channels use different button controls for the same functions. The<br />
following lists below show the basic controls ordered by the possible primary HU channels.<br />
Version Date: Nov. 30, 07 © Sensolutions Inc. 2007<br />
11 | P a g e
2.6.1 External 10 CD Changer (CDC)<br />
In Simple Mode:<br />
Button Operation<br />
Skip to next track<br />
Press preset 1 or rotate 1-20/DISC knob 1 click clockwise: Switch to Advanced<br />
Mode<br />
or<br />
1. Press short: Skip to next track<br />
2. Hold: Scan forward through current track<br />
1. Press short: Skip to previous track<br />
2. Hold: Scan backwards through current track<br />
In Advanced Mode:<br />
Button Operation<br />
Switch Random on/off<br />
or<br />
2.6.2 External MD Changer (MDC)<br />
In Simple Mode:<br />
Press preset 1 or rotate 1-20/DISC knob 1 click clockwise: Switch between<br />
Song View and Playlist View<br />
1. Press short: Skip to next track<br />
2. Hold: Scan forward through current track<br />
3. In Playlist View: Next playlist<br />
1. Press short: Skip to previous track<br />
2. Hold: Scan backwards through current track<br />
3. In Playlist View: Previous playlist<br />
Button Operation<br />
Skip to next track<br />
Rotate 1-20/DISC knob 1 click clockwise: Switch into Advanced Mode<br />
1. Press short: Skip to next track<br />
2. Hold: Scan forward through current track<br />
1. Press short: Skip to previous track<br />
2. Hold: Scan backwards through current track<br />
Version Date: Nov. 30, 07 © Sensolutions Inc. 2007<br />
12 | P a g e
In Advanced Mode:<br />
Button Operation<br />
Switch Random on/off<br />
- Rotate 1-20/DISC knob 1 click clockwise: Switch between Song View<br />
and Playlist View<br />
- Press 1-20/DISC knob once to show song, artist, playlist names on<br />
the HU display<br />
Press short: skip 10 songs forward<br />
Press short: skip 10 songs backwards<br />
1. Press short: Skip to next track<br />
2. Hold: Scan forward through current track<br />
1. Press short: Skip to previous track<br />
2. Hold: Scan backwards through current track<br />
2.6.3 External Satellite Receiver (SAT)<br />
In Simple Mode:<br />
Button Operation<br />
Switches display and scrolls through a static display(Simple Mode,<br />
SENSOLUTIONS INC, <strong>iMIV</strong> for iPod, -iPod-)<br />
Switch to Advanced Mode<br />
1. Press short: Skip to next track<br />
2. Hold: Scan forward through current track<br />
1. Press short: Skip to previous track<br />
2. Hold: Scan backwards through current track<br />
In Advanced Mode:<br />
Button Operation<br />
Switches display and scrolls through lines like playlist name, artist name, song<br />
name and status. The status line shows the playlist and song number currently<br />
playing, e.g. P01 03% (the percentage sign ‘%’ indicates Random mode, see<br />
below)<br />
Switches Random play mode on/off. A percentage sign in the status line indicates<br />
if Random mode is on.<br />
Switch between Song View and Playlist View * in order to change a playlist<br />
Leave Advanced Mode immediately<br />
1. Press short: Skip to next track<br />
2. Hold: Scan forward through current track<br />
1. Press short: Skip to previous track<br />
2. Hold: Scan backwards through current track<br />
* … HU display should be in status or playlist name line in order to see the new playlist selection<br />
Version Date: Nov. 30, 07 © Sensolutions Inc. 2007<br />
13 | P a g e
2.7 AUX Input<br />
The <strong>iMIV</strong> adapter is capable of connecting an external audio source which is available on a separate HU<br />
channel. The audio source has to be connected to the adapter using two RCA audio connectors (Red and<br />
white RCA connectors for audio left and right).<br />
Your adapter comes pre-installed with firmware where the AUX input is available on the TV channel of<br />
the HU. Since this default firmware also supports the iPod Video (5 th generation) two aux/video inputs<br />
are available, utilized via TV 1 and TV 2.<br />
TV 1 selects the iPod as audio/video input and TV 2 selects the external audio/video source (RCA<br />
connectors). The user can switch between TV 1 and TV 2 by using , or the steering wheel<br />
controls.<br />
The AUX channel is available on two other channels besides TV which are CD-CHGR or MD-CHGR. The<br />
user can customize that by downloading another firmware version into the adapter. The AUX channel is<br />
always different from the iPod channel. See our list of downloadable firmware files on our website for<br />
possible combinations of channel configurations on your HU.<br />
If the AUX input is configured as the CD-CHGR channel, the HU will display CD01 TRK01 constantly.<br />
Pressing buttons on the HU will not affect the display.<br />
If the AUX input is configured as the MD-CHGR channel, the HU will display MD01 TRK01 constantly.<br />
Pressing buttons on the HU will not affect the display.<br />
If the AUX input is configured as the TV channel (using a firmware for non-video-iPods), the HU displays<br />
TV 1 or TV 0 (Some HU models display ‘TV 0’ while other models display ‘TV’ without the ‘0’ indication).<br />
Pressing the buttons on the HU will toggle between TV 0 and TV 1. TV 1 connects the video<br />
output to the RTI and TV 0 disconnects the video output from the RTI (no video signal on RTI screen). In<br />
both cases the RCA audio connectors on the adapter are selected as audio source.<br />
2.8 RTI And Video Signal<br />
If you have RTI in your car and want to connect the <strong>iMIV</strong> adapter to your built-in navigation screen, first<br />
you need to purchase a special video cable (also available in a video-and-power-cable combination). This<br />
cable connects the video output of the adapter to the RTI unit.<br />
This cable is available for DVD-based RTI units and plugs into the RTI with a special green connector.<br />
This connector can only be inserted in the correct receptacle at the back of the RTI unit in the trunk, so<br />
installation is straightforward and easy.<br />
Since the RTI unit is mainly designed for navigation, the unit itself determines the<br />
precedence of the navigation screen and the connected video signal. Navigation always has<br />
priority over the video signal as explained in the following paragraph.<br />
Suppose that you have a video source connected to the adapter and have installed the video cable to<br />
the RTI.<br />
Version Date: Nov. 30, 07 © Sensolutions Inc. 2007<br />
14 | P a g e
Selecting the TV channel<br />
Select the TV channel on the HU and set the source to TV 1 or TV 2. With the navigation system<br />
switched on, the screen switches from navigation to video automatically, if the car is not moving. The<br />
screen switches from video to navigation automatically, if the car starts moving with a higher speed<br />
than 5mph.<br />
With the navigation system switched off, the screen raises and shows the video, if the car is not moving.<br />
The screen turns black for your safety, if the car starts moving with a higher speed than 5mph.<br />
Deselecting the TV channel<br />
Deselect the TV channel on the HU and switch to another channel.<br />
With the navigation system switched on, the screen switches from video to navigation automatically.<br />
With the navigation system switched off, the screen lowers and turns black.<br />
Temporarily turning off the video signal<br />
Selecting TV 0 by using either buttons or steering wheel controls disconnects the video signal<br />
from the RTI unit.<br />
With the navigation system switched on, the screen no longer switches to video automatically, if the car<br />
stops, but navigation remains visible as if you had not selected the TV channel. This feature is for your<br />
convenience when e.g. you drive in a (unknown) city and need the navigation all the time, but do not<br />
want to deselect the TV channel.<br />
2.8.1 iPod Video (5 th Generation)<br />
A special firmware has been created to fully support iPods with a video output (iPod Photo and<br />
especially iPod Video-G5). The <strong>iMIV</strong> adapter has been designed so that the audio and video capabilities<br />
of your iPod can be leveraged into the factory audio system without the need for extra cables or<br />
additional hardware.<br />
The adapter’s iPod Video firmware enables a second video input on the TV channel and provides high<br />
quality audio and video signals from the iPod. Besides video your iPod can still be used as a music player<br />
via the CDCHGR or MD-CHGR channel as described in previous sections without disconnecting it.<br />
All features of AUX and Video as described above in previous sections remain unchanged.<br />
Switching between the A/V inputs<br />
The TV channel is the only available channel for the external AUDIO/VIDEO input on the adapter, with<br />
the iPod Video firmware version. The TV channel can switch between the two AUDIO/VIDEO inputs,<br />
using TV 1 and TV 2. TV 1 switches the iPod AUDIO/VIDEO input and TV 2 switches the external<br />
AUDIO/VIDEO RCA connectors on the adapter as input to connect e.g. a DVD player, rearview camera,<br />
gaming console, etc.<br />
Temporarily turning off the video signal<br />
Version Date: Nov. 30, 07 © Sensolutions Inc. 2007<br />
15 | P a g e
Besides TV 1 and TV 2, TV 0 is available as well to disconnect the video signal from the RTI and<br />
temporarily turn off the video signal.<br />
The knob can be used to switch from TV 1 to TV 0. The knob can be used to switch from TV 2 to<br />
TV 0.<br />
iPod video settings<br />
To use the iPod as video source its video settings need to be set up correctly.<br />
Scroll to the “Videos → Video Settings” menu on your iPod Video. Now set the “TV Out” option to “On”<br />
and set the “TV Signal” option to “PAL”, if the RTI screen is used for video.<br />
If an external TFT is used to display video, either PAL or NTSC can be used for the “TV Signal” setting,<br />
depending on whether the video input signal setting of the TFT panel supports it.<br />
2.8.2 Video While In Motion<br />
2.8.2.1 Important Information<br />
The <strong>iMIV</strong> fully integrates your digital entertainment source(s) with the OEM car radio and RTI (Road<br />
Traffic Information) in-dash LCD screen. While some video source configurations will allow will allow<br />
(for) a video signal on the RTI screen while the car is in motion, it has not been the specifically designed<br />
by Sensolutions to permit watching video images while driving on the RTI screen. Therefore the video<br />
connection between the RTI and the <strong>iMIV</strong> is only to be used for transmitting motion picture frames<br />
while the vehicle is stationary. Specifically, the <strong>iMIV</strong> video output is incorporated for rear seat<br />
entertainment or still picture display on your RTI screen. Any other use is strongly discouraged for traffic<br />
safety reasons.<br />
If you must watch the screen, do so briefly: remain attentive while driving. In some<br />
jurisdictions/countries it is unlawful for the driver to watch video while driving: OBEY LOCAL TRAFFIC<br />
LAWS. Operating any device while driving, including the <strong>iMIV</strong> and/or any of its connected peripherals<br />
(radio, MP3 player), poses a risk. This risk includes accidental property damage, personal injury or even<br />
death. If you must OPERATE THE <strong>iMIV</strong> or its peripherals, do so ONLY WHEN the car is AT A COMPLETE<br />
STOP.<br />
Remember, you drive a VOLVO: SAFETY FIRST!<br />
2.8.2.2 Where To Get The Video While In Motion Feature<br />
A special file has to be downloaded from www.imiv.ca (log-in necessary). In order to download that file<br />
you have to agree to the terms of use and type in your <strong>iMIV</strong>s serial number, which can be found in 2<br />
different spots:<br />
1. Underneath the bar code on the <strong>iMIV</strong> unit itself (picture 1)<br />
2. On the iPod screen after putting the iPod into Service Mode (picture 2). See 3.2.2.1 for details.<br />
Version Date: Nov. 30, 07 © Sensolutions Inc. 2007<br />
16 | P a g e
Picture 1 Picture 2<br />
It is important to download the file especially for your device, because the file is being created on<br />
request with the serial number you entered and will not work on other devices.<br />
2.8.2.3 How To Install Video While In Motion<br />
After downloading and unpacking the archive from our website you will see a *.wav file. This file has to<br />
be installed just in the same way as you upload a new firmware version to your device. See 3.2.2.1<br />
(about how to put the adapter into Service Mode) and 3.2.2.2 (about how to upload a new firmware to<br />
the <strong>iMIV</strong>) for detailed information about the upload process.<br />
2.8.3 Possible Issues And How To Resolve Them<br />
Video is playing while the car is not in motion but the RTI signal appears as soon as the car<br />
starts driving.<br />
Since the RTI unit is mainly designed for navigation the unit itself determines the<br />
precedence of the navigation screen and the connected video signal. Navigation always has<br />
priority over the video signal. In order to still use the Video While In Motion the RTI has to<br />
be switched off.<br />
The RTI remains quiet after installing the <strong>iMIV</strong> adapter.<br />
This phenomenon is more installation related: The <strong>iMIV</strong> kit has probably been shipped with<br />
a “MELBUS second in Chain Cable”, which means that the <strong>iMIV</strong> has to be connected behind<br />
the RTI. No disconnection of the RTI necessary: Just plug the received “MELBUS second in<br />
Chain Cable” into the free connector of the RTI and plug the other end into the HU labeled<br />
connector of the <strong>iMIV</strong>.<br />
Version Date: Nov. 30, 07 © Sensolutions Inc. 2007<br />
17 | P a g e
3. All About Firmware<br />
3.1 Identify <strong>iMIV</strong> Revision<br />
As of today there are 2 different <strong>iMIV</strong> versions: Hardware revision 1 and 2. Two different ways can be<br />
used in order to identify the version of an <strong>iMIV</strong>:<br />
1. Purchase date:<br />
If the <strong>iMIV</strong> has been purchased and received before May 2007 it is hardware revision 1.<br />
Any later receipt of the device will be revision 2.<br />
2. Look at the <strong>iMIV</strong><br />
3.2 Firmware Update<br />
Revision 1 <strong>iMIV</strong>s have a “jumper” on the side in order to perform an emergency<br />
firmware upload if needed.<br />
Revision 2 <strong>iMIV</strong>s have a “dip switch” on the same spot that can be used for an<br />
emergency firmware upload if needed.<br />
<strong>iMIV</strong> Revision 1 (Jumper) <strong>iMIV</strong> Revision 2 (Switch)<br />
3.2.1 Get the right firmware<br />
First of all you have to choose the correct firmware file. For that the <strong>iMIV</strong> has to be identified (see 3.1).<br />
After that you have to decide which channels you would like to run the <strong>iMIV</strong> on. Possible combinations<br />
are:<br />
CDC-TV<br />
CDC-MDC<br />
MDC-TV<br />
MDC-CDC<br />
SAT-TV<br />
SAT-CDC<br />
The first name always stands for the channel you run your iPod on in Simple Mode and Advanced Mode.<br />
The second one is for video over iPod (if a 5 th generation iPod Video is used) and the AUX input (Audio<br />
and Video).<br />
Version Date: Nov. 30, 07 © Sensolutions Inc. 2007<br />
18 | P a g e
You might find more than one file for a certain channel configuration in our firmware file download list.<br />
That is because of other additional features. There can be files with and/or without the following<br />
features for the same 2 channels:<br />
“Rear View Camera”<br />
o RTI screen switches automatically to a connected rear view camera, when changing into<br />
rear gear<br />
o Firmware files usually include a “rc” in their name, when the feature is included<br />
“iPod-Video-Support”<br />
o Supports videos on the RTI screen from a supported iPod model with video out (see 1.1)<br />
o Firmware files without that feature usually include a “xi” in their name<br />
“Display Song Titles”<br />
o Artist, Song and Playlist names can be displayed on the radio display<br />
o Works mostly with MD changer and SAT channels<br />
“DVD based RTI only”<br />
o Those files mostly affect video playback via RTI navigation screens which is only<br />
possible, if the RTI is a DVD based system<br />
Another important point is to select the right iPod model in your profile on our website. Some iPod<br />
models (for instance the iPod Nano 2Gen) requires a special version in order to successfully update the<br />
<strong>iMIV</strong>. So using a wrong iPod-firmware combination makes is impossible to load the file onto the <strong>iMIV</strong><br />
adapter.<br />
3.2.2 Update Process Over iPod – Nonemergency<br />
The <strong>iMIV</strong> adapter features a sophisticated method to upload new firmware into the adapter’s flash<br />
memory by simply playing a sound file on the iPod.<br />
Other firmware is needed when you would like to change the channel configuration on the HU or assign<br />
different channels to the iPod or AUX input. It is highly recommended to upgrade the firmware when a<br />
new firmware release becomes available.<br />
Before firmware uploading can be commenced, the firmware sound file needs to be uploaded to your<br />
iPod. Please check www.imiv.ca (log in necessary) for available firmware releases. After selecting and<br />
downloading the appropriate firmware file it has to be transferred to the iPod using iTunes.<br />
It is recommended to place the firmware sound file(s) in a unique Music library location in iTunes, so the<br />
file is isolated from the rest of your music collection and can be easily found and selected. For example<br />
create a new Genre named as “_vol_<strong>iMIV</strong>” and place the firmware sound file(s) in there. When the iPod<br />
is synced with iTunes the firmware file(s) can be located easily.<br />
3.2.2.1 Put the <strong>iMIV</strong> into Service Mode/Firmware Mode<br />
First of all you have to select the primary channel of your current firmware (which would be the external<br />
10 CD Changer for the pre-installed version). Have it in Simple Mode and pause the iPod in case it’s<br />
playing. It might even be a good idea to navigate to the firmware. Then switch into Service Mode:<br />
Version Date: Nov. 30, 07 © Sensolutions Inc. 2007<br />
19 | P a g e
Get into Service Mode using the 1-20/DISC knob:<br />
Button Operation<br />
Rotate the 1-20/DISC knob 10 clicks counter clockwise and press in<br />
order to put the <strong>iMIV</strong> into firmware mode (<strong>iMIV</strong> adapter is waiting for a new<br />
firmware file)<br />
+<br />
+<br />
Rotate the 1-20/DISC knob 10 clicks counter clockwise and press in<br />
order to see the firmware revision number and <strong>iMIV</strong> serial number on the<br />
iPod display (see 2.8.2.2 for details)<br />
Get into Service Mode using the Preset Buttons – CDC Channel<br />
Button Operation<br />
Press the preset 2 button 10 times and press in order to put the <strong>iMIV</strong><br />
+<br />
into firmware mode (<strong>iMIV</strong> adapter is waiting for a new firmware file)<br />
+<br />
Press the preset 2 button 10 times and press in order to see the<br />
firmware revision number and <strong>iMIV</strong> serial number on the iPod display (see<br />
2.8.2.2 for details)<br />
Get into Service Mode using the Preset Buttons – SAT Channel<br />
Button Operation<br />
Press the preset 5 button 10 times and press in order to put the <strong>iMIV</strong><br />
+<br />
into firmware mode (<strong>iMIV</strong> adapter is waiting for a new firmware file)<br />
+<br />
Press the preset 5 button 10 times and press in order to see the<br />
firmware revision number and <strong>iMIV</strong> serial number on the iPod display (see<br />
2.8.2.2 for details)<br />
What you will see then is, depending on the channel you are using, a CD ERROR, MD ERROR or SAT<br />
ERROR. Also the LED on the side of the <strong>iMIV</strong> starts flashing red and green and you iPod stops charging.<br />
3.2.2.2 Upload The New Firmware File<br />
1. Start playing the firmware sound file on your iPod. The adapter expects the firmware sound file<br />
to be started within approximately 30 seconds. The indication LED remains blinking red/green<br />
during this time to indicate that a firmware file can be started. If the adapter does not recognize<br />
Version Date: Nov. 30, 07 © Sensolutions Inc. 2007<br />
20 | P a g e
a valid firmware file or the file has not been started during the blinking of the indication LED it<br />
breaks off the procedure without uploading firmware and returns to normal operation. The<br />
indication LED will light green and the iPod gets charged again.<br />
2. When uploading has started (user started playing the firmware file within the 30 seconds) the<br />
indication LED lights red constantly with a short green flash every 2 seconds. This process will<br />
take a few minutes to finish. A beeping/ crackling noise is heard on the audio system. You can<br />
select another channel or turn down the volume completely. It is very important NOT to pause<br />
the iPod during uploading. This would result in corrupted firmware and causes the adapter to<br />
fail! Once the sound file played all the way through, the indication LED flashes green 4 times<br />
shortly to indicate a successful upload. The adapter returns to normal operation with a green<br />
indication LED and the HU reflects the changes after a few seconds.<br />
3. After that turn the ignition off and wait for at least 30 seconds or until the indication LED has<br />
switched off. Turn the ignition back on and check if everything works as expected. If the<br />
expected HU channels do not show up at all, something went wrong with the upload and the<br />
adapter fails to operate normally. In that case you can use the emergency update procedure to<br />
restore a correct firmware onto the adapter.<br />
The adapter stops charging the iPod once the firmware uploading is enabled. Therefore it is<br />
critical that the iPod is charged sufficiently since firmware uploading takes a few minutes<br />
to finish. If the iPod stops in the middle of firmware uploading for any reason, the firmware<br />
of the adapter is corrupted and the adapter will not operate normally anymore. Only the<br />
emergency procedure can be used in this case to upload new firmware and have the<br />
adapter operational again.<br />
3.2.3 Update Process – Emergency Update<br />
In rare occasions, uploading firmware may have been unsuccessful for any reason, causing corrupted<br />
firmware of the adapter and failure of its operation. The most likely reason is that the transfer of the<br />
sound file has been interrupted, e.g. because the iPod was paused accidentally or the iPod lacked<br />
enough power to play for a few minutes or the cables introduced some kind of unacceptable electrical<br />
noise.<br />
1. Turn off the ignition and wait for at least 30 seconds or until the indication LED is switched off.<br />
2. Set the jumper (<strong>iMIV</strong> revision 1) or the switch (<strong>iMIV</strong> revision 2) on the side of the adapter marked<br />
as “prg” to position “1”.<br />
3. Connect your iPod, pause the iPod and navigate to the firmware sound file on your iPod but do<br />
not start playing it yet.<br />
4. Turn on the ignition. The indication LED on the adapter lights red.<br />
5. Wait approximately 2 seconds. The adapter starts up in firmware upload mode just as if normal<br />
firmware uploading had been activated via the HU and is ready to receive new firmware. The<br />
iPod is not being charged. The indication LED starts blinking red/green after approximately 2<br />
seconds. The adapter will not communicate with the HU which results in an error being displayed<br />
on the HU (depending on the current firmware version CD ERROR, MD ERROR or SAT ERROR).<br />
This is normal behavior.<br />
Version Date: Nov. 30, 07 © Sensolutions Inc. 2007<br />
21 | P a g e
6. Start playing the firmware sound file on your iPod. The adapter expects the firmware sound file<br />
to be started within approximately 30 seconds. The indication LED remains flashing red/green<br />
during this time to indicate that a firmware file can be started. If the adapter does not recognize<br />
a valid firmware file or the file has not been started within 30 seconds it stops the procedure<br />
without uploading firmware and returns to normal operation.<br />
7. If uploading has started the LED lights constantly red with a short green flash every 2 seconds.<br />
The uploading will take a few minutes to finish. It is very important NOT to pause the iPod during<br />
uploading, which could result in corrupted firmware and causes the adapter to fail! Once the<br />
sound file has finished playing, the indication LED flashes green 4 times shortly to indicate a<br />
successful upload. The adapter returns to normal operation with a green indication LED and the<br />
HU reflects the changes after a few seconds.<br />
8. Turn off the ignition and wait for at least 30 seconds or until the indication LED is switched off.<br />
Reset the jumper/switch from position “1” back to position “2”.<br />
9. Turn on the ignition and check if everything works as expected. If the additional HU channels do<br />
not show up, something went wrong with the upload and the adapter fails to operate normally.<br />
Re-engage the emergency procedure to restore correct firmware to the adapter.<br />
3.2.4 Possible Issues And How To Resolve Them<br />
The <strong>iMIV</strong> adapter is in Service Mode but the LED is solid green just a few seconds after the<br />
firmware file has been started.<br />
The reason for that problem is a version conflict. That means that either the firmware file is<br />
not compatible with the hardware revision of your <strong>iMIV</strong> or the firmware does not match the<br />
iPod model.<br />
Solutions:<br />
1. Check, that you downloaded the right revision number for your <strong>iMIV</strong> hardware<br />
revision (see 3.1 for details and use the filter function on our download page)<br />
2. Select the right iPod model in your profile. Firmware files are being pre-filtered by<br />
your profile settings so if you want to perform a successful firmware upgrade with<br />
an iPod Nano (2 nd generation) you have to select exactly this model in your profile.<br />
Version Date: Nov. 30, 07 © Sensolutions Inc. 2007<br />
22 | P a g e
4. Warranty, Disclaimer And Liability<br />
4.1 Warranty<br />
Please retain the receipt as proof of purchase and write down the information below in case you need<br />
to obtain support information<br />
- Sensolutions Product<br />
- Date of Purchase<br />
- Serial Number<br />
- Invoice Number and/or Dealer:<br />
The Sensolutions <strong>iMIV</strong> carries a one year limited warranty that protects you from defects in material and<br />
workmanship. We do not warrant any installation. Should a product fail to perform as described above<br />
within the warranted period, it will be repaired or replaced with the same functionally equivalent<br />
product by Sensolutions, at its discretion, free of charge provided you:<br />
1. Return the failed product to a Sensolutions designated repair facility with shipping charges prepaid,<br />
and<br />
2. Provide Sensolutions with proof of the original date of purchase<br />
Repaired or replacement products will be returned to you with shipping charges prepaid. If Sensolutions<br />
is unable to repair or replace the defective product, it will issue a refund at a fair market value. Warranty<br />
does not cover normal tear and wear, damages due to negligence, improper installation or operation.<br />
Warranty is void if opened. The maximum liability of Sensolutions under this warranty is limited to the<br />
purchase price of the product covered by the warranty. Prior to returning any defective product, you<br />
must obtain a Returns Materials Authorization (RMA) number from Sensolutions. All defective products<br />
should be returned to Sensolutions with shipping charges prepaid. Sensolutions will not accept collect<br />
shipments.<br />
4.2 Disclaimer and Liability<br />
The <strong>iMIV</strong> adapter’s design and specifications are subject to change without notice.<br />
Future firmware updates for your iPod may affect the features and functions described in this manual.<br />
In general, the iPod has not been designed to withstand temperature extremes in automobiles. Consult<br />
the iPod’s Owner <strong>Manual</strong> regarding acceptable operation and storage temperatures.<br />
Sensolutions is not liable for any incidental, consequential or indirect damages. Nor can we be held<br />
liable for warranties that are voided because of the use of this adapter.<br />
In case of erratic behavior of your car’s electrical system please disconnect your <strong>iMIV</strong> first and have it<br />
checked by your installer. Sensolutions assumes no liability for any diagnostic fees.<br />
The maximum liability of Sensolutions under its warranty is limited to the purchase price of the product<br />
covered by the warranty.<br />
Version Date: Nov. 30, 07 © Sensolutions Inc. 2007<br />
23 | P a g e
4.3 Trademarks<br />
- iPod, iPod mini, iPod Photo, iPod Nano, iPod Video, iPod Classic, iPod Touch and iTunes are<br />
registered trademarks of Apple Computer, Inc.<br />
- Volvo is a registered trademark of Volvo Trademark Holding AB and/ or Volvo Cars<br />
- Sensolutions is not affiliated with AB Volvo, Volvo Car Corporation, Volvo Cars or any other<br />
Volvo companies<br />
Version Date: Nov. 30, 07 © Sensolutions Inc. 2007<br />
24 | P a g e