
Create successful ePaper yourself
Turn your PDF publications into a flip-book with our unique Google optimized e-Paper software.
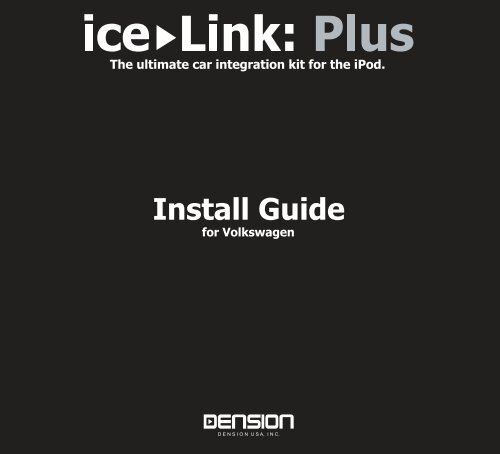
The ultimate car integration kit for the iPod.<br />
<strong>Install</strong> <strong>Guide</strong><br />
for Volkswagen
Kit Contents<br />
!<br />
ice Link: Plus<br />
This instruction is provided for educational purposes only, we are not responsible for<br />
any damages! Always seek professional help when in doubt !<br />
Overview:<br />
1.Confirm that you have all Dension ice>Link Plus parts and they are compatible with your vehicle and radio<br />
system<br />
2.Make sure to have the radio security code available if the vehicle requires code upon loss of power<br />
3.Follow the hardware installation guides. If radio removal is required, proceed following the factory service<br />
guide of the vehicle<br />
4.Configure the system if not factory pre-configured .See configuration guide at http://install.densionusa.com<br />
5.Verify operation<br />
6.Read users manual<br />
Included parts:<br />
iPod Docking<br />
Cradle (1)<br />
Docking Cradle<br />
mini Insert (1)<br />
ice>Link Plus Adapter (1) Radio Specific Cable (1)<br />
(image may not show actual cable)<br />
Cradle Spacer (1) Docking Cradle<br />
Mounting Base (1)<br />
ice>Link Plus<br />
<strong>Install</strong> <strong>Guide</strong> (1)<br />
2<br />
Screws for<br />
Mounting Base (4)<br />
ice>Link Plus<br />
Quick Start <strong>Guide</strong> (1)<br />
Allen Wrench (1)<br />
ice>Link Plus<br />
Users Manual (1)<br />
<strong>Install</strong> <strong>Guide</strong>
Connection Diagram<br />
!<br />
R For<br />
ice Link: Plus<br />
Disconnect vehicle's battery before installation! Failure to do so may result in damage to elctrical<br />
components. The ice>Link Plus may not function or wil funtion improperly if the battery is not<br />
disconnected before installation!<br />
component location see vehicle's service manual or contact vehicle dealer for information.<br />
3<br />
<strong>Install</strong> <strong>Guide</strong>
Mounting the ice Link: Plus Cradle<br />
Assemble the base of the iPod cradle with an optional vehicle specific adapter. An optional adapter is not<br />
required, however it is recommended for easy and damage free installation.<br />
!<br />
ice Link: Plus<br />
Broken cradle due to the use of force without first loosening the set screw is not covered by the<br />
warranty!<br />
Attach the cradle to the back with at least 2 screws. If holes do not align rotate the base until a match is found.<br />
Insert the front of the cradle to the back piece, but do not force the cradle onto the base. The pin is keyed<br />
and will only insert in one orientation. Align cradle orientation as desired. Tighten the set screw with the<br />
included Allen wrench. Do not drive the set screw through the pin, only tighten the screw so it grabs the pin.<br />
Once set, the cradle should not be forced to a different position. To adjust, first loosen the set screw, tilt and<br />
rotate to realign, and then fasten the screw again.<br />
A variety of spacers and rubber pads are included to provide the best support for the iPod. These are held in<br />
place by a double sided tape, and may be removed by the end user if a thicker iPod is used later on.<br />
? A<br />
slight black line may appear on the back side of the iPod Photo the first few times it is inserted<br />
into the cradle. This line can be easily removed with a soft cloth, as it is only paint rubbing off of<br />
the cradle.<br />
4<br />
<strong>Install</strong> <strong>Guide</strong>
Vehicle Specific Connector<br />
!<br />
ice Link: Plus<br />
There are two radio end connectors included in the kit. Use only the connector which fits<br />
the CD changer connector on the back of your radio (shown by red arrow)<br />
The black wire must be grounded. If a factory CD changer is installed in the vehicle, it MUST<br />
be disconnected.<br />
5<br />
<strong>Install</strong> <strong>Guide</strong>
Troubleshooting<br />
If iPod does not charge -<br />
1. Check all connections.<br />
2. Make sure that charge control is not turned off (see user's manual pages 11 and 12).<br />
3. Connect the iPod to a computer to see if it will charge from there.<br />
If you can not hear music playing -<br />
1. Make sure CD changer, SAT mode, or AUX is selected on your radio; the correct key will depend on your radio system<br />
and the installation type<br />
2. Make sure that a non-empty album or playlist is selected on the iPod.<br />
If you can not switch your radio to CD changer mode -<br />
1. Check cables to make sure everything is tight.<br />
2. Remove the fuse of the radio, wait for 30 seconds, and then reinsert the fuse. This will reset your radio and the interface.<br />
You may have to enter the radio security code, so please keep it handy.<br />
3. Consult with your installer or contact your local Dension support center.<br />
If you can not control the iPod from the radio or if checkmark remains on iPod screen -<br />
1. Make sure the firmware on your iPod is the most recent. For updates please visit www.apple.com/ipod<br />
2. Reset the iPod.On the click-wheel iPods hold the center button and the Menu buttons, on the 3rd generation models<br />
press and hold Menu and Play/Pause buttons until iPod reboots. (Resetting will not erase your music, it will only restart the<br />
operating system of the iPod.)<br />
If iPod does not turn on -<br />
1. Verify that the iPod's battery is not depleted by attempting to turn it on without connecting it to the car.<br />
2. Turn off both your car stereo, and the iPod before inserting it to the cradle. Power on your radio and select the<br />
appropriate source.<br />
3. Attempt to lower output level of ice>Link Plus from the ice>Link Plus setup menu. See users manual pg.12.<br />
If the music is distorted or the sound level is too low -<br />
1. Check and make sure all EQ and BASS boost options are turned OFF on your iPod.<br />
2. Make sure the Gain control is adjusted properly on the ice>Link, located under ice>Link Plus setup.<br />
Why is the menu size small on the iPod photo?<br />
1. iPod photo has a high resolution screen, and therefore everything appears smaller.<br />
2. At the time of development, iPod photo specifications were not available. A future firmware upgrade may enlarge menu<br />
size.<br />
! Please make sure that you connect the plug and the receptacle in the right orientation and that the housing<br />
ice Link: Plus<br />
latches to ensure tight retention.<br />
incorrect correct<br />
6<br />
<strong>Install</strong> <strong>Guide</strong>
Disclaimer / FCC Information / Warranty and Support<br />
Important Disclaimer, please read !<br />
Driving is dangerous and requires concentration. Do not allow the Apple iPod to distract you from prevailing traffic conditions. If in doubt, only<br />
operate the unit when stationary or ask a passenger to operate it for you.<br />
Do not submerge or expose to water or other fluids. ice>Link Plus is NOT water proof and it will be damaged by water.<br />
You must properly insulate its casing if your installation environment may subject the unit to water, such as a convertible vehicle.<br />
Keep away from children !<br />
The ice>Link Plus cradle can be broken, or disassembled, and components may become loose from vibration and heat. Small components and<br />
packaging materials may become choking hazard when handled by children.<br />
Unauthorized reproduction, or reverse engineering is strictly prohibited ! Intellectual property included is distributed under specific of general<br />
agreement with respective vendor(s). No warranty, explicit or implied is stated, and neither Dension USA, nor any of its distributors, dealers or<br />
vendors shall be liable for damages. IN NO EVENT SHALL DENSION USA'S LIABILITY EXCEED THE PRICE PAID FOR THE PRODUCT<br />
FROM DIRECT, INDIRECT, SPECIAL, INCIDENTAL, OR CONSEQUENTIAL DAMAGES RESULTING FROM THE USE OF THE PRODUCT,<br />
ITS ACCOMPANYING SOFTWARE, OR ITS DOCUMENTATION. Dension ice>Link is a registered trademark of Dension Audio System LTD,<br />
and/or Dension USA, Inc. All other products are registered and copyrighted by their respective owners.<br />
FCC Instruction to the user<br />
This equipment has been tested and found to comply with the limits for a class B digital device, pursuant to part 15 of the FCC Rules.<br />
These limits are designed to provide reasonable protection against harmful interference in a residential installation. This equipment generates,<br />
uses and can radiate radio frequency energy and if not installed and used in accordance with the instructions, may cause harmful interference<br />
to radio or television reception, which can be determined by turning the equipment off and on, the user is encouraged to try to correct the<br />
interference by one or more of the following measures:<br />
o Reorient or relocate the receiving antenna.<br />
o Increase the separation between the equipment and receiver.<br />
o Consult the dealer or an experienced radio/TV technician for help.<br />
This equipment has been verified to comply with the limits for a class B computing device, pursuant to FCC Rules. In order to maintain<br />
compliance with FCC regulations, shielded cables must be used with this equipment. Operation with non-approved equipment or unshielded<br />
cables is likely to result in interference to radio and TV reception. The user is cautioned that changes and modifications made to the equipment<br />
without the approval of manufacturer could void the user's authority to operate this equipment.<br />
Warranty and Support<br />
The Dension ice>Link Plus carries a one year limited warranty that protects you from defects in material and workmanship of products sold by<br />
Dension USA or its authorized agents, distributors and dealers. We do not warrant any installation. If you experience any problems or need help,<br />
please contact Dension USA support at www.densionusa.com , or by phone at (562)- 595-5143. To order accessories, call us at (562) 595-5153.<br />
Proof of purchase is required.<br />
Warranty does not cover normal tear and wear, damages due to negligence, improper installation or operation.<br />
ice Link: Plus<br />
7<br />
<strong>Install</strong> <strong>Guide</strong>