String Games - Arvind Gupta (1.1 Mb Pdf)
String Games - Arvind Gupta (1.1 Mb Pdf)
String Games - Arvind Gupta (1.1 Mb Pdf)

Create successful ePaper yourself
Turn your PDF publications into a flip-book with our unique Google optimized e-Paper software.
STRING<br />
GAMES<br />
<strong>Arvind</strong> <strong>Gupta</strong><br />
Illustrions: Avinash Deshpande<br />
Published by<br />
National Book Trust<br />
A-5, Green Park<br />
New Delhi 110016, India<br />
Price Rupees Forty only<br />
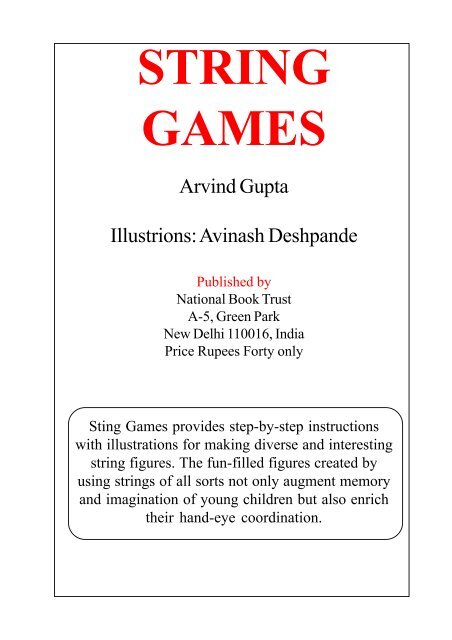
Sting <strong>Games</strong> provides step-by-step instructions<br />
with illustrations for making diverse and interesting<br />
string figures. The fun-filled figures created by<br />
using strings of all sorts not only augment memory<br />
and imagination of young children but also enrich<br />
their hand-eye coordination.
INTRODUCTION<br />
<strong>String</strong> is used for a number of things - from tying parcels to making bags and nets. Everyone<br />
needs string or something to tie with. This ‘something’ is different in different parts of the world.<br />
The Eskimo uses thin strips of sealskin to lash together his sledges or to fasten an axe-head to its<br />
shaft. Vegetable fibres are a very common form of ‘string’ among natives - we ourselves use<br />
raffia in a number of ways. Sutli is very commonly used in India for tying things together. Some<br />
native Australians use human hair - tile women grow it for their men folk to use - while others<br />
use the great sinews from the Kangaroo’s legs .<br />
One common habit which almost everyone has is of fiddling and playing with anything that<br />
happens to be in their hands. You see it in buses when people fold or pleat their tickets and you<br />
see it in when pieces of string are knotted and twisted about.<br />
It is easy to picture a group of natives idling over the mending of their fishing net One person<br />
fiddles with an odd length of twine tied into a loop until his neighbour exclaims ‘Why, you have<br />
just made a house of string!’ Someone else might now be inspired to copy the same string<br />
picture. This is probably how most of the 750 documented string games were invented.<br />
We can’t be very sure but this is how many of the string games started. For you go where you<br />
will - to the arctic north or to the coral islands of the Pacific – string games are everywhere. The<br />
Eskimos with their long winter darkness, lasting for months, had plenty of time and became very<br />
clever at making string pictures. They will show you string pictures of deer, bears and other<br />
animals, of birds, kayaks (skin boats) and such like. The Navaho and Apache natives of<br />
America are adept at making tipis (tents) and little animals like coyotes and rabbits. Each race<br />
has its own string figures and when you come to think of it this is natural - for how would an<br />
Eskimo make a string picture of a palm tree, or an Australian of a polar bear.<br />
<strong>String</strong> games are great fun. They exercise your memory and your imagination. They are great for<br />
hand and eye coordination. At times, the step-by-step instructions and illustrations for making a<br />
string figure might look difficult but the actual making of the figure might be really simple! So,<br />
don’t panic if you have problems in your first few attempts Just go back to the beginning and<br />
start again. Soon you will have a good ‘feel’- for the string.<br />
It is best to start with the easier figures and as you feel more comfortable to go oil to make those<br />
figures that have more steps and are more complicated. At first you will have to remember all the<br />
steps. But very soon your fingers will remember them for you. So learn these string figures and<br />
share them with your friends. They probably will show You some new ones. If you keep<br />
experimenting, who knows you might invent some wonderful string figures of your own. So<br />
always carry a string in your pocket.
STRING START<br />
People in the past have tried to document string figures. For this they often made drawings of the<br />
finished patterns. Some even tried sticking the finished string pattern on a piece of cardboard. The<br />
trouble is that once the string figure is finished, it is almost impossible to tell how it was made. To<br />
make it easier for beginners to make string figures, the fingers of the hands have been named as<br />
‘thumb, index finger, middle finger, ring finger and little finger’ as shown below.<br />
Index Finger<br />
Middle Finger<br />
Ring Finger<br />
Index Finger<br />
Little Finger<br />
Thumb<br />
Thumb<br />
Palm<br />
Palm<br />
Left Hand<br />
Wrist<br />
Right Hand<br />
TO NAVAHO A LOOP<br />
When you have loops on your thumb-a lower and an upper loop you can Navaho these loops<br />
by tipping down your thumb and letting the lower loop slip off. You can straighten your thumb<br />
again.
LENGTH OF STRING<br />
How long a string should you take As a<br />
general rule, a two metre long string which will<br />
make a metre long loop will do well. But then<br />
there are people with long and short arms and<br />
there are children. So a quick and easy way to<br />
find the correct length of string for your very<br />
own loop is to hold one end of the string and<br />
then stretch your arm up in the air, and cut the<br />
string where it touches the ground.<br />
MAKING A LOOP FROM THE STRING<br />
1. To tie a reef knot first lay the right end of<br />
the string across the left end.<br />
2. Put the right end under the left<br />
string to tie the first part of the knot.<br />
3. Now lay the left end across the right end<br />
4. Put the left end under the right<br />
string and tighten the knot.<br />
5. Trim the ends to make a neat and tiny knot.<br />
JOINING THE STRING ENDS BY MELTING<br />
If the string is made of nylon, then both its ends can be melted together, to make a very tiny and<br />
almost invisible knot. You might need adult help to do this.<br />
1. Hold the ends of the<br />
string about a centimetre<br />
above the candle flame.<br />
Soon the ends will<br />
become soft and start<br />
melting.<br />
2. When two molten blobs<br />
appear on the ends, stick<br />
them together. Wait for about<br />
five seconds to let them cool<br />
and then roll them between<br />
your fingers to get a smooth<br />
joint.
BASES<br />
Many of the string figures start with a base. It is important to master them first.<br />
Black Marks the string which<br />
you pick up or drop next.<br />
1. Hold a loop of string in your right<br />
hand and place it behind and around<br />
your left thumb and little finger.<br />
2. Repeat the above step with the right<br />
hand. This is called the Starting Position, or<br />
Position 1.<br />
3. Now bring<br />
your right<br />
middle finger to<br />
scoop up the<br />
string from your<br />
left palm and<br />
pull the string<br />
back.<br />
Far <strong>String</strong><br />
Near <strong>String</strong><br />
4. Both your hands will<br />
now be in this position.<br />
5. With your left<br />
middle finger<br />
scoop up the<br />
string from your<br />
right palm and<br />
pull the string<br />
back.<br />
6. This is called the Middle Finger Base<br />
or Opening A. This is the most common<br />
base.<br />
7. Instead of using the middle finger,<br />
you can use both your index fingers,<br />
to make the Index Finger Base.
THUMB TRAP<br />
This is a very simple string trick. The end is very tricky too!<br />
1. Put the string in the thumbs and little<br />
fingers of both hands. Give the loop a<br />
twist to make a cross in the middle.<br />
2. Now lift the left palm string with your<br />
right index finger. Lift the right hand<br />
palm string with your left index finger.<br />
3. Put your thumbs into the forefinger<br />
loops as shown in the picture.<br />
4. Hold the string underneath your<br />
thumbs. Release the index and little<br />
finger strings of both the hands.<br />
5. Bend your hands inwards.<br />
6. Full your hands apart as far as they<br />
will go.<br />
7. You will be surprised that<br />
both your thumbs will be<br />
trapped in a loop of string.
THE GREAT ESCAPE<br />
You can challenge a friend to remove the scissors without cutting the string.<br />
1. Passing one end of the string loop<br />
through the scissors hole, weave the other<br />
end loop of the string through this loop.<br />
3. Hold one end of the loop and give the scissors<br />
to a friend and ask him to free the scissors from<br />
the loop of string without cutting it.<br />
2. Pass the other end of the loop<br />
through the scissors second finger hole.<br />
4. The way to do this is<br />
to loosen the loop knot<br />
made in figure 1 and pull<br />
the loop.<br />
5. the opposite finger hole.<br />
6. Pass this loop all the<br />
way over the scissors.<br />
Do not twist it around.<br />
7. By pulling on the other end<br />
of the loop string you will be<br />
able to free the scissors.
A MAGICAL TRICK<br />
This easy trick has a magical ending.<br />
1. Hold the loop of string in both your<br />
hands. With the right hand string on top<br />
make a small loop within the large loop.<br />
3. Holding the large loop in<br />
your left hand, swing the<br />
right index finger over and<br />
around the long right hand<br />
string and up into the large<br />
loop as shown.<br />
2. Place the top of the loops between<br />
your teeth. Put your right index finger<br />
(downwards) into the small loop.<br />
4. Touch your<br />
nose with your<br />
right hand finger.<br />
5. Release the strings from<br />
between your teeth. Pull the large<br />
loop away with your left hand and<br />
the strings will magically dissolve<br />
away from your right index finger.
HANDCUFFS<br />
This amazing trick will provide you and your friend a lot of fun.<br />
You will need two pieces of string and a friend.<br />
1. Tie the two ends of a string to<br />
the two wrists of your friend.<br />
2. Then ask your friend to take the second<br />
string and tie its two ends to both your wrists.<br />
3. Both you and your friend will<br />
now be linked together.<br />
How can you both separate<br />
4. Hold the loop of<br />
string that ties your<br />
friend as shown.<br />
Push this loop<br />
underneath the string<br />
that you have tied<br />
around your left<br />
wrist. Do not twist<br />
the loop around.<br />
5. Bend your left hand down<br />
and pass the loop over it.<br />
6. Now straighten out your left hand to<br />
make the loop of string move to the back.<br />
7. Step away from your<br />
friend and you will both be<br />
separated!
STRING IN A RING<br />
How do you remove the string from inside a ring<br />
This puzzle can be quite baffling if you don’t know the secret<br />
1. Put one end of a loop of string<br />
inside a ring. Pull the string to bring<br />
the ring in the middle.<br />
2. Now loop the string<br />
across both your palms<br />
and behind your little<br />
fingers and thumbs.<br />
Do not twist the loop<br />
of string around.<br />
3. Pick up the left palm<br />
string with your right<br />
middle finger string and the<br />
right palm string with your<br />
left middle finger. Now<br />
release the string of both<br />
little fingers the left middle<br />
finger and the right thumb.<br />
4. Be careful not to<br />
release the right<br />
middle finger and<br />
left thumb strings.<br />
On pulling your<br />
hands apart the<br />
ring will get free!
HAND TRAP<br />
First you perform this trick and then ask your friends to repeat<br />
They will have a real problem if they have not seen you perform very carefully.<br />
1. In front of a<br />
friend place a loop<br />
of string over your<br />
left hand. Put<br />
your right hand<br />
(downwards)<br />
inside the loop and<br />
swing it around<br />
and up.<br />
2. Put right hand<br />
into the back of<br />
the loop.<br />
3. Pull your<br />
hands apart.<br />
4. The string<br />
will be freed<br />
from your<br />
right hand.<br />
5. Now give the<br />
loop of string to a<br />
friend and ask if he<br />
can repeat the<br />
trick. Your friend<br />
will probably<br />
mistake the<br />
direction of the<br />
swing and go<br />
around the loop in<br />
the wrong<br />
direction.<br />
6. And his<br />
hand will be<br />
caught in a<br />
trap!
HAND CUT<br />
You will need the help of a friend to perform this amazing trick.<br />
1. Hold the loop of string in both<br />
hands. Place the right hand string on<br />
top and make a loop. Place this loop<br />
over your friend’s wrist.<br />
2. Now make the starting position.<br />
3. Next make the middle finger<br />
base. Without leaving any of the<br />
string, place the centre of the middle<br />
finger base over your friend’s hand.<br />
4. This will be the finished result. Now release<br />
the strings of the little fingers and thumbs.<br />
5. When you pull your<br />
hands apart your friend’s<br />
wrist will magically be<br />
released from the string!
THE WINKING EYE<br />
This string figure comes from Hawaii.<br />
With a little imagination you can really see the eye twitch and wink.<br />
1. Hang the string loop<br />
over the fingers (but not<br />
on the thumb) of your<br />
left hand.<br />
2. Close your left middle, ring<br />
and little fingers on the string<br />
hanging down across the<br />
palm. The left index finger will<br />
still be pointing out.<br />
3. With your right thumb and index<br />
finger take the back string of the<br />
hanging loop and wrap it all the<br />
way round on your left index<br />
finger. Then bring it forward to<br />
hang up on your thumb.<br />
4. With your right index finger<br />
and thumb pull out the loop<br />
around the left index finger to<br />
share it with your left thumb.<br />
Be careful not to twist the<br />
loop while doing this.<br />
5. Pick the left hand string<br />
of the hanging loop, lift it up<br />
over the string which runs<br />
between your index finger<br />
and thumbs. Let this string<br />
hang down between the<br />
thumb and index finger.<br />
6. Take the other string of the<br />
hanging loop and lift it over to<br />
hang over your thumb.<br />
7. The eye can now be made to wink by<br />
pulling the string of the hanging loop. On<br />
doing this, the left index finger and thumb<br />
come closer and the eye closes. To open<br />
the eye you will have to pull your left<br />
thumb and index finger apart and loosen<br />
your grip on the hanging loop.
CUP AND SAUCER<br />
This is a simple string figure.<br />
In Japan, it is called a saki cup when right side up and a house when it is upside down.<br />
1. Start with the index finger base.<br />
For this figure, if you want, you<br />
can double up the string.<br />
2. Your thumbs go over the far thumb strings,<br />
over the near index strings, then under the far<br />
index strings to get them and bring them towards<br />
you. The thumbs return to the basic position.<br />
Each thumb will now have two loops.<br />
3. Pinch the lower loop on the left<br />
thumb with your right thumb and index<br />
finger, and discard it. Do the same to<br />
the lower loop of the right thumb.<br />
4. Now drop the little finger loops.<br />
5. If you now pull your hands apart and do a thumbs up,<br />
then you can see a cup and a saucer in the middle.
OWL’S EYES<br />
The Owl’s Eyes is a continuation of the Cup and Saucer.<br />
After completing the Owl’s Eyes you can put them on your own eyes like a pair of glasses.<br />
1. First make the Cup and Saucer.<br />
Then put your thumbs from<br />
underneath the index loops. Now you<br />
will have two loops on each thumb.<br />
2. With your right thumb and index<br />
finger, pinch the lower loop of the<br />
thumb and discard it. Also discard<br />
the lower loop of the right thumb.<br />
3. With your index fingers hook over the<br />
long string which crosses the middle of<br />
the figure, and down into the loops.<br />
4. Turn your hands so that the palms face<br />
away from you. Do not worry about the<br />
index loops. They will automatically slip off<br />
the index fingers.<br />
5. Now straighten<br />
your index fingers and<br />
pull them apart to<br />
make the Owl’s Eyes.
THE SAW<br />
This figure is found in many parts of the world.<br />
You will need the help of a friend to operate the cutting saw!<br />
1. Put the loop of string behind the index,<br />
middle and ring fingers of both hands.<br />
2. With the thumb and index finger of the right<br />
hand, take the near string and wrap it around<br />
the fingers of your left hand. Similarly, wrap the<br />
string around the finger of your right hand.<br />
3. Using the left middle finger, pick up the<br />
right palm string. With the right middle<br />
finger pick up the left palm string.<br />
4. Now you will need a friend’s help. Ask the<br />
friend to hold the two long strings which run from<br />
one hand to the other at the bottom of the figure.<br />
5. Press all the fingers tightly together so that the loops don’t slip out. Keeping only<br />
the middle finger loops, gently discard all the other loops from your hands. Ask<br />
your friend to hold his strings. Now you and your friend can alternately pull and this<br />
way the strings will slide back and forth just like a cutting saw.
MOSQUITO OR FLY<br />
This string figure is a great fun to make especially if you hate mosquitoes and flies.<br />
You can have the pleasure of creating these pests and then squashing them with your hands.<br />
1. Begin with the string on tile little<br />
fingers. Pick up both strings of the<br />
little finger loops with your thumbs.<br />
2. Pick up the two strings on the left<br />
palm with your right index finger.<br />
3. Use your left thumb to go over all<br />
the string to pick up the two right hand<br />
palm strings by the right little finger.<br />
4. Drop the lower loops<br />
on the left thumb.
5. Drop the right thumb loops and<br />
pull the string tight with your<br />
palms facing away from you.<br />
6. Without pulling, drop<br />
the loops on your right<br />
index finger and with<br />
your left thumb.<br />
7. You will be able to see the<br />
mosquito with its wings.<br />
8. Now comes the fun part.<br />
Clap both your hands<br />
together to ‘kill’ the mosquito.<br />
9. Quickly pull your hands<br />
apart as far as you can and<br />
the mosquito will disappear.
THE STRING STORY<br />
This story is known throughout the world. The Indian version is as follows:<br />
A farmer first ploughs the field, then he sows the seeds, next he waters the crop.<br />
Finally he applies manure. The crop is now ready to be harvested.<br />
Then a fat rat comes and eats up all the crop.<br />
1. Hang the loop<br />
of string over<br />
your left hand<br />
thumb. (farmer<br />
selects the field)<br />
2. Put your right index<br />
finger under the front<br />
string and hook the string<br />
that is between the left<br />
thumb and index finger.<br />
3. Give this loop one twist<br />
to the right (it won’t work if<br />
the twist is the way).<br />
4. Place this small loop<br />
over your left index finger<br />
(farmer ploughs the field).<br />
5. Hold the hanging strings with<br />
your right hand and pull them tight.<br />
6. With your right hand index finger<br />
again hook the string between the<br />
left index and middle finger.<br />
7. Pull it under the front string. Give this<br />
loop a twist to the right and...
8. place it in the middle<br />
finger. Pull everything tight.<br />
(farmer sows the seeds).<br />
9. Again hook the string<br />
between the middle and<br />
ring fingers and pull the<br />
loop to the front.<br />
10. Twist to the right and place<br />
it over your left ring finger<br />
(farmer waters the crop).<br />
11. Finally reach under the front string<br />
between your ring and little finger and<br />
pull a loop of the back string to the front.<br />
12. Give this loop a twist to the right<br />
and place it in your left little finger<br />
(farmer applies manure).<br />
13. This should be the final result<br />
(the crop is ready). Release the<br />
left thumb loop (a fat rat comes<br />
and the left thumb loop is the rat).<br />
14. Pull the front string away from your<br />
left hand. The loops will unwind from all<br />
the fingers (the fat rat eats up all the crop).<br />
This is the end of the story.
MAN CLIMBING A TREE<br />
This is a very dynamic string figure. It is said to have originated in Australia.<br />
1. Start with the Index Finger Base.<br />
2. With your little fingers scoop up<br />
the near string and pull it back.<br />
3. This should be the finished result.<br />
Release the string indicated by the arrow.<br />
4. This picture shows the releasing action.<br />
5. Bend your index fingers down and tightly<br />
hold the string that goes across them.<br />
6. Twist your hands away from you. Use a book<br />
to hold down the far bottom string on the floor.<br />
7. Now hold the<br />
index finger strings<br />
tightly and release<br />
all the other strings.<br />
8. By<br />
alternately<br />
pulling upwards<br />
on each of the<br />
index string you<br />
call make the<br />
man climb up<br />
the tree.
SINGLE DIAMOND<br />
With just a few moves you can make a single diamond.<br />
Later on you call make two, three and four diamonds.<br />
1. Place the loop of string over your<br />
thumbs. With the help of the little<br />
fingers scoop up the near string.<br />
2. Pick the left palm string<br />
with the right middle finger<br />
and the right palm string<br />
with the middle finger.<br />
3. Release both little finger loops.<br />
4. Bend your little fingers and<br />
scoop up the far thumb strings.
5. Bend the thumbs over and scoop up<br />
the middle finger strings as shown. You<br />
can use the thumb and index finger of the<br />
other hand to do this job.<br />
6. Release the bottom thumb string<br />
by lifting them over the top ones.<br />
With a little practice you will be<br />
able to slip them easily.<br />
7. Bend your middle fingers down<br />
and put them into two little triangles.<br />
8. Release the little finger and the outside<br />
middle finger strings. Hold on to the<br />
thumb and inside middle finger strings.<br />
9. Carefully pull your hands<br />
apart. As you twist your left<br />
hand away from you, a single<br />
diamond will appear.
DOUBLE DIAMOND<br />
The next step after a single diamond is a double diamond.<br />
1. Make the Middle Finger Base.<br />
Release the thumb strings.<br />
2. With bend thumbs scoop up<br />
the far string.<br />
3. Bend your thumbs over and scoop up<br />
the near middle finger strings as shown.<br />
4. Release the bottom thumb strings by lifting<br />
them over the top ones, with your teeth.<br />
5. Bend the middle fingers down and put them<br />
in the two small triangles as shown.<br />
6. Release the little finger and outside<br />
middle strings. Keep hold of the thumb<br />
and inside middle finger strings.<br />
7. Full your hands apart and twist<br />
both hands away from you to make<br />
it double diamond.
TRIPLE DIAMOND<br />
This is a very beautiful diamond pattern.<br />
1. Place a loop of string over the<br />
left thumb and index finger.<br />
2. With the right index finger and thumb<br />
hold and pull away the string between<br />
your left thumb and index finger.<br />
3. Twist the right hand over<br />
towards yourself and upwards.<br />
4. With the right thumb scoop up the<br />
string from the palm of your left hand.<br />
5. Bend the little fingers over and<br />
scoop up the far thumb strings.
6. Bend the thumbs over and scoop<br />
up the near index finger strings.<br />
7. Use your teeth to release the<br />
bottom thumb strings by lifting<br />
them over the top ones.<br />
8. Bend the index fingers down<br />
and put them into the small<br />
triangles.<br />
9. Release the little finger<br />
strings and the outside index<br />
finger strings. Hold on to the<br />
thumb and inside index finger<br />
strings.<br />
10. Pull the hands away from<br />
yourself making three<br />
diamonds in a row.
JACOB’S LADDER<br />
The Jacob’s Ladder is also known as the fishnet or four-diamonds.<br />
It is very well known in many parts of the world.<br />
1. Start with Opening A.<br />
Drop the thumb loops.<br />
2. With both thumbs pick up from<br />
below the far little finger strings<br />
(the bottom strings).<br />
3. Both thumbs go over near index string to<br />
get the far index strings and return.<br />
4. Drop the little finger loops.<br />
5. Both little finger go over the near index<br />
strings to get the far thumb strings and return.<br />
6. Now drop the thumb loops. The<br />
string look like a Cat’s Whiskers!<br />
7. The thumbs go over both strings of the<br />
index loops to get the near little finger<br />
strings and return.<br />
8. Repeat this again to share the right<br />
index loop with your right thumb.
9. Tip your thumbs down (you call also<br />
use your fingers or teeth) to Navaho<br />
first the left thumb loops, then the right.<br />
10. Put your index fingers in the<br />
string triangles next to the thumbs.<br />
11. Gently remove the little fingers out of<br />
their loops.<br />
12. Turn your hands so that the palms face<br />
away from you. The index loops will just<br />
slip off the index fingers.<br />
13. Now straighten up your index<br />
finger to get the four diamond<br />
Jacob’s Ladder<br />
14. To make the Eiffel Tower, hold the midpoint<br />
of the top string between your teeth<br />
and pull. From this you can make the<br />
Witch’s Hat.<br />
15. To make the Witch’s Hat, hold the midpoint<br />
of the top string between your teeth. Drop the<br />
loops of the index fingers and pull down with<br />
your thumbs.
EARTHQUAKE HOUSE<br />
Many parts of India like Uttarkashi, Latur and Bhuj are very prone to earthquakes.<br />
The string house collapses in the earthquake and two boys run for their lives.<br />
1. Place the string around the four fingers<br />
of each hand. Using the little fingers<br />
scoop up the near string and pull it back.<br />
2. After you have finished the<br />
string will look like this.<br />
3. With the right index finger pick<br />
up the left palm string. With the<br />
left index finger pick up the right<br />
hand palm string.<br />
4. This should be the finished result<br />
Now bend your thumbs into the near<br />
triangles as shown and scoop up…<br />
5. the far bottom back string.
6. Full your thumbs back towards<br />
yourself. Release the strings<br />
indicated by the arrows<br />
7. For releasing the arrow strings,<br />
use the thumb and the index finger<br />
of each hand. Afterwards, pull<br />
your hands apart.<br />
8. When you twist your hands<br />
away from you, suddenly a<br />
house would appear.<br />
9. Now comes the earthquake.<br />
For rocking the house, release<br />
the strings from your index<br />
fingers.<br />
10. As you pull your hands<br />
apart, the house falls and two<br />
boys run in opposite direction<br />
to save their lives.
PALM TREE<br />
For making this gorgeous tree you will need to use both your hands and one foot.<br />
1. Loop the string across<br />
both your palms and<br />
behind your thumbs and<br />
the little fingers.<br />
2. Pick up the<br />
left hand palm<br />
string with your<br />
right index finger<br />
and pull your<br />
hands apart.<br />
3. Now, in the same way, pick up the right<br />
hand palm string with your left index finger.<br />
4. As you pull your hands apart<br />
you would have made the<br />
Index Finger Base.<br />
5. Now rest your fingertips straight down on the<br />
floor and find the string that runs straight across the<br />
outside of your thumbs. The string has been<br />
indicated with an arrow.<br />
6. Put one foot under all the other<br />
strings and step on this one.<br />
7. Keep your foot (and the string you are stepping<br />
on) on the ground and pull your hands up a bit.<br />
turning them so that your fingertips point away from<br />
you. When viewed from the front it will look like<br />
this.
8. Now move all the loops on your right hand over<br />
to your left hand. Keep them closer to your<br />
fingertips than the loop already on your left hand.<br />
Now the right thumb goes into your left thumb.<br />
The loop on your right first goes on your left first<br />
finger.<br />
The right little finger loop goes on your left little<br />
finger.<br />
9. Now move the left finger loops (the bottom<br />
ones, marked with arrows) over the top loops<br />
and onto your right hand.<br />
Start by moving the left little finger loop over to<br />
your right little finger.<br />
Pull all the bottom loops<br />
over the top loops and put<br />
on your right hand.<br />
10. Then move the loops from your<br />
left index finger and your left thumb<br />
over to your right hand.<br />
11. Pull your hands up a bit more<br />
and you will see an elegant palm<br />
tree. Wave your hands from side to<br />
side to make it sway in the breeze!
BUTTERFLY<br />
This pretty little string butterfly comes from Japan.<br />
It has some unusual moves, so follow the instructions very carefully.<br />
1. Pull the string around your thumbs as shown.<br />
2. Pick up the far thumb string with your<br />
left little finger.<br />
3. Except for the little finger, bend all the<br />
other right fingers down. Put your right<br />
little finger down behind the left palm<br />
string. Check to make sure that the string<br />
looks as shown in the drawing.<br />
4. Pick up the near little finger<br />
string with your index fingers.<br />
5. Do “Opening A” with your<br />
middle fingers and the short<br />
palmar strings in front of each<br />
middle and ring finger.
6. With your little fingers, pick up the far thumb<br />
strings and return to the “Basic Position”<br />
7. Put your index fingers down into the<br />
index loops over the palmar strings.<br />
8. Holding tight to these palmer<br />
strings with your index finger,<br />
drop your thumb loops.<br />
9. Face your palms towards yourself<br />
and let the old index loops slide off<br />
your index fingers.<br />
10. As you straighten your index fingers,<br />
the strings under them become the new<br />
index loops.<br />
11. Face your palms towards each<br />
other again, and turn your hands so<br />
that the thumbs are up and the fingers<br />
are pointing away from you. You will<br />
see a pretty butterfly hiding in it.
INDIAN COT<br />
This string figure represents a decorated Apache door .<br />
To us, it looks more like the traditional Indian cot (a charpoy)<br />
1. Bring the string in Position 1.<br />
2. Put your whole right hand under the left<br />
palm string and as you pull it out, let the string<br />
loop slide down around your right wrist.<br />
3. Repeat by putting your whole left hand,<br />
including the thumb, under the right palm<br />
string and as you pull it out, let the string<br />
loop slide down around your left wrist.<br />
4. With your thumbs pick the near little<br />
finger strings and return.<br />
5. Now the little fingers<br />
pick the far thumb strings<br />
and return.<br />
6. With your whole<br />
right hand take hold of<br />
all the strings in the<br />
middle of the figure.<br />
7. Put all these strings<br />
between your left index finger<br />
and thumb. Don’t cover up<br />
the thumb loops. Now let go<br />
the strings which you are<br />
holding with your right hand.
8. Sow use your right index<br />
finger and thumb to take hold<br />
of the two left thumb loops and<br />
hang on to them. Don’t move<br />
the right hand at all.<br />
9. Take your left thumb<br />
out of these two thumb<br />
loops and out of the strings<br />
you have just wrapped<br />
around it.<br />
10. From below, slide your<br />
left thumb back into the two<br />
loops that your right index<br />
finger and thumb have been<br />
holding.<br />
11. Repeat this for your right<br />
hand. So, with your left hand,<br />
take hold of all the strings in<br />
the middle of the figure.<br />
12. Put all these strings<br />
between your right index<br />
finger and thumb.<br />
13. With your left index<br />
finger and thumb, take hold<br />
of the two right thumb loops<br />
and hang on to them. Do not<br />
move your left hand.<br />
14. Take your right thumb<br />
out of these two thumb<br />
loops. From below, slide<br />
your right thumb back into<br />
the loops held by your left<br />
index and thumb.<br />
15. With your right index<br />
finger and thumb, take the<br />
left wrist loop right off your<br />
left hand and let it lie in the<br />
middle of the figure.<br />
16. With your left index<br />
finger and thumb, take the<br />
right wrist loop right off<br />
your right hand and let it lie<br />
in the middle of the figure.<br />
17. Now comes the<br />
fun part. Bring your<br />
hands together and<br />
chant some mantra!<br />
18. Pull your hands<br />
apart to extend the<br />
figure. And you will<br />
see a beautiful four<br />
legged, woven cot in<br />
the middle.
PARACHUTE OR A BUNCH OF KEYS<br />
This string figure has a lot of steps, but let it nut discourage you.<br />
It is not as hard as it looks.<br />
1. First lay the string<br />
between the little<br />
finger and thumb of<br />
the left hand as<br />
shown. Then put the<br />
string across your<br />
palm behind your<br />
middle finger.<br />
2. Put your right hand through the<br />
hanging loop and use your right<br />
index finger like a hook to take hold<br />
of the left front index loop.<br />
Use your right middle finger like a<br />
hook to take hold of the front ring<br />
finger loop. Pull these loops out as<br />
far as the will go, letting the long<br />
loop of string slide off your wrist.<br />
There will be space between the<br />
loops of the right hand.<br />
3. Now lower your left index finger into<br />
the loop held by your right index finger.<br />
The left middle finger will go into the<br />
space between the loops. Finally the left<br />
ring finger will go down into the loop<br />
held by your right middle finger.<br />
4. Hang these<br />
back of your<br />
loops over the<br />
left hand and<br />
let go off the<br />
strings.<br />
5. Use your right<br />
index finger like a<br />
hook to take hold<br />
of the left front<br />
thumb loop. Use<br />
your right middle<br />
finger like a hook<br />
to take hold of the<br />
left front little finger.<br />
6. Pull out these loops<br />
carefully to make a<br />
parachute.<br />
7. If you upturn<br />
the parachute<br />
and remove the<br />
fingers of your<br />
left hand then the<br />
string figure<br />
looks like a<br />
Bunch of Keys.
BUNCH OF BANANAS<br />
With a loop of string you can make a bunch of bananas. But can you munch them<br />
1. Hang the string loop around the<br />
back of the index and middle<br />
fingers of your left hand. The long<br />
loop will hang down across your<br />
palm. Put your right index finger<br />
into the hanging loop from behind,<br />
then between your left index and<br />
middle finger. Use it like a hook to<br />
take hold of the string that goes<br />
behind your left index and middle<br />
fingers. Pull this loop as far as<br />
possible, letting the string loop<br />
slide off your wrist.<br />
2. Put your right hand<br />
into the long hanging<br />
loop from below. With<br />
your right thumb and<br />
index finger catch the<br />
strings which go<br />
between your left index<br />
and middle finger.<br />
Make sure you pick<br />
them up above the<br />
single front loop.<br />
3. Now pull out these<br />
strings as far as they<br />
will go, letting the wrist<br />
loop slide off your right<br />
hand as you pull. Hold<br />
the loop with your right<br />
thumb and index finger.<br />
Do not twist the loop.<br />
Now put the other<br />
fingers of your right<br />
hand into the loop.<br />
4. With your left thumb and little<br />
finger pick up from below, one of the<br />
bottom strings. Drop the strings of<br />
the right hand.<br />
5. You will see a small loop that goes<br />
around the loops on your left index<br />
and middle fingers. With your right<br />
thumb and index finger, gently pull<br />
out this small loop. Don’t pull too far<br />
otherwise the figure will fall apart.<br />
6. This is the native<br />
Indian tent (tipi)<br />
7. Now if you remove<br />
the string loops from<br />
your left hand fingers<br />
then you will have a<br />
Bunch of Bananas.
FLYING BIRD<br />
You can really make a bird fly by pulling your hands apart in this dynamic string figure!<br />
1. Place the loop of string on your left<br />
hand, between the thumb and the little<br />
finger, so that it runs across your<br />
palm. The right hand should be free.<br />
2. Hold the left palm string with your right<br />
thumb and index finger, and pull it all the way<br />
down. The finished result look like this<br />
3. Again pick the new<br />
palm string and pull it<br />
all the way down.<br />
4. Rest the finger of<br />
your right hand against<br />
your left palm. Your<br />
right thumb and little<br />
finger should go under<br />
the hanging string and...<br />
5. find the loops that run<br />
around the thumb and little<br />
finger of the left hand<br />
(marked with arrows).
6. Put your right thumb<br />
and finger into these<br />
loops and ...<br />
7. pull these loops through<br />
the big hanging loop...<br />
8. all the way down.<br />
9. Once the loops have been pulled all<br />
the way down, drop the right hand<br />
strings. You will see two little triangles<br />
hanging near the palm of the left hand.<br />
10. Hook your right thumb and little<br />
finger behind the bottom string of the<br />
two triangles (marked with arrows).<br />
11. Pull these strings<br />
away from your left<br />
hand. Keep holding on<br />
to the strings. Don’t let<br />
them go. You will see<br />
two diamonds between<br />
your hands.
12. With the right index finger pick up<br />
the loop that holds the left point of the<br />
diamond (marked with an arrow).<br />
13. This is how the string figure<br />
should appear at this stage.<br />
14. As you pull your hands apart<br />
the two loops will tighten into knots<br />
15. Carefully, drop the loops<br />
off the right thumb and little<br />
finger to make the bird’s wings.<br />
16. As you pull your hands<br />
apart the bird will appear<br />
to fly towards the left.
CANDLE STICKS<br />
This string game describes the candle making process.<br />
The wick is dipped into hot wax many times until the candle becomes thick enough.<br />
These string figures also contain an interesting story.<br />
1. Lay the string<br />
across on the left<br />
palm, leaving out<br />
the thumb. Using<br />
the right index<br />
finger and thumb,<br />
pick up the two<br />
hanging strings<br />
behind the left<br />
hand.<br />
2. Bring these<br />
string up and<br />
over the finger<br />
as shown. The<br />
loop of string<br />
must hang flat<br />
over the palmar<br />
string.<br />
3. With the right index finger<br />
and thumb, pick up the left<br />
palmer string between the two<br />
hanging strings. Pull this string<br />
out far enough to make a loop<br />
that will fit over the left middle<br />
and ring fingers. There should<br />
still be a loop hanging down<br />
over the palm. Tighten this<br />
loop by pulling.<br />
4. Put the right middle finger down<br />
into loop around the left little finger,<br />
and put the right index finger down<br />
into the loop, around the left index<br />
finger. Pull these out as far as they<br />
will go.
5. Close the left hand fingers into the<br />
palm putting the left index finger over<br />
the left near index string, the middle<br />
finger into the left index loop, the left<br />
ring finger into the left little finger loop,<br />
and the left little finger over the left far<br />
little finger string.<br />
6. Using your right thumb and index finger<br />
take the two hanging loops and thread them<br />
through the loop over the back of the left<br />
middle and ring fingers. Pull them so that<br />
they hang down the back to the left hand.<br />
Story: Once there was<br />
a man who stole a lot<br />
of candles. He took<br />
them home and hung<br />
them from a nail.<br />
7. Using the right index finger<br />
and thumb, pull the loop that<br />
crosses the back of the left<br />
middle and ring fingers over<br />
the knuckles of these two<br />
fingers towards the palm.<br />
8. Carefully and slowly<br />
pull this loop away from<br />
the left hand while<br />
opening the left fingers<br />
out. Holding the left hand<br />
palm up and pulling up<br />
with the right hand, you<br />
will see four candles.
9. Put the loop held by the<br />
right index finger and thumb<br />
over the left thumb without<br />
twisting any strings.<br />
10. Hold the left hand<br />
with the palm facing<br />
down and fingers<br />
pointing right. Using the<br />
right index finger and<br />
middle finger, hook the<br />
loops on the back of the<br />
left middle finger and<br />
ring finger. The back of<br />
the right hand fingers<br />
should face the back of<br />
the left hand’s fingers.<br />
11.With the right hand pull these two<br />
loops up as far as possible. At the<br />
same time, turn the left palm inwards.<br />
This forms the chair the man sat on.<br />
The man was very tired so<br />
he sat down on a chair and<br />
went to sleep.<br />
When the man woke up, it was<br />
dark. He got a pair of scissors to cut<br />
the candles, to separate them apart,<br />
so that he could light one.<br />
12. Drop the left thumb loop to<br />
form the scissors. Move right<br />
index and middle fingers up and<br />
down to show the scissors in the<br />
cutting motion.
When the man was cutting off the candles,<br />
a police man came with a stick and arrested<br />
him for stealing the candles.<br />
13. Drop the left index finger loop, and<br />
pull the hands apart as far as possible to<br />
see the policeman’s long stick.<br />
The policeman put handcuffs on the<br />
wrists of the thief and took him away<br />
to the jail.<br />
14. Drop the right index loop.<br />
15. Put the left hand<br />
through the left little finger<br />
loop and put the right<br />
hand through the loop on<br />
the right middle finger.<br />
16. Gently pull your hands apart.<br />
17.You now have handcuffs<br />
around your wrists, just like a thief!
CAT’S CRADLE<br />
This most popular string game is played by two people. The game of Cat’s Cradle probably<br />
travelled from Asia to Europe with the ten trade. Children in England certainly played the Cat’s<br />
Cradle as early as 1782. We know about this because the famous writer Charles Lamb wrote<br />
about weaving “cat-cradle’s” with his friends in school.<br />
Two people are needed to play this game. In most of the Cat’s Cradle figures, you can see X’s<br />
and straight strings. One person holds the figure while the other picks up the ‘X’s and takes them<br />
over, under or between the straight strings. The players take turns holding the figure and picking<br />
up the X’s to move to the next step.<br />
This game can go on forever, but if you want to stop it, you can choose one of the several<br />
different endings. There are several different ways in which the X strings can be picked up.<br />
So keep experimenting and trying and have fun!<br />
The sequence of making figures is as follows:<br />
The Cradle<br />
Soldier’s Bed<br />
Candles<br />
Boat<br />
Cat‘s Eye<br />
Fish in a Dish<br />
Hand Drum
1. You need a partner to play Cat’s<br />
Cradle. The one who makes the moves<br />
is named A and his partner is named B.<br />
First A places the loop of string over the<br />
first four fingers of his left hand.<br />
2. Then A holds the string and loops it around<br />
his left hand as shown. Then A pulls his hands<br />
apart and makes the middle finger base...<br />
3. to make The Cradle. A holds the<br />
cradle between his fingers. Then B, with<br />
thumbs and index fingers of both hands,<br />
pinches the crossed X strings together,<br />
from the sides of the cradle.<br />
4. B pulls the X strings out, and under to<br />
scoop them up the two straight strings.<br />
5. Once B has scooped up the straight<br />
strings, A releases all the strings.<br />
6. Then B pulls his fingers apart and makes<br />
the second cat’s cradle shape called the<br />
Soldier’s Bed.<br />
With his thumbs and index fingers A pinches<br />
the crossed strings together, from the top of<br />
the Soldier’s Bed.
7. A then pulls the crossed strings out and<br />
scoops up the two straight strings.<br />
8. B releases all the strings from his hand.<br />
9. A pulls his fingers apart and makes the<br />
third cat’s cradle shape called the Candles.<br />
B now hooks the left single string, from the<br />
toy of the candles with his right little finger<br />
and pulls it to the right.<br />
10. Again B hooks the right single string from the<br />
top of the candles with his left little finger and<br />
pulls to the left.<br />
11. B keeps holding the little finger strings<br />
and scoops up the straight double strings<br />
with his thumbs and index fingers.<br />
12. Now A releases all his strings. B<br />
pulls his fingers apart, while still holding<br />
on to the little finger strings...
13, to make the fourth cat’s cradle<br />
shape called the Boat. A then pinches<br />
the crossed strings together, from the<br />
sides of the boat, with his thumbs and<br />
index fingers.<br />
14. A pulls the X strings out and<br />
over the two straight strings.<br />
15. Then A pulls his finger down and<br />
apart. B releases all the strings, thus<br />
returning A again to the Soldier’s Bed.<br />
16. Now B, using both his thumbs<br />
and index fingers, pinches the crossed<br />
strings together from the top of the<br />
Soldier’s Bed.<br />
17. B pulls the X strings out and scoops<br />
them up the two straight strings.<br />
18. Now A releases all the strings.<br />
B pulls his fingers apart to make the fifth<br />
cat’s cradle shape called the Cat’s Eye.
19. From the top of the cat’s eyes,<br />
A puts his thumbs and index fingers into<br />
the triangles and swings upwards.<br />
20. Here the swinging action<br />
is shown in detail.<br />
21. B releases all the strings from his hands.<br />
A pulls his fingers apart to make the sixth<br />
cat’s cradle shape called Fish in a Dish.<br />
22. B with his thumbs and index fingers,<br />
pinches the crossed strings together from<br />
the top of the fish in a dish, and then swings<br />
the tips of his thumbs and index fingers up<br />
between the centre strings of the figure.<br />
23. A releases all the strings. B pulls his<br />
fingers apart and returns back to...<br />
24. the cat’s eye.
25. A with his little fingers<br />
hooks the straight strings<br />
from the back of B’s hands.<br />
26. A keeps holding the little<br />
finger strings from the top of<br />
the cat’s eye and pinches the<br />
X strings together with the<br />
thumbs and index fingers of<br />
both his hands.<br />
27. B releases all his strings.<br />
A pulls his fingers apart, while<br />
still holding on to the little<br />
finger strings, to make...<br />
28. the seventh<br />
cat’s cradle shape<br />
which is called The<br />
Hand Drum. B<br />
pinches the<br />
crossed strings<br />
together, from the<br />
sides of the hand<br />
drum, with his<br />
thumbs and index<br />
fingers.<br />
29. Then B<br />
swings the tips<br />
of his thumbs<br />
and index<br />
fingers up into<br />
the Centre of<br />
the hand drum.<br />
30. A releases all his strings. B pulls<br />
his fingers apart and returns to...<br />
31. the candles. Both A and B can keep<br />
playing and experimenting with the cat’s cradle.<br />
Soon they will discover several surprising<br />
shapes which have not been described.
REFERENCES<br />
1. <strong>String</strong> <strong>Games</strong> for Beginners - Kathleen Haddon (Heffer, U.K., 1934)<br />
2. Fun with <strong>String</strong> Figures - W.W. Rouse Ball (Dover Publications, NY, L971)<br />
3. Fun with <strong>String</strong> - Joseph Leeming (Dover Publications, New York, 1974)<br />
4. Cat’s Cradle <strong>String</strong> <strong>Games</strong> - Camilla Gryski ( Beech Tree Paperback, NY, 1983)<br />
5. Magical <strong>String</strong> - Steve and Megumi Biddle (Beaver Books, U.K, 1990)<br />
6. The World’s Best <strong>String</strong>s <strong>Games</strong> - Joanmarie Kalter (Sterling, New York, 1989)<br />
7. <strong>String</strong> <strong>Games</strong> - Anne Akers Johnson (Klutz, California, USA, 1995)


![tq,a] diM+s vkSj vk/qfud ekuo - Vidya Online](https://img.yumpu.com/31264147/1/190x245/tqa-dim-s-vksj-vk-qfud-ekuo-vidya-online.jpg?quality=85)