Set-Pro Control Manual - Evenheat Kilns
Set-Pro Control Manual - Evenheat Kilns
Set-Pro Control Manual - Evenheat Kilns

Create successful ePaper yourself
Turn your PDF publications into a flip-book with our unique Google optimized e-Paper software.
<strong>Set</strong>-<strong>Pro</strong> w/ Express Mode Operating <strong>Manual</strong><br />
Heat Treat version - March 2012<br />
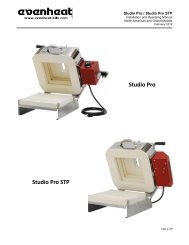
For Use with Studio <strong>Pro</strong> STP and Kingpin 88 Models with “EX” at End of Serial Number<br />
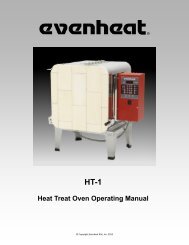
For Use with KF, KH and HT-1 <strong>Set</strong>-<strong>Pro</strong> Equipped Ovens with Serial Number’s 102077 and Above<br />
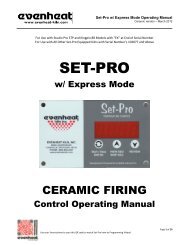
SET-PRO<br />
w/ Express Mode<br />
HEAT TREATING<br />
<strong>Control</strong> Operating <strong>Manual</strong><br />
Use your Smart-phone to scan this QR code to watch <strong>Set</strong>-<strong>Pro</strong> how-to <strong>Pro</strong>gramming Videos!<br />
Page 1 of 17
<strong>Set</strong>-<strong>Pro</strong> w/ Express Mode Operating <strong>Manual</strong><br />
Heat Treat version - March 2012<br />
Thank you for purchasing a <strong>Set</strong>-<strong>Pro</strong> equipped oven from <strong>Evenheat</strong>. The <strong>Set</strong>-<strong>Pro</strong> offers Custom Mode programming to allow the heat treater complete<br />
control over all heat processing decisions. Please take some time to read this manual. Not only does it cover the basics, it also contains some little gems<br />
that are sure to make your command of the <strong>Set</strong>-<strong>Pro</strong> a thoroughly rewarding experience.<br />
The <strong>Set</strong>-<strong>Pro</strong> w/ Express Mode offers four programming modes: Custom (Used for Heat Treating), Metal Clay Express, Glass Express and Ceramic Express<br />
Custom Mode is designed for the creation of custom heat treating programs.<br />
Metal Clay Express Mode is designed exclusively for firing Art Clay and PMC brands of metal clay. Preset firing programs for each brand make<br />
programming easy and accurate. Knife makers may be interested in this particular art, check it out!<br />
Glass Express Mode is designed exclusively for glass firing. It’s quick, easy and accurate using preset firing parameters. Simply answer a few<br />
questions and you’re ready to fire.<br />
Ceramic Express Mode is designed exclusively for ceramic firing. Choose your cone number and firing speed and the <strong>Set</strong>-<strong>Pro</strong> does the rest<br />
automatically.<br />
This manual describes the use of the <strong>Set</strong>-<strong>Pro</strong> w/ Express Mode as it relates to using the Custom Mode for Heat Treating. For <strong>Set</strong>-<strong>Pro</strong> w/ Express Mode<br />
manuals relating to using the Metal Clay Express Mode, Glass Express Mode and Ceramic Express Mode please refer to the manuals disc included with<br />
your oven, visit our web site at www.evenheat-kiln.com or contact us at info@evenheat-kiln.com.<br />
CAUTION: The <strong>Set</strong>-<strong>Pro</strong> is used to control temperature, it is not a safety devise. Never leave the oven unattended while firing. Check on the oven at the<br />
end of the heat treat process to ensure process has completed as planned.<br />
CAUTION: Throw control power switch, located on oven control panel, to the OFF position (O) when not in use.<br />
Table of Contents<br />
Quick Step <strong>Pro</strong>gramming<br />
Quick Steps for Custom Mode <strong>Pro</strong>gramming ................................. 3<br />
Detailed <strong>Pro</strong>gramming<br />
<strong>Set</strong>-<strong>Pro</strong> Key Descriptions ................................................................ 4<br />
Custom Mode <strong>Pro</strong>gramming (Detailed) ......................................... 5<br />
On-the-Fly Features<br />
Adding Time to a Hold .................................................................... 7<br />
Adding Temperature to a Hold ....................................................... 7<br />
Skipping Ahead to the next Segment ............................................. 7<br />
View Segment Feature ................................................................... 7<br />
<strong>Pro</strong>gramming & Use Features<br />
Initialization ................................................................................... 8<br />
Idle ................................................................................................. 8<br />
Beginning and End <strong>Pro</strong>cess Alarms ................................................ 8<br />
<strong>Pro</strong>gram Review ............................................................................. 9<br />
Start Now ....................................................................................... 9<br />
Storing a Custom Mode <strong>Pro</strong>gram ................................................... 9<br />
Selecting and Running a Custom Mode <strong>Pro</strong>gram ........................... 9<br />
Stopping the <strong>Pro</strong>gram .................................................................... 9<br />
4 User <strong>Pro</strong>grams in Custom Mode ................................................. 9<br />
8 Segments per Custom Mode <strong>Pro</strong>gram ........................................ 9<br />
<strong>Pro</strong>gramming a Time Value ............................................................ 9<br />
Temperature Rate Options .......................................................... 10<br />
Using UP & Down Arrow Keys ...................................................... 10<br />
Number of Segments ................................................................... 10<br />
Writing Over Data ........................................................................ 10<br />
Clearing Function ......................................................................... 10<br />
Fahrenheit or Celsius ................................................................... 10<br />
Maximum <strong>Pro</strong>grammable Temperature ...................................... 10<br />
Firing Down to Room Temperature ............................................. 10<br />
Delay Start Feature ...................................................................... 11<br />
Display & Heat Treat Data<br />
<strong>Set</strong>-<strong>Pro</strong> Display Conditions ........................................................... 12<br />
<strong>Set</strong>-<strong>Pro</strong> Display Messages ............................................................ 12<br />
Key Function Table....................................................................... 13<br />
<strong>Set</strong>-<strong>Pro</strong> Error Messages................................................................ 13<br />
Heat Treat Data ........................................................................... 14<br />
Oven Trouble Shooting ................................................................ 17<br />
Use your Smart-phone to scan this QR code to watch <strong>Set</strong>-<strong>Pro</strong> how-to <strong>Pro</strong>gramming Videos!<br />
Page 2 of 17
<strong>Set</strong>-<strong>Pro</strong> w/ Express Mode Operating <strong>Manual</strong><br />
Heat Treat version - March 2012<br />
Use this Quick Guide to Immediately Begin the Custom Mode <strong>Pro</strong>gramming <strong>Pro</strong>cess<br />
This Quick Guide to programming is a fairly straight forward, key-by-key approach to programming your heat treat program. It doesn’t go into much detail<br />
beyond what keys to press for most heat treating programs. If you were to rip a page out of this manual and tack it to the wall, it would be this page. For<br />
more detailed programming instructions check out page 5.<br />
The Custom Mode allows the creation of your own, individual heat treating programs. You choose the rate of temperature increase, the temperature you<br />
want to achieve and any hold time once you’re there. These 3 items, taken together, create what’s known as a segment. Generally speaking, heat treat<br />
programs use only 1 segment.<br />
Quick Steps for Custom Mode <strong>Pro</strong>gramming<br />
1. Throw the power switch on the oven control panel to the On position.<br />
2. The <strong>Set</strong>-<strong>Pro</strong> begins its initialization process and the display will illuminate.<br />
3. The <strong>Set</strong>-<strong>Pro</strong> will finish its initialization process and then display IdLE (Idle).<br />
4. Press the Enter key one time to begin the programming process. The display will read either, GLAS, ALAr, M-C, CEr or CUSt.<br />
5. Use the Up or Down arrow keys to make the display read CUSt (Custom Mode) if it does not already.<br />
6. Press the Enter key. USr is displayed along with some number.<br />
7. Use the Up arrow key to choose. You’re choosing which of the 4User program numbers will be used to store your program. Your choices are 1 thru 4.<br />
8. Press the Enter key. SEG is displayed along with some number.<br />
9. Use the Up or Down arrow keys to choose. You’re choosing the total number of segments used in the program. Your choices are 1 thru 8. Generally<br />
speaking, heat treat programs usually use only 1 segment.<br />
10. Press the Enter key. rA 1 is displayed along with some number.<br />
11. Use the Up and Down arrow keys to choose. You’re programming the temperature rate (°/hr.) for this segment. Generally speaking, heat treat<br />
programs usually go As Fast As Possible up to temperature.<br />
12. Press the Enter key. °F 1 is displayed along with some number.<br />
13. Use the Up and Down arrow keys to choose. You’re programming the temperature set point for this segment.<br />
14. Press the Enter key. HLd 1 is displayed along with some number.<br />
15. Use the Up and Down arrow keys to choose. You’re programming the hold time for this segment.<br />
16. Press the Enter key. rA 2 is displayed. Repeat steps 11 thru 14 for all remaining segments.<br />
17. Once all remaining segments have been programmed the display will read rEdI (Ready).<br />
18. Press the Enter key to begin the heat treating process. The <strong>Set</strong>-<strong>Pro</strong> is now running your Custom heat treat program.<br />
When the process is complete the display alternates between CPLt and total process time. Press the Start/Stop key at this point will cause the display to<br />
briefly read StOP and then IdLE.<br />
You may stop the heat treat process at any time by pressing the Enter key. Doing so will cause the program to stop and StOP will briefly be displayed.<br />
Use your Smart-phone to scan this QR code to watch <strong>Set</strong>-<strong>Pro</strong> how-to <strong>Pro</strong>gramming Videos!<br />
Page 3 of 17
<strong>Set</strong>-<strong>Pro</strong> w/ Express Mode Operating <strong>Manual</strong><br />
Heat Treat version - March 2012<br />
<strong>Set</strong>-<strong>Pro</strong> Key Layout & Key Descriptions<br />
F or °C - The <strong>Set</strong>-<strong>Pro</strong> can be set to display<br />
in either Fahrenheit or Celsius.<br />
Display - Large, bright LED display<br />
can be seen from a distance.<br />
Start/Stop - Enter<br />
The Start/Stop key starts and stops the heat treat process. It’s also used to enter or store heat treat program information during the programming process.<br />
UP Arrow – VIEW SEG – SKIP SEG<br />
Used to select values when programming and allows for Viewing the current running segment as well as performing the Skip Ahead feature.<br />
Down Arrow – REVIEW<br />
Used to select values when programming and allows for the Review program feature.<br />
See the <strong>Set</strong>-<strong>Pro</strong> Key Function Table on page 13, for more detailed key information.<br />
Use your Smart-phone to scan this QR code to watch <strong>Set</strong>-<strong>Pro</strong> how-to <strong>Pro</strong>gramming Videos!<br />
Page 4 of 17
<strong>Set</strong>-<strong>Pro</strong> w/ Express Mode Operating <strong>Manual</strong><br />
Heat Treat version - March 2012<br />
Custom Mode <strong>Pro</strong>gramming (Detailed)<br />
The Custom Mode is a method of programming that allows you to precisely define every aspect of the heat treating process. You’re creating a custom<br />
program designed for the work at hand. During programming you will be asked to enter in data for rate of temperature increase (or decrease), the set<br />
point temperature you would like to reach and hold time at the set point temperature. Most heat treat programs are simple, 1 segment affairs that ramp<br />
up to temperature and hold that temperature for a period of time, then shut off. The <strong>Set</strong>-<strong>Pro</strong> does allow for heat treating applications that involve multiple<br />
firing steps. We have included some basic heat treat data at the end of this manual to assist you developing your heat treat programs.<br />
1. Throw the power switch on the oven control panel to the On position.<br />
2. The <strong>Set</strong>-<strong>Pro</strong> begins its initialization process and the display will illuminate.<br />
3. The <strong>Set</strong>-<strong>Pro</strong> will finish its initialization process and then display IdLE (Idle).<br />
Idle simply means the <strong>Set</strong>-<strong>Pro</strong> is at rest and is not running any programs.<br />
4. Press the Enter key one time to begin the Custom Mode programming process. The display will read GLAS, ALAr, M-C, CEr or CUSt.<br />
The <strong>Set</strong>-<strong>Pro</strong> includes preset programs designed to fire glass, metal clays, ceramic as well as offering Custom programs for heat treating.<br />
These choices are displayed as:<br />
GLAS – Glass Express Mode<br />
ALAr – Beginning and End <strong>Pro</strong>cess Alarms<br />
M-C – Metal Clay Express Mode<br />
CEr – Ceramic Express Mode<br />
CUSt – Custom Mode<br />
5. Use the Up or Down arrow keys to make the display read CUSt (Custom Mode) if it does not already.<br />
6. Press the Enter key. The display will read USr along with some number.<br />
The <strong>Set</strong>-<strong>Pro</strong> needs to know which of the 4 available locations you would like to store your Custom Mode program. In other words: a program<br />
number. Your choices are 1 thru 4.<br />
7. Use the Up arrow key only to select the desired program number.<br />
8. Press the Enter key. The display will read SEG along with some number.<br />
The <strong>Set</strong>-<strong>Pro</strong> needs to know the total number of segments you would like to use for the Custom Mode program. A Segment consists of these 3<br />
questions: Rate: how fast am I supposed to get to temperature <strong>Set</strong> Point: what temperature am I going to Hold Time: the amount of time to<br />
hold at my <strong>Set</strong> Point temperature<br />
You can use up to 8 segments for your program. Your choices are 1 thru 8. Most heat treat programs usually use 1 segment.<br />
9. Use the Up and Down arrow keys to select desired number of segments to be used in the Custom program.<br />
10. Press the Enter key. The display will read rA-1 along with some number.<br />
The <strong>Set</strong>-<strong>Pro</strong> is asking for the desired temperature rate to be used in segment 1. rA stands for Rate and the 1 means you’re programming the<br />
rate of temperature change for segment 1.<br />
Rate means speed and you need to tell the <strong>Set</strong>-<strong>Pro</strong> how fast you want the temperature to change. Rate for the <strong>Set</strong>-<strong>Pro</strong> is programmed in<br />
degrees per hour (°/hr.). The choice is yours.<br />
Most heat treat programs use a temperature rate of “As Fast As Possible”. “As Fast As Possible” is programmed in as 9999 or Full, see page 10<br />
for detailed information.<br />
Use your Smart-phone to scan this QR code to watch <strong>Set</strong>-<strong>Pro</strong> how-to <strong>Pro</strong>gramming Videos!<br />
Page 5 of 17
<strong>Set</strong>-<strong>Pro</strong> w/ Express Mode Operating <strong>Manual</strong><br />
Heat Treat version - March 2012<br />
11. Use the UP and DOWN arrow keys to select your desired rate.<br />
12. Press the Enter key. The display will read °F 1 (°C 1 if using Celsius).<br />
Custom Mode <strong>Pro</strong>gramming (Detailed) – continued from previous page<br />
The <strong>Set</strong>-<strong>Pro</strong> is asking for the temperature set point you wish to reach in segment 1. °F stands for the temperature set point (°C is displayed if<br />
you’re using the Celsius scale) and the 1 means you’re programming the temperature you would like to reach in segment 1.<br />
The choice is yours.<br />
13. Use the Up and Down arrow keys to select your set point temperature.<br />
14. Press the Enter key. The display will read HLd1 along with some number.<br />
The <strong>Set</strong>-<strong>Pro</strong> is asking for the amount of time you wish to hold at the set point temperature. HLd stands for Hold (a.k.a. soak or dwell) and the 1<br />
means you’re programming the amount of time you want the temperature to stay at the segment 1 temperature once you reach it.<br />
Hold time is programmed in hours and minutes. Values to the left of the decimal point are hours and values to the right of the decimal are<br />
minutes. You do not have to hold at temperature if you don’t want to, in which case hold time would be 0.<br />
15. Use the Up and Down arrow keys to select your desired hold time.<br />
16. Press the Enter key. If you have chosen to use more than 1 segment for your firing the display will read rA 2 along with some number. If you have<br />
chosen to use only 1 segment for this firing skip ahead to line #21 for further instruction.<br />
The <strong>Set</strong>-<strong>Pro</strong> is asking for temperature rate, this time for segment 2.<br />
17. Use the Up and Down arrow keys to select your desired rate.<br />
18. Press the Enter key. The display will read °F 2 along with some number.<br />
The <strong>Set</strong>-<strong>Pro</strong> is asking for the temperature set point, this time for segment 2.<br />
19. Use the Up and Down arrow keys to select your desired temperature set point.<br />
20. Press the Enter key. The display will read HLd2 along with some number.<br />
The <strong>Set</strong>-<strong>Pro</strong> is asking for the amount of hold time at your temperature set point, this time for segment 2.<br />
As you can see from the emerging pattern, the <strong>Set</strong>-<strong>Pro</strong> will continue to ask the same three questions: rate, temperature and time for all remaining<br />
segments. Just keep answering the questions.<br />
21. Once all your segments are programmed the <strong>Set</strong>-<strong>Pro</strong> will display rEdI which means it’s ready to run your Custom Mode program.<br />
22. Press the Enter key to begin the heat treating process. The <strong>Set</strong>-<strong>Pro</strong> is now running your Custom heat treat program.<br />
When the heat treat process is complete the display alternates between CPLt and total process time. Pressing the Start/Stop key at this point will cause<br />
the display to briefly read StOP and then IdLE.<br />
The <strong>Set</strong>-<strong>Pro</strong> automatically stops running the heat treat program once complete. However, you may always stop a heat treat process in progress, at any<br />
time, by pressing the Start/Stop key. StOP is displayed briefly and then IdLE.<br />
Use your Smart-phone to scan this QR code to watch <strong>Set</strong>-<strong>Pro</strong> how-to <strong>Pro</strong>gramming Videos!<br />
Page 6 of 17
<strong>Set</strong>-<strong>Pro</strong> w/ Express Mode Operating <strong>Manual</strong><br />
Heat Treat version - March 2012<br />
On-The-Fly Features<br />
The <strong>Set</strong>-<strong>Pro</strong> contains a set of features that allow you to adjust and tweak the firing while it’s actually running! We’ve dubbed these features as “On-the-<br />
Fly”. With these features it’s possible to add a little bit of time to a hold if needed, add a little bit of temp to a hold or just leave the segment entirely and<br />
move to the next segment (in multi-segment programs).<br />
Adding Time to a Hold<br />
During a hold period it may be necessary to add just a little more time to the programmed hold time. The <strong>Set</strong>-<strong>Pro</strong> allows you to add time to a hold in 5<br />
minute increments.<br />
To Use the Add Time Feature<br />
While holding at a temperature (display reads temperature along with remaining hold time), repeatedly press the UP arrow key until the display<br />
reads tME (stands for time). Press the ENTER key one time. You have now added 5 minutes to the hold time. The display will go back to reading<br />
temperature and remaining hold time and you will notice that 5 minutes has been added to the hold. You may use this procedure as often as<br />
necessary during a hold to get the hold time you desire. It should be noted that the Adding Time to a Hold feature is a temporary adjustment<br />
only. That is, it does not change the program stored in memory.<br />
Adding Temperature to a Hold<br />
During a hold period it may be necessary to add just a little extra temperature to the programmed set point temperature. The <strong>Set</strong>-<strong>Pro</strong> allows you to add<br />
more temperature in °5 increments.<br />
To Use the Add Temperature Feature<br />
While holding at a temperature (display reads temperature along with remaining hold time), repeatedly press the UP arrow key until the display<br />
reads tMP (stands for temperature). Press the ENTER key one time. You have now added 5 degrees to the set point temperature. Once set, the<br />
display will go back to reading temperature and remaining hold time. You may use this procedure as often as necessary during a hold to get the<br />
hold temperature you desire. It should be noted that the Adding Temperature to a Hold feature is a temporary adjustment only. That is, it does<br />
not change the program stored in memory.<br />
Skipping Ahead to the Next Segment<br />
During multi-segment heat treating processes it may become desirable to stop what you’re currently doing and skip ahead to the next segment in the<br />
program.<br />
To Use the Skip Ahead Feature<br />
At any time during the heat treating process press the UP arrow key one time. The display will eventually read SStP (stands for Skip Step). When<br />
it does, press the ENTER key one time. You have now skipped to the next programmed segment. If you need to continue to skip ahead even<br />
further feel free to do so. Once you skip the display will go back to reading temperature.<br />
View Segment Feature<br />
At any point during the heat treat process you may press the UP arrow one time to display the current action (ramping or holding) and current segment.<br />
This will tell you if you’re ramping or holding and which segment you’re doing this in. After a moment or two the display will go back to normal operation.<br />
Use your Smart-phone to scan this QR code to watch <strong>Set</strong>-<strong>Pro</strong> how-to <strong>Pro</strong>gramming Videos!<br />
Page 7 of 17
<strong>Set</strong>-<strong>Pro</strong> w/ Express Mode Operating <strong>Manual</strong><br />
Heat Treat version - March 2012<br />
<strong>Pro</strong>gramming and Use Features<br />
Initialization (Boot-Up)<br />
When the <strong>Set</strong>-<strong>Pro</strong> is powered up it goes through an initialization process. Various data is displayed until the initialization is complete and the display reads<br />
IdLE.<br />
IdLE (Idle)<br />
Idle simply means the <strong>Set</strong>-<strong>Pro</strong> is not running any firing programs at the moment.<br />
Beginning and End of <strong>Pro</strong>cess Alarm Feature<br />
The <strong>Set</strong>-<strong>Pro</strong> allows you to set a special Beginning of <strong>Pro</strong>cess Alarm and End of <strong>Pro</strong>cess Alarm to sound at very important heat treating points.<br />
The Beginning of <strong>Pro</strong>cess Alarm sounds when you have reached your process temperature and the material is beginning to hold/soak at process<br />
temperature. This alarm basically gives you a heads up that your material has entered the soak/hold portion of the heat treat process and it<br />
won’t be long before it needs to be quenched.<br />
The End of <strong>Pro</strong>cess Alarm sounds when your material has completed its heat treat operation and is ready to quench. Action on your part is<br />
required at this point of the process and this End of <strong>Pro</strong>cess alarm lets you know. If you’ve ever missed the opportunity to quench at<br />
temperature, this End of <strong>Pro</strong>cess Alarm is made just for you!<br />
From the standpoint of actual use, the End of <strong>Pro</strong>cess Alarm is arguably the most valuable. When you’re heat treating, knowing when<br />
the heating cycle is completed and the material is ready to quench is critical. The End of <strong>Pro</strong>cess alarm let’s you know when this<br />
occurs and gives you the opportunity to react properly and in time, take advantage of it!<br />
To choose your desired Beginning and End of <strong>Pro</strong>cess Alarms combination:<br />
1. Throw the power switch on the kiln control panel to the On position.<br />
2. The <strong>Set</strong>-<strong>Pro</strong> begins its initialization process and the display will illuminate.<br />
3. The <strong>Set</strong>-<strong>Pro</strong> will finish its initialization process and then display IdLE (Idle). Idle simply means the <strong>Set</strong>-<strong>Pro</strong> is at rest and is not running any<br />
programs.<br />
4. Press the Enter key one time to begin the Alarm setting process. The display will read GLAS, ALAr, M-C, CEr or CUSt.<br />
5. Use the Up or Down arrow keys to make the display read ALAr (<strong>Pro</strong>cess Alarm) if it does not already.<br />
6. Press the Enter key. The display will read either OFF, bEGn, End or botH. These choices allow you to decide at what point the <strong>Pro</strong>cess Alarms<br />
function. You can set them to both be silent (OFF), have just the beginning of process alarm sound (bEGn), have just the end of process alarm<br />
sound (End) or have both of them sound (botH).<br />
OFF = Beginning of <strong>Pro</strong>cess and End of <strong>Pro</strong>cess Alarms are both Off and will not sound.<br />
bEGn = Beginning of <strong>Pro</strong>cess Alarm will sound, End of <strong>Pro</strong>cess Alarm will not sound.<br />
End = End of <strong>Pro</strong>cess Alarm will sound, Beginning of <strong>Pro</strong>cess alarm will not sound.<br />
botH = Both the Beginning and End of <strong>Pro</strong>cess Alarms will sound.<br />
7. Use the Arrow keys to choose your desired process alarm setting. Press the Enter key to store your choice.<br />
8. Press the Enter key. The display will read IdLE which stands for Idle. You <strong>Pro</strong>cess Alarm choice is now programmed.<br />
Once you have chosen which combination of process alarms you desire, your choice stays programmed for all remaining programs and use until you<br />
decide to choose a different combination.<br />
To silence any alarms simply press one of the arrow keys.<br />
Use your Smart-phone to scan this QR code to watch <strong>Set</strong>-<strong>Pro</strong> how-to <strong>Pro</strong>gramming Videos!<br />
Page 8 of 17
<strong>Set</strong>-<strong>Pro</strong> w/ Express Mode Operating <strong>Manual</strong><br />
Heat Treat version - March 2012<br />
<strong>Pro</strong>gramming and Use Features Continued from Previous Page<br />
<strong>Pro</strong>gram Review<br />
It’s always best to review your program before starting it. When the controller is reading IdLE just press the REVIEW key and the display will automatically<br />
show you what’s programmed. Just watch. When it’s done reviewing rEdI will be displayed. Press Start/Stop key to start the program. If it’s not what you<br />
want, Press the Start/Stop key again to get to IdLE and enter a new program.<br />
Start Now<br />
For you brave souls out there who want to skip the program review you can get to the rEdI command quickly by pressing the REVIEW key twice (when IdLE<br />
is displayed). This bypasses the review process and gets you directly to rEdI. Just press the Start/Stop to start the program.<br />
Storing a Custom Mode <strong>Pro</strong>gram<br />
As you go through the Custom Mode programming process and complete it, your program is automatically stored in the program number you selected at<br />
the beginning of the programming process.<br />
Selecting and Running a Custom Mode <strong>Pro</strong>gram<br />
At some point you are likely to have set all 4 Custom Mode programs set to something you like and want to run again and again. The <strong>Set</strong>-<strong>Pro</strong> allows you to<br />
quickly select the program you desire.<br />
To Select a Custom Mode <strong>Pro</strong>gram<br />
From IdLE press the Enter key one time. Use the UP arrow key to choose the Custom Mode program you wish to run and then press the DOWN<br />
arrow key. The <strong>Set</strong>-<strong>Pro</strong> display automatically cycles through the chosen program settings and then displays rEdI. Simply press Start to begin the<br />
firing.<br />
Stopping the <strong>Pro</strong>gram<br />
At any time you may stop the heat treat process while it’s running by pressing the Start/Stop key. The display will briefly read StOP and then read IdLE<br />
along with chamber temperature.<br />
4 User <strong>Pro</strong>grams in Custom Mode<br />
The <strong>Set</strong>-<strong>Pro</strong> allows the heat treater to save up to 4 Custom Mode programs in memory. Your programs remain in these 4 locations indefinitely and can be<br />
recalled or changed at any time.<br />
8 Segments per Custom Mode <strong>Pro</strong>gram<br />
The <strong>Set</strong>-<strong>Pro</strong> allows you to use up to 8 segments for each Custom Mode firing program. Typical heat treat programs use only 1 segment. However, if you do<br />
need more than 1, you got ‘em!<br />
<strong>Pro</strong>gramming a Time Value<br />
The <strong>Set</strong>-<strong>Pro</strong> accepts time as Hours and Minutes. When programming a time value, a red dot will illuminate in the middle of the four display digits.<br />
Numbers to the left of the dot indicate hours and numbers to the right of the dot indicate minutes.<br />
Use your Smart-phone to scan this QR code to watch <strong>Set</strong>-<strong>Pro</strong> how-to <strong>Pro</strong>gramming Videos!<br />
Page 9 of 17
<strong>Set</strong>-<strong>Pro</strong> w/ Express Mode Operating <strong>Manual</strong><br />
Heat Treat version - March 2012<br />
<strong>Pro</strong>gramming and Use Features Continued from Previous Page<br />
Temperature Rate Options<br />
Temperature rate is programmed in degrees per hour (°/hr.). Heat treat processes usually go As Fast As Possible”. You can do this in two ways. You can<br />
program in the maximum rate of 9999 which works fine or use the FULL command. The FULL command instructs the controller to go Full on (or Full off) to<br />
the set point temperature. To set your rate to FULL simply press the down arrow key until the display stops at 0000, then release the key. Wait a moment<br />
or two then press the down arrow one time. The display will read FULL.<br />
Using the UP and DOWN Arrow Keys<br />
When using the arrow keys, especially when holding them down, the “tens” position will change first then the “hundreds” position will change then the<br />
“thousands” position will change. This process is designed to get you where you want to go a little faster, and easier. Another twist to this feature allows<br />
you to “tap” the button to change the position slowly. For instance: let’s say you’re holding down the up arrow key and the hundreds position is changing.<br />
Simply let go of the arrow key and press it once to increment the hundreds up by 1. Press it once again and it moves up by 1 again. And so on and so forth.<br />
This feature is true when any position is the one being changed. We hope you find it useful.<br />
Number of Segments<br />
The <strong>Set</strong>-<strong>Pro</strong> can control up to 8 segments per use or program. However, that doesn’t mean that you need to use all 8. If your program only needs 1 or 2<br />
segments to operate, great, use only 1 or 2. When it comes time to choose just select the number of segments you need.<br />
Writing Over Data<br />
You will want to change the data in your Custom Mode programs at some point. We expect this as you try new techniques and fine tune your skills. When<br />
you do, you’ll see the old firing data as you’re programming in the new data. Simply key in the new data as though the old never existed.<br />
Clearing Function<br />
There is no feature that allows you to perform an “ALL CLEAR” function, i.e. set all the settings to 0. Sorry. We understand the desire for such a feature but<br />
it’s really not necessary.<br />
Fahrenheit or Celsius<br />
Your <strong>Set</strong>-<strong>Pro</strong> was set at the factory for use in the Fahrenheit or Celsius temperatures scales. If programmed to the Fahrenheit scale you will see °F when<br />
programming your set point temperatures. If set to Celsius you will see °C when programming your set point temperature. You will also note that a small,<br />
red dot will be illuminated at the bottom right of the <strong>Set</strong>-<strong>Pro</strong> display area to indicate a Celsius temperature. This small, red dot is not illuminated when<br />
using the Fahrenheit scale. If you would like to change which temperature scale you are using please consult <strong>Evenheat</strong> if you wish to adjust this setting.<br />
Maximum <strong>Pro</strong>grammable Temperature<br />
The maximum temperature that can be programmed in the <strong>Set</strong>-<strong>Pro</strong> is 2350°F (1288°C).<br />
Firing Down to Room Temperature<br />
Over the years we’ve seen users attempt to program their ovens to come down to room temperature at the end of the heat treat process. They have<br />
literally programmed in 72° as the last segment temperature. Don’t do this. If your actual room temperature goes above what you have programmed the<br />
firing won’t end until the room temp drops, you get an error or you stop the firing. If you want to control the cooling down to some low, final temperature<br />
don’t make it room temperature. We suggest 200° or above.<br />
Use your Smart-phone to scan this QR code to watch <strong>Set</strong>-<strong>Pro</strong> how-to <strong>Pro</strong>gramming Videos!<br />
Page 10 of 17
<strong>Set</strong>-<strong>Pro</strong> w/ Express Mode Operating <strong>Manual</strong><br />
Heat Treat version - March 2012<br />
<strong>Pro</strong>gramming and Use Features Continued from Previous Page<br />
Delay Start Feature<br />
The <strong>Set</strong>-<strong>Pro</strong> can delay the start of your firing for up to 100 hours. This feature becomes valuable when different electrical rates are charged at different<br />
times of the day.<br />
To Use the Delay Start feature<br />
With the display reading rEdI press the DOWN arrow key one time. dELA is displayed. Use the UP and DOWN arrow keys to select the amount<br />
of delay start time. Press the Enter key. The display will read rEdI. Press the Start/Stop key one time. The <strong>Set</strong>-<strong>Pro</strong> will display dLY along with<br />
remaining delay start time. When the delay start counts down to 0 the firing program will start.<br />
To stop the delay start feature press the Start/Stop one time.<br />
Use your Smart-phone to scan this QR code to watch <strong>Set</strong>-<strong>Pro</strong> how-to <strong>Pro</strong>gramming Videos!<br />
Page 11 of 17
<strong>Set</strong>-<strong>Pro</strong> w/ Express Mode Operating <strong>Manual</strong><br />
Heat Treat version - March 2012<br />
<strong>Set</strong>-<strong>Pro</strong> Display Conditions<br />
Display Alternating Between IdLE (Idle) and Temperature<br />
<strong>Pro</strong>gram is not running: oven chamber temperature is displayed.<br />
Display Reading Temperature<br />
<strong>Pro</strong>gram is running and is ramping to temperature: oven chamber temperature is displayed.<br />
Display Alternating Between Time Value and Temperature<br />
<strong>Pro</strong>gram is running and is holding at temperature: oven chamber temperature is displayed along with the time value counting down remaining hold time.<br />
Dot Displayed Between the 10’s and 100’s Digits<br />
Indicates the value being displayed is a time value.<br />
Dot Displayed to the Right of the 1’s Digit<br />
Indicates that a Celsius temperature is being displayed. If no dot is displayed the <strong>Set</strong>-<strong>Pro</strong> is displaying in Fahrenheit.<br />
<strong>Set</strong>-<strong>Pro</strong> Display Messages<br />
ALAr <strong>Pro</strong>cess Alarm, page 8 ErrF Error F, page 13 PC <strong>Pro</strong>metheus Clay, N/A<br />
ArtC Art Clay, N/A ErrP Error P, page 13 PMC PMC, N/A<br />
bEGn Beginning <strong>Pro</strong>cess Alarm, page 8 Err1 Error 1, page 13 PrHt Pre Heat, N/A<br />
botH Both Beginning and End Alarms, page 8 °F Fahrenheit, page 10 rA Rate, page 5<br />
bron <strong>Pro</strong>metheus Bronze, N/A FASt Fast, N/A rEdI Ready, page 6<br />
°C Celsius (Centigrade), page 10 FULL Full, page 10 rSLO Extra Slow, N/A<br />
CASt Cast, N/A FUSE Fuse, N/A S.S. Art Clay Silver Standard, N/A<br />
CEr Ceramic Express Mode, N/A GLAS Glass Express Mode, N/A S.S.-S Art Clay Silver Standard Slow Dry, N/A<br />
CO82 COE 82, N/A GoLd PMC Gold Slow, N/A SEG Segments, page 5<br />
CO90 COE 90, N/A HLd Hold, page 6 SLO Slow, N/A<br />
CO96 COE 96, N/A IdLE Idle, page 8 SOFt Soften, N/A<br />
COnE Cone, N/A LAM Laminate, N/A SStP Skip Segment, page 7<br />
COP2 <strong>Pro</strong>metheus Copper, N/A LF Art Clay Silver 650/1200 Low Fire, N/A Stnd PMC Standard, N/A<br />
COPP Art Clay Copper, N/A LF-S Art Clay Silver 650/1200 Low Fire Slow Dry, N/A StOP Stop, page 9<br />
CPLt Firing Complete, page 6 M-C Metal Clay Express Mode, N/A tC Thermocouple, page 13<br />
CUSt Custom Mode, page 5 MEd Medium, N/A tC/FAIL Thermocouple Failure, page 13<br />
dELA Delay Start, page 11 OFF Off, page 8 tME Time, page 7<br />
dLY Delay Start, page 11 P F PMC+ Fast, N/A tMP Temperature, page 7<br />
End End, page 8 P3 F PMC3 Fast, N/A USr User, page 5<br />
Errd Error D, page 13 P3 S PMC3 Slow, N/A<br />
Use your Smart-phone to scan this QR code to watch <strong>Set</strong>-<strong>Pro</strong> how-to <strong>Pro</strong>gramming Videos!<br />
Page 12 of 17
<strong>Set</strong>-<strong>Pro</strong> w/ Express Mode Operating <strong>Manual</strong><br />
Heat Treat version - March 2012<br />
Key Function Table<br />
Start/Stop - ENTER<br />
While at the Idle Position (IdLE) While Running a <strong>Pro</strong>gram At Any Other Position<br />
Pressing once begins the<br />
Custom Mode programming process<br />
Stops the currently running program<br />
Pressing once with rEdI displayed starts<br />
the currently loaded firing program.<br />
While programming, it stores the<br />
currently displayed data and moves<br />
programming to the next step.<br />
UP Arrow – VIEW SEG – SKIP SEG<br />
While at the Idle Position (IdLE) While Running a <strong>Pro</strong>gram At Any Other Position<br />
No Function<br />
Allows you to access the View Segment,<br />
Add Temperature, Add Time and<br />
Skip Segment features.<br />
Used to select various program<br />
values while programming.<br />
DOWN Arrow - REVIEW<br />
While at the Idle Position (IdLE) While Running a <strong>Pro</strong>gram At Any Other Position<br />
Pressing twice takes you<br />
directly to the rEdI position<br />
Allows you to view entire<br />
currently running program.<br />
Used to select various program<br />
values while programming.<br />
Pressing once while rEdI is displayed<br />
allows for setting of any delay time.<br />
<strong>Set</strong>-<strong>Pro</strong> Error Messages<br />
The <strong>Set</strong>-<strong>Pro</strong> monitors each firing and compares performance to a set of standards. If the firing does not meet performance standards the <strong>Set</strong>-<strong>Pro</strong><br />
automatically stops the firing and displays a corresponding Error Code describing the fault. These codes are identified and described below.<br />
tC FAIL - tC alternating with FAIL indicates the thermocouple has failed. Replace the defective thermocouple with <strong>Evenheat</strong> supplied thermocouple only.<br />
To clear, press any key.<br />
Err1 – Error 1 indicates the temperature in the oven is rising slower than 15°F/hr during an up ramp. If this rate continues for 8 minutes, the firing will be<br />
stopped. Err1 may be an indication that elements are worn or defective or that a relay has stopped working.<br />
ErrF – Error F indicates the temperature in the oven is decreasing less than 15°F/hr during a down ramp. If this rate continues for 8 minutes, the firing will<br />
be stopped. ErrF may be an indication that a relay has stuck in the on position.<br />
Errd – Error d indicates that the oven temperature is 100°F above the traveling set point, which is the current desired temperature in the oven. The<br />
traveling set point will increase or decrease according to the programmed rate. Errd may indicate a stuck relay in the on position or a problem with a<br />
thermocouple not reading properly.<br />
ErrP – ErrP is displayed whenever there is a power interruption that is long enough to stop the firing. If the power interruption is brief, the oven will<br />
continue to fire when power is restored; in this case there will be no indication of a power failure. To clear the error, press any key.<br />
tC – The Red and Yellow thermocouple wires are reversed.<br />
Use your Smart-phone to scan this QR code to watch <strong>Set</strong>-<strong>Pro</strong> how-to <strong>Pro</strong>gramming Videos!<br />
Page 13 of 17
<strong>Set</strong>-<strong>Pro</strong> w/ Express Mode Operating <strong>Manual</strong><br />
Heat Treat version - March 2012<br />
Heat Treat Data<br />
The following heat treat data has been provided to <strong>Evenheat</strong> by various sources. We suggest you view this data as a starting and reference point on which<br />
to build your heat treating experience. What works for these guys may or may not necessarily work for you.<br />
General Heat Treating Data for Various Metals<br />
Special Thanks to Texas Knifemakers Supply for this Information<br />
Steel Type<br />
Rockwell<br />
Hardness<br />
Hardening<br />
Temperature<br />
Hardening<br />
Time<br />
Temper<br />
Temperature<br />
D2 Tool Steel 58 RC 1880°F 15 min. 500°F<br />
D2 Springs & Rockers 43 to 45 RC 1880°F 15 min. 1200°F<br />
154CM S.S.<br />
154CM S.S. Springs<br />
& Rockers<br />
58 RC<br />
61 RC<br />
1900°F 15 min.<br />
400°F for 58 RC<br />
275°F for 61 RC<br />
43 to 45 RC 1900°F 15 min. 1200°F<br />
440C S.S. 58 RC 1880°F 15 min. 225°F<br />
440C S.S. Springs<br />
& Rockers<br />
43 to 45 RC 1880°F 15 min. 1100°F<br />
CPM 440V S.S. (S60V) 58 RC 1950°F 30 min. 300°F<br />
CPM 440V S.S. Springs &<br />
Rockers<br />
ATS-34 S.S.<br />
ATS-34 S.S. Springs<br />
& Rockers<br />
43 to 45 RC 1950°F 30 min. 1100°F<br />
58 RC<br />
61 RC<br />
1900°F 15 min.<br />
400°F for 58 RC<br />
275°F for 61 RC<br />
43 to 45 RC 1900°F 15 min. 1200°F<br />
Vascoware & Cru-ware 1950°F 30 min. 1000°F<br />
Boye Dendritic S.S. 1880°F 30 min. 400°F<br />
440A S.S. 1880°F 15 min. 212°F<br />
CMP420V 2150°F 10 min. 400°F<br />
A-2 1800°F 500°F<br />
01 Tool Steel 1500°F<br />
Annealing 1650°F 30 min.<br />
10 min. or until non-magnetic, oil quench<br />
(oil needs to be warm - 100 to 150°F)<br />
Temper at 350°F for 2 hrs.<br />
Temper<br />
Time<br />
2 hrs.<br />
2 times<br />
2 hrs.<br />
1 time<br />
2 hrs.<br />
2 times<br />
2 hrs.<br />
1 time<br />
2 hrs.<br />
1 time<br />
1 hr.<br />
1 time<br />
2 hrs.<br />
2 times<br />
2 hrs.<br />
1 time<br />
2 hrs.<br />
1 time<br />
2 hrs.<br />
2 times<br />
2 hrs.<br />
3 times<br />
1 hr.<br />
2 times<br />
2 hrs.<br />
1 time<br />
2 hrs.<br />
2 times<br />
2 hrs.<br />
2 times<br />
1650°F for 30 min. Shut off with<br />
oven door closed. Leave in overnight.<br />
NOTE: These figures are based on 3/16" thick material and should be altered to the thickness of the material being treated. (I.E. 1/8" thick material should<br />
be 8 to 10 minutes and 1/4" material should be near 20 minutes). The rule of thumb is 1 hour per inch of thickness.<br />
Use your Smart-phone to scan this QR code to watch <strong>Set</strong>-<strong>Pro</strong> how-to <strong>Pro</strong>gramming Videos!<br />
Page 14 of 17
<strong>Set</strong>-<strong>Pro</strong> w/ Express Mode Operating <strong>Manual</strong><br />
Heat Treat version - March 2012<br />
Heat Treating Stainless Blade Steels at Ranger Original Handcrafted Knives<br />
Special Thanks to Rob Ridley of Ranger Original for this Information<br />
We have had a number of people ask us for our “secrets” about heat treating knife blades. While we appreciate the compliment, there really are no<br />
secrets – and what works for us may not be your favored solutions. Here are our recipes. You may copy them, publish them or use them as you please. We<br />
have drawn from various sources, including Crucible data sheets, other steel suppliers and postings on Blade Forums as well as a good dose of personal<br />
experience.<br />
All of our stainless blades get double wrapped in high temperature, 309SS foil envelopes – with double folded seams pressed down firmly. Always put<br />
them in the envelope the same way – so you can put them in spine down and pull them out by the handle, instead of the tip. We use brown paper (no<br />
idea why brown – just what we use) in pieces about 2 x 2 inches. 2 pieces for an average hunter and four for a big bowie. The trick is to use enough paper<br />
to eat up the Oxygen in the envelope – without blowing up the envelope like a balloon.<br />
154CM, CPM154, ATS34<br />
All three of these, heat treat the same. After a full speed ramp up to temperature, they soak 45 minutes to an hour in the <strong>Evenheat</strong> Oven at 1950F<br />
degrees. Then they get placed – still in the foil – spine down – then flat - on a 1” aluminum plate. The second aluminum plate is placed on top and pressure<br />
is applied. We used to use weights for the pressure, but now we use clamps. You are looking for good firm contact. If you are thinking hydraulics you are<br />
thinking WAY too much pressure. After 2 minutes (or less) they will be hand cool, and ready to remove from the foil for cryogenics. They don’t have to go<br />
straight into cryo, but aim for something less than an hour from plate quenching. We use liquid nitrogen for cryo but dry ice in acetone will also do. The<br />
household freezer is no use at all. They probably only need a couple hours in cryo, but we leave them overnight.<br />
The next morning, they will be in the range of RHC63+. After warming to room temperature, they get tempered. We temper twice at 500F degrees for two<br />
hours each time – to get about RHC61. You can experiment for other hardness's but 61 is a very good target for these steels.<br />
CPMS30V<br />
Same wrap – same temperature (1950F) - same soak time – same plate quench – same cryo as 154CM above. This steel gets double tempered at 400F<br />
degree for about RHC60<br />
440C<br />
Same wrap – Harden at 1900F degrees and only about 15 minutes at temperature – then plate quench and cryo as above. Hardness out of cryo will be<br />
about 61. Temper (twice for 2 hours) at 275F for RHC60 – 325F for RHC59 – and 375F for an excellent RHC57-58.<br />
Q1: Does Cryo really make a difference.<br />
Questions and Answers provided by Rob Ridley of Ranger Original<br />
A1: Yes! It increases initial hardness between 1.5 to 2 points and even though you may temper back to softer levels, the steel has been more completely<br />
transformed to a tough and desirable state.<br />
Q2: Why do you leave blades in the foil to plate quench them.<br />
A2: The really hot blades never see oxygen this way. That means no scale and very little oxide. Air quenching the old way meant going back to the grinder<br />
to clean up the mess. Blades done our way can be cleaned up with just a buffer.<br />
Q3: Why do you remove the blades from the envelope before cryo<br />
A3: Experience! We like hanging the blades from a coat hanger in the cryo tank. Handle pin holes make that easier. We also found that when a tight foil<br />
bag full of liquid nitrogen, hits the warm summer air, bad things can happen. The low tempering temperatures won’t cause you any scale or oxide<br />
problems anyway.<br />
Q4: Can I use my freezer for cryo<br />
A4: No. It isn’t nearly cold enough to do any good at all. Dry Ice or Liquid Nitrogen work equally well. Dry ice is easier to handle but only lasts a day or<br />
so. Liquid nitrogen in a good dewar will last a month or more depending on use.<br />
Use your Smart-phone to scan this QR code to watch <strong>Set</strong>-<strong>Pro</strong> how-to <strong>Pro</strong>gramming Videos!<br />
Page 15 of 17
<strong>Set</strong>-<strong>Pro</strong> w/ Express Mode Operating <strong>Manual</strong><br />
Heat Treat version - March 2012<br />
Q5: I heard ATS34 etc can be tempered at a high or low range. Is this true<br />
Questions and Answers provided by Rob Ridley of Ranger Original - continued<br />
A5: Sort of – but the high range gives you reduced toughness and corrosion resistance. It should be avoided.<br />
Q6: Are there other ways to heat treat these steels<br />
A6: Heck yes! Air quenching, Oil quenching, Salt baths, Vacuum furnaces…. But you’ll have to ask someone else about them. I haven’t seen anything that<br />
gives more satisfactory results that the way we use now.<br />
Q7: Aluminum is expensive! Can I plate quench between thick steel plates.<br />
A7: Yes – less desirable because it absorbs heat slower – but workable.<br />
Q8: How do I know if it hardened and tempered properly.<br />
A8: The correct answer is to use a Rockwell C scale tester and then to do performance testing on your blades. Some claim they can tell hardness pretty<br />
close by the way a file skates over the steel. I can’t. We test every blade through here and write the hardness on the blade before shipping it out. Having<br />
said that, we are rarely out by more than 1 Rockwell point from where we aimed.<br />
Q9: 321SS foil is much cheaper. Can I use it instead of the 309SS<br />
A9: Depending on who you talk to, the 321 is rated to something between 1800 - 2000 degrees. The risk is that the 321 will either fail, allowing air in, or<br />
stick to the blade inside. In practice, we have used it successfully with our own blades without problem. We have seen 321SS stuck to a blade heat treated<br />
elsewhere. Because we treat other maker’s blades, we choose to use only 309SS foil. Experiment at your own risk.<br />
Q10: Does it matter where in the oven I place the blade<br />
A10: Yes. Temperature inside an oven can vary and generally is only measured at one point – where the thermocouple is located. For consistent results,<br />
you should keep your blades in a more or less consistent place in the chamber. Hint; Avoid getting closer to heating coils than necessary.<br />
Q11: How do I know if my oven is accurate for temperature<br />
A11: Some will tell you that you can test temperature with ceramic firing cones. We disagree. Cones do not measure temperature. They measure heat<br />
work – a combination of time and temperature. Orton makes a product called TempChek which is better but still requires a rather complex cycle for a<br />
good result. An electronic probe and thermocouple is the best way to check, though can be expensive. Of course, unless you can calibrate the probe, you<br />
still don’t really know do you Note: Rob really nailed the question of using a pyrometric cone for temperature measurement. It's apples and oranges. Save<br />
the pyrometric cones for the potters.<br />
Q12: How far can a blade be finished before heat treat<br />
A12: Many of our customers finish to 800 grit before heat treat. We ask makers to leave us 20 thou at the edge and point – essentially a finished blade<br />
that has not been sharpened. Although we have not had any stress fractures, it is also a good idea to avoid sharp corners where possible and to deburr<br />
pinholes and other irregularities.<br />
Safety<br />
Heat treating has obvious hazards. Please wear safety glasses or face shield and decent gloves. The day will come when you drop a hot blade. Make sure<br />
the floor around your oven is free from combustibles and please resist the urge to catch the falling blade.<br />
Use your Smart-phone to scan this QR code to watch <strong>Set</strong>-<strong>Pro</strong> how-to <strong>Pro</strong>gramming Videos!<br />
Page 16 of 17
<strong>Set</strong>-<strong>Pro</strong> w/ Express Mode Operating <strong>Manual</strong><br />
Heat Treat version - March 2012<br />
Oven Trouble Shooting<br />
Listed below are some of the more probable oven problems you’ll encounter along with their most common cause and repair advice. Please feel free to<br />
contact <strong>Evenheat</strong> for assistance when dealing with these and other potential oven problems.<br />
No Display<br />
Check to see that the oven is actually plugged in. It happens! Also check the circuit protection (breakers or fuses) to see that they are not tripped or open.<br />
Breakers and fuses don’t trip or open for no reason. They indicate a fault which should be investigated by licensed personnel. See below.<br />
Oven Won’t Reach Temperature<br />
A low voltage will certainly slow an oven down and, if the drop is low enough, it may cause failure to reach temperature. Low voltage is generally<br />
associated with your power service or provider and is rarely a fault in the oven.<br />
A failed element reduces the heat produced. Failed elements tend to be very visual and are easily seen. With the oven off (not running and unplugged)<br />
have a look at the elements for any breaks. If you see no breaks in the heating element then suspect a relay problem.<br />
A failed relay (fails to close) reduces the heat produced. While a relay failure acts like an element failure, a relay is not visible. If the heating elements<br />
appear to be intact replace the relay.<br />
Oven won’t stop firing (won’t shut off)<br />
Most likely a failed relay (failed closed). A failed relay may cause the oven temperature to increase when it should be decreasing. Depending upon your<br />
particular oven model you may see up to 2 relays used in its design. Identifying the failed relay is fairly simple as the element connected to it will remain<br />
on. Unplug the oven and remove the oven control panel. Simply follow the element leads to the relay to identify it. Relays are maintenance items and we<br />
recommend replacing all of them when needing to replace one.<br />
Check your program.<br />
tC/Fail is Displayed<br />
The thermocouple (temperature sensor) circuit is faulty. The thermocouple circuit is broken at some point, usually the thermocouple itself. The<br />
thermocouple circuit consists of the thermocouple, any connecting blocks and the thermocouple lead wire connecting to the <strong>Set</strong>-<strong>Pro</strong>.<br />
Circuit <strong>Pro</strong>tection Opens (“Blown” Breaker or Fuse)<br />
Circuit protection can open for various reasons. The BIG TWO are a short circuit and overheating. We’ll look at each separately.<br />
Short circuits occur when line voltage finds it’s way to another line or ground. They are usually violent occurrences with lots of noise, flashes of light and<br />
maybe a bit of smoke! During a short circuit the amperage goes very high. This increase in amperage exceeds your breaker/fuse rating which causes them<br />
to open (“blow”). That’s exactly why they’re there. Short circuits generally happen immediately upon plugging the oven in or running the firing. They<br />
generally do NOT happen after the oven has been on for some time.<br />
Overheating of the breakers/fuses can cause them to open (“blow”). Overheating needs time to happen. If the oven is running fine for a while and then<br />
the breakers or the fuses open we can be fairly confident that the problem is overheating and not a short circuit. Overheating reduces the amount of<br />
amperage a breaker/fuse will allow to pass before it opens. Overheating is caused by many factors, the most common are: loose wire connections at the<br />
breakers/fuses, the size of the wire “feeding” the oven is too small, the electrical receptacle is faulty or breaker/fuse is faulty.<br />
Reasons for a Failed Heating Element<br />
Heat Treat oven elements rarely fail on their own. When they do fail it’s usually from contamination. If you do have an element failure, double check the<br />
groove at the point of failure. Remove power form the oven and attempt to remove any debris from the groove with a sharp tool. Not doing so may allow<br />
the debris to destroy the replacement element.<br />
Reasons for a Failed Relay<br />
Relays are the switches that turn the heating elements on and off. They are moving parts and they’re working all the time. Long, slow heat treat processes<br />
make the relays work more which shortens their overall lifespan. Relay replacement is expected at some point.<br />
Use your Smart-phone to scan this QR code to watch <strong>Set</strong>-<strong>Pro</strong> how-to <strong>Pro</strong>gramming Videos!<br />
Page 17 of 17