Instruction for use - Heimerle + Meule
Instruction for use - Heimerle + Meule
Instruction for use - Heimerle + Meule

Create successful ePaper yourself
Turn your PDF publications into a flip-book with our unique Google optimized e-Paper software.
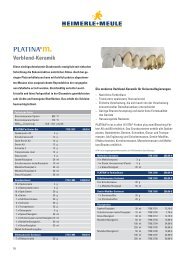
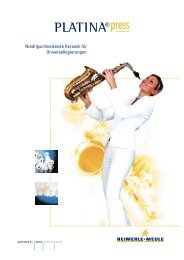
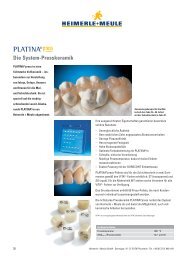
Press Ceramik<br />
The perfect frame material <strong>for</strong> all<br />
ceramic dental restorations.<br />
The best possible supplement <strong>for</strong><br />
INSPIRATION – the up-to-date<br />
leucite-glass-ceramic with reduced<br />
fusing temperature.<br />
Natural vividness<br />
High ratio of fluorescence<br />
Quick results due to simple<br />
handling<br />
Precise fit with the new DURO-<br />
CONT investment material<br />
Outstanding results due to colour<br />
variety of the press pellets<br />
Perfectly matching the<br />
INSPIRATION<br />
Cost-efficient way to all ceramic<br />
dental restorations<br />
<strong>Instruction</strong> <strong>for</strong> <strong>use</strong><br />
0483<br />
<strong>Heimerle</strong> + <strong>Meule</strong> GmbH · Dennigstr. 16 · D-75179 P<strong>for</strong>zheim · Tel. +49 (0) 7231 940-140 · Fax +49 (0) 7231 940-2701 · www.heimerle-meule.com
<strong>Instruction</strong> <strong>for</strong> <strong>use</strong> INSPIRATIONpress<br />
1 Indication<br />
The technical characteristics of the material make indications of all<br />
ceramic individual crowns within the dental front and molar area as<br />
well as single- and multi-faced inlays, onlays, and veneers possible.<br />
The frame material INSPIRATIONpress is perfectly harmonising with<br />
the up-to-date leucite-glass-ceramic INSPIRATION.<br />
2 Modell/Work Stump<br />
The master model can be prepared as usual. Apply the distance varnish<br />
<strong>for</strong> the composite cement evenly up to 1 mm to the preparation<br />
margin.<br />
3 Modelling<br />
Wax: Burning residue-free,<br />
<strong>for</strong> example with PLATINA ® press modelling wax.<br />
Shape: Work up wax model to final shape in accordance with the<br />
anatomical and functional aspects.<br />
Wall thickness of the ceramic:<br />
Steps<br />
minimum 1,0 mm<br />
Cups and chewing area<br />
minimum 1,5 mm<br />
made of 2/3 press ceramic and1/3 layering ceramic<br />
4 Spruing of the Pressing Cone<br />
Direct spruing wax wire 2 – 3 mm<br />
wax wire length<br />
7 – 9 mm<br />
NOTE: The root points of the wax wire have to be rounded. The wax<br />
wires have to be aligned in flow direction.<br />
5 Material Input<br />
Wax weight:<br />
Up to max. 0.6 g wax weight:<br />
Up to max. 1.4 g wax weight:<br />
6 Investment<br />
weight the modelled object with<br />
pressing cone<br />
1 blank<br />
2 blanks<br />
Use only phosphate-bound investment materials.<br />
Speed precision investment material: DUROCONT new<br />
Mixing ratio: 100 g powder : 25 ml liquid/distilled water<br />
Concentration:<br />
liquid : distilled water<br />
Inlays, MOD‘s: 40 % : 60 %<br />
Onlays: 50 % : 50 %<br />
Crowns and caps: 60 % : 40 %<br />
Note: Higher concentration of the DUROCONT liquid will increase the<br />
total expansion. Less DUROCONT liquid results in less setting<br />
expansion.<br />
Carefully pour the investment material into the muffle <strong>for</strong>mer.<br />
Setting time <strong>for</strong> speed investment material:<br />
Muffle 1 (100 g)<br />
17 minutes<br />
Muffle 2 (200 g)<br />
19 minutes<br />
Put the muffle into the pre-heated to 850 °C furnace.<br />
7 Pre-Heating<br />
Speed: Muffle 1 at least 60 minutes<br />
Muffle 2 at least 75 minutes<br />
Standard: After more than 25 minutes setting time, put muffle into the<br />
furnace at room temperature.<br />
Heat with 5 °C per minute to 290 °C. Hold 30 minutes<br />
(muffle 2 – 45 minutes), further heat with 5 °C per minute<br />
to 590 °C and hold 30 minutes (muffle 2 – 45 minutes), then<br />
heat with 5 °C per minute to 850 °C and hold 30 minutes<br />
(muffle 2 – 45 minutes).<br />
8 Pressing<br />
Use suitable press ceramic furnace:<br />
Pre-heating temperature: 700 °C<br />
Heating rate:<br />
60 °C/min.<br />
End temperature: 1080 °C<br />
Holding time:<br />
20 minutes<br />
Pressing time:<br />
9 minutes<br />
Important Note: Use only alox plungers <strong>for</strong> the pre-heating furnace.<br />
Put press blanks cold – alox plunger hot into the converted muffle. Put<br />
disposable plungers cold into the hot muffle.<br />
9 Divesting<br />
Pre-blast with gloss-blast pearls under 4 bar pressure until the ceramic<br />
objects become visible. Then clean-blast with 2 bar pressure.<br />
10 Finishing Staining- and Layering Technique<br />
Separate pressing cones with a thin diamond disk. Carefully put<br />
objects onto the stump, remove impurities with a diamond abrasive<br />
wheel, if necessary create surface structure with suitable abrasive<br />
tools, clean thereafter.<br />
Staining technique:<br />
Stir glaze material to creamy consistence and per<strong>for</strong>m 2 glaze firing<br />
circles (see firing chart).<br />
Layering technique:<br />
Reduce crowns with diamonds/grinders.<br />
Keep minimum strength of the dentin core of at least 0.8 mm.<br />
Clean thereafter and layer with ceramic – INSPIRATON (see firing<br />
chart).<br />
Attention: Avoid local overheating during grinding.<br />
Note:<br />
Lead:<br />
Use only very thin metal pins or firing wool.<br />
INSPIRATIONpress is compatible with every layering<br />
material, staining colour and Shade of the INSPIRATION<br />
assortment.<br />
11 In<strong>for</strong>mation <strong>for</strong> the Dentist<br />
Use all ceramic restorations with composite bonding materials only.<br />
Inorganic cements are contraindicated and increase breakage risks.<br />
In order to ensure sufficient bonding, the acid-active inner ceramic<br />
side has to be silane-treated prior to insertion.<br />
INSPIRATION-Firing Chart<br />
Basic Pre-drying Heating Vacuum End Holding<br />
temperature time rate start temperature time<br />
[°C] [min] [°C/min] [°C] [°C] [min]<br />
Layering Technique<br />
Dentin/enamel firing circle 400 4 – 6 60 450 880 1<br />
Glaze firing circle 400 4 60 – 840 – 850 1<br />
Staining Technique<br />
Staining colours/Shade 400 4 60 – 860 – 865 1<br />
Glaze firing circle 400 4 60 – 860 – 865 1<br />
Our recommendations and instructions <strong>for</strong> <strong>use</strong> are based on our experience. They do not replace, however, the professional knowledge and experience of dentists and dental technicians who are solely<br />
responsible <strong>for</strong> the decision on selection and processing of the materials. The advice we offer is just a voluntary service not establishing any liability. Warranty and damage claims are strictly limited to<br />
the contractual terms and conditions of our general delivery provisions.