INSTALLATION GUIDE - Acr-asia.com
INSTALLATION GUIDE - Acr-asia.com
INSTALLATION GUIDE - Acr-asia.com
You also want an ePaper? Increase the reach of your titles
YUMPU automatically turns print PDFs into web optimized ePapers that Google loves.
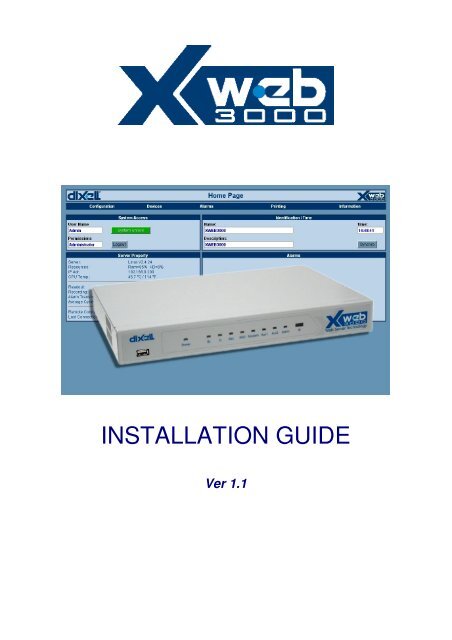
<strong>INSTALLATION</strong> <strong>GUIDE</strong><br />
Ver 1.1
WARNING:<br />
WARNING:<br />
Use only modems supported by this monitoring<br />
units. Dixell S.p.a can accept no responsibility for<br />
possible damage due the usage of not supported<br />
modems.<br />
Dixell S.p.a. reserves itself the right to alter this<br />
manual without notice. The last version available<br />
can be downloaded from the website.
INDEX<br />
1 CHECK LIST.............................................................................5<br />
2 TO DO LIST ..............................................................................6<br />
3 RS 485 CONNECTION.............................................................7<br />
3.1 The TTL output......................................................................9<br />
3.2 Serial address of the instruments ..........................................9<br />
4 Local connection with monitor, mouse and keyboard..............10<br />
4.1 HOW TO SETUP YOUR NETWORK CARD .......................12<br />
4.1.1 Windows 98 and ME TCP/IP Setup..............................12<br />
4.1.2 Windows 2000 TCP/IP Setup.......................................16<br />
4.1.3 Windows XP TCP/IP Setup ..........................................18<br />
5 Modem connection (“or point to point connection”) .................23<br />
5.1 HOW TO SETUP a dial-up connection................................25<br />
5.1.1 Setting up dial-up connection for windows 98 ..............25<br />
5.1.2 Setting up dial-up connection for windows me .............31<br />
5.1.3 setting up dial-up connection for windows 2000...........39<br />
5.1.4 SETTING UP dial-up connection for windows XP ........52<br />
6 Intranet / ethernet connection .................................................66
XWEB SERIES<br />
Installation Guide<br />
1 CHECK LIST<br />
• The XWEB 3000 server unit.<br />
• One power cord for power supply connection.<br />
• A couple of brackets.<br />
• Quick reference manual (Fast installation).<br />
• One serial line adapter<br />
• One CD Rom containing the Operating manual and software<br />
04/11/2004 1592017000 Pg. 5/74
XWEB SERIES<br />
Installation Guide<br />
2 TO DO LIST<br />
• Check if the power supply line match the XWEB 3000<br />
specification (90~264 VAC 50~60Hz.).<br />
• Connect the serial line RS 485 with the adapter provided.<br />
• Plug-in monitor, keyboard and mouse (if needed) before turning<br />
on the unit.<br />
• Plug-in RJ 45 network cable (not provided).<br />
Pg. 6/74 1592017000 04/11/2004
XWEB SERIES<br />
Installation Guide<br />
3 RS 485 CONNECTION<br />
To be connected to the serial line all the Dixell Modbus instruments<br />
must be provided with direct RS485 terminals or the “TTL”-RS485<br />
interface (XJRS485 or XJ485). Check the instrument manuals for<br />
more information. The RS485 line is mainly based on two polarised<br />
terminals. Please beware to respect the right sequence for all the<br />
devices connected to the serial line.<br />
Follow these important advises:<br />
• The RS485 serial line must reach all the instruments where they<br />
are installed.<br />
• Beware to the wire polarities when screwing them into the<br />
instrument terminals.<br />
• The cable must have 2 or 3 wires with shield, minimum section<br />
0,5mm 2 (eg. the BELDEN 8772).<br />
• From the XWEB 3000 position the cable reaches all the<br />
instrument positions.<br />
• Do not execute loops or derivations:<br />
04/11/2004 1592017000 Pg. 7/74
XWEB SERIES<br />
Installation Guide<br />
Right connection:<br />
Wrong connection:<br />
• Always keep the serial cable away from power cables.<br />
• Always keep the serial cable away from Electro-magnetic or<br />
frequency sources.<br />
• Do not connect shield to ground.<br />
• Do not connect the “Gnd” terminal.<br />
• Remember to draw a map of the line. This will help you to find<br />
errors if something is wrong.<br />
• The instrument with RS485 have “+” and “-“ terminals, respect<br />
the polarity.<br />
• To keep the line balanced it is necessary a 100 Ohm resistor at<br />
the end of the line (you ca use the RS 485+ and RS 485-<br />
terminals of the last instrument connected).<br />
Pg. 8/74 1592017000 04/11/2004
XWEB SERIES<br />
Installation Guide<br />
3.1 The TTL output<br />
The instrument with RS485 on board do not need any kind of<br />
external interface module. For instruments with external interface:<br />
keep the TTL cable away from power cables or frequency sources.<br />
The XJ485 external interface must be connected with TTL cable to<br />
the instrument with TTL <strong>com</strong>patibility.<br />
3.2 Serial address of the instruments<br />
Each instrument must be defined by its unique address.<br />
Check the address into the Adr parameter value. Take reference to<br />
the instruction manual of the instrument itself to find the right<br />
procedure to enter the programming and set the value.<br />
The easiest way to work with the category functions is to set the<br />
addresses progressively for similar groups of instruments which<br />
have the same application.<br />
04/11/2004 1592017000 Pg. 9/74
XWEB SERIES<br />
Installation Guide<br />
4 Local connection with monitor, mouse<br />
and keyboard<br />
On the back side, the XWEB 3000 is provided with the sockets for a<br />
monitor, a mouse and a keyboard. Please connect all the<br />
peripherals before powering-on the unit otherwise the system may<br />
fails to recognise them. This means that , for example, if you do not<br />
plug the monitor cable now, you won’t see anything displayed on it<br />
later.<br />
The unit can also work without these three elements therefore if the<br />
user intend to work just with the remote, he can definitively remove<br />
them after the setup operations. In any case inside XWEB 3000 is<br />
loaded a standard browser to allow the user setting up the unit.<br />
If necessary check the instructions manual of each device<br />
connected to the unit.<br />
The operative procedure to work with XWEB 3000 is the same for<br />
all connection method.<br />
Pg. 10/74 1592017000 04/11/2004
XWEB SERIES<br />
Installation Guide<br />
It is possible to connect to the unit via a single PC provided with<br />
LAN card, by using the net connector RJ 45 (LAN). Due to the PCclient<br />
power, this kind of connection is more suitable for the setup<br />
procedures.<br />
IMPORTANT: the cable between the Server and the PC must be<br />
with crossing wires (“Bridge Cable”).<br />
The connection procedure from the remote PC is describe in deep<br />
in this guide. You may need some changes to your PC network<br />
card, then you will be able to connect to XWEB 3000 via Ethernet<br />
line. Once you have finished setting up your network card,<br />
connection to XWEB 3000 is established simply by launching the<br />
Browser and inserting the default IP number of the unit<br />
http://192.168.0.200 into the address bar.<br />
Before going on reading, please take some moments to write down<br />
your PC network setup, may be we are going to change it. If the IP<br />
address of your PC belong to the hierarchy 192.168.0.XYZ (where<br />
XYZ represent a number between 1 and 254), you can reach XWEB<br />
3000 simply plugging in the network cable.<br />
04/11/2004 1592017000 Pg. 11/74
XWEB SERIES<br />
Installation Guide<br />
4.1 HOW TO SETUP YOUR NETWORK CARD<br />
Windows 98 and ME TCP/IP Setup<br />
Windows 2000 TCP/IP Setup<br />
Windows XP TCP/IP Setup<br />
4.1.1 WINDOWS 98 AND ME TCP/IP SETUP<br />
pg.12<br />
pg.16<br />
pg.18<br />
On the desktop, select My Computer -> Control Panel -> Network.<br />
Choose the Configuration tab.<br />
Highlight the TCP/IP associated with your Ethernet card and choose<br />
Properties. The TCP/IP Properties window will open. On each tab,<br />
Pg. 12/74 1592017000 04/11/2004
XWEB SERIES<br />
Installation Guide<br />
make the following settings.<br />
Choose the IP Address tab.<br />
Select radio button “Specify an IP address” and <strong>com</strong>pile the fields<br />
as the image above. Then go to the DNS tab an choose the radio<br />
button “Disable DNS”.<br />
04/11/2004 1592017000 Pg. 13/74
XWEB SERIES<br />
Installation Guide<br />
Go to gateway and delete any entry.<br />
Pg. 14/74 1592017000 04/11/2004
Push Ok button, Windows will ask you to make a reboot. Choose ok<br />
and wait while system is rebooting.
4.1.2 WINDOWS 2000 TCP/IP SETUP<br />
Go to Start -> Settings -> Network and Dial-up Connections:<br />
following window should appear:
XWEB SERIES<br />
Installation Guide<br />
Right-click the network connection associated with your network<br />
card, and then click Properties. The following window should<br />
appear:<br />
Select “Internet Protocol (TCP/IP)”, then properties. The following<br />
window should appear:<br />
04/11/2004 1592017000 Pg. 17/74
XWEB SERIES<br />
Installation Guide<br />
Select radio button “Use the following IP address” and <strong>com</strong>pile the<br />
fields as the image above. Push “OK” button<br />
4.1.3 WINDOWS XP TCP/IP SETUP<br />
Pg. 18/74 1592017000 04/11/2004
XWEB SERIES<br />
Installation Guide<br />
Click on Start button, chose Control panel, click on “Network and<br />
internet connections” icon:<br />
Then chose “Network connections”:<br />
The following windows will appear:<br />
Right mouse click on network interface icon, then chose<br />
“Properties”:<br />
04/11/2004 1592017000 Pg. 19/74
XWEB SERIES<br />
Installation Guide<br />
The following windows will appear:<br />
Pg. 20/74 1592017000 04/11/2004
XWEB SERIES<br />
Installation Guide<br />
Select “Internet Protocol (TCP/IP)”, then click on Properties. The<br />
following windows will appear:<br />
04/11/2004 1592017000 Pg. 21/74
XWEB SERIES<br />
Installation Guide<br />
Pg. 22/74 1592017000 04/11/2004
XWEB SERIES<br />
Installation Guide<br />
5 Modem connection (“or point to point<br />
connection”)<br />
It represents the most <strong>com</strong>mon method where the LAN (intranet /<br />
Ethernet / internet) is not available.<br />
It is strongly advised to use a dedicated telephone line.<br />
IMPORTANT: Use exclusively modem devices approved by<br />
Dixell.<br />
Remember that many modems are not <strong>com</strong>patible with Linux.<br />
The list of <strong>com</strong>patible models can be found under the menu:<br />
Configuration – System - Modem.<br />
USB Modem (re<strong>com</strong>mended).<br />
Connect the USB Modem to the USB Port on the back side using<br />
the modem cable <strong>com</strong>monly included into the modem packaging<br />
itself. There is no need to give power supply to the modem because<br />
the Server provides it through the USB port.<br />
The modem reset is directly controlled by the XWEB 3000 Server<br />
through the USB port by turning off and then on the modem device.<br />
Connect the modem to the telephone line with the phone cable<br />
included into the modem packaging. Remember to check if there is<br />
a switching machine.<br />
The connection procedure is divided in two parts. In the first part it is<br />
necessary to create the Remote Access, in your PC, set with the<br />
telephone number of the line where the XWEB 3000 is connected<br />
to. You have to use Dixell as Username and Password.<br />
The second is the procedure you will ever use: after launching the<br />
new Remote Access that will engage the line through the modem,<br />
start the Browser from your PC and insert the address<br />
http://192.168.1.200 into Explorer/Netscape address bar.<br />
04/11/2004 1592017000 Pg. 23/74
XWEB SERIES<br />
Installation Guide<br />
Pg. 24/74 1592017000 04/11/2004
XWEB SERIES<br />
5.1 HOW TO SETUP a dial-up connection<br />
Setting up dial-up connection for windows 98<br />
Setting up dial-up connection for windows me<br />
setting up dial-up connection for windows 2000<br />
SETTING UP dial-up connection for windows XP<br />
Installation Guide<br />
pg.25<br />
pg.31<br />
pg.39<br />
pg.52<br />
5.1.1 SETTING UP DIAL-UP CONNECTION FOR WINDOWS 98<br />
1. Double-click on the "My Computer" icon on your Desktop, then<br />
double-click on "Dial-Up Networking".<br />
2. If this is the first time Dial-Up Networking has been run, the<br />
Wel<strong>com</strong>e screen will open. Click on "Next" and proceed to step 4.<br />
04/11/2004 1592017000 Pg. 25/74
XWEB SERIES<br />
Installation Guide<br />
3. If you don't get the Wel<strong>com</strong>e screen, double-click on "Make New<br />
Connection".<br />
Pg. 26/74 1592017000 04/11/2004
XWEB SERIES<br />
Installation Guide<br />
4. Type “XWEB 3000 DIRECT MODEM” in the first box. When you<br />
finish the New Connection wizard, the connection icon will be<br />
named “ XWEB 3000 DIRECT MODEM ”. Chose “digi<strong>com</strong> Botticelli<br />
web” or another modem approved dy Dixell.<br />
Click “Next".<br />
04/11/2004 1592017000 Pg. 27/74
XWEB SERIES<br />
Installation Guide<br />
5. Do not type the area code, insert telephone number with the area<br />
code of XWEB 3000 as a prefix.<br />
E.G: If telephone number is 555789 and area code is 099, put this<br />
Telephone number: 099555789.<br />
If there is a switching machine and you have to dial a digit to get the<br />
line ( 0 or 9 for example, it depends on the switching machine), put<br />
this telephone number: 0, 099555789 or 9, 099555789. Chose your<br />
country.<br />
Click "Next".<br />
Pg. 28/74 1592017000 04/11/2004
XWEB SERIES<br />
Installation Guide<br />
6.Click "Finish".<br />
04/11/2004 1592017000 Pg. 29/74
XWEB SERIES<br />
Installation Guide<br />
Pg. 30/74 1592017000 04/11/2004
XWEB SERIES<br />
Installation Guide<br />
5.1.2 SETTING UP DIAL-UP CONNECTION FOR WINDOWS ME<br />
1. From the Start menu, click Settings, and choose Dial-Up<br />
Networking.<br />
2. Double-click the Make New Connection icon.<br />
3. In the Type a name for the <strong>com</strong>puter you are dialling field, type<br />
XWEB3000 DIRECT MODEM.<br />
4. Click the down arrow on the Select a device drop-down list and<br />
choose “digi<strong>com</strong> botticelli web” or another modem approved dy<br />
Dixell.<br />
5.Click the Next button.<br />
04/11/2004 1592017000 Pg. 31/74
XWEB SERIES<br />
Installation Guide<br />
6. Do not type the area code, insert telephone number with the area<br />
code of XWEB 3000 as a prefix.<br />
E.G: If telephone number is 555789 and area code is 099, put this<br />
Telephone number: 099555789.<br />
If there is a switching machine and you have to dial a digit to get the<br />
line ( 0 or 9 for example, it depends on the switching machine), put<br />
this telephone number: 0, 099555789 or 9, 099555789.Chose your<br />
country.<br />
7.Click the Next button.<br />
Pg. 32/74 1592017000 04/11/2004
XWEB SERIES<br />
Installation Guide<br />
8. Click the Finish button.<br />
04/11/2004 1592017000 Pg. 33/74
XWEB SERIES<br />
Installation Guide<br />
9. Click the XWEB 3000 DIRECT MODEM icon with your right<br />
mouse button, then choose Properties.<br />
10. Click on the Networking tab.<br />
11. Click the down arrow on the Type of Dial-Up Server: drop-down<br />
list and choose PPP: Internet, Windows 2000/NT, Windows Me.<br />
12. Uncheck all the boxes except for Enable software <strong>com</strong>pression<br />
and TCP/IP.<br />
Pg. 34/74 1592017000 04/11/2004
XWEB SERIES<br />
Installation Guide<br />
13. Click the TCP/IP Settings... button.<br />
14. Select Server assigned IP address<br />
15. Select Server assigned name server addresses.<br />
16. Click the OK button.<br />
04/11/2004 1592017000 Pg. 35/74
XWEB SERIES<br />
Installation Guide<br />
17. Click on the Security tab.<br />
18. In the User name: dixell<br />
19. In the Password: dixell<br />
20. Click the OK button.<br />
Pg. 36/74 1592017000 04/11/2004
XWEB SERIES<br />
Installation Guide<br />
21. Click the XWEB 3000 DIRECT MODEM icon with your right<br />
mouse button, then choose Create Shortcut.<br />
04/11/2004 1592017000 Pg. 37/74
XWEB SERIES<br />
Installation Guide<br />
22. Click the Yes button.<br />
Pg. 38/74 1592017000 04/11/2004
XWEB SERIES<br />
Installation Guide<br />
5.1.3 SETTING UP DIAL-UP CONNECTION FOR WINDOWS<br />
2000<br />
Start-Menu "Settings", then "Network and Dial-up<br />
Connections".<br />
Select to "Make a New Connection"<br />
04/11/2004 1592017000 Pg. 39/74
XWEB SERIES<br />
Installation Guide<br />
This starts up the "Network Connection Wizard".<br />
Continue with "Next"<br />
Pg. 40/74 1592017000 04/11/2004
XWEB SERIES<br />
Installation Guide<br />
Chose “Dial up to the Internet"<br />
04/11/2004 1592017000 Pg. 41/74
XWEB SERIES<br />
Installation Guide<br />
Choose “Connect using my phone line”:<br />
Pg. 42/74 1592017000 04/11/2004
XWEB SERIES<br />
Installation Guide<br />
Do not type the area code, insert telephone number with the area<br />
code of XWEB 3000 as a prefix.<br />
E.G: If telephone number is 555789 and area code is 099, put this<br />
Telephone number: 099555789.<br />
If there is a switching machine and you have to dial a digit to get the<br />
line ( 0 or 9 for example, it depends on the switching machine), put<br />
this telephone number: 0, 099555789 or 9, 099555789.Chose your<br />
country.<br />
Click the Next button.<br />
04/11/2004 1592017000 Pg. 43/74
XWEB SERIES<br />
Installation Guide<br />
The User name and Password is dixell.<br />
Pg. 44/74 1592017000 04/11/2004
XWEB SERIES<br />
Installation Guide<br />
As connection name use “XWEB 3000 direct modem”:<br />
04/11/2004 1592017000 Pg. 45/74
XWEB SERIES<br />
Installation Guide<br />
First part is done.<br />
Pg. 46/74 1592017000 04/11/2004
XWEB SERIES<br />
Installation Guide<br />
Now you will found a new icon in your network directory:<br />
04/11/2004 1592017000 Pg. 47/74
XWEB SERIES<br />
Installation Guide<br />
Right mouse click and choose properties:<br />
Pg. 48/74 1592017000 04/11/2004
XWEB SERIES<br />
Installation Guide<br />
Let general tab as you <strong>com</strong>pile before in this guide choose<br />
“networking” tab:<br />
04/11/2004 1592017000 Pg. 49/74
XWEB SERIES<br />
Installation Guide<br />
Select Internet Protocol (TCP/IP) and click on “Properties”:<br />
Pg. 50/74 1592017000 04/11/2004
XWEB SERIES<br />
Installation Guide<br />
Compile your windows as describe above. Click ok and close all<br />
windows.<br />
04/11/2004 1592017000 Pg. 51/74
XWEB SERIES<br />
Installation Guide<br />
5.1.4 SETTING UP DIAL-UP CONNECTION FOR WINDOWS XP<br />
In Windows XP, you will use the "New Connection Wizard".<br />
1. From the Start menu, select Control Panel.<br />
2. If Control Panel is set for "Classic View", double-click on the<br />
Network Connections icon.<br />
Pg. 52/74 1592017000 04/11/2004
XWEB SERIES<br />
Installation Guide<br />
3. If Control Panel is set for "Category View", select the "Network<br />
and Internet Connections" category, then double-click on the<br />
Network Connections icon.<br />
04/11/2004 1592017000 Pg. 53/74
XWEB SERIES<br />
Installation Guide<br />
Pg. 54/74 1592017000 04/11/2004
XWEB SERIES<br />
Installation Guide<br />
4. Under Network Tasks, select "Create a new connection".<br />
04/11/2004 1592017000 Pg. 55/74
XWEB SERIES<br />
Installation Guide<br />
5. Click "Next".<br />
Pg. 56/74 1592017000 04/11/2004
XWEB SERIES<br />
Installation Guide<br />
6. Click "Next" at the bottom of this page to continue with the setup<br />
instructions.<br />
7. Select "Connect to the Internet" and click "Next".<br />
04/11/2004 1592017000 Pg. 57/74
XWEB SERIES<br />
Installation Guide<br />
8. Select "Set up my connection manually" and click "Next".<br />
Pg. 58/74 1592017000 04/11/2004
XWEB SERIES<br />
Installation Guide<br />
9. Select "Connect using a dialup modem" and click "Next".<br />
04/11/2004 1592017000 Pg. 59/74
XWEB SERIES<br />
Installation Guide<br />
10. Type "XWEB 3000 DIRECT MODEM" in the ISP Name box and<br />
click "Next".<br />
Pg. 60/74 1592017000 04/11/2004
XWEB SERIES<br />
Installation Guide<br />
11. Type the access number in the Phone Number box.<br />
E.G: If telephone number is 555789 and area code is 099, put this<br />
Telephone number: 099555789.<br />
If there is a switching machine and you have to dial a digit to get the<br />
line ( 0 or 9 for example, it depends on the switching machine), put<br />
this telephone number: 0, 099555789 or 9, 099555789.<br />
Click "Next".<br />
04/11/2004 1592017000 Pg. 61/74
XWEB SERIES<br />
Installation Guide<br />
12. Type dialup account name dixell in the User Name box. Type<br />
dialup password dixell in the Password and Confirm Password<br />
boxes. We re<strong>com</strong>mend that you check the first 2 checkboxes, but<br />
not the 3rd box which turns on the Internet Connection Firewall.<br />
Click "Next".<br />
Pg. 62/74 1592017000 04/11/2004
XWEB SERIES<br />
Installation Guide<br />
13. Place a checkmark in the box to create a shortcut on your<br />
desktop, and click "Finish".<br />
04/11/2004 1592017000 Pg. 63/74
XWEB SERIES<br />
Installation Guide<br />
14. You are now ready to connect to your XWEB 3000.<br />
If you want to dial your XWEB 3000 DIRECT MODEM connection<br />
automatically when you start Internet Explorer, do the following.<br />
Start Internet Explorer, and select "Internet Options" from the<br />
"Tools" menu. Select the "Connections" tab. Make sure that XWEB<br />
3000 DIRECT MODEM is your default connection (if not, highlight it<br />
and click "Make Default"). Make sure that the "Always dial my<br />
default connection" option is selected.<br />
Pg. 64/74 1592017000 04/11/2004
XWEB SERIES<br />
Installation Guide<br />
04/11/2004 1592017000 Pg. 65/74
XWEB SERIES<br />
Installation Guide<br />
6 Intranet / ethernet connection<br />
The Intranet or Ethernet connection should be initially managed by<br />
the net administrator which will assign one free IP address to reach<br />
the Server. This number is an example of what you should expect:<br />
http://192.168.000.111.<br />
After receiving the address from your network Administrator the<br />
XWEB 3000 must be set with this number.<br />
REMEMBER: A setup wizard will guide you through the procedure.<br />
Please ensure you have an IP address to use in network section.<br />
Use a standard RJ45 network cable to connect the unit to your lan.<br />
The Intranet method allows the connection to interact with XWEB<br />
3000 from all the PC Clients. Insert the net address assigned by the<br />
administrator into the Browser address bar. Bookmark the address<br />
with personalised name for the future connections.<br />
Internet connection<br />
It is necessary a STATIC IP address for the XWEB 3000 which is<br />
normally assigned by the Provider of your internet services (ISP).<br />
The Internet connection allows XWEB 3000 to be reached from all<br />
PC-clients. Insert the net address assigned by the administrator into<br />
the Browser address bar. Bookmark the address with personalised<br />
name for the future connections.<br />
Pg. 66/74 1592017000 04/11/2004
XWEB SERIES<br />
Installation Guide<br />
Ask your provider for more details about the rent of a the static IP.<br />
This the internet system requirements for the best result:<br />
Wide band connection.<br />
At least 1 static IP addresses for the XWEB 3000.<br />
The internet connection is established through a device called<br />
Router that receives and sends the data as interface between an<br />
Intranet and Internet. The Provider also assigns the address of the<br />
router that is called IP WAN.<br />
Remember that the default value of the IP of the XWEB 3000 is:<br />
192.168.0.200.<br />
Depending on the contract the Provider can also supply the router,<br />
otherwise the user can buy it separately.<br />
REMEMBER: ask qualified personnel for the router installation by<br />
using this information.<br />
Used ports that are mapped to the LAN side:<br />
80 (used for the http:// access)<br />
22 (used for SSH connection)<br />
443 (used for SSL protected connection)<br />
10000 (used for the internal modules of the system)<br />
The above ports are all related to the XWEB 3000 IP address<br />
192.168.0.200.<br />
While the ports on the WAN side are:<br />
Telnet (to configure the router from a remote, also via Internet)<br />
http (To access the XWEB 3000)<br />
If working with the router GATEWAY and DNS check your Internet<br />
contract details.<br />
04/11/2004 1592017000 Pg. 67/74
XWEB SERIES<br />
Installation Guide<br />
Pg. 68/74 1592017000 04/11/2004
XWEB SERIES<br />
Installation Guide<br />
04/11/2004 1592017000 Pg. 69/74
XWEB SERIES<br />
Installation Guide<br />
Troubleshooting Guide<br />
Problem<br />
The log-in page doesn’t<br />
load<br />
My password doesn’t allow<br />
me to log-in.<br />
My browser can’t reach<br />
XWEB 3000 log-in page<br />
Someone in the<br />
intranet/LAN receive a<br />
warning message about an<br />
IP conflict.<br />
Solution<br />
Check your browser setup.<br />
Beware to the caps-lock<br />
button an capitol letters. Is it<br />
your password correct<br />
Check cable typology<br />
From windows go to<br />
Start->Run…<br />
ping 192.168.0.200 –t<br />
A continuous set of<br />
information should be<br />
appear.<br />
XWEB 3000 uses the same<br />
address of a resource<br />
already used in your<br />
intranet/LAN. Change<br />
XWEB 3000 IP address.<br />
Pg. 70/74 1592017000 04/11/2004
XWEB SERIES<br />
Installation Guide<br />
Unit Setup Reminder<br />
Please take some moments to make an hardcopy of this page, then<br />
<strong>com</strong>pile it and store it near XWEB 3000 unit.<br />
HostName<br />
IP Address<br />
Gateway<br />
DNS 1<br />
DNS 2<br />
SMTP<br />
E-mail address<br />
Modem type<br />
___________________________<br />
___________________________<br />
___________________________<br />
___________________________<br />
___________________________<br />
___________________________<br />
___________________________<br />
___________________________<br />
Telephone number ___________________________<br />
04/11/2004 1592017000 Pg. 71/74
XWEB SERIES<br />
Installation Guide<br />
Notes<br />
______________________________________________________<br />
______________________________________________________<br />
______________________________________________________<br />
______________________________________________________<br />
______________________________________________________<br />
______________________________________________________<br />
______________________________________________________<br />
______________________________________________________<br />
______________________________________________________<br />
______________________________________________________<br />
______________________________________________________<br />
______________________________________________________<br />
______________________________________________________<br />
______________________________________________________<br />
______________________________________________________<br />
______________________________________________________<br />
______________________________________________________<br />
______________________________________________________<br />
______________________________________________________<br />
______________________________________________________<br />
______________________________________________________<br />
______________________________________________________<br />
______________________________________________________<br />
______________________________________________________<br />
______________________________________________________<br />
______________________________________________________<br />
______________________________________________________<br />
______________________________________________________<br />
______________________________________________________<br />
______________________________________________________<br />
______________________________________________________<br />
______________________________________________________<br />
Pg. 72/74 1592017000 04/11/2004
XWEB SERIES<br />
QUICK REFERENCE <strong>GUIDE</strong>
XWEB SERIES<br />
Installation Guide<br />
<br />
! " #$ " %<br />
& ' ( ) (' * (+ & ' ( ) (' * ' <br />
, (- . / 0 - (1 .223 3 3 0 -<br />
Pg. 74/74 1592017000 04/11/2004


