cwcs cassette fan coil type
cwcs cassette fan coil type
cwcs cassette fan coil type

Create successful ePaper yourself
Turn your PDF publications into a flip-book with our unique Google optimized e-Paper software.
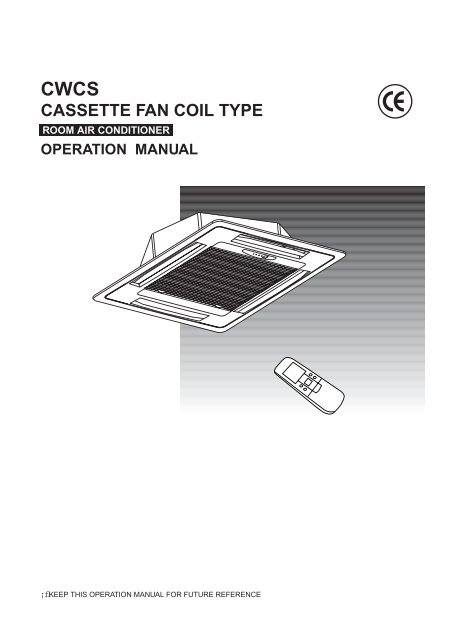
CWCS<br />
CASSETTE FAN COIL TYPE<br />
ROOM AIR CONDITIONER<br />
OPERATION MANUAL<br />
¡flKEEP THIS OPERATION MANUAL FOR FUTURE REFERENCE
CONTENTS<br />
PRECAUTIONS .................................................. 2<br />
NAME AND FUNCTION OF PARTS ......................... 6<br />
PREPARTION..................................................... 10<br />
AUTOMATIC OPERATION..................................... 12<br />
MODE OPERATION(COOL,DRY,FAN,HEAT)............. 14<br />
TIME/TEMP. ADJUSTMENT................................... 17<br />
AIR DIRECTION ADJUSTMENT.............................. 18<br />
TIMER BUTTON SETTING .................................... 19<br />
TIMER OPERATION ............................................. 20<br />
SLEEP OPERATION ............................................. 21<br />
ELECTROSTATIC CLEANER (OPTIONAL) ................ 22<br />
CARE AND MAINTENANCE ................................... 23<br />
TROUBLE SHOOTING .......................................... 25<br />
OPERATION DETAILS .......................................... 27<br />
PRECAUTIONS<br />
¡· Before using the appliance, read these "PRECAUTIONS" thoroughly and operate in the correct way.<br />
¡· The instructions in this section all relate to safety; be sure to maintain safe operating conditions.<br />
¡· "CAUTION" and "WARNING" have the following meanings in these instructions:<br />
WARNING!<br />
CAUTION!<br />
This mark indicates procedures which, if improperly performed, might lead to the death or<br />
serious injury of the user.<br />
This mark indicates procedures which, if improperly performed, might possibly result in<br />
personal harm to the user, or damage to property.<br />
Safety Symbols<br />
¡ The triangular symbol indicates WARNING and CAUTION items.<br />
¡‡This symbol indicates prohibited operations. The prohibited action is indicated both within the symbol, and in<br />
nearby explainations.<br />
¡·This symbol indicates instructions regarding operations which are to be performed by the user.<br />
DANGER<br />
Do not attempt to install this air conditioner by yourself.<br />
¡·Consult authorized service personnel for all installations.<br />
Consult authorized service personnel for any repairs.<br />
¡·Do not attempt to remove parts, or service the unit yourself, since you may be exposed<br />
to dangerous electrical shock. This appliance contains no user-serviceable parts.<br />
When moving, consult authorized service personnel for<br />
disconnection and installation of the unit .<br />
2
PRECAUTIONS<br />
DANGER<br />
Do not stay in direct cooling airflow for long periods.<br />
¡·Excessive direct exposure to chilled air could be bad for your health.<br />
¡·Be especially careful when going to bed, and in rooms where in<strong>fan</strong>ts, aged, or sick<br />
people are staying.<br />
Do not insert fingers or objects into the outlet port or indoor<br />
unit front panel.<br />
¡·A <strong>fan</strong> operates at high speed inside the unit, and personal injury could result.<br />
¡·Be particularly careful regarding small children.<br />
Do not start and stop air conditioner operation by disconnecting<br />
the power cord and so on.<br />
In the event of a malfunction (burning smell, etc.), immediately<br />
stop operation, disconnect the power plug, and consult authorized<br />
service personnel.<br />
¡·Continuing to operate the unit under such conditions could lead to hazard of<br />
fire or electrical shock.<br />
3
PRECAUTIONS<br />
CAUTION<br />
Provid occasional ventilation during use.<br />
¡·Be careful to provide adequate ventilation particularly<br />
when using the unit in combination with other heating<br />
apparatus.<br />
Do not direct air flow at fireplaces or heating<br />
apparatuses.<br />
¡·Direct air blowing on fires could result in improper<br />
combustion or fire.<br />
¡·Insufficient ventilation could lead to oxygen starvation.<br />
Do not climb on, or place objects on, the air<br />
conditioner.<br />
¡·Personal injury could result from a falling object, or if the<br />
unit tips over.<br />
¡·Do not hang on or cover the air conditioner.<br />
Do not expose the air conditioner directly to water.<br />
¡·Electrical insulation could be damaged, resulting in<br />
electrical shock.<br />
Do not set flower vases or water containers on<br />
top of air conditioners.<br />
¡·Water leaking inside the unit could damage electrical<br />
insulation, leading to danger of electrical shock.<br />
Do not operate the air conditioner with wet hands.<br />
¡·Electrical shock could result.<br />
Do not pull power cord.<br />
¡·Pulling on the cord to disconnect the plug could damage<br />
the wires inside the cord, resulting in heat or fire.<br />
Always turn off power and disconnect the power<br />
plug whenever cleaning the air conditioner or<br />
changing the air filter.<br />
¡·A <strong>fan</strong> operates at high speed inside the unit, and personal<br />
injury could result.<br />
Turn off power source when not using the<br />
unit for extended periods.<br />
Check the condition of the installation for damage.<br />
¡·After lengthy use, arrange for visit by authorized service<br />
personnel to check installation condition.<br />
Take precautions to prevent in<strong>fan</strong>ts<br />
from accidentally swallowing batteries.<br />
¡·A battery can be very harmful if swallowed. If an in<strong>fan</strong>t<br />
accidentally swallows a battery, make the in<strong>fan</strong>t eject it,<br />
and consult your physician.<br />
4
CAUTION<br />
Do not drink the water drained from the air<br />
conditioner.<br />
Do not use in applications involving the storage<br />
of foods, plants or animals, precision equipment,<br />
or art works.<br />
¡·The quality of the stored items may deteriorate.<br />
Take out the batteries from the remote control unit<br />
when not using for a long time.<br />
¡·Take out the batteries to prevent troubles caused by battery<br />
liquid leakage.<br />
¡·If leaking battery fluid comes in contact with your skin, eyes,<br />
or mouth, immediately wash with copious amounts of water,<br />
and consult your physician.<br />
Always operate with the air filter installed.<br />
¡·Operating the unit without the air filter could cause<br />
excessive dirt to collect on internal parts, leading to<br />
malfunction.<br />
Do not touch the heat exchanger radiator fins.<br />
¡·Personal injury could result.<br />
¡·Be particularly careful when cleaning.<br />
¡·Bending or damage to the fins will affect the efficiency<br />
of the unit.<br />
Do not block or cover the front panel and outlet<br />
port.<br />
¡·Obstructing the ports will reduce operating efficiency,<br />
leading to improper operation and possible damage.<br />
Install the indoor unit and remote control unit at<br />
least one meter from any television sets or radio.<br />
¡·Signal radiation could be induced into the system to give<br />
erroneous operation.<br />
Do not inflammable gases near the air conditioner.<br />
When installing the indoor unit and outdoor unit ,<br />
take precautions to prevent access by in<strong>fan</strong>ts.<br />
¡·Unexpected accidents could occur.<br />
For heat pump mode, the temperature of connectors<br />
are high. Be careful when operate the system.<br />
¡·Someone may be burned when touch carelessly the<br />
connectors.<br />
Avoid to install the air conditioners near the<br />
fireplace and heating devices.<br />
¡·The shell of air conditioner may be warped when it is<br />
explored at too high temperatwe surroundings.<br />
5
NAME AND FUNCTION OF PARTS<br />
Indoor Unit<br />
1<br />
3<br />
2<br />
4<br />
1 Air Filter<br />
Remove all dirt and dust from the air.<br />
2 Air flow-direction Louvers<br />
Control airflow direction.<br />
3 Indicator Lamps<br />
Show the current operating status.<br />
4 Front Panel<br />
Air enters from here.<br />
6
Indicator Lamps<br />
1 2 3 4<br />
5<br />
1 SLEEP<br />
ELECTROSTATIC CLEANER (OPTIONAL) (RED)<br />
¡·Lights when sleep function is operating.<br />
¡·After 200hrs using, flashes to advise filter cleaning.<br />
2 OPERATION INDICATOR (GREEN)<br />
¡·Lights when unit is operating.<br />
¡·Flashes when unit turn on lasts for 20 seconds or 2-way/3-way<br />
stops.<br />
3 TIMER INDICATOR (YELLOW)<br />
¡·Lights during TIMER operation.<br />
¡·Flashes when unit is broken down.<br />
4 EMERGENCY BUTTON<br />
When the remoter is broken or lost, you can use the emergency<br />
button to start the A/C.<br />
5 SIGNAL RECEIVER<br />
It receives the signal transmitted from the remoter.<br />
7
NAME AND FUNCTION OF PARTS<br />
Remote Controller<br />
1 POWER ON/OFF button<br />
Press to start and stop operation.<br />
2 SLEEP button<br />
Press to use sleep function mode.<br />
3 TIMER ADJUST button (1HR-9HR)<br />
Use to quickly set the desired operating time (1hr-9hr).<br />
4 TEMP/TIME button (¡ˇ)<br />
Press to set the unit's thermostat and clock. (increase)<br />
5 TEMP/TIME button (-)<br />
Press to set the unit's thermostat and clock. (decrease)<br />
6 MODE CONTROL button<br />
Press to set the various operating models (AUTO ,<br />
COOL , DRY , FAN , HEAT )<br />
7 AIRFLOW DIRECTION button<br />
Use to adjust the airflow.<br />
8 ELECTROSTATIC CLEANER button (OPTIONAL)<br />
Press to purify the room air.<br />
9 FAN CONTROL button<br />
Press to select the <strong>fan</strong> speed (AUTO, LOW, MEDIUM,<br />
HIGH)<br />
AIRFLOW DIRECTION AUTO<br />
Press to set the airflow direction AUTO.<br />
OFF TIMER button<br />
Set to the desired time that you wish operation to stop.<br />
ON TIMER button<br />
Set to the desired time that you wish operation to start.<br />
TIMER CANCEL button<br />
Use to cancel the timer set condition.<br />
TIMER CONFIRM button<br />
Use to confirm the timer set condition.<br />
CLOCK SET button<br />
Use to adjust the current time.<br />
ACL button<br />
Use to reset all the user set and return to original set<br />
condition.<br />
SIGNAL TRANSMITTER<br />
Control signals are sent to the air conditioner from here.<br />
8
NAME AND FUNCTION OF PARTS<br />
Remote Controller Display<br />
1<br />
3<br />
7<br />
4<br />
6<br />
5<br />
8<br />
2<br />
1 Transmit Indicator<br />
This indicator is displayed when a signal is sent to the air<br />
conditioner.<br />
2 Clock Display<br />
Indicate either the current time or the timer setting<br />
( AM, PM, from 1:00 to 12:59 ) .<br />
¡·When use "ON TIME" function, on the LCD right side will<br />
disply the time desidered to start operation.<br />
(AM. PM from 1:00 to 12:59)<br />
¡·When use "OFF TIME" function, on the LCD left side will<br />
disply the time desidered to stop operation.<br />
(AM. PM from 1:00 to 12:59)<br />
3 Operation Mode Display<br />
Display the operation mode ( AUTO,COOL,DRY,FAN,HEAT ).<br />
4 Timer Adjust Display<br />
Display the desired time to operate.<br />
5 Set Temperature Display<br />
Display the thermostat setting.<br />
6 Fan Speed Display<br />
Display the current <strong>fan</strong> speed.<br />
7 Sleep and Air Clean<br />
8 Timer Mode Display<br />
Display the modes of current time, OFF TIMER,<br />
ON TIMER.<br />
¡·Signals will not be transmitted properly if a wall,curtain,<br />
or other object is between the air conditioner and the<br />
remote control unit.<br />
¡·The air conditioner may fail to operate properly if strong<br />
direct light is allowed to strike the signal receiver. Use a<br />
curtain to shade strong sunlight from windows, and place<br />
strong lamps at a distance away from the signal receiver.<br />
¡·If another electric appliance is operated by the remote<br />
control unit move the appliance away or consult with<br />
authorized service personnel.<br />
¡·Do not place the remote control unit in locations where it<br />
may be subjected to heat from direct sunlight or from<br />
heating apparatus.<br />
¡·Do not subject the remote control unit to strong impacts,<br />
and do not allow water or other liquids to splash on it.<br />
¡·When the remote control unit is used in rooms furnished<br />
with instant-lighting <strong>type</strong> fluorescent lamps,the air<br />
conditioner may fail to receive control signals correctly.<br />
Consult with authorized service personnel when<br />
purchasing a new fluorescent lamp.<br />
9
PREPARATION<br />
Turn on the Power<br />
1 Connect the power plug to an electrical point.<br />
Prepare the Remote Control Unit<br />
Load batteries in the remote control unit and set the clock<br />
to the current time.<br />
Load Batteries (R03/ LR03¡ 2)<br />
1Press and slide the battery compartment lid<br />
on the bottom to open it.<br />
Slide in the direction<br />
of the arrow while<br />
pressing the ¥W place.<br />
2 Insert batteries.<br />
Be sure to align the battery<br />
polarities¡]¡ /¡‡¡^correctly.<br />
3 Close the battery compartment lid.<br />
CAUTION!<br />
¡·Take precautions to prevent in<strong>fan</strong>ts from accidentally<br />
swallowing batteries.<br />
¡·When not using the remote control unit for an extended<br />
period, remove the batteries to avoid possible<br />
leakage and damage to the unit.<br />
¡ If leaking battery fluid comes in contact with your<br />
skin, eyes, or mouth, immediately wash with copious<br />
amounts of water, and consult your physician.<br />
¡·Dead batteries should be removed quickly and<br />
disposed of properly, either by placing in a public<br />
battery collection receptacle, or by returning to a<br />
properly equipped dealer.<br />
¡·Do not attempt to recharge dry batteries.<br />
10<br />
NOTE:<br />
¡·Never mix new and used batteries, or batteries of<br />
different <strong>type</strong>s.<br />
¡·Batteries should last about one year under normal<br />
use. If the remote control unit's operating range<br />
becomes appreciably reduced, replace the batteries<br />
and press the ACL button with the tip of a ballpoint<br />
pen or other small object.
PREPARATION<br />
Set the Current Time<br />
1 Press the TIME ADJUST button.<br />
(Remote Control Unit<br />
Display)<br />
To Use the Remote Control Unit<br />
¡·The remote control unit must be pointed at signal receiver<br />
to operate correctly.<br />
¡·When a signal is properly received by the air conditioner,<br />
a beeping sound will be heard.<br />
¡·If no beep is heard, press the remote control unit button<br />
again.<br />
Signal Receiver<br />
TIME ADJUST<br />
button<br />
Use the tip of a ball-point<br />
pen or other small object<br />
to press the button.<br />
The AM, PM will flash.<br />
2 Use the / TIME SET buttons to adjust the<br />
clock to the current time.<br />
button: Press to advance the time.<br />
button: Press to reverse the time.<br />
(Each time the buttons are pressed, the time will be<br />
advance/reversed in one-minute increments; hold the<br />
buttons depressed to change the time quickly in oneminute<br />
increments every 0.1 second ).<br />
Example:<br />
When the clock is set<br />
to 11:30 AM.<br />
Operating Range:<br />
Within about 7<br />
meters<br />
Remote Control Unit Holder<br />
¡·This holder can be mounted on a wall or in a convenient<br />
position to allow operation.<br />
¡·If the holder is installed in a location allowing signals to be<br />
received by the air conditioner, the remote control unit can<br />
be used without removing it from the holder.<br />
1 2 3<br />
Insert<br />
Slide up<br />
Screws<br />
3 Press the TIME ADJUST button again.<br />
This completes the time setting and starts the clock.<br />
Press in<br />
Pull out<br />
1 Mount the Holder.<br />
2 Set the remote control unit .<br />
3 To remove the remote control unit (for hand use).<br />
TIME ADJUST<br />
button<br />
The AM,PM, display<br />
stops flashing and<br />
lights steadily.<br />
11
AUTOMATIC OPERATION<br />
To Select AUTOMATIC Operation<br />
1 Press the POWER ON/OFF button.<br />
The air conditioner will start operation.<br />
2 Press the MODE CONTROL button to select AUTO.<br />
The operating mode "AUTO " will appear alone in the display. The<br />
transmit indicator will flash to indicate the command has been sent,<br />
and the signal transmits after releasing button. While set to AUTO<br />
mode, controller choices the operating mode depending on room<br />
temperature. These status is set as shown.<br />
¡·Cooling<br />
Cooling 25¢J above<br />
Dry 23¢J¡ª 25¢J<br />
Fan 23¢J below<br />
25¢J<br />
23¢J<br />
Cooling<br />
Dry<br />
Fan<br />
¡·Heating<br />
Cooling 25¢J above<br />
Dry 23¢J¡ª 25¢J<br />
Heating 23¢J below<br />
25¢J<br />
23¢J<br />
Cooling<br />
Dry<br />
Heating<br />
About Automatic Operation<br />
¡·Depending on the room temperature at the time<br />
operation begins, the operating mode will be switched<br />
automatically as shown. Also, depending on the operating<br />
mode, the room temperature setting will cause the<br />
"normal " temperature to be set as shown.<br />
¡·Auto function is valid when POWER ON or when change<br />
to AUTO mode from another status at first time, unit can<br />
operate cooling, dry, <strong>fan</strong>, heating mode. The mode will<br />
change no more, even if the room temperature changed.<br />
1.When AUTO mode, temperature can be set increasing or<br />
decreasing 2¢J, AUTO mode will re-judge one time.<br />
2.When unit under AUTO mode operating, thermostat will rejudge<br />
room temperature every one hour and execute the<br />
appraisal mode.<br />
¡·In dry mode, <strong>fan</strong> operates as setting till room temperature is<br />
lower than setting temperature, unit then changes to drying<br />
mode, <strong>fan</strong> will operate at slow speed.<br />
¡·In the dry mode, the <strong>fan</strong> will operate slowly to prevent room<br />
humidity from rising, and the room <strong>fan</strong> may stop.<br />
12
AUTOMATIC OPERATION<br />
To Change the Fan Speed<br />
Display 0.5 second<br />
Flash one time/ second<br />
¡J<br />
Press the SPEED button.<br />
Each time the button is pressed, the <strong>fan</strong> speed changes<br />
in sequence:<br />
AUTO LOW MED HIGH<br />
About 0.5 second later, the entire dislay will reappear.<br />
AUTO<br />
When the SPEED is set to AUTO:<br />
The <strong>fan</strong> speed switches in accordance with the difference of room<br />
temperature and setting temperature.<br />
As the difference between the thermostat setting and actual room<br />
temperature is reduced, the <strong>fan</strong> speed becomes slower.<br />
To Stop Operation<br />
Press the POWER ON/OFF button.<br />
13
MODE OPERATION (COOL ,DRY , FAN , HEAT )<br />
To Select Mode Operation<br />
1 Press the POWER ON/OFF button.<br />
The air conditioner will start operation.<br />
2 Press the MODE CONTROL button to select<br />
the desired mode.<br />
Each time the button is pressed, the mode will change in the<br />
sequence.<br />
¡·Cooling<br />
FAN<br />
AUTO<br />
COOL<br />
DRY<br />
¡·Heating<br />
HEAT<br />
AUTO<br />
FAN<br />
COOL<br />
DRY<br />
About Mode Operation<br />
COOL<br />
¡·Use to cool your room.<br />
DRY<br />
¡·Use for gently cooling while dehumidifying your room.<br />
¡·You cannot heat the room during DRY mode.<br />
¡·The <strong>fan</strong> speed cannot be changed manually when DRY<br />
mode has been selected.<br />
During COOL / DRY mode:<br />
¡·Set the thermostat to a temperature setting that is lower<br />
than thecurrent room temperature. The COOL and DRY<br />
modes will not operate if the thermostat is set higher than<br />
the actual room temperature (in COOL mode, the <strong>fan</strong> will<br />
operate alone).<br />
FAN<br />
¡·When using a space heater to heat the room, using the air<br />
conditioner's FAN setting will help prevent warm air from<br />
collectiong near the ceiling, and thus assist in distributing warm<br />
air evenly throughout the room.<br />
¡·During FAN mode:<br />
You cannot use the unit to cool your room.<br />
HEAT<br />
¡·Use to warm your room.<br />
¡·Set th thermostat to a temperature seeting that is higher than the<br />
current room temperature.<br />
The heat mode will not be operated when the thermostat is set<br />
lower than the current room temperature.<br />
COOL MODE<br />
1 When the <strong>fan</strong> speed set to "AUTO ", COOL mode<br />
operation is as below:<br />
14<br />
Temperature<br />
decreasing<br />
Setting temp<br />
¡ˇ4¢J<br />
Setting temp<br />
¡ˇ2¢J<br />
Setting temp<br />
¡—1¢J<br />
¡ T2<br />
¡ T1<br />
Strong<br />
Cooling<br />
Middle<br />
Cooling<br />
Weak<br />
Cooling<br />
Fan<br />
Strong<br />
Cooling<br />
¡ K<br />
Middle<br />
Cooling<br />
¡ J<br />
Weak<br />
Cooling<br />
¡ I<br />
Fan<br />
¡ Tb<br />
¡ Ta<br />
Setting temp<br />
¡ˇ5¢J<br />
Setting temp<br />
¡ˇ3¢J<br />
Setting temp<br />
¡ˇ1¢J<br />
Temperature<br />
increasing<br />
Temperature difference :<br />
¡ T1=¡ Ta=3.0¡ 0.5¢J<br />
¡ T2=¡ Tb=2.0¡ 0.5¢J<br />
Temperature arrear :<br />
¡ I=¡ J=¡ K=1.0¡ 0.5¢J<br />
2 When the <strong>fan</strong> speed controlled by manual, mode<br />
operation is as below:<br />
Temperature<br />
decreasing<br />
Setting temp<br />
¡—1¢J<br />
ON<br />
OFF<br />
2-way/3-way<br />
¡ I<br />
ON<br />
OFF<br />
Setting temp<br />
¡ˇ1¢J<br />
Setting<br />
temp<br />
Temperature<br />
increasing<br />
Temperature<br />
arrear :<br />
¡ I=2.0¡ 0.5¢J
MODE OPERATION (COOL ,DRY , FAN , HEAT )<br />
DRY MODE<br />
The operating mode is as following:<br />
Air conditioner operates with COOL mode when the room<br />
temperature is not reach setting temperature, <strong>fan</strong> speed as<br />
setting.<br />
Air conditioner operates with DRY mode until the room<br />
temperature goes down below setting temperature.<br />
In this time, <strong>fan</strong> speed changes into slow level.<br />
1 The DRY operation is the ON/OFF action of 2-way/3-way.<br />
It is used for dehumidify during the 2-way/3-way "ON",<br />
and recover time to room temperature during the<br />
2-way/3-way "OFF".<br />
2 Operation is shown as below:<br />
10 Min 6 Min<br />
ON OFF<br />
10 Min<br />
ON<br />
FAN MODE<br />
When use FAN SPEED function, it can select STRONG,<br />
MIDDLE and WEAK and AUTO levels.<br />
When SELECT AUTO level, the operation is as following:<br />
Temperature<br />
decreasing<br />
Strong<br />
Strong<br />
Setting temp¡ˇ5¢J<br />
Setting temp¡ˇ4¢J<br />
¡ J ¡ Ta<br />
¡ T1 Middle<br />
Middle<br />
Setting temp¡ˇ3¢J<br />
Setting temp¡ˇ2¢J<br />
¡ I<br />
Weak<br />
Weak<br />
Setting temp<br />
Temperature<br />
increasing<br />
Temperature difference: ¡ T1=¡ Ta=2.0¡ 0.5¢J<br />
Temperature arrear : ¡ I=¡ J=1.0¡ 0.5¢J<br />
To Set the Fan Speed<br />
Press the SPEED button.<br />
Control signals are sent to the unit 0.5 seconds later.<br />
1 The button is effective only in the condition of POWER ON.<br />
2 Each time the button is pressed, the <strong>fan</strong> speed changes in the<br />
following sequence.<br />
AUTO WEAK MIDDLE STRONG<br />
About 0.5 seconds later, the entire display will reappear.<br />
15
MODE OPERATION (COOL ,DRY , FAN , HEAT )<br />
HEAT MODE<br />
1.2-way /3-way operates when POWER ON, <strong>fan</strong> won't<br />
operate till thermostat temperature ¡ 35¢J( to prevent cool<br />
air blowing out, uncomfortness caused ). Showed as the<br />
figure.<br />
2.When POWER OFF, <strong>fan</strong> won't stop operating till thermostat<br />
temperature ¡ 34¢J. Showed as the figure.<br />
3.In heat, <strong>fan</strong> speed will change automatically , depends to<br />
thermostat temperature changed due to outside<br />
temperature or unit situation changed.<br />
35¢J 43¢J<br />
Fan off Low Fan speed setting<br />
34¢J 37¢J<br />
1 When the <strong>fan</strong> speed set to "AUTO" HEAT mode<br />
operation is as below:<br />
2 When the <strong>fan</strong> speed controlled by manual, mode<br />
operation is as below:<br />
Temperature<br />
decreasing<br />
Setting temp<br />
-1¢J<br />
Setting temp<br />
-3¢J<br />
Setting temp<br />
¡—5¢J<br />
¡ T2<br />
Pause<br />
Weak<br />
warm<br />
¡ T1 Middle<br />
warm<br />
Strong<br />
warm<br />
Pause<br />
¡ M<br />
Weak<br />
warm<br />
¡ L<br />
Middle<br />
warm<br />
¡ I<br />
Strong<br />
warm<br />
Setting temp<br />
¡ˇ1¢J<br />
¡ Tb<br />
Setting temp<br />
-2¢J<br />
¡ Ta<br />
Setting temp<br />
-4¢J<br />
Temperature<br />
increasing<br />
Temperature<br />
decreasing<br />
Setting temp<br />
¡—1¢J<br />
2-way/3-way<br />
OFF<br />
OFF<br />
¡ I<br />
ON<br />
ON<br />
Setting temp<br />
¡ˇ1¢J<br />
Setting<br />
temp<br />
Temperature<br />
increasing<br />
Temperature<br />
arrear :<br />
¡ I=2.0¡ 0.5¢J<br />
Temperature difference :<br />
¡ T1=¡ Ta=3.0¡ 0.5¢J<br />
¡ T2=¡ Tb=2.0¡ 0.5¢J<br />
Temperature arrear :<br />
¡ I=¡ L=¡ M=1.0¡ 0.5¢J<br />
To Stop Operation<br />
Press the POWER ON / OFF button.<br />
16
TEMP. / TIME ADJUSTMENT<br />
TEMP. / TIME ADJUSTMENT<br />
TEMP. / TIME buttons<br />
button : Press to increase the setting.<br />
button : Press to decrease the setting.<br />
TEMP./ TIME increase button, control signals are sent to the unit 0.5<br />
seconds later.<br />
1 Temperature adjustment:<br />
a. Except for time adjustment and quick timer setting, the button is<br />
used "temp. setting increase button ". Each time the button is<br />
pressed, temperature would increase in 1¢J. Keep pressing the<br />
button, the value would increase 1¢Jfor every 0.3 second after the<br />
first second.<br />
b.The number display sequence is as below:<br />
16¡ 17¡ 18¡ ...... ¡ 30<br />
c.When mode choices AUTO, setting can only set<br />
Normal temp. ¡—2¢J¡ Normal temp.¡ Normal temp. +2¢J<br />
2 Time adjustment:<br />
a.When use the ON TIMER, OFF TIMER, current time adjustment<br />
function , the button is used "time increase button".<br />
b.In the current time adjustment , each time the button is pressed,<br />
the time increases 1 minute. After accumulates to 59 minutes,<br />
minute returns to " 0 ", hour adds "1" .The other increase is similar.<br />
c.In the ON TIMER, OFF TIMER function, each time the button is<br />
pressed, the time increases 10 minutes. After accumulates to 50<br />
minutes, minute returns to " 0 ", hour adds "1". The other increase<br />
is similar. Keep pressing this button for more than 1 second, every<br />
0.1 second increases "1" . Switch cycle is as below:<br />
AM<br />
12:00<br />
AM<br />
12:01<br />
AM<br />
12:59<br />
AM<br />
1:00<br />
PM<br />
12:00<br />
PM<br />
1:00<br />
PM<br />
11:59<br />
TEMP./TIME decrease button,control signals are sent to the unit 0.5<br />
seconds later.<br />
1 Temperature adjustment<br />
a.Except for time adjustment and quick timer setting, the button is<br />
used "temp. setting decrease button ". Each time the button is<br />
pressed, temperature would decrease in 1¢J. Keep pressing the<br />
button, the value would decrease 1¢Jfor every 0.3 second after the<br />
first second.<br />
b.The number display sequence is as below:<br />
30¡ ...... ¡ 18¡ 17¡ 16<br />
c.When mode choices AUTO, setting can only set<br />
Normal temp. +2¢J¡ Normal temp.¡ Normal temp. ¡—2¢J<br />
2 Time adjustment<br />
a.When use the ON TIMER, OFF TIMER, current time adjustment<br />
functions, the button is used " time decrease button ".<br />
b.In the current time adjustment , each time the button is pressed,<br />
the time decreases 1 minute. After go down to " 00 " minutes, minute<br />
changes to "59", hour decreases 1 . The other decrease is similar.<br />
c.In the ON TIMER, OFF TIMER function, each time the button is<br />
pressed, the time decreases 10 minute. After decreases to "00",<br />
minute changes to "59' , hour decreases "1". The other decrease is<br />
similar. Keep pressing this button for more than 1 second, every 0.1<br />
second decreases 1. Switch cycle is as below:<br />
AM<br />
12:00<br />
PM<br />
11:59<br />
PM<br />
11:00<br />
PM<br />
12:00<br />
AM<br />
11:59<br />
AM<br />
11:00<br />
AM<br />
12:01<br />
17
AIR DIRECTION ADJUSTMENT<br />
¡·Use the remote control unit's AIR FLOW DIRECTION button to adjust the up-down direction of airflow.<br />
¡·Begin unit operation and confirm that the airflow-direction louvers are stopped before setting the airflow-direction.<br />
WARNING!<br />
¡·Do not put fingers or other objects into the air louvers; an internal <strong>fan</strong> operates at high speed and<br />
could result in personal injury or damage.<br />
¡·Do not operate the air conditioner with the airflow louvers blocked, since malfunction could result.<br />
Automatic Airflow-Direction Adjustment<br />
Louver Swing Degree Adjustment<br />
1 The signal immediately transmits after pressing "AUTO "<br />
button.<br />
Non auto swing¡ Auto swing<br />
a.The button is effective only in the condition of<br />
POWER ON .<br />
b.When in auto swing condition already, pressing this<br />
button is no use.<br />
2 The signal immediately transmits after pressing "DIREC. "<br />
button.<br />
a.The button is effective only in the condition of POWER ON .<br />
b.Operating order is as below:<br />
Auto swing ¡ Manual swing direction<br />
c.Already be manual swing direction - press this button is no<br />
effective.<br />
NOTE:<br />
¡·Always use the remote control unit's airflow-direction button<br />
to change the position of the up-down airflow-direction<br />
louvers. Do not attempt to set louvers by hand, since it may<br />
result in improper operation. In this case, stop the air<br />
conditioner temporarily and then restart to return the louvers<br />
to proper operation.<br />
¡·Never operate the air conditioner when the up-down airflowdirection<br />
louvers are closed.<br />
¡·In the cooling and drying modes, dew may condense around<br />
and drop from the air outlet ports when the louvers are set to<br />
the other cooling range. As a result, we recommend that this<br />
position be used only for brief periods.<br />
¡·After pressing the remote control unit's airflow-direction button<br />
,a certain time interval may be required unit the louvers are<br />
set to the desired position. During the interval, the airflowdirection<br />
button will not respond, even if pressed.<br />
Do not operate when closed!<br />
18
TIMER BUTTON SETTING<br />
Timer Button Setting<br />
1 When press"TIMER°"button , LCD will display"one Hr. off", setting<br />
will increase by one hour by more one pressing TIMER button, at<br />
max till 9 hours.<br />
2 "TIMER" Setting , LCD will decrease by one hour when one hour<br />
pass (For example, when 8 hours is set on TIMER, after one hour<br />
later , LCD will show 7,and keep decreasing every one hour, till 0,<br />
units will stop automatically.)<br />
3 When this TIMER button setting function is repeated at the TIMER<br />
OPERATION function showed page 20, function is effective that<br />
meets setting time first.<br />
19
TIMER OPERATION<br />
Before using the timer function, be sure that the<br />
remote controller is set to the correct current<br />
time.<br />
ON TIMER (Begins air conditioner operation at the set time)<br />
1 When the " ON TIMER " buttton is pressed, "ON TIMER" will be<br />
displayed and flashed, it means entering the "ON TIMER" setting.<br />
Meanwhile, can use " "buttons to adjust the desired time.<br />
2 When the adjustment is finished, press "ENT."button once. Then<br />
"ON TIMER" signal keep lighted and setting is confirmed.<br />
3 If you don't press any button over 30 seconds, the setting procedure<br />
will be stopped and return to current time .<br />
OFF TIMER (Stops the air conditioner operation at the set time)<br />
1 When the " OFF TIMER " buttton is pressed, "OFF TIMER" will be<br />
displayed and flashed, it means entering the "OFF TIMER" setting.<br />
Meanwhile, can use " "buttons to adjust the desired time.<br />
2 When the adjustment is finished, press "ENT."button once.<br />
Then "OFF TIMER" signal keep lighted and setting is confirmed.<br />
3 If you don't press any button over 30 seconds, the setting procedure<br />
will be stopped and return to current time.<br />
To Cancel the Timer<br />
1 Press " ON TIMER " or "OFF TIMER" . The display of " ON TIMER "<br />
or "OFF TIMER" will be flashed.<br />
2 Press " DEL. " button . The signal " ON TIMER " and "OFF TIMER"<br />
will disappear, and display the current time. That means the cancel<br />
step is finished.<br />
To Stop Air Conditioner Operation while the Timer is Operating<br />
Press the POWER ON/OFF button.<br />
To Change Operating Conditions<br />
If you wish to change operating conditions (Mode, Fan Speed, Thermostat<br />
Setting, Air flow direction), after making the timer setting wait until the<br />
entire display reappears, then press the appropriate buttons to change the<br />
operating condition desired.<br />
Changing Daily Timer Operation and<br />
Setting Timer Button Function<br />
1. When ON TINER is set, this function will begin to operate at the<br />
presetting time every day.<br />
2. Set ON TIMER them off.<br />
3. Set OFF TIMER then on.<br />
4. When power failure, ON TIMER function will be no effective, it needs to<br />
reset when request.<br />
20
SLEEP OPERATION<br />
To Use the SLEEP Function<br />
While the air conditioner is operating or stopped, press the SLEEP<br />
button.The indoor unit's red lamp lights.<br />
1 The function is effective only at POWER ON status.<br />
2 Sleep operation is not valid on FAN mode.<br />
3 Switch sequence is as below:<br />
execute sleep<br />
function<br />
cancel sleep<br />
function<br />
To Change the Timer Settings<br />
1 Press the TIMER button to adjust quickly operating time.<br />
2 Press the ON TIMER and OFF TIMER functions to adjust the set time<br />
of start and stop air conditioner.<br />
TIMER button (Hours Adjustment)<br />
1 The function is effective only at POWER ON status.<br />
2 When press the TIMER button, LCD displays "1 Hr. OFF".<br />
Setting will increase by 1 hour by pressing TIMER button.<br />
3 Setting cycle in hours is as below :<br />
1 2 3 8 9 Switch off<br />
4 When the set time is adjusted to "SWITCH OFF" status, it means the<br />
TIMER setting is canceled.<br />
To Cancel the Timer:<br />
See ¡uTIMER OPERATION ¡v<br />
To Stop the Air Conditioner During Timer Operation:<br />
Press the POWER ON / OFF button.<br />
21
SLEEP OPERATION<br />
About the SLEEP FUNCTION<br />
To prevent excessive cooling during sleep, the SLEEP function automatically modifies the thermostat setting in accordance with the<br />
time setting. When the set time has elapsed, the air conditioner completely stops.<br />
¡· During Cooling / Drying operation:<br />
When the SLEEP is set, the thermostat setting is automatically<br />
raised 1¢J every sixty minutes. When the thermostat has been<br />
raised a total of 2¢J, the thermostat setting at that time is<br />
maintained until the set time has elapsed, at which time the air<br />
conditioner automatically turns off.<br />
¡· During Heating operation:<br />
When the SLEEP is set, the thermostat setting is automatically<br />
decreased 1¢Jevery one hour.<br />
The thermostat setting can decrease total 2¢J.<br />
¡· Operation Model:<br />
1.While in the cooling model, whenever the SLEEP function is<br />
started, the thermostat setting is automatically raised 1¢J.<br />
Setting is raised 1¢J again after sixty minutes. The total raise<br />
is 2¢J¡C<br />
2.SLEEP function is not valid on FAN mode.<br />
Set time<br />
Cooling: 1 hour<br />
SLEEP ON<br />
1¢J<br />
SLEEP time setting<br />
SLEEP time setting<br />
SLEEP ON<br />
1¢J<br />
Heating: 1 hour<br />
Set time<br />
2¢J<br />
2¢J<br />
TO CLEAN AIR FILTER ELECTROSTATIC CLEANER(OPTIONAL)<br />
To Clean Air Filter<br />
Electrostatic Cleaner<br />
1 When indoor <strong>fan</strong> operates over accumulated 200 hours,<br />
SLEEP LCD will flash, it is time to clean air filter. After<br />
cleaning, please press UNMANUAL AUTO button, it will<br />
calculate <strong>fan</strong> operation hours from start again.<br />
1 After press the "AIR CLEAN" button , the air clean function<br />
is started.<br />
Remote controller displays "CLEAN ".<br />
2 SLEEP LCD will flash continuously if you don't press<br />
UNMANUAL AUTO button.<br />
execute air clean<br />
function<br />
cancel air clean<br />
function<br />
3 When clean air filter, less cooling efficiency and power<br />
expend will happened before put air filter back.<br />
2 The function is valid only in POWER ON status.<br />
22
CARE AND MAINTENANCE<br />
CAUTION!<br />
Before cleaning the unit, be sure to stop the unit and disconnect the power supply.<br />
1. Disconnect the power plug. 2. Turn off the electrical breaker.<br />
¡· A <strong>fan</strong> operates at high speed inside the unit, and personal injury could result.<br />
When cleaning the air conditioner, disconnect the power plug<br />
or turn off the electrical breaker.<br />
Cleaning the Indoor Unit<br />
Clean the indoor unit by wiping with a cloth dipped in cool or<br />
warm water, then wipe with another soft, clean, dry cloth.<br />
Never use water that is hotter than 40¢J. The body may warp<br />
or change colour.<br />
More than 40¢J<br />
The unit can be damaged by gasoline, benzine, thinners,<br />
insecticides and other chemical agents.<br />
Thinner<br />
Gasoline<br />
Benzine<br />
Cleansing rag<br />
Do not use inflammable sprays such as lacquer or hair spray<br />
near the air conditioner.<br />
When Not Using the Unit for Extended<br />
Periods ( One Month or More )<br />
Operate the unit on <strong>fan</strong> mode for about one-half day on a day<br />
with clear weather, to assure that the internal parts are dried.<br />
CAUTION!<br />
When not using the unit for extended periods, disconnect<br />
the power plug for safety.<br />
¡· When a plug is left connected, dust may collect on the<br />
blades, leading to smoke and fire hazard.<br />
Hair spray<br />
Lacquer<br />
Check the Power Cord<br />
Check the power cord occasionally to confirm that it is not<br />
damaged by cuts or abrasions. If you discover damage to the<br />
cord, consult authorized service personnel.<br />
Inspections and Repairs<br />
Depending on the conditions of use, the internal parts of an air conditioner will be come dirty after about two or three seasons<br />
of use, and performance may be affected. For this reason, regular professional maintenance is recommended.<br />
Consult authorized service personnel.<br />
23
CARE AND MAINTENANCE<br />
Cleaning the front panel<br />
2. Hook the hooks to the front panel hooks shaft.<br />
3. Push the front panel PULL buttons (two places) until you<br />
hear a "click".<br />
Front panel hooks<br />
Removing the front panel<br />
1. Pull the front panel PULL buttons (two places) downward and<br />
open it.<br />
Cleaning the Air Filter<br />
2. Remove the front panel by opening it 100¢Xto 120¢X, take the<br />
two axles out, then the front panel can be taken away.<br />
If dirt is allowed to collect in the air fiter, the airflow will be<br />
reduced, leading to reduced performance, and increased<br />
operation noise. Be sure to clean the filters at the beginning<br />
of the operating season, and about every two weeks during<br />
periods of frequent operation.<br />
100¢X~120¢X<br />
Take the filter out in<br />
the direction of the<br />
arrow.<br />
Removing and installing the Air Filter<br />
1. Move the front panel 100¢Xto 120¢X.<br />
2. Take the filter out.<br />
3. To install the air filter, follow the opposite procedure of<br />
"Removing".<br />
Cleaning the electrostatic precipitation grill<br />
Cleaning the front panel<br />
Use a vacuum cleaner to remove dust accumulations, then wipe<br />
the grille with a clean cloth dipped in warm water; wipe with a<br />
clean dry cloth to remove any water.<br />
1. Switch off the power supply.<br />
2. Open the front panel.<br />
3. Take out the electrostatic precipitation grill (be carefull to<br />
not be stung by the needles)<br />
4. Wash it with water or add little detergente.(after washing, it<br />
must be dried defore reinstalling, in order to avoid any<br />
electric leakage).<br />
Installing the front panel<br />
1. Tilt the front panel 100¢Xto 120¢X, then insert the two axles.<br />
Front panel hooks<br />
Take the electrostatic<br />
precipitation grill out this<br />
direction.<br />
Axles<br />
CAUTION!<br />
¡·Do not put the fingers or other things into the front panel,<br />
in order to avoid any electric shock.<br />
¡·The power supply must be switched off before cleaning<br />
the electrostatic precipitation grill.<br />
24
TROUBLE SHOOTING<br />
WARNING!<br />
In the event of a malfunction (burning smell, etc.), immediately stop operation, disconnect the power<br />
plug, and consult authorized service personnel.<br />
Merely turning off the unit's power switch will not completely disconnect the unit from the power<br />
source. Always be sure to disconnect the power plug and turn off your circuit breaker to ensure that<br />
power is completely off.<br />
Before requesting service, perform the following checks:<br />
Symptom<br />
Problem<br />
See Page<br />
NORMAL<br />
FUNCTIONS<br />
Doesn't operate immediately:<br />
¡· If the unit is stopped and then immediately started again, the<br />
2-way/3-way will not operate for about 3 minutes, in order to<br />
prevent fuse blowouts.<br />
¡X<br />
¡· Whenever the power plug is disconnected and then reconnected<br />
to a power outlet, the protection circuit will operate for about<br />
3 minutes, preventing unit operation during that period.<br />
Noise is heard:<br />
¡· During operation and immediately after stopping the unit, the<br />
sound of water flowing in the air conditioner's piping may be<br />
heard. Also, noise may be particularly noticeable for about 2 to<br />
3 minutes after starting operation .<br />
¡· During operation, a slight squeaking sound may be heard. This<br />
is the result of minute expansion and contraction of the front<br />
cover due to temperature changes.<br />
¡X<br />
Smells:<br />
¡· Some smell may be emitted from the indoor unit. This smell is<br />
the result of room smells ( furniture, tobacco, ect. ) which have<br />
been taken into the air conditioner.<br />
¡X<br />
Mist or steam are emitted:<br />
¡· During Cooling or Drying operation, a thin mist may be seen to<br />
emit from the indoor unit. This results from the sudden<br />
cooling of room air by the air emitted from the air conditioner,<br />
resulting in condensation and misting.<br />
¡X<br />
Airflow is weak or stops:<br />
¡· The <strong>fan</strong> may operate at very low speed during Drying mode or<br />
AUTO operation.<br />
15<br />
¡· In AUTO operation, the <strong>fan</strong> will operate at very low speed.<br />
12<br />
25
WARNING!<br />
Consult authorized service personnel for any repairs.<br />
Symptom Items to Check See Page<br />
CHECK ONCE<br />
MORE<br />
No operating at all : ¡· Is the power plug disconnected from its outlet ?<br />
¡· Has there been a power failure ?<br />
¡· Has a fuse blown out, or a circuit breaker been tripped ?<br />
¡· Is the main power switch set to the OFF position?<br />
¡· Is the timer operating ?<br />
¡X<br />
10<br />
20-22<br />
Poor Cooling performance:<br />
¡· Is the air filter dirty ?<br />
¡· Are the air conditioner's intake grille or outlet port blocked ?<br />
¡· Did you adjust the room temperature settings (thermostat)<br />
correctly ?<br />
¡· Is there a window or door open?<br />
¡· In the case of cooling operation, is a window allowing bright<br />
sunlight to enter ? (Close the curtains.)<br />
¡· In the case of Cooling operation, are there heating apparatus<br />
or computers inside the room, or are there too many people<br />
in the room ?<br />
¡X<br />
26
OPERATION DETAILS<br />
Please read and understand following details regarding this air conditioner.<br />
Malfunction<br />
Nearby lighting or use of a mobile radio (short wave, etc.)<br />
may result in malfunction. In this case, disconnect the power<br />
plug from its outlet and connect it again, then use the remote<br />
control unit to resume operation.<br />
Temperature and Humidity Range<br />
Permissible ranges of temperature and humidity are as follows:<br />
Cooling<br />
Operation<br />
Outdoor temperature:<br />
About 18¢J to 43¢J<br />
Indoor temperature:<br />
About 18¢J to 32¢J<br />
Auto Restart<br />
¡· Auto Restant function is available after professional<br />
modification.<br />
¡· The air conditioner power has been interrupted by a power<br />
failure. The air conditioner will then restart automatically in<br />
auto mode.<br />
¡· If a power failure occurs during timer operation, the timer<br />
will be reset and the unit will begin (or stop) operation at<br />
the new time setting.<br />
Drying<br />
Operation<br />
Indoor humidity:<br />
About 80¢H or less. If the unit is used for long<br />
periods under conditions of high humidity,<br />
water may condense on and drip from the<br />
surface of the unit.<br />
Outdoor temperature:<br />
About 18¢J to 43¢J<br />
Indoor temperature:<br />
About 18¢J to 32¢J<br />
Indoor humidity:<br />
If the unit is used for long periods under<br />
conditions of high humidity, water may<br />
condense on and drip from the surface of the<br />
unit.<br />
If the unit is used under higher temperature conditions than<br />
those noted here, the automatic protection circuit may<br />
operate, interrupting the operation. If the unit is used under<br />
lower temperature conditions than those noted here, the heat<br />
exchanger may freeze, causing water leakage or other<br />
malfunction.<br />
¡·Do not use the air conditioner for any purpose other than<br />
room cooling, room drying or <strong>fan</strong>.<br />
27