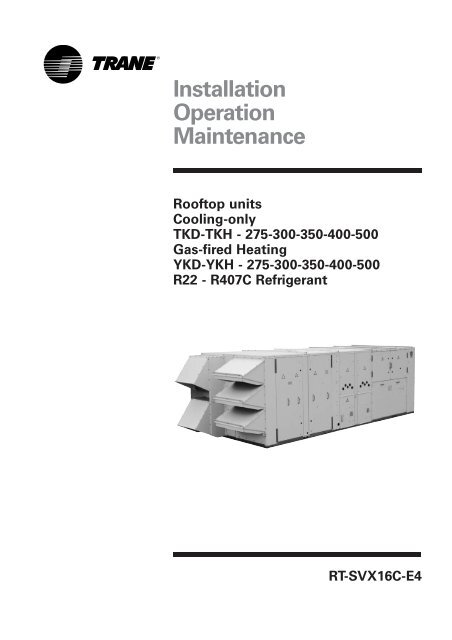
Installation Operation Maintenance
Installation Operation Maintenance
Installation Operation Maintenance

You also want an ePaper? Increase the reach of your titles
YUMPU automatically turns print PDFs into web optimized ePapers that Google loves.
General informationForewordThese instructions are given as aguide to good practice in theinstallation, start-up, operation, andmaintenance by the user, of TraneTKD/TKH and YKD/YKH units.They do not contain full serviceprocedures necessary for thecontinued successful operation ofthis equipment. The services of aqualified technician should beemployed through the medium of amaintenance contract with areputable service company. Readthis manual thoroughly before unitstart-up.TKD/TKH, WKD/WKH and YKD/YKHunits are assembled, pressuretested, dehydrated, charged and runtested before shipment.Warnings and cautionsWarnings and Cautions appear atappropriate sections throughoutthis manual. Your personal safetyand the proper operation of thismachine require that you followthem carefully. The constructorassumes no liability for installationsor servicing performed byunqualified personnel.WARNING!: Indicates a potentiallyhazardous situation which, if notavoided, could result in death orserious injury.CAUTION!: Indicates a potentiallyhazardous situation which, if notavoided, may result in minor ormoderate injury. It may also beused to alert against unsafepractices or for equipment orproperty-damage-only accidents.Safety recommendationsTo avoid death, injury, equipment orproperty damage, the followingrecommendations should beobserved during maintenance andservice visits:1. The maximum allowablepressures for system leak testing onlow and high pressure side aregiven in the chapter "<strong>Installation</strong>".Always provide a pressureregulator.2. Disconnect the main powersupply before any servicing on theunit.3. Service work on the refrigerationsystem and the electrical systemshould be carried out only byqualified and experiencedpersonnel.2RT-SVX16C-E4
ContentsGeneral informationForeword 2Reception 3Warranty 3Refrigerant 3Storage 4<strong>Installation</strong>Reception of units 7Rooftop curb <strong>Installation</strong> 8Installing the unit 9Dimensions/Weights/Clearances 11Connection of duct network 13Condensate drain piping 13Gas pipework installation 14Filter installation 15Supply fan adjustment 16Component air pressure drops 17Supply fan performances 18Drive selection 21Electrical connections 22Options80 - 100% Supply fan Frequency Inverter 24Soft Starter 26Soft Starter with 80-100% speed control 260 - 25% fresh Air Hood 27Barometric relief 27Exhaust fans 28Hot water coil 29Electric Heater 29RT-SVX16C-E45
ContentsControlsControl wiring 30Remote potentiometer 31CO 2 / VOC sensor 32Fire thermostat 35Clogged filter detector 36Smoke detector 36High temperature safety thermostat 36Supply air sensing 36Remote fault relay 36Thermostats 37Communication Interfaces 38<strong>Operation</strong>Setting the economizer or 0-50% motorized hood 39Tests procedures 40Test modes 43Unit start-up 44Unit operation 46Final installation checklist 53<strong>Maintenance</strong>End-user routine maintenance 54Service technician maintenance 54Troubleshooting 556RT-SVX16C-E4
<strong>Installation</strong>General information: Theinstallation must conform to alllocal standards and regulations.Reception of unitsRooftop unitThe unit is supplied on woodenbeams. It is recommended to checkthe machine's condition uponreception.There are two ways to handle theunit:1) Handle the machine using aforklift, in accordance withapplicable safety regulations.2) Use a lifting beam correctlyadjusted to fit the unit (SeeFigure 1).Unit HandlingThe units are supplied on the truckbut are not unloaded. A lifting lug isprovided on each corner of theunit's base to facilitate handling.4 shackles and 4 slings are required.Use a lifting beam to prevent thecables pressing too hard on top ofthe unit during lifting. (SeeFigure 1).Important: For unit to fit on theroof curb the forklift pockets mustbe removed.Figure 1 - Unit handlingCMU (kg) OT800 1T100 1T100(mm) 16,0 18,0 20,0F (mm) 64,0 72,0 72,0A (mm) 30,0 35,0 35,0C (mm) 31,0 41,0 41,0B (mm) 64,0 78,0 78,0E (mm) 18,0 19,5 19,5G (mm) 48,0 59,0 59,0Weight (kg) 0,480 0,960 0,960RT-SVX16C-E47
<strong>Installation</strong>Lifting and moving InstructionsSpecific lifting method isrecommended as follows:1 - The units are supplied with fourlifting points2 - Slings and spreader bar to beprovided by rigger and attachedto the four lifting points.3 - Minimum rated lifting capacity(vertical) of each sling andspreader bar shall be no lessthan the tabulated unit shippingweight. (See Table 1 and Table 4).4 - Caution: The unit must be liftedwith the utmost care. Avoidshock load by lifting slowly andevenly.5 - Remove slings and spreader barswhen installation is completed.Roof curb <strong>Installation</strong>(TKD-YKD accessories)Roof curbs are available as anaccessory for "downflow" units tosupport the unit and ensure thewater tightness between the rooftopand the roof. Two types of roofcurbsare available: The standard versionto allow the installation of the uniton a flat roof and the adjustableversion for a sloped roofinstallation. (See Table 2 for themaximum slopped correction ofadjustable roofcurb.)The adjustable roof curbs aresupplied pre-assembled on a skid.Two types of self-adhesive seals areprovided separately. (40 mm widefor the perimeter, 20 mm wide forthe cross pieces). Make sure theyare properly installed whereindicated to assure an adequatecurb-to unit seal.Instructions for the roofcurbassembly and installation with curbdimensions are provided with eachroofcurb kit.Table 1 - Slings lengths and max unit weightTK*YK*A (mm)B (mm)Table 2 - Maximum slopped correction of adjustable roofcurbMAXIMUM WEIGHT(Kg)275 2680 3700 2327300 2680 3700 2357350 2680 3700 2395400 2680 4000 2727500 2680 4000 2805TK* 275 - 300 - 350YK* 275L - 300L - 350LUnit TypeLong SidecorrectionShort sidecorrection4% 5%YK* 275H - 300H - 350H 3% 5%TK* 400 - 500YK 400L - 400H - 500L - 500H3% 5%8RT-SVX16C-E4
<strong>Installation</strong>Figure 2 - Waterproofing41. Roofcurb2. Roof membrane3. Seal4. Rooftop312Installing the unitThe structure accommodating theunit(s) must be designed to supportthe equipment in operation, as aminimum. Refer to Table 3 fordimensions, weights and the spacerequirement plan.Unit supportIf the unit is to be roof mountedcheck the building codes for weightdistribution requirements.Location and clearancesChoose a location that will enableair to circulate freely in thecondenser coil and allow air to bedischarged above the fans. Theclearance distances for aircirculation and maintenance areindicated in the space requirementplans. (See table 3)Placing and riggingThe rooftop units are designed tobe installed outdoors and must bepositioned horizontally (vertical airdischarge off the condenser).Rig the unit using either belt orcable slings. The sling eyelet mustbe placed through the lifting holesin the base rail of the unit. The pointwhere the slings meet the liftingeyelet should be at least 2.2 mabove the unit. Use spreader bars toprevent excessive pressure on thetop of the unit during lifting.Slab mountFor ground level installation, theunit base should be adequatelysupported and hold the unit nearlevel.In areas where snowfall is common,the unit must be elevated enough toensure that the bottom of theoutdoor coil is above the height ofthe expected snow accumulation.Where severely cold temperaturesare a consideration, elevation of theunit is again recommended toensure that defrost water does notcreate an ice build up that willinterfere with unit operation. Inaddition, runoff water from roofs,etc... must not be allowed to fall onthe outdoor coil ; any blockage ofairflow through the coil can bedetrimental to unit operation andreliability.The manufacturer suggests that thebottom of the outdoor coil be raised30 cm above grade or roof toprevent possible ice build-upproblems.The unit frame structure is notdesigned to be supported byfour points (mounting on springisolators for instance).The unit must therefore rest on itswhole base.RT-SVX16C-E49
<strong>Installation</strong>Figure 3 - Location of components1723645981. Electric panel2. Compressor section3. Gas section (optional)4. Heating section (Gas heat, electricheat, Hot water heat)5. Filter & Evaporator section6. Exhaust air hood (Optional,Downflow unit)7. Fresh air hood (Optional,Downflow unit)8. Exhaust air hood (Optional,horizontal flow unit)9. Fresh air hood (Optional,horizontal flow unit)10RT-SVX16C-E4
<strong>Installation</strong>Dimensions/Weights/ClearancesFigure 4 - Dimensions and clearancesAccesscontrol panelTable 3 - Dimensions, weights and clearancesDimensions (mm) Shipping Operating Minimum clearances (mm)Unit Size X Y Z weight (kg) weight (kg) A B C D ETKD/TKH 275 4580 2368 1821 1697/1717 1597/1617 1900 2440 1220 1220 1830TKD/TKH 300 4580 2368 1821 1733 1633 1900 2440 1220 1220 1830TKD/TKH 350 4580 2368 1821 1772 1672 1900 2440 1220 1220 1830TKD/TKH 400 5917 2368 1988 2199 2059 1900 2440 1220 1220 1830TKD/TKH 500 5917 2368 1988 2277 2137 1900 2440 1220 1220 1830YKD/YKH 275 L 4580 2368 1821 1756 1656 1900 2440 1220 1220 1830YKD/YKH 275 H 5285 2368 1821 1940/1969 1820/1849 1900 2440 1220 1220 1830YKD/YKH 300 L 4580 2368 1821 1792 1692 1900 2440 1220 1220 1830YKD/YKH 300 H 5285 2368 1821 1976/1999 1856/1879 1900 2440 1220 1220 1830YKD/YKH 350 L 4580 2368 1821 1931 1731 1900 2440 1220 1220 1830YKD/YKH 350 H 5285 2368 1821 2015/2037 1895/1917 1900 2440 1220 1220 1830YKD/YKH 400 L 5917 2368 1988 2301/2313 2161/2173 1900 2440 1220 1220 1830YKD/YKH 400 H 5917 2368 1988 2356/2369 2216/2229 1900 2440 1220 1220 1830YKD/YKH 500 L 5917 2368 1988 2379/2390 2239/2250 1900 2440 1220 1220 1830YKD/YKH 500 H 5917 2368 1988 2433/2447 2293/2307 1900 2440 1220 1220 1830(1) For standard unit, without accessories or optionsRT-SVX16C-E411
<strong>Installation</strong>Table 4 - Point loading percentage of total unit weightA B C D E FUnit size % % % % % %275 23% 23% 13% 14% 13% 14%300 23% 23% 13% 14% 13% 14%350 23% 23% 13% 14% 13% 14%400 23% 23% 13% 14% 13% 14%500 23% 23% 13% 14% 13% 14%Figure 5 - Top view of unit with loading pointsTable 5 - Factory-installed Options Net Weights (kg)UNIT SizeStandardRoofcurbAdjustableRoofcurbBarometricReliefPowerExhaustOversizedSupply FanMotor0-25%ManualDamper EconomizerElec.HeatHot WaterCoilTKD/TKH 275 255 345 50/65 74/90 54 23 117/128 100 89TKD/TKH 300 255 355 50/65 74/90 54 23 117/128 100 89TKD/TKH 350 255 345 50/65 74/90 54 23 117/128 100 89TKD/TKH 400 305 415 50/65 74/90 56 23 131/135 140 169TKD/TKH 500 305 415 50/65 74/90 56 23 131/135 140 169YKD/YKH 275L 255 345 50/65 74/90 54 23 117/128 - -YKD/YKH 275H 280 375 50/66 74/90 54 23 117/128 - -YKD/YKH 300L 255 345 50/65 74/90 54 23 117/128 - -YKD/YKH 300H 280 375 50/66 74/90 54 23 117/128 - -YKD/YKH 350L 255 345 50/65 74/90 54 23 117/128 - -YKD/YKH 350H 280 375 50/66 74/90 54 23 117/128 - -YKD/YKH 400 305 415 50/65 74/90 56 23 131/135 - -YKD/YKH 500 305 415 50/65 74/90 56 23 131/135 - -Notes:Net weight should be added to unit weight when ordering factory installed accessories.12RT-SVX16C-E4
<strong>Installation</strong>Connection of ductnetworkSupply and return openings havecurb flanges provided for easy ductinstallation. It is recommended toinsulate the circumference of thecurb after the unit is mounted toprevent condensation.CAUTION! : All ductwork must berun and attached to the curb flangesbefore the unit is set into place.Guidelines for ductworkconstruction- Connections to the unit should bemade with 7.5 cm canvasconnectors to minimize noise andvibration transmission.- Elbows with turning vanes orsplitters recommended tominimize air noise and resistance.- The first elbow in the ductworkleaving the unit should be nocloser than 60 cm from the unit, tominimize noise and resistance.Attaching horizontal ductwork tounit- All conditioned air ductworkshould be insulated to minimizeheating and cooling duct losses.Use minimum of 5 cm ofinsulation with a vapor barrier. Theoutside ductwork must be weatherproofed between the unit and thebuilding.- When attaching ductwork to ahorizontal unit, provide a flexiblewatertight connection to preventnoise transmission from the unitto the ducts. The flexibleconnection must be indoors andmade out of heavy canvas.Note: Do not draw the canvas tautbetween the solid ducts.Condensate drain pipingEach Voyager III unit is equippedwith a PVC 1 1/4" femalecondensate drainage connector.Since the drainage connector is onthe negative pressure side of thefan, a condensate trap must beinstalled. Install a P trap on the unit,following the instructions inFigure 6.Slope the drainage pipe down atleast 1 % to ensure an adequatecondensate flow.Check all the condensate drainagepipe fittings comply with theapplicable construction regulationsand waste disposal standards.Figure 6 - Condensate trap installation43752351. Panel enclosure2. Atmosphere pressure3. Pressure plan4. Static drainRT-SVX16C-E413
<strong>Installation</strong>Gas pipework installation(Gas Fired units YKD/YKH)<strong>Installation</strong> of gas piping (to beperformed by the contractor)The installation rules for publicbuildings shall be followed: refer tothe brochure in the "Journal Officiel"number 1477-1 (France only).The gas supply piping and the gasstop valve shall be dimensioned toguarantee the gas supply pressureat the unit's inlet when it isfunctioning at full capacity.It is recommended to install oneexpansion valve as close aspossible to each installed unit.The piping must be self-supportingbefore the final branch connectionto the burner. Allow for a dust trap(filter) upstream of the connectionto the unit.Search for gas pipe leaks usingproducts such as "Typol" or"1000 bulles" or another equivalentmethod. Soapy water must not beused.WARNING! : Never use a flame tosearch for leaks. The required gaspressures at the unit's inletconnection are specified in table 22.CAUTION! : The piping must notexert any stress on the branchconnection to the burner.The heating system must beisolated by the gas stop valve onthe gas supply piping during thepressure tests, as soon as thepressure exceeds 0.035 bar(35 mbar). If pressure greater than0.035 bar is applied to the gas valveinlet the unit may be damaged.Figure 7 - Typical gas supply pipework1. Evaporator section2. Gas burner section3. Condenser section4. Gas supply connection5. Gas supply line6,8. Gas stop valve (Field supplied)7. Expansion valve (Field supplied)9. Filter (Field supplied)14RT-SVX16C-E4
<strong>Installation</strong>Filter installationAccess to the filter cells is done viathe filter access door.Each unit is shipped with eitherEU2/G2 or EU4/G4 filters.EU4/G4 filters are available either in50 mm or 100 mm depth.The number and the size of the filtercells are determined by the size andthe configuration of the unit.(See table 6.)CAUTION! : Do not operate unitwithout filters in place.The maximum pressure dropsallowable on filters are thefollowing:EU2/G2: 120 PaEU4/G4: 150 Pa (50 & 100 mm)Table 6 - Filter arrangementUnitType Unit 50mm EU2 - STD 50mm EU4 - AR500 10mm EU4 - AR500TKD/HYKD/HTKD/HYKD/HTKD/HYKD/HTKD/HYKD/HTKD/HYKD/HSize Qty Size Qty Size Qty Size275 16 (395x497x45) 16 (395x495x45) 16 (395x495x90)300 16 (395x497x45) 16 (395x495x45) 16 (395x495x90)350 16 (395x497x45) 16 (395x495x45) 16 (395x495x90)400 17 (395x497x45) 17 (395x495x45) 17 (395x495x90)500 17 (395x497x45) 17 (395x495x45) 17 (395x495x90)RT-SVX16C-E415
<strong>Installation</strong>Figure 8 - Indoor Fan Belt guard (Option)Supply fan adjustment1. Belt Guard2. Fitted with 4 screws.Figure 9 - Typical fan, motor and sheave43112Use the following procedure todetermine the proper adjustment ofthe evaporator fan for a specificapplication.1) Determine total external staticpressure about system andaccessories.a) Obtain the design airflow rateand the design external staticpressure drop through thedistribution system.b) Add static pressure drop ofthe accessories installed onthe unit. (Table 7)c) Add the total accessory staticpressure drop (from step 1b)to the design external staticpressure (from step 1a). Thesum of these two values is thetotal system external staticpressure.2) Using the table 8 to find theexternal static pressure thatmost closely approximates totalsystem external static pressure.Then locate the appropriateairflow rate for your unit. Thevalue obtained represents thebrake horsepower for theevaporator fan motor and the fanRPM.3) To increase belt tension: First,remove the fan belt guard(Figure 8). Then, Loosen the nut(next to the idler sheave) thatsecures the sheave in place. Witha wrench, apply pressureclockwise on the outside nut(round headed one), untiltension desired is reached(Table 10). While holdingpressure with the tension nut,retighten the nut next to the idlersheave. (Table 10).CAUTION! : Excessive belt tensionmay reduce bearing life. Refer toTable 10 for ideal belt tension.21. Fan housing2. Adjustable motor support for belt tensioning3. Motor sheave4. Fan sheave16RT-SVX16C-E4
<strong>Installation</strong>Component air pressure dropsTable 7 - Pressure drop through the components#275#300#350#400#500AirflowFilter50 mmEU2/G2Filter50 mmEU4/G4Filter100 mmEU4/G4Economizer 1Gas heatLow heatGas heatHigh heatElectric heaterHot water coil10880 14 35 33 8 16 13 12 7412240 16 39 37 9 19 15 14 8813600 19 43 40 11 23 19 17 10314960 22 48 44 13 28 22 20 11916320 24 52 47 14 32 26 24 13517680 27 56 51 16 37 29 27 15212240 16 39 37 9 19 15 14 8813770 19 44 41 11 24 19 18 10515300 22 49 45 13 29 23 21 12316830 25 54 49 15 34 27 25 14118360 29 58 53 17 40 31 29 16119890 32 63 57 19 46 36 33 18113600 19 43 40 11 23 19 17 10315300 22 49 45 13 29 23 21 12317000 26 54 49 15 35 27 25 14318700 30 60 53 18 41 32 30 16520400 33 65 58 20 48 38 35 18822100 37 70 62 22 56 43 40 21216320 26 49 45 16 2 7 26 4418360 29 55 50 19 2 8 32 5320400 32 61 55 22 3 10 39 6222440 35 67 60 25 4 12 45 7224480 37 73 65 28 4 14 52 8326520 40 80 69 31 5 16 60 9419680 31 59 53 21 3 9 36 5922140 34 66 59 24 4 11 44 7124600 38 74 65 28 4 14 53 8427060 41 81 71 31 5 16 62 9729520 44 89 76 35 6 19 72 11131980 47 96 82 39 8 22 82 126Notes:1. Add only if greater than the R.A. ductwork Pressure drop.2. Supply fan performance table includes internal resistance of rooftop wet coil pressure drop and 50mm EU2/G2 filters. For total static pressure determination, systemexternal static must be added to appropriate component static pressure drops, (optional filters, optional economizer, optional heating device).RT-SVX16C-E417
<strong>Installation</strong>Supply fan performancesTable 8 - Available static pressureSize 275 fan performanceExternal Static Pressure (Pa)50 100 150 200 250 300 350 400 450 500 550 600m 3 /h RPM kW RPM kW RPM kW RPM kW RPM kW RPM kW RPM kW RPM kW RPM kW RPM kW RPM kW RPM kW10880 - - - - 406 1.4 455 1.7 501 2.1 543 2.5 580 2.8 614 3.2 646 3.6 678 4.1 708 4.7 - -12240 - - - - 419 1.6 463 2.0 505 2.4 546 2.8 585 3.2 622 3.7 656 4.1 686 4.6 711 4.9 - -13600 - - - - 436 1.9 476 2.3 514 2.7 552 3.1 590 3.6 627 4.1 662 4.6 693 5.1 716 5.5 - -14960 - - 415 2.0 454 2.3 491 2.7 526 3.1 562 3.5 597 4.0 633 4.5 667 5.0 699 5.6 725 6.1 - -16320 - - 436 2.4 473 2.8 508 3.2 541 3.6 574 4.0 607 4.5 640 5.0 673 5.5 704 6.1 734 6.8 - -17680 417 2.5 457 2.9 493 3.3 527 3.7 558 4.2 589 4.6 619 5.1 649 5.6 680 6.1 711 6.7 - - - -Notes:1. Supply fan performance table includes internal resistance of rooftop wet coil pressure drop and 50mm EU2/G2 filters. For totalstatic pressure determination, system external static must be added to appropriate component static pressure drops, (optional filters,optional economizer, optional heating device).2. The pressure drops from the supply fan to the space should not exceed 550 Pa positive for sizes 275.3. Maximum motor kW for size 275is 7.5 kW.Use 7.5 kW motorSize 300 fan performanceExternal Static Pressure (Pa)50 100 150 200 250 300 350 400 450 500 550 600m 3 /h RPM kW RPM kW RPM kW RPM kW RPM kW RPM kW RPM kW RPM kW RPM kW RPM kW RPM kW RPM kW12240 - - - - 419 1.6 463 2.0 505 2.4 546 2.8 585 3.2 622 3.7 656 4.1 686 4.6 711 4.9 729 5.213770 - - - - 438 2.0 477 2.3 515 2.7 553 3.2 591 3.6 628 4.1 663 4.6 694 5.1 717 5.6 739 5.915300 - - 420 2.1 459 2.4 495 2.8 530 3.2 564 3.6 599 4.1 634 4.6 669 5.2 700 5.7 727 6.3 - -16830 402 2.2 444 2.6 481 3.0 515 3.4 547 3.8 579 4.2 611 4.7 643 5.2 675 5.7 707 6.3 737 7.0 - -18360 428 2.7 468 3.2 503 3.6 536 4.0 567 4.5 597 4.9 626 5.4 654 5.9 684 6.4 715 7.0 - - - -19890 454 3.3 492 3.8 526 4.3 559 4.8 589 5.3 617 5.7 643 6.2 670 6.7 696 7.2 725 7.8 - - - -Notes:1. Supply fan performance table includes internal resistance of rooftop wet coil pressure drop and 50mm EU2/G2 filters. For totalstatic pressure determination, system external static must be added to appropriate component static pressure drops, (optional filters,optional economizer, optional heating device).2. The pressure drops from the supply fan to the space should not exceed 550 Pa positive for size 300.3. Maximum motor kW for size 275-300 is 7.5 kW.Use 7.5 kW motor18RT-SVX16C-E4
<strong>Installation</strong>Size 350 fan performanceExternal Static Pressure (Pa)50 100 150 200 250 300 350 400 450 500 550 600m 3 /h RPM kW RPM kW RPM kW RPM kW RPM kW RPM kW RPM kW RPM kW RPM kW RPM kW RPM kW RPM kW13600 - - 411 1.7 452 2.1 491 2.4 530 2.9 568 3.3 605 3.8 642 4.3 675 4.8 704 5.2 723 5.6 730 5.915300 - - 437 2.2 475 2.6 510 3.0 545 3.4 580 3.9 615 4.3 649 4.8 683 5.4 713 6.0 737 6.6 752 7.117000 424 2.4 464 2.8 499 3.2 532 3.6 564 4.1 595 4.5 627 5.0 658 5.5 690 6.1 722 6.7 - - - -18700 453 3.1 490 3.5 524 4.0 556 4.4 586 4.9 614 5.3 643 5.8 671 6.3 700 6.8 732 7.5 - - - -20400 481 3.8 516 4.3 550 4.8 581 5.3 610 5.8 637 6.3 662 6.8 688 7.3 715 7.8 745 8.3 - - - -22100 509 4.6 543 5.2 576 5.7 606 6.3 634 6.8 660 7.4 684 7.9 709 8.4 735 8.9 - - - - - -Notes:1. Supply fan performance table includes internal resistance of rooftop wet coil pressure drop and 50mm EU2/G2 filters. For totalstatic pressure determination, system external static must be added to appropriate component static pressure drops, (optional filters,optional economizer, optional heating device).2. The pressure drops from the supply fan to the space should not exceed 550 Pa positive for size 350.3. Maximum motor kW for size 350 is 11 kW.Use 7.5 kW motorUse 11.2 kW motorSize 400 fan performanceExternal Static Pressure (Pa)50 100 150 200 250 300 350 400 450 500 550 600m 3 /h RPM kW RPM kW RPM kW RPM kW RPM kW RPM kW RPM kW RPM kW RPM kW RPM kW RPM kW RPM kW16320 - - - - 403 2.5 437 2.9 470 3.3 501 3.8 532 4.2 562 4.7 592 5.1 621 5.5 648 5.9 664 6.118360 - - - - 421 3.1 453 3.5 484 4.0 514 4.4 542 4.9 570 5.4 597 6.0 622 6.5 650 7.0 670 7.520400 - - 409 3.3 441 3.8 471 4.2 499 4.7 527 5.2 554 5.8 581 6.3 606 6.9 631 7.5 656 8.1 680 8.722440 401 3.6 432 4.1 461 4.6 489 5.1 516 5.6 543 6.2 568 6.7 593 7.3 618 7.9 642 8.5 665 9.1 688 9.724480 427 4.5 455 5.0 482 5.6 509 6.1 534 6.7 559 7.2 584 7.8 608 8.4 630 9.0 651 9.6 670 10.1 700 10.726520 452 5.5 479 6.1 504 6.6 529 7.2 553 7.8 578 8.4 601 9.0 623 9.6 643 10.2 659 10.8 672 11.3 - -Notes:1. Supply fan performance table includes internal resistance of rooftop wet coil pressure drop and 50mm EU2/G2 filters. For totalstatic pressure determination, system external static must be added to appropriate component static pressure drops, (optional filters,optional economizer, optional heating device).2. The pressure drops from the supply fan to the space should not exceed 620 Pa for size 400.3. Maximum motor kW for size 400 is 11 kW.Use 7.5 kW motorUse 11.2 kW motorRT-SVX16C-E419
<strong>Installation</strong>Size 500 fan performanceExternal Static Pressure (Pa)50 100 150 200 250 300 350 400 450 500 550 600m 3 /h RPM kW RPM kW RPM kW RPM kW RPM kW RPM kW RPM kW RPM kW RPM kW RPM kW RPM kW RPM kW19680 - - 402 3.1 434 3.5 464 4.0 494 4.5 522 4.9 550 5.4 577 6.0 602 6.5 628 7.1 652 7.7 676 8.322140 398 3.5 429 4.0 458 4.5 486 5.0 514 5.5 540 6.0 566 6.6 591 7.1 616 7.7 640 8.3 664 8.9 687 9.624600 428 4.6 457 5.1 484 5.6 510 6.2 535 6.7 560 7.3 585 7.9 608 8.5 631 9.0 652 9.6 671 10.2 701 10.727060 459 5.8 485 6.4 510 6.9 534 7.5 559 8.1 583 8.8 605 9.4 627 10.0 646 10.6 662 11.1 675 11.6 - -29520 489 7.3 513 7.9 537 8.5 560 9.1 583 9.8 606 10.5 628 11.1 647 11.8 664 12.4 675 12.9 680 13.2 - -31980 520 9.0 543 9.6 565 10.3 586 10.9 608 11.6 629 12.3 650 13.1 670 13.8 688 14.4 703 14.9 714 15.3 - -Notes:1. Supply fan performance table includes internal resistance of rooftop wet coil pressure drop and 50mm EU2/G2 filters. For totalstatic pressure determination, system external static must be added to appropriate component static pressure drops, (optionalfilters, optional economizer, optional heating device).2. The pressure drops from the supply fan to the space should not exceed 620 Pa for size 500.Use 7.5 kW motorUse 11.2 kW motorUse 15 kW motor20RT-SVX16C-E4
<strong>Installation</strong>Drive selectionTable 9 - Supply fan drive selection#275-300#350#400#500ACDACDHH5.5 kW 7.5 kW 11 kW 15 kW460 RPM520 RPM580 RPME 650 RPMG 725 RPM460 RPM520 RPM580 RPME 650 RPMG 725 RPM G 725 RPM415 RPMK 465 RPML 515 RPMM 610 RPMN 685 RPM415 RPMK 465 RPML 515 RPMM 610 RPMN 685 RPM N 685 RPMTable 10: Belt drive tensioningTK* / YK*MotorkWFanpulleydiam.Motorpulleydiam.BelttypeBeltdeflectionmmDeflectioneffortminikgDeflectioneffortmaxikgBelttensionminiNBelttensionmaxiN275-300-350 5.5 280 90 XPA-2360 8.79 1.8 2.4 300 400275-300-350 5.5 250 90 XPA-2360 9.06 1.8 2.4 300 400275-300-350 5.5 280 112 XPA-2360 8.64 1.8 2.4 300 400275-300-350 7.5 250 112 XPA-2360 8.9 1.8 2.4 300 400275-300-350 7.5 280 140 XPA-2500 9.15 1.8 2.4 300 400275-300-350 11 280 140 XPA-2360 8.44 2.4 2.9 400 500400-500 5.5 315 90 XPA-2500 9.18 1.8 2.4 300 400400-500 7.5 280 90 XPA-2360 8.79 2.4 2.9 400 500400-500 7.5 315 112 XPA-2500 9.03 2 2.6 340 440400-500 11 315 132 XPA-2500 8.9 2.5 3.1 420 520400-500 11 280 132 XPA-2360 8.5 2.5 3.1 420 520400-500 15 280 132 XPA-2360 8.5 3.4 3.9 570 670RT-SVX16C-E421
<strong>Installation</strong>Electrical connectionsThe electric panel is located abovethe unit's compressor section. Theunit is designed to run with400 V +/- 5%/50 Hz/3 pH.Over current protectionThe branch circuit feeding the unitmust be protected in accordancewith national or local codes andmax unit amps indicated in Table 11.Power wiringThe unit's power supply must beprovided by 4-wire cable with crosssectionalareas complying withlegislation.2 glands are available on each unitto be able to connect the unit to themain supply either from the side orfrom the bottom.The power supply cables must belaid in leak-tight pipes and passthrough the bottom of the electricpanel. The cables must not be taut.Appropriate connectors must beprovided. Flexible pipe supports arerequired to prevent noisetransmission in the building'sstructure. Ensure all the connectionsare tightened.CAUTION! : After completion ofwiring, check all electricalconnections, and ensure allconnections are tight. Replace andsecure all electrical box covers andaccess doors before leaving unit orconnecting power to circuitsupplying unit.Note:a) earthing must be executed inaccordance with local legislation.b) the machines are designed for ashort-circuit current of 10 kA. Inthe event of a higher application,contact your Trane sales office.Table 11 - Electrical characteristicsUnitNominal AmpsCompressorStart AmpsIndoor FanNominal Amps(Std/Oversized)OutdoorFanNominalAmpsUnitNominalAmpsTKD/TKH 275 18.1/27.3 120/175 11.9 / 15.2 4.4 74 222YKD/YKH 275 low heat 18.1/27.3 120/175 11.9 / 15.2 4.4 74 222YKD/YKH 275 high heat 18.1/27.3 120/175 11.9 / 15.2 4.4 74 222TKD/TKH 300 27.3/27.3 175/175 11.9 / 15.2 4.4 83 231YKD/YKH 300 low heat 27.3/27.3 175/175 11.9 / 15.2 4.4 83 231YKD/YKH 300 high heat 27.3/27.3 175/175 11.9 / 15.2 4.4 83 231TKD/TKH 350 27.3/27.3 175/175 11.9 / 15.2 / 21.1 4.4 89 237YKD/YKH 350 low heat 27.3/27.3 175/175 11.9 / 15.2 / 21.1 4.4 89 237YKD/YKH 350 high heat 27.3/27.3 175/175 11.9 / 15.2 / 21.1 4.4 89 237TKD/TKH 400 27.3/27.3/18.1 175/175/120 11.9 / 15.2 / 21.1 4.4 111 259YKD/YKH 400 low heat 27.3/27.3/18.1 175/175/120 11.9 / 15.2 / 21.1 4.4 111 259YKD/YKH 400 high heat 27.3/27.3/18.1 175/175/120 11.9 / 15.2 / 21.1 4.4 111 259TKD/TKH 500 27.3/27.3/27.3 175/175/175 11.9 / 15.2 / 21.1 / 29.1 4.4 129 276YKD/YKH 500 low heat 27.3/27.3/27.3 175/175/175 11.9 / 15.2 / 21.1 / 29.1 4.4 129 276YKD/YKH 500 high heat 27.3/27.3/27.3 175/175/175 11.9 / 15.2 / 21.1 / 29.1 4.4 129 276StartAmps22RT-SVX16C-E4
<strong>Installation</strong>Scroll compressorsProper phasing of the electricalpower wiring is critical for properoperation and reliability of the scrollcompressor and fans.Proper rotation of the scrollcompressor must be establishedbefore the unit is started. This isaccomplished by confirming thatthe electrical phase sequence of thepower supply is correct. The motoris internally connected for clockwiserotation with the inlet power supplyphased A, B, C.The direction of rotation may bereversed by interchanging any twoof the line wires. It is this possibleinterchange of wiring that makes aphase sequence indicator necessaryif the operator is to quicklydetermine the phase rotation of thecompressor motor.The "ABC" indicator on the face ofthe phase indicator will glow ifphase is ABC for terminals L1, L2,and L3.WARNING! : Disconnect all power,including remote disconnects, anddischarge all capacitors beforeservicing. Follow properlockout/tagout procedures to ensurethe power cannot be inadvertentlyenergized. After power is removed,allow 14 minutes for capacitors todischarge. Verify with anappropriate voltmeter that allcapacitors have discharged. Failureto disconnect power and/ordischarge capacitors beforeservicing could result in death orserious injury. For additionalinformation regarding the safedischarge of capacitors, see TraneService Bulletin PROD-SVB06A.RT-SVX16C-E423
Options80 - 100% Supply fanFrequency InverterThe 80-100% frequency inverter is afactory installed, programmed andtested option, used mainly to loweroperation and maintenance costs.It can be used also to adjust the airflow and for textile ductapplications.The inverters drive the supply fanmotors at 80% or 100% of thenominal speed according to thecooling and the heating capacitysteps of the rooftops. Inverters areelectrically enslaved to thecompressors and gas burnercontactors.High voltage WARNING !The voltage of the frequencyconverter is dangerous wheneverthe converter is connected to mains.Consequently, it is essential tocomply with the instructions in theInverter manual.These rules concern your safety:1. The frequency converter must bedisconnected from the mains ifrepair work is to be carried out.Check that the mains has beendisconnected and that theprescribed time has passedbefore removing motor andmains plugs.2. The [STOP/RESET] key on thecontrol panel of the frequencyconverter does not disconnectthe equipment from mains and isthus not to be used as a safetyswitch.3. The earth leakage currents arehigher than 3.5 mA.4. Do not remove the plugs for themotor - and mains while thefrequency converter is connectedto mains. Check that the mainshas been disconnected and thatthe prescribed time has passedbefore removing motor andmains plugs.5. Note that the frequencyconverter has more voltageinputs than L1, L2 and L3 whenthe DC bus terminals are used.Check that all voltage inputs aredisconnected and that theprescribed time has passedbefore repair work iscommenced.It can be extremely dangerousto touch the electrical partseven when the mains supplyhas been disconnected.Also ensure that other voltageinputs are disconnected fromload sharing through the DCbus.Wait at least 14 minutes afterthe input power has beenremoved before servicing thedrive.WARNING ! against unintendedstart1. The motor can be brought to astop by means of digitalcommands, bus commands,references or a local stop, whilethe frequency converter isconnected to mains. If personalsafety considerations make itnecessary to ensure that nounintended start occurs, thesestop functions are not sufficient.2. While parameters are beingchanged, the motor may start.Consequently, the stop key[STOP/RESET] must always beactivated, following which datacan be modified.3. A motor that has been stoppedmay start if faults occur in theelectronics of the frequencyconverter, or if a temporaryoverload or a fault in the supplymains or the motor connectionceases.In any case, the operator mustbe out of the unit when the unitis connected to mains.24RT-SVX16C-E4
OptionsRFI switch Mains supply isolatedfrom earth:If the frequency converter issupplied from an isolated mainssource (IT mains), the RFI switchcan be turned off (OFF). In OFFposition, the internal RFI capacities(filter capacitors) between thechassis and the intermediate circuitare cut off to avoid damage to theintermediate circuit and to reducethe earth capacity currents(according to IEC 61800-3).NB!: The RFI switch is not to beoperated with mains connected tothe unit. Check that the mainssupply has been disconnectedbefore operating the RFI switch.NB!: The RFI switch disconnects thecapacitors galvanically fromground.The switch Mk9, placed next toterminal 96, should be removed todisconnect the RFI-filter.The RFI switch is only available onTR1 2880-2882 (11,00 and 15,00 kW).With IT mains, it is recommended toprotect the rooftops with a 300 mmdifferential switch.Frequency Inverter: Control panelLCPThe front of the frequency converterfeatures a control panel - LCP (LocalControl Panel). This is a completeinterface for operation andprogramming of the frequencyconverter.The control panel is detachable andcan - as an alternative - be installedup to 3 meters away from thefrequency converter, e.g. on thefront panel, by means of amounting kit option.The functions of the control panelcan be divided into five groups:1. Display2. Keys for changing display mode3. Keys for changing programparameters4. Indicator lamps5. Keys for local operationAll data are indicated by means of a4-line alphanumeric display, which,in normal operation, is able to show4 operating data values and3 operating condition valuescontinuously. During programming,all the information required forquick, effective parameter Setup ofthe frequency converter will bedisplayed.As a supplement to the display,there are three indicator lamps forvoltage (ON), warning (WARNING)and alarm (ALARM), respectively.All frequency converter parameterSetups can be changed immediatelyvia the control panel, unless thisfunction has been programmed tobe Locked [1] via parameter 016Lock for data change or via a digitalinput, parameters 300-307 Datachange lock.Control keys for parameter setupThe control keys are divided intofunctions. This means that the keysbetween display and indicatorlamps are used for parameterSetup, including selecting thedisplay indication during normaloperation.Figure 10 - Local Control PanelFor more information aboutchanging parameters andprogramming, see the VFDmanual ref. TR1-SVX15A,page 86.RT-SVX16C-E425
OptionsSoft StarterA variable speed drive is used as asoft starter to achieve a progressivesupply fan starting and a reducedstarting current as well as the motorstarting torque. This option is welladapted for textile ductapplications. It is factory installed inthe main control panel.The starting time is factory set at 60seconds but can be adjusted on sitewith the VFD parameter n°207.When both options "Soft starter"and "fan failure switch" are orderedat the same time, the starting timemust not exceed 90 seconds.The nominal speed of the motor canbe adjusted on site with the VFDparameter n°003.Soft Starter with 80-100%speed controlThe factory mounted soft starter canbe factory programmed with a80-100% two-speed control toreduce operating costs. In this case,the starting time can be adjusted onsite with the VFD parameter n°211and the nominal speed of the motorcan be adjusted with the VFDparameters n°204.For more information aboutchanging parameters andprogramming, see the VFD manualref TR1-SVX15A.Figure 11 - VFD (Soft starter & 80-100% speed control) location26RT-SVX16C-E4
Options0 - 25% fresh Air HoodThe 0-25% fresh air hood allows tointroduce fresh air into the unit. Thisis a manual device fitted on the backof the unit, sized for a maximum of25% of the nominal rooftop air flow.This option includes for the hooditself, a wire mesh and a slidabledamper.The slidable damper has to beadjusted manually by removing thescrews and sliding it off up or down(Figure 12).The amount of fresh air introducedis then permanently fixed.Barometric reliefThe barometric relief allows tominimize overpressure in thebuilding caused by the introductionof fresh air. This option is typicallyinstalled when fresh air intake isbelow 25% of the nominal air flowand when the return air pressuredrop is below 25Pa.This option includes exhaust hoodsand gravity dampers located in thereturn air section. When thepressure of the building increase,the gravity dampers open andrelieve air to the outside.If the return air duct pressure dropis higher than the buildingoverpressure, the gravity damperswill not open.If the return air duct pressure dropis lower than the buildingoverpressure, the gravity damperswill open and relieve air outside ofthe building.Figure 12 - 0-25% manual fresh air damperAB1A. Down flow unitsB. Horizontal flow units1. Slidable dampersRT-SVX16C-E427
OptionsExhaust fansThe exhaust axial fans are used tominimize the overpressure in thebuilding caused by the introductionof fresh air.This option is typically used whenthe fresh air intake needed isbetween 40 to 50% of the nominalair flow or when the return air ductpressure drop is higher than 25 Pa.This option includes hoods, gravitydampers and two axial fans.(Figure 13)Both fans work always synchronizedwith one stage.A potentiometer installed in the Airinlet section allows to adjust theexhaust fan set point,corresponding to the fresh airdamper position.When the supply air fan is ON, theexhaust fans turn on whenever theposition of the fresh air dampersmeet or exceed the exhaust fan setpoint. (If the potentiometer is set at40%, the exhaust fans will startwhen the fresh air dampers willmeet or exceed 40% opening).Table 12 - Exhaust fan performancesFigure 13 - Fresh air and power exhaust fans3A. Side view showing fresh air andpower exhaust hoods fordownflow configuration1. Fresh air hood2. End of unit3. Power exhaust hood1A22B. Side view showing powerexhaust hoods for horizontalconfiguration1. End of unit2. Power exhaust hoodB1External Static Pressure (Pa)ExhaustAirflowStep 1ESPStep 2ESPm 3 /h Pa Pa1690 186,8 1992560 169,4 1943380 162 1874250 130 1795110 105 1695940 77 1626800 62 1527630 37 1408500 0 1309360 11510190 10511050 9011880 7712740 6213610 5014440 3715300 2516130 1016990 0Notes:1. Step 1 = 1 exhaust fan motor operating.Step 2 = 2 exhaust fan motor operating.2. Power Exhaust option is not to be applied onsystems that have more return air static pressuredrop than the maximum shown in the table foreach motor speed tap.28RT-SVX16C-E4
OptionsHot water coilLow pressure hot water coils arefitted horizontally in the fandischarge plenum. (Option availableonly in downflow units).The hot water coil is provided witha fully modulating 3-way valve, astop valve, a draining trap and ananti freeze protection.When the temperature around thecoil approaches the freezing point(2°C), the anti frost thermostat openthe 3-way valve to 100%. No signaloutput available.Max operating pressure: 4 barsMax water temperature: 90°C<strong>Installation</strong> and connectionIn order to prevent water fromfreezing up in the coil duringunoccupied period or shutdownlimited period, it is recommendedto use ethylene glycol. The servicesof a water treatment specialist arerecommended if water used cancause scaling deposits or erosion.Insulate all the water piping likely tobe exposed to freezingtemperatures in order to avoidfreeze up of the coil and heat losses.The water distribution network mustbe fitted with vents in places whereair is likely to be trapped.Table 13 - Ethylene glycol percentageEthylene glycolpercentageWater inlet connection: 1''1/4 ISO R7Water outlet connection: 1''1/4 ISO R7Freezing point(%) (°C)10 -420 -10The hot water coil is factorymounted and placed in thedischarge section. Two holes areprovided to connect the hot watercoil. They are located in the base ofthe unit. Remove the central panelor the EVP panel to access the coil,using an 8-mm wrench (The boltsare located on the bottom part ofthe panel). The tubes for enteringand leaving water are equippedwith a threaded female connection.Electric HeaterElectric heaters are fitted on thesupply fan discharge.Heaters have two heating stagesand provided with two types ofoverheat thermostats:• Automatic reset thermostats whichstop the electric heater when theair temperature rises to 76°C.Automatic reset at 60°C. No alarmoutput available.• The manual reset thermostat whichstops the unit when the airtemperature rises to 120°C.No alarm output available.Figure 14 - Hot water coil connectionsRT-SVX16C-E429
ControlsControl wiringThe control circuit is powered by24 voltsWARNING! : The unitdisconnection switch must beopened and blocked open. There isa risk of injury or electrocution.Note: The unit 24V transformermust not be used to poweraccessories installed on the site,apart from accessories mounted inthe factory.Unit controlled by thermostatWire up the electrical connectionbetween the thermostat (thermostatterminal strip) and the unit (LTBterminal strip) in accordance withthe connection diagram.The low voltage wiring must not beinstalled in the same ducts as thepower cables.The sizes and lengths of thethermostat connection cables arespecified in table 12. The totalresistance of these control cablesmust not exceed 5 ohms. If theresistance exceeds this value, thethermostat may not function withthe same accuracy.The wire between the remotesensor and the programmable zonethermostat THP03 must be a twistedshielded pair with a sectional areaof at least 0.75 mm².Unit controlled by BASEach unit must be equipped with aTCI3 board.A communication bus (twistedshielded pair) must link each TCI3 tothe Trane Rooftop Manager (RTM) orthe communication gateway (in thecase of an external BAS).Connect one ambient sensor perunit.Unit controlled by TRACKERsupervisor.The units must also be equippedwith the TCI-3 communicationboard. It is necessary to have oneremote sensor per unit for aconstant volume installation. In caseof a variable flow rate installation(Varitrac), this sensor must not beinstalled.A twisted shielded pair must beused for the communication cable.Among other things, the Trackersupervisor is used to control setpoints, manage timings(Programming) and display faults.For more information refer to thesupervisor's documentation.Electronic zone thermostatEnsure the electronic zonethermostats are configured at theright data transmission speed. Thesetting needs to be modified forlarge rooftop units (thermostat'smicro-switches).Table 14 - Controls Wire SizingMaximum Wire lengthWire size(mm²)THS/THP 03Zone sensor wire sizeConventionalthermostatTHS/THP 01-02Zone sensor wire sizeCO2 sensor wire sizeMaximum wire length(m)0,33 450,5 760,75 1151,3 1852 3000,33 100,5 150,75 231,3 372 600,25 500,5 1001 20030RT-SVX16C-E4
ControlsRemote potentiometerRemote potentiometer is used toadjust remotely the permanent freshair intake. It is compatible with0-50% fresh air motorized hood andeconomizer.Figure 15 - Remote potentiometerFigure 16 - Potentiometer connectionRT-SVX16C-E431
ControlsFigure 17 - CO 2 / VOC sensor wiringCO 2 / VOC (VolatileOrganic Compound)sensorCO 2 / VOC sensor allows to adjustthe amount of fresh air introducedin the building to maintain a goodIndoor air quality.This sensor controls the opening ofthe 0-50% fresh air damper of amotorized fresh air hood option oreconomizer option.When the CO 2 and/or the VOCconcentration meets or exceeds theadjustable set point, the fresh airdamper modulates from thepermanent set value and 50% of thenominal airflow.This option includes an electronicboard factory mounted in thecontrol panel and a photoacousticroom sensor to be installed in theair-conditioned room.Note:Proper location is important toensure accurate measurements ofrepresentative samples. TheCO 2 /VOC sensor should be placed inan area of the room where there isfree circulation of air on a flatsurface area, 1.4 m from the floor.Avoid locating the sensor onsurfaces with an uncooled,unheated area behind them or in"dead" spot behind doors or incorners.The sensor can be duct mounted(accessory). In this case air velocityshould not exceed 7.6m/s on theintake sampling tube.To run properly, size and length ofwire connections have to be asshown below:Table 15 - CO 2 sensor wire sizeCross sectionmm²Max. lengthm0.25 500.5 1001 2001. CO 2 /VOC Sensor2. ROM/UEM board3. UEM Board_____ Factory wiring------- Field wiring32RT-SVX16C-E4
ControlsFigure 18 - P1 to P5 jumper configurationCO2CO2VOCThe CO 2 option allows to measure aCO 2 (or CO 2 and volatile organiccompounds) in order to increase ordecrease the fresh air amount in thebuilding.The CO 2 /VOC sensor providessensing of carbon dioxide over arange of 0-2000ppm converted to avoltage signal from 0-10Vdc. Thissignal is converted in the resistanceoutput module (ROM/UEM) to aresistance value (64 stages of3.12 ohms) from 0-200 ohms tocontrol the minimum openingposition of a damper of theeconomizer or the damper of a0-50% motorized damper.Figure 19 - CO2/VOC adjustmentpotentiometer location1. VR1: Integral adaptive timer 1 to60sec/stage2. VR2: Start control point (0 to 5Vinput)3. VR3: minimum output value4. Switch1: Not used5. Switch2: 50% max. valueRT-SVX16C-E433
ControlsFigure 20 - CO 2 /VOC adjustmentVR1: Integral adaptive timer is toprevent instability brought about bylarge fluctuations from the signalinput. Adjustment is 1 to 60sec/stage. The lower the integral time,the quicker the control response(may cause instability). The higherthe integral time, the slower thecontrol response (may causesluggish response).VR2: Input control start point from0 to 5 Volts. This allows the startpoint to be matched to the basevalue of the input signal. i.e. if thebase value of the input signal is2.5V then no increase in the outputresistance is obtained until the inputsignal rises above 2.5V.VR3: Minimum resistance outputvariable from 0 to 200Ohms. VR3 isused to set a minimum fresh airindependent of the CO 2 measure.Switch 2: This switch when ONlimits the output to 50% of the fullrange i.e. 100 Ohms.34RT-SVX16C-E4
ControlsFire thermostatThere are two sensors in the firethermostat Kit. SensorX13100040-01 is factory set to openat 57°C. Sensor X13100040-02 is setto open at 115°C. Sensors aremounted directly in the ductwork,they should be installed whereelements can respond quickly to airtemperature changes. If notpossible, the sensor may beinstalled on a suitable bracket sothe air is drawn across the element.Sensor X13100040-01 has to bemounted in the return air duct.Sensor X13100040-02 has to bemounted in the supply air duct.Note: Do not permit element guardto touch internal parts. Do notlocate sensor where the aircirculation is restricted by baffles. Atthe selected location, cut a hole toclear element guard and drill holesfor mounting screws according tofigure 21.Figure 21 - Duct mounted thermostatConnect wires according tofigure 22.Figure 22 - Connection of fire thermostatwith TCI board1 TCI3 communication board2 Supply duct limit control3 Return duct limit control4 To BMSConnection without TCI boardConnect according to the standardwiring diagram provided on theunit. Remove sensor cover andfasten control securely with screws.Loads connected must not exceed2amps, 30V Ac.1. Fire thermostat2. Hole in the ductRT-SVX16C-E435
ControlsClogged filter detectorThis device is mounted in the filtersection. The detector measures thedifference in pressure before andafter the filter section. The cloggedfilter information is sent to theTPH03 thermostat, to the TRACKERor to the BMS. The setting range is40 to 300 Pa.Figure 23 - Clogged filter detectorlocation1. Clogged filter detectorSmoke detectorThis device is used to detect smokein the air stream. It includes afactory mounted detectorconnected to a central panel, bothfitted in the fan section.When smoke is detected, it shutsoff the unit. A dry contact isavailable on the control panel for aremote default.1High temperature safetythermostatThis additional safety device is amanual reset thermostat for gasfired units (YKD/YKH), requiredmainly by the French ERPregulation.It is located in the gas burnersection. It stops the gas burner andthe supply air fan when the supplyair temperature rises to 120°C.Supply air sensingLocated in the supply fan section,this temperature sensor reports thesupply air temperature to thecontroller. With the TCI-3 option, itcan be used to report thetemperature to the TRANEsupervisor.Remote fault relayThis is a factory-mounted relay usedto remote alarm signals (drycontact) to a local BMS or a localcontrol panel. With this relay, thecompressor, heating, fan/ andpower supply alarm output signalsfrom the controller are reported to asingle dry contact.Figure 24 - Smoke detectorCAUTION! : The smoke detectorsensor must be cleaned upperiodically to avoid repeated cutouts.For safety reasons, the manualreset on the smoke detector mustbe avoid. It is recommended toswitch off/on the unit with thedisconnect switch.36RT-SVX16C-E4
ControlsThermostats6 thermostats are available:THS01/THP01, THS02/THP02 andTHS03/THP03."THS" are non-programmablethermostats, "THP" areprogrammable.01 and 02 series are conventionalthermostats, 03 series are dedicatedto the controller.Other accessories available:• Remote temperature sensor to beused with THS/THP 01-02• TZS0: Remote room temperaturesensor to be used with THS/THP03, Tracker or Varitrac systems.• DTS: Duct temperature sensor tobe used with THS/THP 03.• TZS02: Remote room temperaturesensor with adjustable thumwheelsetpoint to be used with Tracker orVaritrac systems.• TZS04: Room temperature sensorwith adjustable thumbwheel andoverride button, to be used withTracker or Varitrac systemsRefer to separate documentation formore information.Table 16 - Thermostats featuresTHS01 THP01 THS02 THP02 THS03 THP03non-programmable X - X - X -programmable - X - X - Xelectronic X X X X X Xunit control type design electromech. electromech. electromech. electromech. UCP2 UCP2interface card needed CTI* CTI* CTI* CTI* none nonefor Cooling Only units X X - - X Xfor Heat Pump units - - X X X Xfor Gas Fired units X X - - X XCooling stages 2 2 2 2 2 2auxiliary heating stages(elec. heater, HWC )heating stages(heat pump mode)2 2 1 1 2 2none none 1 1 1 1liquid crystal display X X X X - XNote: thermostats are powered up by the rooftop control (24V)RT-SVX16C-E437
ControlsCommunication InterfacesConventional Thermostat Interface(CTI) boardThis is an electronic board factorymounted in the main control panel,needed to allow communicationbetween conventional thermostats(such as THS/P 01-02) and the unit.When the CTI board is used:- The unit is controlled by thethermostat or the BAS device.- The board diagnostic can nolonger be performed, but can bedone on the UCP level, on the J7junction pin.- If a failure occurs on the devicecontrolling the unit, the unitoperation stops.TRANE Communication Interface(TCI-3) boardThis is an electronic board factorymounted in the main control panel,needed to allow communicationbetween a TRANE IntegratedComfort system (TRACKER orVaritrac CCP2) and the unit(COM3-COM4).LON Communication Interface (LCI)boardThis is an electronic board factorymounted in the main control panel,needed to allow communication ona LonTalk ® Network at the unit level.The LonTalk ® CommunicationInterface board (LCI-V)This interface board allows Voyagerunits to communicate on aLonTalk ® Network at the unit level.Network variables are based on theLonMark ® Space Comfort ControllerFunctional Profile Template. TheLCI-V utilizes a Free Topologytransceiver FTT-10A. The FTT-10. Atransceiver supports non-polaritysensitive, free topology wiring,allowing the system installer toutilize star, bus, and looparchitecture. The LCI-V can also beconnected to an optional HighTemperature Limit Switch ifinstalled with the rooftop unit. Formore information, see attachedmanual LTCI-IN-1.38RT-SVX16C-E4
<strong>Operation</strong>Setting the economizer or0-50% motorized hood(option)Note: The Unit Economizer Moduleis located in the electrical panel.Note: When the C02/VOC sensoroption is installed, the economizermust be set from the UEM board(refer to CO2/VOC sensor section inthis manual).- The electrical power must bedisconnected to set the permanentposition and check the economizer.- Disconnect the power supply, putthe thermostat fan selector to "ON"and the "HEAT/COOL" selector to"OFF". This sets the damper in theminimum ventilation position.- To set the required permanentventilation air position, turn thedial on the UEM clockwise toincrease ventilation, orcounterclockwise to decreaseventilation. The damper will openat this setting whenever the fancircuit is powered up.- When the arrow on the dial'sadjustment screw is pointing to 8o'clock, the permanent position isroughly 0%. When the dial ispointing to 12 o'clock it is roughly25%, and when the dial is pointingto 4 o'clock it is roughly 50%.(See figure 25).Notes: To check the damper isfunctioning correctly, the UEM isequipped with an indicator light atthe bottom to the left. This lightcomes on each time the motoractivates the damper to open orclose it. While setting thepermanent position, the dampermay move towards the new settingin several small steps. Once thedamper has remained in the sameposition for 10 to 15 seconds it canbe assumed it is in the newposition. When the fan circuit is nolonger powered up, the dampercloses.Figure 25 - Minimum fresh air adjustment1. Minimum position - 0% fresh air2. Minimum position - 25% fresh air3. Minimum position - 50% fresh airRT-SVX16C-E439
<strong>Operation</strong>Verification procedure:1st step: loosen screw on port 6 ofgas valve (See figure 26).2nd step: connect pressure gauge(electronic or U-tube) togas valve on port 6.3rd step: Place the unit in step testmode - Step 6 (Heat 2),(Refer to table 17).4th step: Check that igniter greenled on igniter board isblinking.5th step: Set minimal gas pressurecut-out at 50 Mb usingknob 1 as shown in figure26.6th step: Verify that igniter green ledis off. Verify that burner fanpressure is below -25 mmwater head7th step: Set minimal gas pressurecut-out at appropriatepressure according to gastype:G20 and G25 gases:15 mbarG31: 20 mbar8th step: Burner will startautomatically aftercompletion of fan purgeand ignition pre-heatcycles Vacuum willstabilize between -1 and -9 mm water head Shouldburner fail to start (notenough gas flow) orvacuum not stabilizebetween - 1 and - 9 mmwater head, proceed withgas valve adjustment.Gas valve adjustment- using a screw driver, remove plugon gas flow adjustment screw 4(See figure 26).- turn:. clockwise to increase gas mix andbring vacuum to -1 mm waterhead max.. counterclockwise to decrease gasmix and bring vacuum to - 9-mmwater head min.- replace plug on gas flowadjustment screw 4- remove hose from port 6- tighten firmly screw on port 6. It ishighly recommended to check thecombustion gases with a flue gasanalyzer. The measured valuesmust be within the followingranges:. carbon monoxide (CO) less than50 PPM. oxygen (O2) greater than 1.5%. carbon dioxide (CO2) less than11%.Note: If the correct setting cannotbe obtained, contact a Tranetechnician.WARNING! : If any operatingchecks must be performed with theunit operating, it is the technician'sresponsibility to recognize anypossible hazards and proceed in asafe manner. Failure to do so couldresult in severe personal injury ordeath due to electrical shock orcontact with moving parts.RT-SVX16C-E441
<strong>Operation</strong>Power-up initializationCAUTION! : Before proceedingwith any test procedure oroperation, make sure that crankcaseheaters have been energized for 8hours at least. All units areequipped with crankcase heaters.Note: Units are factory suppliedwith a smoke detector.A manual reset on the smokedetector device has to be done inorder to start the unit.Idle status: Green LED ONDetection status: Green LED OFFThe "initialization" by the UCPoccurs each time the system ispowered-up. The UCP performsinternal self-diagnostics checks,which include identifying theequipment components of itssystem, and the configuring of itselfto that system. It also checks itselfto be sure it is functioning correctly.On units with the optionaleconomizer, the damper is drivenopen for 15 to 20 seconds and thenfully closed. The UCP systemindicator LED is turned to "ON"within one second of start-up ifoperation is correct.Test mode procedure at the UCPcontrol boardOperating the unit from the roofusing the test mode at the UCPcontrol board.CAUTION! : Before proceedingwith the following test procedures,make sure that thermostat or zonesensor is off.WARNING! : When operating theunit in test mode, the evaporatoraccess panel and the control boxcover must be closed. Failure toensure that the evaporator accesspanel and control box cover is inplace could result in severepersonal injury or death.The Unitary Control Processor(UCP) has a red indicator light in thelower left corner. When power isapplied to the unit, the light willglow if the UCP is functioningcorrectly. If the system is placed intest mode the light will blinkcontinuously.Note: The control box cover has asmall peephole, located in the lowerleft-hand corner. The red indicatorlight on the UCP can be seenthrough this peephole. Do notremove the control box cover whilethe unit power is connected.The microelectronic control (UCP)provides compressor anti shortcycle timing functions throughminimum "Off" and "On" timing toincrease reliability, performance andto maximize unit efficiency. Uponpower initialization, the UCPperforms self-diagnostic checks toinsure that all internal controls arefunctioning. It checks theconfiguration parameters againstthe components connected to thesystem. When units are equippedwith an optional economizer, theUCP drives the economizerdampers toward the open positionfor 15 to 20 seconds then closes.The economizer is closed forapproximately 90 seconds to ensureproper damper calibration.The LED located on the UCP moduleis turned "On" within one secondafter power-up if all internaloperations are good.42RT-SVX16C-E4
<strong>Operation</strong>Test modesStep test mode- The step test mode is initiated byshorting across the "TEST"terminals, marked test 1 and test 2on the unit low voltage terminalstrip (LTB), for two to threeseconds and then removing theshort.- When the test mode is initiated,the light on the UCP will blink andthe system will begin the first testsstep (See test mode Table 17).- To continue to the next step,reapply the short across the testterminals for 2 to 3 seconds.- The unit may be left in any teststep for up to one hour. If allowedto remain in any test step for morethan one hour, the test mode willterminate and control will revert tothe zone sensor. As you continueto apply and remove the shortacross the test terminals, the unitwill move through the stepsaccording to Table 17.- To terminate the test mode, cyclethe unit power at the unitdisconnect or continue steppingthrough the modes until the UCPindicator light glows constantly.Auto test mode- The auto test mode is initiated byinstalling a jumper betweenterminals marked TEST 1 andTEST 2 on the LTB. The unit willstart step 1 and cycle through thetest steps one time, changingevery 30 seconds.- When the test mode is initiated,the light on the UCP will blink andthe system will begin the first teststep, and turn on the indoor fan(See test mode Table 17).- At the end of the auto test mode,the indicator light will glowconstantly and control will revertto the zone sensor.- The unit can be left in any of thetest steps, by removing thejumper. It will remain in this stepfor up to one hour. If allowed toremain in any test step for morethan one hour, the test mode willterminate and control will revert tothe zone sensor.- If the test mode is to be startedagain, cycle the unit power andreapply the jumper.- To terminate the test mode, cyclethe unit power at the unitdisconnect.Resistance test mode- The resistance test mode isinitiated by applying theappropriate resistance valueacross the "TEST" terminalsmarked TEST 1 and TEST 2 on theLTB- When the test mode is initiated,the light on the UCP will blink andthe system will begin the test stepselected by the resistance beingapplied across the test terminals(See test mode Table 17).- The resistance values are indicatedin the resistance value chart below(See Table 18).- After selecting the desired teststep, and applying the appropriateresistance across the testterminals, the unit will start.- The unit can be left in this step forup to one hour. If allowed toremain in any test step for morethan one hour, the test mode willterminate and control will revert tothe zone sensor.- To terminate the test mode,remove the resistance, and cyclethe unit power at the unitdisconnect.Table 17 - Test mode YKD/YKH 275 to 500Step Mode Fan Econ Cool 1 Cool 2 Heat 1 Heat 21 Fan On On Min Off Off Off Off2* Econ. On Open Off Off Off Off3 Cool. 1 On Min On Off Off Off4 Cool. 2 On Min On On Off Off5 Heat 1 On Min Off Off On Off6 Heat 2 On Min Off Off On OnNote: Steps for optional accessories and modes not present in unit should be skipped.* With optional accessoryTable 18 - Resistance values chartStep Mode Ohms1 Fan On 2.2 k2* Economizer 3.3 k3 Cool 1 4.7 k4 Cool 2 6.8 k5 Heat - speed 1 10 k6 Heat - speed 2 15 k* With optional accessoryRT-SVX16C-E443
<strong>Operation</strong>Figure 28 - Gas heating module principle diagram1. Negative pressure controller2. Safety solenoid valve3. Gas injector4. Air inlet holes5. To the burner6. Fan7. Gas block8. Gas minimum cutoutUnit start-upSetting the gas-fired module intooperation (to be performed by thequalified gas technician)WARNING! : This type of burnercan only be put into operation by aqualified technician who has readand understood the followingprocedure, or even better who hasundergone the training course onTrane gas burners.Before performing any tests it isnecessary to carry out the followingoperations:- Check a stop valve is in place.- Check an expansion valve is inplace, and is appropriate for thetype of gas used:* G 20: 20 mb.* G 25: 25 mb.* G 31: 37 or 50 mb.N.B. To function with Propane gas,the burner is fitted with a clipper(supplied by Trane).- Vent the gas pipe.- Check the gas pipe is leak tightupstream of the gas unit (Seedrawing). Use Typol or a foamproduct ("1000 bulles" aerosol orsimilar). Do not use soapy water.- Check the pressure upstream ofthe gas unit (the branchconnection for the pressure inputis located on the minimum gaspressure cutout). The minimumcutout must be set to 15 mbar. Thisoperation must be performedwhen the burner is OFF.- Check the power supply voltage ispresent at the output of theT2-2 transformer:* 115 volts for power supply of theIGN module (L1-L2 and S1-S2).* 230 volts for power supply of theburner fan-motor.- Measure the negative pressuredownstream of the gas unit:Connect a flexible hose at thebranch connection to the gas unit(for sizes 060 and 075 the branchconnection is located on the gaspiping) and connect an electronicpressure gauge or else a U tube.- Start the burner by changing thethermostat set point or by usingthe "test mode" terminals on themachine terminal strip.- Measure the partial vacuumdownstream: it must be - (minus)5 mm of water head, + or - 4 mm.- Check again the gas supplypressure upstream of the gas unitin operation, in order to ensure thepressure has not dropped.Important note: If thismeasurement is correct, do notmodify the gas unit setting. It isdefined in the factory.Caution: The drainage line is directlyabove the heating element. To avoidinjuries due to high temperatures,combustible substances or productsresulting from incompletecombustion, do not stand in front ofthe heating element duringoperation or start-up of the burner.44RT-SVX16C-E4
<strong>Operation</strong>Adaptation to available gases(Table 19)There are different categories ofgas-fired modules built intoYKD/YKH units. The units aresupplied prepared for operationusing natural gas G20 (20mbar) andG25 (25mbar) or for propane gasG31 (37mbar).The change from gas G20 to gasG25 does not require any specialarrangements. The power availableat the G25 gas supply is reduced.The change from natural gas G20 topropane gas G31 requires thefollowing modifications:- Change of aperture for gas suctionin the burner's fan.- A pressure clipper must bebrought into action.Starting the unit in cooling modeVerify that the unit airflow rate isadjusted according to informationprovided in the "Supply fanadjustment" section of this manual.To start the unit in cooling mode:- Place the zone sensor systemswitch in the COOL position.- Position the cooling setpointapproximately 10° below roomtemperature and place the fanswitch in the "AUTO" or "ON"position.- Turn on unit main power supply.The condenser fan motor,compressor and evaporator fanmotor should operateautomatically. There will be a delayof up to 5 minutes before the unitstarts in cooling mode.Cooling shutdownTo exit the test mode, disconnectunit power for 3-5 seconds andreapply. When running the unitusing the zone sensor as thecontrol, position the selector switchto "OFF". There may be a delay ofup to 3 minutes before compressorsshutdown and an additional 1minute before the fan shuts down inthis setting.Operating pressuresAfter the unit has operated incooling mode for a short period oftime, install pressure gauges on thegauge ports of the discharge andsuction line valves.Note: Always route refrigeranthoses through the port holeprovided and ensure that thecompressor access panel is in place.WARNING !Do not de-energize main powerdisconnect except when unit is tobe serviced. Power is required tokeep the compressor crankcasewarm and boil off refrigerant in theoil (except on units with Scrollcompressors).Table 19 - Marking category of the gas section in different countriesCountries FR LU - DE CH-ES-GB-IE-PT IT NL BE AT-DK-FI-SECategories ll2E+3P l2E and l3P ll2H3P ll2H3+ ll2L3P l2E+ and l3P l2HGas typePressure (mBar)G20 20 20 20 20 - 20 20G25 25 20 - - 25 25 -G31 37 50 37 37 30 37 -The transition from G20 gas to G25 gas does not require any action.RT-SVX16C-E445
<strong>Operation</strong>Unit operationOperating principles of the gasheating moduleWARNING! : Start-up of theheating mode must only beperformed after the cooling mode.This operation must be performedby a qualified technician.Heating in YKD/YKH units is carriedout by means of a heating moduleconsisting of a heat exchanger anda gas burner.The burner is the forcedcombustion type and provides twooperating rates controlled by theUCP electronic control modulewhich optimizes operation of the airconditioner.The heating need detected by thetemperature measurement sensoractivates the heating module. Thenormal cycle for starting the heatingmodule begins when the need isdetected.The UCP module powers its internalrelay K5. It also powers the K70contactor of the burner fan (2M70)and the ignition control module(IGN) by means of the safety relayK2 and the contact for the minimumgas pressure cut-out.Table 20 - State of the LEDs on the gas-fired moduleRelay K5 trips and sets the burnerfan to high speed. Afterapproximately one minute the K5relay falls back and the 2M70 fanchanges to low speed. The ignitioncontrol module preheats theignition probe (IP) for 36 seconds.After this pre-heating phase, the gasvalve is energized for approximately8 seconds to ignite the burner. If theburner does not ignite, thecontroller makes two furtherattempts and then locks for72 minutes. When the gas ignites,the IP probe is de-energized and canthen be used for flame detection.If the controlled ambienttemperature remains below the setpoint for the 1st heating step, theUCP powers the K5 relay again. Theburner fan then changes to highspeed and the heating capacity is atits maximum.When the temperature of the areato heat reaches the set point, theUCP cuts the power supplies to K5,K70 and the IGN, thus stopping theburner.If the return air fan (4M46) has beenset to operate automatically, it willonly start operating a few secondsafter the heating need has beendetected. Similarly, it will only stopapproximately a minute and a halfafter the burner stops, to ensure themaximum amount of heatcontained in the exchanger isrecovered.To rearm the ignition controlmodule when it has been locked, itis sufficient to either isolate the unitusing the general disconnectionswitch, or eliminate the need forheat by modifying the set point forthe ambient temperaturemeasurement sensor.Apart from the safety provided bythe ignition control module, theburner must implement thefollowing safety measures:- Detection of a minimum gassupply pressure by the automaticreset B70 cut-out.- Detection of an abnormal heatingtemperature of the conditioned air(Thermostat TC01).- Detection of overheating due toinsufficient air circulation on theheat exchanger (Thermostat TC02).TC01, TC02 and TC03 are automaticreset thermostats. If thesethermostats trip without justificationa qualified technician must be calledin to diagnose the causes of theapparent fault.Version units (High power)High power gas-fired machines areequipped with two gas modules.Each module is identical to themodule used for the low powerunit. The two modules will start upand be controlled in parallel. Only ifthe electrode detects a flame faultwill a single module beextinguished and go through anignition cycle. However, ifoverheating is detected on one ofthe three overheating thermostatsTC01, TC02 and TC03, or if low gaspressure is detected, both burnerswill be extinguished.Diagnostics Green LED Red LED1. Powered but no heat demand Off Off2. Heat demand without fault Flashing Off3. No flame detection on ignition - or signaldetected and then lost4. Gas unit incorrectly wired or flame signaldetected on a heat demandOffSteadyFlashingFlashing5. Internal fault Off Steady46RT-SVX16C-E4
<strong>Operation</strong>Figure 29 - Gas burner section1 Negative pressure connection2 Multi-aperture plate3 Fan motor assembly4 Multi-aperture plate5 Injector6 Min. gas cut-out7 Gas pressure connection8 Clipper (propane only)Checking correct operation of theburner safety devicesAfter a few successful ignitions, itwill be necessary to check theburner safety devices are operatingcorrectly, following the procedurebelow:1) Close the main gas valve, andsimulate a need for heating. Theburner must start and then stopwhen the quantity of gascontained in the pipe betweenthe main valve and the built-ingas unit has been exhausted.Then, due to the drop in gassupply pressure, the B70 cut-outmust open and stop all thecomponents in the gas chain(fan, gas valve, ignitioncontroller). Any attempt to reignitethe burner must fail.2) Open the main gas valve. TheB70 cut-out will re-armautomatically. The burner can beput back into operation.3) Restart the burner. Oncecombustion has been obtained,simulate disappearance of theflame by disconnecting one ofthe flame detection sensorconnections by opening therapid wiring connector. Theignition controller immediatelystops the burner and closes thegas valve.4) Re-establish the connection.Restart the burner. Whencombustion has been obtained,simulate an air fault on the heatexchanger by disconnecting aconnection on the TCO1 sensor.The gas valve and ignitioncontroller are no longerpowered. Reconnect the TCOconnection.5) When combustion has been reestablished,simulateover-heating by disconnecting aconnection on the TCO2 sensor.All the burner components stop(the fan, the gas valve and theignition controller are no longerpowered). Re-connect the TCO2connection.RT-SVX16C-E447
<strong>Operation</strong>Trane Gas Heating Module Ignition Controller start-up and safety sequenceFigure 30 - Operating sequencesNormal sequence(stopping by control)Sequence after activation of a safety measureIgnition after a flame fault signalOn signal of loss of flameTimeFunctioningManualControletc...etc...Gas valveFan2° 6p1° 6pElectrodeheatingIonisationTSE = 0.96 s maxiTable 21 - Gas burner dataBurner G250 G350 G400Natural Gas G20 (20mbar) 34.02 MJ/m 3 (15°C-1013)Gas Flow (15 C-1013 mbar)(m 3 /h)Nominal rate 5.6 8.1 9Reduced rate 5.08 8.13 8.47Heating Capacity(kW)Nominal rate 48.2 69.3 77.4Reduced rate 43.7 69.1 72.8Heating Rate(kW)Nominal rate 53 77 85Reduced rate 48 76.8 80Efficiency %Nominal rate 91 90 91Reduced rate 91 90 91G20 - 20mbar CO % < 0.001% < 0.001% < 0.001%Smoke analysis @ 400V-3- Nox ppm 19 ppm 9 ppm 46 ppm50Hz CO 2 % 8.5% 9.7% 9.6%Burner G250 G350 G400Natural Gas G25 (20 ou 25 mbar) 29.30 MJ/m 3 (15°C-1013)Gas Flow (15 C-1013 mbar)(m 3 /h)Nominal rate 5.3 8.8 8.2Reduced rate 5.15 8.21 8.02Heating Capacity(kW)Nominal rate 38.3 62.9 60.3Reduced rate 37.5 59.5 58.5Heating Rate(kW)Nominal rate 43 71.5 67Reduced rate 41.9 66.8 65.3Efficiency %Nominal rate 89 88 90Reduced rate 89 89 90G25 - 25mbar CO % 0.050% < 0.001% < 0.001%Smoke analysis @ 400V-3- Nox ppm - - -50Hz CO 2 % 7.1% 7.4% 7.0%Burner G250 G350 G400Propane Gas G31 (30. 37ou 50 mbar) 88.00 MJ/m 3 (15 C-1013)Gas Flow (15 C-1013 mbar)(m 3 /h)Nominal rate 2.2 2.7 3.5Reduced rate 2.17 2.56 3.19Gas Flow (15 C-1013 mbar)(kg/h)Nominal rate 4.2 5.1 6.6Reduced rate 4.1 4.9 6.1Heating Capacity(kW)Nominal rate 48.6 57.5 78.2Reduced rate 47.7 55.3 71.8Heating Rate(kW)Nominal rate 54 65.3 85Reduced rate 53 62.6 78Efficiency %Nominal rate 90 88 92Reduced rate 90 88.3 92Combustion Air Flow (Avec E=25%)(m 3 /h)Nominal rate 72 98 113Reduced rate 71 93 103G31 - 37mbar CO % < 0.001% < 0.001% 0.002%Smoke analysis @ 400V-3- Nox ppm - - -50Hz CO 2 % 9.3% 8.9% 12.0%48RT-SVX16C-E4
<strong>Operation</strong>Mechanical Cooling with anEconomizerIf the outdoor air enthalpy is greaterthan the return air enthalpy, theeconomizer will not operate and thedamper will not open past theminimum position setting. Theeconomizer will not operate atoutdoor temperatures above 24°C. Ifthe outdoor air enthalpy is less thanthe return air enthalpy, the damperswill modulate to maintain thecooling setpoint.The control point for theeconomizer is designed to control atleast 0.8°C below the coolingsetpoint or 0.8°C above the heatingsetpoint, whichever produces thehighest economizer control setpoint.Example:Heating Setpoint = 20° CoolingSetpoint = 21° The controltemperature for the economizer willbe 0.8° above the heating setpointdue to it producing the leastamount of offset.Example: (continued)Heating Setpoint = 13° CoolingSetpoint = 24° Because of thespread between the heating andcooling setpoints, the control willchoose to control the economizer atan offset temperature of 0.8° belowthe cooling setpoint. This will be thehighest resulting control setpointtemperature while maintaining theleast amount of offset.Table 21 list the percentages thedampers will open based on theseconditions.If either or both the return airhumidity sensor or the return airsensor fails, the economizer willoperate using the referenceenthalpy setpoints.While economizing, if the supply airtemperature falls below 10°C, thedamper will not be allowed to openuntil the supply air temperaturerises above 10°C. If the supply airtemperature falls below 7°C, thedampers will be driven to minimumposition and held there until thesupply air temperature rises above10°C.The mechanical cooling is disabledwhile in an economizing state untiltwo conditions are met:- The economizer dampers havebeen fully open for three minutes,and- The calculated rate of change inthe zone temperature is less than7°C per hour.Zone Temperature . OccupiedCoolingWhen the unit is in cooling modeand the zone temperature raisesabove the cooling setpointcontrolband, the economizer andthe compressor stages will becycled as required by the zonesensor, remote panel, or Tracer.Zone Temperature . OccupiedHeatingWhen the unit is in heating modeand the zone temperature fallsbelow the heating setpointcontrolband, the necessary stagesof heat will cycle to raise thetemperature to within the setpointcontrolband.If the economizer is disabled due tounsuitable conditions, themechanical cooling will cycle asthough the unit had no economizer.The economizer is at the selectedminimum position when the supplyfan is "On", and is closed when thesupply fan is "Off".Supply FanWhen the Fan Selection Switch is inthe "AUTO" position and a call forcooling is initiated, the supply fanwill delay starting for approximatelyone second. When the Fan SelectionSwitch is in the "ON" position, thesupply fan will run continuously. Ifairflow through the unit is notproven for more than 5 secondsnominally, the UCP will shut off allmechanical operations, lock thesystem out, send a diagnostic toICS, and the SERVICE LED will flash.The system will remain locked outuntil a reset is initiated eithermanually or through ICS.RT-SVX16C-E449
<strong>Operation</strong>Table 22 - Percent of damperTable 23 - Compressor staggingMechanical Cooling without anEconomizerMechanical cooling is used tomaintain the zone temperature.The UCP is designed to limit thecompressor cycle rates to within 10cycles per hour based on theminimum compressor "on" and "off"times. It stages the mechanicalcooling to control the zonetemperature to within +/-1°C of thesensor setpoint at the sensedlocation.Table 22 lists the compressorstepping sequence.zone temp - econ setpoint °Czone -ODT 0- 0.3 0.3 - 0.6 0.6 - 1.1 1.1 - 1.7 1.7 - 2 >5.80 - 4 °C 0% 3% 9% 30% 90% 100%4 - 8 °C 0% 2% 6% 20% 60% 100%> 8 °C 0% 1% 3% 10% 30% 100%ONOFFStep 1 Step 2 Step 3 Step 1 Step 2 Step 3275 - 350 comp1* comp 1+2 comp 1+2 comp1400 -500 stage 1** stage 2*** stage1+2 stage 1+2 stage 2*** stage 1**Note: The "Stages" listed under each step are the operating stages* - Single circuit, dual manifolded compressors** - Number one refrigeration circuit, Stand-alone compressor, is "On".*** - First Stage is "Off", Number two refrigeration circuit, manifolded compressor pair operating simultaneously,is "On".Supply Air TemperingThis function allows the supply airtemperature to be maintainedwithin a low limit parameter duringminimum ventilation periods. Whenthe system is operating in "Heating"mode, the low limit parameter isequal to the heating setpoint minus6 °C.When an economizer is installed, airtempering is allowed (if selected)when the fan system switch is in the"ON" position with no call forheating. If the supply airtemperature falls 6 °C below theheating setpoint, the next availablestage of heat will be turned on. Itwill remain on until the supply airtemperature reaches 6° above theheating setpoint.Off ModeThis mode is set at the zone sensoror by ICS. During this status, noheating, ventilation, or mechanicalcooling is being performed.When switching the "system"selector to the "Off" mode from anyother mode, any diagnostic dataand diagnostic indication signal willbe retained as long as the systemremains in the "Off" status.Switching the "System" selectorfrom the "Off" mode back to anyother mode of operation will resetall diagnostics and diagnosticsignals.Zone Temperature . UnoccupiedCoolingWhile a building is in an unoccupiedperiod as designated by a remotepanel with night setback or ICS, thenecessary stages of cooling willcycle to maintain the zonetemperature to within theunoccupied setpoint deadband. If aneconomizer is enthalpy enabled, itwill modulate in an attempt tomaintain the zone temperature towithin the setpoint deadband.50RT-SVX16C-E4
<strong>Operation</strong>Zone Temperature . UnoccupiedHeatingWhile a building is in an unoccupiedperiod as designated by a remotepanel with night setback or ICS, thenecessary stages of heat will cycleto maintain the zone temperature towithin the unoccupied setpointdeadband.Gas Heat ControlThe ignition sequence and timingare provided by a separate heatcontrol module. The UCP onlyprovides the heating outputs toinitiate Ist and 2nd stages andcontrol the combustion blowerrelays. Both stages of the furnace,when initiated after each cycle, willstart and operate for one minutethen cycle back if only one stage isrequired.When the fan selection switch is inthe "AUTO" mode, the fan will bedelayed from coming on forapproximately 45 seconds after acall for heat has been initiated. Thefan will remain on forapproximately 90 seconds after theheating setpoint has been satisfied.Electric Heat ControlThe UCP provides two heatingoutputs for Ist and 2nd stages witha 10-second delay between eachstage.When the fan selection switch is inthe "AUTO" mode, the fan will startapproximately one second beforethe 1st heater stage is activated. Thefan and heater will cycle off afterthe heating setpoint has beensatisfied.Clogged Filter (Optional)The unit mounted clogged filterswitch allows the conditions of thereturn air filters to be monitored.The binary input is normally openas long as the filters are within anacceptable soiled range. Theclogged filter output is energizedwhen the supply fan is operatingand the clogged filter switch hasbeen closed for at least 2 minutes.The system will continue to operateregardless of the status of the filterswitch. The clogged filter input canbe used to activate a field suppliedfilter light.Compressor Disable (Demand Limit)ControlThis input incorporates the LPC ofeach refrigeration circuit and can beactivated by opening a fieldsupplied contact.If this circuit is open before acompressor(s) is started, neithercompressor in that circuit will beallowed to operate.Anytime this circuit is opened for5 continuous seconds, thecompressor(s) in that circuit isturned off immediately. Thecompressor(s) will not be allowedto restart for a minimum of3 minutes. If four consecutive openconditions occur during the firstthree minutes of operation, thecompressor(s) in that circuit will belocked out, a diagnosticcommunicated to the BMS, and amanual reset will be required torestart the compressor(s).Power Exhaust ControlThe power exhaust fan is startedwhenever the position of theeconomizer dampers meets orexceeds the power exhaust setpointwhen the supply fan is on.RT-SVX16C-E451
<strong>Operation</strong>High Pressure Cut-outThe high-pressure controls arewired in series between thecompressor outputs on the UCP andthe compressor contactors.On 275, 300 and 350 size units, ifthe high-pressure safety switchopens, the UCP senses a lack ofcurrent while calling for cooling andlocks both compressors out. On 400and 500 size units, if the highpressuresafety opens, thecompressor(s) on the affectedcircuit is locked out. A manual resetfor the affected circuit is required.External Auto/stopWhen this binary input is opened,all outputs are immediately turnedoff and the system will not beallowed to restart until the binaryinput is closed for approximately5 seconds minimum.The shut down is communicated tothe BMS if applicable and the Heatand Cool LED's will blink at anominal rate of 1 blink per second.Compressor Winding ProtectionThe Compressor WindingThermostat(s) are wired in seriesbetween the compressor outputs onthe UCP and the compressorcontactors. In the event a windingthermostat opens, the UCP senses alack of current while calling forcooling and shuts the compressor(s)off for that circuit. Thecompressor(s) on that circuit arelocked out and a manual reset isrequired.Table 24: Capacity Steps with lead/LagEnabledUnit size Step1 Step2 Step3275 Lead 40% 100%Lag 60% 100%300 Lead 50% 100%Lag 50% 100%350 Lead 50% 100%Lag 50% 100%400 Lead 40% 60% 100%Lag 60% 100%500 Lead 33% 67% 100%Lag 67% 100%Figure 31 : Condenser fan locationTable 25: Condenser fan sequenceTemp °CUnit size Step 1 Step 2 Step 3 Output A Output B Fan off275 + 300 comp 1* fan 2 21fan 3 32comp 1,2 fan 2 -23fan 3 16comp 1* fan 2 18350 fan 3 29comp 1,2 fan 2 -29fan 3 13comp 1** fan 2 10fan 3,4 21400 comp 2,3*** fan 2 -7fan 3,4 16comp 1,2,3 fan 2 -34fan 3,4 10comp 1** fan 2 -7fan 3,4 16500 comp 2,3*** fan 2 -23fan 3,4 13comp 1,2,3 fan 2 -34fan 3,4 -34NOTES: The compressors listed are the operating compressors. On 275 to 350 units using lead/lag thecompressors will alternate but the fan sequence will stay the same. On 400 and 500 units with lead/lagthe compressors in steps 2 and 3 will alternate and the fan sequence for that step will be in effect.* Single circuit, manifolded compressor pair.** First stage, number one refrigerant circuit stand alone compressor is ON*** First stage is OFF Number two refrigerant circuit, manifolded pair is ON operating simultaneously.52RT-SVX16C-E4
<strong>Operation</strong>Final installation checklist- Is the condenser fan and indoorblower operating correctly, i.e.:correct rotation and without unduenoise?- Are the compressors operatingcorrectly and has the systemcharge been checked?- Has the gas module been installedas per the procedure in thismanual?- Have the voltage and runningcurrents been checked todetermine if they are within limits?- Have the air discharge grilles beenadjusted to balance the system?- Has the ductwork been checked forair leaks and any condensation?- Has the heating air temperaturerise been checked?- Has the indoor airflow beenchecked and adjusted if necessary?- Has the unit been checked fortubing and sheet metal rattles orany unusual noises?- Are all covers and panels in placeand properly fastened?To keep the unit operating safelyand efficiently, the manufacturerrecommends that a qualified servicetechnician check the entire systemat least once each year, or morefrequently if conditions warrant.RT-SVX16C-E453
<strong>Maintenance</strong>End-user routinemaintenanceSome of the periodic maintenancefunctions for the unit can beundertaken by the end user, thisincludes replacing (disposable) orcleaning (permanent) air filters,cleaning unit cabinet, clearing thecondenser coil, and carrying out ageneral unit inspection on a regularbasis.Warning: Before removing accesspanels to service the unit,disconnect the power supply.Failure to disconnect power beforeattempting any servicing can resultin severe injury or death.Air filtersIt is very important that the centralduct system air filters are keptclean.These should be inspected at leastonce a month when the system is inconstant operation (in newbuildings, the filters should bechecked every week for the first 4weeks).If disposable type filters are usedthey should only be replaced withones of the same type and size. Formaximum pressure drops throughthe filters, refer to the installationsection of this manual.Note: Do not attempt to cleandisposable filters. Permanent typefilters can be cleaned by washingwith a mild detergent and water.Ensure that the filters arethoroughly dry before reinstallingthem in the unit (or duct system).Note: Replace permanent filtersannually if washing fails to cleanthem, or they show signs ofdeterioration. Be sure to use thesame type and size as wereoriginally installed.Condenser coilUnfiltered air circulates through theunit's condenser coil and can causethe coil surface to become cloggedwith dust, dirt, etc... To clean thecoil, brush the coil surface in thedirection of the fins with a softbristled brush. Keep all vegetationaway from the condenser coil area.Service technicianmaintenanceBefore the cooling season,perform the following steps:1. Clean or replace filters.2. Check motors and drives.3. Replace economizer gaskets ifnecessary.4. Tighten and clean condenser fangrille.5. Clean condenser coils.6. Check safety controls.7. Check electrical components andwiring and tighten connectionsas necessary.8. Clean condensate drain.9. Inspect unit duct connections toensure they are physically soundand sealed to the unit casing.10. Inspect unit mounting support tosee that it is sound.11. Inspect unit to ensure there is noobvious deterioration.Before the heating season,perform the following steps:- Visually inspect the unit to ensurethat the airflow required for thecombustion and condenser coil isnot obstructed from the unit.- Visually inspect the flue stack toensure the exhaust path is clearand free of obstructions.- Inspect the control panel wiring toverify that all electricalconnections are tight and that wireinsulation is intact.- Check the operation and safeties ofthe gas ignition system.54RT-SVX16C-E4
<strong>Maintenance</strong>TroubleshootingAlways verify the unit is operatingin the proper "MODE" whentroubleshooting.Symptom Probable Cause Recommended actionUnit will not operate. NoHeat, No Cool or No Fanoperation.1. No power to the Unit. 1. Check line voltage at service disconnect.2. No power to the UCP. 2. Check for 24 VAC from bottom of F1 fuse to systemground.3. UCP fuse (F1) is defective. 3. Check for 24 VAC from top of F1 fuse to system ground.If 24 VAC is not present, replace F1 fuse.4. UCP is defective. 4. 24 VAC is present at the top of F1 fuse to ground, theLED on the UCP should be on. If the LED is not lit,replace the UCP.5. External Auto/Stop input is open. 5. Check the External Auto/Stop input.Unit heats and cools,but will not control tosetpoint.CPR1 will not operate,ODM's will operate.CPR1 operates, ODM's willnot operate.CPR1 and ODM1 will notoperate.Zone Sensor Module is defective.Refer to the Zone Sensor Module1. Compressor failure. 1. Test compressor, mechanically and electrically. Replace ifnecessary.2. Wiring, terminal, or mechanicalcontactor failure.2. Check wires, terminals and compressor contactor. Repairor replace if necessary.3. Low pressure cut out has tripped 3. Leak check, repair, evacuate and recharge as necessary.Check low pressure cut out operation.1. ODM has failed. 1. Check ODM's, replace if necessary.2. ODM capacitor(s) has failed. 2. Check ODM capacitors, replace if necessary.3. Wiring, terminal, or mechanicalcontactor failure.3. Check wires, terminals, Compressor contactor. Repair orreplace if necessary.4. ODF1 relay has failed. 4. Check for proper voltage and contact closure. ODF1 hasa 24 VAC holding Coil and ODF2 relay has a 24 VDCholding coil. If applicable voltage is present, replacerelay.5. UCP is defective. 5. Locate the P1 connector on the UCP. Check for 24 VDCbetween terminals P1-11 and P1-12. If 24 VDC is notpresent, replace UCP.1. No power to contactor coil. PossibleCool Failure1. Check wiring, terminals and applicable controls (CCB1,HPC1, WTL1, LPC1)2. Contactor coil defective. Cool 2. Check contactor coil. If open or shorted, replace it.Failure Indicated.3. CC1 contacts defective. 3. If 24 VAC is present at CC1coil, verify contact closure.4. UCP is defective. 4. If 24 VAC is not present at CC1 coil, reset the Cool Failureby cycling the main power disconnect switch. Verifysystem MODE is set for cooling operation. If no controlshave opened, and CC1 will not close, replace UCP.5. LPC1 has tripped 5. Leak check, repair, evacuate, and recharge as necessary.Check LPC1 operation.RT-SVX16C-E455
<strong>Maintenance</strong>Symptom Probable Cause Recommended actionCPR2 will not operate.Indoor motor (IDM) will notoperateEvaporator coil freezes upduring low ambient operation.Economizer will not operate.Minimum position is at zero,cannot be adjusted.Economizer still modulates1. No power to contactor coil. CoolFailure Possible.2. CC2 coil defective. Cool FailureIndicated.1. Check wiring, terminals and applicable controls (CCB2,CCB3, HPC2, LPC2, WTL2, WTL3)2. Verify integrity of CC2 winding. If open or shorted replaceCC2.3. CC2 contact defective. 3. If 24 VAC is present at CC2, replace relay.4. UCP is defective. 4. 24 VAC is not present at CC2. Reset the Cool Failure bycycling the service disconnect. Place the unit intoCool Stage 2, to insure Compressor 2 operation. Check inputdevices in #1 and #2 above, if no controls have opened, andCC2 and/or 3 will not close, replace UCP.1. IDM has failed. 1. Check IDM, replace if necessary.2. Wiring, terminal, or contactor failure 2. Check wiring, terminals and F contactor. Repair or replacewiring, terminals, or fan contactor F.3. ZSM is defective 3. Place unit in test mode. If the fan operates in the test mode,test the ZSM using the appropriate test procedures.4. UCP is defective. 4. Check the UCP fan output. Locate P2 connector, which isconnected to J2 on the UCP. Find wire 64A (black) andmeasure voltage to ground. If 24 VAC is not present on a callfor fan, replace the UCP.1. System low on refrigerant charge 1. Leak check, repair, evacuate, and recharge system asnecessary.2. System low on airflow 2. Check return air for obstruction or dirty filters. Check fanwheels, motors, and belts.3. Outdoor Air Sensor (OAS) has failed. 3. Test OAS at connector P1, disconnect P1 from J1 on UCP.Test between P1-15 and P1-16. See temperature/resistancecurve. Replace if necessary.1. Economizer connector not plugged 1. Check connector, and connect if necessary.into unit wiring harness2. Economizer Actuator (ECA) has failed 2. Verify that 24 VAC is present between ECA terminals TR andTR1. Jumper TR1 to CCW, economizer actuator should driveopen. Jumper TR1 to CW, economizer actuator should driveclosed. If ECA does not drive as specified, replace ECA.3. Unit Economizer Module (UEM) has 3. Perform the UEM Test Procedures discussed previously.failed.4. Wiring or terminal failure. 4. Check wiring and terminals. Repair or replace if necessary.5. UCP is defective. 5. Perform the UEM Test Procedures discussed previously.1. Minimum position potentiometer hasfailed.1. With the main power off, check the resistance betweenterminals J11 and J12 at the UEM by rotating the on boardminimum position potentiometer knob. Resistance should be50 to 200 Ohms. With power on, DC voltage should measure0.40 to 1.80 VDC. Also refer to the UEM Test Proceduresdiscussed previously.56RT-SVX16C-E4
<strong>Maintenance</strong>Symptom Probable Cause Recommended actionEconomizer goes to minimumposition, and will notmodulate.Economizer modulates, butsystem does not seem tooperate as efficiently as in thepast.Evaporator coil freezes upduring low ambient operation.1. OAS has failed. 1. Check the OAS at connector P1 by disconnecting P1 from J1on the UCP. Check resistance between P1-15 and P1-16, referto the Resistance versus Temperature Chart. Replace sensorif necessary.2. SAS has failed. 2. Check the SAS at connector P12 by disconnecting P12 fromJ2 on the UEM. "SA" is marked on the side of the board.Check for resistance between P12-1 and P12-2, refer to theresistance versus temperature chart. Replace sensor ifnecessary.1. Comparative enthalpy setup, RAS orRHS failed. System is operating usingReference enthalpy2. Reference enthalpy setup, OHS hasfailed. System is operating using drybulb control.3. Comparative enthalpy setup, OHS hasfailed. System is operating using drybulb control.1. Check the return air sensor (RAS) at connector P13 bydisconnecting P13 from J3 on the UEM. "RA" is marked onthe side of the board. Check for resistance between P13-1and P13-2, refer to the Resistance versus Temperature Chart.Replace the sensor if necessary. Check the return airhumidity sensor (RHS) by measuring the operating current atterminals J7 (-), and J8 (+) on the UEM board. Normaloperating current is 4 to20 milliamps mA.Note: The humidity sensors are polarity sensitive, and willnot operate if connected backwards.2. Check the outside humidity sensor (OHS) by measuring theoperating current at terminals J9(-), and J10 (+) on the UEMmodule. Normal operating current is 4 to 20 milliamps mA.3. Perform #2 above.1. System low on refrigerant charge. 1. Leak check, repair, evacuate, and recharge system asnecessary.2. System low on airflow. 2. Check return air for obstruction or dirty filters. Check fans,motors, and belts.Smell of gas near the unit 1. Gas leaks at the connections 1. Stop the unit. Conduct a leak test using Typol. Repair theleak(s)Unpleasant smells, fumes inthe air processed at start-up.1. Residues of oil or leak tight sealaround the heating element.1. Allow the unit to continue operating. Prolonged operation willeliminate this problemSmell of gas in the processedair1. Hole in the heating element 1. Stop the unit. Check the state of the heating element andtubes from the discharge section. Change the heatingelement unit2. Gas leak 2. Conduct a leak test using Typol. Repair the leak(s).The burner "coughs" 1. Excess gas 1. Stop the unit. Verify the passage of air at the burner sectionaccess panel, the mesh plate and the injector. Verify theburner fan is operating correctly. Measure the amps.Values: G205: 1.4 Amp G250, G350 and G400: 2.0 AmpRT-SVX16C-E457
<strong>Maintenance</strong>Symptom Probable Cause Recommended actionThe burner does not start afterthree attempts1. Initial start-up 1. Stop the unit. Check there is no air in the supply gas line.Check the opening of the gate valve. Check which type ofexpansion valve is installed(the expansion valve may be fittedwith a manual reset). Check the gas inlet pressure. Values:Min pressure G20 and G25: 15 mbar Min pressure G31:20 mbar2. Electrical problem (wiring, etc.) 2. Values: G150 and G205: 1.4 Amp G250, G350 and G400: 2.0Amp 2 power supplies to the module: 115 V (Electrode) 24 V(Gas unit solenoid valves)3. The electrode is out of operation 3. Start a new cycle and check in the sight glass that theelectrode is incandescent.If it is not, change the electrode (*)4. There is no gas supply 4. Check the pressure downstream of the gas valve. If thepartial vacuum is high, the gas is not supplied. Change thegas valve. Values: Negative Pressure : 5 mm WH +/- 4 mm.A series of explosions insidethe heating elementUnit does not provide anyheating1. The stainless steel diffusion grilleinside the heating element isdamaged.1. Stop the unit immediately. Dismantle the burner unit andchange the grille. Change the 2 seals.1. Manual reset has tripped off 1. Stop the unit. Look for any unit default that could causeoverheat. Reset.Table 26 : Refrigerant loadUNIT Weight Charge R22 / R407C (kg)(kg) Circuit A Circuit BTKD/TKH 275 1617 24.8YKD/YKH 275 low heat 1656 24.8YKD/YKH 275 high heat 1849 24.8TKD/TKH 300 1633 24.9YKD/YKH 300 low heat 1692 24.9YKD/YKH 300 high heat 1879 24.9TKD/TKH 350 1672 28.1YKD/YKH 350 low heat 1731 28.1YKD/YKH 350 high heat 1917 28.1TKD/TKH 400 2059 25.8 12YKD/YKH 400 low heat 2173 25.8 12YKD/YKH 400 high heat 2229 25.8 12TKD/TKH 500 2137 25.8 12YKD/YKH 500 low heat 2250 25.8 12YKD/YKH 500 high heat 2307 25.8 12NOTE : Accessory weight not included58RT-SVX16C-E4
NotesRT-SVX16C-E459
For additional information, contact :Distributor / Installer stampA business of American Standard Companieswww.trane.comFor more information, contact your local Tranesales office or e-mail us at comfort@trane.comLiterature order number RT-SVX16C-E4Date 1105SupersedesRT-SVX16B-E4Literature stocking location EuropeTrane has a policy of continuous product and product data improvement and reserves the right to changedesign and specifications without notice. Only qualified technicians should perform the installation andservicing of equipment referred to in this publication.American Standard Europe BVBARegistered Office: 1789 Chaussée de Wavre, 1160 Brussels - Belgium