Got Veggies? - Center for Integrated Agricultural Systems
Got Veggies? - Center for Integrated Agricultural Systems
Got Veggies? - Center for Integrated Agricultural Systems

Create successful ePaper yourself
Turn your PDF publications into a flip-book with our unique Google optimized e-Paper software.
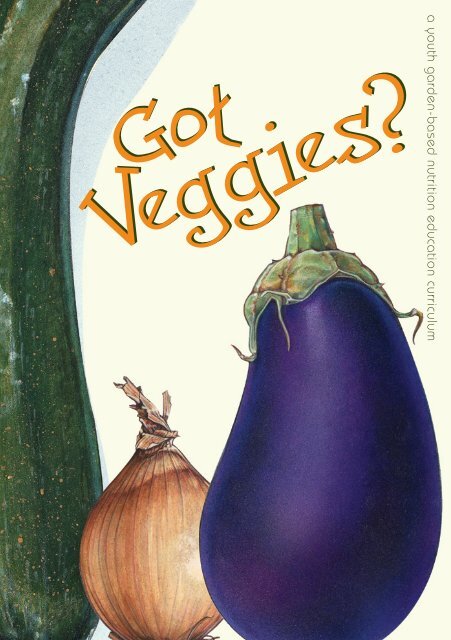
<strong>Got</strong><br />
<strong>Veggies</strong>?<br />
a youth garden-based nutrition education curriculum
For more in<strong>for</strong>mation about this publication, contact:<br />
Community GroundWorks at Troy Gardens<br />
3601 Memorial Drive, Suite 4<br />
Madison, WI 53704-1573<br />
(608) 240-0409<br />
www.communitygroundworks.org/what-we-do/youth-grow-local<br />
Nutrition, Physical Activity & Obesity Program<br />
Wisconsin Department of Health Services<br />
P.O. Box 2659<br />
Madison, WI 53701-2659<br />
http://dhs.wisconsin.gov/health/physicalactivity/index.htm<br />
Thank you to the following organizations <strong>for</strong> their collaboration on this project:<br />
Funding <strong>for</strong> this project was provided by the University of Wisconsin-Madison<br />
School of Medicine and Public Health from the Wisconsin Partnership Program<br />
©2009 The Board of Regents of the University of Wisconsin System<br />
This publication is also supported by Cooperative Agreement Number<br />
5U58DP001494-03 from the <strong>Center</strong>s <strong>for</strong> Disease Control and Prevention (CDC).<br />
Its content is solely the responsibility of the authors and does not<br />
necessarily represent the official views of the CDC.
Contents<br />
Foreword............................................................................................... 2<br />
Introductory Guide ................................................................................. 3<br />
The Main Menu: Lesson Plans................................................................... 7<br />
The Color Harvest: A Comparative Tasting Lesson ............................... 8<br />
Dirt Made Our Lunch.................................................................... 14<br />
Healthy Soil, Healthy Food, Healthy Kids: Composting with Worms...... 18<br />
Seeds & Sprouts......................................................................... 20<br />
Roots........................................................................................ 24<br />
Stems & Leaves.......................................................................... 28<br />
Flowers & Fruit ........................................................................... 32<br />
À La Carte: Additional Garden-Based Activities......................................... 37<br />
Keeping a Garden Journal............................................................ 38<br />
Digging & Wheel Barrowing in the Garden...................................... 39<br />
Chickens.................................................................................... 39<br />
Theme Gardens .......................................................................... 40<br />
Color Scavenger Hunt................................................................... 41<br />
Garden Art................................................................................. 42<br />
Nettle Rope and Flower Braiding ................................................... 42<br />
Hawks & Rabbits......................................................................... 43<br />
Garden Camera........................................................................... 43<br />
Name That Veggie....................................................................... 44<br />
Making Your Own Composting Worm Bin ......................................... 44<br />
Cooking & Eating in the Garden: Tips and Recipes.................................... 47<br />
Eating Fruits & Vegetables in the Garden....................................... 48<br />
Cooking in the Garden................................................................ 48<br />
Farm Stand: Bringing the Food Home............................................. 49<br />
Safety Tips <strong>for</strong> Teachers.............................................................. 49<br />
Kids' Garden Refrigerator Pickles ................................................. 50<br />
Garden Spring Rolls ................................................................... 51<br />
What's-That-Green-Stuff Can-We-Make-it-Again Pesto...................... 52<br />
Homemade Fattoush.................................................................... 53<br />
Kids' Garden Vegetable Pizza ....................................................... 54<br />
Garden Yogurt Dip ...................................................................... 55<br />
Cucumber Salsa .......................................................................... 55<br />
Resources & Acknowledgements.............................................................. 56
Foreword<br />
I am thrilled to present <strong>Got</strong> <strong>Veggies</strong>?, a curriculum<br />
that combines the fun of gardening with nutrition<br />
education. Along with my partners at Community<br />
GroundWorks at Troy Gardens, Wisconsin Home<br />
Grown Lunch, University of Wisconsin-Cooperative<br />
Extension, and the Wisconsin Departments of Health<br />
Services and Public Instruction, I hope this inspires<br />
students, early childhood providers, and teachers.<br />
<strong>Got</strong> <strong>Veggies</strong>? is a wonderful way to engage<br />
children (and adults) in actively taking control of<br />
their own health. As a pediatrician specializing in<br />
childhood obesity, I am confronted every day with<br />
the challenge of helping children keep their bodies<br />
strong and healthy. Consistent eating of vegetables<br />
and fruits has been shown to decrease obesity, heart<br />
disease and some cancers. Healthy eating habits<br />
need to start young, and be rein<strong>for</strong>ced through peers,<br />
mentors, teachers, and parents. This resource is part<br />
of the <strong>Got</strong> Dirt? Garden Initiative which seeks to<br />
provide practical resources <strong>for</strong> starting youth gardens<br />
—which can be used as a place to educate, provide<br />
opportunities <strong>for</strong> physical activity, acquire a useful<br />
skill, and have lots of fun! Nutrition education<br />
combined with gardening is an effective way to<br />
increase knowledge of fruits and vegetables, as<br />
well as rein<strong>for</strong>ce teachers’ and students’ exposure to<br />
gardens as part of the academic curriculum. I hope<br />
<strong>Got</strong> <strong>Veggies</strong>? will further inspire the creation and use<br />
of youth gardens, and nurture a love <strong>for</strong> fresh fruits<br />
and vegetables.<br />
<strong>Got</strong> <strong>Veggies</strong>? has been a collaborative ef<strong>for</strong>t, and the<br />
hard work of many partners has been essential to this<br />
project. Just as in the tilling, planting, weeding and<br />
harvesting of an actual garden, a group ef<strong>for</strong>t brings<br />
the best results.<br />
Happy growing!<br />
Aaron Carrel, M.D.<br />
Medical Director,<br />
University of Wisconsin Pediatric Fitness Clinic<br />
2
Introduction<br />
What is <strong>Got</strong> <strong>Veggies</strong>?<br />
<strong>Got</strong> <strong>Veggies</strong>? is a garden-based nutrition education curriculum. The primary goal<br />
of garden-based nutrition education is to get children to eat more fresh fruits<br />
and vegetables. Gardens have long provided an excellent learning environment<br />
<strong>for</strong> teaching children about scientific concepts such as photosynthesis and<br />
decomposition. What we have discovered in the past decade, however, is<br />
that the garden is also the perfect learning environment <strong>for</strong> nutrition education.<br />
Students learn about nutrition in the garden through direct experience. When<br />
provided an opportunity to grow and prepare food in the garden, youth <strong>for</strong>ge<br />
a deeply personal relationship with the food that sustains them. For example,<br />
a broccoli floret becomes more than a commodity when it is linked to the plant<br />
that bore it; the rain, soil, air, and sunlight that fed it; and the children and<br />
adults who nurtured it from seed to harvest.<br />
Why <strong>Got</strong> <strong>Veggies</strong>?<br />
In 2005, the Wisconsin Department of Health Services and collaborating<br />
partners launched the <strong>Got</strong> Dirt? Garden Initiative with the goal of increasing the<br />
number of youth gardens in Wisconsin as a means <strong>for</strong> increasing access to, and<br />
consumption of, fruits and vegetables. A main part of the Initiative included the<br />
creation of the <strong>Got</strong> Dirt? Toolkit, which was developed to provide a stepby-step<br />
guide <strong>for</strong> starting a youth garden. Feedback gathered from educators<br />
across Wisconsin revealed the need <strong>for</strong> curriculum and activities that connect<br />
the classroom to the youth garden. Thus, <strong>Got</strong> <strong>Veggies</strong>? Garden-Based<br />
Nutrition Education Curriculum was developed <strong>for</strong> school, after school, and<br />
early childhood teachers to make that connection.<br />
Growing evidence demonstrates that nutrition education used in conjunction with<br />
a youth garden positively impacts child and adolescent nutrition. In the midst of<br />
a national obesity epidemic, it has never been so important to support children in<br />
improving their eating and physical activity habits. The <strong>Center</strong>s <strong>for</strong> Disease Control<br />
and Prevention has identified both daily physical activity and increased fruit<br />
and vegetable consumption as two of the six most important strategies <strong>for</strong><br />
preventing obesity. Thus, growing and eating food in the garden is a good<br />
place to start cultivating healthy eating and physical activity habits.<br />
3
What is in <strong>Got</strong> <strong>Veggies</strong>?<br />
<strong>Got</strong> <strong>Veggies</strong>? features seven full lesson plans in the Main Menu section. Each<br />
lesson plan includes an overview, list of objectives (correlated to Wisconsin<br />
Model Academic Standards <strong>for</strong> Nutrition, Health, Science, and other related<br />
subjects), materials list, and directions <strong>for</strong> lesson activities including tasting.<br />
The À La Carte section offers a variety of garden-based activities including Keeping<br />
a Garden Journal, Theme Gardens, and Garden Art. The Cooking & Eating in<br />
the Garden section provides a collection of fun recipes and helpful tips from the<br />
Troy Kids’ Garden. These garden-based lessons and activities can stand alone<br />
or be used in conjunction with each other. Whether you have just a few minutes<br />
to spend with students in the garden or an entire lesson period, this curriculum is<br />
a great way to nurture students’ interest in growing and eating fresh fruits and<br />
vegetables. <strong>Got</strong> <strong>Veggies</strong>? also includes an annotated list of garden-based and<br />
nutrition education resources.<br />
Stealth Health<br />
As poor nutrition and lack of physical activity are central causes of childhood obesity, we need to<br />
find ways to make the healthy choice the easy choice <strong>for</strong> kids. How do we do this? We begin by<br />
finding ways to improve kids’ environments, which includes where they live, learn, and play. Putting<br />
in a garden at a school, afterschool, or early childhood site is certainly changing their environment!<br />
Offering more fruits and vegetables with meals or adding healthier options to a vending machine<br />
are also good examples of things that can be done … all the while kids are unsuspecting of these<br />
changes you are making! When we change environments to support healthier eating and physical<br />
activity, we increase the likelihood that better choices can be made.<br />
—Amy Meinen, Nutrition Coordinator<br />
Wisconsin Department of Health Services<br />
4
Youth Grow Local<br />
When youth tend their food from seed to harvest, they are more adventurous about eating fresh fruits<br />
and vegetables. In the garden, children eagerly snack on a wide range of homegrown treats—such<br />
as spring garlic, broccoli, cucumbers, cherry tomatoes, and kohlrabi. By teaching young people how to<br />
grow their own food, they are introduced to the ultimate local food system. Young gardeners take on<br />
the dual role of grower and consumer. When presented in the proper way, growing and eating food<br />
in the garden is a particularly powerful way <strong>for</strong> youth to connect to nature. It allows them to witness<br />
first-hand the life-giving energy that flows from the Sun to a plant to one’s own body. These types of<br />
garden learning opportunities have the power to change the way that youth commonly experience<br />
food. In the children’s garden, the interpretation of food moves beyond that of a resource or commodity—<br />
it becomes a delicious symbol of life itself.<br />
—Nathan Larson, Education Director<br />
Community GroundWorks at Troy Gardens<br />
What should I know about this curriculum?<br />
<strong>Got</strong> <strong>Veggies</strong>? was developed <strong>for</strong> 2nd and 3rd grade students with attention<br />
to current Wisconsin Model Academic Standards, including those <strong>for</strong> nutrition<br />
education. These lessons and activities can be easily adapted <strong>for</strong> younger<br />
and older children. We encourage school, after school, and early childhood<br />
teachers to modify lessons and activities based on what is developmentally<br />
appropriate <strong>for</strong> different age groups.<br />
This curriculum was developed <strong>for</strong> use in a garden learning environment.<br />
We understand that not every teacher has access to a garden, so many of<br />
these lessons can easily be adapted <strong>for</strong> use in the classroom. If your school,<br />
after school, or early childhood learning environment does not currently have<br />
a garden and you are interested in developing one, please visit www.dhs.<br />
wi.gov/health/physicalactivity/gotdirt.htm <strong>for</strong> more in<strong>for</strong>mation and resources<br />
<strong>for</strong> starting a youth garden.<br />
5
Can I evaluate the effectiveness of this curriculum?<br />
If you wish to evaluate your students’ progress based on the seven core lessons and<br />
short activities contained in this curriculum, we suggest the following:<br />
• Consider collecting pre or baseline evaluation measures be<strong>for</strong>e beginning to use<br />
the curriculum and post measures after using the curriculum.<br />
• A pre/post measure might include documenting the change in knowledge<br />
about fruits and vegetables. Students could be asked questions about how<br />
many fruits and vegetables they should be eating each day or why dark<br />
orange and dark green vegetables are extra special.<br />
• Evaluation measures may include—but are not limited to—measuring change<br />
in students’ knowledge of fruits and vegetables, willingness to try fruits and<br />
vegetables, and attitude toward or likeability of fruits and vegetables.<br />
There are other ways to evaluate the success of your garden program, including use of<br />
the following techniques:<br />
• Photo journaling—taking pictures of the students gardening and of the garden as it grows.<br />
• Journaling—keeping a log of student observations of the gardening experience<br />
including their feedback on trying new fruits and vegetables.<br />
Gardening & Farm to School<br />
As the farm to school movement grows, schools are beginning to procure more foods<br />
(including fruits and vegetables) locally <strong>for</strong> use in school meals and snacks. Gardening<br />
is a great addition to farm to school ef<strong>for</strong>ts! As new varieties of local fruits and vegetables<br />
begin to appear in school lunches across the country, children may be reluctant to try<br />
these new items. However, if children learn about how their food grows or where it comes<br />
from through gardening and nutrition education, they may be more accepting of and<br />
willing to try new foods. Thus, when creating a comprehensive farm to school program<br />
within your school, after school program, or early childhood learning environment,<br />
consider using the <strong>Got</strong> Dirt? Garden Toolkit and <strong>Got</strong> <strong>Veggies</strong>?.<br />
A Comprehensive Farm-to-School Program:<br />
6
The Main Menu<br />
Lesson Plans
The Color Harvest<br />
A Comparative Tasting Lesson<br />
Lesson Overview<br />
This comparative harvesting, cooking, and<br />
eating activity is a fun way to familiarize students<br />
with a variety of fruits and vegetables using color as<br />
the distinguishing characteristic. Eating a variety of colors is<br />
important as this gives our bodies a wide range of valuable nutrients—like<br />
fiber, folate, potassium, and vitamins A and C. For this lesson, you will want<br />
to harvest an assortment of seasonal foods from your garden and compare<br />
their colors and other characteristics. The lesson is suited <strong>for</strong> the garden or<br />
the classroom and if you don’t have enough food in the garden you can get<br />
a colorful variety of fruits and vegetables at a local farmers’ market, farm<br />
stand, or grocery store. Students will learn how eating different colors of<br />
foods makes us healthy in different ways. They are encouraged to use<br />
specific vocabulary to describe color variations between vegetables and<br />
fruits. This lesson can be adapted <strong>for</strong> students of all ages. See some<br />
suggestions <strong>for</strong> different age groups on page 12.<br />
Objectives<br />
Students will:<br />
1. Taste and identify a variety of fruits and vegetables<br />
(Nutrition Ed C.4.2, F.4.2)<br />
2. Understand that some plants are sources of food<br />
(Ag Ed D.4.1; Nutrition Ed F.4.3)<br />
3. Develop descriptive vocabulary <strong>for</strong> specific characteristics of food<br />
(Lang Arts D.4.1, D.4.2; Nutrition Ed F.4.2)<br />
4. Collect and analyze data – see Review and Vote (Math E.4.1, E.4.3)<br />
8
Materials<br />
Food:<br />
• Different varieties of vegetables and fruits that represent a spectrum<br />
of colors from your garden or local market (e.g., orange: carrots, sweet<br />
potatoes, butternut squash, pumpkin; purple: grapes, eggplant, kohlrabi;<br />
red: radishes, tomatoes, red peppers, strawberries, raspberries, apples,<br />
watermelon; yellow: carrots, corn, potatoes, summer squash; green:<br />
collard greens, asparagus, kale, broccoli, peas, zucchini, celery, spinach,<br />
cucumbers; white: cauliflower, white potatoes; blue: blueberries).<br />
Supplies:<br />
• Book: Growing Vegetable Soup by Lois Ehlert or other book to stimulate<br />
discussion about growing and eating a variety of vegetables and fruits<br />
from your garden. For more book suggestions, consult the Booklists on<br />
page 58 in the Resources section.<br />
• Knife<br />
• Cutting board<br />
• Plates<br />
• Word Bank (included at end of lesson)<br />
• Tasting Chart (included at end of lesson)<br />
Preparation<br />
1. Prior to lesson, determine which vegetables and fruits you will need<br />
to harvest or purchase to demonstrate the variety of colors we eat.<br />
Consult the list of suggested vegetables and fruits under the Food heading<br />
in the Materials section above. For more ideas, visit Harvest of<br />
the Month at www.harvestofthemonth.com or MyPyramid.gov <strong>for</strong> lists of<br />
different fruits and vegetables. For vegetables, visit: www.mypyramid.gov/<br />
pyramid/vegetables.html. For fruits, visit: www.mypyramid.gov/pyramid/<br />
fruits.html.<br />
2. Get Growing Vegetable Soup by Lois Ehlert or similar book to stimulate<br />
discussion about growing and eating a variety of vegetables and fruits from<br />
your garden. For more book suggestions, consult the Booklists on page 58<br />
in the Resources section.<br />
the garden<br />
classroom<br />
A healthy school garden is a<br />
critical component of a<br />
vibrant nutrition education.<br />
Bringing nutrition education<br />
from the classroom into<br />
the garden setting has a<br />
powerful effect on children’s<br />
eating habits now and into<br />
their future. The Kids’<br />
Garden has provided us at<br />
Mendota Elementary School<br />
the opportunity to develop<br />
our nutritional senses and<br />
flourish in the benefits of<br />
healthy lifestyle choices.<br />
The kids love to eat the vegetables<br />
they learn about<br />
and are delighted to work<br />
hard harvesting, washing<br />
and hauling the newly<br />
grown treasures.<br />
— Christine Pietruszka,<br />
Teacher at Mendota<br />
Elementary School,<br />
Madison Metropolitan<br />
School District<br />
9
The Color Harvest<br />
3. Rinse vegetables and fruits be<strong>for</strong>e slicing. If possible, slice immediately<br />
be<strong>for</strong>e tasting to preserve freshness. Avoid putting food in the<br />
refrigerator, as it dulls the flavor and changes the texture.<br />
4. Write the name of each vegetable or fruit on a display board or poster to<br />
record student descriptions (refer to Tasting Chart at end of lesson).<br />
5. Post Word Bank with adjectives to guide students’ sensory<br />
observations (included at end of lesson).<br />
Procedure<br />
Introduction: Gather students <strong>for</strong> a discussion or a read-aloud.<br />
Use Growing Vegetable Soup by Lois Ehlert or similar book to<br />
stimulate discussion about growing and eating a variety of<br />
vegetables and fruits from your garden.<br />
You may choose to use some of the following questions to guide<br />
your discussion:<br />
1. Where does food come from?<br />
2. Who has a garden or knows someone with a garden?<br />
What do you grow?<br />
3. Who has been to a farm? What did you see there?<br />
4. Can you think of some vegetables that are grown in a garden<br />
or on a farm?<br />
5. Can you think of some fruits that are grown in a garden or on a farm?<br />
6. Who has tasted any of these fruits or vegetables be<strong>for</strong>e?<br />
7. Which fruits do you like to eat as a snack?<br />
8. Which vegetables do you like to eat as a snack?<br />
9. Do you grow any of these vegetables or fruits with your family?<br />
10. Can you think of a fruit or vegetable that comes in more than one color?<br />
For example, tomatoes come in almost every color as well as in many<br />
shapes and sizes.<br />
11. What colors and shapes of tomatoes have you seen?<br />
10
12. How do these different vegetables and fruits<br />
help us grow? Why are they good <strong>for</strong> us to eat? Answer: Fruits<br />
and vegetables are good <strong>for</strong> our bodies, as they are packed with<br />
nutrients like vitamins and minerals! For older students, you could<br />
explain that fruits and vegetables contain many nutrients including<br />
vitamin A and C, potassium, and dietary fiber. There are also some special<br />
fruits and vegetables, called the “super green and super orange.” These<br />
dark green and orange vegetables are important to eat often because they<br />
contain extra amounts of vitamins and minerals. Can you guess which fruits<br />
and vegetables growing in your garden are green or orange superheroes?<br />
Answer: Super green: bok choy, broccoli, collard greens, mustard greens,<br />
romaine lettuce, spinach, kale, watercress, turnip greens, mesclun, and dark<br />
green leafy lettuce. Super orange: acorn squash, pumpkin, carrots, sweet<br />
potatoes, butternut squash, and hubbard squash.<br />
13. Do you know how many fruits and vegetables you should be eating<br />
each day? Answer: The amount we should eat depends on if we are a<br />
boy or a girl, how much activity we get each day, and how old we are.<br />
Have children try the Fruit and Veggie Calculator at www.fruitsandveggiesmorematters.gov<br />
or visit www.fruitsandveggiesmorematters.gov/<br />
downloads/Low_Literacy_Brochure.pdf <strong>for</strong> in<strong>for</strong>mation on how many fruits<br />
and vegetables kids should be eating daily. As their teacher, how many<br />
fruits and vegetables should you be eating? Compare the recommended<br />
amounts <strong>for</strong> adults and kids.<br />
Following the introduction, review proper hand washing procedures and<br />
discuss why they are important. Have students wash their hands. Prepare<br />
selected fruits and vegetables <strong>for</strong> tasting.<br />
Observation: Write names of selected fruits and vegetables on the display<br />
board or poster paper, or <strong>for</strong> older students, hand out Tasting Charts (see<br />
example on page 13). Explain to students that they will be acting as “investigators”<br />
and will be using their senses to observe, describe, and compare<br />
different fruits and vegetables. Be<strong>for</strong>e tasting, pass around each vegetable<br />
or fruit so students can observe the appearance, texture, scent, etc.<br />
voices from the<br />
Kids' garden<br />
“How many types of these<br />
are there in the world?” a<br />
girl asked while planting<br />
two varieties of kale in the<br />
Kids’ Garden.<br />
After harvesting a broccoli<br />
floret and taking a bite,<br />
a child exclaimed, “Yum!<br />
Wait, I thought broccoli was<br />
gross!”<br />
“It’s interesting, salsa has<br />
everything in it that I didn’t<br />
like, but I like it. I mean, it<br />
has onion, tomatoes, peppers<br />
... but it tastes good!”<br />
11
The Color Harvest<br />
Tasting: Give each student a slice of vegetable or fruit. Encourage them to<br />
taste it. Tell students that you don’t expect everyone to like it, but it is important<br />
to try new vegetables and fruits because they may develop a taste <strong>for</strong><br />
them over time. Have them observe and describe it using words from the Word<br />
Bank. Encourage students to use their own words, which can be added to the<br />
Word Bank <strong>for</strong> future sensory observation activities. Record student descriptions<br />
on the display board or have them write them on their Tasting Chart.<br />
Repeat these steps with each different vegetable or fruit. Encourage your<br />
students to use specific and descriptive vocabulary.<br />
Review and Vote: Briefly review and compare vegetable and fruit descriptions.<br />
Have students vote <strong>for</strong> their favorite variety. This could be an opportunity <strong>for</strong> a<br />
math connection. Count the votes and create a graph or chart to represent the<br />
results. Discuss voting results and reasons why students chose one fruit<br />
or vegetable over others.<br />
Clean-up: Have students help with clean-up and wash their hands. If possible,<br />
vegetable and fruit scraps can go to a compost pile or worm bin.<br />
Individualized to Age Groups<br />
For Younger Children (K to 2nd grade): During observations have students<br />
draw a picture of one of the vegetable or fruit varieties. Or cut vegetable<br />
shapes out of paper and write their descriptive words on the vegetable.<br />
Another fun activity is to have each student offer one descriptive word and<br />
combine them to make a collective poem about a selected vegetable or fruit.<br />
For Older Children (3rd to 5th grade): Use the attached Tasting Chart <strong>for</strong><br />
students to record their own observations. Students may choose adjectives<br />
from the Word Bank or use their own describing words. You may also have<br />
students write a paragraph or poem describing their favorite vegetable or fruit.<br />
Cut fruit or vegetable shapes out of paper and have students write their poems<br />
on them. Glue all the poems to one large piece of paper or poster board.<br />
Lesson Variation: Comparative Heirloom Vegetable or Fruit Tasting: Hone your<br />
students’ taste buds and observation skills by repeating this lesson with heirloom<br />
varieties of just one vegetable or fruit. For example, harvest or purchase<br />
four different heirloom varieties of tomatoes or apples. Heirloom varieties of<br />
certain vegetables and fruits—such as tomatoes and apples—vary greatly in<br />
appearance, texture, and flavor, making them well suited <strong>for</strong> comparison.<br />
12
Additional Activities<br />
Give students a list of foods being grown in the garden or found at their local<br />
market. Have them work with a parent/caregiver to find a word describing a<br />
characteristic of each food on the list. Encourage the parent/caregiver to offer<br />
one or more of these foods at meals or snacks.<br />
Fruit and Vegetable Challenge: Keep track of how many fruits and vegetables<br />
you eat <strong>for</strong> a week.<br />
Compare food in different <strong>for</strong>ms. Make some garden salsa and compare it to<br />
raw tomatoes, tomato soup, ketchup, or sun-dried tomatoes. Compare raw<br />
apples with unsweetened applesauce and dried apples. Ask students how<br />
they think apples are turned into applesauce or dried apples.<br />
Word Bank<br />
sweet<br />
yummy<br />
grand<br />
delicious<br />
fragrant<br />
bitter<br />
sour<br />
sharp<br />
healthy<br />
ripe<br />
tangy<br />
juicy<br />
flavorful<br />
squishy<br />
zippy<br />
tasty<br />
acidic<br />
delectable<br />
earthy<br />
zesty<br />
mealy<br />
firm<br />
crunchy<br />
tough<br />
garden<br />
observations<br />
It’s so inspiring to watch the<br />
garden trans<strong>for</strong>m so many<br />
kids over the course of a<br />
season! Kids who arrive to<br />
the garden saying they<br />
“don’t like vegetables” will<br />
be begging <strong>for</strong> seconds of<br />
freshly picked carrots just a<br />
few weeks later. They start<br />
to love the adventure of trying<br />
new things, and they<br />
start teaching each other<br />
about how crunchy kohlrabi<br />
is or how to wrap a cherry<br />
tomato in a cabbage leaf.<br />
The garden is the first place<br />
where a lot of the kids have<br />
the chance to develop a<br />
positive, respectful relationship<br />
with both food and<br />
nature, and I’ve seen the<br />
pride in their faces when they<br />
show off what they’ve grown<br />
to their teachers and peers.<br />
TASTING CHART<br />
Name of Fruit<br />
or Vegetable<br />
Look<br />
Smell<br />
— V. Ione Machen,<br />
Garden Educator,<br />
Community GroundWorks<br />
at Troy Gardens<br />
Feel<br />
Taste<br />
Sound<br />
13
Dirt Made Our Lunch*<br />
Lesson Overview<br />
This lesson is designed to teach students about the connection between<br />
soil and food. The central activity, Deconstructing a Cheeseburger, asks<br />
students to help trace ingredients back to the soil, showing how we<br />
depend on healthy soil in order to eat. Many of the nutrients in soil come<br />
from decomposition of dead plants and other organic matter. Plants<br />
absorb these nutrients, and in turn, our bodies absorb them when we eat<br />
plants. We refer to this as the nutrient cycle. The Lunch Makes Our Dirt<br />
activity helps students understand how food scraps and plant matter<br />
break down into rich soil.<br />
Objectives<br />
Students will:<br />
1. Trace foods from origin to table<br />
(Ag Ed D.4.1; Nutrition Ed B.4.4; Science F.4.4)<br />
2. Describe the connection between healthy soil and healthy food<br />
(Ag Ed D.4.1; Science F.4.2, F.4.4)<br />
3. Understand that people need food in order to be healthy, have energy,<br />
and grow (Nutrition Ed A.4.3)<br />
4. Determine the difference between plant and animal food sources<br />
(Nutrition Ed F.4.3)<br />
5. Identify the basic food groups and give examples from each<br />
(Nutrition Ed F.4.4)<br />
Materials<br />
Food:<br />
• Dill, cucumbers, mustard seed, peppercorns, vinegar, water and salt.<br />
See Kids’ Garden Refrigerator Pickles recipe listed in the Tasting activity<br />
on page 17.<br />
* Lesson inspired by “Dirt Made My Lunch,” a song by “Solar” Steve Van Zandt of the Banana<br />
Slug String Band.<br />
14
Supplies:<br />
• Photos or drawings that illustrate how common<br />
cheeseburger ingredients can be traced back to the soil<br />
(e.g., bun, wheat, soil. See Deconstructing a Cheeseburger<br />
activity on page 16 <strong>for</strong> full list of images needed).<br />
• Garden journals or paper<br />
• Pens/pencils<br />
• Display board<br />
• Plates<br />
• Napkins<br />
• Cutting boards<br />
• Bowl<br />
• Knives<br />
• 2 quart-sized Mason jars or similar sized plastic containers with lids<br />
Preparation<br />
1. Familiarize yourself with “Dirt Made My Lunch,” a fun and educational song<br />
by “Solar” Steve Van Zandt of the Banana Slug String Band. To watch a<br />
video of the Banana Slug String Band singing “Dirt Made My Lunch,” go to<br />
www.youtube.com/watch?v=SCeyXW64cns. To watch youth gardeners from<br />
Troy Gardens in Madison, Wisconsin singing this song, go to www.youtube.com/watch?v=ZrieCG8D2WI&feature=youtube_gdata.<br />
You can order<br />
songbooks and CDs of many great educational garden and nature songs,<br />
including “Dirt Made My Lunch,” from the Banana Slug String Band at www.<br />
bananaslugstringband.com.<br />
2. Get photos or drawings that illustrate how common cheeseburger ingredients<br />
can be traced back to the soil (e.g., bun, wheat, soil. See Deconstructing<br />
a Cheeseburger activity <strong>for</strong> full list of images needed).<br />
3. Collect pens or pencils and make or purchase garden journals <strong>for</strong> the Lunch<br />
Makes Our Dirt activity. See Keeping a Garden Journal on page 38 in the<br />
À La Carte section <strong>for</strong> garden journal ideas.<br />
4. Harvest or purchase – and wash – food <strong>for</strong> Kids’ Garden Refrigerator<br />
Pickles recipe listed in the Tasting activity.<br />
reciprocal nature<br />
of gardening<br />
Gardening is a gateway to<br />
healthy eating. When children<br />
have the opportunity<br />
to experience how food connects<br />
us to the natural world<br />
they are much more willing<br />
to try and enjoy new fruits<br />
and vegetables. The reciprocal<br />
relationship of nurturing<br />
plants so that they in<br />
turn can nurture us with food<br />
is a marvelous and powerful<br />
thing to take part in.<br />
— Brent Kramer,<br />
Education Coordinator,<br />
Wisconsin Homegrown Lunch<br />
REAP Food Group<br />
fun idea<br />
Emphasize the concept of<br />
the nutrient cycle by feeding<br />
plants in your garden.<br />
Encourage students to use<br />
their hands to place compost<br />
or other nutrient-rich<br />
soil at the base of a plant<br />
and say “Bon Appétit!”<br />
15
Dirt Made Our Lunch<br />
Procedure<br />
Song – Dirt Made My Lunch. Sing along with “Dirt Made My Lunch” by “Solar”<br />
Steve Van Zandt of the Banana Slug String Band.<br />
Introduction: Briefly discuss the importance of soil with a series of questions:<br />
Could we have plants without dirt? Could we have food without plants?<br />
Could we have food without dirt? If doing this lesson in the garden, have<br />
students scoop up a handful of dirt and examine it during this discussion.<br />
Leave questions open-ended as a set-up <strong>for</strong> using the Deconstructing<br />
a Cheeseburger activity to prove that “dirt made our lunch!”<br />
Deconstructing a Cheeseburger<br />
Students help prove how “dirt made our lunch.”<br />
Draw columns on a display board <strong>for</strong> several cheeseburger<br />
ingredients and place the appropriate image at the top of<br />
the column (bun, burger, cheese, pickle, tomato, and avocado).<br />
Then, taking one cheeseburger ingredient at a time, challenge the<br />
class to trace each ingredient back to the soil. Hand out images <strong>for</strong><br />
students to post on the display board as you connect each ingredient<br />
to the soil. For example, the cheese pictures would include cheese,<br />
milk, cow, grass, and soil. For a pickle, use a picture of a pickle<br />
at the top of the column and then a bottle of vinegar, cucumber, a<br />
cucumber plant, a dill plant, and soil. Here’s an example of the chart:<br />
BUN<br />
Flour<br />
Wheat<br />
Soil<br />
Burger<br />
Beef<br />
Cow<br />
Grass<br />
Soil<br />
Cheese<br />
Milk<br />
Cow<br />
Grass<br />
Soil<br />
Pickle Tomato<br />
Vinegar Tomato Plant<br />
Cucumber Soil<br />
Cucumber Plant<br />
Dill Plant<br />
Soil<br />
Avocado<br />
Avocado Tree<br />
Soil<br />
Lunch Makes Our Dirt. Look <strong>for</strong> stages of decomposition in your garden and/<br />
or compost pile. For example, follow the decomposition of overripe fruits and<br />
vegetables periodically (e.g., 3 days, 3 weeks, 3 months) throughout the<br />
season or of a carved pumpkin after Halloween. Have students document the<br />
stages using photos or garden journals. See Keeping a Garden Journal on<br />
page 38 in the À La Carte section <strong>for</strong> garden journal ideas.<br />
If you are doing this in a classroom and don’t have a school compost pile, bring<br />
in some items in various stages of decomposition from your home compost<br />
pile. Use recycled clear plastic containers or paper plates to demonstrate several<br />
decomposition stages. Or start a school composting project! You can also<br />
compost in a bag. Put food scraps, dried leaves, small plant parts, etc. in a zip<br />
top bag, mist with water and watch the process of decomposition take place.<br />
16
Tasting. Remember to have students wash or sanitize their hands. Make fresh<br />
pickles with cucumbers from your garden or local market following the Kids’<br />
Garden Refrigerator Pickles recipe below. See the Cooking & Eating in the<br />
Garden section on page 47 <strong>for</strong> additional tips <strong>for</strong> this and other recipes.<br />
Kids’ Garden Refrigerator Pickles<br />
Pickle recipe can also be found on page 50.<br />
Supplies:<br />
• Two quart size jars with lids<br />
• 1 cup dill (flowers, seeds, and stems all work)<br />
• 5-6 medium cucumbers<br />
• 4 pinches of mustard seed<br />
• 6 black peppercorns<br />
• ½ cup of vinegar<br />
• 2 cups of water<br />
• 8 teaspoons salt<br />
Harvest, wash, and slice the cucumbers into wedges. Place them in a bowl with the dill<br />
and salt, and mix them by hand or with a mixing spoon. Using two mason jars, add to<br />
each 2 pinches of mustard seed, 3 peppercorns, ¼ cup of vinegar, and one cup of<br />
water. Add half of the dill/salt/cucumber mixture to each jar. Seal the lid and mix the<br />
pickles until you can’t wait any longer to eat them (minimum 10 minutes). If you have<br />
leftovers, check with your local food safety specialist to see how long they keep.<br />
For Younger Children (Pre K): Have students color in the MyPyramid to match<br />
the ingredients of the cheeseburger. Orange: Bun (Grains), Green: Tomato and<br />
Pickle (Vegetables), Red: Avocado (Fruit), Blue: Cheese (Milk/Dairy), Purple:<br />
Burger (Meat and Beans). You can find MyPyramid at www.mypyramid.gov.<br />
cross curriculum<br />
benefits<br />
There are so many ways<br />
that you can apply what we<br />
do in the garden in the<br />
classroom. There’s integration<br />
all throughout the curriculum:<br />
mathematics, science,<br />
art, music. And to see them<br />
realize “Oh, this thing that I<br />
saw last week is now this<br />
much bigger or it moved<br />
from this flower and now it’s<br />
creating, what? What it is<br />
creating? Oh it’s creating a<br />
tomato, it’s creating a zucchini,<br />
it’s creating—whatever.”<br />
That is thrilling to see<br />
happen; to see that realization<br />
come over kids. There’s<br />
the stark contrast of seeds<br />
sitting on stalks in the middle<br />
of winter, as well as the<br />
compost that’s out there decomposing<br />
and creating<br />
heat; you can measure the<br />
heat, you can see the snow<br />
melting from the top. It can<br />
be an all year process—it’s<br />
just wonderful that way.<br />
For Older Children (3rd to 5th grade): Have students match the cheeseburger<br />
ingredients to the appropriate MyPyramid food groups. Of the foods we eat,<br />
ask students to identify which of them are plants or parts of a plant? You can<br />
find MyPyramid at www.mypyramid.gov.<br />
Take Home Activity<br />
Give students another common food to deconstruct (e.g., peanut butter and<br />
jelly sandwich, spring roll, pizza, burrito, chips and salsa). Have them demonstrate<br />
how to do this activity <strong>for</strong> their parents/caregivers. Follow up the next<br />
day with a discussion about how to make healthy versions of foods like pizza.<br />
For example, make pizza with a whole-wheat crust, increase the amount of<br />
vegetables, and decrease the amount of meat. Or make burritos with less<br />
meat and cheese and more vegetables (e.g., zucchini, onions, garlic, shredded<br />
carrot, mashed sweet potato or butternut squash, lettuce, tomatoes, beans).<br />
— Ken Swift, Teacher,<br />
Lapham Elementary School,<br />
Madison Metropolitan<br />
School District<br />
17
Healthy Soil, Healthy Food, Healthy Kids<br />
Composting with Worms<br />
Lesson Overview<br />
This lesson is designed to explore the nutrient cycle concept that<br />
students were exposed to in the Dirt Made Our Lunch lesson and<br />
to rein<strong>for</strong>ce the idea that our food comes from the soil. Use worm<br />
composting as an interactive way to demonstrate the importance of<br />
maintaining healthy soil—which keeps us healthy—and introduce students<br />
to the significance of worms in this process.<br />
Objectives<br />
Students will:<br />
1. Understand the nutrient cycle and the connection between healthy soils,<br />
healthy food and healthy people (Nutrition Ed B.4.5; Science E.4.2, F.4.3,<br />
F.4.4, H.4.3; Ecology/Environment E.4.1; Ag Ed D.4.1)<br />
2. Know the function of roots (Science C.4.2, F.4.1, F.4.4)<br />
3.<br />
Understand how plants collect and create nutrients people need<br />
(Ecology/Environment E.4.1; Health A.4.3; Science C.4.2)<br />
4. Trace foods from origin to table<br />
(Ag Ed D.4.1; Nutrition Ed B.4.4; Science F.4.4)<br />
Materials<br />
Food:<br />
• Carrot sticks, apple slices, or some other healthy vegetable or fruit snack<br />
Supplies:<br />
• Worm Bin (see Making Your Own Worm Composting Bin on page 44 in the<br />
À La Carte section <strong>for</strong> instructions)<br />
• Vegetable peeler or apple slicer<br />
• Books: Wonderful Worms by Linda Glaser (<strong>for</strong> K-2/3), Diary of a Worm<br />
by Doreen Cronin (<strong>for</strong> 3-5), Compost by Linda Glaser, Worms Eat Our<br />
Garbage by Mary Appelhof, Mary Frances Fenton, and Barbara Loss Harris<br />
Preparation<br />
1. Make a garden or classroom worm bin. See Making Your Own Worm<br />
Composting Bin activity on page 44 in the À La Carte section <strong>for</strong> instructions<br />
on how to make a worm bin.<br />
2. Get suggested book(s).<br />
3.<br />
Harvest or purchase – and wash – carrots and/or apples (or some other<br />
healthy vegetable or fruit snack). Cut carrots into sticks and apples into slices.<br />
18
Procedure<br />
Introduction: Begin the lesson by handing out a healthy snack such as apple<br />
slices and/or carrot sticks. Remember to have students wash or sanitize their<br />
hands be<strong>for</strong>e tasting. While students are snacking, begin a discussion about<br />
the nutrient cycle.<br />
Let the students know that today’s lesson is about worms. Ask why they might<br />
be eating a snack during a worm lesson? What do apples or carrots have<br />
to do with worms? To answer this question, start by imagining an apple tree<br />
growing in the ground. Have the class brainstorm everything they know about<br />
the apple tree. Lead the discussion with questions about the roots, getting the<br />
students to think about the roots drawing nutrients from the soil, and then the<br />
trunk “sucking” those nutrients up into the rest of the tree and into the apples<br />
themselves. If we eat an apple from that tree, then where do the nutrients go?<br />
Answer: Into our bodies. Where did the nutrients from the apple come from?<br />
Answer: The soil. But how did they get into the soil in the first place? Answer:<br />
Small animals like worms play a big role in breaking down organic material like<br />
apple cores and carrot tops and returning nutrients to the soil. Next, read one<br />
or more of the books about worms. You may want to introduce some fun facts<br />
(see sidebar) be<strong>for</strong>e or during the Worm Bin Exploration.<br />
Worm Bin Exploration. Be<strong>for</strong>e students begin exploring, make sure to mention<br />
two worm handling tips: (1) Keep your hands open, so that the worms can<br />
breathe; (2) If they start wriggling a lot, they are probably too warm or dry<br />
and they need to go back into the cool, moist bin. Ask the students to make<br />
guesses about what they will see when the worm bin is opened. You may also<br />
want to share some photos of what they might discover in the worm bin (e.g.,<br />
worm cocoons). See Life Lab’s Worm Bin Bingo page <strong>for</strong> some good photos,<br />
www.lifelab.org/wormbingo.php. Smaller classes of about 15 students can<br />
successfully stand in a circle around the worm bin, and get a chance to see the<br />
bin all at the same time. With larger classes, the class may be divided into<br />
two groups: one to see the bin, and one to observe some individual worms,<br />
separated out from the worm bin. Extra adult help in the classroom is useful<br />
during this part of the lesson. Students may also choose to feed the worms<br />
with the scraps from their own snack. Apple cores and carrot peels are both<br />
good worm snacks. This rein<strong>for</strong>ces the idea of the nutrient cycle. The worms<br />
will help put the nutrients from the food back into the soil, so that more apple<br />
trees or carrot plants can grow. Students have fun with the idea that worm<br />
poop is healthy soil that helps plants grow. Encourage the students to say<br />
something to the worms as they feed them, such as, “Thanks, worms, <strong>for</strong><br />
turning this back into soil.”<br />
fun worm facts<br />
• Worms do not have eyes,<br />
ears, nose, or bones!<br />
• Although they have no<br />
eyes, they are able to<br />
sense light and dark, and<br />
they prefer to be in the<br />
dark.<br />
• Worms have five hearts!<br />
• All worms are both male<br />
and female (hermaphroditic),<br />
and can mate with<br />
any other worm.<br />
• Worms breathe through<br />
their skin!<br />
• It is a myth that if you cut<br />
a worm in half both sides<br />
will survive; only the side<br />
with the five hearts will<br />
survive.<br />
• Worms’ tunnels loosen up<br />
the soil and bring air<br />
pockets into the soil,<br />
which are important <strong>for</strong><br />
plant roots to grow.<br />
• Worm poop is very rich soil!<br />
19
Seeds & Sprouts<br />
Lesson Overview<br />
There are six main plant parts that people eat—seeds, roots, stems,<br />
leaves, flowers, and fruit. The following edible examples represent the<br />
six plant parts: bean (seed), carrot (root), asparagus (stem), spinach<br />
(leaf), broccoli (flower), and apple (fruit). This lesson is the first in a<br />
series of four <strong>Got</strong> <strong>Veggies</strong>? lessons that focus on the six main plant<br />
parts that we eat. It can be run in the garden or indoor classroom. This<br />
lesson also continues an ongoing investigation of the nutrient cycle that<br />
we began in Dirt Made Our Lunch. Guiding questions include: What do<br />
plants need to live and grow? How do plants help us live and grow?<br />
Where do nutrients come from and how do they get into our food?<br />
The answers to these questions can be found in explorations of plant<br />
development, the six plant parts we eat, and decomposition.<br />
Objectives<br />
Students will:<br />
1. Identify what plants and people need to live and grow<br />
(Environmental Ed B.4.6; Nutrition Ed A.4.3; Science F.4.2, F.4.4)<br />
2. Describe basic plant anatomy<br />
(<strong>Agricultural</strong> Ed D.4.1; Science F.4.3)<br />
3. Understand connections between plants, people, and our natural<br />
environment (Science F.4.4)<br />
4. Participate in a discussion (Lang Arts C.4.3)<br />
5. Trace food from origin to table (Nutrition Ed B.4.4)<br />
20
Materials<br />
Food:<br />
• A fresh seed snack from the garden (e.g., green beans, peas.<br />
See Tasting activity on page 23 <strong>for</strong> more suggestions)<br />
Supplies:<br />
• Spray bottle(s) with water<br />
• A bucket filled with soil or brown paper towels (to represent soil)<br />
• A paper fan, piece of cardboard, bellows, or something that can<br />
simulate wind<br />
Preparation<br />
1. Prepare a spray bottle filled with water, a bucket filled with soil, and a<br />
fan <strong>for</strong> the Plant Role Play activity.<br />
2. Harvest or purchase – and wash – foods <strong>for</strong> the Tasting activity (e.g., green<br />
beans, peas. See Tasting activity on page 23 <strong>for</strong> more suggestions).<br />
voices from the<br />
Kids' garden<br />
After observing the pepper<br />
he planted the previous<br />
week, a child exclaimed:<br />
“Look! The plant I planted<br />
growed!”<br />
“This is why I want to bring<br />
my mom here. You grow the<br />
food and then it tastes so<br />
good!”<br />
Procedure<br />
Introduction: In order to introduce students to the connection between plants,<br />
people, and the environment, briefly discuss how plants help people by<br />
providing something healthy <strong>for</strong> us to eat. Our bodies are healthy when we<br />
eat nutritious foods. Then discuss how people—through farming and gardening<br />
—help plants to grow and be healthy. What can we do to help plants grow<br />
and produce food? We often begin by planting a seed. We can help that seed<br />
sprout and grow by helping it get the things it needs (e.g., water, nutrient-rich<br />
soil). Nature provides the basic things plants need to grow, as students learn<br />
in the following activity.<br />
21
Seeds & Sprouts<br />
Plant Role-Play: Students become plants in order to learn what it<br />
is that plants need to grow and be healthy. We tell students<br />
that there are elements of nature that help plants grow and<br />
that they will discover what those elements are through<br />
a dramatic play activity.<br />
Plants start as seeds, so ask students to crouch<br />
down and become a seed. Ask students to close<br />
their eyes, or turn off the lights if in the classroom,<br />
to simulate a seed that is buried in the ground.<br />
First, give students a small handful of soil, a<br />
piece of brown paper towel, or something<br />
else to represent soil. They should hold the<br />
soil as they crouch. Next, go around with<br />
a spray bottle and give all “seeds” a light<br />
misting of water. After receiving the water,<br />
encourage students to raise a hand in the<br />
air to simulate a seed sprouting through<br />
the soil. Following the water, have students<br />
open their eyes (or turn on the lights in the<br />
classroom) to receive sunlight. Tell students<br />
to rise a bit from the ground to demonstrate<br />
that they are growing. Finally, use a small<br />
paper fan (or some other representation of<br />
wind) to blow air on students, after which<br />
they can stand up to represent a full-grown and<br />
healthy plant.<br />
Follow up by asking students what they needed<br />
to grow from a seed to a mature, healthy plant.<br />
Answer: Sun, Soil, Water, and Air.<br />
Chant: To rein<strong>for</strong>ce what students learned in the role-play, they chant together,<br />
“Sun, Soil, Water, and Air! Everything we eat, and everything we wear, comes<br />
from Sun, Soil, Water and Air!” Begin chanting slowly and gradually pick up<br />
the tempo. Finish by slowing down and lowering voices to a whisper.<br />
22
Tasting: Remember to have students wash or sanitize their hands. Serve<br />
a seed snack harvested from the garden or purchased from your local<br />
market—fresh green beans or peas make a great healthy snack. Other<br />
delicious seed and seeded fruit snacks from the garden include corn,<br />
sunflower seeds, grapes, cherry tomatoes and many varieties of berries<br />
such as raspberries and strawberries. Roasted pumpkin seeds, homegrown<br />
popcorn, and fennel seeds are favorite fall treats!<br />
Additional Activities<br />
Document the growth of a tomato, squash, or bean plant by using garden<br />
journals or taking photos: This is a fun way to follow the development of plants<br />
from seed to fruit. See Keeping a Garden Journal activity on page 38 in the<br />
À La Carte section.<br />
planting<br />
We invite students to choose<br />
and plant from our seedling<br />
supply. Seedlings include<br />
basil, peppers, tomatoes,<br />
kale, cabbage, kohlrabi,<br />
onion, broccoli, fennel, flowers,<br />
parsley, and lavender.<br />
With a trowel in hand, kids<br />
plant their seedlings in garden<br />
beds. Many times kids<br />
help ready the garden beds<br />
<strong>for</strong> planting by pulling weeds,<br />
raking the soil, and adding<br />
compost by wheel barrow.<br />
We teach students to gently<br />
pull the seedling from its tray<br />
and spread, or pull apart, the<br />
compacted roots. Often, kids<br />
will teach one another this<br />
process as new planters join<br />
the station. Digging a hole<br />
large enough to accommodate<br />
the plant’s roots, and spaced<br />
far enough away from<br />
neighboring plants, kids give<br />
the seedlings new homes.<br />
They gently fill in the hole,<br />
adding a bit of compost and a<br />
loving wish <strong>for</strong> good growth.<br />
We are not done yet! The next<br />
step is to mulch the area<br />
around the seedling with hay,<br />
creating a small nest. The hay<br />
provides cool shade <strong>for</strong> the<br />
soil, keeps soil moist longer,<br />
and prevents weed growth.<br />
— Hannah Lavold,<br />
Garden Educator,<br />
Community GroundWorks<br />
at Troy Gardens<br />
23
Roots<br />
Lesson Overview<br />
The root is the first plant part to emerge from the seed in order to draw<br />
up the water and nutrients that the plant needs to grow. People also<br />
depend on roots because our bodies absorb important nutrients when<br />
we eat plants (i.e., fruits and vegetables). The nutrients we consume are<br />
drawn from soil by roots and then transported throughout the plant. Other<br />
animals also get their nutrients from plants (e.g., a cow eating grass), so<br />
we absorb valuable nutrients when we eat meat as well. In this lesson,<br />
students participate in a discussion about the function of roots and become<br />
familiar with a variety of roots we eat through an exploration activity.<br />
Objectives<br />
Students will:<br />
1. Identify the six plant parts and describe the life cycle of plants<br />
(Ag Ed D.4.1; Science F.4.3)<br />
2. Understand the function of various types of roots (Science F.4.1, F.4.2)<br />
3. Identify, describe, and taste different plant foods<br />
(Nutrition Ed B.4.4, C.4.2, D.4.1, E.4.1, F.4.1, F.4.2, F.4.3)<br />
Materials<br />
Food:<br />
• A variety of root vegetables (e.g., carrots, sweet potatoes, radishes.<br />
See Exploration Activities on the next page and Tasting activity on<br />
page 26 <strong>for</strong> more suggestions)<br />
Supplies:<br />
• Display Board<br />
• Knife<br />
• Plates<br />
• Napkins<br />
• Roots of weeds or other plants<br />
(see Exploration Activities)<br />
24
Preparation<br />
1. Harvest or purchase – and wash – a variety of root<br />
vegetables, including orange root vegetables such<br />
as carrots or sweet potatoes. See Exploration<br />
Activities and Tasting activity <strong>for</strong> more suggestions.<br />
2. You will need a knife <strong>for</strong> the Exploration<br />
Activities and Tasting activity.<br />
3. You may also need some plates or<br />
napkins <strong>for</strong> the Tasting activity.<br />
Procedure<br />
Introduction: On a display board in the garden or classroom, list the six main<br />
plant parts we eat: seeds, roots, stems, leaves, flowers, and fruit. Begin a<br />
discussion by asking students which of those parts is the first to grow out of a<br />
seed when it is planted. Or ask students what plant part they eat when they<br />
eat a carrot. Answer: The root. Have students list as many root vegetables as<br />
they can. Have them identify all the root vegetables you have growing in your<br />
garden, or make a list of those they’d like to grow.<br />
Based on the list, students know that roots can be a delicious and healthy<br />
food <strong>for</strong> us, but what do the roots do <strong>for</strong> the plant? Answer: Absorb nutrients<br />
and water from the soil and provide support by anchoring the plant in the<br />
ground. Ask students how people get the water and nutrients they need since<br />
they don’t have roots. Answer: The nutrients that the roots absorb end up in<br />
the food we eat. Roots do a big job in making sure both plants and people<br />
have the nutrients needed to live and grow. The large roots that we eat such<br />
as sweet potatoes and celeriac also store food <strong>for</strong> the plant.<br />
Exploration Activities: Harvest some weeds or other plants that are ready<br />
to be pulled up and examine the roots. The primary root is the largest and<br />
usually central root. Sometimes this is a taproot—a large tapered root like a<br />
carrot. Other plants, such as lettuce, have fibrous root systems. The secondary<br />
roots are the smaller roots that grow horizontally off the primary root. A taproot<br />
stores food <strong>for</strong> the plant and the secondary roots both anchor the plant<br />
and absorb water and nutrients.<br />
Collect – and wash – a variety of interesting root vegetables from the garden,<br />
farmers’ market, or grocery store, such as golden or cylindra beets, turnips,<br />
ginger, celeriac, rutabaga, beauty-heart (watermelon) radish, black Spanish<br />
Wisconsin Nutrition<br />
Education Program<br />
The UW Extension Youth<br />
Nutrition Education Program<br />
in Dane County provides<br />
hands-on interactive learning<br />
activities <strong>for</strong> children<br />
grades K-8 in school and<br />
afterschool programs. Educators<br />
also focus on the<br />
importance of food safety,<br />
especially the benefits of<br />
hand washing. The afterschool<br />
programs include fun<br />
with food clubs and gardening<br />
clubs, where the children<br />
explore healthy ways to prepare<br />
snacks and foods, and<br />
grow, harvest and enjoy<br />
eating tasty fruits and<br />
vegetables. The Wisconsin<br />
Nutrition Education Program<br />
provides nutrition education<br />
to adults and families in 68<br />
counties across Wisconsin.<br />
Contact your local Extension<br />
office <strong>for</strong> more in<strong>for</strong>mation.<br />
— Tracy Smith,<br />
Wisconsin Nutrition Education<br />
Program Administrator,<br />
Dane County University of<br />
Wisconsin-Extension<br />
25
Roots<br />
radish, orange and purple carrots, blue potatoes<br />
(technically a tuber), and sweet potatoes. Organize<br />
students in groups of four and tell them they are root<br />
veggie explorers. Give each group one or two of the root<br />
vegetables. They will need to use their senses to look at, feel, smell,<br />
and taste these roots. Go around to each group and cut one sample of<br />
their root in half so they can see the inside. If possible, offer them a sample<br />
to taste (remember to have students wash or sanitize their hands be<strong>for</strong>e tasting).<br />
Based on their observations about various root characteristics,<br />
the group should come up with a new and unique name <strong>for</strong> these<br />
roots (see Name That Veggie activity on page 44 in the À La Carte Section).<br />
Have each group share the name of their root and explain how they arrived<br />
at that name. Afterwards, students can look <strong>for</strong> ways that all of the roots are<br />
similar to one another and how they are different.<br />
Tasting: Follow up the exploratory activity with a tasting of a variety of<br />
root vegetables. Remember to have students wash or sanitize their hands<br />
be<strong>for</strong>e tasting. Offering a familiar choice, such as a carrot, makes it easier <strong>for</strong><br />
students to try less familiar roots. Raw sweet potato, radishes, celeriac, and<br />
salad turnips also make great snacks. Note: The “super orange” vegetables<br />
that are roots (e.g., carrots and sweet potatoes) provide our bodies with<br />
extra power, so they are important to eat often. For older students, you could<br />
explain that the reason that orange vegetable are “super” is because they<br />
contain extra amounts of key nutrients like vitamins A and C and potassium.<br />
These nutrients are important <strong>for</strong> many reasons, including the following: Vitamin<br />
A is essential <strong>for</strong> keeping our eyes and skin healthy and <strong>for</strong> protecting our<br />
body against illnesses like the cold and flu; Vitamin C keeps our gums and<br />
teeth healthy; and potassium helps our hearts stay healthy. During or after the<br />
tasting, encourage students to create a superhero type name <strong>for</strong> each of the<br />
orange root vegetables they have explored.<br />
For Older Children (3rd to 5th grade)<br />
Explain that many people don’t eat enough orange vegetables like carrots and<br />
sweet potatoes. Ask students what they could do to eat more “super orange”<br />
vegetables in their meals and snacks. Write their suggestions on the board.<br />
Encourage them to pick one of these suggestions and try it at home. Have them<br />
report back on how they liked it. Here are a couple suggestions <strong>for</strong> your list:<br />
• Just like carrots, sweet potatoes make a great raw snack. Really!<br />
• Make sweet potato French fries. Scrub or peel them, cut them into French<br />
fry size, and toss with a small amount of Olive or Canola oil and salt.<br />
Spread them in a single layer on a sheet pan and bake at 400 degrees<br />
<strong>for</strong> 30 to 40 minutes, or until done to your liking. Turn the fries a few times<br />
as they bake to ensure even browning.<br />
26
• Add grated carrots to your pasta sauce or salads.<br />
• Make a fun snack—broccoli and carrot trees. Take a carrot stick (tree’s<br />
trunk) and add 1-2 broccoli florets (tree’s leaves and branches) to one end<br />
of the stick. Add a dollop of yogurt-based veggie dip to the broccoli florets<br />
to make a snow-covered tree.<br />
Take Home Activity<br />
Develop or find a recipe based on one of the suggestions <strong>for</strong> eating more<br />
carrots and sweet potatoes. Perhaps a parent or caregiver could provide a<br />
favorite recipe. Send the recipe home with students to make with their family.<br />
Additional Activities<br />
Sprouting plants:<br />
Sweet potato: Stick three toothpicks around the middle of the potato and<br />
support them on the rim of a clear glass or plastic cup with the plumper or<br />
rounded side of the potato facing up. Fill the glass with water so that the<br />
bottom of the potato is in water. Change the water weekly and replenish<br />
what evaporates. The roots will develop on the tapered bottom end of the<br />
potato while the stem and leaf buds develop at the top.<br />
Carrot: Select fresh, large-sized carrots (not “baby” carrots) from the garden<br />
or market <strong>for</strong> this activity. Do not use those that are sold with the tops still on<br />
them. Remove the top two inches of the root (carrot) <strong>for</strong> the experiment and<br />
enjoy eating the rest. Put a one-inch layer of pebbles or pea gravel in a<br />
saucer. Place the carrots on top of the gravel, cut-side down, and add more<br />
pebbles to hold them in place, leaving about an inch or two of the carrot root<br />
exposed above the pebbles. Space the carrots about two inches apart in the<br />
saucer. Add water to the top of the pebbles and maintain that water level at<br />
all times. Feathery green leaves will grow out of the carrot tops.<br />
it takes a<br />
community<br />
Getting community members<br />
and organizations involved<br />
in youth gardening is an<br />
invaluable resource. UW-<br />
Extension Master Gardeners<br />
can offer technical support<br />
on how and when to plant<br />
your garden as well as<br />
maintenance and troubleshooting;<br />
local non-profit<br />
organizations may assist<br />
with finding funding opportunities;<br />
Parent Teacher<br />
Organizations can provide<br />
ideas and volunteers; School<br />
district officials can ensure<br />
that you have the support<br />
and supplies needed to<br />
make the garden more sustainable.<br />
In turn, community<br />
members see that investing<br />
in the health and education<br />
of youth is a powerful way<br />
to ensure a healthy community<br />
into the future.<br />
— Elizabeth Gering,<br />
Youth Grow Local Coordinator,<br />
Community GroundWorks<br />
at Troy Gardens<br />
27
Stems & Leaves<br />
Lesson Overview<br />
All of the six main plant parts that we eat per<strong>for</strong>m an essential function in<br />
the life cycle of plants. Stems provide structural support while transporting<br />
water and nutrients throughout the plant. Photosynthesis—a process which we<br />
depend on to live—happens in the leaves of the plant. This lesson teaches<br />
students about the important work done by stems and leaves, and provides<br />
an opportunity to taste some of the many delicious stems and leaves we<br />
eat. It also encourages students to eat more highly nutritious dark green,<br />
leafy vegetables.<br />
Objectives<br />
Students will:<br />
1. Describe the function of stems and leaves<br />
(Ag Ed D.4.1; Science C.4.2, F.4.1, F.4.4)<br />
2. Identify what plants need to live and grow<br />
(Environmental Ed E.4.1; Science F.4.4)<br />
3. Identify, taste, and describe a variety of vegetables that are stems and<br />
leaves (Nutrition Ed B.4.4, C.4.2, E.4.1, F.4.1, F.4.2, F.4.3)<br />
Materials<br />
Food:<br />
• Vegetables that are stems and leaves (e.g., celery and kohlrabi <strong>for</strong><br />
stems and spinach and cilantro <strong>for</strong> leaves. See Tasting activity on<br />
page 30-31 <strong>for</strong> more suggestions).<br />
28<br />
Supplies:<br />
• Plates<br />
• Napkins<br />
• Cups <strong>for</strong> water<br />
• Vegetable peeler<br />
• Crackers<br />
• Word Bank and<br />
Tasting Chart<br />
(included in The<br />
Color Harvest lesson<br />
on page 13)<br />
• Props <strong>for</strong> Chef Chlorophyll Theater—<br />
large pot, big mixing spoon, chef hat and<br />
photos or illustrations that represent the<br />
elements plants need <strong>for</strong> photosynthesis:<br />
sunlight, water, and air.<br />
• Blue batons, cups of water, or something else<br />
that represents water. Green batons or something<br />
else that represents nutrient-rich food<br />
(see Great Stem Relay on page 30 <strong>for</strong> more<br />
in<strong>for</strong>mation).
Preparation<br />
1. Harvest or purchase – and wash – a variety of edible stems and leaves<br />
(e.g., celery and kohlrabi <strong>for</strong> stems and spinach and cilantro <strong>for</strong> leaves.<br />
See Tasting activity on page 30-31 <strong>for</strong> more suggestions).<br />
2. Write the name of each edible stem and leaf on a display board or<br />
poster to record student descriptions. Post Word Bank with adjectives<br />
to guide students’ sensory observations (refer to Tasting Chart and<br />
Word Bank in the Color Harvest lesson on page 13).<br />
3. Print or create images representing sunlight, water, and air <strong>for</strong> Chef<br />
Chlorophyll Theater. You’ll also need a soup pot and a large spoon.<br />
A chef hat is also a nice touch.<br />
4. Create blue and green batons using paper towel rolls and paint or markers<br />
(see Great Stem Relay on the next page <strong>for</strong> more in<strong>for</strong>mation).<br />
Procedure<br />
Chef Chlorophyll Theater<br />
This short skit is intended to introduce students to photosynthesis. The primary<br />
objective is to teach students that plants make food <strong>for</strong> themselves, which<br />
helps make plants healthy <strong>for</strong> us to eat. Introduce this activity by reminding<br />
students that roots and stems pull nutrients and water up from the soil, but<br />
leaves also do something very special by making food through a process<br />
called photosynthesis. Have one teacher play “Chef Chlorophyll” and another<br />
adult help ask questions and hand out ingredients. You can also help students<br />
per<strong>for</strong>m the roles of Chef Chlorophyll and the skit facilitator. For older students,<br />
you can explain that Chef Chlorophyll takes his name from the green pigment<br />
in plants that enables them to per<strong>for</strong>m photosynthesis. Chlorophyll is also what<br />
makes plants green.<br />
This short skit takes place inside a leaf, where Chef Chlorophyll sits with his<br />
pot and spoon, mixing up food <strong>for</strong> the plant. Chef Chlorophyll introduces<br />
himself and tells students that he is working inside his leaf kitchen to make a<br />
delicious dish <strong>for</strong> the plant. He takes a taste from his pot and says, “It tastes<br />
okay, but it needs a few ingredients.” Chef Chlorophyll’s helper asks students<br />
what ingredients the chef needs. The helper can explain that the missing<br />
ingredients are things that plants need to live and grow. Answer: sunlight,<br />
water, and air (carbon dioxide).<br />
nutrition<br />
standards<br />
What a student eats can<br />
have a significant impact on<br />
a student's ability to learn<br />
and to live a healthy life.<br />
Nutrition education can positively<br />
influence students'<br />
eating behaviors and assist<br />
them to develop healthy<br />
eating habits. The Wisconsin<br />
Model Academic Standards<br />
<strong>for</strong> Nutrition are a tool<br />
<strong>for</strong> educators to use to<br />
expand the nutrition curricula<br />
<strong>for</strong> their students. The<br />
nutrition standards support<br />
nutrition education so it will<br />
occur sequentially from preschool<br />
through secondary<br />
school, and provide children<br />
with the knowledge and<br />
skills needed to lead<br />
healthy lives.<br />
Wisconsin Model Academic<br />
Standards <strong>for</strong> Nutrition<br />
http://dpi.wi.gov/fscp/pdf/<br />
nestandards.pdf<br />
— Jill Camber Davidson,<br />
Nutrition Education Consultant,<br />
Wisconsin Department of<br />
Public Instruction<br />
29
Stems & Leaves<br />
When a student answers with one of the correct ingredients give them a picture<br />
of that ingredient and have them drop it in the chef’s pot. Chef Chlorophyll<br />
stirs it in and tastes again. “Mmmm, that tastes better, but a couple more<br />
ingredients are needed!” Repeat until all three ingredients are in the pot.<br />
Conclude with Chef Chlorophyll stating that the mixture tastes delicious and<br />
that the food is ready.<br />
Follow up with a brief discussion about photosynthesis. Ask students if people<br />
make food like plants do. Explain that only plants are truly able to make their<br />
own food. Ask them to imagine what it would be like if people could just make<br />
a sandwich or spaghetti inside their hand. That’s a bit what it’s like <strong>for</strong> plants.<br />
Explain that people (and other animals) depend on plants <strong>for</strong> food and that<br />
eating plants helps make us healthy! Plants also help make us healthy by<br />
creating oxygen <strong>for</strong> us to breathe through the process of photosynthesis.<br />
The Great Stem Relay<br />
This running game is designed to help students understand the important role<br />
stems play in transporting water and nutrients throughout plants. Now that<br />
students understand that Chef Chlorophyll needs sunlight, water, and air in<br />
order to make food, ask students to explain how Chef Chlorophyll gets these<br />
essential ingredients into his leaf kitchen. Answer: Plants absorb sunlight from<br />
the Sun, they use carbon dioxide from the air that surrounds them, and they<br />
pull water from the ground using their roots. What role do stems play in this<br />
process? Answer: They provide the transit corridors. Not only does water<br />
travel to the leaves in these corridors, but the newly manufactured food<br />
travels from the leaves to where it needs to go to feed the plant and keep<br />
it healthy. Create a stem relay race course with blue batons to indicate water<br />
(or to add a fun extra challenge, use buckets or cups full of water) and green<br />
batons to indicate nutrient-rich food from Chef Chlorophyll’s kitchen. The<br />
starting point is at the roots where runners must carry the blue “water”<br />
batons through the stem corridor to the other side where they hand the batons<br />
to Chef Chlorophyll in his leaf kitchen. Once the hand-off has occurred, the<br />
green “food” baton runners who have been waiting in the kitchen can speed<br />
off to deliver the newly manufactured food to the roots at the starting point.<br />
Tasting: Have students taste and compare a variety of stems and leaves.<br />
Kohlrabi is a very tasty stem. Although it may not look like one, it is actually an<br />
enlarged stem used <strong>for</strong> storing water and nutrients <strong>for</strong> the plant. Other tasty<br />
stems include celery (technically a leaf stalk), asparagus, and broccoli stems.<br />
There are many choices of edible leaves—any herbs or leafy greens will do <strong>for</strong><br />
30
this tasting. Choose some of your<br />
favorites and some new ones (e.g.,<br />
spinach, arugula, cilantro, basil, parsley,<br />
chard, bok choy, and beet greens). Plan<br />
ahead by planting a variety of edible stems<br />
and leaves in your garden. Encourage students<br />
to use their senses and describe each leaf or stem as<br />
they taste it. Remember to have students wash or sanitize their<br />
hands be<strong>for</strong>e tasting. Similar to the Tasting activity in The Color Harvest lesson<br />
on page 12, use a display board or Tasting Chart to write down student<br />
observations. Post a Word Bank with adjectives to guide students’ sensory<br />
observations. Students will likely generate fun new describing words, which<br />
you can add to your Word Bank <strong>for</strong> future sensory observation activities.<br />
Provide water <strong>for</strong> the students to drink or crackers as palate cleansers since<br />
some of the leaves have strong or bitter flavors.<br />
Additional Activities<br />
Super Green <strong>Veggies</strong>: People use the nutrients we get from food to grow<br />
and stay healthy. Nutrients help us build muscles, bone, skin, teeth, and all<br />
the other parts of our bodies. Have students identify “super green” leafy<br />
vegetables that are growing in their garden (e.g., kale, collard greens,<br />
romaine lettuce, spinach, watercress, and mustard greens). Have students<br />
also identify “super green” stem vegetables (e.g., broccoli and spinach).<br />
Note: For older students, you could explain that fruits and vegetables contain<br />
many nutrients including vitamin A and C, potassium, and dietary fiber. There<br />
are also some special fruits and vegetables, called the “Super Green”. These<br />
dark green vegetables are important to eat often because they contain extra<br />
amounts of key nutrients like vitamins A and C and potassium. These nutrients<br />
are important <strong>for</strong> many reasons, including the following: Vitamin A is essential<br />
<strong>for</strong> keeping our eyes and skin healthy and <strong>for</strong> protecting our body against<br />
illnesses like the cold and flu; Vitamin C keeps our gums and teeth healthy;<br />
and potassium helps our hearts stay healthy.<br />
Chlorophyll Rub: After the Tasting activity, do a leaf pressing using watercolor<br />
paper. Fold a piece of paper in half. Place leaves to be pressed between the<br />
halves and rub over the top with the back of a large spoon. The chlorophyll<br />
in the leaves will print to the paper. Have students write the name of each leaf<br />
and some words describing the flavor next to each print. Cut the paper in bookmark<br />
size, or have each student do a different leaf and glue them to a poster.<br />
garden fit<br />
The garden provides young<br />
people with an excellent<br />
place to engage in meaningful<br />
fitness. That is to say,<br />
it provides them a place to<br />
be active outdoors — shoveling<br />
compost, wrangling<br />
chickens, preparing garden<br />
beds, carting hay around in<br />
wheelbarrows — all in the<br />
pursuit of healthful food<br />
production. Youth gain<br />
fitness as well as sense of<br />
purpose and accomplishment<br />
as they grow food <strong>for</strong><br />
themselves, their families,<br />
and their communities.<br />
— Nathan Larson,<br />
Education Director,<br />
Community GroundWorks<br />
at Troy Gardens<br />
voices from the<br />
Kids' garden<br />
“When I shovel real good I<br />
get really strong muscles.”<br />
“Did you see me? I was<br />
walking the wheelbarrow<br />
back and <strong>for</strong>th and now my<br />
muscles are sore!”<br />
31
Flowers & Fruit<br />
Lesson Overview<br />
In this lesson students learn that flowers produce the fruits we eat, and that<br />
some flowers themselves are edible. A short story is used to illustrate the<br />
process of flower, fruit, and seed growth. Follow the story with an activity in<br />
which students correctly arrange photos of flower and fruit growth. You may<br />
also have students document the growth and development of flowers and fruit<br />
in their garden journals with drawings or with photos.<br />
Objectives<br />
Students will:<br />
1. Identify edible flowers and fruit as healthy food choices<br />
(Health A.4.3, B.4.1; Nutrition Ed C.4.2, F.4.1)<br />
2. Explain how plants grow and develop (Science C.4.2, F.4.3)<br />
3. Describe the function of flowers (Science C.4.2, F.4.3)<br />
4. Identify and taste fruits and vegetables that come from flowering plants<br />
(Nutrition Ed F.4.2)<br />
Materials<br />
Food:<br />
• Variety of edible flowers and fruits (e.g., broccoli, cauliflower, cucumbers,<br />
apples, nasturtiums. See Tasting activity <strong>for</strong> more suggestions)<br />
• Vegetable and fruit dip (e.g., yogurt or low-fat sour cream and dill,<br />
ranch dressing)<br />
32
Supplies:<br />
• Books: How Do Apples Grow? by Betsy Maestro, The Reason <strong>for</strong> a Flower<br />
by Ruth Heller, or other books that illustrate how fruit grows from flowers<br />
• Photos or drawings that represent the stages of flower and fruit development<br />
(Michigan State University Extension has a series of photos depicting<br />
the stages of apple growth: http://web1.msue.msu.edu/fruit/applgrw.htm)<br />
• Plates<br />
• Napkins<br />
• Cutting Boards<br />
• Knives<br />
Preparation<br />
1. Collect photos or drawings that represent different stages in the development<br />
of flowers and fruit <strong>for</strong> Flower to Fruit Theater activity.<br />
2. Harvest or purchase – and wash – a variety of edible flowers and fruits<br />
(e.g. broccoli, cauliflower, cucumbers, apples, nasturtiums. See Tasting<br />
activity <strong>for</strong> more suggestions). Plan ahead by planting some edible<br />
flowers and fruits in your garden.<br />
3. Get How Do Apples Grow? by Betsy Maestro, The Reason <strong>for</strong> a Flower by<br />
Ruth Heller, or another book that illustrates how fruit grows from flowers.<br />
voices from the<br />
Kids' Garden<br />
“I wish I could grow a big<br />
giant strawberry so that we<br />
could ALL eat it!”<br />
“So this is where the supermarket<br />
gets all its food?”<br />
During a harvesting and<br />
snacking activity at a mulberry<br />
tree in the Kids’<br />
Garden, a child exclaimed,<br />
“I can’t believe nature can<br />
taste so good! That’s why I<br />
like to learn about nature.”<br />
33
Flowers & Fruit<br />
Procedure<br />
Introduction:<br />
Start the lesson with a discussion. What do you think of when I<br />
mention flowers? Flowers are definitely beautiful and smell nice.<br />
Did you know some flowers are also nutritious? Can you think of some<br />
flowers that we eat? Answer: Broccoli, Cauliflower, Violets, Squash Blossoms.<br />
Story Time:<br />
Note: You may want to remind students that not all flowers are edible,<br />
and they shouldn’t eat flowers unless a trusted adult says it’s okay.<br />
Some flowers are good <strong>for</strong> us to eat, but they also produce something else we<br />
eat: fruit. Use the book, How Do Apples Grow? by Betsy Maestro, to structure<br />
the story of a plant producing a flower and a fruit.<br />
Apple buds survive the winter and blossom in the spring. Then a bee comes <strong>for</strong><br />
nectar and carries pollen from another flower. The pollinated flower produces<br />
a fruit. Consider using leading questions be<strong>for</strong>e turning to the next page of the<br />
book so students can participate in telling this story.<br />
Flower to Fruit Theater:<br />
This activity can be run in the garden or classroom. You will need photos or<br />
drawings that represent different stages in the development of flowers<br />
and fruit. Student volunteers then come to the front of the class and hold<br />
a photo or drawing. These are the actors. The rest of the students are directors.<br />
They help put the actors in the correct order to represent the development of the<br />
flower and growth of the fruit. Ask the actors to hold their photo or drawing<br />
nice and still so it can be easily seen. They also need to take direction even<br />
if they disagree with where they are being placed. The directors should take<br />
turns offering suggestions. Use clues and leading questions, if needed, to help<br />
students put the photos in the right order.<br />
Run this activity with a fruit and a vegetable. First, use a set of photos or<br />
drawings depicting apple development (e.g., an apple blossom, a bee on the<br />
blossom, fruit starting to <strong>for</strong>m, a small apple, and a mature apple). Second,<br />
use photos or drawings of a developing squash (e.g., a small flower, a fully<br />
developed squash blossom, a small squash, and a fully-grown squash). If you<br />
run this activity in the garden, you can provide students with time afterwards to<br />
explore the garden looking <strong>for</strong> flowers and fruits in different stages of development.<br />
Have students document what they find by taking photos or drawing<br />
pictures and use these <strong>for</strong> the next time you run this activity.<br />
34
Tasting:<br />
Offer a garden medley of edible flowers and fruits—including broccoli,<br />
cauliflower, cucumbers, apples, and nasturtiums. Serve the medley with a<br />
yogurt-based dip <strong>for</strong> a tasty garden snack. Johnny Jump-ups, nasturtiums,<br />
broccoli, cauliflower, asparagus tips, squash blossoms, and violets are all<br />
edible flowers that can be grown in your garden or found at your local<br />
farmers’ market. Consider holding a flower tasting in the garden! Many<br />
fruits can be grown in the garden including blueberries, raspberries, grapes,<br />
cherries, pears, apples, cantaloupes, and watermelons. You can also grow<br />
many delicious and nutritious vegetables (also considered “botanical fruits”<br />
because they contain seeds) such as zucchini, cucumber, winter and summer<br />
squashes, eggplant, peppers, tomatoes, okra, green beans, and pea pods.<br />
Note: Winter squashes like butternut squash and pumpkins are “super orange”<br />
vegetables that are packed full of extra nutrients and make up a regular part<br />
of a healthy diet. For older students, you could explain that the “super orange”<br />
vegetables are particularly important to eat often because they contain extra<br />
amounts of key nutrients like vitamins A and C and potassium. These nutrients<br />
are important <strong>for</strong> many reasons, including the following: Vitamin A is essential<br />
<strong>for</strong> keeping our eyes and skin healthy and <strong>for</strong> protecting our body against<br />
illnesses like the cold and flu; Vitamin C keeps our gums and teeth healthy;<br />
and potassium helps our hearts stay healthy.<br />
Additional Activities<br />
• In the garden, have students document, over time, the growth and development<br />
of flowers and fruit using garden journals or by taking photos.<br />
Strawberry plants and squash plants work well because it is easy to see<br />
the developing flowers and fruit. Plan ahead to grow squash and strawberries<br />
in the garden.<br />
• How many flowers and fruits can be found in the garden? Encourage<br />
students to find them and make a map. Or make a collage of photos or<br />
drawings. Also see Nettle Rope and Flower Braiding activity on page 42<br />
in the À La Carte section.<br />
• Flower Anatomy in the Garden: Provide students with a simple diagram<br />
depicting different flower parts. Dissect squash or other garden flowers<br />
to examine parts in greater detail.<br />
vegetable<br />
or fruit?<br />
Vegetable and fruit are<br />
culinary terms describing<br />
different types of food from<br />
plants. Essentially, fruits are<br />
the sweeter of the two.<br />
Fruit, however, also happens<br />
to be a botanical term<br />
<strong>for</strong> one of the six plant parts.<br />
Botanically speaking, the<br />
fruit is the part of the plant<br />
that carries the seeds. A<br />
vegetable can be any part<br />
of a plant. There are, <strong>for</strong> example,<br />
root vegetables and<br />
leaf vegetables, etc. And<br />
so, there can in fact be fruit<br />
vegetables, which are culinary<br />
vegetables that are<br />
made of the fruiting body of<br />
the plant. Examples include<br />
tomatoes, cucumbers, and<br />
eggplants.<br />
— Whitney Cohen,<br />
Education Director,<br />
Life Lab Science Program<br />
35
Photo by Dorra<br />
"I like gardening because you<br />
can try things, taste them,<br />
eat them and watch them grow."<br />
— Dorra, age 9
À La Carte<br />
Additional Garden-Based Activities
Additional Garden-Based Activities<br />
Keeping a Garden Journal<br />
Keeping a garden journal is a great way <strong>for</strong> students to reflect on their experiences in the garden.<br />
Students will use their observation and creative writing skills to create a daily account of changes<br />
in the garden throughout the growing season.<br />
Supplies: Students can purchase a journal or notebook to record their observations, or they can<br />
create a journal using loose paper and twine. To construct a journal you will need loose leaf paper,<br />
printer paper, or colorful construction paper as well as a hole-punch, twine, pen/pencil, and scissors.<br />
Directions: Gather together the desired number of loose sheets of paper. If the paper does not<br />
already have holes, use the hole-punch to create 2-3 holes on one edge. Cut 2-3 small pieces of<br />
twine and use them to bind the paper together through each of the holes. Have students decorate<br />
the front cover of their garden journal however they choose. Students can separate their garden<br />
journal into sections either by date or by topic such as weather (Science), phenology (Science),<br />
how much produce they have harvested (Math), and notes about how the garden is growing<br />
(English/Language Arts). Students will need a pen or a pencil <strong>for</strong> recording their observations.<br />
Weather<br />
Have students record the weather on a daily basis so<br />
that they gain an understanding of how it affects the<br />
growth and health of plants in your garden. Weather<br />
station tools such as a rain gauge, thermometer, and<br />
wind vane provide a fun way <strong>for</strong> students to observe<br />
and measure weather-related changes in the garden.<br />
Phenology<br />
Have students observe and record the life cycle of<br />
both plants and animals in the garden and how they<br />
relate to the changing seasons. For example, record<br />
the day you first see a robin, seed sprout, squash<br />
blossom, ripe tomato, and frost damage on garden<br />
plants. Then have students compare these events<br />
with weather patterns to gain a better understanding<br />
of the changing seasons.<br />
Garden Notes<br />
Have students record general observations from the garden in a variety of creative <strong>for</strong>mats. They<br />
may write poems about the spicy flavor of a radish, short fiction stories about animals in the garden,<br />
or simply how they feel in that moment sitting in the garden. Students will <strong>for</strong>m a stronger connection<br />
with the garden by looking deeper into the many changes and experiences they have while they<br />
are there.<br />
38
Digging and Wheel Barrowing in the Garden<br />
Sometimes the most fun way to engage children in the garden is with simple tasks like digging<br />
and wheel barrowing. These common work activities become a <strong>for</strong>m of play in the children’s<br />
garden. After a day of sitting at desks, many students savor the chance to lose themselves in<br />
a digging project.<br />
Supplies: Digging tools such as shovels or trowels,<br />
wheel barrows.<br />
Directions: You can designate an area of your garden<br />
as the Digging Garden. Since most gardens always<br />
have new beds to be prepped <strong>for</strong> planting, the<br />
digging area can move around the garden so that<br />
students feel that they are improving their garden<br />
while having fun. Other fun activities that involve<br />
digging and wheel barrowing are moving compost<br />
from a pile outside the garden to add to garden beds<br />
or bringing woodchips to define garden paths. Kids<br />
enjoy the challenge of maneuvering a wheelbarrow<br />
loaded with compost through the twists and turns<br />
of the garden.<br />
Chickens<br />
Chickens are a great addition to any youth garden (providing you can gain municipal/site approval<br />
<strong>for</strong> keeping chickens and you have the capacity to care <strong>for</strong> them throughout the year). Students<br />
love feeding, holding, and generally interacting with chickens in the garden.<br />
Supplies: Chicken coop, fencing <strong>for</strong> a chicken run, chickens, food, water, oyster shells, grit, wood<br />
shavings or other bedding material. See www.madcitychickens.com and www.backyardchickens.<br />
com/ <strong>for</strong> more in<strong>for</strong>mation about keeping chickens.<br />
Directions: Build, purchase, or find a local volunteer to<br />
construct your chicken coop (many great designs can be<br />
found at the websites listed above). Get chickens and<br />
let the fun begin! Students will enjoy learning to hold<br />
and feed the chickens, as well as how they contribute<br />
to a healthful food system. You can use chicken manure<br />
to add nutrients to your garden compost. Hens will<br />
typically lay one egg per day during the growing<br />
season, so consider holding an egg lottery where<br />
one or more lucky students win an egg to take home.<br />
All photos in the A La Carte and Cooking and Eating in the Garden sections were taken at Troy Gardens.<br />
39
Additional Garden-Based Activities<br />
Theme Gardens<br />
Organizing some of your garden beds around a particular theme is a fun way to get students excited<br />
about the garden. Garden themes can also emphasize lessons in a variety of academic subjects including<br />
geography, social studies, history, and literature. Some examples of common themes used in gardens<br />
include popular foods and cultural heritage. Gardens can also be modeled after a popular book —<br />
such as Tops and Bottoms by Janet Stevens—that can help make the story come alive <strong>for</strong> students.<br />
Pizza Garden<br />
The ingredients of popular foods can be grown<br />
in your garden. A classic example of this is the<br />
pizza garden!<br />
Supplies: Plants that are found on a pizza<br />
(e.g., tomatoes, peppers, oregano, onions, and<br />
basil). Materials <strong>for</strong> building raised bed frames<br />
shaped like pizza slices (e.g., rocks, lumber, or logs).<br />
Directions: Design your pizza garden by building<br />
raised frames shaped like pizza slices out of lumber,<br />
logs, or rocks. Place your raised bed slices in a circle<br />
so they <strong>for</strong>m the shape of a pizza pie (with walking paths in between). If you have limited space, you<br />
can plant one pizza slice. Help students plant a variety of pizza toppings such as tomatoes, oregano,<br />
onions, basil, or peppers in the pizza slice beds.<br />
Try out a variety of other popular food theme gardens such as:<br />
• Salsa Garden: Grow tomatoes, tomatillos, peppers (sweet and hot), onions, garlic, and cilantro.<br />
• Pickle Garden: Grow cucumbers and dill.<br />
• Cereal Bowl Garden: Grow different grains that are used to make cereal such as oats, rye, and corn.<br />
Three Sisters Garden<br />
The United States has a rich cultural history and the garden is an excellent place to showcase<br />
different gardening practices as well as fruits and vegetables that have originated from many<br />
corners of the Earth. One example is the Three Sisters Garden, which celebrates the gardening<br />
heritage of Native Americans. The Three Sisters are represented by beans, corns, and squash.<br />
Supplies: A plot set aside in your garden, squash seeds, corn seeds, and bean seeds.<br />
Note: There are many different varieties of all of these three crops that can be grown in your garden.<br />
Directions: Plant the Three Sisters seeds in the designated garden plot. Plant the corn first. Once the<br />
corn has sprouted, plant the beans next to the corn—the corn stalks act as a trellis while the beans<br />
fix nitrogen into the soil to help feed the corn and the squash. Plant the squash in hills around the<br />
corn and beans—the thorny vines and broad leaves of the squash will help protect its sisters from<br />
predators and provide shade to deter weeds and keep the soil moist. Consult the National Gardening<br />
Associations’ website (www.kidsgardening.com/growingideas/projects/march02/mar02-pg1.htm) and<br />
In The Three Sisters Garden by JoAnne Dennee <strong>for</strong> more about incorporating a Three Sisters theme<br />
in your garden.<br />
40
There are a variety of other cultural gardens that can be incorporated into your garden. Consider<br />
consulting the experts in your community <strong>for</strong> advice about different gardening traditions. For<br />
example, if there are Hmong or Latino gardeners in your community, consult with them about<br />
specific plants and growing techniques that celebrate their respective growing traditions.<br />
Color Scavenger Hunt<br />
Create a scavenger hunt that involves searching <strong>for</strong> a variety of different colors of fruits and<br />
vegetables in the garden. This is a good opportunity to introduce students to some foods with<br />
which they may be less familiar.<br />
Supplies: Creative descriptions <strong>for</strong> a variety of fruits and vegetables, colored paper, pens/pencils,<br />
and your garden.<br />
Directions: Create color clue cards with descriptions <strong>for</strong> different fruits and vegetables from your<br />
garden. Each description should not include the name of the fruit or vegetable, but gives students<br />
hints about what it might be. For example, a description <strong>for</strong> a tomato might be, “A red, round<br />
vegetable that helps make pizza sauce and salsa colorful and delicious.” To create a card, paste<br />
or tape the description on colored paper to help remind the students what color fruit or vegetable<br />
they are looking <strong>for</strong>. Ideas <strong>for</strong> a scavenger hunt could include the following:<br />
• Red – strawberry, pepper, raspberry<br />
• Orange – nasturtium flower,<br />
cherry tomato, pie pumpkin<br />
• Yellow – summer squash (e.g., pattypan,<br />
yellow crookneck), watermelon<br />
• Green – collard greens, asparagus, broccoli<br />
• Purple – eggplant, mulberry<br />
• White – cauliflower, onion, garlic<br />
Separate students into small groups and give each group<br />
their first color clue card. Once a group has found a fruit<br />
or vegetable in the garden to match their card, have<br />
a designated student from the group write or draw a<br />
picture of what they found on the blank side of the card.<br />
Then, the group will turn in the card to the teacher to<br />
obtain a new clue and start looking <strong>for</strong> a match <strong>for</strong> the<br />
next color. Repeat this process until each group has<br />
found all the matches to their color clue cards. You could also do this activity with the purpose of<br />
making a snack. For example, create cards that have descriptions of all of the vegetables needed<br />
to make salsa (e.g., tomatoes, tomatillos, peppers (sweet and hot), onions, garlic, and cilantro).<br />
Have students harvest as they find the vegetables and make the snack in the garden.<br />
41
Additional Garden-Based Activities<br />
Garden Art<br />
The garden is a great place <strong>for</strong> students to engage in artistic expression using natural materials.<br />
Supplies: An area inside or outside of the garden. A range of plant and other materials from the<br />
garden (e.g., leaves, rocks, sticks, flowers). Ripe berries, paper, cups, brush (optional) <strong>for</strong> paintings.<br />
Directions: In preparation <strong>for</strong> this activity, lay out borders using branches,<br />
long sticks, and/or rocks to create large frames on the ground. Explain<br />
that we’re opening an earth art gallery and students can work in small<br />
groups or alone to create masterpieces. You could also do a big group<br />
piece with all students working together. Show students several photos<br />
of earth art to provide them with some inspiration and direction. For<br />
some truly remarkable examples, see Andy Goldsworthy: A Collaboration<br />
with Nature by Andy Goldsworthy. In addition, take photos of<br />
student’s finished earth art to use as inspirational examples in the<br />
future. Give students a certain amount of time and space to create<br />
their design. At the end, do a gallery tour and have each group show<br />
off their creation. Another great garden art activity is berry painting—<br />
simply mash ripe berries (e.g., mulberries, raspberries, strawberries)<br />
in cups and use the mixture <strong>for</strong> finger or brush painting!<br />
Nettle Rope & Flower Braiding<br />
Stinging nettle is often considered an unwelcome weed in the<br />
garden, however, the stem can be used to make a very strong<br />
rope that is perfect <strong>for</strong> braiding! In addition, the leaves are<br />
delicious and nutritious (just make sure you deactivate the tiny<br />
stinging needles by steaming or drying them first).<br />
Supplies: Stinging nettle plants from the garden, leather gloves,<br />
knife, scissors, and flowers.<br />
Directions: To prepare <strong>for</strong> this activity, you will want to harvest some<br />
stinging nettle. Make sure that you are wearing long sleeves and<br />
leather gloves, and then pull the nettle plant out of the ground.<br />
Harvest all of the leaves with the scissors or a knife (the underside<br />
of the leaves have the long hairs that sting), so all that you are left<br />
with is the stalk. Hold a knife perpendicular to the stem and scrape<br />
off all of the hairy spines. Now that the stinging needles have been removed, the nettle plant is safe <strong>for</strong><br />
students to handle. Have students pull long strips off of the outer layer of the stalk <strong>for</strong> braiding. Next,<br />
harvest a variety of flowers from your garden (Queen Anne’s lace, clover, or other flowers with long, thin<br />
stems work well). Then students can weave flowers into the nettle rope braid, and tie the ends to make<br />
a bracelet, anklet, or necklace.<br />
42
Hawks & Rabbits<br />
This is a fun running activity designed to help students understand predator-prey relationships and<br />
food chains that exist in nature. You can make it relevant to the garden classroom by explaining to<br />
students that garden plants provide an important food source <strong>for</strong> rabbits and that hawks help garden<br />
plants grow by controlling rabbit populations around the garden. As a follow-up activity, you may<br />
choose to install raptor poles or bat houses in or near your garden to encourage regular visits from<br />
beneficial predators—just make sure to protect your chickens!<br />
Supplies: Cones or lines on a field adjacent to the garden.<br />
Directions: Use cones or lines to create safe zones on either side<br />
of an open field as well as side boundaries to limit the size of<br />
the running area. Explain to students that prey often need to<br />
travel through dangerous open areas where they are at risk of<br />
being hunted by predators in order to get to safer places—like<br />
a hidden feeding area or a rabbit warren. Explain that behind one<br />
line of cones is a safe rabbit warren and that behind the other<br />
line of cones is a safe feeding area but in between the two lines<br />
is an open field. Ask students to pretend they’re hungry rabbits. In<br />
order to get to their safe feeding area from their warren, they will<br />
need to run through the field where the hawk is circling. Pick one<br />
student to be the hawk—he or she stands in the middle of the<br />
field. The rest of the students are rabbits and they all line up on<br />
the line that designates the safe rabbit warren. When the hawk<br />
sounds, the rabbits run across the field to their feeding area. The<br />
hawk tries to tag the rabbits. If they get tagged, they become a<br />
hawk <strong>for</strong> the next round. So it gets harder each time <strong>for</strong> the rabbits. When the hawk sounds again, the<br />
rabbits will need to run back from the feeding area to the safety of their warren. The hawk tries to tag<br />
the rabbits again. The rabbits will run back and <strong>for</strong>th between the feeding area and warren until the last<br />
rabbit is tagged. The last rabbit to get tagged becomes the new hawk to start the next game.<br />
Garden Camera<br />
This activity was adapted from Sharing Nature with<br />
Children Vol. 2 by Joseph Cornell. It is a wonderful way<br />
<strong>for</strong> students to hone their observation skills and provides<br />
a structure <strong>for</strong> them to view the garden with fresh eyes.<br />
It also utilizes suspense and cultivates an appreciation<br />
of the beauty of the world around us!<br />
Supplies: Cameras, display board or photo book.<br />
Directions: Pair students up. One student is the photographer;<br />
one is the camera. The camera closes their eyes<br />
and keeps them closed until the photographer pulls their<br />
left earlobe. The photographer picks a scene they want to<br />
capture. This could be a close-up of a flower, a vegetable<br />
or some other garden scene. The photographer gently<br />
maneuvers the camera’s frame of vision to capture that<br />
image. When the camera is in place, the photographer<br />
43
Additional Garden-Based Activities<br />
gently pulls the left earlobe of the camera and the shutter snaps open (i.e., the person opens their<br />
eyes to view the garden scene). Next, the camera and photographer discuss the scene. Then they<br />
switch! Afterwards, provide each pair with a real camera to capture some of their favorite scenes in<br />
the garden. Create a photo display board or book with their photos so they can see the garden from<br />
each other’s vantage points.<br />
Name That Veggie<br />
Instead of giving a name to vegetables every time a student asks,<br />
let them come up with a name on their own. By giving students the<br />
opportunity to discover their own vegetable, they develop a deeper<br />
appreciation <strong>for</strong> the plant, making it more likely that they will want to<br />
care <strong>for</strong> and eat that plant.<br />
Supplies:<br />
Variety of fruits and vegetables from the garden, a chalkboard or large<br />
piece of paper to make a list.<br />
Directions:<br />
Allow students to look at, feel, smell and taste the vegetables and<br />
then encourage them to come up with 3-4 words that they would use<br />
to describe it. From those words, have them come up with a new name<br />
(e.g., green spiracrunchtasticus).<br />
Making Your Own Composting Worm Bin<br />
Worm bins are a fantastic way <strong>for</strong> students to observe the nutrient cycle in action. Watch worms<br />
trans<strong>for</strong>m vegetable scraps into nutrient-rich compost that can be fed to growing plants in the garden.<br />
Worm bins come in all shapes and sizes—you can create a permanent bin outside in your garden or<br />
a smaller, portable bin in your classroom.<br />
Supplies:<br />
• ½ - 1 pound of red worms, available at a bait shop or online<br />
• Two, 10-gallon opaque plastic bins with lids<br />
• Mesh window screen<br />
• Duct Tape<br />
• Drill with inch and ¼ inch settings<br />
• Newspaper<br />
• Dry Leaves<br />
• Sprinkle of dirt<br />
• Cardboard<br />
• Food scraps<br />
44
Instructions:<br />
1. Drill 1/8 inch holes around the top 2 inches of Bin 1.<br />
2. Drill about 30 ¼ inch holes in the bottom of the bin.<br />
3. Drill about 8 2-inch holes, or 20 ½ inch holes around the bottom<br />
2 inches of the sides of Bin 2 to give the worms air.<br />
4. Measure and cut the screen to fit into bottom of Bin 1; install with duct tape to cover sharp edges.<br />
5. Tear newspaper into ½ inch strips.<br />
6. Soak newspaper strips in water; wring out excess water.<br />
7. Layer about 4 inches of fluffed, wet newspaper mixed with dry leaves into Bin 1.<br />
This is the worms’ bedding.<br />
8. Sprinkle in a small handful of dirt as grit <strong>for</strong> the worms to grind food in their gizzard.<br />
9. Add ½ to 1 pound of red worms. There are about 1000 worms in a pound,<br />
and they will reproduce fairly quickly.<br />
10. Measure and cut cardboard to fit on top of newspaper bedding.<br />
11. Soak cardboard in water, lay on top. Keep cardboard wet as it dries out over the weeks.<br />
12. Stack Bin 1 into Bin 2, and Bin 2 will catch the drips from Bin 1.<br />
13. Start introducing food scraps very slowly, and<br />
eventually the worms will be able to handle<br />
half their weight in food scraps every day.<br />
Feed the worms a handful of food scraps<br />
every 4-5 days, and bury them under the<br />
newspaper to avoid smells. Keep the lid on<br />
the worm bin to keep moisture in the bin.<br />
Use spray bottle if bedding materials start<br />
to dry out, but wetter food scraps should<br />
keep the bin moist on their own.<br />
Worm Care:<br />
Things to Remember:<br />
• Worms need moisture to breathe<br />
• They are vegetarians<br />
• Bury the food scraps in a new place every day<br />
Problem Cause Solution<br />
Worms are dying<br />
Bin Stinks!<br />
• Too wet<br />
• Too dry<br />
• Not enough air<br />
• Too much food<br />
• Too wet<br />
• Add more bedding<br />
• Moisten bedding<br />
• Drill more holes<br />
• Do not feed <strong>for</strong><br />
a couple weeks<br />
• Add more bedding<br />
Fruit Flies Exposed food Bury food in bedding<br />
45
"Coming up with recipes <strong>for</strong> cooking in the<br />
garden is really a matter of not cooking.<br />
Just putting the vegetables together in as<br />
much of a fresh <strong>for</strong>m as you can and really<br />
just putting a little bit of flavor onto them,<br />
and letting them see all the colors naturally<br />
because obviously when you cook it, things<br />
change. But it’s also about getting together,<br />
having a little harvest party, and every day<br />
we sit together and we eat something from<br />
the garden … and that’s what really gets you<br />
because everybody loves to eat."<br />
— Tory Miller<br />
Executive Chef & Co-Proprietor<br />
L'Etoile Restaurant
Cooking &<br />
Eating in<br />
the Garden
Cooking & Eating in the Garden<br />
Eating Fruits & Vegetables in the Garden<br />
Growing, cooking and tasting activities are proven ways to get students to try new fruits and vegetables! When<br />
they take part in the entire process—from starting seeds to harvesting food to preparing meals—students enthusiastically<br />
incorporate more vegetables and fruit into their diets. Encourage everyone to try a small bite—it may take<br />
several times be<strong>for</strong>e a student develops a taste <strong>for</strong> a specific fruit, vegetable, or prepared dish in the garden.<br />
Cooking in the Garden<br />
Cooking is a favorite activity <strong>for</strong> students—many recipes can be prepared right in the garden, allowing young<br />
people to taste the fruits of their labor! This adds to the full experience of growing food. By cooking in the<br />
garden, students are not only introduced to the raw ingredients that make up some of their favorite foods,<br />
they can see first-hand how they are prepared in a healthy way. Even young children can be involved in<br />
preparing snacks and meals in the garden. Children as young as two can help with washing and scrubbing the<br />
fruits and vegetables harvested from the garden. They can also help by tearing lettuce leaves to prepare salad<br />
greens or snapping peas. Four and five-year olds can help mash soft fruits and vegetables, measure dry and<br />
liquid ingredients, and mix ingredients. Students older than five have many, many ways to get involved in<br />
cooking—they can chop, mix, mash and roll a wide variety of different ingredients. As students get older, they<br />
can further develop their culinary skills with a broader array of recipes and techniques. To make the cooking<br />
experience fun, safe and productive, it is important to have the right tools. Here are some suggestions:<br />
• Stainless steel tables <strong>for</strong> preparing garden dishes.<br />
• Colorful plates, bowls, and cutting boards are fun <strong>for</strong> students to use.<br />
• Knives: Due to the sometimes chaotic nature of the outdoor kitchen, using stainless steel serrated dinner<br />
knives will eliminate the worry of students cutting themselves with sharper knives. They are usually heavy<br />
and sharp enough to cut most vegetables and fruits from the garden. If you are able to provide good training<br />
and supervision, students are also perfectly capable of using sharp knives. Make sure students are using the<br />
proper cutting techniques. Students should hold knife in one hand and object with a closed fist in the other hand.<br />
• Stainless steel bowls of various sizes are great <strong>for</strong> mixing and collecting ingredients from the garden.<br />
• Stainless steel or plastic strainers are great <strong>for</strong> washing garden produce.<br />
• Big wooden or stainless steel spoons <strong>for</strong> mixing and mashing.<br />
• Peeler <strong>for</strong> vegetables with tough outer skins like kohlrabi.<br />
• Hand crank cheese grater <strong>for</strong> processing cheeses like parmesan <strong>for</strong> pesto.<br />
• Scissors <strong>for</strong> cutting herbs like rosemary.<br />
Sun Oven<br />
Garden Kitchen<br />
48
Earth Oven<br />
Outdoor cooking appliances add a degree of fun to the garden kitchen while<br />
allowing you to make a wider variety of meals and snacks:<br />
• Solar oven: A fun and educational way to bake garden treats using the<br />
power of the sun. These can be made either from inexpensive materials<br />
or purchased.<br />
• Earth oven: A great place <strong>for</strong> baking garden pizzas and this can be<br />
constructed out of clay, sand, and straw by students right in the garden!<br />
• Hand-crank blender: A must-have in the garden kitchen. Students will<br />
enjoy blending everything from basil pesto to tomatillo salsa!<br />
• Bike-powered grain mill/blender: Another great way to add fun and fitness to the outdoor kitchen<br />
while teaching students about food. For example, students can learn first-hand how wheat berries are<br />
trans<strong>for</strong>med into flour and then how flour is turned into pizza dough.<br />
Farm Stand: Bringing the Food Home<br />
Food that is not eaten fresh off the vine in the garden can be<br />
sent home with the students so that their families receive the<br />
benefits of fresh garden vegetables and fruits as well. During<br />
the harvest season, create a student-run farm stand where<br />
students and parents can select garden fresh food <strong>for</strong> use in<br />
meals and snacks at home. Students can harvest and prep<br />
garden produce to stock the stand during their daily time in the<br />
garden. Consider adding recipe cards or a parent newsletter<br />
that features daily offerings with recipes and in<strong>for</strong>mation about<br />
storage and other tips <strong>for</strong> specific fruits and vegetables.<br />
Safety Tips <strong>for</strong> Teachers<br />
There are a few simple things to remember when cooking and<br />
preparing food in the garden, including the following:<br />
• Raw fruits and vegetables may be a choking hazard <strong>for</strong> very<br />
young children. Cut fruits and vegetables into quarters or<br />
very small pieces or cook to soften be<strong>for</strong>e serving.<br />
• Make sure students wash their hands or hand sanitize prior to any cooking and eating activities to<br />
ensure proper sanitation.<br />
• Ensure students are properly supervised during food preparation and cooking activities.<br />
• Rinse fresh fruits and vegetables be<strong>for</strong>e eating under clean running water. For more in<strong>for</strong>mation on food safety<br />
<strong>for</strong> fruits and vegetables, visit www.fruitsandveggiesmatter.gov/health_professionals/food_safety.html.<br />
• Practice good food safety—keep hot foods hot and cold foods cold. For more in<strong>for</strong>mation and resources <strong>for</strong><br />
talking about food safety with kids, visit www.fsis.usda.gov/Food_Safety_Education/For_Kids_&_Teens/index.asp.<br />
49
G a r d e n K i t c h e n R e c i p e s<br />
Favorite recipes from<br />
the Kids’ Garden at<br />
Troy Gardens<br />
Kids’ Garden Refrigerator Pickles<br />
Ingredients:<br />
1/2 cup of vinegar<br />
2 cups of water<br />
8 teaspoons salt<br />
1 cup dill (flowers, seeds, and stems all work)<br />
5-6 medium cucumbers<br />
4 pinches of mustard seed<br />
6 black peppercorns<br />
Harvest, wash, and slice the cucumbers<br />
into wedges. Place them in a bowl with<br />
the dill and salt, and mix them by hand or<br />
with a mixing spoon. Using two mason jars,<br />
add to each 2 pinches of mustard seed, 3<br />
peppercorns, ¼ cup of vinegar, and one cup<br />
of water. Add half of the dill/salt/cucumber<br />
mixture to each jar. Seal the lid and mix the<br />
pickles until you can’t wait any longer to<br />
eat them!<br />
Kids’ Garden Tips:<br />
• The longer the pickles sit in the vinegar mixture, the more sour and better they taste.<br />
• Don’t be afraid to add more or less salt depending on your taste preferences.<br />
• Our pickles are so popular they rarely reach the refrigerator. If you do have leftovers,<br />
check with your local food safety specialist to see how long they keep.<br />
• Add more vegetables to the mix, such as onion, radishes and garlic <strong>for</strong> new<br />
exciting flavors.<br />
50
Garden Spring Rolls<br />
Ingredients:<br />
Rice noodles<br />
Rice Paper<br />
Chef Tory's Dipping Sauce (see below)<br />
Any veggies fresh from the garden –<br />
try onion, garlic, broccoli, radishes, kale,<br />
green or red tomatoes, basil, carrots or<br />
anything else that might be in season.<br />
Olive oil<br />
Salt<br />
Harvest the vegetables from your garden<br />
and cut them into small pieces. Option One<br />
is to mix all of the vegetables in a bowl,<br />
sprinkle some salt and olive oil on top, and<br />
either sauté or bake them until they are<br />
warm and soft. Option Two is to keep all<br />
of the vegetables fresh and separate in<br />
different bowls. Both ways work great. In<br />
the meantime, cut the rice paper sheets<br />
in half, and soak them in a shallow dish or<br />
plate of water until soft (about 2 minutes).<br />
When the vegetables are ready, lay out<br />
the rice paper on plates or cutting boards,<br />
fill them with any of the fillings, roll them<br />
up, and they are ready to go!<br />
Kids’ Garden Tips:<br />
• When we run out of Chef Tory's Dipping Sauce,<br />
we switch to balsamic vinegar and it tastes great.<br />
• On days that we make pesto, we also put it in<br />
the spring rolls <strong>for</strong> extra flavor.<br />
• Cooking the noodles early in the morning or the<br />
night be<strong>for</strong>e makes set up very easy. It is also<br />
easier when the noodles are cut up.<br />
• Cutting the rolls in half makes <strong>for</strong> less waste.<br />
Chef Tory’s Dipping Sauce<br />
Ingredients:<br />
1 tablespoon soy sauce<br />
1 tablespoon water<br />
1 teaspoon rice wine vinegar<br />
1 teaspoon sesame seed oil<br />
Mix all ingredients and<br />
taste <strong>for</strong> balance. Should<br />
taste deliciously sweet,<br />
spicy and tangy.<br />
Fresh grated ginger<br />
Chopped scallions<br />
Honey and hot sauce to taste<br />
Peanuts or peanut butter (optional)<br />
51
What’s-That-Green-Stuff<br />
Can-We-Make-it-Again Pesto<br />
Ingredients:<br />
Large bowl of basil, about 3 cups<br />
(or use 1/2 basil and 1/2 Red Russian Kale)<br />
1/4 cup parmesan cheese<br />
1/4 cup pine nuts (optional)<br />
1/4 cup olive oil<br />
Crackers or baguette<br />
Chop or rip the basil and put in a blender.<br />
Add parmesan cheese, pine nuts, and olive<br />
oil. Blend until mixture is creamy. Serve over<br />
crackers or baguette.<br />
Kids’ Garden Tips:<br />
• Pine nuts can get expensive, and the pesto still<br />
tastes great without them.<br />
• Add flavor to your pesto by including such<br />
vegetables and herbs as broccoli, radishes,<br />
mint and chives.<br />
• Using a hand-crank blender works perfectly to<br />
blend the mixture, and the kids love blending!<br />
• Serve pesto on crackers, slices of bread,<br />
radishes or cucumbers.<br />
52
Homemade Fattoush<br />
(a Lebanese salad introduced to us by two of our youth gardeners)<br />
Salad:<br />
2 cups shredded lettuce<br />
1 large or 2 small cucumbers, diced<br />
2 medium tomatoes, chopped<br />
1/2 cup chopped parsley<br />
1/4 cup chopped mint leaves<br />
1/2 to 1 green pepper, diced<br />
1 bunch green onions, finely sliced<br />
1/2 teaspoon sumac<br />
2 pieces of pita bread toasted until golden<br />
brown, broken into pieces the size of a quarter<br />
Dressing:<br />
1/2 cup lemon juice<br />
1/2 cup olive oil<br />
2 to 4 cloves garlic, minced<br />
1 teaspoon salt<br />
Pinch of pepper<br />
In a small bowl, mix all dressing ingredients<br />
together. In a large bowl, mix all<br />
salad ingredients together. Toss salad<br />
with the dressing and serve immediately.<br />
Troy Kids’ Garden Tips:<br />
• Break the pita bread into small 1” pieces and toast in<br />
a sun oven until the bread is warm to the touch.<br />
• If ground sumac is not available, fresh red sumac berries<br />
can also be used. Soak the sumac in the lemon juice and<br />
mix it in with the dressing, instead of the salad.<br />
• A small amount of balsamic vinegar can be added to the<br />
dressing to increase volume.<br />
53
Kids’ Garden Vegetable Pizza<br />
Ingredients:<br />
Marinara sauce (garden-fresh or store bought)<br />
Pizza crust<br />
Crackers<br />
Whole wheat tortillas (or pita bread)<br />
Mozzarella, Parmesan, or cheddar cheese<br />
Any veggies fresh from the garden –<br />
try onion, garlic, broccoli, radishes, kale,<br />
green or red tomatoes, basil, or anything<br />
else that might be in season.<br />
Harvest the vegetables from your garden<br />
and cut into small pieces. Spread<br />
pizza sauce on crust, crackers, tortillas, or<br />
pita bread and top with cheese (or you<br />
can make it without cheese <strong>for</strong> a vegan<br />
twist!). Add a variety of vegetables on<br />
each pizza and cook until the cheese is<br />
melted and sauce is warm.<br />
Kids’ Garden Tips:<br />
• Use sun oven, earth oven, or wood burning grill to make the pizzas<br />
outside. The grill adds a strong smoky flavor.<br />
• These can be made all summer long with any vegetables!<br />
• Garden Pesto makes a great substitute <strong>for</strong> tomato sauce.<br />
54
Kids’ Garden Tips:<br />
• If crackers aren’t available to use, dip<br />
large pieces of vegetables into it (try<br />
broccoli, radish chips, carrots, kohlrabi, etc).<br />
• Tortillas can be used in place of the crackers,<br />
or try the dip with spring rolls!<br />
Garden Yogurt Dip<br />
Ingredients:<br />
2 cups plain yogurt<br />
Dill<br />
Crackers<br />
Any veggies fresh from the garden –<br />
try onion, garlic, broccoli, radishes, kale,<br />
green or red tomatoes, cucumbers, basil,<br />
or anything else that might be in season.<br />
Harvest the vegetables from your garden<br />
and cut into small pieces. Put yogurt in a<br />
small bowl and add vegetables. The more<br />
vegetables you add, the healthier it will be!<br />
You can blend the vegetables in a blender if<br />
desired, however whole pieces of vegetables<br />
work great (the yogurt also gets runnier the<br />
more it is mixed). Scoop the dip onto crackers<br />
and serve!<br />
Cucumber Salsa<br />
Ingredients:<br />
3-4 large cucumbers<br />
8 tomatillos<br />
1 medium onion<br />
2 garlic cloves<br />
1 medium hot pepper<br />
2 medium green (or red) tomatoes<br />
Harvest and chop all of the vegetables<br />
in small chunks (the garlic can be minced<br />
or sent through a garlic press). Mix in<br />
a bowl until juices start to extract from<br />
the vegetables. Salsa can be served on<br />
crackers, chips, or with vegetable chips.<br />
Kids’ Garden Tips:<br />
• Mashing the tomatillos with a spoon or <strong>for</strong>k<br />
makes the salsa juicier. It can also be blended<br />
in the hand-crank blender.<br />
• If chips or crackers aren’t available, the salsa can<br />
be served with large cucumber chips. It tasted<br />
just as good and was much healthier!<br />
• You could also put the salsa in spring rolls <strong>for</strong><br />
a new taste sensation.<br />
55
Resources &<br />
Acknowledgements
Resources<br />
Youth Grow Local, Community GroundWorks at Troy Gardens<br />
Youth Grow Local provides educators with a variety of useful garden-based education resources including curricula<br />
and professional development opportunities including conferences, courses and workshops. Young visitors will<br />
appreciate Veggipedia, a kid-friendly online encyclopedia of fruits and vegetables. Youth Grow Local also features<br />
the Youth Garden Portal, a site devoted to connecting educators to a broad array of resources <strong>for</strong> youth gardens.<br />
www.communitygroundworks.org/what-we-do/youth-grow-local<br />
Nutrition, Physical Activity, & Obesity Program, Wisconsin Department of Health Services<br />
Extensive resources related to obesity prevention strategies <strong>for</strong> multiple settings including community, school, and<br />
early childhood. In<strong>for</strong>mation and resources <strong>for</strong> promoting consumption of fruits and veggies are also available.<br />
http://dhs.wi.gov/health/physicalactivity<br />
Wisconsin Nutrition Education Program, University of Wisconsin-Extension<br />
A federally funded nutrition education program that helps limited resource families and individuals choose healthful<br />
diets, purchase and prepare healthful food and handle it safely, and become more food secure by spending their<br />
food dollars wisely. The program operates in most counties in Wisconsin, contact your county UW-Extension Office<br />
<strong>for</strong> more in<strong>for</strong>mation. www.uwex.edu/ces/wnep/overview/index.cfm<br />
Farm to School Program, REAP Food Group<br />
A grassroots initiative whose goal is to enhance Wisconsin schools' existing meal programs by introducing fresh,<br />
nutritious, local and sustainably grown food to children. The program’s website contains curriculum resources and<br />
also highlights unique ways of getting students interested in fruits and vegetables through the Snack and Chef in<br />
the Classroom Programs. www.reapfoodgroup.org/Programs-Events/farm-to-school.html<br />
Life Lab<br />
Life Lab is a non-profit organization and national leader in land-based education located in Santa Cruz, Cali<strong>for</strong>nia.<br />
www.lifelab.org<br />
Wisconsin Model Academic Standards <strong>for</strong> Nutrition Education<br />
Provides excellent examples of age appropriate nutrition concepts and standards <strong>for</strong> grades 4, 8, and 12.<br />
http://dpi.wi.gov/fscp/pdf/nestandards.pdf<br />
Wisconsin Model Academic Standards<br />
Find additional ways to use your garden to meet other academic standards. http://dpi.state.wi.us/standards<br />
The Nutritious Delicious Wisconsin Curriculum<br />
Nutrition lessons <strong>for</strong> 4th grade students that can be used as part of their Wisconsin curriculum. These lessons<br />
are also a great complement to elementary farm to school programs. http://dpi.wi.gov/ne/index.html<br />
Wisconsin Fresh Fruit & Vegetable Program<br />
A USDA funded program that provides free fresh fruits and vegetables to children at participating elementary schools.<br />
The purpose of the program is to expand and increase the variety and amount of fruits and vegetables children<br />
experience and consume. http://dpi.state.wi.us/fns/ffvp.html<br />
Wisconsin AmeriCorps Farm to School Program<br />
The goal of the AmeriCorps Farm to School program is to provide an innovative approach to decreasing childhood<br />
obesity by promoting healthy eating habits in students and increasing access to local foods in schools. The program<br />
provides two half-time AmeriCorps members per site; a local food procurement member and a nutrition education<br />
member. www.datcp.state.wi.us/mktg/business/marketing/val-add/farm_to_school/index.jsp<br />
57
Resources (cont'd)<br />
National Fruit & Vegetable Program, <strong>Center</strong>s <strong>for</strong> Disease Control and Prevention<br />
Several resources are available including a searchable recipe database <strong>for</strong> using garden produce;<br />
kid-tested fruit and vegetable recipe ideas; downloadable and free educational brochures <strong>for</strong> use<br />
with parent and school newsletters, and interactive bulletin boards; and fun facts that will capture<br />
students’ interest in different kinds of fruits and vegetables found in the garden and beyond.<br />
www.fruitsandveggiesmatter.gov<br />
Harvest of the Month Toolkit-Growing Healthy Students<br />
A great addition to any curriculum, the Harvest of the Month tool kit is comprised of four key elements<br />
designed to empower and motivate students to consume fruits and vegetables: educator newsletters,<br />
family newsletters, menu slicks and press releases. www.harvestofthemonth.com<br />
Fruit & Vegetable Games <strong>for</strong> Kids<br />
Find interactive games, artwork, and coloring and activity pages to get students interested in eating<br />
fruits and vegetables. www.foodchamps.org<br />
MyPyramid <strong>for</strong> Kids Classroom Materials<br />
Nutrition education materials <strong>for</strong> elementary-aged students that explore the food groups in MyPyramid<br />
(includes lesson plans, reproducible worksheets, and posters).<br />
www.teamnutrition.usda.gov/resources/mypyramidclassroom.html<br />
<strong>Got</strong> Dirt? Garden Initiative<br />
Want to start a youth garden but have little or no gardening experience? Extensive resources including<br />
a toolkit <strong>for</strong> starting a garden can be found at:<br />
www.dhs.wi.gov/health/physicalactivity/gotdirt.htm<br />
Booklists<br />
Books are a great addition to any lesson plan or activity! The following lists provide common garden<br />
and nutrition-related books <strong>for</strong> preschool to elementary-aged students.<br />
• Blooming with Books (<strong>for</strong> Preschoolers & Kindergartener):<br />
www.rif.org/assets/Documents/StorySamplers/Gardening.pdf<br />
• Michigan Team Nutrition—Grades K-2 Booklist:<br />
www.michigan.gov/documents/mde/UpdatedMichiganTeamNutritionBooklist_290287_7.pdf<br />
• Michigan Team Nutrition—Preschool Booklist:<br />
www.michigan.gov/documents/mde/PreschoolBooklist_290284_7.pdf<br />
58
Acknowledgements<br />
Authors<br />
Nathan Larson, MS, is the Education<br />
Director at Community GroundWorks<br />
at Troy Gardens and Senior Outreach<br />
Specialist in the Department of<br />
Landscape Architecture at the<br />
University of Wisconsin-Madison.<br />
Nathan directs urban garden education<br />
programs <strong>for</strong> K-12 students, develops<br />
garden-based curricula, and provides<br />
professional development <strong>for</strong> school<br />
teachers, college students and<br />
community educators.<br />
Amy Meinen, MPH, RD, CD, is<br />
the Nutrition Coordinator <strong>for</strong> the<br />
Wisconsin Department of Health<br />
Services' Nutrition, Physical Activity,<br />
& Obesity Program. She also serves<br />
as the Wisconsin Fruit and Vegetable<br />
Nutrition Coordinator, which involves<br />
statewide ef<strong>for</strong>ts with partners to<br />
increase youth and adult fruit and<br />
vegetable consumption. These<br />
ef<strong>for</strong>ts include the <strong>Got</strong> Dirt? Garden<br />
Initiative, the Wisconsin AmeriCorps<br />
Farm to School Project, and the<br />
Wisconsin Farm to School Coalition.<br />
Brent Kramer, BS, is a farmer at<br />
Garden to Be near New Glarus,<br />
Wisconsin. In his <strong>for</strong>mer role, as<br />
Education Coordinator at REAP Food<br />
Group’s Wisconsin Homegrown<br />
Lunch, Brent spent numerous hours<br />
in classrooms across Madison getting<br />
students interested in eating fresh<br />
fruits and vegetables through<br />
hands-on nutrition education.<br />
Elizabeth Gering, BS, is the Youth<br />
Grow Local Coordinator <strong>for</strong> Community<br />
GroundWorks at Troy Gardens,<br />
and <strong>for</strong>mer AmeriCorps VISTA with<br />
University of Wisconsin-Extension 4-H<br />
Youth Development. She focuses on<br />
supporting community-based youth<br />
gardening projects at schools, community<br />
gardens, and community centers.<br />
Contributors<br />
Mary Kay Warner, BS, is the owner<br />
of Sandhill Studio LLC. She was the<br />
art director and designer on <strong>Got</strong> Dirt?<br />
Garden Toolkit and <strong>Got</strong> <strong>Veggies</strong>?.<br />
Whitney Hein, BFA, collaborated on the<br />
design and layout <strong>for</strong> "<strong>Got</strong> <strong>Veggies</strong>?".<br />
Libby Weiland, BA, is a <strong>for</strong>mer Nutrition<br />
Educator at University of Wisconsin-<br />
Extension. She has spent much of her<br />
working life involved with food banks,<br />
community and garden-based education,<br />
and plans on pursuing a graduate<br />
degree in environmental education to<br />
further study in these fields.<br />
Gayle Coleman, MS, RD, CD, is a<br />
Nutrition Education Program Specialist<br />
with University of Wisconsin-Extension.<br />
Kshinte Brathwaite, MSW, MPA,<br />
is a Nutrition Education Program<br />
Specialist with the University of<br />
Wisconsin-Extension.<br />
Jill Camber Davidson, RD, CD is the<br />
Nutrition Education Consultant and<br />
Director of TEAM Nutrition <strong>for</strong> the Wisconsin<br />
Department of Public Instruction.<br />
V. Ione Machen, BS, is a Garden Educator<br />
at Community GroundWorks at<br />
Troy Gardens and <strong>for</strong>mer AmeriCorps<br />
Farm-to-School Nutrition Educator. She<br />
has been involved with various Madison<br />
kids’ garden initiatives, and soon<br />
plans on pursuing a graduate degree<br />
to continue her farm-to-school work.<br />
Hannah Lavold, BS, is a Garden<br />
Educator at Community GroundWorks<br />
at Troy Gardens.<br />
Alison Watson, BS, is a Garden<br />
Educator at Community GroundWorks<br />
at Troy Gardens.<br />
The Kids’ Garden Education Crew<br />
at Community GroundWorks at Troy<br />
Gardens.<br />
Former University of Wisconsin<br />
Hospital and Clinics Dietetic Interns<br />
Joanna Otis; Brenda Nurmela; Morgen<br />
Terrell; Kimberly Maloomian; Jennifer<br />
VandenHeuvel<br />
Former Wisconsin Department of Health<br />
Services’ Nutrition, Physical Activity,<br />
& Obesity Program Student Learners:<br />
Brittany Lyman, University of Wisconsin-<br />
Madison;<br />
Patrick Ferguson, Purdue University<br />
Reviewers<br />
Mary Pesik, RD, CD, is the Program<br />
Coordinator <strong>for</strong> the Wisconsin Department<br />
of Health Services’ Nutrition,<br />
Physical Activity, and Obesity Program.<br />
Megan Cain, BA, helped create the<br />
Kids’ Gardening Program at Troy<br />
Gardens in Madison, WI. She now<br />
manages the East High Youth Farm.<br />
Her passions revolve around helping<br />
youth get their hands dirty in<br />
the garden.<br />
Sara Soka, MS, is a Wisconsin Population<br />
Health Fellow working with the<br />
Wisconsin Department of Health Services’<br />
Nutrition, Physical Activity, and<br />
Obesity Program.<br />
Rick Larson, MA, is a <strong>for</strong>mer elementary<br />
school teacher and principal. He<br />
has gardened <strong>for</strong> over <strong>for</strong>ty years and<br />
currently tends a backyard vegetable<br />
garden and orchard at the foot of the<br />
Rocky Mountains.<br />
Whitney Cohen, MA, is the Education<br />
Director of Life Lab Science Program,<br />
where she leads educator workshops<br />
and develops garden-based learning<br />
curricula.<br />
Scott Brinton, MA, is the Garden<br />
Educator at IslandWood and<br />
Co-owner of Mystery Bay Farm<br />
in Washington State.<br />
Terrie Anderson, BS, is a <strong>for</strong>mer 2nd<br />
and 4th grade teacher and current<br />
educational consultant, Troy gardener<br />
and Community GroundWorks Board<br />
member.<br />
Trish Ellis, is an Educational Consultant<br />
and Founder of Commitment to<br />
Learning, LLC.<br />
59
Community GroundWorks at Troy Gardens<br />
3601 Memorial Drive<br />
Madison, WI 53704-1573<br />
Phone: 608.240.0409<br />
www.communitygroundworks.org<br />
Wisconsin Department of Health Services<br />
Nutrition, Physical Activity and Obesity Program<br />
P.O. Box 2659<br />
Madison, WI 53701-2659<br />
www.dhs.wisconsin.gov/health/physicalactivity/index.htm<br />
P-00228 November 2010