You also want an ePaper? Increase the reach of your titles
YUMPU automatically turns print PDFs into web optimized ePapers that Google loves.
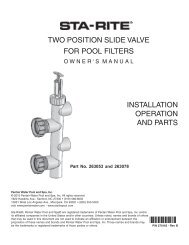
Figure 2 – “Filter” Position.<br />
Water flow pattern shown with<br />
valve handle in fully depressed<br />
position.<br />
Figure 3 – “Backwash” Position.<br />
Water flow pattern shown with<br />
valve handle in fully extended<br />
position.<br />
OPERATION<br />
Valves are two position valves. Valve handle must be fully extended or fully<br />
depressed. There is no in between, or throttling position. Connect center<br />
port to pump.<br />
With valve stem depressed, (Figure 2), pump water is directed to bottom<br />
filter port. Top filter port is open to upper discharge. Lower discharge is idle.<br />
With valve stem extended, (Figure 3), pump water is directed to top filter<br />
port. Bottom port is open to lower discharge.<br />
MAINTENANCE<br />
Filter Control Valve (Slide Valve):<br />
Turn Pump OFF Before Proceeding.<br />
1. Inspect bi-yearly. Check for ease of operation. If handle is difficult to<br />
move, follow steps 2 through 6 below.<br />
2. Disassemble valve:<br />
A. Remove three screws in index plate.<br />
B. Remove piston assembly using a straight upward pull. Rotate assembly<br />
slightly for easy removal.<br />
3. Inspect O-Ring for nicks, cuts, cracks, etc. Replace if necessary.<br />
4. Inspect valve seating areas for grooves, nicks, etc. Remove any corrosion<br />
by sanding with No. 400 wet or dry emery cloth, using it wet.<br />
NOTICE: Sand lightly so as not to destroy the seating area.<br />
5. Lubricate O-Rings with Aqua-Lube 1 grease or petroleum jelly, before<br />
reassembling valve.<br />
6. Reassemble valve:<br />
A. Insert piston assembly into valve body.<br />
B. Replace three screws loosely.<br />
C. Lift the valve handle into “BACKWASH” position. This well center<br />
the index plate with the piston shaft and valve bore.<br />
D. Tighten three screws securely.<br />
E. Place the piston assembly into the “FILTER” position. It should slide<br />
easily. If not, repeat above until piston moves freely.<br />
Winterizing For Freezing Climates:<br />
Place valve handle in an intermediate position, between “FILTER” and<br />
“BACKWASH” positions.<br />
CONNECTING <strong>SLIDE</strong> VALVE<br />
TO FILTER SYSTEM<br />
NOTICE: Filter ports and valve ports are furnished with union connections,<br />
matching the connections of the filter ports. DO NOT use pipe sealants on<br />
union collar (nut).<br />
Use care before assembly not to damage union sealing surfaces or O-Ring.<br />
Install union O-Rings in groove; tighten union collar hand tight.<br />
<strong>FOR</strong> SLIP FITTINGS: Use correct solvent/cement when fitting piping or<br />
adapters to slide valve. The valve body is ABS plastic, thus any good quality<br />
ABS to PVC solvent can be used, such as Weld-On #793 or #710. Use P-70<br />
(purple) primer on PVC components only. Allow a minimum of four hours<br />
drying time prior to pressure testing or operation. If ABS adapters are glued<br />
into valve ports in lieu of PVC fittings, use Weld-On Solvent #771, #1707<br />
or #773.<br />
To avoid serious personal injury or property damage, follow<br />
cement manufacturer’s instructions exactly.<br />
<strong>FOR</strong> THREADED FITTINGS: Use Plasto-Joint Stik 2 only. Other substances<br />
may degrade plastic and create poor joints and leaks.<br />
NOTICE: Do not overtighten.<br />
1<br />
Far Best Co., Los Angeles, CA<br />
2<br />
Lake Chemical Co., Chicago, IL<br />
4