wadsworth-1979-intro-to-lo-res-graphics
wadsworth-1979-intro-to-lo-res-graphics
wadsworth-1979-intro-to-lo-res-graphics

Create successful ePaper yourself
Turn your PDF publications into a flip-book with our unique Google optimized e-Paper software.
•<br />
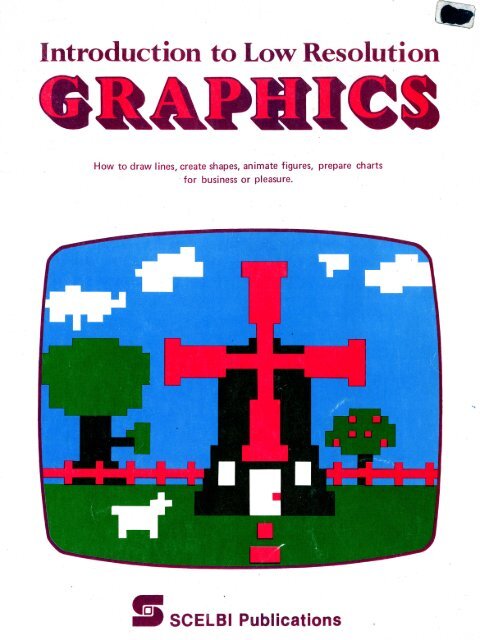
Introduction <strong>to</strong> Low Resolution<br />
How <strong>to</strong> draw lines, create shapes, animate figu<strong>res</strong>, prepare charts<br />
-for business or pleasure.<br />
s SCELBI Publications
Introduction<br />
<strong>to</strong> Low Resolution<br />
~llt~~Wll
Copyright © <strong>1979</strong><br />
Scelbi Computer Consulting, Inc.<br />
20 Hurlbut Street<br />
Elmwood, CT 06110<br />
ALL RIGHTS RESERVED<br />
IMPORTANT NOTICE<br />
No part of this publication may be reproduced, transmitted,<br />
s<strong>to</strong>red in a retrieval system, or otherwise duplicated in any form or<br />
by any means electronic, mechanical, pho<strong>to</strong>copying, recording or<br />
otherwise, without the prior exp<strong>res</strong>s written consent of the copyright<br />
owner.<br />
The information in this manual has been carefully reviewed<br />
and is believed <strong>to</strong> be entirely reliable. However, no <strong>res</strong>ponsibility is<br />
assumed for inaccuracies or for the success or failure of various<br />
applications <strong>to</strong> which the information contained herein might be<br />
applied.
Foreword.,<br />
There are <strong>lo</strong>ts of small computers available <strong>to</strong>day that are capable<br />
of displaying information graphically in at least a <strong>lo</strong>w <strong>res</strong>olution<br />
mode. This means that information can be summarized by a computer<br />
and placed in a visual format that is entertaining <strong>to</strong> people.<br />
Alas, while this capability is provided, it appears that few<br />
people are using it. This is a shame. Why isn't the average user of a<br />
small personal computer capitalizing on this power? I hope it is because<br />
they have simply not been <strong>intro</strong>duced <strong>to</strong> the easily unders<strong>to</strong>od<br />
techniques that may be used <strong>to</strong> produce graphic displays on their<br />
machines.<br />
The purpose of this publication is <strong>to</strong> get users started utilizing<br />
<strong>lo</strong>w <strong>res</strong>olution <strong>graphics</strong> as a means <strong>to</strong> liven up the interface between<br />
people and computing machines. Only the simplest of techniques are<br />
p<strong>res</strong>ented here <strong>to</strong> get across the fundamentals. Once mastered, the<br />
enthusiastic initiate can call on his or her own artistic talents <strong>to</strong> further<br />
the craft. Indeed, much of the fun of computer <strong>graphics</strong> is that<br />
the personal tastes and preferences of the individual programmer can<br />
be exp<strong>res</strong>sed on the video screen.<br />
Right now there are thousands of individuals dabbling in the<br />
area of creating programs that utilize <strong>lo</strong>w <strong>res</strong>olution <strong>graphics</strong>. We<br />
shall really start <strong>to</strong> make prog<strong>res</strong>s when there are hundreds of thousands<br />
of people who are comfortable with the art.<br />
I urge you <strong>to</strong> get started now. To enjoy the thrill of being a pioneer<br />
in an exciting area of the application of small computers serving<br />
individual people. An area where the creative talents of individuals<br />
can do much <strong>to</strong> advance the art as a whole. Low <strong>res</strong>olution <strong>graphics</strong><br />
capability has much <strong>to</strong> offer. Use it for all it is worth.<br />
September, <strong>1979</strong><br />
Nat Wadsworth
ACKNOWLEDGEMENT<br />
I would like <strong>to</strong> thank all the people at SCELBI Publications for<br />
their continued dedication <strong>to</strong> excellence in an area of publishing that<br />
is most demanding. Their technical and production people are most<br />
helpful in working with me <strong>to</strong> get my manuscripts and programs accurately<br />
reproduced in book form.<br />
Julie MacGregor at SCELBI must receive special accolades for<br />
her tireless devotion <strong>to</strong> getting this book in<strong>to</strong> production in a very<br />
short amount of time.<br />
J
Contents<br />
Introduction Page 1<br />
I Getting Started Page 9<br />
2 A Whole Chapter on Math Page 15<br />
J Drawing Simple Shapes Page 19<br />
4 Drawing Lines Page 21<br />
5 A Graphics Library Page 31<br />
Index Page 11
Introduction<br />
Many small computer systems sold <strong>to</strong>day have at least a limited<br />
form of <strong>graphics</strong> capability. The Commodore PET, the Radio Shack<br />
TRS-80 and the APPLE II, for instance, are all able <strong>to</strong> at least display<br />
or "p<strong>lo</strong>t" at a designated point in a display matrix. (Some of these<br />
units, with appropriate software, can provide much more complex<br />
types of <strong>graphics</strong> capability.)<br />
Because a machine is capable of doing something doesn't mean<br />
that it is going <strong>to</strong> do it! People have <strong>to</strong> know several things before a<br />
personal computer is going <strong>to</strong> utilize its <strong>graphics</strong> capabilities effectively.<br />
They have <strong>to</strong> know how the machine does it and they have<br />
·<strong>to</strong> tell the machine <strong>to</strong> do it! It seems that we are in the stage of<br />
personal computer use where not <strong>to</strong>o many people understand how<br />
<strong>to</strong> utilize a small system's <strong>graphics</strong> capability. I hope <strong>to</strong> change that<br />
a little bit through this publication!<br />
The discussion ~hat fol<strong>lo</strong>ws will be aimed at showing users how<br />
a computer, equipped with what is commonly referred io as "<strong>lo</strong>w<br />
<strong>res</strong>olution" <strong>graphics</strong> capability, can be programmed <strong>to</strong> provide inte<strong>res</strong>ting<br />
and entertaining displays. This will be done here by deve<strong>lo</strong>ping<br />
a specific "game" program in a step-by-step manner that is<br />
fashioned around simple <strong>graphics</strong> effects.<br />
What do I mean by "<strong>lo</strong>w <strong>res</strong>olution" ·<strong>graphics</strong>? I mean any<br />
system (such as an APPLE II, Commodore PET or Radio Shack<br />
TRS-80) that is capable of controlling the display on a television,<br />
video moni<strong>to</strong>r or other typ(, of cathode-ray-tube device so that it<br />
causes a "point" in a matrix <strong>to</strong> be on or off or light up with one<br />
co<strong>lo</strong>r or another. To be "<strong>lo</strong>w <strong>res</strong>olution" it is assumed that the number<br />
of points in the matrix is on the order of a few thousand points<br />
or less. For instance, an APPLE-II .3ystem when operating in the<br />
normal <strong>lo</strong>w <strong>res</strong>olution <strong>graphics</strong> mode has a display matrix that con-<br />
Learning By Doing<br />
''Because a machine is<br />
capable of doing something,<br />
doesn't mean that<br />
it is going <strong>to</strong> do it!"<br />
Introduction 7
" ... you will have the<br />
knowledge <strong>to</strong> al<strong>lo</strong>w you <strong>to</strong><br />
be '<strong>graphics</strong> boss' of your<br />
own machine."<br />
sists of 40 points in the X direction and 40 in the Y direction for a<br />
<strong>to</strong>tal of 1600 points on the screen.<br />
What type of game will we be deve<strong>lo</strong>ping in this publication?<br />
Well, it is a game of football. An interactive game of football that<br />
pits a person against the well designed capriciousness of a computer.<br />
A game of football that entertains the player with graphic action,<br />
and yes, one that can include sound effects, <strong>to</strong>o!<br />
More important than the fact that we will deve<strong>lo</strong>p a " football"<br />
game in this publication is the fact that you will learn how <strong>to</strong><br />
form images, then make them move and, if desired, even emit<br />
sounds. With this knowledge you will be in a position <strong>to</strong> go off on<br />
your own. Then you can create your own animated version of football<br />
or parcheesi. Or, you can create car<strong>to</strong>ons. Or, if your line is of<br />
a more serious nature, you can chart and draw business graphs or<br />
rep<strong>res</strong>ent chemical structural diagrams or draw simple electronic<br />
schematics. In other words, you will have the knowledge <strong>to</strong> al<strong>lo</strong>w<br />
you <strong>to</strong> be "<strong>graphics</strong> boss" of your own machine. That is what you<br />
really want anyhow, right? Then keep reading on.<br />
8 Introduction
Chapter 1<br />
Getting Started<br />
There is the old s<strong>to</strong>ry of the army sergeant who was reviewing and<br />
attempting <strong>to</strong> discipline a group of new recruits. He had them all<br />
lined up for inspection. "Attention!" he bel<strong>lo</strong>wed. His greenhorns<br />
nervously s<strong>to</strong>od their straightest. "Now everybody raise their right<br />
foot!" he shouted in preparation for a boot inspection. The<br />
sergeant <strong>lo</strong>oked down the <strong>lo</strong>ng line of raised legs, then his exp<strong>res</strong>sion<br />
changed <strong>to</strong> one of disbelief. "All right." he roared, "Who is the wise<br />
guy that has both of his feet up!?"<br />
We don't want that kind of situation here. So, let's start by<br />
making sure that we all understand the basic organization of a<br />
display matrix and the kinds of commands or directives we can use<br />
<strong>to</strong> control the contents of the matrix.<br />
Figure 1 illustrates a hypothetical matrix of a display that I will<br />
use for initial discussion purposes. You should note that the drawing<br />
p<strong>res</strong>ents a grid composed of 16 rows and 16 columns of squa<strong>res</strong>.<br />
There are thus 256 squa<strong>res</strong> in the grid or matrix. In order <strong>to</strong> talk<br />
about individual squa<strong>res</strong> within this grid it is necessary <strong>to</strong> designate<br />
some reference point' and correlate our discussions <strong>to</strong> this point.<br />
A method that has done very well for mathematicians for many<br />
years is <strong>to</strong> call one side of the grid the "X" side and an adjacent side<br />
the "Y" side. A point a<strong>lo</strong>ng each such designated side can be specified<br />
as the zero reference point and all other points a<strong>lo</strong>ng that side<br />
referred <strong>to</strong> that point.<br />
Now a likely place from common experience <strong>to</strong> use as a zero<br />
reference point for the grid in Figure 1 would be at the <strong>lo</strong>wer lefthand<br />
corner of the matrix. Squa<strong>res</strong> could then he designated as being<br />
<strong>to</strong> the right of the zero point a<strong>lo</strong>ng the X side or axis and <strong>to</strong>wards<br />
the <strong>to</strong>p from the zero point a<strong>lo</strong>ng the Y side.<br />
You will note please, however, that I have not labeled the diagram<br />
in such a fashion. Rather, the illustration shows a zero ref-<br />
Let's All Start<br />
on the Same Foot<br />
Getting Started 9
erence point at the <strong>to</strong>p left-hand corner of the diagram. While this<br />
still al<strong>lo</strong>ws us <strong>to</strong> reference points a<strong>lo</strong>ng the X axis <strong>to</strong> the right of<br />
the starting point, note that a<strong>lo</strong>ng the Y axis we will be going down<br />
(instead of up) from the reference point.<br />
Now why, you may be asking, would I try <strong>to</strong> confuse you right<br />
at the start like that? I am not trying <strong>to</strong> confuse you. I am, alas, trying<br />
<strong>to</strong> show you how most of the designers of popular cathode-raytube<br />
(abbreviated CRT hereafter) displays like <strong>to</strong> refer <strong>to</strong> the operation<br />
of their creations. In the typical system, the electron beam<br />
Figure 1<br />
0<br />
~o 1 2 3<br />
0<br />
4 5 6<br />
X=8<br />
Y=7<br />
OR POSITION #120<br />
7 8 9 10 11<br />
12 13 14 15<br />
I<br />
15<br />
15<br />
1<br />
31<br />
2<br />
47<br />
3<br />
63<br />
X=7<br />
Y=7<br />
OR<br />
POSIT<br />
#119<br />
4<br />
5<br />
ION r-<br />
2 40<br />
6 t--r-<br />
111<br />
t--<br />
7<br />
8<br />
9<br />
10<br />
11<br />
12<br />
13<br />
14<br />
15<br />
J<br />
X=7, Y=8<br />
OR<br />
POSITION #135<br />
T<br />
_J_<br />
z<br />
- r=z<br />
if<br />
z<br />
79<br />
95<br />
127<br />
143<br />
. 159<br />
175<br />
191<br />
207<br />
223<br />
239<br />
~<br />
255<br />
~<br />
255<br />
X=8<br />
Y=8<br />
OR<br />
POSITION<br />
#136<br />
10 Chapter l
sweeps lines from left <strong>to</strong> right. Each line is placed be<strong>lo</strong>w the previous<br />
one. Thus, it is convenient <strong>to</strong> start the reference point at what<br />
may seem an unconventional <strong>lo</strong>cation on the screen. But, that is<br />
how it is, so <strong>to</strong> stay consistent in this field, that is how I will p<strong>res</strong>ent<br />
things in our discussions.<br />
To summarize, points on a CRT matrix can be referenced f~om<br />
the upper left-hand corner a<strong>lo</strong>ng aµ "X" axis that increases <strong>to</strong> the<br />
right and a "Y" axis that increases as we go down.<br />
Thus, in the diagram, we could define the shaded squa<strong>res</strong> in<br />
the center of the matrix <strong>to</strong> be <strong>res</strong>iding at the four positions: X =7,<br />
Y = 7; X = 8, Y = 7; X = 7, Y = 8 and X = 8, Y = 8.<br />
Aha! But that is not the only way that we could reference<br />
positions of squa<strong>res</strong> within the grid. Another way would be <strong>to</strong> assign<br />
each square in the grid a number. Some popular small computer<br />
systems do just this. In the example, I have indicated that the squa<strong>res</strong><br />
in the <strong>to</strong>p row could be designated as boxes 0 through 15. Boxes in<br />
the row beneath it could be referred <strong>to</strong> by the numbers 16 through<br />
31. In the next <strong>lo</strong>wer row they would be numbered 32 through 47.<br />
The bot<strong>to</strong>m row in the diagram would have numbers 240 through<br />
255.<br />
Oh yes, please note in the illustration that I have shown the first<br />
position in a column or row as being position zero. I p<strong>res</strong>ume that<br />
anyone reading this publication is familiar with the cus<strong>to</strong>m of computer<br />
users <strong>to</strong> assign the reference zero <strong>to</strong> the first add<strong>res</strong>s of memory,<br />
etc. Thus, I won't do anything more here than <strong>to</strong> caution you <strong>to</strong><br />
watch out and think when we are talking about items versus referencing<br />
their positions. Remember, the fifteenth item in a line will<br />
be referenced as being in the fourteenth cell because the first item<br />
will be <strong>res</strong>iding in cell number zero! It gets <strong>to</strong> be tricky stuff sometimes,<br />
but again, it is the convention established among computer<br />
users.<br />
Remember here that Figure 1 refers <strong>to</strong> a hypothetical display matrix.<br />
Most systems will have a considerably larger display grid with which<br />
<strong>to</strong>.work.<br />
Suppose all the points in the diagram of Figure 1 were "turned<br />
off" or "not illuminated" by the computer and we wanted <strong>to</strong> have<br />
the four shaded squa<strong>res</strong> or "points" on our display lit? The computer<br />
language of some systems would al<strong>lo</strong>w us <strong>to</strong> do that by making<br />
statements something a<strong>lo</strong>ng the fol<strong>lo</strong>wing lines:<br />
"In the typical system, the<br />
electron beam sweeps lines<br />
from left <strong>to</strong> right."<br />
P<strong>lo</strong>t It or Poke It<br />
PLOT 7,7<br />
Getting Started 11
PLOT 8,7<br />
PLOT 7,8<br />
PLOT 8,8<br />
"Some systems, such as an<br />
APPLE-II, will al<strong>lo</strong>w us <strong>to</strong><br />
designate the co<strong>lo</strong>r of<br />
points . ..."<br />
Or, in general by using a "PLOT X,Y" directive where X and Y rep<strong>res</strong>ent<br />
distances a<strong>lo</strong>ng a cor<strong>res</strong>ponding axis.<br />
Some systems, such as an APPLE-II, will al<strong>lo</strong>w us <strong>to</strong> designate<br />
the co<strong>lo</strong>r (or, in black and white displays, the intensity) of points by<br />
preceding PLOT statements with a co<strong>lo</strong>r-designating statement, such<br />
as "COLOR=Z ",.where the variable Z rep<strong>res</strong>ents an al<strong>lo</strong>wable number<br />
that specifies a certain co<strong>lo</strong>r. Thus, with an APPLE-II system, one<br />
could get a blue, orange, green and a yel<strong>lo</strong>w square at the four<br />
shaded positions in Figure l by issuing directives a<strong>lo</strong>ng the lines of<br />
COLOR=6<br />
PLOT 7,7<br />
COLOR=9<br />
PLOT 8,7<br />
COLOR=l2<br />
PLOT 7,8<br />
COLOR=l3<br />
PLOT 8,8<br />
Other systems might require that the illumination of a spot be<br />
indicated by referencing the position's number. Thus, for the example,<br />
one might need <strong>to</strong> designate instructions such as<br />
ON 119,120,135,136<br />
Still other systems make things just a tad more complicated.<br />
Sometimes it is necessary <strong>to</strong> directly place data in<strong>to</strong> a specific memory<br />
<strong>lo</strong>cation. The types of displays we are dealing with in this discussion<br />
are driven out of sections of memory <strong>res</strong>erved for such purposes.<br />
The CRT can be viewed as an image of this section of memory.<br />
Indeed, the hardware portion of such a system simply keeps scanning<br />
the cor<strong>res</strong>ponding display memory buffer area and decodes the<br />
data there <strong>to</strong> turn the display on or off at matching positions on the<br />
screen.<br />
In such systems it is generally necessary <strong>to</strong> know the memory<br />
add<strong>res</strong>s at which the display buffer starts. From that point one adds<br />
a displacement value <strong>to</strong> reach the <strong>lo</strong>cation of the byte that is <strong>to</strong> be<br />
activated. For instance, in a Commodore PET unit, a memory buffer<br />
12 Chapter l
starts at add<strong>res</strong>s 32768. To get the positions in our hypothetical display<br />
grid <strong>to</strong> light up in such a system, we would need <strong>to</strong> do something<br />
a<strong>lo</strong>ng the fol<strong>lo</strong>wing lines: Add the display position number <strong>to</strong> the<br />
base memory add<strong>res</strong>s and place a specific data code in<strong>to</strong> that memory<br />
<strong>lo</strong>cation. What data code? The data code for the type of character<br />
or graphic symbol we want <strong>to</strong> see displayed! The PET has a<br />
choice of several hundred such symbols. How do you put the data<br />
in<strong>to</strong> the memory <strong>lo</strong>cation? One such way is <strong>to</strong> use a BASIC language<br />
"POKE" or equivalent directive.<br />
So, if we wanted <strong>to</strong> fill the four shaded squa<strong>res</strong> in our example<br />
diagram with a symbol, such as an asterisk (*), we would need<br />
<strong>to</strong> poke the code for an asterisk ( 42) in<strong>to</strong> memory <strong>lo</strong>cations that<br />
were offset 119, 120, 135and136 units from the CRT buffer's base<br />
add<strong>res</strong>s of 32768. Thus, we would need <strong>to</strong> perform a series of directives<br />
such as<br />
" ... in a Commodore PET<br />
unit, a memory buffer starts<br />
at add<strong>res</strong>s 32768."<br />
POKE 32887,42<br />
PO KE 32888 ,42<br />
POKE 32903,42<br />
PO KE 32904 ,42<br />
Remember, the grid in our example is only 16 by 16 units. Actually<br />
poking data in<strong>to</strong> the memory add<strong>res</strong>ses just calculated on a<br />
Commodore PET unit would not <strong>res</strong>ult in the four cells being adjacent,<br />
as the display matrix is larger than 16 by 16 units. It is, in<br />
fact, 40 (X axis) by 25 (Y axis) units. Given this information, as an<br />
exercise can you determine just where in the display the data would<br />
appear if the add<strong>res</strong>ses used in this discussion were actually used?<br />
In this discussion, what I mean by ''accessing the screen" is simply<br />
finding out the status of a display using the computer. (Obviously, I<br />
can find out the status of the display directly by <strong>lo</strong>oking at it! Trouble<br />
is, I wouldn't be able <strong>to</strong> manipulate what I saw as fast as I might<br />
like <strong>to</strong>. The computer can do so much better in that area, so why not<br />
let it?)<br />
This capability is generally provided in the form of instructions<br />
that are sort of the inverse of a POKE or PLOT command. For instance,<br />
with a Radio Shack TRS-80 unit you can use a statement<br />
"POINT (X,Y)" <strong>to</strong> determine the display status of a cell. This directive<br />
will return a zero value if the cor<strong>res</strong>ponding position on the<br />
display is turned off (not illuminated). It returns a nonzero value<br />
(such as -1) if the spot is illuminated when the statement is executed.<br />
Accessing the Screen<br />
Getting Started 13
"The opposite of a POKE<br />
statement is the<br />
'PEEK(N)' directive."<br />
Note that the POINT statement uses the X and Y axes as references.<br />
This is similar <strong>to</strong> the method used on the APPLE-II. Here the<br />
statement "SCRN(X,Y)" returns a value from 0 <strong>to</strong> 15. Each value<br />
rep<strong>res</strong>ents the co<strong>lo</strong>r being displayed at the specified matrix position.<br />
The value 0 cor<strong>res</strong>ponds <strong>to</strong> black (or off as it is essentially "no<br />
co<strong>lo</strong>r"). The other figu<strong>res</strong> rep<strong>res</strong>ent the various co<strong>lo</strong>rs the APPLE-II<br />
is capable of generating.<br />
The opposite of a POKE statement is the "PEEK(N)" directive.<br />
Here N stands for the value of an add<strong>res</strong>s in memory. The PEEK<br />
statement returns the contents of the memory add<strong>res</strong>s specified. In<br />
a system such as the Commodore PET, one can determine the status<br />
of a point in the display by peeking at an add<strong>res</strong>s in the display's<br />
memory buffer. Doing so will return a number cor<strong>res</strong>ponding <strong>to</strong> the<br />
character or symbol code being displayed. One or more of these character<br />
codes, such as "32" for a "space," rep<strong>res</strong>ents a "no display"<br />
or unilluminated condition at that point on the CRT!<br />
Chances are your computer system uses one of the types of directives<br />
mentioned (or something similar) <strong>to</strong> activate or deactivate<br />
a position on the screen. At least now we have a common language or<br />
shorthand from which <strong>to</strong> start a more detailed discussion of deve<strong>lo</strong>ping<br />
graphic displays.<br />
14 Chapter l
Chapter 2<br />
A Whole Chapter on Math<br />
Nothing more complicated than high school algebra is needed in order<br />
<strong>to</strong> get started drawing graphic figu<strong>res</strong>. That is all we shall use in<br />
this publication. Of course, if mathematics is your bag, you will undoubtably<br />
see how more sophisticated mathematical principles<br />
could be used <strong>to</strong> good advantage in various situations. And, indeed, if<br />
you want <strong>to</strong> graph or draw mathematical functions you will have <strong>to</strong><br />
have an understanding of what it is you want <strong>to</strong> rep<strong>res</strong>ent. It will be<br />
p<strong>res</strong>umed in such cases, that the reader will be as prepared as one's<br />
inte<strong>res</strong>ts leads him/her.<br />
Now, as I have said, in order <strong>to</strong> do just about anything using<br />
<strong>graphics</strong>, it is necessary <strong>to</strong> call upon some basic high school algebra<br />
techniques.<br />
For instance, the 8 by 5 b<strong>lo</strong>ck of squa<strong>res</strong> shown in Figure<br />
2 could be referenced using the standard cartesian coordinate<br />
Math - How Much<br />
Is Really Necessary?<br />
(4,5) (6,2)<br />
---<br />
'\<br />
' \. '<br />
(4,1) (6.4)<br />
A Whole Chapter on Math 15
"The computer ... 'thinks'<br />
that going down a<strong>lo</strong>ng the<br />
Y axis is a positive direction."<br />
system. Suppose one wanted <strong>to</strong> move ·the shaded square shown as<br />
<strong>res</strong>iding at (4,1), meaning X = 4 and Y = 1, so that it <strong>res</strong>ided at the<br />
point (6,4) indicated by the arrow. To a viewer not familiar with the<br />
workings of a computer, it would seem that <strong>to</strong> reach the point (6,4)<br />
one would simply move 2 squa<strong>res</strong> in the positive direction a<strong>lo</strong>ng the<br />
X axis and 3 squa<strong>res</strong> up (positive), a<strong>lo</strong>ng the Y axis from the starting<br />
point at (4,1).<br />
You, however, having read this far, know that <strong>to</strong> make this<br />
move using the typical <strong>lo</strong>w <strong>res</strong>olution graphing capabilities of the<br />
type we have been discussing, we have <strong>to</strong> direct the machine <strong>to</strong> do<br />
something slightly different! Namely, the computer must reference<br />
the move a<strong>lo</strong>ng the Y axis for the example <strong>to</strong> be negative in direction!<br />
How is that?<br />
(Remember, the computer would start its scan from the <strong>to</strong>p<br />
left-hand square (instead of the bot<strong>to</strong>m left-hand square). The computer<br />
also "thinks" that going down a<strong>lo</strong>ng the Y axis is a positive<br />
direction. Accordingly, the shaded square <strong>to</strong> the computer is referenced<br />
by the computer as (6,2). To go from the shaded square <strong>to</strong><br />
the <strong>lo</strong>cation pointed <strong>to</strong> by the arrow, the computer will calculate a<br />
move of 2 squa<strong>res</strong> in the positive direction a<strong>lo</strong>ng the X axis. It will<br />
view the move a<strong>lo</strong>ng the Y axis as being 3 units in the negative direction!<br />
Study the diagram and review the concepts carefully here<br />
until you are sure you understand the translation! (Note in this<br />
example that the computer begins at (1,1) and not at (0,0) as would<br />
normally be the case. This reference point was chosen <strong>to</strong> simplify<br />
this illustration.)<br />
Thus, for instance, if the computer had already displayed the<br />
shaded point in the diagram, one could have it display the <strong>lo</strong>cation<br />
pointed <strong>to</strong> by the arrow using a statement on an APPLE-II system<br />
such as:<br />
PLOT X+2,Y-3<br />
Note that X and Y in this statement refer <strong>to</strong> the coordinates of the<br />
last point (the shaded square in the example) displayed by the computer.<br />
If one was interfacing with a user who wished <strong>to</strong> give directions<br />
for the move in reference <strong>to</strong> the standard cartesian starting point<br />
(bot<strong>to</strong>m right square), one would only have <strong>to</strong> have the computer<br />
make the simple translation: Change all positive moves a<strong>lo</strong>ng the Y<br />
axis <strong>to</strong> negative and vice versa. Thus, when the opera<strong>to</strong>r said, "Move<br />
16 Chapter 2
3 units in the positive direction a<strong>lo</strong>ng the Y axis," the computer<br />
would translate that <strong>to</strong> mean, "Move 3 units (still up here!) in the<br />
negative direction."<br />
As discussed earlier, some computer graphing systems do not al<strong>lo</strong>w<br />
positions <strong>to</strong> be simply identified by defining X and Y coordinates.<br />
Some units assign a number <strong>to</strong> each square. The number of a<br />
square becomes a function of the number of squa<strong>res</strong> in a row in such<br />
cases. Figure 3 illustrates the same type of move being made as has<br />
been discussed for Figure 2. That is, the <strong>lo</strong>cation pointed <strong>to</strong> by the<br />
arrow is 2 units <strong>to</strong> the right of and 3 units above the shaded square.<br />
In a system that assigned numbers <strong>to</strong> the squa<strong>res</strong> (beginning in the<br />
<strong>to</strong>p left-hand corner at square "zero"), the diagram depicts the shaded<br />
square as being number 35. The arrow points <strong>to</strong> the square assigned<br />
number 13.<br />
To translate the move from cartesian coordinates in the example,<br />
one would need <strong>to</strong> proceed in the fol<strong>lo</strong>wing manner.<br />
First, determine the number of rows (up or down) between the<br />
starting and ending point. In this example, three rows separate the<br />
two <strong>lo</strong>cations. The number of rows that separate the points will become<br />
a multiplier value.<br />
Next, it is necessary <strong>to</strong> determine a sign, positive or negative,<br />
for the "row multiplier." In keeping with our computer-oriented<br />
" ... some computer graphing<br />
systems do not al<strong>lo</strong>w<br />
positions <strong>to</strong> be simply identified<br />
by defining X and Y<br />
coordinates."<br />
--+2-7<br />
7<br />
15<br />
23<br />
-3X8<br />
31<br />
39<br />
(35) (13)<br />
4-22_J<br />
A Whole Chapter on Math 17
" ... the offset is a 'signed'<br />
(positive or negative)<br />
value."<br />
convention, <strong>to</strong> move up on the screen means~ minus direction, as it<br />
is moving back <strong>to</strong>wards the reference point (at the upper left-hand<br />
corner of the screen). Thus, in the example of Figure 3, the sign of<br />
the row multiplier will be minus or negative.<br />
Now the number of columns in a row is multiplied by the<br />
"row multiplier." In this example (-3 X 8) = -24.<br />
Finally, this value (-24 here) is augmented by the offset in<br />
rows between the two points. Note that here also the offset is a<br />
"signed" (positive or negative) value. For the example, it is positive<br />
if <strong>to</strong> the right of the starting point and negative if <strong>to</strong> the left. If the<br />
starting and ending squa<strong>res</strong> are in the same column, then the offset<br />
is zero. Figure 3 has an offset value of +2. Adding the offset value<br />
(+2) <strong>to</strong> the row multiplier (-24) yields a <strong>res</strong>ult of (-22). As illustrated<br />
in the diagram, taking 22 from 35 yields 13.<br />
Thus, in a PET or similar computer where a display is controlled<br />
by the contents of a display buffer in memory, assuming the display<br />
buffer was organized only as a 5 by 8 matrix, the shaded square in<br />
the diagram would be illuminated by a command such as POKE<br />
BASE+35,42. The arrow on the diagram would be illuminated by a<br />
directive such as POKE BASE+35-22,42 (or POKE BASE+l3,42).<br />
Again, for the sake of clarity, Figure 3 has assumed a starting point<br />
at (1,1) instead of the usual (0,0).<br />
Be sure and study the discussion of Figu<strong>res</strong> 2 and 3 before<br />
proceeding further in this manual. It is crucial for further understanding<br />
that these fundamental concepts be unders<strong>to</strong>od.<br />
18 Chapter -2
Chapter 3<br />
Drawing Simple Shapes<br />
W can draw pictu<strong>res</strong> of simple objects by putting a number of<br />
points <strong>to</strong>gether. Figu<strong>res</strong> 4 and 5 illustrate a number of ways in which<br />
we could form the rep<strong>res</strong>entation of a triangle. The diagrams in those<br />
Getting Started<br />
Figure 4<br />
A<br />
0 7 8<br />
15<br />
B<br />
c<br />
Drawing Simple Shapes 19
figu<strong>res</strong> also highlight some subtle points about creating <strong>lo</strong>w <strong>res</strong>olution<br />
pictu<strong>res</strong>.<br />
Want <strong>to</strong> g~t started? OK, if you have an APPLE-II system, try<br />
executing the fol<strong>lo</strong>wing directives in BASIC language<br />
Figure 5<br />
A<br />
B<br />
D<br />
c<br />
E<br />
20 Chapter 3
GR<br />
COLOR=l3<br />
PLOT 2,3<br />
PLOT 3,3<br />
PLOT 1,4<br />
PLOT 2,4<br />
PLOT 3,4<br />
PLOT 4,4<br />
Issuing these directives will <strong>res</strong>ult in the crude rep<strong>res</strong>entation of the<br />
triangle shown in Figure 4A <strong>to</strong> be drawn on the screen!<br />
Don't have an APPLE-II system? Then try this on a Radio<br />
Shack TRS-80<br />
CLS<br />
SET (2,3)<br />
SET (3,3)<br />
SET (1,4)<br />
SET (2,4)<br />
SET (3,4)<br />
SET (4,4)<br />
On a Commodore PET you would need <strong>to</strong> do something like<br />
(Strike key <strong>to</strong> clear the screen)<br />
A=32768<br />
POKE A+81,<br />
POKEA+82,<br />
POKEA+l20,<br />
POKEA+l21,<br />
POKEA+l22,<br />
POKEA+l23,<br />
If your system is like any one of these, you can issue the cor<strong>res</strong>ponding<br />
statements <strong>to</strong> obtain similar <strong>res</strong>ults. Do you see what is<br />
being done? The reference point for these diagrams is taken as the<br />
<strong>to</strong>p left-hand corner. That point is designated as being at X=O and<br />
Y =O on the screen. Figu<strong>res</strong> 4A and SA rep<strong>res</strong>ent "magnified" views<br />
of a crude triangle being constructed from just a few illuminated<br />
squa<strong>res</strong>.<br />
Do you notice a difference between Figu<strong>res</strong> 4A and SA? Sure<br />
you do. Figure 4A uses an even number of squa<strong>res</strong> in both the ver-<br />
Drawing Simple Shapes 21
"Some pictu<strong>res</strong> can be<br />
drawn better if an odd number<br />
of sec<strong>to</strong>rs are used<br />
rather than an even number."<br />
''If we increase the number<br />
of points we illuminate,<br />
our object will get larger."<br />
tical and horizontal directions. Figure 5A draws the triangle using<br />
an odd number of sec<strong>to</strong>rs in both directions. Do you think one<br />
<strong>lo</strong>oks better than the other? Why not figure out the statements needed<br />
<strong>to</strong> draw Figure 5A on your display and compare the two versions?<br />
The two drawings are provided <strong>to</strong> illustrate a simple point.<br />
Some pictu<strong>res</strong> can be drawn better if an odd number of sec<strong>to</strong>rs are<br />
used rather than an even number, or vice versa. Remember this<br />
when you start creating pictu<strong>res</strong> on your own. If you can't get the<br />
desired shape or effect with one attempt, try redrawing the diagram<br />
using one more or less sec<strong>to</strong>r in one or both dimensions.<br />
It's simple, but it sure can work wonders at times.<br />
If we increase the number of points we illuminate, our object<br />
will get larger. It may also appear <strong>to</strong> get "smoother" in appearance.<br />
Compare Figure 4A with 4B or 5A <strong>to</strong> 5B. Try drawing these figu<strong>res</strong> on<br />
your screen by expanding the concept used <strong>to</strong> draw Figure 4A. You<br />
might want <strong>to</strong> note an inte<strong>res</strong>ting phenomena by examining Figu<strong>res</strong><br />
5A and 5B. When the number of squa<strong>res</strong> in Figure 5A is doubled <strong>to</strong><br />
that shown in 5B, the number of sec<strong>to</strong>rs in the X direction switches<br />
<strong>to</strong> an even value! If you want <strong>to</strong> keep the aesthetic value of using an<br />
odd number of squa<strong>res</strong> in the X direction, you would have <strong>to</strong> settle<br />
for slightly more or less than a doubling in the X dimension as illustrated<br />
by Figure 5D.<br />
If you try drawing Figure 4B or 5B on your screen, you will<br />
soon learn firsthand the effects of doubling both dimensions. The<br />
number of points that must be p<strong>lo</strong>tted is more than doubled! It<br />
soon becomes apparent that a better method than individually<br />
specifying all the points <strong>to</strong> be drawn is desirable.<br />
Figure 4C shows a triangle that is four times larger than in 4A.<br />
Do you really want <strong>to</strong> specify all the points, on a one-by-one basis,<br />
that need <strong>to</strong> be illuminated in order <strong>to</strong> create that triangle? Not<br />
likely! It is time <strong>to</strong> call on your computer and BASIC language <strong>to</strong><br />
do some of the work for you. Listing 1 shows one way of drawing<br />
the triangle in Figure 4C using a series of BASIC statements grouped<br />
as a subroutine. The first version in Listing 1 is for an APPLE-II<br />
system. Statement line number 5 calls the subroutine that commences<br />
at line 10.<br />
Similar listings are included <strong>to</strong> draw the same type of figure<br />
on a Radio Shack TRS-80 and a Commodore PET. Note that the<br />
listing for the PET requi<strong>res</strong> a conversion from X and Y coordinates<br />
<strong>to</strong> the linear add<strong>res</strong>sing scheme utilized by that system's <strong>graphics</strong>.<br />
The conversion used in the POKE statements is A+X+Y*40. A is<br />
defined as the starting add<strong>res</strong>s of the display buff er. This simple<br />
22 Chapter 3
1 GR: COLOR=13<br />
4 8ASEX=0:8ASEY=O<br />
5 GOSU8 10<br />
6 END<br />
10 Y=8ASEY+8<br />
20 FOR X=8ASEX+7 TO 8ASEX+8: PLOT<br />
X,Y: NEXTX<br />
30 Y=Y+1: FOR X=8ASEX+6 TO 8ASEX+<br />
9: PLOT X,Y: NEXT X<br />
40 Y=Y+1: FOR X=8ASEX+5 TO 8ASEX+<br />
10: PLOT X,Y: NEXT X<br />
50 Y=Y+1: FOR X=8ASEX+4 TO 8ASEX+<br />
11: PLOT X,Y: NEXT X<br />
60 Y=Y+1: FOR X=8ASEX+3 TO 8ASEX+<br />
12: PLOT X,Y: NEXT X<br />
70 Y=Y+1: FOR X=8ASEX+2 TO 8ASEX+<br />
13: PLOT X,Y: NEXT X<br />
80 Y=Y+1: FOR X=8ASEX+1 TO 8ASEX+<br />
14: PLOT X,Y: NEXT X<br />
90 Y=Y+1: FOR X=8ASEX TO 8ASEX+<br />
15: PLOT X,Y: NEXT X<br />
100 RETURN<br />
Listing 1<br />
1 CLS<br />
4 81=0:82=0<br />
5 GOSU8 10<br />
6 END<br />
10 Y=82+8<br />
20 FOR X=81+7 TO 81+8:SET (X,Y):NEXT X<br />
30 Y=Y+1:FOR X=81+6 TO 81+9:SET (X,Y):NEXT X<br />
40 Y=Y+1 :FOR X=81+5 TO 81+10:SET (X,Y):NEXT X<br />
50 Y=Y+1: FOR X=81+4 TO 81+11 :SET (X,Y) :NEXT X<br />
60 Y=Y+1 :FOR X=81+3 TO 81+12:SET (X,Y):NEXT X<br />
70 Y=Y+1 :FOR X=81+2 TO 81+13:SET (X,Y):NEXT X<br />
80 Y=Y+1:FOR X=81+1TO81+14:SET (X,Y):NEXT X<br />
90 Y=Y+1:FOR X=81 TO 81+15:SET (X,Y):NEXT X<br />
100 RETURN<br />
1 (Statement <strong>to</strong> clear screen)<br />
4 A=32768:81=0:82=0<br />
5 GOSU8 10<br />
6 END<br />
10 Y=82+8<br />
20 FOR X=81+7 TO 81+8:POKE A+X+Y*40,102:NEXT X<br />
30 Y=Y+1:FOR X=81+6 TO 81+9:POKE A+X+Y*40,102:NEXT X<br />
40 Y=Y+1:FOR X=81+5 TO 81+10:POKE A+X+Y*40,102:NEXT X<br />
50 Y=Y+1:FOR X=81+4 TO 81+1 l:POKE A+X+Y*40,102:NEXT X<br />
60 Y=Y+1:FOR X=B1+3 TO 81+12:POKE A+X+Y*40,102:NEXT X<br />
70 Y=Y+1 :FOR X=B1+2 TO 81+13:POKE A+X+Y*40,102:NEXT X<br />
80 Y=Y+1:FOR X=81+1 TO B1+14:POKE A+X+Y*40,102:NEXT X<br />
90 Y=Y+1:FOR X=B1 TO 81+15:POKE A+X+Y*40,102:NEXT X<br />
100 RETURN<br />
Drawing Simple Shapes 23
procedure enables us <strong>to</strong> handle PET <strong>graphics</strong> in a manner similar <strong>to</strong><br />
those used on the APPLE-II and TRS-80 systems where we use the<br />
PLOT or SET statements.<br />
Note that Listing l operates by first setting the Y coordinate<br />
value. It then uses a FOR--NEXT <strong>lo</strong>op <strong>to</strong> turn on all the desired<br />
points a<strong>lo</strong>ng the X axis for the current value of Y. You see, it does<br />
save quite a few individual PLOT directives over the method suggested<br />
for drawing the diagram in Figure 4A!<br />
Make Your Triangle<br />
Multiply<br />
The triangle produced by the subroutine exhibited in Listing l can<br />
be positioned just about anywhere you want it on the CRT screen.<br />
How? By merely initializing the value of the reference point variables<br />
BASEX and BASEY (or Bl and B2 in the PET and TRS-80 versions).<br />
Listing 2 shows a "calling sequence" that will cause the triangle<br />
<strong>to</strong> be drawn a number of times on the screen. (The triangles<br />
will overlap a bit on their sides. Y eu can modify the program so<br />
that they are completely separated if you like. I just happened <strong>to</strong><br />
like the pattern they made when they slightly overlap!) Listing 2<br />
is specifically for an APPLE-II system. However, with just a few<br />
minor modifications (such as using the appropriate statement type <strong>to</strong><br />
Listing 2<br />
1 GR : COLOR=13<br />
3 FOR BASEX=O TO 24 STEP 12<br />
4 FOR BASEY=O TO 24 STEP 8<br />
6 GOSUB 1{)<br />
7 NEXT BASEY<br />
8 NEXT BASEX<br />
9 END<br />
10 Y=BASEY+8<br />
20 FOR X=BASEX+7 TO BASEX+a: PLOT<br />
;.:,y: NEXT X<br />
30 Y=Y+i: FOR X=BASEX+6 TO BASEX+<br />
9: PLOT x,y: NEXT x<br />
40 Y=Y+1: FOR X=BASEX+5 TO BASEXt<br />
1 (): PLOT x,y: NEXT x<br />
50 Y=YtU FOf~ X=BASEXt4 TO BASEX+<br />
1U PLOT x,v: NEXT x<br />
6(i Y=Y+U FOR X=BASEXt3 TO BASEX+<br />
1,.., •<br />
..:.. ,;,. PLOT x,y: NEXT x<br />
70 Y=Y+1: FOR X=BASEX+2 TO BASEX+<br />
13: PLOT x,v: NEXT x<br />
80 Y=Yti: FOf\ X=BASEX+1 TO BASEX+<br />
14: PLOT x,y: NEXT x<br />
90 Y=Y+U FOR X=BASEX TO BASEX+<br />
1"'" ...J. •<br />
100 RETURN<br />
PLOT x,y: NEXT x<br />
24 Chapter 3
clear the display) the same essential calling sequence can be used<br />
for other types of computers.<br />
Now the calling sequence in Listing 2 is nice if you want <strong>to</strong> draw a<br />
whole bunch of triangles and leave them on the screen. But suppose<br />
you just want <strong>to</strong> have the triangle change its position. That is, for it<br />
<strong>to</strong> disappear from one part of the screen and appear in another place.<br />
Well, in that case you had better "erase" the old triangle. Right?<br />
That is simple enough <strong>to</strong> do if you only want <strong>to</strong> have the<br />
single triangle somewhere on the screen at any one time. Listing 3<br />
illustrates a calling sequence that will do the job. The difference between<br />
it and Listing 2 is that it has a statement <strong>to</strong> clear the screen<br />
prior <strong>to</strong> drawing another triangle. (Again, the listing is specifically<br />
for an APPLE-II unit. You will need <strong>to</strong> make minor statement<br />
changes for other systems.)<br />
Listing 3 will serve fine if all you need <strong>to</strong> display on the screen<br />
is the one item drawn by the subroutine. Suppose, however, that<br />
you will have other items on the screen at the same time that you<br />
desire <strong>to</strong> move the triangle about? Unless you plan <strong>to</strong> redraw the entire<br />
screen, you sure don't want <strong>to</strong> use a "clear screen" statement<br />
And What About Erasing?<br />
3 FOR BASEX=O TO 24 STEP 12<br />
4 FOR BASEY=O TO 24 STEP 8<br />
5 Gf:: t COL0f
" ... <strong>to</strong> get rid of the old<br />
triangle ... change the<br />
calling sequence so that it<br />
reexecutes the subroutine<br />
with COLOR=O ..• "<br />
<strong>to</strong> get rid of the old triangle. Nope, all you want <strong>to</strong> do is erase the<br />
old triangle. So, you execute a routine just like the one for drawing a<br />
triangle, only now you turn the display off at those points.<br />
Such a procedure is a snap on the APPLE-II. Listing 4 shows<br />
that all one has <strong>to</strong> do is change the calling sequence so that it reexecutes<br />
the subroutine with COLOR=O, which effectively extinguishes<br />
the old triangle. (What else could you do with the APPLE-II? You<br />
could reexecute the subroutine with COLOR set <strong>to</strong> some other<br />
value, so that previous positions of the triangle are displayed in a<br />
co<strong>lo</strong>r different than its current position!)<br />
If one set up the drawing subroutine for a PET so that the portion<br />
of the POKE statement that designates the code <strong>to</strong> be inserted<br />
was a variable name, then a similar type of calling sequence would<br />
work there. (i.e., If a POKE statement in the subroutine appeared<br />
as POKE A+X+Y*40,Z, then a statement in the calling sequence<br />
could alter the variable Z between a displaying and nondisplaying<br />
code. For instance, setting Z <strong>to</strong> the value 32 would effectively blank<br />
out thP- triangle if the drawing subroutine was reexecuted.)<br />
The situation would be a little more complicated with a TRS-80<br />
or similar system. One would need <strong>to</strong> actually create a second suhrou<br />
tine. This would be identical <strong>to</strong> the one shown for the TRS-80 in<br />
Listing 1 except that the SET (X ,Y) directives would be replaced<br />
with the RESET (X,Y) command. One would then have the calling<br />
sequence alternately call the two subroutines: one <strong>to</strong> draw the figure<br />
using the SET statements, the other <strong>to</strong> eliminate it through the<br />
use of the RESET statements.<br />
Listing 4<br />
1 GR<br />
2 FOR BASEX=O TO 24 STEP 12<br />
3 FOR BASEY=O TO 24 STEP 8<br />
4 COLOR=13: GOSUB 10<br />
5 COLOR=O: GOSUB 10<br />
6 NEXT BASEY<br />
7 NEXT BASEX<br />
8 END<br />
10 Y=BASEY +8<br />
20 fOR X=BASEXt7 TO BASEXtS: PLOT<br />
x,Yt NEXT X<br />
30 Y=Y+1: FOR X=BASEXt6 TO BASEX+<br />
9: PLOT x,y: NEXT X<br />
40 Y=Y+1: FOR X=BASEX+5<br />
10: PLOT x,y: NEXT X<br />
50 Y=Ytlt FOR X=BASEXt4<br />
11! PLOT x,y: NEXT X<br />
60 Y=Y+1: Fm~ X=BASEX+3<br />
12: PLOT x,y: NEXT X<br />
7•) 'f::::Yf1: FOR X=BASEX+2<br />
13: PLOT x,y: NEXT X<br />
80 Y=Y+1: FOf;: X=BASEX+1<br />
14: PLOT XYY: NEXT x<br />
90 Y=Y+1 ! FOf~ X=BASEX TO<br />
15: PLOT XrY: NEXT X<br />
100 F
Chapter 4<br />
Drawing Lines<br />
A few readers might wonder why I didn't discuss the drawing of a<br />
line before talking about something like triangles. After all, what<br />
could be simpler than drawing a line? Lots of things, it turns out!<br />
Drawing a line by computer, yes a plain old straight line, is not<br />
quite so simple as it might appear at first glance.<br />
Oh yes, it is not difficult <strong>to</strong> draw a perfectly vertical or a perfectly<br />
horizontal line on a screen. In fact, you already know how <strong>to</strong><br />
do that. We drew some straight horizontal lines when we drew the<br />
triangle! The procedure for creating a horizontal line is simply <strong>to</strong><br />
set Y <strong>to</strong> the value on which the line is <strong>to</strong> <strong>res</strong>ide, then invoke a statement<br />
such as<br />
FOR X=O TO 39 STEP 1: PLOT X,Y :NEXT X<br />
or<br />
FOR X=O TO 39 STEP l:POKE A+X+Y*40,Z:NEXT X<br />
where A=32768 for a PET system and Z is the code for the graphic<br />
symbol <strong>to</strong> be displayed.<br />
Similarly, <strong>to</strong> draw a vertical line you can set X <strong>to</strong> a fixed value<br />
and then vary Y over the desired range of the line that is <strong>to</strong> be<br />
drawn.<br />
It turns out, however, that the cases of a perfectly vertical or<br />
perfectly horizontal line are somewhat unique. It is a little bit harder<br />
<strong>to</strong> draw a line using a computer when the end points are not on<br />
the same X or Y coordinate.<br />
To take a <strong>lo</strong>ok at the situation, why don't you <strong>lo</strong>ad in the program<br />
shown in Listing 5 in<strong>to</strong> your machine?<br />
Please note that from here on out in this publication, listings<br />
will be shown for the APPLE-II system. I'll assume you will make<br />
It's Time <strong>to</strong> Draw the Line<br />
" ... what could be simpler<br />
than drawing a line?<br />
Lots of things, it turns out!"<br />
Drawing Lines 27
Listing 5 1 Gt~ : COLOR= 13<br />
4 x1 = o:x2 = 39<br />
5 Y1 = o:v~ = 39<br />
6 GOSUB 10<br />
9 END<br />
10 FOR X = Xl TO X2<br />
20 Y = INT
Now the s<strong>lo</strong>pe m is simply the change in units a<strong>lo</strong>ng the Y axis<br />
over the change in units a<strong>lo</strong>ng the X axis between two points on the<br />
lin.e. What two points on the line? Why the starting and ending points<br />
of the line as far as we are concerned! So, if a line starts at Xl,Yl<br />
and ends at X2,Y2, then the s<strong>lo</strong>pe can be equated <strong>to</strong> (Y2 - YI)/<br />
(X2- Xl). Or,in other words, once the end points (or any two points,<br />
but I shall be using end points in my examples) have been defined,<br />
then points a<strong>lo</strong>ng the Y axis are those defined by multiplying the<br />
value of X at that <strong>lo</strong>cation times (Y2 - Yl)/(X2 - Xl). Line 20 in<br />
Listing 5 uses precisely that relationship <strong>to</strong> calculate values of Y<br />
a<strong>lo</strong>ng the line. Only integer values are used because we can only p<strong>lo</strong>t<br />
<strong>lo</strong>cations at integral points on the CRT screen.<br />
Figure 6<br />
0<br />
0<br />
I ' I<br />
'<br />
I<br />
•<br />
I<br />
\<br />
I<br />
I<br />
'<br />
0<br />
1<br />
2<br />
I<br />
'<br />
I<br />
I<br />
'<br />
0 1 2 39<br />
39<br />
Drawing Lines 29
If you execute the program in Listing 5, with a RETURN statement<br />
inserted at line 45, it will draw what appears <strong>to</strong> be a nice diagonal<br />
line. That could lead you <strong>to</strong> think that the program works<br />
just fine. However, if you were <strong>to</strong> change line 4 of the calling sequence<br />
<strong>to</strong> Xl=O:X2=2, you might be a little disappointed with the<br />
"line" drawn. As the dotted line in Figure 6 illustrates, you would<br />
only see a few points displayed a<strong>lo</strong>ng the line! That is hardly what<br />
you could call "drawing a line."<br />
Res<strong>to</strong>ring line 4 <strong>to</strong> its original value, Xl=O:X2=39, and then<br />
changing line 5 <strong>to</strong> read Yl=O,Y2=2 would yield the nearly horizontal<br />
line shown in Figure 6. That line is not exactly perfect. For<br />
one thing, the end point of the line does not get displayed by the<br />
Figure 7<br />
0<br />
0<br />
0<br />
1<br />
2<br />
0 1 2<br />
39<br />
39<br />
30 Chapter 4
outine!<br />
The reason we do not get a very good line drawn is because,<br />
with a RETURN statement at line 45, the program only calculates<br />
and p<strong>lo</strong>ts points a<strong>lo</strong>ng the Y axis at di~crete values of X. When<br />
X only goes from 0 <strong>to</strong> 2, you will only get a few points displayed,<br />
regardless of how far the line goes in the Y direction. We can improve<br />
the situation somewhat by removing the RETURN statement at line<br />
45. Now the program will effectively fill in the gaps between points<br />
because it will also p<strong>lo</strong>t points a<strong>lo</strong>ng the X axis for discrete values<br />
of Y. Figure 7 illustrates the improvement one obtains when the<br />
entire program in Listing 5 is util~ed. .<br />
Well, the lines in Figure 7 might be pretty good, considering<br />
Figure 8<br />
0<br />
0<br />
0 1 2 39<br />
Drawing Lines 31
that they do show the end points of the line as well as a pretty<br />
rough approximation of the path that the line takes. However, <strong>to</strong><br />
some people they ·may appear somewhat less than perfect. What<br />
seems <strong>to</strong> be the problem?<br />
The problem is an anomaly of using digital computer techniques.<br />
A point a<strong>lo</strong>ng the line does not get p<strong>lo</strong>tted until a discrete<br />
value is reached. Thus, for the line that runs from Xl=O <strong>to</strong> X2=39<br />
a<strong>lo</strong>ng the <strong>to</strong>p of Figure 7, the line is p<strong>lo</strong>tted a<strong>lo</strong>ng Y =O until Y<br />
reaches the value 1. It is p<strong>lo</strong>tted at Y=l until Y=2, etc. Y reaches 2<br />
just at the point that the line ends. This causes the line <strong>to</strong> appear<br />
somewhat <strong>lo</strong>psided or weighted <strong>to</strong>wards the <strong>lo</strong>wer values of X.<br />
A "smoother" line can be drawn by slightly modifying the<br />
program of Listing 5 so that it appears as shown in Listing 6. Compare<br />
lines 20 and 60 in those two listings. The simple technique of<br />
rounding off values <strong>to</strong> the next higher coordinate, by adding 0.5 <strong>to</strong><br />
the product of the s<strong>lo</strong>pe and the opposite axis' value, <strong>res</strong>ults in the<br />
improvement shown in Figure 8. Figure 8 is about the best you are<br />
going <strong>to</strong> be able <strong>to</strong> do when drawing straight lines with a <strong>lo</strong>w <strong>res</strong>olution<br />
display!<br />
We aren't done with the matter of drawing straight lines yet!<br />
The program is Listing 6 is only for special cases of lines that start<br />
at the coordinate X=O,Y=O. It also will not handle the cases of a<br />
perfectly vertical or horizontal line. (Can you see why?)<br />
What we really want is a general procedure for drawing a<br />
straight line starting and ending anywhere on a display. To do this,<br />
we need <strong>to</strong> add in the off set (b) part of our general line equation<br />
Y = mX +b. We also need <strong>to</strong> make a few tests so that our computer<br />
can handle the special cases when X or Y does not change value (thus<br />
Listing 6 1 GF: : COLOR= 13<br />
4 x1 :::: o:x2<br />
5 Yi :::: 0: Y2<br />
6 GO~·WB 10<br />
9 END<br />
10 Fm;: X =<br />
20 Y ::-~ INT<br />
Xi ) ) *<br />
30 PL.OT x,y<br />
40 NEXT X<br />
= 39<br />
X1 TO X2<br />
esulting in a delta value of zero in the divisor of the s<strong>lo</strong>pe variable<br />
in the equation).<br />
Listing 7 shows a general line-drawing algorithm that fills the<br />
bill. The line-drawing subroutine starting at line 5000 expects the<br />
starting and ending points of the line Xl,Yl and X2,Y2 <strong>to</strong> be set<br />
up before it is called.<br />
The calling sequence I have shown in Listing 7 will cause an<br />
APPLE-II system <strong>to</strong> draw lines of random length and direction with<br />
randomly varying co<strong>lo</strong>rs. If you RUN it, your display screen will<br />
soon fill up with a continuously changing pattern. Systems that do<br />
not provide different co<strong>lo</strong>rs can still be coaxed in<strong>to</strong> inte<strong>res</strong>ting displays<br />
by alternately having the lines be drawn in white and black.<br />
This is easy <strong>to</strong> do with a PET by changing the POKE character each<br />
time the line drawing subroutine is called. Witli a TRS-80 you would<br />
need <strong>to</strong> create another line drawing subroutine that utilized the<br />
RESET (X,Y) statement. In any event, you can see how BASIC's<br />
RND (random) function can be used in connection with the line<br />
drawing subroutine <strong>to</strong> create random patterns.<br />
1 GR •<br />
COLOR= 13<br />
2 Xi :::: INT ( RND < 1 > * 38 >:x2 ==<br />
INT < RND < 1 > * 38 >: IF Xl =<br />
X2 THEN 2<br />
3 Xl = INT ( RND < 1 > * 38 >:X2 :::<br />
INT < RND < 1 > * 38)<br />
.., c·<br />
Y1 :::: INT < RND < 1 > * 38 >:Y2 =<br />
INT < RND * 38)<br />
6 GOSUB 5000<br />
7 COLOR= RND ( 1 > * 14 + 1<br />
8 GOTO 2<br />
9 EN[t<br />
5000 IF X2 > X1 THEN A :::: 1<br />
5010 IF X2 < X1 THEN A = -· 1<br />
5(>20 IF X2 :::: X1 THEN 5070<br />
5030 FOR X :::: X1 TO X2 STEP A<br />
5040 y = INT
34 Chapter 4<br />
11
Just as drawing lines on a display is not as easy as one might initially<br />
think for the general case; drawing of circles can become quite<br />
complex for the general case. For that reason and another fac<strong>to</strong>r<br />
that I will discuss shortly, I recommend that you minimize your use<br />
of circular diagrams. Furthermore, when you find you really want<br />
<strong>to</strong> use a circle, I suggest you draw it using a point-by-point specification<br />
method such as that used <strong>to</strong> draw triangles that I p<strong>res</strong>ented<br />
earlier.<br />
Figure 9 shows the points that could be illuminated <strong>to</strong> draw a<br />
circle. Listing 8 illustrates the method for drawing the circle.<br />
Notice that a subroutine is used <strong>to</strong> actually draw the diagram. The<br />
calling sequence al<strong>lo</strong>ws the user <strong>to</strong> specify initial values for X and Y<br />
so that the circle may be positioned wherever desired on the screen.<br />
Alas, if you were <strong>to</strong> <strong>lo</strong>ad the program of Listing 8 in<strong>to</strong> your<br />
computer system and try displaying the circle it draws, you might<br />
be a bit disappointed. The circle would quite likely <strong>lo</strong>ok more like<br />
an ellipse than a perfectly round ring. Why? Because, unfortunately,<br />
most CRT displays <strong>to</strong>day do not p<strong>lo</strong>t or illuminate a sec<strong>to</strong>r that is<br />
actually a square. The sec<strong>to</strong>rs are generally rectangular. To make<br />
matters worse, there does not appear <strong>to</strong> be any standardization<br />
amongst manufacturers.<br />
For instance, Figure 10 illustrates the typical shapes of a <strong>lo</strong>w<br />
<strong>res</strong>olution sec<strong>to</strong>r for several popular systems. The numbers a<strong>lo</strong>ng the<br />
sides of each rectangle give the approximate ratio of the sides in the<br />
vertical and horizontal directions. You can promptly see that an<br />
APPLE-H's display illuminates a sec<strong>to</strong>r that is somewhat <strong>lo</strong>nger<br />
horizontally than vertically. On the other hand, a TRS-80's display<br />
Avoid Going around<br />
in Circles<br />
Figure 10<br />
'1llf ..<br />
i 1.25<br />
1<br />
t<br />
APPLE-II<br />
-41: 1.5 ~<br />
I<br />
l<br />
...,.__,~<br />
COMMODORE PET<br />
1<br />
1.75<br />
l<br />
RADIO<br />
SHACK<br />
TRS-80<br />
Drawing Lines 35
36 Chapter 4<br />
has sec<strong>to</strong>rs that are just the opposite. They are taller vertically than<br />
horizontally! The PET unit is somewhat like the Radio Shack<br />
TRS-80 except that the ratio is not as pronounced. For drawing circles,<br />
the PET unit has about the best symmetry, but it <strong>to</strong>o is not<br />
perfectly balanced.<br />
What <strong>to</strong> do if you really want a circle <strong>to</strong> <strong>lo</strong>ok like a circle rather<br />
than an ellipse? You will need <strong>to</strong> use special graph paper that accurately<br />
rep<strong>res</strong>ents the ratios of the display sec<strong>to</strong>rs on your particular<br />
system. Draw a circle on that graph, and then create the exact statements<br />
needed <strong>to</strong> draw the round circle on your display.
Chapter 5<br />
A Graphics Library<br />
he whole key <strong>to</strong> really effectively applying <strong>graphics</strong> on your own<br />
personal machine is the building up of a "library" of routines that<br />
you can call on as desired. This library must be carefully organized<br />
so that it consists of subroutines that operate in such a manner that<br />
they can be positioned wherever desired on the screen. That is,<br />
they should start from a set reference point, such as the upper lefthand<br />
sec<strong>to</strong>r (0,0). They then may be positioned by having the calling<br />
sequence set up the appropriate offset values. This procedure has<br />
been <strong>intro</strong>duced in this publication starting off with the triangles<br />
and was continued with the circle. This principle will be continued<br />
so you can at least start your library with some of th~~items p<strong>res</strong>ented<br />
here.<br />
Remember, the key idea is <strong>to</strong> structure your subroutines so<br />
that they are able <strong>to</strong> be off set by a base add<strong>res</strong>s. When you first<br />
design an item, the base add<strong>res</strong>s can be zero. Later, when you want<br />
<strong>to</strong> position the drawing at some particular point on the screen, you<br />
have the calling sequence set the base value <strong>to</strong> the desired starting<br />
point of the drawing.<br />
You become the boss when it comes <strong>to</strong> building up your <strong>graphics</strong><br />
library. You also become the artist! The strategy and the fundamental<br />
technique is simple.<br />
You get some graphing paper.<br />
Now be careful! I generally like <strong>to</strong> work with the "engineering"<br />
type of graphing paper you can buy from drafting paper supply<br />
houses. I usually work with the type that has 1/ 4-inch or· 1/8-inch<br />
grids. But you can buy the paper with grids ranging from. one inch<br />
down <strong>to</strong> 1/20 inch. By "be careful," I mean <strong>to</strong> keep in mind the<br />
fact that this kind of graphing paper has square grids. The individual<br />
sec<strong>to</strong>rs that are illuminated on your screen, as previously pointed<br />
Build Up Your Own<br />
Graphics Library<br />
Creating a Library Means<br />
Drawing Pictu<strong>res</strong><br />
A Graphics Library 37
38 Chapter 5<br />
out, are not likely <strong>to</strong> be exactly square. If you p<strong>lo</strong>t a square on your<br />
graph paper, you are going <strong>to</strong> get a rectangle if you illuminate the<br />
cor<strong>res</strong>ponding positions on your screen. If you plan a circle, you will<br />
get an ellipse.<br />
I have found I can work pretty effectively using the regular<br />
engineering-type graphing paper. I just keep in mind the kind of dis<strong>to</strong>rtion<br />
likely <strong>to</strong> occur on the screen and make adjustments if necessary.<br />
However, if you are a perfectionist, or are going <strong>to</strong> get involved<br />
in fancy drawings or critical rep<strong>res</strong>entations, you may want <strong>to</strong> construct<br />
your pictu<strong>res</strong> on special graph paper.You can make your own<br />
by drawing grids that have the same horizontal <strong>to</strong> vertical ratios as<br />
that used on the display screen your system uses. If you have access<br />
<strong>to</strong> a duplicating or mimeographing machine, you can make up one<br />
master and then run off a bundle. You can do the same thing if there<br />
is an offset printer in your neighborhood. In fact many of the offset<br />
printing firms can actually make up pads of 50 or so sheets of your<br />
own personally created grids.<br />
In any event, get a hold of some graphing paper that suits you.<br />
Then, lightly sketch the outline of the object you wish <strong>to</strong> rep<strong>res</strong>ent<br />
on the screen, going a<strong>lo</strong>ng grid lines wherever possible. Then fill in<br />
the portion(s) <strong>to</strong> he rep<strong>res</strong>ented as you see fit. In some cases you<br />
will just want <strong>to</strong> outline the object, such as was done for the circle<br />
illustrated in Figure 9. In other cases, such as the triangles shown<br />
earlier, you may want <strong>to</strong> fill in the entire object.<br />
When the outline of your sketched object goes at an angle <strong>to</strong><br />
the grid, you will have <strong>to</strong> make a judgment about illuminating a sec<strong>to</strong>r.<br />
A good rule of thumb is that if more than half the sec<strong>to</strong>r is "in,<br />
side" the line, then illuminate it. However, sometimes you will have<br />
<strong>to</strong> use "artistic judgment." This is particularly true when you are<br />
drawing curves or dealing with angular and irregularly shaped objects,<br />
etc.<br />
Don't he afraid <strong>to</strong> experiment and try different arrangements.<br />
If something doesn't seem <strong>to</strong> come out right, try some of the fol<strong>lo</strong>wing<br />
alternatives:<br />
1) Try just bordering the object instead of illuminating it solidly<br />
or vice versa.<br />
2) Try reversing the background. That is, surround the drawing<br />
with illuminated points so that the object or its outline is portrayed<br />
by sec<strong>to</strong>rs that are not illuminated.<br />
3) Try changing the number of sec<strong>to</strong>rs a<strong>lo</strong>ng one or both dimensions.<br />
Especially try going from an odd <strong>to</strong> an even value or vice
versa.<br />
4) Reposition the item you are trying <strong>to</strong> rep<strong>res</strong>ent on the grid<br />
or show it in a new perspective.<br />
5) If you have co<strong>lo</strong>r capability (such as on the APPLE-II) or<br />
special <strong>graphics</strong> symbols (such as on the PET), by all means try <strong>to</strong><br />
capitalize on that capability. Alter the co<strong>lo</strong>rs <strong>to</strong> enhance lines or<br />
change the <strong>graphics</strong> symbols used <strong>to</strong> accent a line or portion of a<br />
drawing.<br />
Once you have your drawing rep<strong>res</strong>ented on graphing paper,<br />
you are ready <strong>to</strong> construct your "general purpose" subroutine. By<br />
general purpose, I mean a subroutine constructed in such a way that<br />
it can be called upon, by setting up parameters, <strong>to</strong> draw the item at<br />
different <strong>lo</strong>cations on the screen. The easiest technique <strong>to</strong> use is<br />
the one illustrated when p<strong>res</strong>enting the triangle and circle in this<br />
manual. You simply have the subroutine construct the drawing as<br />
though it was positioned initially at 0,0 (as the starting point). Then<br />
use variables that can be offset by the subroutine calling sequence. In<br />
Listing 8 variables X and Y are set by the calling sequence so that the<br />
circle can be drawn anywhere on the screen after initial values of X<br />
and Y are defined. In Listing 1, the triangle is offset a<strong>lo</strong>ng the X axis<br />
by the variable named BASEX and the Y axis offset is determined<br />
by variable BASEY, if desired, or simply by the variable Y.<br />
When a subroutine has been prepared in this manner, it can be<br />
used again and again in the same or different programs. The item rep<strong>res</strong>ented<br />
by the subroutine can be placed wherever desired on the<br />
screen. As will be observed later, this technique also permits a programmer<br />
<strong>to</strong> animate pictu<strong>res</strong> by rapidly changing the positions of<br />
drawings on the screen. This concept was <strong>intro</strong>duced by the program<br />
of Listing 4 that causes a triangle <strong>to</strong> move about the screen. ·<br />
"When a subroutine has<br />
been prepared in this manner,<br />
it can be used again<br />
and again .•. "<br />
Listing 9 shows a large group of subroutines (starting at line 9000)<br />
that may be placed in your library. They may be used <strong>to</strong> draw pictu<strong>res</strong><br />
of playing cards - from the Ace of Hearts <strong>to</strong> the Deuce of<br />
Spades. The first part of the listing illustrates just one way that the<br />
subroutines may be called. Lines 10 through 220 in the program will<br />
repeatedly deal two cards at random from a deck and cause them <strong>to</strong><br />
be drawn on the display screen. Lines 20 and 40 set values of X and<br />
Y <strong>to</strong> position the starting point for the subroutine at line 9000 that<br />
draws an outline of a playing card.<br />
Figure 11 illustrates how a playing card is built up. This is done<br />
by selecting any one of a group oLsmaller "picture b<strong>lo</strong>cks" and placing<br />
it in the proper position within the outline or border of a card<br />
Let's Stack Your Library<br />
with a Deck of Cards<br />
A Graphics Library 39
Listing 9<br />
10 GR : COLOR= 13: REM GRAPHIC<br />
S/COLOR STATEMENT FOR COLOR<br />
SYSTEMS<br />
20 X = 2:Y = 7<br />
30 GOSUB 9000<br />
40 X = 22:Y = 7<br />
50 GOSUB 9000<br />
60 X = 4:Y = 15<br />
70 C1 ·- INT ( RND ( 1 ) * 52 + 1 )<br />
80 C2 = INT < RND C 1 ><br />
* 52 + 1 )<br />
90 IF C2 = Cl THEN 80<br />
100 s = INT CC1 I 13 > + 1<br />
110 GO SUB 2000<br />
120 X = 4:Y = 9<br />
130 N = INT (C1 I 4) + 1<br />
140 GOSUB 2100<br />
150<br />
160<br />
170<br />
180<br />
190<br />
200<br />
210<br />
2000<br />
2010<br />
2020<br />
2030<br />
2040<br />
2100<br />
2110<br />
2120<br />
2130<br />
2140<br />
2150<br />
2160<br />
2170<br />
2180<br />
2190<br />
2200<br />
2210<br />
2220<br />
2230<br />
9000<br />
9010<br />
X - 24:Y = 15<br />
S = INT CC2 I 13) t 1<br />
GOSUB 2000<br />
X - 24:Y = 9<br />
N = INT RETUF
9200 f
9320 COLOR= 6: REM COLOR ST~1TE<br />
MENT FOR COLOR SYSTEMS<br />
s)··1~·;,.><br />
w, y: NEXT I<br />
~ .... ..:... FOi:\: I = 4 TO 7:W = x + I: PLOT<br />
9324· FOR I - 3 TO a:w = x + I: PLOT<br />
S 1 326<br />
w,y + 1: NEXT I<br />
FOR I - 3 TO a:w = x + 1: PLOT<br />
w,y + 2: NEXT I<br />
9328 PLOT x + 1,y + 3: PLOT x +<br />
2,y + 3: FOR I = 4 TO 7: lJ =<br />
x + 1: PLOT w,y + 3: NEXT I:<br />
PLOT x + 9,y + 3: PLOT x +<br />
1(), y<br />
+ 3<br />
9330 FOR I - 0 TO 1UW - x + I: PLOT<br />
w,y + 4: NEXT I<br />
9332 FOR I - 0 TO 11: tJ = x + I: PLOT<br />
w,y + 5: NEXT I<br />
9334 FOF~ I = 0 TO 1UW = x + I: PLOT<br />
w,y + 6: NEXT I<br />
9336 FOF~ I - 0 TO 11:W = x + r: PLOT<br />
w,y + 7t NEXT I<br />
9338 PLOT x + 1,y + a: PLOT x +<br />
2,y + a: PLOT x + 5,y + a: PLOT<br />
x + 6, '( + 8! PLOT x + 9,y +<br />
s: PLOT x + 10,y + 8<br />
9340 PLOT x + 5,y + 9: PLOT x +<br />
6,Y + CJ<br />
9345 RETURN<br />
9350 1:
93'10<br />
9395<br />
S)50 0<br />
9505<br />
9510<br />
9512<br />
9514<br />
9515<br />
9516<br />
9518<br />
9525<br />
9~30<br />
9535<br />
95.40<br />
9542<br />
9~144<br />
1 i~146<br />
9548<br />
95o0<br />
9555<br />
9560<br />
1 1!:16~1<br />
951·0<br />
1·l5?4<br />
9~/'6<br />
•;)5/'8<br />
9580<br />
9585<br />
95·:;0<br />
PLOT X + 5,y t 9: PLOT X t<br />
6,Y t 9<br />
f
9600 CQLOR= 15: REM COLOR STAT<br />
EMENT FOR COLOR SYSTEMS<br />
9602 PLOT x,y: PLOT X + 3,y<br />
9604 PLOT x,y + 1: PLOT X + 3,y t<br />
9606 1PL01· x,y t 2: PLOT X t 3rY +<br />
2<br />
9608 FOR I = 0 TO 4:W - X t l: PLOT<br />
WrY t 3: NEXT I<br />
9610 PLOT X + 3,y + 4<br />
9615 RETURN<br />
9620 REM **FIVE** CALL CLEANU<br />
P ROUTINE<br />
9625 GOSUB 9980)<br />
9630 COLOR= 15: REM COLOR STAT<br />
EMENT FOR COLOR SYSTEMS<br />
9632 FOR I - 0 TO 4tW = X t 1: PLOT<br />
WrY: NEXT I<br />
9634 PLOT x,y + 1<br />
9636 FOR I = 0 TO 4:W = X t l: PLOT<br />
w,y t 2: NEXT I<br />
9638 PLOT X t 4,y t 3<br />
9640 FOR I = o TO 4tW = X + I: PLOT<br />
WrY + 4; NEXT l<br />
9645 RETURN<br />
9650 REM **SIX** CALL CLEANUP<br />
ROUTINE<br />
9655 GOSUB 9980<br />
9660 COLOR= 15: REM COLOR STAT<br />
EMENT FOR COLOR SYSTEMS<br />
9662 PLOT x,y<br />
9664 PLOT x,y + 1<br />
9666 FOR I - 0 TO 4:W = X + lt PLOT<br />
w,y + 2: NEXT I<br />
9668 PLOT x,y + 3: PLOT X t 4,y +<br />
3<br />
9670 FOR I = 0 TO 4:W = X t lt PLOT<br />
w,y + 4: NEXT I<br />
9675 RETURN<br />
9680 REM **SEVEN** CALL CLEAN<br />
UP ROUTINE<br />
9685 GOSUB 9980<br />
9690 COLOR= 15: REM COLOR STAT<br />
EMENT FOR COLOR SYSTEMS<br />
9692 FOR I - 0 TO 4tW = X t 1: PLOT<br />
w,y: NEXT I<br />
9694 PLOT X t 3,y + 1<br />
9696 PLOT X t 2,y + 2<br />
9698 PLOT X t 1,y + 3<br />
9700 PLOT x,y + 4<br />
9705 RETURN<br />
9110 R~M **EIGHT** CALL CLEAN
UP ROUTINE<br />
971~ GOSUB 9980<br />
9720 COLOR= 15: REM COLOR STAT<br />
u EMENT FOF< COL.OR SYSTEMS<br />
9722 FUR I = 0 TO 4tW = X t 1: PLOT<br />
9/24<br />
t:t726<br />
9728<br />
9730<br />
97:15<br />
974(><br />
9745<br />
r:n~:;<br />
9756<br />
9758<br />
9/6(><br />
9/65<br />
r:n70<br />
9775<br />
9780<br />
97B2<br />
978-4<br />
9786<br />
9788<br />
979(><br />
9795<br />
980()<br />
9805<br />
9810<br />
w,y: NEXT I<br />
PLOT XrY t<br />
1: PLOT X t 4,y t<br />
1<br />
FOR I = 0 TO 4:W = X t 1: PLOT<br />
w,y + 2: NEXT I<br />
PLOT XrY t 3: PLOT X t 4rY t<br />
3<br />
FOF< I :::: 0 10 • .<br />
w,y + 4: NEXT f •W = X + l: PLOT<br />
f<br />
COLOR= 15: REM<br />
COLOR STAT<br />
EMENT FOR COLOR SYSTEMS<br />
FOR I = 0 TO 4:W = X t l: PLOT<br />
Wv'i: NEXT l<br />
PLOT XrY t 1: PLOT X t 4,y t<br />
1<br />
FOR I = 0 TO 4:W = X t 1: PLOT<br />
WrY + 2: NEXT l<br />
Pun x + 4,y + 3<br />
PLOT X + ·4, Y t 4<br />
f
9812 FOR I = 0 TO 4HJ = x t I: PLOT<br />
w,y: NEXT I<br />
9814 PLOT x + 2,y + 1<br />
9816 PLOT x + 2,y t "> .:..<br />
9818 PLOT x,y + 3: PLOT x t 2,y +<br />
3<br />
. 9820 PLOT x,y + 4: PLOT x + 1,y +<br />
4: PLOT x + 2,y + 4<br />
9fl25 RETURN<br />
98:50 REM **QUEEN** CALL CLEAN<br />
UP ROUTINE<br />
9835 GO SUB 99BO<br />
9840 COLOR= 1 i;:-.<br />
REM COLOR STAT<br />
~·<br />
EM ENT FOR COL.OR SYSTEMS<br />
9842 FOR I = 0 TO 4tW = x + It PLOT<br />
w,y: NEXT I<br />
9844 PLOT x,y + 1: PLOT x + 4,y t<br />
.<br />
1<br />
9986 W = X + J:Z - Y t 1: PLOT w,<br />
z<br />
NEXT .J<br />
NEXI I<br />
F
Figure 11<br />
0<br />
4<br />
0<br />
4<br />
15<br />
0<br />
r--<br />
o I<br />
I<br />
I<br />
I<br />
I<br />
I<br />
I<br />
I<br />
I<br />
g L----<br />
11<br />
.--,<br />
•, I<br />
' I<br />
'<br />
I<br />
I<br />
I<br />
I<br />
I<br />
I<br />
I<br />
I<br />
____ J<br />
0<br />
25<br />
r---<br />
1<br />
I<br />
I<br />
I<br />
I<br />
I<br />
L------'<br />
.... ----------,<br />
I<br />
I<br />
I<br />
I<br />
I<br />
I<br />
I<br />
I<br />
I<br />
L..-------<br />
I<br />
___ J<br />
0<br />
r---<br />
o I<br />
I<br />
I<br />
I I<br />
I<br />
I<br />
I<br />
I<br />
I<br />
9 L---- -<br />
0<br />
r----<br />
o I ,<br />
I<br />
I<br />
I<br />
I I<br />
I<br />
I<br />
I<br />
'<br />
9 I<br />
L-----------.J<br />
0<br />
11<br />
48 Chapter 5
It will also be pointed out here that the subroutines shown in<br />
the example listing were created in a manner <strong>to</strong> maximize clarity<br />
of p<strong>res</strong>entation. Each b<strong>lo</strong>ck is defined by specifying each sec<strong>to</strong>r<br />
that should be turned on (illuminated) all the way across each row.<br />
This was done on a row-by-row basis. Naturally, this method is very<br />
wasteful of memory. All of the subroutines could be considerably<br />
comp<strong>res</strong>sed by creating other subroutines that performed repetitive<br />
functions. By all means do such comp<strong>res</strong>sion if memory is at a premium<br />
in your system. It is also possible <strong>to</strong> comp<strong>res</strong>s some of the<br />
subroutines by using different methods of specifying the sec<strong>to</strong>rs <strong>to</strong><br />
be illuminated, such as capitalizing on nested subroutines.<br />
TRS-80 users will probably want <strong>to</strong> double the number of horizontal<br />
points used <strong>to</strong> define a symbol. (By the way, if you want <strong>to</strong><br />
sound like a real pro, you can refer <strong>to</strong> an individual <strong>lo</strong>w <strong>res</strong>olution<br />
point or sec<strong>to</strong>r as a pixel. For some reason the nomenclature reminds<br />
me of knitting so I rarely use it. However, some people who are<br />
really in<strong>to</strong> <strong>graphics</strong> use it all the time, so remember it, at least you<br />
will know what they are talking about!) Don't forget also <strong>to</strong> substitute<br />
the SET statement in place of the PLOT statement shown in<br />
the listing for a TRS-80. You also won't need the COLOR statements<br />
shown in the listing on a TRS-80.<br />
If you want <strong>to</strong> use the card drawing subroutines on a PET,<br />
things will be just a little more complicated as you now know. A<br />
statement shown in Listing 9 as PLOT X + l ,Y +2 would translate <strong>to</strong><br />
POKE A+(X+ l)+(Y +2)*40,Z for the PET, where A is the starting<br />
add<strong>res</strong>s of the display buffer (32768) and Z is the code for the<br />
graphic symbol <strong>to</strong> be displayed. It is a bit more work <strong>to</strong> keep this<br />
formula straight as you convert the subroutines of Listing 9 for use<br />
on a PET, but it will go pretty smoothly once you get the knack of<br />
it. It is a good idea <strong>to</strong> check out each subroutine as it is entered <strong>to</strong><br />
catch any boo-boos right away. Just initialize X and Y <strong>to</strong> some<br />
suitable values (such as 0,0 or 15,15 if you want things more <strong>to</strong>wards<br />
the center of the screen) and call the subroutine you want <strong>to</strong> test.<br />
Use Figure 11 as a comparison <strong>to</strong> see that you get each card rank.and<br />
suit symbol displayed correctly.<br />
Once you have them checked out, be sure and save a couple of<br />
copies of the subroutines on your mass s<strong>to</strong>rage device. Then you will<br />
be all set <strong>to</strong> conjure up your own card playing games with genuine<br />
card drawing <strong>graphics</strong>. It makes a big difference in the imp<strong>res</strong>sion<br />
your computer will make on friends when the card in play is actually<br />
drawn and displayed by the computer, rather than just having a<br />
printed message <strong>to</strong> the effect of ''you drew the Ace of Clubs."<br />
" ..• you can refer <strong>to</strong> an individual<br />
<strong>lo</strong>w <strong>res</strong>olution<br />
point or sec<strong>to</strong>r as a pixel."<br />
A Graphics Library 49
Are You Ready for<br />
Some C<strong>lo</strong>wning Around?<br />
Figure 12 shows the layout of a figure that, for lack of better words<br />
I have called a c<strong>lo</strong>wn. I shall use the figure <strong>to</strong> <strong>intro</strong>duce the subject<br />
of simple animation and a few other novelties. Note that Figure 12<br />
shows several parts of the c<strong>lo</strong>wn identified by a different type of<br />
Figure 12<br />
11111111112222222222<br />
0123456789012345 67890123456789<br />
0<br />
2<br />
t--+--+--+--+---+---+----il--+--<br />
3<br />
t--+--+--+--+---+---+----il--+--<br />
4<br />
t--+--+--+--+---+---+----il--+--<br />
5<br />
t--+--+--+--+---+---+----il--+--<br />
6<br />
t--+--+--+--+---+---+----il--+--<br />
7 t--+--+--+--+---+---+----il--+--<br />
8 t--+--+--+--+---+---+----il--+--<br />
9 t--+--+--+--+---+---+----il--+-+--<br />
10<br />
t--+--+--+--+---+---+----il--+-+--+--<br />
11<br />
t--+--+--+--+---+---+--ll--+-+--1----1--<br />
12<br />
13<br />
14<br />
15<br />
16<br />
17<br />
18<br />
t--+--+--+--+---+---+----it--;---t--<br />
19<br />
1---1--1--+--+---+---+--ll--+-+--<br />
20<br />
t--+---+--+--+---+---+---!~+-+---<br />
21<br />
t--+---+--+--+---+---+---!~+-+---<br />
221--+---+--+--+---+---+---l~+-+--<br />
23<br />
t--+---+--i--+---+---+---l~+--+--1<br />
24<br />
t--+---+--+--+---+---+---!~+-+-t-<br />
251---+--+--1---+---+---+--I~+---<br />
26<br />
l---+--+--i--+---+---+--l~+---<br />
27<br />
t--+---+--+--+---+---+---l~+--<br />
28 l---+-+--+--+--l---+---+---1--<br />
29<br />
1---1--+--+--+--+--+--I~<br />
30<br />
1---1--+--+--+--+--+--I~<br />
31<br />
1---1--+--+--+--+--+--I~<br />
32<br />
t--+---+--+--+---+---+---l~<br />
33 t--+---t--+--+--+--<br />
34 l---+--+--l---+--<br />
35 .___..._...__.....__......__<br />
50 Chapter 5
shading. These parts include the center part of the mouth, the eyes,<br />
and a "finger" on each hand. These parts of the character are not<br />
drawn by the main subroutines. They are filled in by small subroutines<br />
that will serve <strong>to</strong> animate the diagram.<br />
Listing 10 provides the software for the c<strong>lo</strong>wn. The main c<strong>lo</strong>wndrawing<br />
subroutine starts at line 9000. Because the c<strong>lo</strong>wn takes up<br />
almost all the vertical space on the display of a typical <strong>lo</strong>w <strong>res</strong>olution<br />
system such as an APPLE-II, the subroutine does not provide for<br />
varying the reference point a<strong>lo</strong>ng the Y axis. (Indeed, if you want <strong>to</strong><br />
draw the c<strong>lo</strong>wn on a PET unit, you will have <strong>to</strong> be satisfied with<br />
the upper half of the figure! Note, however, that I did not attempt<br />
<strong>to</strong> animate anything be<strong>lo</strong>w the waist, so you PET users will be able<br />
<strong>to</strong> save yourself some work here and still get all the benefits of the<br />
discussion.)<br />
10 GR<br />
15 GOSUB 9980<br />
20 COLOR=?<br />
30 GOSUB 9000<br />
40 Y=9tA=5<br />
50 FOR M=1 TO RND (5)<br />
60 GOSUB 9600<br />
70 S= RND C100>t100:T=40: GOSUB<br />
9990<br />
80 GOSUB 9650<br />
90 S= RND C60>+20:T=40: GOSUB<br />
9990<br />
100 GOSUB 9600<br />
110 S= RND C 100 >+100 :T=40: GOSUB<br />
9990<br />
120 GOSUB 9650<br />
130 S= RND C60>t20iT=40: GOSUB<br />
9990<br />
140 NEXT M<br />
150 FOR 1=1 TO 500: NEXT l<br />
160 Y=4<br />
170 GOSUB 9700<br />
180 S=60tT=20: GOSUB 9990<br />
190 GOSUB 9725<br />
200 FOR 1=1 TO 200: NEXT l<br />
210 GOSUB 9750<br />
220 GOSUB 9990<br />
230 GOSUB 9775<br />
240 FOR 1=1 TO 500: NEXT I<br />
250 Y=15<br />
260 GOSUB 9800<br />
270 S=240tT=240t GOSUB 9990<br />
280 GOSUB 9825<br />
290 FOR I=l TO 500: NEXT I<br />
Listing 10<br />
A Graphics Library 51
300 GOSUB 9850<br />
310 GOSUB 9990<br />
32(; GOSUB 9875<br />
330 FOR I=1 TO RND : NEXT<br />
r<br />
340 GOTO 40<br />
900(> Y=1 :A=5<br />
9010 FOR X=At12 TO At17: PLOT x,<br />
Y: NEXT X<br />
9020 Y=Y+1: PLOT A+11,y: PLOT At<br />
1a,y<br />
9030 Y=Ytl: PLOT A+10,y: PLOT At<br />
12,y: PLOT At171Y: PLOT At19<br />
,y<br />
9040 Y=Y+l: PLOT A+9,y: PLOT At11<br />
,y: PLOT A+13,y: PLOT At16'<br />
Y: PLOT At1a,y: PLOT A+20,y<br />
9050 Y=Ytlt PLOT A+9,Y: PLOT At12<br />
,y: PLOT A+17,y: PLOT At20'<br />
y<br />
....•<br />
9060 Y=Yt1t PLOT Af9,y: PLOT At14<br />
,y: PLOT A+15,Y: PLOT At20,<br />
y<br />
9070 Y=Ytlt PLOT A+9,y: PLOT At20<br />
,y<br />
9080 Y=Y+1: PLOT A+9,y<br />
9090 FOR X=At12 TO At17: PLOT x,<br />
Y: NEXT X<br />
9100 PLOT A+20,y<br />
9110 Y=Ytl: PLOT A+9,y: PLOT At12<br />
,y: PLOT A+17,y: PLOT A+20,<br />
y<br />
9120 Y=Yt1: PLOT A+10,y<br />
9130 FOR X=At12 TO At17: PLOT Xr<br />
Y: NEXT X<br />
9140 PLOT At19,Y<br />
9150 Y=Yt1t PLOT At11,y: PLOT At<br />
19,y<br />
9160 Y=Ytlt FOR X=At12 TO At17: PLOT<br />
x,y: NEXT X<br />
9170 Y=Y+1: FOR X=At12 TO At17: PLOT<br />
x,y: NEXT X<br />
9180 Y=Yt1: PLOT At2rY<br />
9190 FOR X=AW TO At22: PLOJ x,y:<br />
NEXT X<br />
9200 PLOT At27rY<br />
9210 Y=Y+1: FOR X=At1 TO At28: PLOT<br />
x,v: NEXT X<br />
9220 Y=Y+1: FOR X=Atl TO At28: PLOT<br />
x,y: NEXT X<br />
9230 Y=Ytlt FOR X=At1 TO At6: PLOT<br />
x,y: NEXT X<br />
52 Chapter 5
9240 FOR X=At10 TO At19: PLOT Xr<br />
Y: NEXT X<br />
9250 FOR X=At23 TO At28: PLOT Xr<br />
Y: NEXT X<br />
9260 Y=Yt1: PLOT A+1,y: PLOT At2<br />
,y<br />
9270 FOR X=At10 TO At19: PLOT Xr<br />
Y: NEXT X<br />
9280 PLOT A+27,y: PLOT.At2BrY<br />
9290 FOR Y=Yt1 TO Yt7<br />
9300 FOR X=At10 TO At19: PLOT Xr<br />
Y: NEXT X<br />
9310 NEXT Y<br />
9320 FOR X=At10 TO At13: PLOT Xr<br />
n NEXT X<br />
9330 FOR X=At16 TO At19: PLOT.Xr<br />
Y: NEXT X<br />
9340 Y=Yt1: FOR X=At9 TO At13: PLOT<br />
x,y: NEXT X<br />
9350 FOR X=At16 TO At20t PLOT Xr<br />
Y: NEXT X<br />
9360 Y=Ytlt FOR X=At9 TO At12: PLOT<br />
x, Y: NEXT X<br />
9370 FOR X=At17 TO At20t PLOT Xr<br />
Y: NEXT X<br />
9380 Y=Y+1: FOR X=At9 TO A+12: PLOT<br />
Xr V: NEXT X<br />
9390 FOR X=At17 TO At20: PLOT Xr<br />
Y: NEXT X<br />
9400 Y=Yt1: FOR X=At9 TO A+12: PLOT<br />
x, V: NEXT X<br />
9410 FOR X=At17 TO At20: PLOT Xr<br />
Y: NEXT X<br />
9420 Y=Yt1: FOR X=At8 TO A+12: PLOT<br />
XrY: NEXT X<br />
9430 FOR X=At17 TO At21: PLOT X1<br />
Y: NEXT X<br />
9440 Y=Y+1: FOR X=At8 TO At11: PLOT<br />
X1Y: NEXT X<br />
9450 FOR X=At18 TO At21: PLOT Xr<br />
Y: NEXT X<br />
9460 Y=Yt1: FOR X=AtB TO At11t PLOT<br />
x,y: NEXT X<br />
9470 FOR X=At18 TO At21: PLOT Xr<br />
Y: NEXT X<br />
9480 Y=Y+1: PLOT At9 ~: PLOT At10<br />
,y: PLOT At191Y: PLOT At20r<br />
y<br />
9490 Y=Y+l: FOR X=At6 TO At11: PLOT<br />
Xr V: NEXT X<br />
9500 FOR X=At18 TO At23: PLOT Xr<br />
A Graphics Library 53
Y: NEXT X<br />
9510 Y=Yt1: FOR X=At5 TO At11: PLOT<br />
x,y: NEXT X<br />
9520 FOR X=At18 TO At24: PLOT Xr<br />
Y: NEXT X<br />
9530 RETURN<br />
9600 COLOR=11: REM COLOR STATEMENT<br />
FOR COLOR SYSTEMS<br />
9610 FOR X=At13 TO At16: PLOT x,•<br />
Y: NEXT X<br />
9620 RETURN<br />
9650 COLOR=O: REM COLOR STATEMENT F<br />
OR COLOR SYSTEMS<br />
9660 FOR X=At13 TO At16: PLOT x,<br />
Y: NEXT X<br />
9670 RETURN<br />
9700 COLOR=6: REM COLOR STATEMENT F<br />
OR COLOR SYSTEMS<br />
9705 PLOT At12,y<br />
971 (> RETURN<br />
9725 COLOR=O: REM COLOR STATEMENT F<br />
OR COLOR SYSTEMS<br />
9730 PLOT A+12,y<br />
9735 RETURN<br />
9750 COLOR=6: REM COLOR STATEMENT F<br />
OR COLOR SYSTEMS<br />
9755 PLOT A+17,y<br />
9760 RETURN<br />
9775 COLOR=O: REM COLOR STATEMENT F<br />
OR COLOR SYSTEMS<br />
978(i PLOT A+17, Y<br />
9785 RETURN<br />
9800 COLOR=9t REM COLOR STATEMENT F<br />
OR COLOR SYSTEMS<br />
9805 PLOT A,Y<br />
98Hl RETUF~N<br />
9815 PRINT s,T<br />
9820 GOSUB 9990<br />
9825 COLOR=O: REM COLOR STATEMENT F<br />
OR COLOR SYSTEMS<br />
9830 PLOT A,Y<br />
9835 RETURN<br />
9840 NEXT S<br />
9850 COLOR=9: REM COLOR STATEMENT F<br />
OR COLOR SYSTEMS<br />
9855 PLOT A+29,y<br />
9860 RETURN<br />
9875 COLOR=O: REM COLOR STATEMENT F<br />
OR COLOR SYSTEMS<br />
9880 PLOT At291Y<br />
9885 RETURN<br />
9980 POKE 2,173: POKE 3,49: POKE<br />
54 Chapter 5
4,192: POKE 5,136: POKE 6,208<br />
: POKE 7,4: POKE a,19a: POKE<br />
9,1: POKE 10r240<br />
9985 POKE 11,at POKE 12,202: POKE<br />
13,2oa: POKE 14r246: POKE 15<br />
,166: POKE 16,o: POKE 17r76<br />
: POKE 18r2t POKE 19)0: POKE<br />
20,96: RETURN<br />
9990 POKE o,s: POKE 1rTt CALL 2:<br />
RETURN<br />
9999 END<br />
When the subroutine starting at line 9000 is executed, the<br />
c<strong>lo</strong>wn will be drawn on the screen except for the center of the<br />
eyes, the middle of the mouth, and the index fingers on either hand.<br />
Note that you can vary the horizontal position of the figure by initializing<br />
the value of the variable A. You TRS-80 owners will probably<br />
want <strong>to</strong> double the number of sec<strong>to</strong>rs used a<strong>lo</strong>ng the horizontal<br />
axis <strong>to</strong> get a figure proportionally equivalent <strong>to</strong> that shown.<br />
Now the fun begins. The subroutine that starts at line 9600 causes<br />
the middle portion of the c<strong>lo</strong>wn's mouth <strong>to</strong> be filled in. Another subroutine<br />
at line 9650 <strong>res</strong><strong>to</strong><strong>res</strong> the mouth <strong>to</strong> the "open" position. By<br />
alternating the two subroutines, the c<strong>lo</strong>wn can be made <strong>to</strong> appear as<br />
though it is opening and c<strong>lo</strong>sing its mouth!<br />
Similarly, a simple subroutine at line 9700 causes the left eye<br />
<strong>to</strong> c<strong>lo</strong>se. The subroutine at 9725 causes the left eye <strong>to</strong> open back<br />
up. Execute the one at 9700, provide a slight delay, then execute<br />
the one at 9725 and the eye will appear <strong>to</strong> wink.<br />
Subroutines at 9750 and 9775 can be invoked <strong>to</strong> cause the right<br />
eye <strong>to</strong> wink, <strong>to</strong>o!<br />
You can call on the subroutine that starts at line 9800 <strong>to</strong> have<br />
a simulated index finger appear on the c<strong>lo</strong>wn's left hand. The subroutine<br />
at line 9825 will make that finger disappear. Similarly, routines<br />
at 9850 and 9875 control the action of such a finger on the righthand<br />
side of the finger.<br />
So now, by judiciously calling on the "action" subroutines, you<br />
can have the c<strong>lo</strong>wn open and shut its mouth, wink either or both<br />
eyes, and point <strong>to</strong> the right or the left. Can you think of ways <strong>to</strong><br />
combine such a figure with a game or quiz <strong>to</strong> amuse people? I assure<br />
you, newcomers <strong>to</strong> computers get quite a kick out of seeing<br />
such a performance.<br />
Animation Makes It Look<br />
Alive - Well, Almost!<br />
" ... by judiciously calling<br />
on the 'action' subroutines,<br />
you can have the c<strong>lo</strong>wn<br />
open and shut its mouth,<br />
wink either or both eyes,<br />
and point <strong>to</strong> the right or<br />
the left."<br />
A Graphics Library 55
Now Add Some Sound<br />
People expect something that opens and c<strong>lo</strong>ses its mouth <strong>to</strong> make<br />
some noise. Well, you can synchronize some other simple subroutines<br />
with the animation subroutines just discussed so that the c<strong>lo</strong>wn<br />
beeps and buzzes as it moves its mouth. It's good for a laugh from<br />
most people!<br />
If you have an APPLE-II computer, you can use the noise-making<br />
subroutines shown in Listing 10. The subroutine starting at line<br />
9980 sets up the basic sound generating program that is recommended<br />
in the APPLE II Reference Manual, published by APPLE<br />
Computer Incorporated (January 1978 edition) that comes with<br />
the basic APPLE-IT machine. The subroutine at 9990 sets up the<br />
parameter values for frequency and duration of the <strong>to</strong>ne that are<br />
passed <strong>to</strong> it and activates the sound unit.<br />
Lines 10 through 340 in Listing 10 tie <strong>to</strong>gether all the various<br />
suhroutiiles mentioned <strong>to</strong> provide a demonstration sequence of animation<br />
complete with sound effects. The use of some random numbers<br />
provides for a more inte<strong>res</strong>ting demonstration. This is done by<br />
varying the number of times that the c<strong>lo</strong>wn opens and c<strong>lo</strong>ses its<br />
mouth during each cycle. Random numbers also vary the pitch at<br />
which the c<strong>lo</strong>wn emits buzzes and beeps. Study lines 10 through 340<br />
so that you can see how the various subroutines are sequenced <strong>to</strong><br />
provide the animation and synchronized noises. Remember, the sequence<br />
was chosen for demonstration purposes. Feel free <strong>to</strong> make<br />
your own variations. All I am trying <strong>to</strong> do here is illustrate concepts.<br />
Once you grasp them, you have the freedom <strong>to</strong> run off and create<br />
funny acts of your own!<br />
They All Can Do It Oh yes, almost any popular computer can make beeps and buzzes<br />
even if it does not have a circuit for that specific purpose built in<strong>to</strong><br />
it. If it is able <strong>to</strong> s<strong>to</strong>re data on an external magnetic tape device,·<br />
you can probably jury-rig it <strong>to</strong> make entertaining burbles. You certainly<br />
can do this with a Radio Shack TRS-80 or Commodore PET.<br />
Just insert a short little tape-write subroutine in place of the noise<br />
generating subroutine I sh,owed at line 9990 in Listing 10. If you<br />
want <strong>to</strong> get really fancy, create two or three such subroutines: one<br />
that writes, for instance, a series of ones <strong>to</strong> the tape unit; another<br />
that writes a series of zeros; and still another that writes alternating<br />
ones and zeros. You will then be able <strong>to</strong> select one of three different<br />
<strong>to</strong>nes or buzzes.<br />
Now refer <strong>to</strong> Figure 13. It shows a b<strong>lo</strong>ck diagram of how you<br />
can jury-rig your tape recorder system <strong>to</strong> hear the sounds you create<br />
with your tape-write subroutines. Unless you have a small speaker/<br />
56<br />
Chapter 5
amplifier, you will have <strong>to</strong> be satisfied with listening <strong>to</strong> the sounds<br />
using an earphone. However, the electronic technician types among<br />
you will undoubtably have little difficulty hooking up a small speaker/<br />
amplifier so that your friends will be able <strong>to</strong> hear things through a<br />
speaker. (Frankly, you might be wise <strong>to</strong> keep the earphone arrangement<br />
available. For some reason, other members of your household<br />
might not appreciate your computer emitting burps and beeps at the<br />
wee hours of the night. Aren't those just the times when you want <strong>to</strong><br />
run some of those fun-and-game programs that emit all those wierd<br />
noises?)<br />
The arrangement shown in Figure 13 re9_ui<strong>res</strong> that you put the<br />
tape recorder in the "record" mode without having a tape cassette<br />
unit installed. Most cassette players have a "record <strong>lo</strong>ckout" switch<br />
that normally prevents the tape recorder from going in<strong>to</strong> the record<br />
mode unless an "unprotected" cassette is installed in the machine.<br />
An unprotected cassette is one that has not had its recording tab<br />
knocked out. With the tab in place, the cassette will push against<br />
the record <strong>lo</strong>ckout switch when it is installed in the player.<br />
Figure 13<br />
YOUR<br />
COMPUTER<br />
+<br />
OR OPTIONAL<br />
SPEAKER/AMPLIFIER<br />
f<br />
___________ J<br />
,,<br />
I<br />
TAPE OUTPUT<br />
FROM YOUR<br />
COMPUTER<br />
MICROPHONE<br />
OR "AUX"<br />
INPUT<br />
-n--NO CASSETTE IN UNIT<br />
--- SEE TEXT & FIGURE 14<br />
TAPE UNIT IN<br />
"RECORD"<br />
MODE<br />
A Graphics Library 57
Figure 14 shows the typical <strong>lo</strong>cation of the record <strong>lo</strong>ck-out<br />
switch on a tape cassette player. You can make the player think it<br />
has an unprotected cassette installed by taping the switch c<strong>lo</strong>sed<br />
(as though a cassette were pushing against it) or using a plastic pen<br />
or similar object lightly wedged in<strong>to</strong> the unit <strong>to</strong> keep the switch activated.<br />
With the switch activated, you should then be able <strong>to</strong> place<br />
the recorder in the normal record mode. When in this mode, most<br />
players will couple whatever is fed in<strong>to</strong> the microphone or auxiliary<br />
input. <strong>to</strong> the earphone jack so that moni<strong>to</strong>ring can take place.<br />
It is this feature that you wish <strong>to</strong> take advantage of in order <strong>to</strong> hear<br />
what your computer sends out <strong>to</strong> the tape unit. Since the sounds<br />
are for entertainment only, there is no need <strong>to</strong> waste good tape<br />
by actually recording the nonsense sounds.<br />
This simple arrangement provides a quick and inexpensive way<br />
for you <strong>to</strong> liven up animated performances as they appear on your<br />
display screen.<br />
An Animated Game<br />
of Football<br />
Now that you have a fundamental background in how <strong>to</strong> create and<br />
position graphic symbols, it is time <strong>to</strong> tie all that you have learned<br />
<strong>to</strong>gether as a final exercise. In doing so you will create a game that<br />
is graphically entertaining.<br />
The game is called football. The object of the game is <strong>to</strong> guide a<br />
quarterback through a field of defenders <strong>to</strong> gain yardage. Gain<br />
enough yards and you score a goal. Or, in certain situations you can<br />
Figure 14<br />
RECORD<br />
LOCK-OUT<br />
SWITCH<br />
TAPE CASSETTE TRANSPORT<br />
.....<br />
I .l<br />
.-.v<br />
0 0<br />
58 Chapter 5
try <strong>to</strong> kick a field goal. Of course, all of the running and defending is<br />
done on your computer's video screen. But, you get <strong>to</strong> control the<br />
direction of the quarterback's movement. (The computer gets <strong>to</strong> control<br />
the defense!)<br />
It should be remembered here that the version I am p<strong>res</strong>enting<br />
is merely a guideline. The listing shown is for an APPLE-IT system.<br />
However, by fol<strong>lo</strong>wing the discussion and referring <strong>to</strong> the listing,<br />
you can gain the knowledge <strong>to</strong> modify the program <strong>to</strong> run on a PET,<br />
TRS-80 or other type of <strong>lo</strong>w <strong>res</strong>olution display system. Don't be<br />
afraid <strong>to</strong> try your own ideas. Change the graphic symbols if you like.<br />
Change the way the game is controlled or played if you want <strong>to</strong>!<br />
After all, the whole point of a computer is that it provides immense<br />
freedom of choice and creativity. Exercise some of that capability<br />
<strong>to</strong> suit your own tastes!<br />
Figure 15<br />
A Graphics Library 59
The game I am p<strong>res</strong>enting takes place on a grid consisting of a<br />
9 by 5 matrix as illustrated in Figure 15. Each box in the matrix<br />
is made up of 18 pixels arranged in a 3 by 6 fashion. Counting<br />
the grid lines, that are all one sec<strong>to</strong>r wide, the entire grid is defined<br />
by an area that is 37 units wide by 36 units high. This fits comfortably<br />
with some room <strong>to</strong> spare on an APPLE-II display. It will<br />
not fit in the vertical direction on a PET display. I suggest that you<br />
reduce the number of vertical boxes <strong>to</strong> three if you create this program<br />
for a PET system. On a TRS-80, you will probably want <strong>to</strong><br />
increase the number of horizontal sec<strong>to</strong>rs <strong>to</strong> a box. If you do not,<br />
the animated characters are going <strong>to</strong> <strong>lo</strong>ok rather skinny on the display!<br />
The Screen Cast<br />
The stars of our football game are tiny animated characters as depicted<br />
in Figure 16. There are seven basic configurations in which<br />
the players can appear plus a blank or "no character" symbol. The<br />
latter is needed <strong>to</strong> erase the previous position of a displayed player.<br />
Notice that ,some of the characters are drawn as pairs. Characters 1<br />
Figure 16<br />
0 3 5 7<br />
7800 *6000 *6400 6800 *7200<br />
2 4 6<br />
6200 *6600 *7000<br />
60 Chapter 5
and 2 in Figure 16 will be paired <strong>to</strong>gether in an alternating fashion<br />
<strong>to</strong> rep<strong>res</strong>ent a player that is opening and c<strong>lo</strong>sing its mouth. Characters<br />
number three and four can be alternated <strong>to</strong> show an animated<br />
version of a player "running." You might not think so from seeing<br />
characters number 5 and 6 in Figure 16, but they can be alternately<br />
displayed <strong>to</strong> symbolize a player punting the football. Figure number<br />
7 rep<strong>res</strong>ents a player that has been flattened after being tackled!<br />
(Come on! Use your imagination. You have <strong>to</strong> use a little if you want<br />
<strong>to</strong> utilize <strong>lo</strong>w <strong>res</strong>olution <strong>graphics</strong> effectively. Don't judge the characters<br />
until you see them in action on a video screen!)<br />
Figure 17 illustrates how the characters might typically appear<br />
in a "frozen frame" shot at the start of a game. For the APPLE-II<br />
version there are 11 defensemen lined up as shown. If you only have<br />
Figure 17<br />
i<br />
l<br />
t )<br />
( 8 7 6 5 4 3<br />
2<br />
g---,+<br />
A Graphics Library 61
a 9 by 3 box matrix, such as might be used on a PET, I would<br />
recommend you reduce the number of defensemen <strong>to</strong> something<br />
in the order of five or six. The defensemen are all au<strong>to</strong>matically<br />
controlled by the computer. They will at all times advance upon and<br />
attempt <strong>to</strong> contact or "tackle" the quarterback. The quarterback is<br />
shown in Figure 17 all a<strong>lo</strong>ne on the right end of the grid. Different<br />
co<strong>lo</strong>rs are used <strong>to</strong> distinguish between the quarterback and the defensive<br />
players on an APPLE-II system. For black and white systems<br />
you can change the figure used <strong>to</strong> rep<strong>res</strong>ent the quarterback.<br />
Or, on a system such as the PET, you can construct the quarterback<br />
using different graphic symbols than that used for the defensemen.<br />
The arrows eminating from the quarterback in Figure 17 show<br />
the possible directions of movement afforded <strong>to</strong> the quarterback.<br />
The direction of movement is always under the control of a person<br />
serving as the coach of the offensive team. Note, however, that the<br />
quarterback can never run backwards. While evasive maneuvers<br />
can be made up and down on the screen (across the playing field),<br />
the <strong>lo</strong>yal quarterback can only attempt <strong>to</strong> gain yardage, not fritter<br />
it away! (For most people, attempting <strong>to</strong> gain yardage will be enough<br />
of a challenge. It is not as easy as it might <strong>lo</strong>ok at first glance.)<br />
Each time the quarterback is able <strong>to</strong> advance a square without<br />
contacting or being contacted by a defenseman, a ''yard" is gained.<br />
If the quarterback gets all the way across the grid, it is advanced,<br />
on the next move, back <strong>to</strong> the right side. This is depicted by the<br />
numbers shown at the bot<strong>to</strong>m of the diagram in Figure 17. (These<br />
numbers and the arrows surrounding the quarterback are not produced<br />
on the display. They are provided for illustrative purposes<br />
only in Figure 17 .)<br />
Setting the Stage and<br />
the Cast<br />
Listing 11 contains the program for the football game. The program<br />
is structured as a number of subroutines that are in turn tied <strong>to</strong>gether<br />
by several control routines.<br />
The playing grid is drawn by the subroutine that starts at line<br />
9000 in the listing. Nested FOR-NEXT <strong>lo</strong>ops are used <strong>to</strong> draw all the<br />
horizontal lines of the grid and then all of the vertical lines. The grid<br />
lines are drawn in white for an APPLE-II co<strong>lo</strong>r system. On a black<br />
and white system, such as a TRS-80, you might not want <strong>to</strong> actually<br />
draw the playing grid. This is because a grid that is not distinguished<br />
by a. different co<strong>lo</strong>r from the graphic symbols may not be as pleasing<br />
<strong>to</strong> some as simply having an implied grid. Try it both ways, with<br />
and without a grid, <strong>to</strong> see which version you and your friends like<br />
better. Or, you can make the grid lines appear different by using a<br />
62 Chapter 5
different kind of character, such as an asterisk. This is the technique<br />
<strong>to</strong> use on a PET. However, you can also use it <strong>to</strong> POKE a unique grid<br />
on the TRS-80 or similar systems. Again, don't be afraid <strong>to</strong> experiment.<br />
Take a <strong>lo</strong>ok at some different methods; then use what you<br />
like best.<br />
The cast of characters used in the game are defined in a series<br />
of .subroutines starting at line 6000. The start of each character is<br />
indicated by the line number given be<strong>lo</strong>w each in Figure 16. Notice<br />
also that some line numbers in Figure 16 are preceded by an aster-<br />
. 4<br />
isk. This indicates that some sound generation is associated with<br />
that configuration of the character.<br />
Refer <strong>to</strong> Listing 11, line 6000 <strong>to</strong> study the deve<strong>lo</strong>pment of a<br />
typical character. The first few lines in each subroutine have been<br />
left available <strong>to</strong> set the type of symbol one might want <strong>to</strong> use or<br />
define the co<strong>lo</strong>r in a co<strong>lo</strong>r system. Co<strong>lo</strong>r definition for an APPLE-II<br />
has been done in line 6010 of the listing. The actual creation of character<br />
type number one (as designated in Figure 16) begins at line<br />
6050.<br />
1 GR<br />
10 p 80<br />
20 G 10<br />
30 v 1<br />
40 T = 900<br />
50 GOSUB 1900<br />
100 G = 1<br />
200 IF G = 0 THEN G = 1: GOTO 22<br />
0<br />
210 IF G = 1 THEN G = 0<br />
22(l D = 0 :G = 10<br />
300<br />
1000<br />
1010<br />
GOSUB 1900<br />
FOR [I = 1 TO 4<br />
GOSUB 2000<br />
1020 P = P - u: IF P < = 0 THEN<br />
B = 7: GOTO 1400<br />
1030 Q = G - u: IF G < = 0 THEN<br />
D = o:a = 10: GOSUB 1700<br />
1040 IF T < = 0 THEN T = O: GOTO<br />
180C•<br />
1060 IF D = 3 THEN PRINT : PRINT<br />
"YOU NEED "mp YARDS FOR A<br />
FIRST DOWN!": PRINT : PRINT<br />
11<br />
DO YOU WANT TO TRY A KICK•;<br />
: INPUT Wf: IF LEFT$ < W$rl ><br />
= II Y" THEN 1500<br />
1070 IF D < 4 THEN GOSUB 1900<br />
1080 NEXT D<br />
1090 P = 100 - P: GOTO 200<br />
Listing 11<br />
A Graphics Library 63
1400 IF G = 0 THEN S2 = S2 + B<br />
1410 IF G = 1 THEN S1 = 51 + B<br />
1420 p = ao: GOTO 200<br />
1500 GOSUB 3000<br />
1530 FOR I = 1 TO 500<br />
154(> GOSUB 7000<br />
1550 FOR I = 1 TO 100<br />
1560 GOSUB 6800<br />
1570 U = INT< RND.Cl> * 55 + 1><br />
1580 P = .P - U: IF P < = 0 THEN<br />
I= RND Cl>: IF I> 0.5 THEN<br />
PRINT : PRINT : PRINT "HURR<br />
AH! YOU KICKED A FIELD GOAL!<br />
11 : PRINT tB = 3: GOTO 1400<br />
1590 IF P < = 0 THEN P = SO: GOTO<br />
200 .<br />
1600 P = 100 - P: GOTO 200<br />
1700 PRINT : PRINT 11 YOU PICKED U<br />
p A FIRST DOWN. II<br />
1710 PRINT : PRINT "CONGRATULATI<br />
ONS -- YOU BIG OX ! !"<br />
1720 FOR J = 1 TO 5000: NEXT J<br />
1730 RETURN<br />
1800 V = V + 1: IF V > 4 THEN V =<br />
4: GOTO 1840<br />
1810 T = 900<br />
1820 IF v = 3 THEN G = l:P = 00:<br />
G = 10:D = 0<br />
1830 GOTO 3(i0<br />
1840 GR<br />
1850 PRINT : PRINT : PRINT "IT'S<br />
ALL OVER - EXCEPT FOR THE S<br />
HOUHNG ! II: FOR I = 1 TO 2000<br />
: NEXT I: GOSUB 1900: GR<br />
1860 PRINT : PRINT : PRINT 11 WANT<br />
A NEW GAME 11 ;: INPUT W$: IF<br />
LEFT$ ( W$, 1 > = "Y" THEN GOTO<br />
10<br />
1870 PRINT : PRINT : PRINT : PRINT<br />
: GOTO 9999<br />
1900 PRINT " DOWN: 11 ;D + lJ" MA<br />
RKER: n;p;" YARDS TO GO: n;<br />
Q<br />
1910 PRINT " TIME REMAINING: u;<br />
T;"<br />
QUARTER: "PV<br />
1920 PRINT "BLUE TEAM HAS: 0 ;s1;<br />
" YELLOW TEAM HAS: ";s2<br />
1930 FOR J = 1 TO 2000: NEXT J<br />
1940 RETURN<br />
2000 FOR M = v TO 8<br />
2010 FOR N = 0 TO 4<br />
2()20 ACMrN) = 0<br />
~~~8 ~~~f ~<br />
2050 AC 0, 2 } = 1<br />
~898 *H:~~ ; l<br />
2080 AC 3, U = 1<br />
2090 A(3,2) = 1<br />
2100 A(3,3) = 1<br />
2110 AC 5,0 > = 1<br />
2120 AC 5, 1> = 1<br />
2130 AC 5, 2 ) = 1<br />
2140 A(S,3} = 1<br />
215() AC 5,4) = 1<br />
2200 GOSUB 9000<br />
2210 X = 32:Y = 14: IF G = 0 THEN<br />
C = 13: GOTO 2220<br />
2215 c = 2<br />
2220 GOSUB 6200<br />
2230 IF G = 0 THEN C = 2: GOTO 2<br />
240<br />
2235 c = 13<br />
2240 GOSUB 9200<br />
2250 M = o:N = O:U = 0<br />
2260 X = 32:Y = 14:x2 = 32:Y2 = 1<br />
4: IF G = 0 THEN C = 13: GOTO<br />
2270<br />
2265 c = 2<br />
227(> GOSUB 8000<br />
2280 X = X2iY = Y2: IF G = 0 THEN<br />
C = 13! GOTO 2290<br />
2285 c = 2<br />
2290 GOSUB 8000<br />
2295 IF F = 1 THEN GOTO 2330<br />
2300 GOSUB 9500<br />
2310 IF F = 0 THEN GOTO 2280<br />
2330 X = X2:Y = Y2<br />
2340 GOSUB 7200<br />
2350 RETURN<br />
3000 FOR M = O TO 8<br />
3010 FOR N = 0 TO 4<br />
302(> ACMrN} = 0<br />
3030 NEXT N<br />
3040 NEXT M<br />
305() AC v, 2 > = 1<br />
3060 A( 1 '1 ) = 1<br />
307(> A( 1'3) = 1<br />
3(>80AC3r1)=1<br />
~ 3090 AC3r2) = 1<br />
3100 AC3r3) = 1<br />
3110A(5r0)=1<br />
:5120 AC 5'1) = 1<br />
313(i A< 5r2 > = 1<br />
3140 AC 5,3} = 1<br />
64 Chapter 5
315(i A(5,4)= 1<br />
3200 GOSUB 9000<br />
3210 X = 32:Y = 14: IF G = 0 THEN<br />
C = 13: GOTO 32?0<br />
3215 c = 2 ~<br />
3220 GOSUB 6800<br />
3230 IF G = 0 THEN C = 2: GOTO 3<br />
240<br />
3235 c = 13<br />
3240 GOSUB 9200<br />
3250 X = 32:Y = 14: IF G = 0 THEN<br />
C = 13: GOTO 3260<br />
3255 c = 2<br />
3260 RETURN<br />
6000 REM FIGURE TYPE t 1<br />
6() 10 COLOR= C<br />
6050 PLOT X t 1,y + 1<br />
6060 PLOT X + 2,y t 1<br />
6070 PLOT X + 3,y + 1<br />
6080 PLOT X + 1,y t 2<br />
6090 PLOT X t 3,y + 2<br />
6100 PLOT X + 2,y t 3<br />
6110 PLOT X t 1,y t 4<br />
6120 PLOT X + 2,y + 4<br />
6130 PLOT X t 3,y + 4<br />
6140 PLOT X t 2,y t 5<br />
6150 PLOT X + 1,y t 6<br />
6160 PLOT X t 3,y t 6<br />
6170 COLOR= (i<br />
6172 PLOT X + 2rY t 2<br />
6174 PLOT X + 1,y t 3<br />
6176 PLOT X + 3,y t 3<br />
6178 PLOT X t 1,y + 5<br />
6180 PLOT X t 3,y t 5<br />
6182 PLOT X t 2,y + 6<br />
6184 s = - 16336<br />
6186 FOR I = 1 TO 20<br />
6188 R = PEEK - PEEK -<br />
PEEK - PEEK CS) - PEEK<br />
( S ) - PEEK ( S )<br />
619(1 NEXT I<br />
6199 RETURN<br />
6200 REM FIGURE TYPE t 2<br />
6210 COLOR= C<br />
6250 PLOT X t 1,y t 1<br />
6260 PLOT X t 2,y t 1<br />
6270 PLOT X t 3,y t 1<br />
6280 PLOT X t 1,y t 2<br />
6290 PLOT X t 2,y t 2<br />
6300 PLOT X + 3,y t 2<br />
6310 PLOT X t 2,y t 3<br />
6320 PLOT X t 1,y t 4<br />
6330 PLOT X t 2,y t 4<br />
6340 PLOT X t 3,y t 4<br />
6350 PLOT X t 2,y t 5<br />
6360 PLOT X + 1rY t 6<br />
6365 PLOT X + 3,y t 6<br />
63/0 COLOR= 0<br />
6374 PLOT X + 1,y t 3<br />
6316 PLOT X t 3,y t 3<br />
6378 PLOT X t 1,y t 5<br />
6380 PLOT X t 3,y t 5<br />
6382 PLOT X t 2,y t 6<br />
6399 RETURN<br />
6400 REM FIGURE TYPE t 3<br />
6410 COLOR= C<br />
6420 s = - 16336<br />
6425 FOR I = 1 TO 2<br />
6430 R = PEEK (5) - PEEK -<br />
PEEK ( S ><br />
6435 NEXT I<br />
6450 PLOT X + 1,y t 1<br />
6455 PLOT X t 2,y t 1<br />
6460 PLOT X t 3,y t 1<br />
6465 PLOT X + 1,y t 2<br />
6470 PLOT X t 2,y t 2<br />
6475 PLOT X + 3,y t 2<br />
6480 PLOT X + 2,y t 3<br />
6485 PLOT X t 1,y t 4<br />
6490 PLOT X + 2,y t 4<br />
6495 PLOT X + 3,y t 3<br />
6500 PLOT X t 2rY t 5<br />
6505 PLOT X t 3,y t 5<br />
6510 PLOT X t 1,y t 6<br />
6520 COLOR= 0<br />
6530 PLOT X + 11Y t 3<br />
6535 PLOT X t 3,y t 4<br />
6540 PLOT X t 1,y + 5<br />
6545 PLOT X + 2,y t 6<br />
6550 PLOT X t 3,y t 6<br />
6599 RETURN<br />
6600 REM FIGURE TYPE t 4<br />
6610 COLOR= C<br />
6620 s = - 16336<br />
6625 FOR I = 1 TO 2<br />
6630 R = PEEK (5) - PEEK -<br />
PEEK < S ><br />
6635 NEXT I<br />
6650 PLOT X + 1,y t 1<br />
6655 PLOT X + 2rY t 1<br />
6660 PLOT X + 3,y t 1<br />
6665 PLOT X t 1,y + 2<br />
6670 PLOT X t 2,y + 2<br />
6675 PLOT X t 3,y + 2<br />
A Graphics Library 65
6680 1 PLOT X + 2rY t 3<br />
6685 PLOT X t lrY t 3<br />
6690 PLOT X + 2rY t 4<br />
6695 PLOT X + 3,y t ·4<br />
6/00 PLOT X + 1rY + 5<br />
6705 PLOT X t 2rY t 5<br />
6710 PLOT X + 3,y + 6<br />
6720 COLOR= 0<br />
6730 PLOT X + 1rY + 4<br />
6735 PLOT X + 3,y + 3<br />
6740 PLOT X + 3,y + 5<br />
6745 · PLOT X t 1rY t 6<br />
6750 PLOT X + 2rY + 6<br />
6799 RETURN<br />
6800 REM FIGURE TYPE t 5<br />
6810 COLOR= C<br />
6850 PLOT X + 1rY + 1<br />
6855 PLOT X + 2,y + 1<br />
6860 PLOT X + 1rY + 2<br />
6865 PLOT X + 2rY t 2<br />
6870 PLOT X + 2rY t 3<br />
6875 PLOT X + 1rY + 4<br />
6880 PLOT X + 2rY + 4<br />
6885 PLOT X + 3,y t 4<br />
6890 PLOT X + 2rY + 5<br />
6895 PLOT X + lrY t 6<br />
6900 PLOT X + 2rY t 6<br />
6920 COLOR= 0<br />
6930 PLOT X + 3,y + 1<br />
6935 PLOT X + 3,y + 2<br />
6940 PLOT X + 1rY + 3<br />
6945 PLOT X + 3,y + 3<br />
6950 PLOT X + lrY + 5<br />
6955 PLOT X + 3,y t 5<br />
6960 PLOT X + 3,y + 6<br />
6999 RETURN<br />
7000 REM FIGURE TYPE t 6<br />
7010 COLOR= C<br />
7020 s = - 16336<br />
7025 FOR I = 1 TO 20 :R = PEEK <<br />
S >: NEXT I<br />
7050 PLOT X + 1rY + 1<br />
7055 PLOT X + 2rY + 1<br />
7060 PLOT X t 2rY t 2<br />
7065 PLOT X + 2rY t 3<br />
7(170 PLOT X + 3,y + 3<br />
7(175 PLOT X + 1rY t 4<br />
7080 PLOT X + 2rY t 4<br />
7085 PLOT X + 1rY t 5<br />
7090 PLOT X + 2rY t 5<br />
7095 PLOT X + 2rY + 6<br />
710(> COLOR= 0<br />
7110 PLOT X + 3,y t 1<br />
7115 PLOT X t 1rY t 2<br />
7120 PLOT X 3,y + 2<br />
7125 PLOT X 1rY 3<br />
7130 PLOT X + 3,y 4<br />
7135 PLOT X t 3' Y + 5<br />
7140 PLOT X + lrY + 6<br />
7145 PLOT X + 3,y + 6<br />
7199 RETURN<br />
7200 REM FIGURE TYPE t 7<br />
7210 COLOR= 11<br />
7250 PLOT X lrY + 1<br />
7255 PLOT X + 3,y + 1<br />
7260 PLOT X 1rY 2<br />
7265 PLOT X 3,y + 2<br />
7270 PLOT X 2,y + 3<br />
7275 PLOT X 2rY 4<br />
7280 PLOT X + 1rY 5<br />
7285 PLOT X 3,y 5<br />
7290 PLOT X lrY 6<br />
7295 PLOT X + 3,y + 6<br />
7300 COLOR= 0<br />
7305 PLOT X 2,y + 1<br />
7310 PLOT X + 2rY t 2<br />
7315 PLOT X lrY t 3<br />
7320 PLOT X 3,y 3<br />
7325 PLOT X lrY 4<br />
7330 PLOT X 3,y 4<br />
7335 PLOT X 2rY 5<br />
7340 PLOT X + 2rY + 6<br />
7350 s = - 16336<br />
7355 FOR I = 1 TO 150<br />
7360 R = PEEK ( S ><br />
7365 NEXT I<br />
7370 RETURN<br />
7800 . REM FIGURE TYPE t 0<br />
7810 COLOR= 0<br />
7850 FOR I 1 TO 3<br />
7860 FOR J = 1 TO 6<br />
7870 PLOT X + I,Y + J<br />
7880 NEXT J: NEXT I<br />
7890 RETURN<br />
8000 Xl' = X21Y1 = Y2<br />
8010 IF PDL CO)< 110 THEN Y =<br />
y + 7<br />
8020 IF PDL CO> > 146 THEN Y =<br />
y - 7<br />
8030 IF Y < 0 THEN Y = 0<br />
8040 IF Y > 28 THEN Y = 28<br />
8050 FOR I = 1 TO 100<br />
8060 IF PEEK ( - 16287) > 127 THEN<br />
I = 100<br />
66 Chapter 5
8070 NEXT I<br />
8080 IF PEEK ( - 16287> > 127 THEN<br />
x = x - 4<br />
8090 IF X > 32 THEN X = 32<br />
8100 IF X < 0 THEN X = 32<br />
8110 IF PEEK ( - 16287> > 127 THEN<br />
8110<br />
8120 T = T - INT C RNII ( 1 > * 5 t<br />
1)<br />
8130 IF ACX I 4,y I 7) < > 0 THEN<br />
F = 1! RETURN ~<br />
8140 IF X < > X2 THEN U = U + 1<br />
8150 X2 = X!Y2 = Y<br />
0160 x = x1:v = v1<br />
8170 GOSUB 7800<br />
8180 X = X2!Y = Y2<br />
8190 GOSUB 6200!F = o: RETURN<br />
9000 GR<br />
9010 COLOR= 15<br />
9020 FOR Y = 0 TO 35 STEP 7<br />
9030 FOR X = 1 TO 36 STtP 1<br />
9040 PLOT x,y<br />
9050 NEXT X<br />
9060 NEXT Y<br />
9070 FOR Y = 0 TO 35 STEP 1<br />
9080 FOR X = 0 TO 36 STEP 4<br />
9090 PLOT x,y<br />
9100 NEXT X<br />
911(i NEXT Y<br />
912 = 0 THEN 9250<br />
9230 X = M * 4:Y = N * 7<br />
9235 X = M * 4:Y = N * 7<br />
9240 GOSUB 6200<br />
9250 NEXT N<br />
9260 NEXT M<br />
927•'J RETURN<br />
9500 F = 0: IF G = 0 THEN C = 2: GOTO<br />
9510<br />
9505 c = 13<br />
9510 FOR M = 0 TO a: GOSUB 9550<br />
9520 IF F = 1 THEN RETURN<br />
9530 NEXT M<br />
9540 N = N t 1: IF N > 4 THEN N =<br />
o: RETURN<br />
9550 IF A(M,N> = 0 THEN RETURN<br />
9560 IF RND C 1 > > 0 .2 THEN 9650<br />
9570 IF X2 I 4 = M THEN 9650<br />
9580 IF X2 I 4 < M THEN 9620<br />
9590 IF CM+ 1} * 4 = X2 AND N *<br />
7 = Y2 THEN F = 1: RETURN<br />
9600 IF ACM t 1,N) < > 0 THEN 9<br />
650<br />
9610 ACM t 1' N > = l:A( M1N > = 0 :x =<br />
M * 4!Y = N * 7: GOSUB 7'800:<br />
COLOR= c:x = < M t 1) t 4: GOSUB<br />
9800: RETURN . (<br />
9620 IF ( M - 1> * 41 = X4 AND< N *<br />
7 = Y2 THEN F = 1: ~~TURN<br />
9630 IF ACM - 11N> < • 1 THEN 9<br />
65(;<br />
9640 ACM - 1'N> = 1!A 1 '(N) = o:x =<br />
M * 4!Y = N * 7t uSUB 7800:<br />
'<br />
COLOR= C!X = C~ -1> * 4: GOSUB<br />
9800 t ·RETURN<br />
9650 IF RND C1> ~ ·.4 THEN RETURN<br />
966C IF Y2 I 7 = N . HEN RETURN<br />
9670 IF Y2 I 7 < ~ THEN 9710<br />
9680 IF M * 4 = X' ANH < N t 1) *<br />
7 = Y2 THEN F = 1: RETURN<br />
9690 IF A 0 THEN RETURN<br />
9700 A = 1:A(M1N> = OtX =<br />
M * 4:Y = N * 7: GOSUB 7800:<br />
COLOR= CtY = C N t 1 > * 7: GOSUB<br />
980 0 : RETURN<br />
9710 IF M * 4~ = X2 AND < N - 1 > *<br />
7 = Y2 THEN F = 1: RETURN<br />
9720 IF A 0 THEN RETURN<br />
9730\_ACM1N - 1> = UAOhN > = o:x =<br />
M * +:Y = N * 7: GOSUB 7800:<br />
COLOR= C:Y = < N - 1) * 7: GOSUB<br />
9800: RETURN<br />
9800 IF RND C1) > 0.2 THEN 9870<br />
9810 FOR Z = 1 TO RNII ( 1) * 3 t<br />
1<br />
9820 GOSUB 6400<br />
9830 FOR .J = 1 TO 50: NEXT J<br />
9840 GOSUB 6600<br />
9850 FOR J = 1 TO 50 : NEXT J<br />
9860 NEXT Z<br />
9870 IF RND ( 1 > > 0 .1 THEN 9940<br />
9880 FOR Z = 1 TO RNII ( 1 > * 5 t<br />
1<br />
9890 GOSUB 6000<br />
9900 FOR J = 1 TO 5: NEXT J<br />
9910 GOSUB 6200<br />
A Graphics Library 67
9920 FOR .J = 1 TO s: NEXT J<br />
9930 NEXT Z<br />
994-0 GOSUB 62_00: RETURN<br />
9999 END<br />
"Note that line 6050<br />
through 6160 define every<br />
point within a box that is<br />
<strong>to</strong> be illuminated. "<br />
Note that lines 6050 through 6160 define every point within a<br />
box that is <strong>to</strong> be illuminated. Most important, <strong>to</strong>o, is that line 6172<br />
through 6182 define every point that is <strong>to</strong> be blanked! Failure <strong>to</strong><br />
perform this step will <strong>res</strong>ult in problems when a character is repositioned<br />
on the screen and overlaid on <strong>to</strong>p of a previous figure. (Line<br />
6170 sets the co<strong>lo</strong>r <strong>to</strong> zero for an APPLE-II which means black or<br />
"no co<strong>lo</strong>r.") On a TRS-80, lines 6172 through 6182 would be<br />
RESET statements. On a PET, one would want <strong>to</strong> POKE blank<br />
characters in those positions.<br />
Again, I must point out that these characters serve as guidelines.<br />
For instance, on a TRS-80 you would probably want the characters<br />
<strong>to</strong> contain more sec<strong>to</strong>rs in the horizontal direction. Perhaps you<br />
would want each box in a grid <strong>to</strong> be 6 by 6 units. If such is the<br />
case, you will have <strong>to</strong> define more points in each box in order <strong>to</strong> define<br />
a character.<br />
Please take careful note that each point making up a character<br />
is defined as an X plus displacement and Y plus displacement<br />
value. It is most important that you construct your characters in this<br />
manner in order that they may be moved and positioned anywhere<br />
desired on the grid, by initializing the variables X and Y. I trust by<br />
this point that my previous lessons on this essential point have<br />
reached their mark!<br />
Lines 6184 through 6190 are statements <strong>to</strong> have an APPLE-II<br />
emit a short buzzing sound. You will want <strong>to</strong> create similar capability<br />
using appropriate statements for your system if you want your<br />
animated players <strong>to</strong> have sound effects. Initially, I suggest you try<br />
<strong>to</strong> create your sound effects <strong>to</strong> last· about half a second. You can<br />
change the duration later <strong>to</strong> suit your audi<strong>to</strong>ry channels.<br />
The other characters shown in Figure 16 are drawn by subroutines<br />
beginning at lines 6200, 6400, 6800, 7000 and 7200, plus the<br />
special blank box that is drawn by the subroutine starting at line<br />
7800. All of these subroutines will be called on as needed <strong>to</strong> draw<br />
and animate the characters.<br />
One other feature I will point out is that you may notice that<br />
some of the character-drawing routines insert the sound effects before<br />
the figure is drawn. Others have it after the character has been<br />
drawn. This arrangement has been derived from experience so as <strong>to</strong><br />
c<strong>lo</strong>sely synchronize the sounds with the action. As always, however,<br />
68 Chapter 5
I urge you <strong>to</strong> experiment with your own ideas if you are not satisfied<br />
with what you see and hear.<br />
Figure 17 illustrates one way the defense can be set each time a<br />
play is started. The positions of the defensemen are defined by a<br />
two-dimensional array (named "A," having elements M,N). The initial<br />
positions of the defensemen are set up in a sequence of instructions<br />
by a subroutine that starts at line 2000. The subroutine that<br />
actually examines the array and positions figu<strong>res</strong> on the playing grid<br />
starts at line 9200.<br />
A position in the matrix M,N is set <strong>to</strong> the value one if a defenseman<br />
is <strong>to</strong> be placed at the cor<strong>res</strong>ponding position on the playing grid.<br />
Note that the cells of the playing grid, cor<strong>res</strong>ponding <strong>to</strong> positions<br />
in the array, are numbered from left <strong>to</strong> right and <strong>to</strong>p <strong>to</strong> bot<strong>to</strong>m,<br />
per the convention generally established when dealing with CRT displays.<br />
Also note that the actual starting position of a box is obtained<br />
by multiplying the array position by a multiplication fac<strong>to</strong>r in<br />
each direction. The fac<strong>to</strong>r is four in the X direction and seven in the<br />
Y direction for the grid shown. This is because each box, when the<br />
grid line associated with it is included, takes four sec<strong>to</strong>rs in the X direction<br />
and seven in the Y direction.<br />
When the defense is first set, all of the characters are drawn<br />
using the character defined by the subroutine that starts at line 6200.<br />
In other words, there is no initial animation of the characters. In<br />
initial tests of the program I did animate the defense as it was set.<br />
I found that the extra time it takes <strong>to</strong> produce the animation tended<br />
<strong>to</strong> s<strong>lo</strong>w the pace of a game <strong>to</strong> the point where it became annoying.<br />
The defensemen thus do not start their antics until play gets<br />
underway.<br />
One of the major subroutines and probably the most involved one<br />
in the program begins at line 9500. The purpose of this subroutine<br />
is primarily <strong>to</strong> move the defensemen <strong>to</strong>wards the quarterback in order<br />
<strong>to</strong> accomplish a "tackle." In conjunction with these maneuvers,<br />
the subroutine also serves <strong>to</strong> "animate" the football characters.<br />
The fundamental operation of the defense-movements subroutine<br />
is as fol<strong>lo</strong>ws. The M ,N array is scanned <strong>to</strong> <strong>lo</strong>cate the positions<br />
of· the defensemen in the grid. Each time one is <strong>lo</strong>cated, its position<br />
is· compared <strong>to</strong> that of the quarterback. If it is not on the same<br />
X coordinate on the grid as the quarterback, then approximately 20<br />
percent of the time (using the random function) a defenseman will<br />
advance a<strong>lo</strong>ng the X direction, always <strong>to</strong>wards the quarterback. If a<br />
Setting the Defense<br />
Placing the Defensemen<br />
in Motion<br />
A Graphics Library 69
defenseman is on the same X coordinate as the quarterback or it<br />
is not advanced a<strong>lo</strong>ng the X axis, then there is a 40 percent chance<br />
that it will advance <strong>to</strong>wards the quarterback a<strong>lo</strong>ng the Y axis. If<br />
"Since animation of the either type of move, in the X or Y direction, <strong>res</strong>ults in a defenseman<br />
characters s<strong>lo</strong>ws down making contact with the quarterback, then a "tackle" has occurred.<br />
play somewhat, the level Only one row of grid positions is manipulated each time the subrouof<br />
animation has been kept tine is entered. This is because of the interplay that takes place under<br />
<strong>lo</strong>w." program control between the defense and the manual control of the<br />
quarterback by a player.<br />
Interwoven in<strong>to</strong> the defense-movements subroutine are subroutines<br />
<strong>to</strong> animate a small percentage of the defensemen. Thus, from<br />
time-<strong>to</strong>-time, a defenseman will be exercised <strong>to</strong> make it appear as<br />
through it is shifting its feet or "running." Also, from time-<strong>to</strong>-time<br />
a defense character has its mouth animated while it emits sounds that<br />
are meant <strong>to</strong> mimic a charging tackler! Since animation of the characters<br />
s<strong>lo</strong>ws down play somewhat, the level of animation has been<br />
kept <strong>lo</strong>w. However, the percentage of characters that are animated<br />
is readily changed by altering the values used in lines 9800 and 9870<br />
of the listing.<br />
The speed at which animation takes place is controlled by delay<br />
<strong>lo</strong>ops at lines 9830 and 9850 when character "running" is being<br />
portrayed. Lines 9900 and 9920 control the rate at which the mouth<br />
of a character is opened and c<strong>lo</strong>sed during animation.<br />
Control of the Quarterback The motion of the quarterback is under the control of a person playing<br />
the game of football. The subroutine that translates the directives<br />
of a player <strong>to</strong> move the quarterback on the screen begins at<br />
line 8000 in the listing.<br />
For the version p<strong>res</strong>ented in the listing, a system paddle is used<br />
as an input device. A "paddle" on an APPLE-II system is a variable<br />
<strong>res</strong>is<strong>to</strong>r that can be controlled by a player. Associated with a paddle<br />
is a "but<strong>to</strong>n." This but<strong>to</strong>n is used in the listed version of this program<br />
<strong>to</strong> cause the quarterback <strong>to</strong> advance a<strong>lo</strong>ng the grid in order <strong>to</strong><br />
gain yardage. Advancement always takes place from right <strong>to</strong> left<br />
a<strong>lo</strong>ng the grid as indicated in Figure 17.<br />
Line 8010 and 8020 test the position of the player paddle and<br />
either increase or decrease the offset value for the quarterback in<br />
order <strong>to</strong> change its position a<strong>lo</strong>ng the Y axis. Lines 8030 and 8040<br />
are used <strong>to</strong> limit the Y range so that the figure does not get off set<br />
completely out of the playing grid.<br />
Next, a <strong>lo</strong>op is formed <strong>to</strong> provide a time "window" in which a<br />
player may push the paddle but<strong>to</strong>n <strong>to</strong> attempt <strong>to</strong> advance the quar-<br />
70 Chapter 5
terback a<strong>lo</strong>ng the X axis. If the but<strong>to</strong>n is p<strong>res</strong>sed during this period,<br />
the quarterback can be advanced. Line 8110 ensu<strong>res</strong> that only one<br />
advance directive will be accepted per entry <strong>to</strong> the subroutine. Lines<br />
8090 and 8100 keep the quarterback within the boundaries of the<br />
playing grid. This is done by repositioning the quarterback on the<br />
right-hand side of the grid whenever it advances beyond the lefthand<br />
grid line.<br />
The balance of the subroutine calls on the figure erasing and<br />
drawing routines <strong>to</strong> reposition the quarterback when a move directive<br />
is received.<br />
TRS-80 and PET users, who do not have paddle controls on<br />
their machines, will need <strong>to</strong> modify the quarterback moving subroutine<br />
<strong>to</strong> <strong>res</strong>pond <strong>to</strong> a set of keyboard characters. Select one character<br />
<strong>to</strong> move the quarterback up, another <strong>to</strong> move it down, and·yet<br />
another <strong>to</strong> have it move forward. Be sure <strong>to</strong> use the GET or IN.KEY$<br />
statement as the input directive rather than an INPUT statement.<br />
The latter type of statement would cause the program <strong>to</strong> wait for<br />
an input each time the subroutine was used. What you really want<br />
is <strong>to</strong> just check and see if a particular character was inputted during<br />
the period, if not, the quarterback is not moved.<br />
Once all the various <strong>graphics</strong> subroutines have been established, it is<br />
necessary <strong>to</strong> do some "housekeeping" work <strong>to</strong> keep track of the<br />
game in prog<strong>res</strong>s. Lines numbered 1 through 300 in the listing are<br />
used <strong>to</strong> initialize the program at the start of the game as well as between<br />
quarters. Additionally, lines 200 and 210 change the co<strong>lo</strong>rs<br />
of the defensemen and the quarterback whenever a team sco<strong>res</strong> or a<br />
fourth down has occurred. It is not necessary <strong>to</strong> change the co<strong>lo</strong>rs or<br />
the figu<strong>res</strong> if yqu do not have such capability. All you really need <strong>to</strong><br />
do is make sure that the scorekeeping changes, <strong>to</strong> keep track of the<br />
team that is "quarterbacking."<br />
The main calling sequence for the football program starts at<br />
line 1000 in the listing. It, in turn, calls on the subroutines already<br />
mentioned <strong>to</strong> perform <strong>graphics</strong>, plus some others that are shown<br />
with line numbers in the 1400 <strong>to</strong> 2000 range. These subroutines perform<br />
such functions as keeping the scoreboard updated, offering an<br />
option <strong>to</strong> permit kicking of the ball (punting) on a fourth down,<br />
and controlling the turnover of the ball when a quarter expi<strong>res</strong>.<br />
The scoreboard routines use a portion of the display screen<br />
that, on an APPLE-II, are <strong>res</strong>erved for text messages. For other types<br />
of systems you will most likely want <strong>to</strong> POKE scoreboard <strong>res</strong>ults<br />
beneath the playing grid. Or, you can p<strong>res</strong>ent the scoreboard in be-<br />
"TRS-80 and PET users,<br />
who do not have paddle<br />
controls on their machines,<br />
will need <strong>to</strong> modify the<br />
quarterback moving subroutine<br />
.. . "<br />
Putting It All Together<br />
A Graphics Library 71
tween each new play in place of the playing grid.<br />
Playing a Game<br />
By this time you .probably have a pretty good idea of what is involved<br />
in actually playing a game of football. Ideally, two players<br />
take turns competing against one another. One captains the blue<br />
team, the other the yel<strong>lo</strong>w. (You can, of course, still enjoy the game<br />
by competing against yourself and playing for both teams.)<br />
The game starts with the blue team defending. The yel<strong>lo</strong>w quarterback<br />
is then controlled by a player through a paddle and but<strong>to</strong>n<br />
(or keyboard keys in alternate versions). The object for the player<br />
in control is <strong>to</strong> advance the quarterback from the right side of the<br />
playing grid <strong>to</strong> the left while avoiding being "tackled" by a defenseman.<br />
A tackle occurs when any contact is made with the quarterback,<br />
whether as a <strong>res</strong>ult of the quarterback charging in<strong>to</strong> a defenseman<br />
or a defenseman contacting the quarterback.<br />
The defensemen are under computer control. They will con-<br />
Figure 18<br />
72 Chapter 5
stantly proceed in the general direction of the quarterback. If the<br />
player controlling the quarterback does nothing, the quarterback<br />
will still be tackled. Figure 18 illustrates how the playing grid might<br />
appear when a play was in prog<strong>res</strong>s. The dotted arrows show a possible<br />
way for the quarterback <strong>to</strong> move in the situation shown in order<br />
<strong>to</strong> gain yards. Play ends when the quarterback is s<strong>to</strong>pped because<br />
contact has been made with the defense. The number of yards gained<br />
per play is equal <strong>to</strong> the number of grid lines crossed.<br />
After each play, the yardage required for a first down is calculated.<br />
If a first down has not been earned, the down is advanced.<br />
A player has four downs in which <strong>to</strong> gain 10 yards, thereby earning<br />
a new first down, or <strong>to</strong> score a goal.<br />
In a fourth down situation, a player has the choice of attempting<br />
<strong>to</strong> gain yardage by running or advancing the ball by "kicking."<br />
If kicking is elected, a random number genera<strong>to</strong>r is used <strong>to</strong> compute<br />
a kick in the range of 1 <strong>to</strong> 55 yards. If the kick was <strong>lo</strong>ng enough <strong>to</strong><br />
reach the end zone, then a percentage of the kicks are scored as<br />
three-point field goals. A kick in<strong>to</strong> the end zone <strong>res</strong>ults in the ball<br />
being brought hack out <strong>to</strong> the 20-yard line (meaning the opposite<br />
team will have 80 yards <strong>to</strong> go <strong>to</strong> make a goal).<br />
When a score is made or four downs have been used, the opposite<br />
team defends.<br />
Time is consumed during each play. At the end of each quarter<br />
the 900 second playing c<strong>lo</strong>ck is <strong>res</strong>et. The yel<strong>lo</strong>w team always starts<br />
as quarterback <strong>to</strong> begin a game. At the start of the third quarter, the<br />
blue team starts on the offensive.<br />
Scorekeeping is done after each play has been completed. The<br />
<strong>res</strong>ults are then au<strong>to</strong>matically displayed on the "scoreboard." Play<br />
always goes from right <strong>to</strong> left on the grid, regardless of which team is<br />
defending, with the co<strong>lo</strong>r of the characters being changed <strong>to</strong> show<br />
the team defending. Also note that the scoreboard always gives yardage<br />
<strong>to</strong> go in terms of the current quarterback's position relative <strong>to</strong><br />
the goal.<br />
Remember, the object of this publication has been <strong>to</strong> give you the<br />
knowledge and insights necessary <strong>to</strong> create graphic applications on<br />
your own machine. Since each type of computer with <strong>lo</strong>w level <strong>res</strong>olution<br />
<strong>graphics</strong> capability is different, the actual implementation<br />
of the routines and programs I have described will generally have<br />
<strong>to</strong> be cus<strong>to</strong>mized by you for your system. To help you do this for<br />
the football game described, I shall conclude this publication with a<br />
"map" of the source listing and a list of the key variable names used<br />
"Play always goes from<br />
right <strong>to</strong> left on the grid,<br />
regardless of which team<br />
is def ending ... "<br />
To Help You Create<br />
Your Own<br />
A Graphics Library 73
in the program. Try <strong>to</strong> apply what you have learned in this manual<br />
<strong>to</strong> get your own cus<strong>to</strong>mized version of the program on line. Have<br />
fun, and happy animations!<br />
74 Chapter 5<br />
Subroutine Map 1 Statements <strong>to</strong> initialize program at start, after quarters, after scoring,<br />
and when a first down is not achieved.<br />
1000 Main calling sequence. Keeps track of downs. Calls on various subroutines<br />
<strong>to</strong> display <strong>graphics</strong> and conduct a game.<br />
1400 Routine <strong>to</strong> update score and <strong>res</strong>et yard marker after a goal has been<br />
scored.<br />
1500 Routine <strong>to</strong> kick ball if option taken on fourth down. Calls on<br />
<strong>graphics</strong> subroutines, randomly computes length of kick, and, if a<br />
field goal is made, goes <strong>to</strong> update score<br />
1700 Routine <strong>to</strong> display message when a first down is obtained.<br />
1800 Routine <strong>to</strong> keep track of quarters played. Resets c<strong>lo</strong>ck for a new<br />
quarter. Changes teams at the half. Displays end of game message<br />
at conclusion of game.<br />
1900 Routine <strong>to</strong> update and display scoreboard.<br />
2000 Main <strong>graphics</strong> control routine. Sets defense at start of a play. Calls<br />
on defense-moves subroutine and quarterback control routine <strong>to</strong><br />
deve<strong>lo</strong>p play. Routine is exited when a "tackle" occurs.<br />
3000 Graphics control routine for fourth down kick.<br />
6000 Draws figure type 1 - front view, mouth c<strong>lo</strong>sed.<br />
6200 Draws figure type 2 - front view, mouth open, with sound.<br />
6400 Draws figure type 3 - front view, running position A, with tapping<br />
sound.<br />
6600 Draws figure type 4 - front view, running position 8, with tapping<br />
sound.<br />
6800 Draws figure type 5 - side view, kicking stance A.<br />
7000 Draws figure type 6 - side view, kicking stance 8, with sound.<br />
7200 Draws figure type 7 - X =man tackled, with sound.<br />
7800 Draws figure type 0 - blank <strong>to</strong> wipe out previous character dis·<br />
played.<br />
8000 Routine <strong>to</strong> move quarterback. Inputs directions from player. Keeps
quarterback within boundaries of the playing grid. Advances yardage<br />
counter if quarterback is advanced. Controls <strong>graphics</strong> <strong>to</strong> display<br />
new position. Advances timer. "Tackle" occurs if contact made with<br />
a defenseman.<br />
9000<br />
9200<br />
9500<br />
Routine <strong>to</strong> draw playing grid at start of each play.<br />
Draws defensemen in their initial positions at the start of play.<br />
Defensive moves routine. Selects defenseman using random functions<br />
<strong>to</strong> advance <strong>to</strong>wards the quarterback. Controls movement and<br />
animation of the defensemen as they prog<strong>res</strong>s <strong>to</strong>wards "tackling"<br />
the quarterback.<br />
Variable.<br />
Symbol<br />
A<br />
B<br />
D<br />
F<br />
G<br />
I<br />
J<br />
M<br />
N<br />
p<br />
a<br />
R<br />
s<br />
51<br />
52<br />
T<br />
u<br />
v<br />
W$<br />
x<br />
X1<br />
X2<br />
y<br />
Y1<br />
Y2<br />
z<br />
Function<br />
Array (0 - 8 and 0 - 4) having 45 positions. An array element having<br />
the value 1 indicates a defenseman is at that position. The element<br />
is zero otherwise.<br />
Temporary s<strong>to</strong>rage variable.<br />
"Downs" counter.<br />
Man tackled flag.<br />
Team flag. 0 = blue defending, 1 =yel<strong>lo</strong>w defending.<br />
Counter for temporary <strong>lo</strong>ops.<br />
Counter for temporary <strong>lo</strong>ops .<br />
. X coordinates assigned <strong>to</strong> defense.<br />
Y coordinates assigned <strong>to</strong> defense.<br />
Current position marker.<br />
Yards required <strong>to</strong> obtain first down.<br />
Assigned <strong>to</strong> sound generating routines.<br />
Constant for sound generating routines.<br />
Blue team score.<br />
Yel<strong>lo</strong>w team score.<br />
Time remaining in a quarter.<br />
Yardage gained per play.<br />
Current quarter in play.<br />
Keyboard input buffer.<br />
Primary X coordinate.<br />
Temporary X coordinate.<br />
New X coordinate of quarterback.<br />
Primary Y coordinate.<br />
Temporary Y coordinate.<br />
New Y coordinate of quarterback.<br />
Counter for major <strong>lo</strong>ops.<br />
A Graphics Library 75
Index<br />
Accessing the screen: 13<br />
Add<strong>res</strong>s .offset: 18<br />
Animation: 55<br />
Base add<strong>res</strong>s: 37<br />
Cards, drawing of: 39<br />
Cartesian coordinate: 15<br />
Cassette, unprotected: 57<br />
Circles, drawing of: 35<br />
C<strong>lo</strong>wn, drawing of: 50<br />
COLOR: 12<br />
Display matrix: 9<br />
Display, planning of: 38<br />
Erasing: 25<br />
Football game, description of: 58<br />
instructions: 72<br />
listing of: 63<br />
subroutine map: 74<br />
variables list: 75<br />
Football grid, drawing of: 60<br />
Football players, drawing of: 60<br />
Football, game of: 58<br />
Graphics library: 37<br />
Grid: 9<br />
Horizontal line, drawing of: 27<br />
Line off set: 32<br />
Line, drawing of any: 33<br />
equation of a: 28<br />
s<strong>lo</strong>pe of a: 29<br />
Low <strong>res</strong>olution: 7<br />
ON: 12<br />
PEEK: 14<br />
Pixel: 49<br />
PLOT: 11<br />
POINT: 13<br />
POKE: 13<br />
Positioning: 24<br />
RESET: 26<br />
Row multiplier: 17<br />
SCRN: 14<br />
·Sec<strong>to</strong>r ratios: 35<br />
SET: 21<br />
Smoothing: 22<br />
Sound, generation of: 56<br />
Subroutines, use of: 39<br />
Switch, tape recorder <strong>lo</strong>ckout: 57<br />
Tape recorder: 57<br />
Translate: 17<br />
Triangle, drawing a: 21<br />
Vertical line, drawing of: 27<br />
X axis: 9<br />
Y'axis: 9<br />
Zero reference point: 9<br />
Index 77
The Author<br />
Introduction <strong>to</strong> Low Resolution Graphics is written by SCELBI's<br />
<strong>to</strong>p staff author, Nat Wadsworth. He is truly a pioneer of the field<br />
having designed and deve<strong>lo</strong>ped the world's first "personal computing<br />
system," marketed by SCELBI in 1973-75. Nat wrote the ZBO<br />
Instruction Handbook, Z80 Gourmet Guide and Cookbook, and<br />
Machine Language Programming, among other books and has had<br />
articles published in the popular microcomputer magazines. One<br />
reason for his success and popularity is his unique ability <strong>to</strong> make<br />
even the most elusive concept seem simple!
Questionnaire for GRAPHICS Book<br />
Do you have a Radio Shack TRS-80 or a Commodore PET computer?<br />
Are you unsure about creating your own version of the football<br />
game described in this hook <strong>to</strong> run on your TRS-80 or PET?<br />
Well, why not first try your hand at it as a learning experience?<br />
If you want something <strong>to</strong> compare your version with, drop this coupon<br />
in the mail. SCELBI will send you absolutely FREE* your<br />
choice of one of the fol<strong>lo</strong>wing:<br />
A.) Listing of "football" <strong>to</strong> run on a TRS-80 Level II.<br />
B.) Listing of "football" <strong>to</strong> run on a Commodore PET.<br />
C.) Listing of "windmill" scene in co<strong>lo</strong>r for the APPLE-<br />
11.<br />
(*Offer may be withdrawn without notice.)<br />
Check your choice of one of the above. (Checking more than one<br />
will disqualify your request.) This coupon itself must be removed<br />
from the book and submitted <strong>to</strong> SCELBI. Pho<strong>to</strong>copies of this form<br />
will not be accepted.<br />
Would you like <strong>to</strong> see more instructive books similar <strong>to</strong> this one published<br />
by SCELBI? Help us determine your needs by providing the<br />
fol<strong>lo</strong>wing information. It will only take a few minutes of your time<br />
<strong>to</strong> answer the questions. Your replies will help us continue <strong>to</strong> provide<br />
the kinds of publications you want!<br />
Approximately how <strong>lo</strong>ng have you been. 'fovolved" with computers?<br />
Do you currently own a personal computer?<br />
If so, what kind is it? (Manufacturer, CPU chip ... )<br />
How <strong>lo</strong>ng have you had it?<br />
How much memory does it have?<br />
Do you have f<strong>lo</strong>ppy disk capability?<br />
Do you like <strong>to</strong> create or cus<strong>to</strong>mize your own programs?<br />
If so, what kind of languages do you frequently use?<br />
Where do you use computers the most?<br />
At home?<br />
At work?<br />
At school?<br />
Other?
What types of applications do you use your computer for?<br />
Business?<br />
Education?<br />
Home uses?<br />
Recreation?<br />
Other? (please list.)<br />
Thank you for your assistance!
"Introduction <strong>to</strong> Low Resolution GRAPHICS"<br />
Errata for page 67<br />
9610A(M+1,N) = 1:A(M,N) = O:X =<br />
M * 4:Y = N * 7: GOSUB 7800:<br />
COLOR= C:X = (M + 1) * 4: GOSUB<br />
9800: RETURN<br />
9620 IF(M-1)*4=X2ANDN*<br />
7 = Y2 THEN F = 1: RETURN<br />
9630 IFA(M- 1,N)OTHEN9<br />
650<br />
9640 A(M - 1,N) = 1 :A(M,N) = O:X =<br />
M * 4:Y = N * 7: GOSUB 7800:<br />
COLOR= C:X = (M - 1) * 4: GOSUB<br />
9800: RETURN<br />
9650 IF RND (1) > 0.4 THEN RETURN<br />
9660 IF Y2 I 7 = N THEN RETURN<br />
9670 IF Y2 I 7 < N THEN 9710<br />
9680 IFM*4=X2AND(N+1)*<br />
7 = Y2 THEN F = 1: RETURN
Now you can produce amazing computer <strong>graphics</strong> - even if you<br />
can't draw a straight line. Literally! Learn how <strong>to</strong> draw lines and<br />
shapes, make graphs, draw pictu<strong>res</strong> and even do animation. The<br />
simple secrets of how <strong>to</strong> do all this are contained in SCELBI 's new<br />
book "Introduction <strong>to</strong> Low Resolution Graphics."<br />
Today's exciting personal and small business computing machines<br />
are generally provided with at least some kind of "<strong>lo</strong>w <strong>res</strong>olution"<br />
<strong>graphics</strong> capability. What is <strong>lo</strong>w <strong>res</strong>olution <strong>graphics</strong>? It is<br />
<strong>graphics</strong> p<strong>res</strong>ented on a point-by-point basis where the number of<br />
points is limited <strong>to</strong> about 8000 or less. The APPLE II by APPLE<br />
Computers, Inc., the Radio Shack TRS-80 and the Commodore<br />
PET all have <strong>lo</strong>w <strong>res</strong>olution <strong>graphics</strong> capability. So do many other<br />
kinds of microcomputers.<br />
What can you do with <strong>lo</strong>w <strong>res</strong>olution <strong>graphics</strong>? All kinds of<br />
things .. . . If you know how! You can p<strong>lo</strong>t plain and simple or fancy<br />
and complex graphs <strong>to</strong> consolidate data, for business or pleasure<br />
purposes. But you can use the capability <strong>to</strong> improve the p<strong>res</strong>entation<br />
and impact of almost anything you want your computer <strong>to</strong><br />
tell people. It can be used <strong>to</strong> animate games or data, clarify and<br />
amplify educational materials, or just plain entertain people.