Nissan/Infiniti - Intraphex
Nissan/Infiniti - Intraphex
Nissan/Infiniti - Intraphex

Create successful ePaper yourself
Turn your PDF publications into a flip-book with our unique Google optimized e-Paper software.
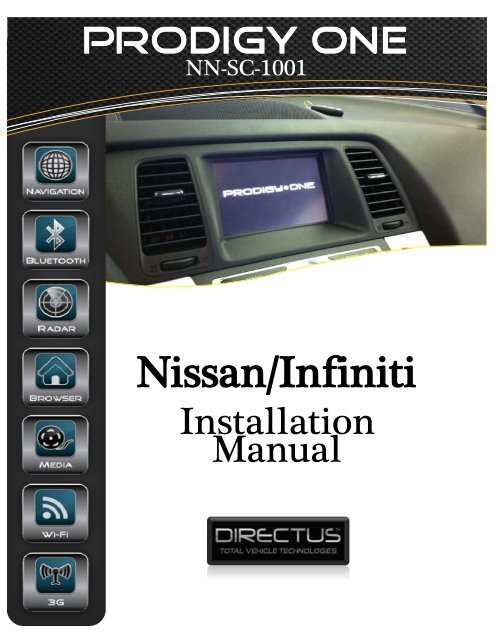
Prodigy One<br />
NN-SC-1001<br />
<strong>Nissan</strong>/<strong>Infiniti</strong><br />
Installation<br />
Manual
Contacts<br />
www.directusnav.com<br />
support@directusnav.com<br />
Support: 810.355.2266<br />
Fax: 810-735-0175
Contents
Infinity g35 panel shown. Different models may have slight<br />
variations.<br />
Remove dash bezel and LCD panel assembly from<br />
vehicle. *Note* Remove bracket from LCD assembly.<br />
Place on a clean, non-abrasive surface.<br />
Locate and remove 4 LCD assembly-fastening screws<br />
located on the top and bottom of assembly.<br />
Unplug harness from factory unit as shown<br />
Note: Use a mid sized screw driver for proper removal.<br />
Remove the rear casing of the LCD assembly to expose circuit board.<br />
Note: Be sure to keep screws in an easy to locate area for re-assembly
A<br />
B<br />
C<br />
A<br />
Mounting<br />
Screws<br />
B<br />
Make sure to keep<br />
ribbon cable clear<br />
and exposed
Locate and pull back 4 mounting tabs for front faceplate. These will be identified by<br />
small pull tabs with de-tents in them to keep the faceplate clipped on.<br />
Note: A small pick tool can be used to free the tabs.<br />
Once faceplate has been removed, place LCD assembly aside and locate two pieces<br />
shown in Fig<br />
One is LCD plastic mount (black) and the other is the touch panel glass. Place black<br />
plastic frame into original LCD frame (metal) as shown below in<br />
Fig.<br />
with the ribbon cable groove positioned at the bottom of original LCD frame<br />
(metal).<br />
Next, place touch panel glass into plastic frame with ribbon cable facing up as shown in<br />
Fig.<br />
B<br />
C<br />
A<br />
( Note: foam gasket will be face up.)<br />
Re-assemble faceplate with touch panel glass as shown in Fig.<br />
Once assembled, remove 4 board mounting screws as shown in Fig.<br />
A<br />
b<br />
(You will no longer need them)
New fasteners<br />
in place
Locate 4 NEW provided mounting screws and fasten into provided locations to create<br />
stand–off mount from previous circuit board provided. (Some models may require<br />
more spacing to mount Directus PCB. Use provided washers to space as needed.)<br />
Locate DIRECTUS provided circuit board and align as shown in pic to newly installed<br />
mounting screws installed in previous step. Use provided screws to mount Circuit<br />
board. (Additional spacing may be required on some models) Be sure not to over tighten<br />
screws.<br />
Locate newly installed touch panel ribbon cable and connect to location provided on<br />
new circuit board. Please be sure to seat ribbon cable properly. Use double sided tape<br />
under ribbon cable connection for proper fastening and stability.
New cable<br />
connections to<br />
be made<br />
Final 3 cable<br />
connections
Locate provided system harness and make all necessary connections shown in pic.<br />
Make sure that all connections are seated properly before re-assembly.<br />
Before re-attaching back plate, you may want to notch out the side as shown below to<br />
make assembly easier. (This is not necessary, but will help with re-assembly) Unplug<br />
harness from factory unit as shown<br />
Back plate should go on with minimal effort. Once in place, locate 4 screws removed in<br />
Step 2, and replace. (Note: if case will not line up correctly please check that you have<br />
removed the OEM clear plastic LCD protector.)
Make all connections to Prodigy One “BRAIN” including: Power, Data, RGB, GPS<br />
antenna, and Speaker. Find suitable location for provided speaker. Example below in<br />
picture.<br />
Reinstall LCD assembly in to vehicle making necessary connections. Replace any OEM<br />
plugs removed to their original location.<br />
**BE SU R E T O R E PL AC E PLU GS I N T O C OR R E C T<br />
L OC AT I ON S OT H ER WI SE , YOU MAY L OC K U P<br />
C .A .N SY ST E M OF C A R . N O DA MAGE WI L L OC -<br />
C U R , BU T C .A .N SY ST E M WI L L N E ED T O BE R E -<br />
PR OGR A MME D BY DE A L E R SH I P**
Prodigy One Module Connection<br />
and Installation<br />
1. Plug cable added to OEM LCD display in earlier steps, and connect to Prodigy One module, DO<br />
NOT FORCE.)<br />
2. Connect 4 pin DC in cable making sure that they locking tab is fully seated and secured.<br />
3. Make proper power connections<br />
RED - ACC<br />
YELLOW<br />
- 12v constant<br />
BLACK - GROUND<br />
WHITE<br />
- MUTE<br />
***FOR CAMERA INSTALLATION ONLY** Locate VI -2 cable in box and connect it to BACK of<br />
Prodigy One at Video in connection point (3.5 mm jack) Yellow RCA is for rear camera input.<br />
4. External speaker is provided for voice guidance. You may locate anywhere that it may be heard<br />
or clip off speaker and connect to rear of dash provided AUX in. (NOTE: When connection is<br />
made to AUX IN, operator MUST have radio set to AUX to hear voice commands.<br />
5. Install GPS antenna located inside of box. Connect to GPS ANT connection of Prodigy One<br />
module.<br />
Locate receiver end of antenna in a clear area free of any metal above it. Antenna can be located<br />
under dash. Please make sure that there is metal located under antenna for best reception.
6. ONCE INSTALLATION IS COMPLETE, TEST ALL FUNCTIONS OF OEM RADIO AND NAVI-<br />
GATION<br />
TO ENSURE THAT THEY ARE OPERATIONAL. (NOTE: NAVIGATION SYSTEM WILL BE THE<br />
ONLYFEATURE THAT IS TOUCH SCREEN OPERATIONAL.) TO SWITCH BETWEEN RADIO<br />
AND<br />
NAVIGATION FUNCTIONS PRESS THE LOWER LEFT CORNER OF THE NEWLY INSTALLED<br />
TOUCHSCREEN FOR 3 SECONDS.<br />
7. It is possible that the newly installed touch screen will need calibration before use. To perform<br />
this please follow below instruction:<br />
Use a USB mouse plugged into USB HOST on the Prodigy One module to exit the navigation<br />
software. Once at the MAIN screen for prodigy one CLICK the NEXT button on the lower right<br />
side. On the next screen you will see SETTINGS. CLICK the SETTINGS button and then enter<br />
the installer password of 7777. Click OK. CLICK the CALIBRATE button. A white screen will<br />
appear with a crosshair. Use your finger to press the crosshair, as you press it may move to<br />
another location, continue to press the crosshair until it is no longer there. One it has<br />
disappeared, press the exit button. Your newly installed touch screen should be fully<br />
calibrated now. All other settings in the SETTINGS screen are pre<br />
-programmed for<br />
<strong>Nissan</strong>/Infinity. No need to access any other settings. If settings are changed Prodigy One<br />
module may become unresponsive to <strong>Nissan</strong>/Infinity interface module. (NOTE: do not pass<br />
the installer password of 7777 on to end user as they may change the settings, rendering the<br />
unit inop.) If this happens please contact technical support.