Field Service Procedure â Replacement PCU Kit, ST24 - Livewire ...
Field Service Procedure â Replacement PCU Kit, ST24 - Livewire ...
Field Service Procedure â Replacement PCU Kit, ST24 - Livewire ...

You also want an ePaper? Increase the reach of your titles
YUMPU automatically turns print PDFs into web optimized ePapers that Google loves.
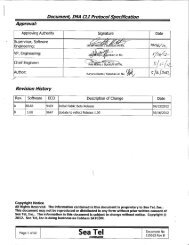
<strong>Field</strong> <strong>Service</strong> <strong>Procedure</strong> – <strong>Replacement</strong> <strong>PCU</strong> <strong>Kit</strong>, <strong>ST24</strong><br />
1. Brief Summary:<br />
Troubleshooting document for diagnosing a fault with and replacing the main <strong>PCU</strong> PCB on the <strong>ST24</strong> antenna.<br />
2. Checklist:<br />
<br />
<br />
Verify Initialization<br />
Built‐In Test<br />
3. Theory of Operation:<br />
The <strong>ST24</strong> is a two axis antenna (elevation and azimuth) with a motorized polarization assembly to keep the LNB in the<br />
correct reception position as the vessel rolls. The <strong>PCU</strong> assembly houses a single PCB with integrated <strong>PCU</strong> motherboard<br />
for stabilization and DVB receiver for tracking the RF signal.<br />
The <strong>PCU</strong> motherboard is responsible for the stabilization of the antenna housing a solid state MEM sensor which acts as<br />
the horizon reference for the elevation, pol and 3 rate sensors for stabilization for the azimuth, elevation and pol axis<br />
(acting like the antennas cross level axis). When motion is detected by the relevant rate sensor the <strong>PCU</strong> motherboard will<br />
issue the drive to move the axis the opposite amount for maintaining stabilization.<br />
No gyro connection is integrated in the system when searching the antenna targets in elevation based on the vessels<br />
GPS position and desired satellite, the azimuth axis then sweeps in search of signal above threshold. Once the NID for<br />
the desired satellite has been decoded tracking will be enabled.<br />
The DVB receiver integrated onto the <strong>PCU</strong> motherboard takes a feed directly from the LNB to receive the satellite signal<br />
and will also decode the NID (Network Identity) from the carrier the antenna is tracking as the output of the receiver is<br />
passed to the multi‐switch.<br />
4. Initialization:<br />
To reinitialize the pedestal, cycle the Power to the antenna by toggling the power switch to the GACP control panel.<br />
During the initialization process the antenna will calibrate the encoders on the elevation and pol motors as well as<br />
verifying the motor drive and acquiring GPS lock. The initialization process is as follows:<br />
1. EL drive – The elevation axis drives down into its end stop to calibrate the encoder and then up to a<br />
zero degree look angle.<br />
2. Pol Drive – The feed drives counter clockwise into its end stop to calibrate the encoder and then drives<br />
clockwise until the LNB is vertical.<br />
3. EL Drive 45 – The elevation axis then drives the reflector to a 45 degree look angle.<br />
Once the initialization process is complete the system will then target the last preset satellite in the GACP.<br />
Page 1 of 8<br />
Document No<br />
135398 Rev A<br />
Copyright © Sea Tel, Inc 2012 - The information contained in this document is proprietary to Sea<br />
Tel, Inc. This document may not be reproduced or distributed in any form without prior written<br />
consent of Sea Tel, Inc.
<strong>Field</strong> <strong>Service</strong> <strong>Procedure</strong> – <strong>Replacement</strong> <strong>PCU</strong> <strong>Kit</strong>, <strong>ST24</strong><br />
5. Verify Power to <strong>PCU</strong> PCB:<br />
The pedestal is powered by 12VDC if the GACP is powered but the system won’t energize remove the <strong>PCU</strong> PCB cover<br />
and disconnect the communications cable from the <strong>PCU</strong> PCB (black one in the centre of the board). 12VDC should be<br />
present across the centre pin to the outer connector, if the voltage is present but the pedestal isn’t energizing the <strong>PCU</strong><br />
PCB is defective and needs to be replaced. If no voltage is present troubleshoot the source down to the coax cable<br />
entering the communications (black) port in the radome base and the output from the GACP in the “RF‐IN” F‐connector.<br />
If the 12VDC is present entering the termination block on the rear of the GACP but the GACP won’t energize the GACP is<br />
defective and needs to be replaced.<br />
6. Verify Communications With the <strong>PCU</strong> PCB:<br />
If the control panel is energized and states on the display “<strong>PCU</strong> Communication error” this is an indication that the<br />
control panel is powered, but not in communication with the <strong>PCU</strong> PCB. Verify if the pedestal is powered, if the pedestal is<br />
powered yet no feedback is being received from the <strong>PCU</strong> PCB this is an indication that the coax connection is good, but<br />
there is communication problem. The control panel is potentially defective, replace the control panel. If the control panel<br />
is replaced and communications with the <strong>PCU</strong> PCB are not established replace the <strong>PCU</strong> PCB assembly (the original<br />
control panel can be refitted as it’s unlikely to be defective).<br />
7. Run the <strong>ST24</strong> Built‐In Test:<br />
To run the internal system test on the <strong>ST24</strong> antenna access the home page of the control panel. If there is a locked<br />
padlocked displayed in the lower right corner of the screen, press this to access the options.<br />
Select the antenna option from the home page and then select the advanced options, you’ll now see the option to run<br />
“system test”. Select the system test option to display the different tests available. You’ll now have the following<br />
options:<br />
7.1. Power on Self Test Results <strong>PCU</strong>:<br />
Displays the <strong>PCU</strong>s test results for the elevation motor and encoder, pol motor and encoder, azimuth motor, tilt sensor,<br />
rate sensors, GPS, and some internal communication tests which were recorded when the antenna was last initialized.<br />
Possible Failure results are:<br />
1. EL Motor and Encoder – Loose connection, a winding is down in the motor, encoder failure. Verify<br />
connection, replace the motor.<br />
2. Pol Motor and Encoder – Loose connection, a winding is down in the motor, encoder failure. Verify<br />
connection, replace the motor.<br />
3. AZ Motor – Loose connection, a winding is down in the motor. Verify the connection, replace the<br />
motor. This test is not currently active at time of print contact your local Sea Tel service department to<br />
verify if it’s supported by your <strong>PCU</strong> software (version 1.11 or higher).<br />
4. Tilt (MEM) Sensor – Failure of the solid state accelerometer or the pedestal is tilted more than 15<br />
degrees, rerun test with pedestal level, or replace the <strong>PCU</strong>.<br />
5. Rate Sensor – Failure of one of the rate sensors, replace the <strong>PCU</strong>. This test is not currently active at<br />
time of print contact your local Sea Tel service department to verify if it’s supported by your <strong>PCU</strong><br />
software (version 1.11 or higher).<br />
Page 2 of 8<br />
Document No<br />
135398 Rev A<br />
Copyright © Sea Tel, Inc 2012 - The information contained in this document is proprietary to Sea<br />
Tel, Inc. This document may not be reproduced or distributed in any form without prior written<br />
consent of Sea Tel, Inc.
<strong>Field</strong> <strong>Service</strong> <strong>Procedure</strong> – <strong>Replacement</strong> <strong>PCU</strong> <strong>Kit</strong>, <strong>ST24</strong><br />
6. GPS – The GPS is only tested during the in service test due to the amount of time required for the GPS<br />
antenna to acquire lock.<br />
7. Processor – Failure of the main <strong>PCU</strong> processor to communicate properly with onboard devices, replace<br />
the <strong>PCU</strong>.<br />
8. Tuner Communication – Failure of the DVB tuner, replace the <strong>PCU</strong>.<br />
7.2. In <strong>Service</strong> Test <strong>PCU</strong>:<br />
Tests the internal components on the <strong>PCU</strong> PCB including the tilt (MEM) sensor, rate sensor, GPS, processor and tuner<br />
communication. Possible Failure results are:<br />
1. Tilt (MEM) Sensor – Failure of the solid state accelerometer or the pedestal is tilted more than 15<br />
degrees, rerun test with pedestal level, or replace the <strong>PCU</strong>.<br />
2. Rate Sensor – Failure of one of the rate sensors, replace the <strong>PCU</strong>.<br />
3. GPS ‐ No active GPS update, verify connection, replace GPS antenna, or replace <strong>PCU</strong>.<br />
4. Processor – Failure of the main <strong>PCU</strong> processor to communicate properly with onboard devices, replace<br />
the <strong>PCU</strong>.<br />
5. Tuner Communication – Failure of the DVB tuner, replace the <strong>PCU</strong>.<br />
7.3. Out of <strong>Service</strong> Test <strong>PCU</strong>:<br />
This will take the antenna off satellite by doing a software reset of the <strong>PCU</strong>, reinitializing the system. In doing this it reruns<br />
the <strong>PCU</strong>’s power on self test which include the elevation motor and encoder, pol motor and encoder, azimuth<br />
motor, tilt sensor, rate sensors, GPS, and some internal communication tests. Possible Failure results are:<br />
1. EL Motor and Encoder – Loose connection, a winding is down in the motor or encoder failure. Verify the<br />
connection, replace the motor.<br />
2. Pol Motor and Encoder – Loose connection, a winding is down in the motor or encoder failure. Verify<br />
the connection, replace the motor.<br />
3. AZ Motor – Loose connection, a winding is down in the motor. Verify the connection, replace the<br />
motor. This test is not currently active at time of print contact your local Sea Tel service department to<br />
verify if it’s supported by your <strong>PCU</strong> software (version 1.11 or higher).<br />
4. Tilt (MEM) Sensor – Failure of the solid state accelerometer or the pedestal is tilted more than 15<br />
degrees, rerun test with pedestal level, or replace the <strong>PCU</strong>.<br />
5. Rate Sensor – Failure of one of the rate sensors, replace the <strong>PCU</strong>. This test is not currently active at<br />
time of print contact your local Sea Tel service department to verify if it’s supported by your <strong>PCU</strong><br />
software (version 1.11 or higher).<br />
6. GPS – The GPS is only tested during the in service test due to the amount of time required for the GPS<br />
antenna to acquire lock.<br />
7. Processor – Failure of the main <strong>PCU</strong> processor to communicate properly with onboard devices, replace<br />
the <strong>PCU</strong>.<br />
8. Tuner Communication – Failure of the DVB tuner, replace the <strong>PCU</strong>.<br />
Page 3 of 8<br />
Document No<br />
135398 Rev A<br />
Copyright © Sea Tel, Inc 2012 - The information contained in this document is proprietary to Sea<br />
Tel, Inc. This document may not be reproduced or distributed in any form without prior written<br />
consent of Sea Tel, Inc.
<strong>Field</strong> <strong>Service</strong> <strong>Procedure</strong> – <strong>Replacement</strong> <strong>PCU</strong> <strong>Kit</strong>, <strong>ST24</strong><br />
7.4. Power on Self Test Results Panel:<br />
Displays the control panels test results for the GACPs processor, touch screen, modem board and <strong>PCU</strong> communications<br />
which were recorded when the antenna was initialized. Possible Failure results are:<br />
1. Processor ‐ Failure of the GACP processor, replace the GACP.<br />
2. Touch Screen ‐ Failure of the GACP touch screen, replace the GACP.<br />
3. Modem Board ‐ Failure of the GACP modem board, replace the GACP.<br />
4. <strong>PCU</strong> (communications) – Failure of communication with the <strong>PCU</strong>, verify the cable connection, verify<br />
voltage to the <strong>PCU</strong>/antenna powered, replace the GACP.<br />
7.5. In <strong>Service</strong> Test Panel:<br />
Tests the internal components on the control panel including the GACP processor, touch screen, modem board and <strong>PCU</strong><br />
communications. Possible Failure results are:<br />
1. Processor ‐ Failure of the GACP processor, replace the GACP.<br />
2. Touch Screen ‐ Failure of the GACP touch screen, replace the GACP.<br />
3. Modem Board ‐ Failure of the GACP modem board, replace the GACP.<br />
4. <strong>PCU</strong> (communications) – Failure of communication with the <strong>PCU</strong> verify cable, verify voltage to the<br />
<strong>PCU</strong>/antenna powered, replace the GACP.<br />
7.6. Out of <strong>Service</strong> Test Panel:<br />
Runs the panels power on tests which include the GACP processor and touch screen. Possible Failure results are:<br />
1. Processor ‐ Failure of the GACP processor, replace the GACP.<br />
2. Touch Screen ‐ Failure of the GACP touch screen, replace the GACP.<br />
Page 4 of 8<br />
Document No<br />
135398 Rev A<br />
Copyright © Sea Tel, Inc 2012 - The information contained in this document is proprietary to Sea<br />
Tel, Inc. This document may not be reproduced or distributed in any form without prior written<br />
consent of Sea Tel, Inc.
<strong>Field</strong> <strong>Service</strong> <strong>Procedure</strong> – <strong>Replacement</strong> <strong>PCU</strong> <strong>Kit</strong>, <strong>ST24</strong><br />
8. Replacing the <strong>ST24</strong> <strong>PCU</strong> PCB:<br />
8.1. Tools.<br />
#1 Phillips Screwdriver<br />
7/16” Wrench/Spanner<br />
Loctite 248<br />
8.2. <strong>Procedure</strong>.<br />
<strong>Procedure</strong> for replacing the <strong>ST24</strong> Main <strong>PCU</strong> PCB, Sea Tel kit part number: 135913 (<strong>ST24</strong> <strong>PCU</strong> PCB part number:<br />
132362‐1).<br />
*Caution: Power down the pedestal before following this<br />
procedure.<br />
1. Remove the four screws securing the <strong>PCU</strong> PCB cover<br />
using a #1 Phillips screwdriver. Save the hardware for<br />
future use.<br />
2. Disconnect the RF coax cables from the DVB receiver<br />
using a 7/16” wrench.<br />
3. Now disconnect the communications cable from the<br />
main <strong>PCU</strong> PCB using a 7/16” wrench.<br />
Page 5 of 8<br />
Document No<br />
135398 Rev A<br />
Copyright © Sea Tel, Inc 2012 - The information contained in this document is proprietary to Sea<br />
Tel, Inc. This document may not be reproduced or distributed in any form without prior written<br />
consent of Sea Tel, Inc.
<strong>Field</strong> <strong>Service</strong> <strong>Procedure</strong> – <strong>Replacement</strong> <strong>PCU</strong> <strong>Kit</strong>, <strong>ST24</strong><br />
4. Remove the GPS antennas RJ‐45 connector from the<br />
<strong>PCU</strong> PCB.<br />
5. Disconnect the azimuth elevation and pol motor and<br />
encoder IDC connectors from the <strong>PCU</strong> PCB.<br />
6. Remove the six screws securing the <strong>PCU</strong> PCB’s heat<br />
sinks to the back of the yoke using a #1 Phillips<br />
screwdriver. Save the hardware for future use.<br />
7. Remove the 8 screws securing the <strong>PCU</strong> PCB to the yoke,<br />
save the hardware for future use.<br />
*Note: The orientation of the screws is shown below.<br />
Page 6 of 8<br />
Document No<br />
135398 Rev A<br />
Copyright © Sea Tel, Inc 2012 - The information contained in this document is proprietary to Sea<br />
Tel, Inc. This document may not be reproduced or distributed in any form without prior written<br />
consent of Sea Tel, Inc.
<strong>Field</strong> <strong>Service</strong> <strong>Procedure</strong> – <strong>Replacement</strong> <strong>PCU</strong> <strong>Kit</strong>, <strong>ST24</strong><br />
8. The 8 mounting points of the <strong>PCU</strong> PCB.<br />
9. Install the replacement <strong>PCU</strong> PCB using the hardware<br />
removed in the previous step applying Loctite 248 to the<br />
threads.<br />
10. Reinstall the six screws removed in step 6 to secure the<br />
heat sinks to the yoke.<br />
11. Connect the azimuth, elevation and pol motor and<br />
encoder IDC connectors to the <strong>PCU</strong> PCB.<br />
Page 7 of 8<br />
Document No<br />
135398 Rev A<br />
Copyright © Sea Tel, Inc 2012 - The information contained in this document is proprietary to Sea<br />
Tel, Inc. This document may not be reproduced or distributed in any form without prior written<br />
consent of Sea Tel, Inc.
<strong>Field</strong> <strong>Service</strong> <strong>Procedure</strong> – <strong>Replacement</strong> <strong>PCU</strong> <strong>Kit</strong>, <strong>ST24</strong><br />
12. Reconnect the communication coax cable to the <strong>PCU</strong><br />
PCB.<br />
*Note: The communications connector is the one in the<br />
center of the <strong>PCU</strong> PCB.<br />
13. Reconnect the RF coax cables to the DVB tuner, with<br />
the yellow cable on the right & the yellow on the left. Angle<br />
the cables as shown in the image on the right.<br />
14. Apply Loctite 248 to the hardware removed in step 1<br />
and reinstall the <strong>PCU</strong> PCB cover to the yoke.<br />
Page 8 of 8<br />
Document No<br />
135398 Rev A<br />
Copyright © Sea Tel, Inc 2012 - The information contained in this document is proprietary to Sea<br />
Tel, Inc. This document may not be reproduced or distributed in any form without prior written<br />
consent of Sea Tel, Inc.